center BMW 550I TOURING 2006 E61 Owner's Guide
[x] Cancel search | Manufacturer: BMW, Model Year: 2006, Model line: 550I TOURING, Model: BMW 550I TOURING 2006 E61Pages: 259, PDF Size: 8.9 MB
Page 96 of 259
Technology for comfort, convenience and safety
94
Malfunction
The warning lamp lights up yellow and
a message is shown on the Control Dis-
play. The active steering is no longer
operational. At low speeds, greater steering
wheel movements are required, whereas at
higher speeds, the vehicle reacts more sen-
sitively to steering wheel movements. The
stability-promoting intervention can also be
deactivated. Proceed cautiously and drive
defensively. Have the system checked.
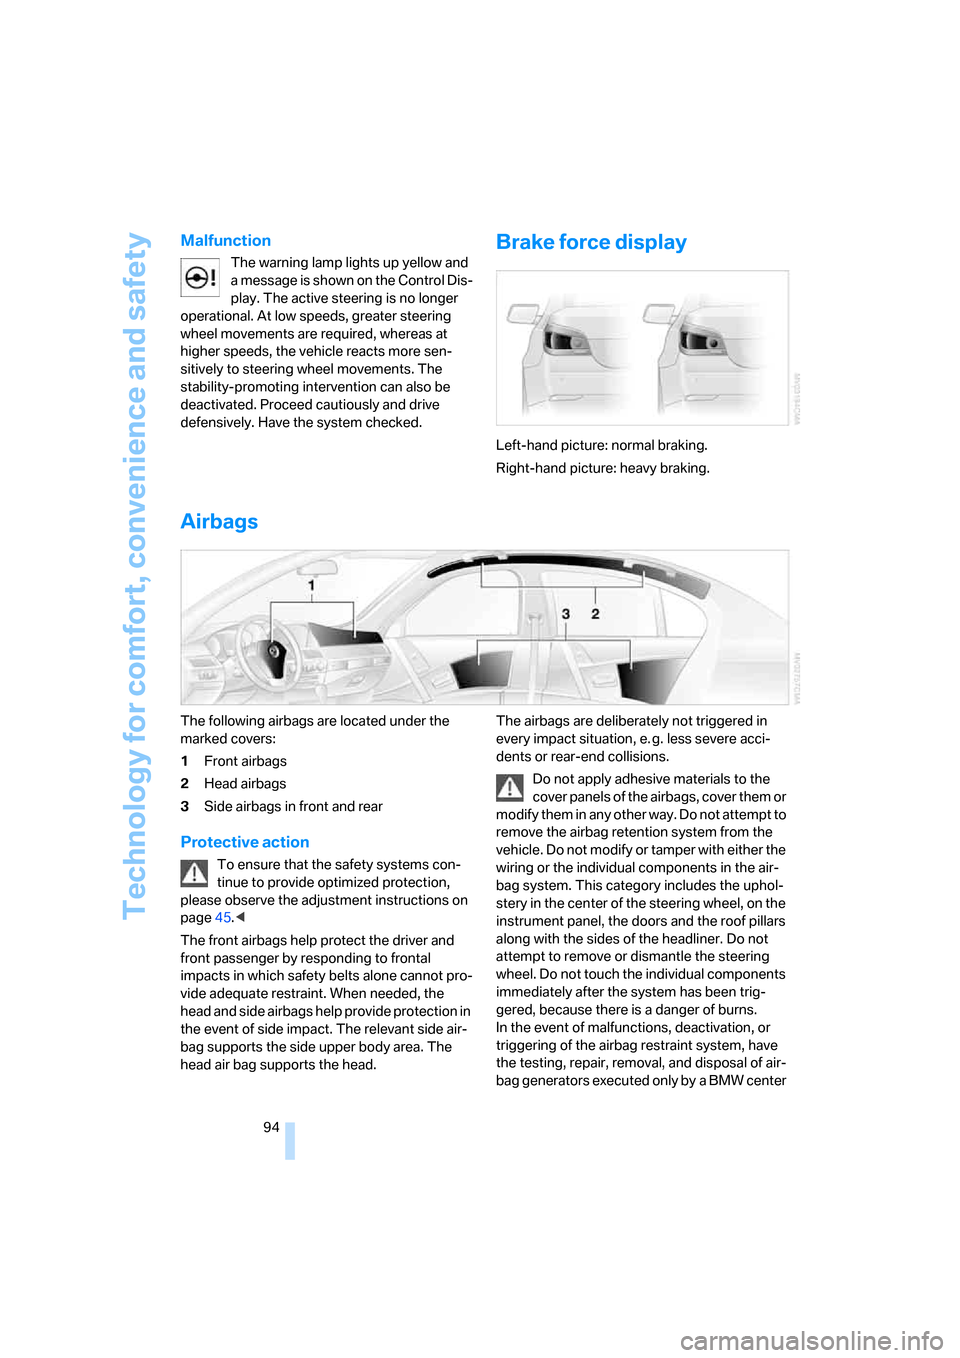
Brake force display
Left-hand picture: normal braking.
Right-hand picture: heavy braking.
Airbags
The following airbags are located under the
marked covers:
1Front airbags
2Head airbags
3Side airbags in front and rear
Protective action
To ensure that the safety systems con-
tinue to provide optimized protection,
please observe the adjustment instructions on
page45.<
The front airbags help protect the driver and
front passenger by responding to frontal
impacts in which safety belts alone cannot pro-
vide adequate restraint. When needed, the
head and side airbags help provide protection in
the event of side impact. The relevant side air-
bag supports the side upper body area. The
head air bag supports the head.The airbags are deliberately not triggered in
every impact situation, e. g. less severe acci-
dents or rear-end collisions.
Do not apply adhesive materials to the
cover panels of the airbags, cover them or
modify them in any other way. Do not attempt to
remove the airbag retention system from the
vehicle. Do not modify or tamper with either the
wiring or the individual components in the air-
bag system. This category includes the uphol-
stery in the center of the steering wheel, on the
instrument panel, the doors and the roof pillars
along with the sides of the headliner. Do not
attempt to remove or dismantle the steering
wheel. Do not touch the individual components
immediately after the system has been trig-
gered, because there is a danger of burns.
In the event of malfunctions, deactivation, or
triggering of the airbag restraint system, have
the testing, repair, removal, and disposal of air-
bag generators executed only by a BMW center
Page 99 of 259
Controls
97Reference
At a glance
Driving tips
Communications
Navigation
Entertainment
Mobility
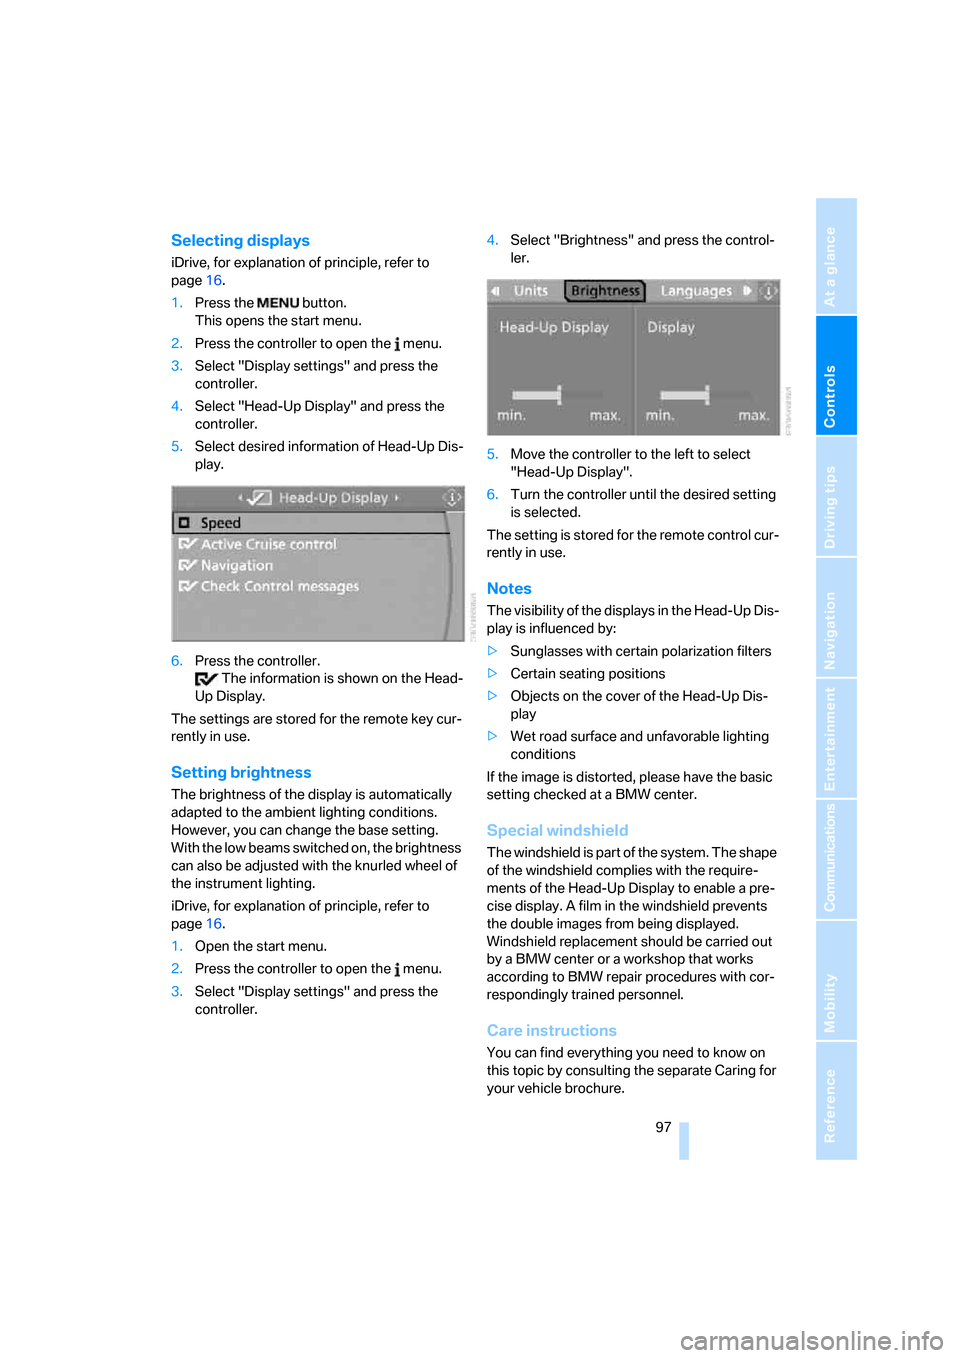
Selecting displays
iDrive, for explanation of principle, refer to
page16.
1.Press the button.
This opens the start menu.
2.Press the controller to open the menu.
3.Select "Display settings" and press the
controller.
4.Select "Head-Up Display" and press the
controller.
5.Select desired information of Head-Up Dis-
play.
6.Press the controller.
The information is shown on the Head-
Up Display.
The settings are stored for the remote key cur-
rently in use.
Setting brightness
The brightness of the display is automatically
adapted to the ambient lighting conditions.
However, you can change the base setting.
With the low beams switched on, the brightness
can also be adjusted with the knurled wheel of
the instrument lighting.
iDrive, for explanation of principle, refer to
page16.
1.Open the start menu.
2.Press the controller to open the menu.
3.Select "Display settings" and press the
controller.4.Select "Brightness" and press the control-
ler.
5.Move the controller to the left to select
"Head-Up Display".
6.Turn the controller until the desired setting
is selected.
The setting is stored for the remote control cur-
rently in use.
Notes
The visibility of the displays in the Head-Up Dis-
play is influenced by:
>Sunglasses with certain polarization filters
>Certain seating positions
>Objects on the cover of the Head-Up Dis-
play
>Wet road surface and unfavorable lighting
conditions
If the image is distorted, please have the basic
setting checked at a BMW center.
Special windshield
The windshield is part of the system. The shape
of the windshield complies with the require-
ments of the Head-Up Display to enable a pre-
cise display. A film in the windshield prevents
the double images from being displayed.
Windshield replacement should be carried out
by a BMW center or a workshop that works
according to BMW repair procedures with cor-
respondingly trained personnel.
Care instructions
You can find everything you need to know on
this topic by consulting the separate Caring for
your vehicle brochure.
Page 111 of 259
Controls
109Reference
At a glance
Driving tips
Communications
Navigation
Entertainment
Mobility
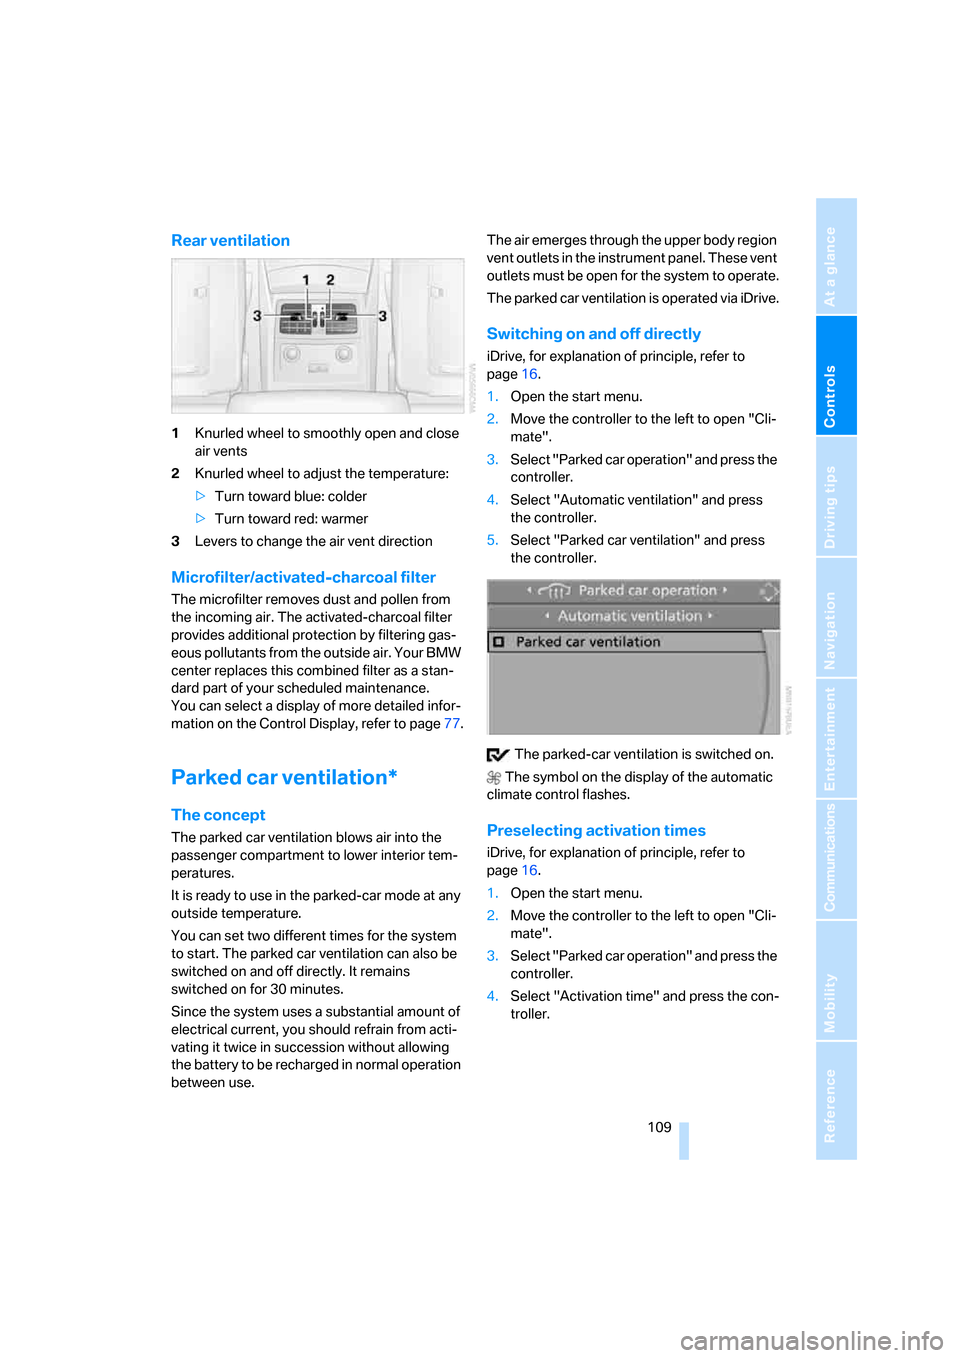
Rear ventilation
1Knurled wheel to smoothly open and close
air vents
2Knurled wheel to adjust the temperature:
>Turn toward blue: colder
>Turn toward red: warmer
3Levers to change the air vent direction
Microfilter/activated-charcoal filter
The microfilter removes dust and pollen from
the incoming air. The activated-charcoal filter
provides additional protection by filtering gas-
eous pollutants from the outside air. Your BMW
center replaces this combined filter as a stan-
dard part of your scheduled maintenance.
You can select a display of more detailed infor-
mation on the Control Display, refer to page77.
Parked car ventilation*
The concept
The parked car ventilation blows air into the
passenger compartment to lower interior tem-
peratures.
It is ready to use in the parked-car mode at any
outside temperature.
You can set two different times for the system
to start. The parked car ventilation can also be
switched on and off directly. It remains
switched on for 30 minutes.
Since the system uses a substantial amount of
electrical current, you should refrain from acti-
vating it twice in succession without allowing
the battery to be recharged in normal operation
between use.The air emerges through the upper body region
vent outlets in the instrument panel. These vent
outlets must be open for the system to operate.
The parked car ventilation is operated via iDrive.
Switching on and off directly
iDrive, for explanation of principle, refer to
page16.
1.Open the start menu.
2.Move the controller to the left to open "Cli-
mate".
3.Select "Parked car operation" and press the
controller.
4.Select "Automatic ventilation" and press
the controller.
5.Select "Parked car ventilation" and press
the controller.
The parked-car ventilation is switched on.
The symbol on the display of the automatic
climate control flashes.
Preselecting activation times
iDrive, for explanation of principle, refer to
page16.
1.Open the start menu.
2.Move the controller to the left to open "Cli-
mate".
3.Select "Parked car operation" and press the
controller.
4.Select "Activation time" and press the con-
troller.
Page 113 of 259
Controls
111Reference
At a glance
Driving tips
Communications
Navigation
Entertainment
Mobility
Practical interior accessories
Integrated universal remote
control*
The concept
The integrated universal remote control can
replace as many as three hand-held transmit-
ters for various remote-controlled accessories,
such as door openers and house alarm sys-
tems. The integrated universal remote control
registers and stores signals from the original
hand-held transmitters.
The signal of an original hand-held transmitter
can be programmed on one of the three mem-
ory buttons1. Then with the ignition switched
on, this programmed memory button1 can be
used to operate the respective feature. The
LED2 flashes to confirm transmission of the
signal.
Should you sell your vehicle one day, be sure to
delete the stored programs beforehand for your
safety, refer to page112.
To prevent possible damage or injury,
before programming or using the inte-
grated universal remote control, always inspect
the immediate area to make certain that no peo-
ple, animals or objects are within the travel
range of the device. Also, comply with the
safety precautions of the original hand-held
transmitter.<
Checking compatibility
If you see this symbol on the packaging
or in the manual supplied with the orig-
inal hand-held transmitter, it is safe to
assume that it is compatible with the integrated
universal remote control.
If you have additional questions, please
contact your BMW center or call:
1-800-355-3515.
Information is also provided on the Internet at:
www.bmwusa.com or
www.homelink.com.HomeLink is a registered trademark of Johnson
Controls, Inc.<
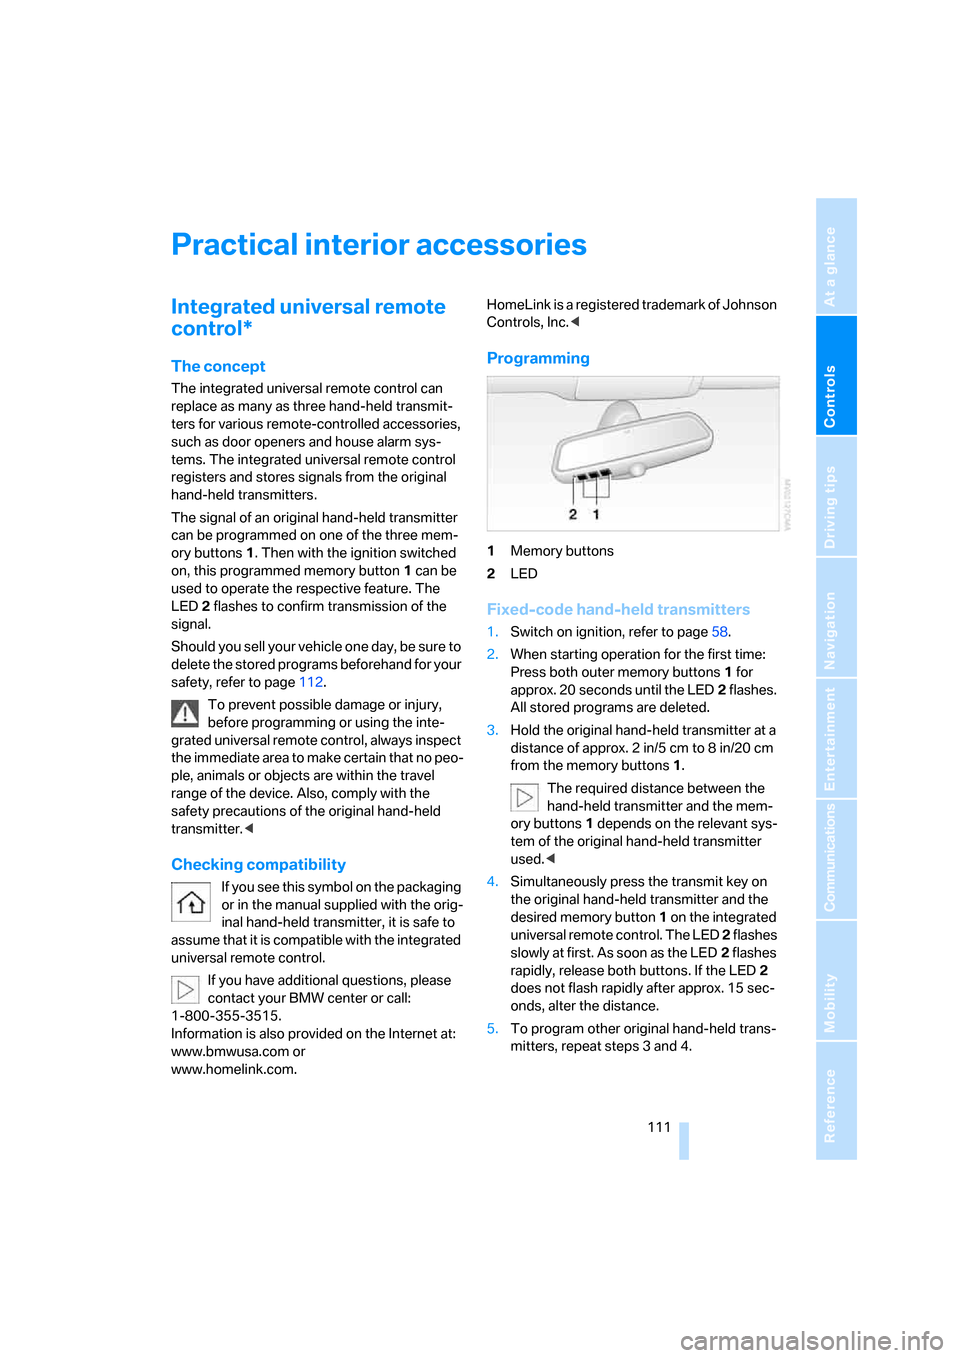
Programming
1Memory buttons
2LED
Fixed-code hand-held transmitters
1.Switch on ignition, refer to page58.
2.When starting operation for the first time:
Press both outer memory buttons1 for
approx. 20 seconds until the LED2 flashes.
All stored programs are deleted.
3.Hold the original hand-held transmitter at a
distance of approx. 2in/5cm to 8in/20cm
from the memory buttons1.
The required distance between the
hand-held transmitter and the mem-
ory buttons1 depends on the relevant sys-
tem of the original hand-held transmitter
used.<
4.Simultaneously press the transmit key on
the original hand-held transmitter and the
desired memory button 1 on the integrated
universal remote control. The LED 2 flashes
slowly at first. As soon as the LED2 flashes
rapidly, release both buttons. If the LED2
does not flash rapidly after approx. 15 sec-
onds, alter the distance.
5.To program other original hand-held trans-
mitters, repeat steps 3 and 4.
Page 114 of 259
Practical interior accessories
112 The corresponding memory button 1 is now
programmed with the signal of the original
hand-held transmitter.
You can operate the system when the engine is
running or when the ignition is switched on.
If the device can not be used after
repeated programming, check whether
the original hand-held transmitter uses an alter-
nating-code system. To do so, either read the
instructions for the original hand-held transmit-
ter or hold down the programmed memory
button1 of the integrated universal remote
control. If the LED2 on the integrated universal
remote control flashes rapidly for a short time
and then remains lit for approx. 2 seconds, this
indicates that the original hand-held transmitter
uses an alternating-code system. In the case of
an alternating-code system, program the mem-
ory buttons1 as described at Alternating-code
transmitters.<
Alternating-code transmitters
To program the integrated universal remote
control, consult the operating instructions for
the equipment to be set. You will find informa-
tion there on the possibilities for synchroniza-
tion.
When programming hand-held transmitters
that employ an alternating code, please observe
the following supplementary instructions:
Programming will be easier with the aid of
a second person.<
1.Park your vehicle within the range of the
remote-controlled device.
2.Program the integrated universal remote
control as described above in the section
Fixed-code hand-held transmitters.
3.Locate the button on the receiver of the
device to be set, e. g. on the drive unit.
4.Press the button on the receiver of the
device to be set. After step 4, you have
approx. 30 seconds for step 5.
5.Press the programmed memory button1
of the integrated universal remote control
three times.The corresponding memory button 1 is now
programmed with the signal of the original
hand-held transmitter.
If you have any additional questions,
please contact your BMW center.<
Deleting stored programs
Press both outer memory buttons1 for approx.
20 seconds until the LED2 flashes:
All stored programs are deleted.
Individual programs cannot be deleted.
Sun blinds*
Sun blind for rear window
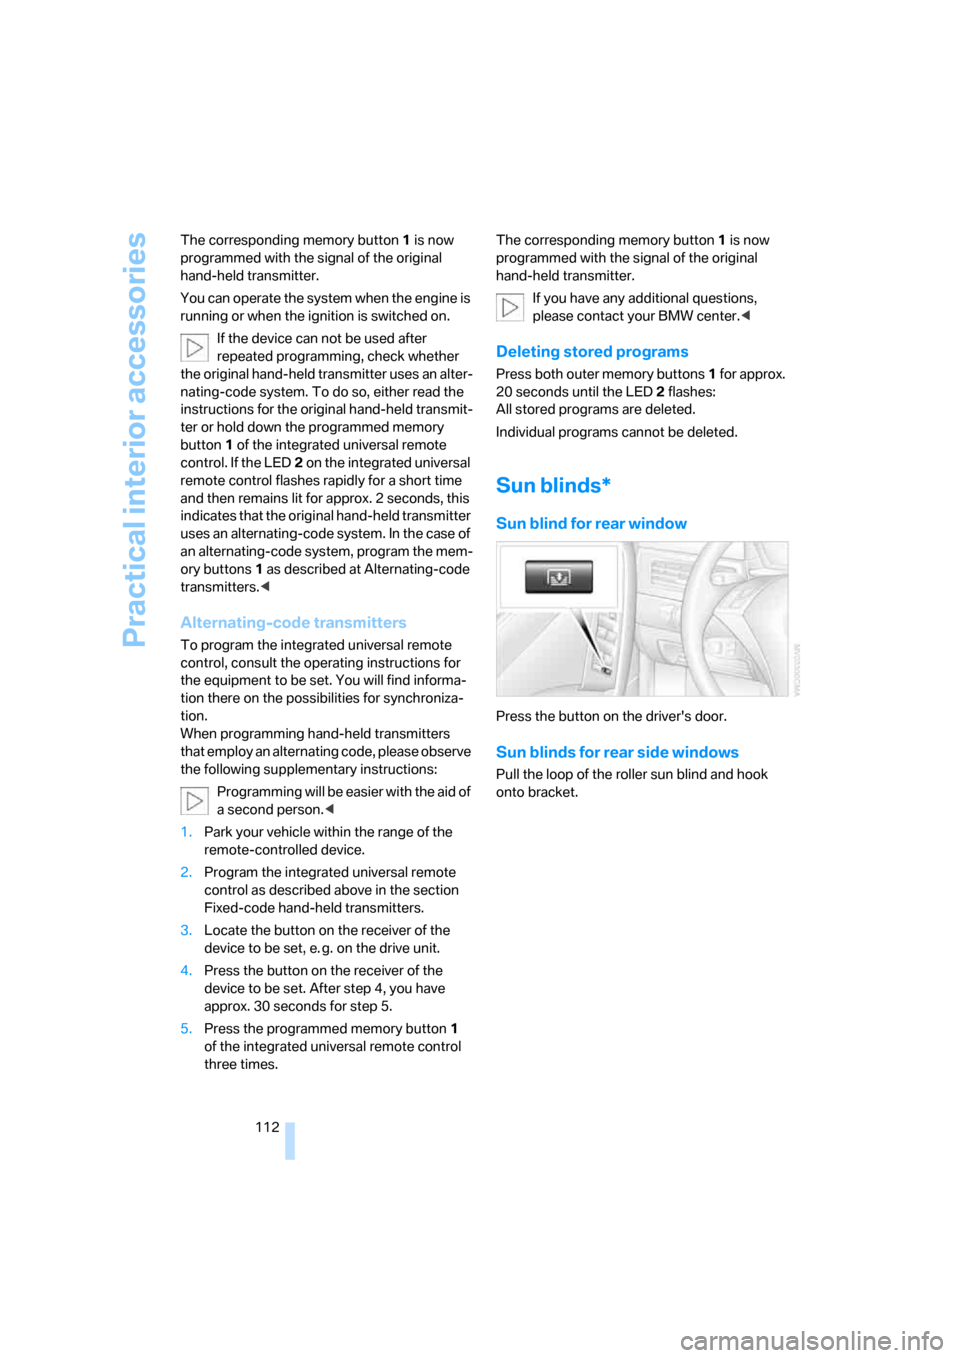
Press the button on the driver's door.
Sun blinds for rear side windows
Pull the loop of the roller sun blind and hook
onto bracket.
Page 115 of 259
Controls
113Reference
At a glance
Driving tips
Communications
Navigation
Entertainment
Mobility
Glove compartment
Opening
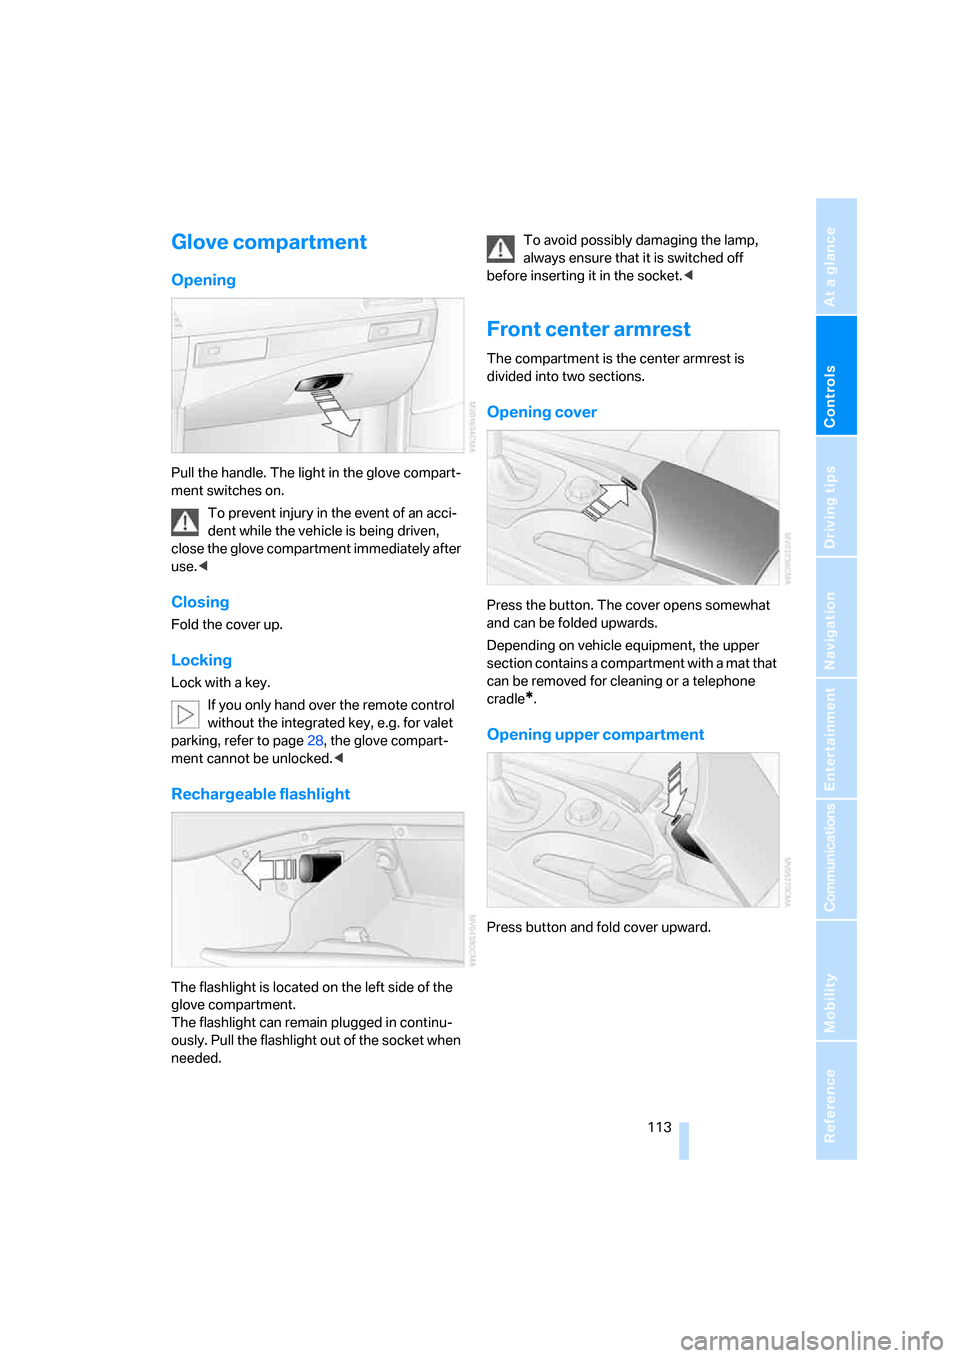
Pull the handle. The light in the glove compart-
ment switches on.
To prevent injury in the event of an acci-
dent while the vehicle is being driven,
close the glove compartment immediately after
use.<
Closing
Fold the cover up.
Locking
Lock with a key.
If you only hand over the remote control
without the integrated key, e.g. for valet
parking, refer to page28, the glove compart-
ment cannot be unlocked.<
Rechargeable flashlight
The flashlight is located on the left side of the
glove compartment.
The flashlight can remain plugged in continu-
ously. Pull the flashlight out of the socket when
needed.To avoid possibly damaging the lamp,
always ensure that it is switched off
before inserting it in the socket.<
Front center armrest
The compartment is the center armrest is
divided into two sections.
Opening cover
Press the button. The cover opens somewhat
and can be folded upwards.
Depending on vehicle equipment, the upper
section contains a compartment with a mat that
can be removed for cleaning or a telephone
cradle
*.
Opening upper compartment
Press button and fold cover upward.
Page 116 of 259
Practical interior accessories
114
Accessing lower compartment
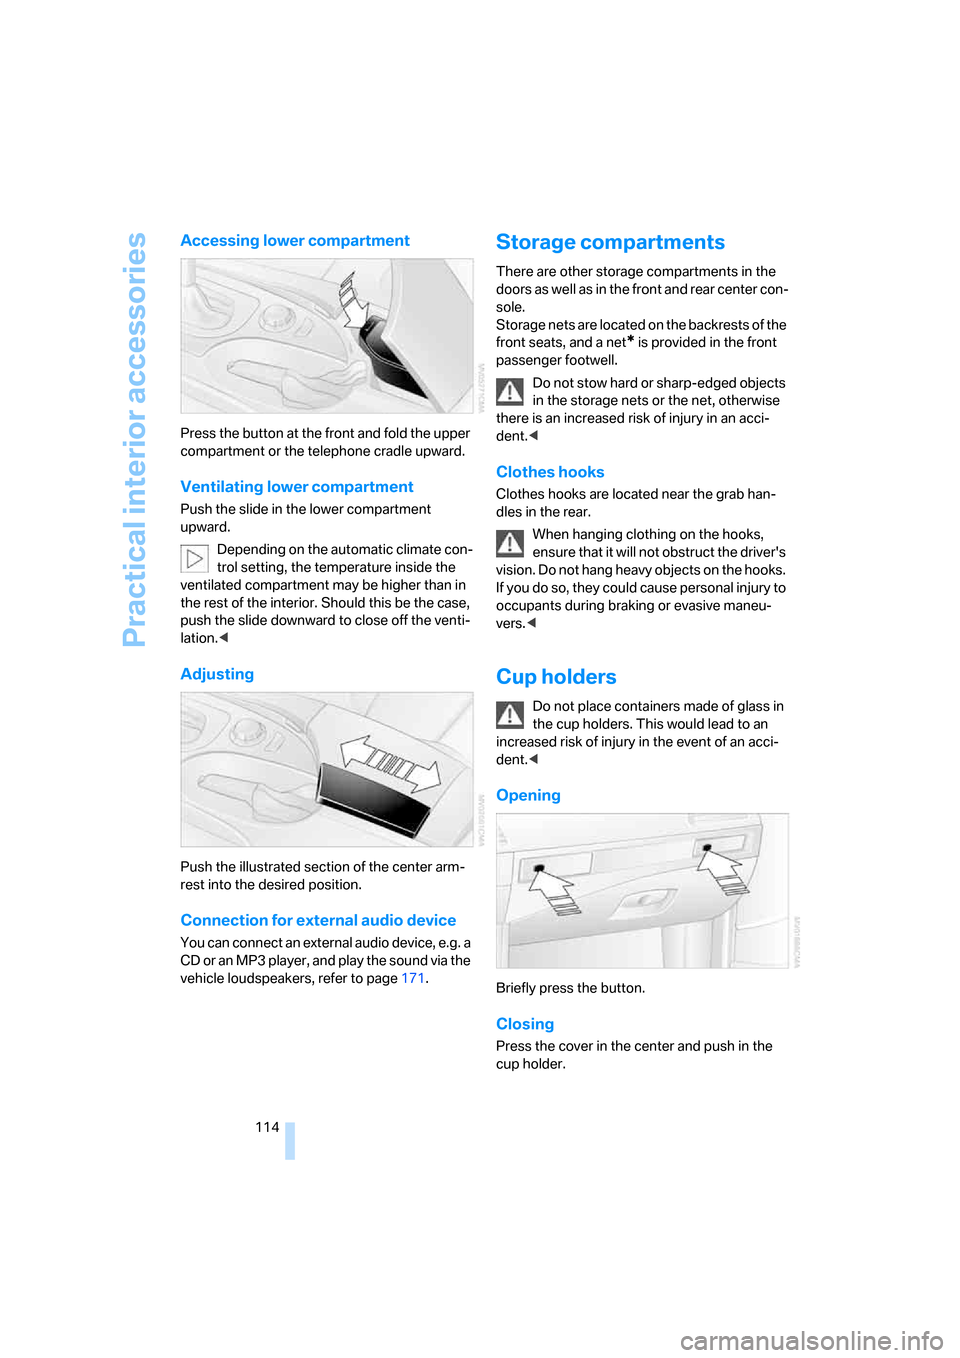
Press the button at the front and fold the upper
compartment or the telephone cradle upward.
Ventilating lower compartment
Push the slide in the lower compartment
upward.
Depending on the automatic climate con-
trol setting, the temperature inside the
ventilated compartment may be higher than in
the rest of the interior. Should this be the case,
push the slide downward to close off the venti-
lation.<
Adjusting
Push the illustrated section of the center arm-
rest into the desired position.
Connection for external audio device
You can connect an external audio device, e.g. a
CD or an MP3 player, and play the sound via the
vehicle loudspeakers, refer to page171.
Storage compartments
There are other storage compartments in the
doors as well as in the front and rear center con-
sole.
Storage nets are located on the backrests of the
front seats, and a net
* is provided in the front
passenger footwell.
Do not stow hard or sharp-edged objects
in the storage nets or the net, otherwise
there is an increased risk of injury in an acci-
dent.<
Clothes hooks
Clothes hooks are located near the grab han-
dles in the rear.
When hanging clothing on the hooks,
ensure that it will not obstruct the driver's
vision. Do not hang heavy objects on the hooks.
If you do so, they could cause personal injury to
occupants during braking or evasive maneu-
vers.<
Cup holders
Do not place containers made of glass in
the cup holders. This would lead to an
increased risk of injury in the event of an acci-
dent.<
Opening
Briefly press the button.
Closing
Press the cover in the center and push in the
cup holder.
Page 118 of 259
Practical interior accessories
116
In front passenger footwell
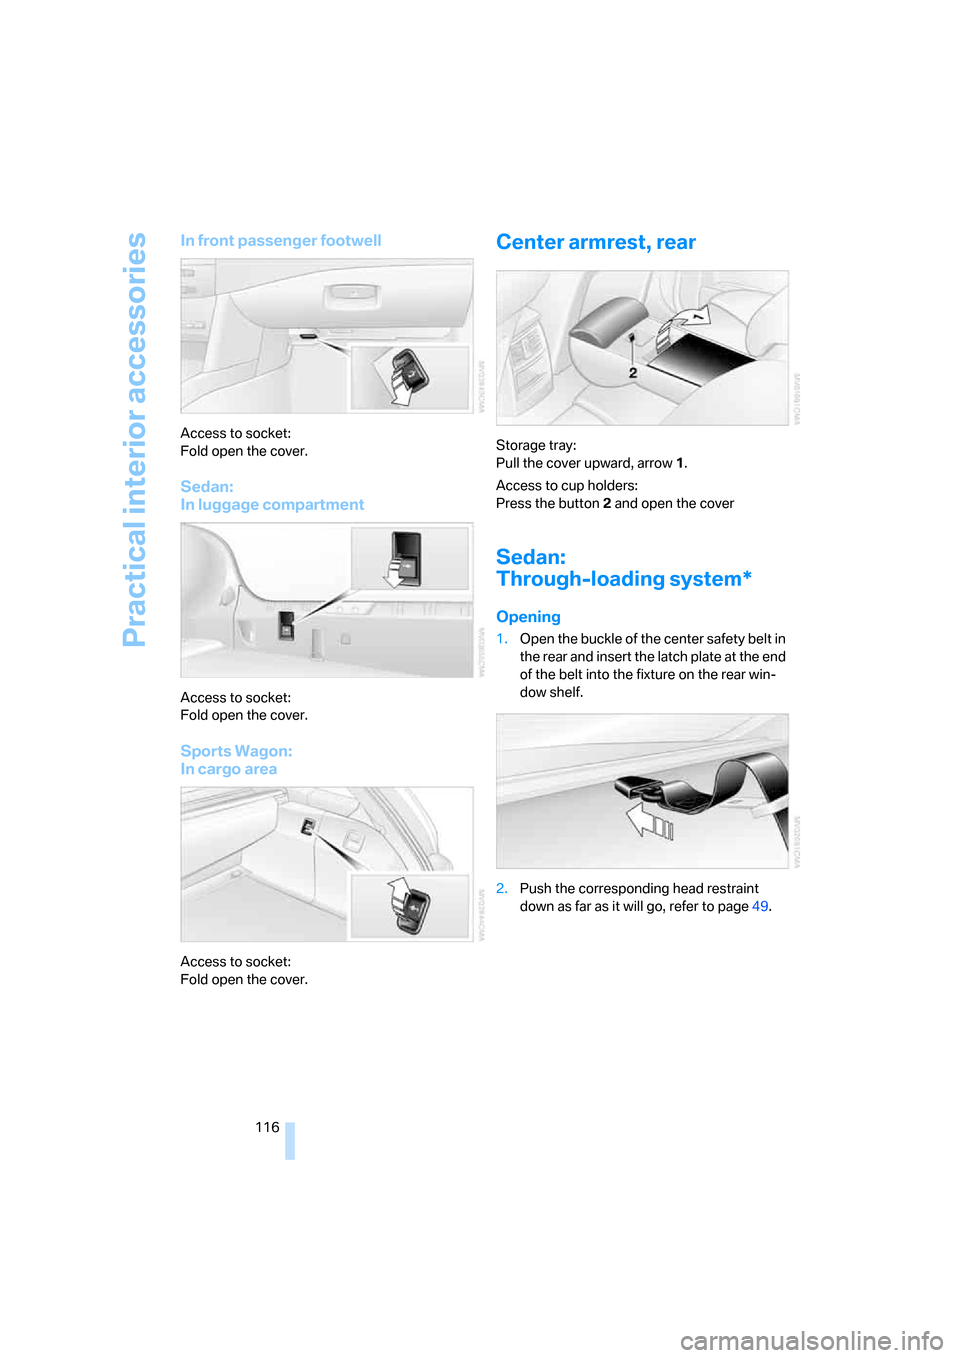
Access to socket:
Fold open the cover.
Sedan:
In luggage compartment
Access to socket:
Fold open the cover.
Sports Wagon:
In cargo area
Access to socket:
Fold open the cover.
Center armrest, rear
Storage tray:
Pull the cover upward, arrow1.
Access to cup holders:
Press the button2 and open the cover
Sedan:
Through-loading system*
Opening
1.Open the buckle of the center safety belt in
the rear and insert the latch plate at the end
of the belt into the fixture on the rear win-
dow shelf.
2.Push the corresponding head restraint
down as far as it will go, refer to page49.
Page 119 of 259
Controls
117Reference
At a glance
Driving tips
Communications
Navigation
Entertainment
Mobility
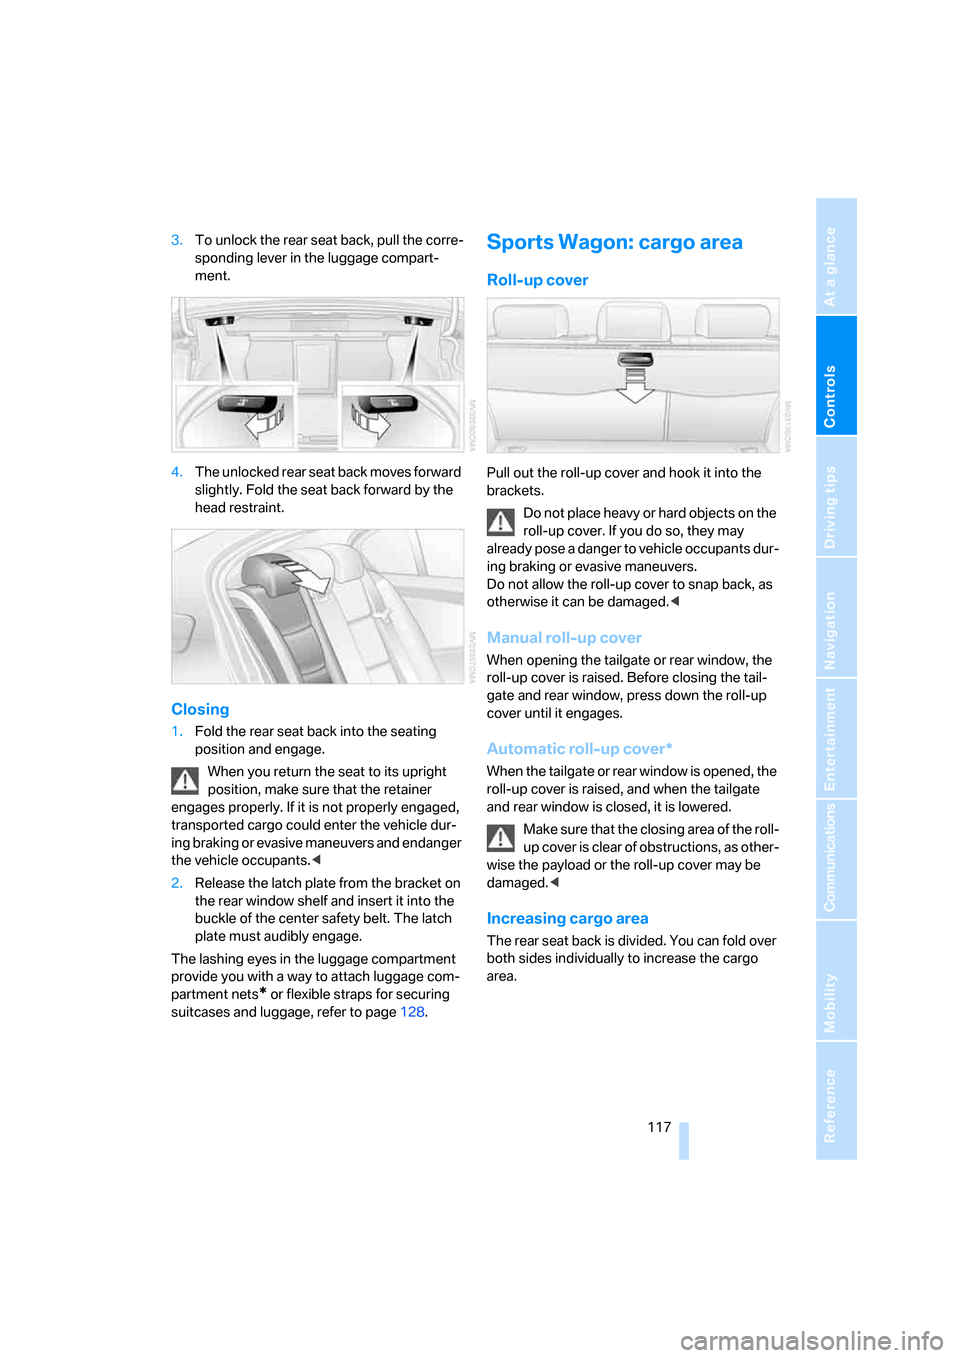
3.To unlock the rear seat back, pull the corre-
sponding lever in the luggage compart-
ment.
4.The unlocked rear seat back moves forward
slightly. Fold the seat back forward by the
head restraint.
Closing
1.Fold the rear seat back into the seating
position and engage.
When you return the seat to its upright
position, make sure that the retainer
engages properly. If it is not properly engaged,
transported cargo could enter the vehicle dur-
ing braking or evasive maneuvers and endanger
the vehicle occupants.<
2.Release the latch plate from the bracket on
the rear window shelf and insert it into the
buckle of the center safety belt. The latch
plate must audibly engage.
The lashing eyes in the luggage compartment
provide you with a way to attach luggage com-
partment nets
* or flexible straps for securing
suitcases and luggage, refer to page128.
Sports Wagon: cargo area
Roll-up cover
Pull out the roll-up cover and hook it into the
brackets.
Do not place heavy or hard objects on the
roll-up cover. If you do so, they may
already pose a danger to vehicle occupants dur-
ing braking or evasive maneuvers.
Do not allow the roll-up cover to snap back, as
otherwise it can be damaged.<
Manual roll-up cover
When opening the tailgate or rear window, the
roll-up cover is raised. Before closing the tail-
gate and rear window, press down the roll-up
cover until it engages.
Automatic roll-up cover*
When the tailgate or rear window is opened, the
roll-up cover is raised, and when the tailgate
and rear window is closed, it is lowered.
Make sure that the closing area of the roll-
up cover is clear of obstructions, as other-
wise the payload or the roll-up cover may be
damaged.<
Increasing cargo area
The rear seat back is divided. You can fold over
both sides individually to increase the cargo
area.
Page 121 of 259
Controls
119Reference
At a glance
Driving tips
Communications
Navigation
Entertainment
Mobility
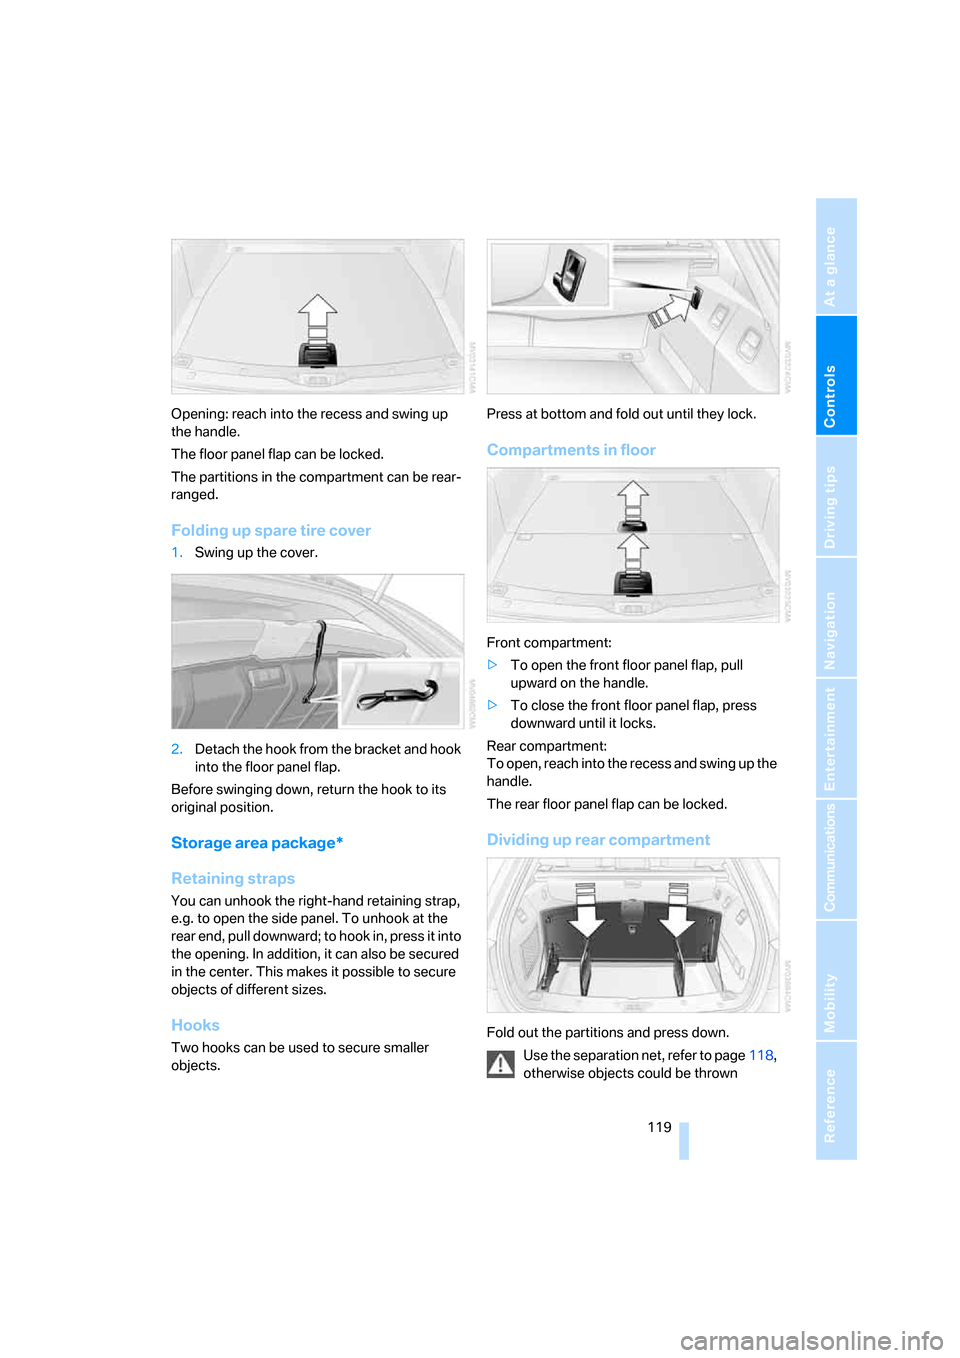
Opening: reach into the recess and swing up
the handle.
The floor panel flap can be locked.
The partitions in the compartment can be rear-
ranged.
Folding up spare tire cover
1.Swing up the cover.
2.Detach the hook from the bracket and hook
into the floor panel flap.
Before swinging down, return the hook to its
original position.
Storage area package*
Retaining straps
You can unhook the right-hand retaining strap,
e.g. to open the side panel. To unhook at the
rear end, pull downward; to hook in, press it into
the opening. In addition, it can also be secured
in the center. This makes it possible to secure
objects of different sizes.
Hooks
Two hooks can be used to secure smaller
objects.Press at bottom and fold out until they lock.
Compartments in floor
Front compartment:
>To open the front floor panel flap, pull
upward on the handle.
>To close the front floor panel flap, press
downward until it locks.
Rear compartment:
To open, reach into the recess and swing up the
handle.
The rear floor panel flap can be locked.
Dividing up rear compartment
Fold out the partitions and press down.
Use the separation net, refer to page118,
otherwise objects could be thrown