low beam BMW 550I XDRIVE 2013 Owners Manual
[x] Cancel search | Manufacturer: BMW, Model Year: 2013, Model line: 550I XDRIVE, Model: BMW 550I XDRIVE 2013Pages: 246, PDF Size: 5.39 MB
Page 13 of 246
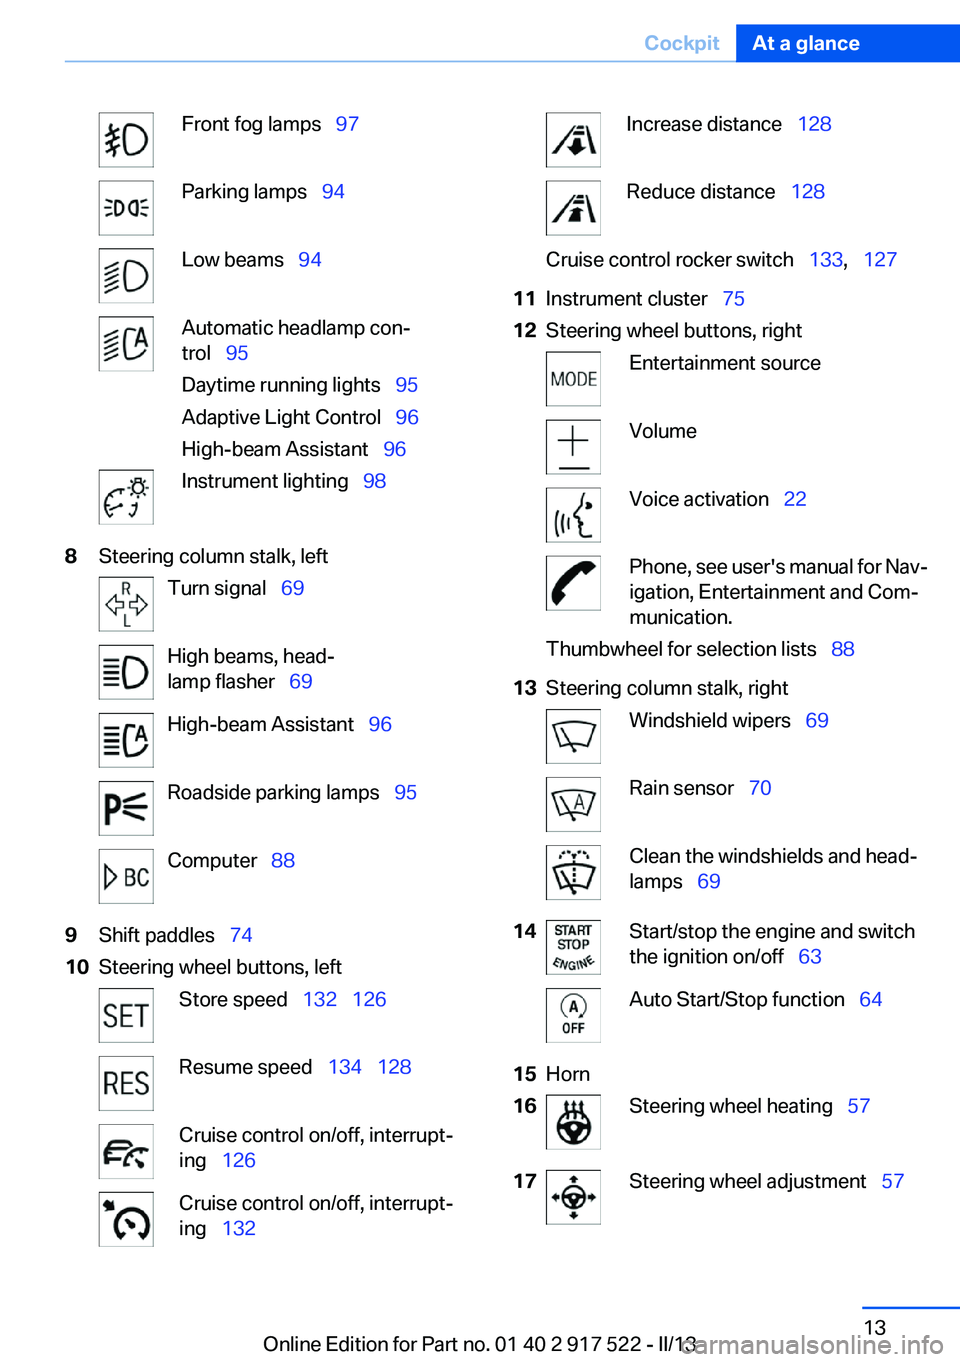
Front fog lamps‚Äā‚ÄÖ97Parking lamps‚Äā‚ÄÖ94Low beams‚Äā‚ÄÖ94Automatic headlamp con‚Äź
trol‚Äā‚ÄÖ 95
Daytime running lights‚Äā‚ÄÖ 95
Adaptive Light Control‚Äā‚ÄÖ 96
High-beam Assistant‚Äā‚ÄÖ 96Instrument lighting‚Äā‚ÄÖ988Steering column stalk, leftTurn signal‚Äā‚ÄÖ69High beams, head‚Äź
lamp flasher‚Äā‚ÄÖ 69High-beam Assistant‚Äā‚ÄÖ 96Roadside parking lamps‚Äā‚ÄÖ 95Computer‚Äā‚ÄÖ889Shift paddles‚Äā‚ÄÖ 7410Steering wheel buttons, leftStore speed‚Äā‚ÄÖ132‚Äā‚ÄÖ126Resume speed‚Äā‚ÄÖ 134‚Äā‚ÄÖ128Cruise control on/off, interrupt‚Äź
ing‚Äā‚ÄÖ 126Cruise control on/off, interrupt‚Äź
ing‚Äā‚ÄÖ 132Increase distance‚Äā‚ÄÖ 128Reduce distance‚Äā‚ÄÖ128Cruise control rocker switch‚Äā‚ÄÖ 133,‚Äā‚ÄÖ12711Instrument cluster‚Äā‚ÄÖ 7512Steering wheel buttons, rightEntertainment sourceVolumeVoice activation‚Äā‚ÄÖ22Phone, see user's manual for Nav‚Äź
igation, Entertainment and Com‚Äź
munication.Thumbwheel for selection lists‚Äā‚ÄÖ 8813Steering column stalk, rightWindshield wipers‚Äā‚ÄÖ69Rain sensor‚Äā‚ÄÖ70Clean the windshields and head‚Äź
lamps‚Äā‚ÄÖ 6914Start/stop the engine and switch
the ignition on/off‚Äā‚ÄÖ 63Auto Start/Stop function‚Äā‚ÄÖ 6415Horn16Steering wheel heating‚Äā‚ÄÖ5717Steering wheel adjustment‚Äā‚ÄÖ 57Seite 13CockpitAt a glance13
Online Edition for Part no. 01 40 2 917 522 - II/13
Page 62 of 246
DrivingVehicle equipment
All standard, country-specific and optional
equipment that is offered in the model series is
described in this chapter. Therefore, equipment
is also described that is not available in a vehicle,
e. g., because of the selected optional equip‚Äź
ment or country variant. This also applies for
safety-related functions and systems.
Start/Stop button
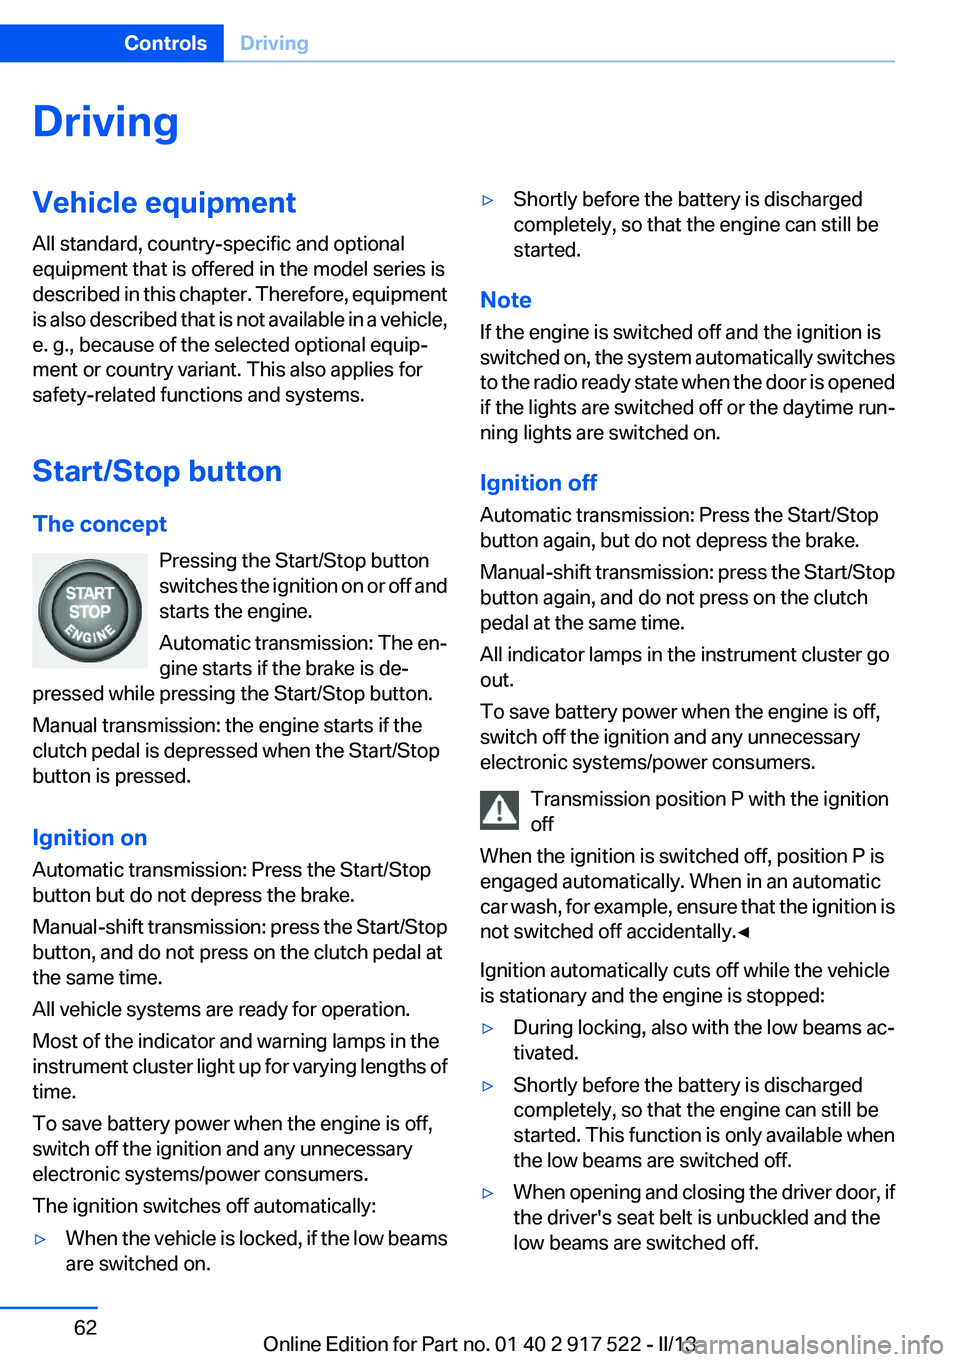
The concept Pressing the Start/Stop button
switches the ignition on or off and
starts the engine.
Automatic transmission: The en‚Äź
gine starts if the brake is de‚Äź
pressed while pressing the Start/Stop button.
Manual transmission: the engine starts if the
clutch pedal is depressed when the Start/Stop
button is pressed.
Ignition on
Automatic transmission: Press the Start/Stop
button but do not depress the brake.
Manual-shift transmission: press the Start/Stop
button, and do not press on the clutch pedal at
the same time.
All vehicle systems are ready for operation.
Most of the indicator and warning lamps in the
instrument cluster light up for varying lengths of
time.
To save battery power when the engine is off,
switch off the ignition and any unnecessary
electronic systems/power consumers.
The ignition switches off automatically:‚Ė∑When the vehicle is locked, if the low beams
are switched on.‚Ė∑Shortly before the battery is discharged
completely, so that the engine can still be
started.
Note
If the engine is switched off and the ignition is
switched on, the system automatically switches
to the radio ready state when the door is opened
if the lights are switched off or the daytime run‚Äź
ning lights are switched on.
Ignition off
Automatic transmission: Press the Start/Stop
button again, but do not depress the brake.
Manual-shift transmission: press the Start/Stop
button again, and do not press on the clutch
pedal at the same time.
All indicator lamps in the instrument cluster go
out.
To save battery power when the engine is off,
switch off the ignition and any unnecessary
electronic systems/power consumers.
Transmission position P with the ignition
off
When the ignition is switched off, position P is
engaged automatically. When in an automatic
car wash, for example, ensure that the ignition is
not switched off accidentally.‚óÄ
Ignition automatically cuts off while the vehicle
is stationary and the engine is stopped:
‚Ė∑During locking, also with the low beams ac‚Äź
tivated.‚Ė∑Shortly before the battery is discharged
completely, so that the engine can still be
started. This function is only available when
the low beams are switched off.‚Ė∑When opening and closing the driver door, if
the driver's seat belt is unbuckled and the
low beams are switched off.Seite 62ControlsDriving62
Online Edition for Part no. 01 40 2 917 522 - II/13
Page 63 of 246
‚Ė∑While the driver's seat belt is unbuckled, if
the driver's door is open and the low beams
are switched off.
When the ignition is switched off, by opening or
closing the driver's door or unbuckling the driv‚Äź
er's seat belt, the radio ready state remains ac‚Äź
tive.
Radio ready state
Activate radio ready state:
‚Ė∑When the ignition is switched off: press ON/
OFF button on the radio.‚Ė∑When the engine is running: press the Start/
Stop button.
Some electronic systems/power consumers re‚Äź
main ready for operation.
Radio ready state switches off automatically:
‚Ė∑After approx. 8 minutes.‚Ė∑When the vehicle is locked using the central
locking system.‚Ė∑Shortly before the battery is discharged
completely, so that the engine can still be
started.
Starting the engine
General information Enclosed areas
Do not let the engine run in enclosed
areas; otherwise, breathing of exhaust fumes
may lead to loss of consciousness and death.
The exhaust gases contain carbon monoxide, an
odorless and colorless but highly toxic gas.‚óÄ
Unattended vehicle
Do not leave the vehicle unattended with
the engine running; doing so poses a risk of dan‚Äź
ger.
Before leaving the vehicle with the engine run‚Äź
ning, set the parking brake and place the trans‚Äź
mission in position P or neutral to prevent the
vehicle from moving.‚óÄ
Repeated starting in quick succession
Avoid repeated unsuccessful attempts to
start the vehicle or starting the vehicle several
times in quick succession. Otherwise, the fuel is
not burned or is inadequately burned, posing a
risk of overheating and damage to the catalytic
converter.‚óÄ
Do not wait for the engine to warm up while the
vehicle remains stationary. Start driving at mod‚Äź
erate engine speeds.
Manual transmission
Starting the engine1.Depress the brake pedal.2.Press on the clutch pedal and shift to neu‚Äź
tral.3.Press the Start/Stop button.
The ignition is activated automatically for a cer‚Äź
tain time and is stopped as soon as the engine
starts.
Automatic transmission
Starting the engine
1.Depress the brake pedal.2.Press the Start/Stop button.
The ignition is activated automatically for a cer‚Äź
tain time and is stopped as soon as the engine
starts.
Engine stop
General information Take the remote control with you
Take the remote control with you when
leaving the vehicle so that children, for example,
cannot start the engine.‚óÄ
Seite 63DrivingControls63
Online Edition for Part no. 01 40 2 917 522 - II/13
Page 94 of 246
LampsVehicle equipment
All standard, country-specific and optional
equipment that is offered in the model series is
described in this chapter. Therefore, equipment
is also described that is not available in a vehicle,
e. g., because of the selected optional equip‚Äź
ment or country variant. This also applies for
safety-related functions and systems.
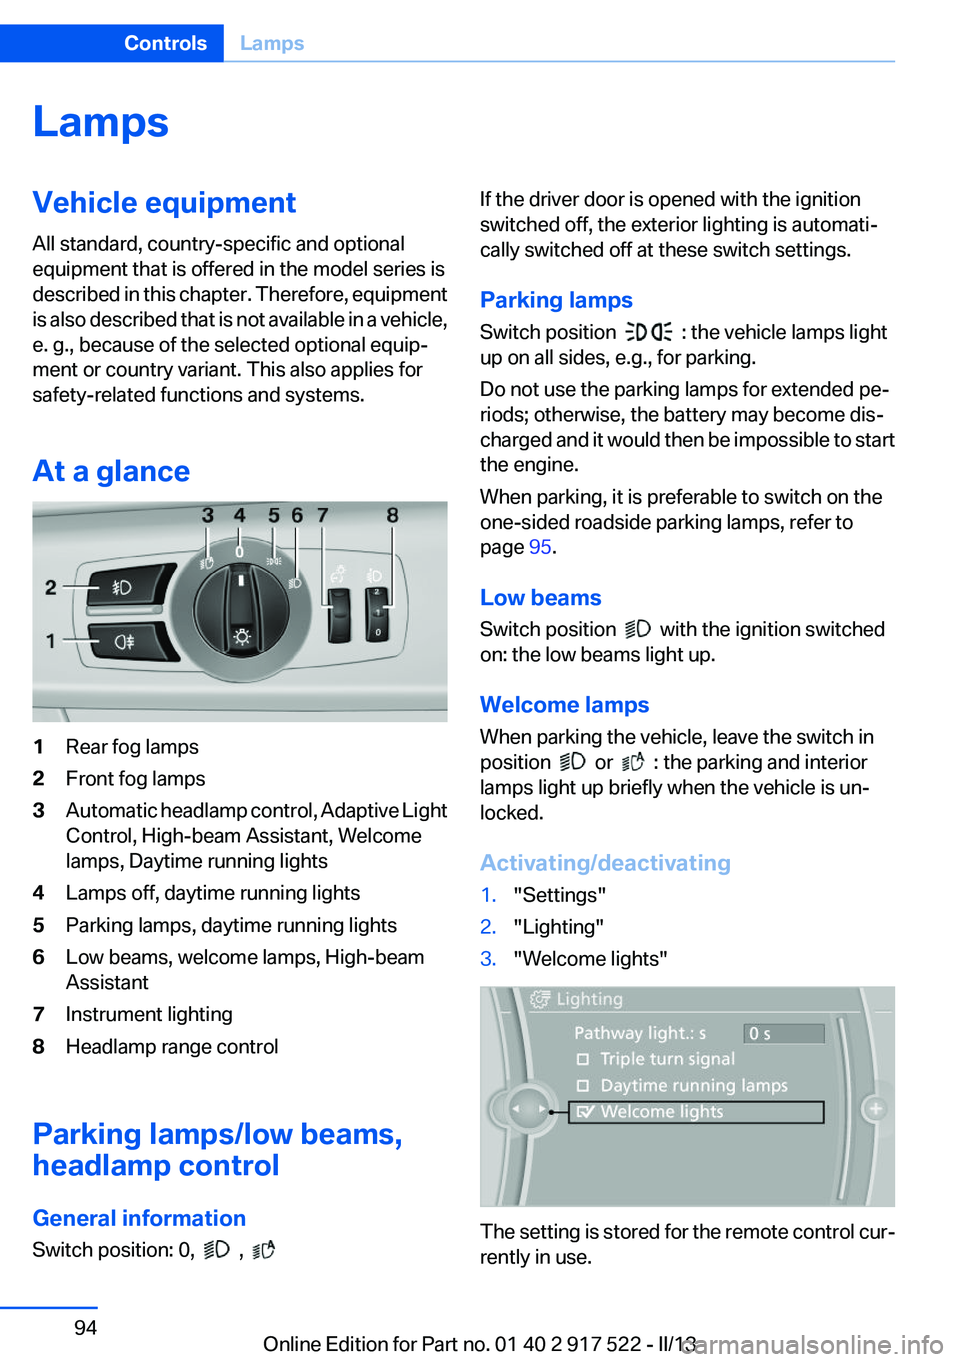
At a glance1Rear fog lamps2Front fog lamps3Automatic headlamp control, Adaptive Light
Control, High-beam Assistant, Welcome
lamps, Daytime running lights4Lamps off, daytime running lights5Parking lamps, daytime running lights6Low beams, welcome lamps, High-beam
Assistant7Instrument lighting8Headlamp range control
Parking lamps/low beams,
headlamp control
General information
Switch position: 0,
,
If the driver door is opened with the ignition
switched off, the exterior lighting is automati‚Äź
cally switched off at these switch settings.
Parking lamps
Switch position
: the vehicle lamps light
up on all sides, e.g., for parking.
Do not use the parking lamps for extended pe‚Äź
riods; otherwise, the battery may become dis‚Äź
charged and it would then be impossible to start
the engine.
When parking, it is preferable to switch on the
one-sided roadside parking lamps, refer to
page 95.
Low beams
Switch position
with the ignition switched
on: the low beams light up.
Welcome lamps
When parking the vehicle, leave the switch in
position
or : the parking and interior
lamps light up briefly when the vehicle is un‚Äź
locked.
Activating/deactivating
1."Settings"2."Lighting"3."Welcome lights"
The setting is stored for the remote control cur‚Äź
rently in use.
Seite 94ControlsLamps94
Online Edition for Part no. 01 40 2 917 522 - II/13
Page 95 of 246
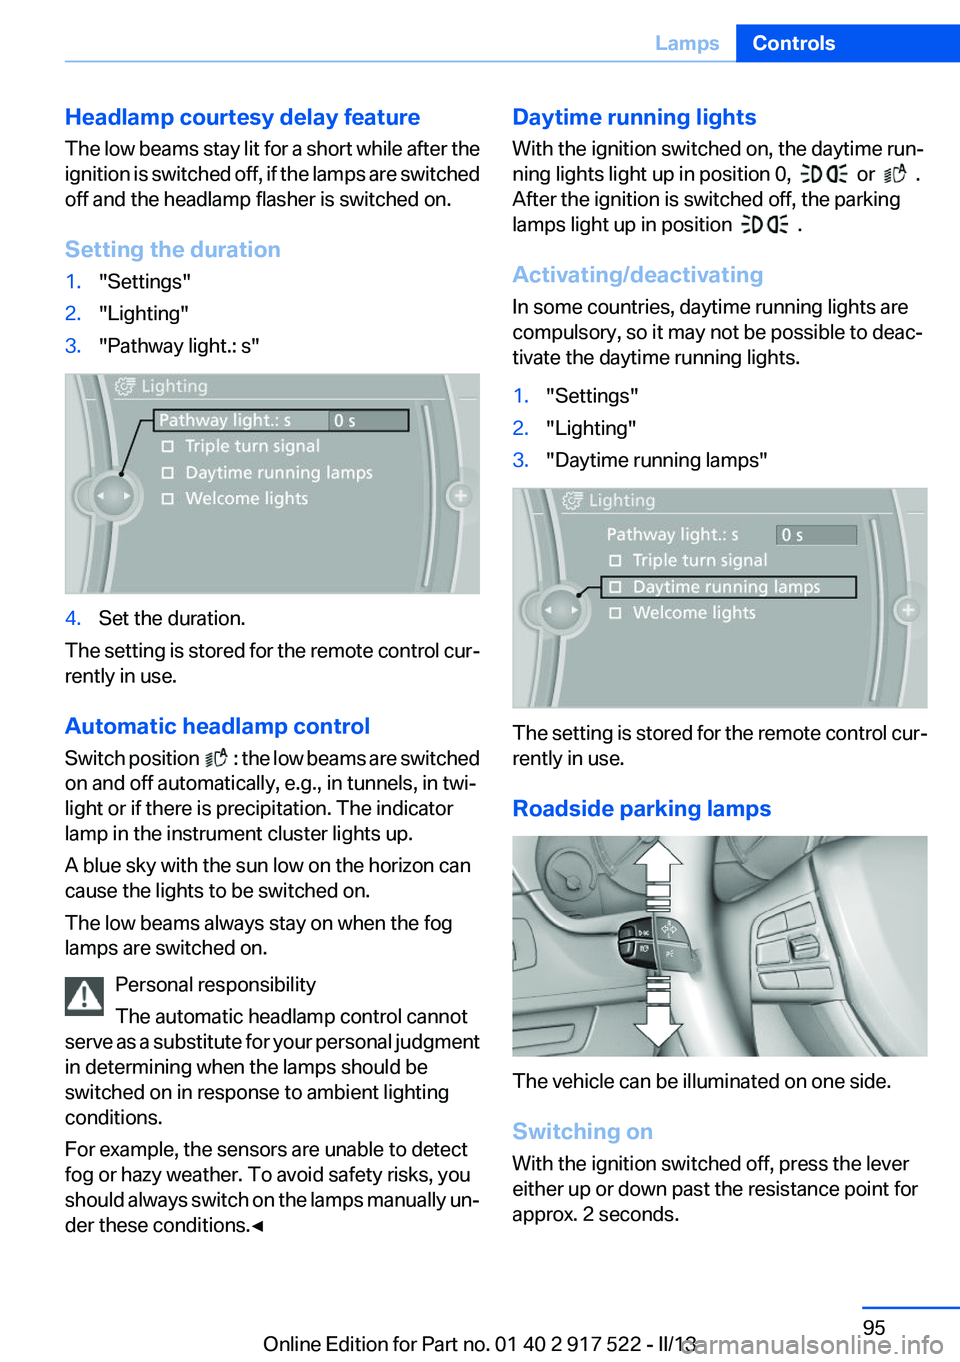
Headlamp courtesy delay feature
The low beams stay lit for a short while after the
ignition is switched off, if the lamps are switched
off and the headlamp flasher is switched on.
Setting the duration1."Settings"2."Lighting"3."Pathway light.: s"4.Set the duration.
The setting is stored for the remote control cur‚Äź
rently in use.
Automatic headlamp control
Switch position
: the low beams are switched
on and off automatically, e.g., in tunnels, in twi‚Äź
light or if there is precipitation. The indicator
lamp in the instrument cluster lights up.
A blue sky with the sun low on the horizon can
cause the lights to be switched on.
The low beams always stay on when the fog
lamps are switched on.
Personal responsibility
The automatic headlamp control cannot
serve as a substitute for your personal judgment
in determining when the lamps should be
switched on in response to ambient lighting
conditions.
For example, the sensors are unable to detect
fog or hazy weather. To avoid safety risks, you
should always switch on the lamps manually un‚Äź
der these conditions.‚óÄ
Daytime running lights
With the ignition switched on, the daytime run‚Äź
ning lights light up in position 0,
or .
After the ignition is switched off, the parking
lamps light up in position
.
Activating/deactivating
In some countries, daytime running lights are
compulsory, so it may not be possible to deac‚Äź
tivate the daytime running lights.
1."Settings"2."Lighting"3."Daytime running lamps"
The setting is stored for the remote control cur‚Äź
rently in use.
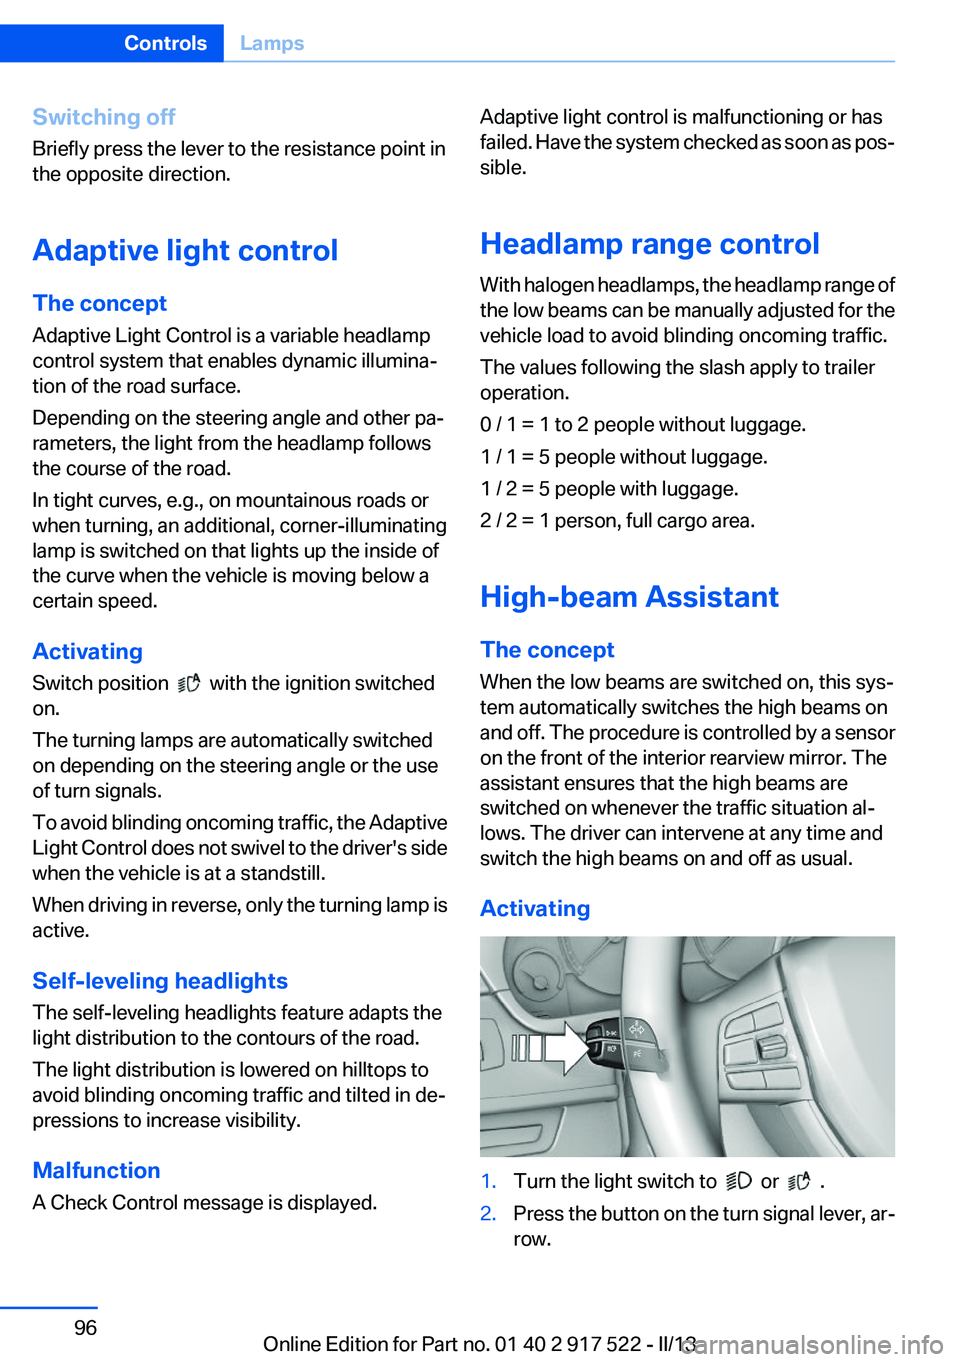
Roadside parking lamps
The vehicle can be illuminated on one side.
Switching on
With the ignition switched off, press the lever
either up or down past the resistance point for
approx. 2 seconds.
Seite 95LampsControls95
Online Edition for Part no. 01 40 2 917 522 - II/13
Page 96 of 246
Switching off
Briefly press the lever to the resistance point in
the opposite direction.
Adaptive light control
The concept
Adaptive Light Control is a variable headlamp
control system that enables dynamic illumina‚Äź
tion of the road surface.
Depending on the steering angle and other pa‚Äź
rameters, the light from the headlamp follows
the course of the road.
In tight curves, e.g., on mountainous roads or
when turning, an additional, corner-illuminating
lamp is switched on that lights up the inside of
the curve when the vehicle is moving below a
certain speed.
Activating
Switch position
with the ignition switched
on.
The turning lamps are automatically switched
on depending on the steering angle or the use
of turn signals.
To avoid blinding oncoming traffic, the Adaptive
Light Control does not swivel to the driver's side
when the vehicle is at a standstill.
When driving in reverse, only the turning lamp is
active.
Self-leveling headlights
The self-leveling headlights feature adapts the
light distribution to the contours of the road.
The light distribution is lowered on hilltops to
avoid blinding oncoming traffic and tilted in de‚Äź
pressions to increase visibility.
Malfunction
A Check Control message is displayed.
Adaptive light control is malfunctioning or has
failed. Have the system checked as soon as pos‚Äź
sible.
Headlamp range control
With halogen headlamps, the headlamp range of
the low beams can be manually adjusted for the
vehicle load to avoid blinding oncoming traffic.
The values following the slash apply to trailer
operation.
0 / 1 = 1 to 2 people without luggage.
1 / 1 = 5 people without luggage.
1 / 2 = 5 people with luggage.
2 / 2 = 1 person, full cargo area.
High-beam Assistant
The concept
When the low beams are switched on, this sys‚Äź
tem automatically switches the high beams on
and off. The procedure is controlled by a sensor
on the front of the interior rearview mirror. The
assistant ensures that the high beams are
switched on whenever the traffic situation al‚Äź
lows. The driver can intervene at any time and
switch the high beams on and off as usual.
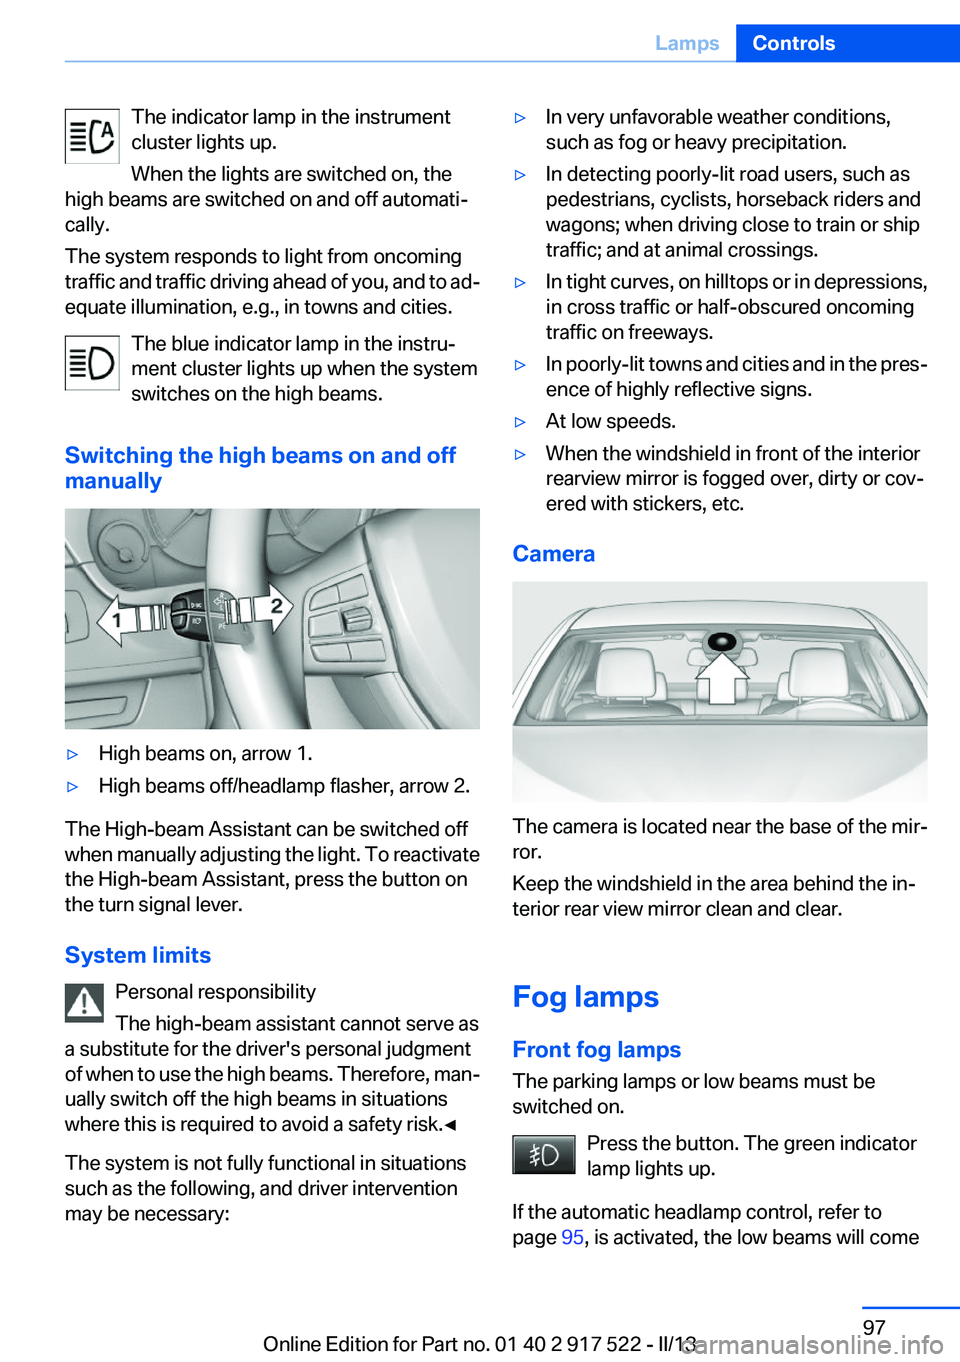
Activating1.Turn the light switch to or .2.Press the button on the turn signal lever, ar‚Äź
row.Seite 96ControlsLamps96
Online Edition for Part no. 01 40 2 917 522 - II/13
Page 97 of 246
The indicator lamp in the instrument
cluster lights up.
When the lights are switched on, the
high beams are switched on and off automati‚Äź
cally.
The system responds to light from oncoming
traffic and traffic driving ahead of you, and to ad‚Äź
equate illumination, e.g., in towns and cities.
The blue indicator lamp in the instru‚Äź
ment cluster lights up when the system
switches on the high beams.
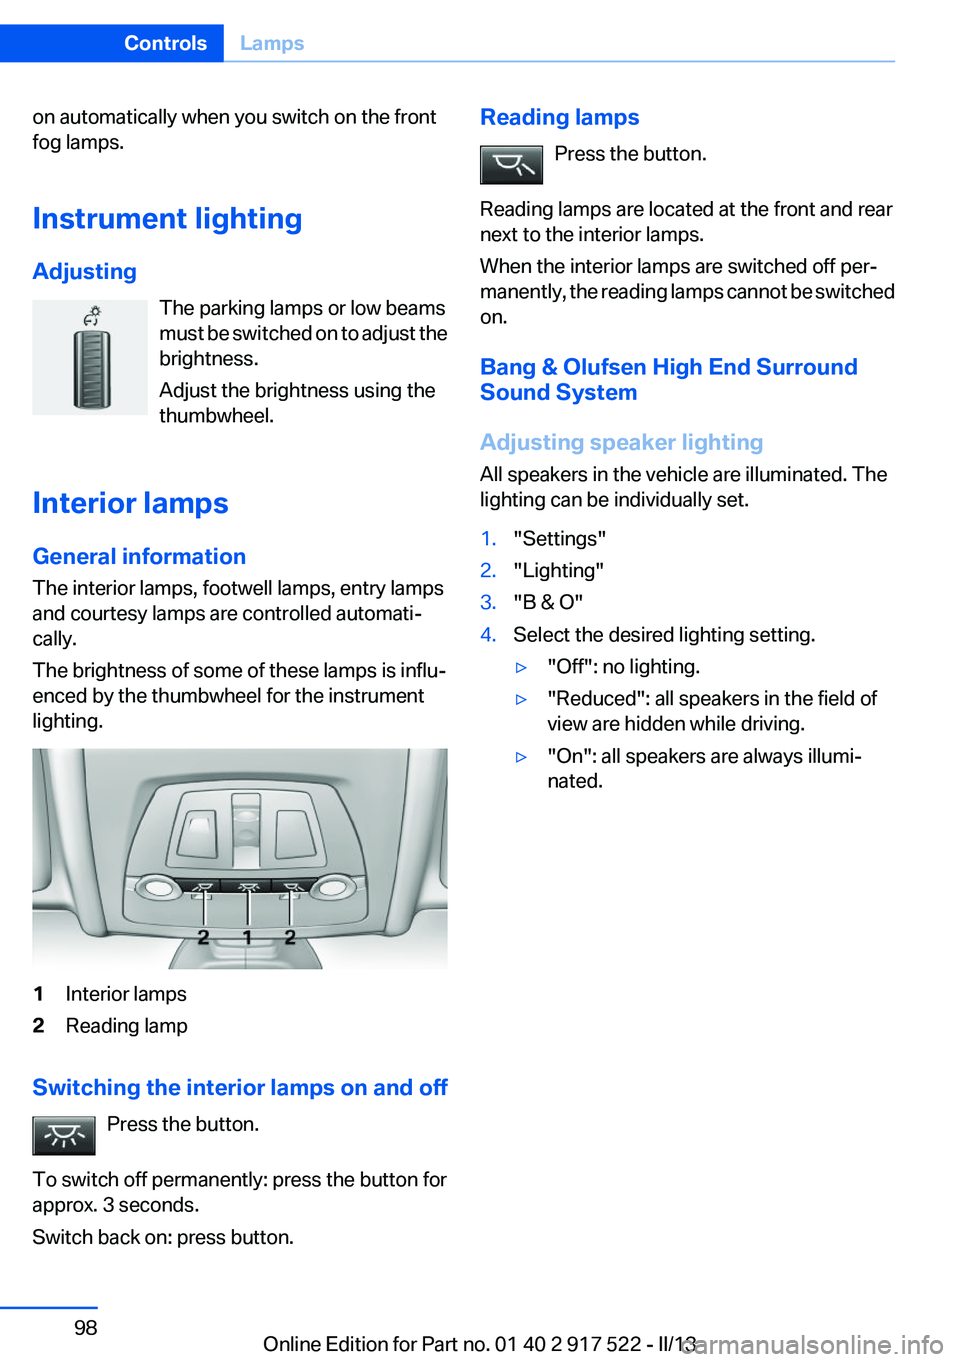
Switching the high beams on and off
manually‚Ė∑High beams on, arrow 1.‚Ė∑High beams off/headlamp flasher, arrow 2.
The High-beam Assistant can be switched off
when manually adjusting the light. To reactivate
the High-beam Assistant, press the button on
the turn signal lever.
System limits Personal responsibility
The high-beam assistant cannot serve as
a substitute for the driver's personal judgment
of when to use the high beams. Therefore, man‚Äź
ually switch off the high beams in situations
where this is required to avoid a safety risk.‚óÄ
The system is not fully functional in situations
such as the following, and driver intervention
may be necessary:
‚Ė∑In very unfavorable weather conditions,
such as fog or heavy precipitation.‚Ė∑In detecting poorly-lit road users, such as
pedestrians, cyclists, horseback riders and
wagons; when driving close to train or ship
traffic; and at animal crossings.‚Ė∑In tight curves, on hilltops or in depressions,
in cross traffic or half-obscured oncoming
traffic on freeways.‚Ė∑In poorly-lit towns and cities and in the pres‚Äź
ence of highly reflective signs.‚Ė∑At low speeds.‚Ė∑When the windshield in front of the interior
rearview mirror is fogged over, dirty or cov‚Äź
ered with stickers, etc.
Camera
The camera is located near the base of the mir‚Äź
ror.
Keep the windshield in the area behind the in‚Äź
terior rear view mirror clean and clear.
Fog lamps
Front fog lamps
The parking lamps or low beams must be
switched on.
Press the button. The green indicator
lamp lights up.
If the automatic headlamp control, refer to
page 95, is activated, the low beams will come
Seite 97LampsControls97
Online Edition for Part no. 01 40 2 917 522 - II/13
Page 98 of 246
on automatically when you switch on the front
fog lamps.
Instrument lighting
Adjusting The parking lamps or low beams
must be switched on to adjust the
brightness.
Adjust the brightness using the
thumbwheel.
Interior lamps
General information
The interior lamps, footwell lamps, entry lamps
and courtesy lamps are controlled automati‚Äź
cally.
The brightness of some of these lamps is influ‚Äź
enced by the thumbwheel for the instrument
lighting.1Interior lamps2Reading lamp
Switching the interior lamps on and off
Press the button.
To switch off permanently: press the button for
approx. 3 seconds.
Switch back on: press button.
Reading lamps
Press the button.
Reading lamps are located at the front and rear
next to the interior lamps.
When the interior lamps are switched off per‚Äź
manently, the reading lamps cannot be switched
on.
Bang & Olufsen High End Surround
Sound System
Adjusting speaker lighting
All speakers in the vehicle are illuminated. The
lighting can be individually set.1."Settings"2."Lighting"3."B & O"4.Select the desired lighting setting.‚Ė∑"Off": no lighting.‚Ė∑"Reduced": all speakers in the field of
view are hidden while driving.‚Ė∑"On": all speakers are always illumi‚Äź
nated.Seite 98ControlsLamps98
Online Edition for Part no. 01 40 2 917 522 - II/13
Page 112 of 246
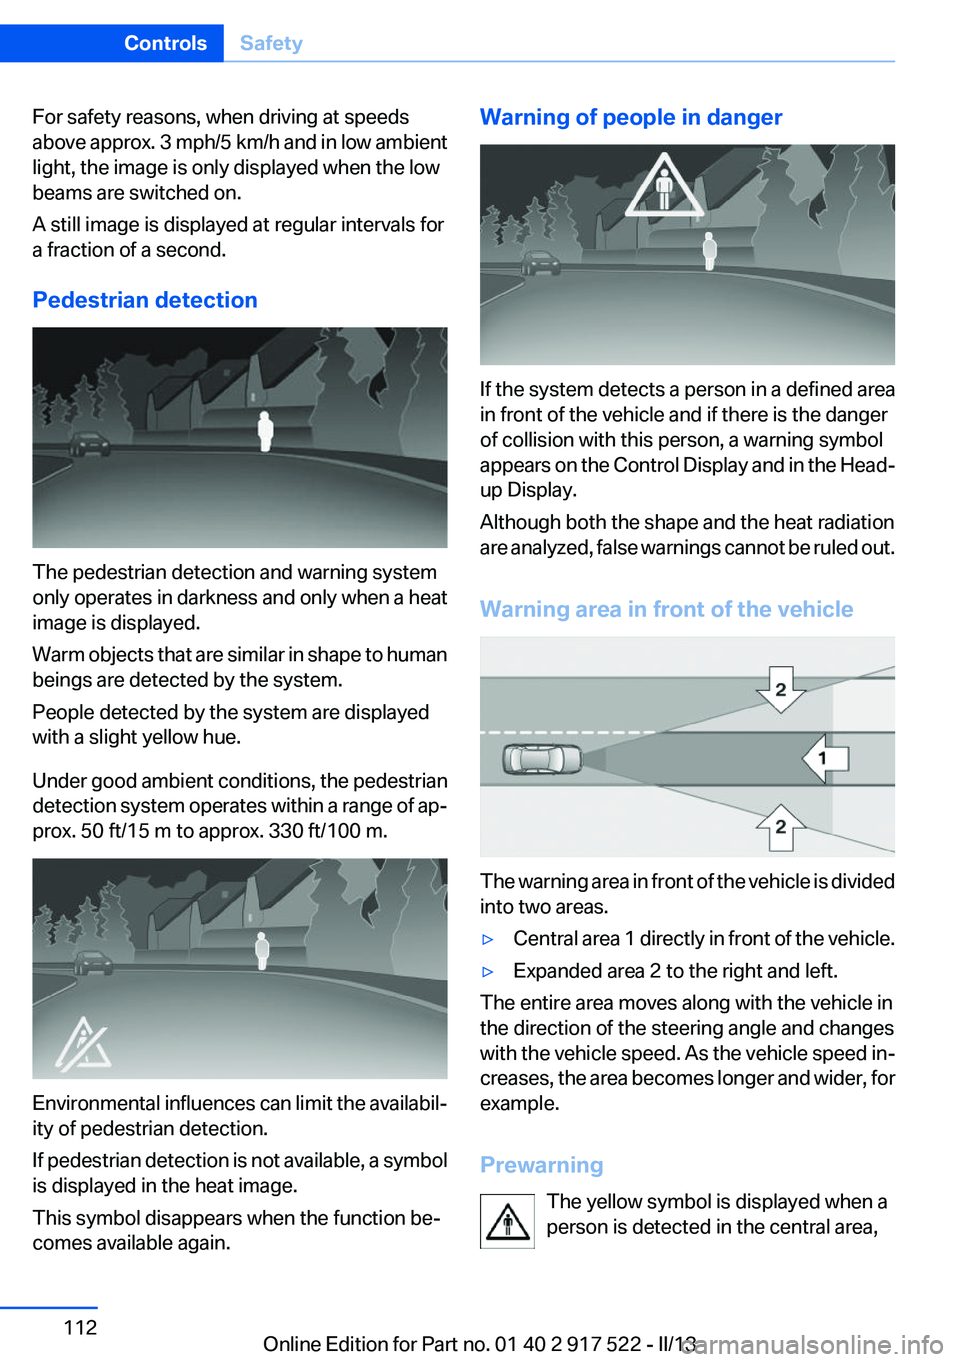
For safety reasons, when driving at speeds
above approx. 3 mph/5 km/h and in low ambient
light, the image is only displayed when the low
beams are switched on.
A still image is displayed at regular intervals for
a fraction of a second.
Pedestrian detection
The pedestrian detection and warning system
only operates in darkness and only when a heat
image is displayed.
Warm objects that are similar in shape to human
beings are detected by the system.
People detected by the system are displayed
with a slight yellow hue.
Under good ambient conditions, the pedestrian
detection system operates within a range of ap‚Äź
prox. 50 ft/15 m to approx. 330 ft/100 m.
Environmental influences can limit the availabil‚Äź
ity of pedestrian detection.
If pedestrian detection is not available, a symbol
is displayed in the heat image.
This symbol disappears when the function be‚Äź
comes available again.
Warning of people in danger
If the system detects a person in a defined area
in front of the vehicle and if there is the danger
of collision with this person, a warning symbol
appears on the Control Display and in the Head-
up Display.
Although both the shape and the heat radiation
are analyzed, false warnings cannot be ruled out.
Warning area in front of the vehicle
The warning area in front of the vehicle is divided
into two areas.
‚Ė∑Central area 1 directly in front of the vehicle.‚Ė∑Expanded area 2 to the right and left.
The entire area moves along with the vehicle in
the direction of the steering angle and changes
with the vehicle speed. As the vehicle speed in‚Äź
creases, the area becomes longer and wider, for
example.
Prewarning The yellow symbol is displayed when a
person is detected in the central area,
Seite 112ControlsSafety112
Online Edition for Part no. 01 40 2 917 522 - II/13
Page 147 of 246
Selecting displays in the Head-up
Display1."Settings"2."Head-Up Display"3."Displayed information"4.Select the desired displays in the Head-up
Display.
The settings are stored for the remote control
currently in use.
Setting the brightness
The brightness is automatically adjusted to the
ambient light.
The basic setting can be adjusted manually.
1."Settings"2."Head-Up Display"3."Brightness"4.Turn the controller.
When the low beams are switched on, the
brightness of the Head-up Display can be addi‚Äź
tionally influenced using the instrument lighting.
The setting is stored for the remote control cur‚Äź
rently in use.
Adjusting the height
1."Settings"2."Head-Up Display"3."Height"4.Turn the controller.
The setting is stored for the remote control cur‚Äź
rently in use.
Setting the rotation
1."Settings"2."Head-Up Display"3."Rotation"4.Turn the controller.
The setting is stored for the remote control cur‚Äź
rently in use.
Special windshield
The windshield is part of the system.
The shape of the windshield makes it possible
to display a precise image.
A film in the windshield prevents double images
from being displayed.
Therefore, have the special windshield replaced
by a service center only.Seite 147Driving comfortControls147
Online Edition for Part no. 01 40 2 917 522 - II/13