ECU BMW 6 SERIES CONVERTIBLE 2014 F12 Owner's Guide
[x] Cancel search | Manufacturer: BMW, Model Year: 2014, Model line: 6 SERIES CONVERTIBLE, Model: BMW 6 SERIES CONVERTIBLE 2014 F12Pages: 255, PDF Size: 5.37 MB
Page 186 of 255
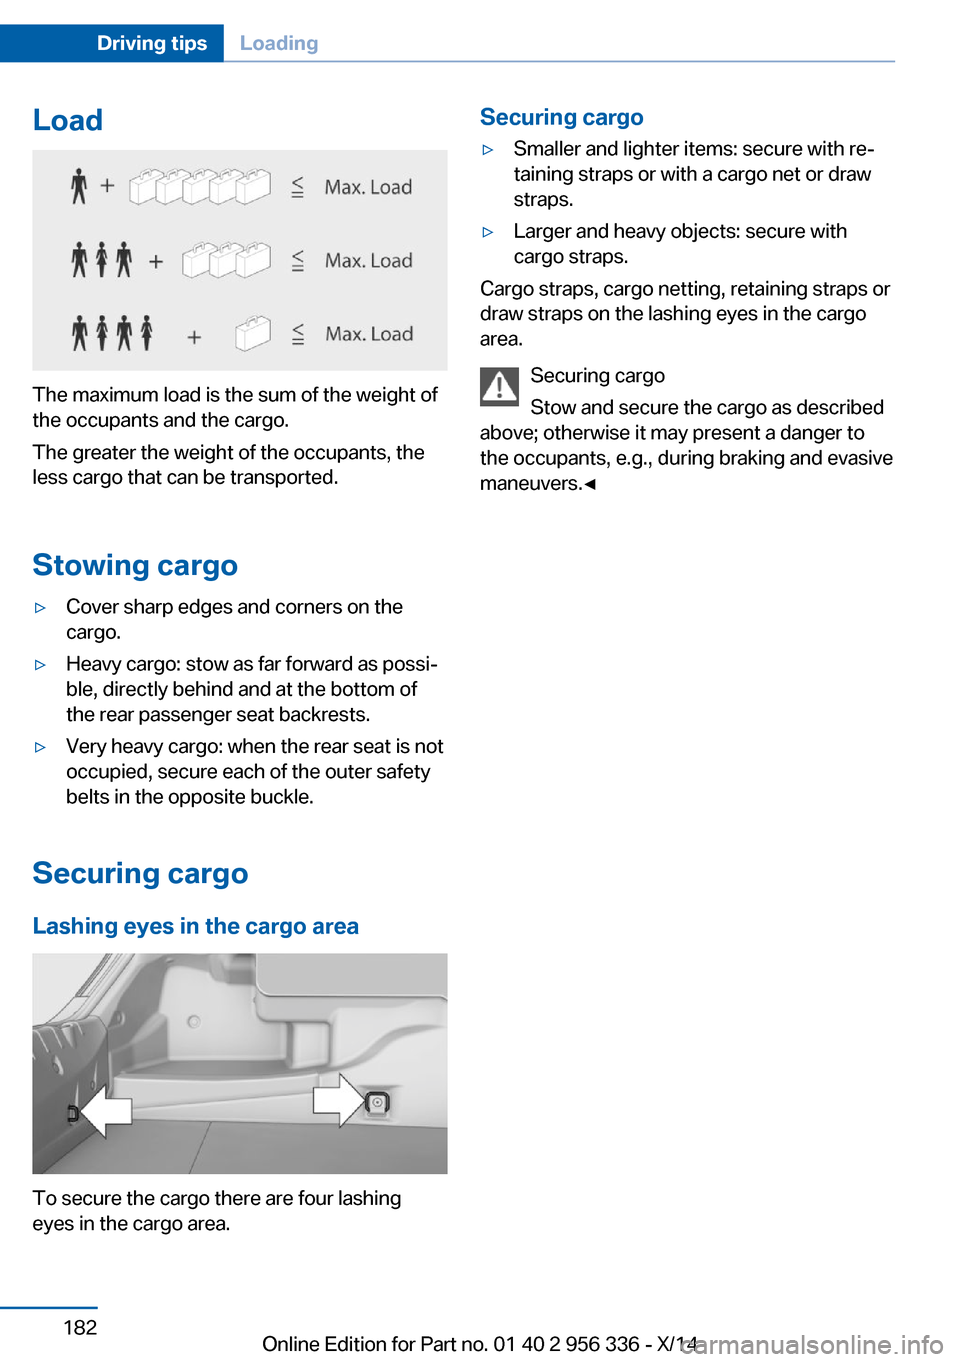
Load
The maximum load is the sum of the weight of
the occupants and the cargo.
The greater the weight of the occupants, the
less cargo that can be transported.
Stowing cargo
▷Cover sharp edges and corners on the
cargo.▷Heavy cargo: stow as far forward as possi‐
ble, directly behind and at the bottom of
the rear passenger seat backrests.▷Very heavy cargo: when the rear seat is not
occupied, secure each of the outer safety
belts in the opposite buckle.
Securing cargo
Lashing eyes in the cargo area
To secure the cargo there are four lashing
eyes in the cargo area.
Securing cargo▷Smaller and lighter items: secure with re‐
taining straps or with a cargo net or draw
straps.▷Larger and heavy objects: secure with
cargo straps.
Cargo straps, cargo netting, retaining straps or
draw straps on the lashing eyes in the cargo
area.
Securing cargo
Stow and secure the cargo as described
above; otherwise it may present a danger to
the occupants, e.g., during braking and evasive
maneuvers.◀
Seite 182Driving tipsLoading182
Online Edition for Part no. 01 40 2 956 336 - X/14
Page 213 of 255
Never reach into the engine compart‐
ment
Never reach into spaces or gaps in the engine
compartment; otherwise, there is a risk of in‐
jury, e.g., from rotating or hot parts.◀
Danger of injury when the hood is open
There is a danger of injury from protrud‐
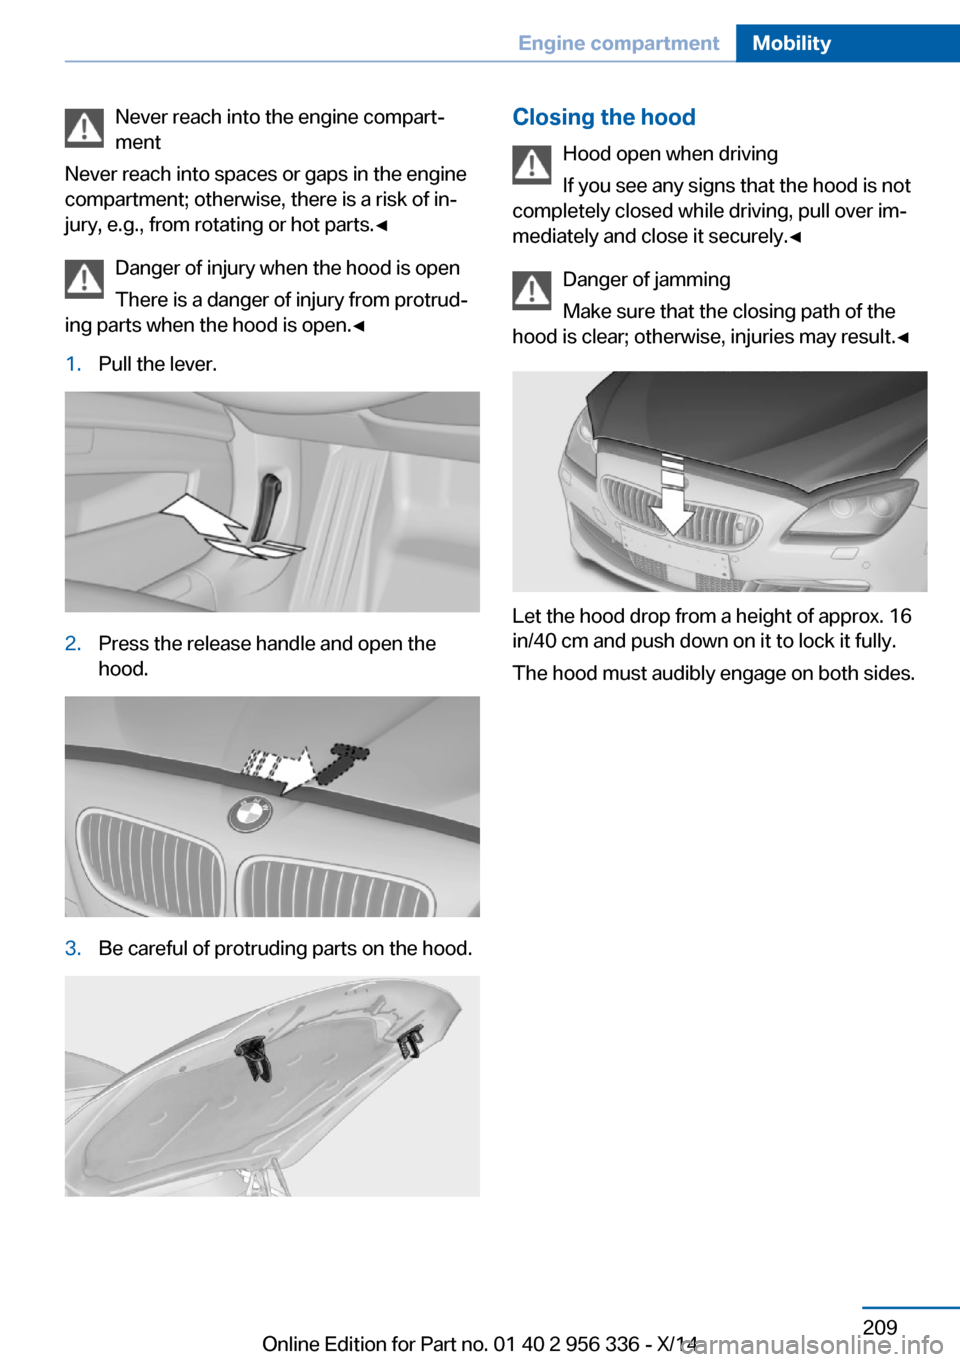
ing parts when the hood is open.◀1.Pull the lever.2.Press the release handle and open the
hood.3.Be careful of protruding parts on the hood.Closing the hood
Hood open when driving
If you see any signs that the hood is not
completely closed while driving, pull over im‐
mediately and close it securely.◀
Danger of jamming
Make sure that the closing path of the
hood is clear; otherwise, injuries may result.◀
Let the hood drop from a height of approx. 16
in/40 cm and push down on it to lock it fully.
The hood must audibly engage on both sides.
Seite 209Engine compartmentMobility209
Online Edition for Part no. 01 40 2 956 336 - X/14
Page 223 of 255
Light-emitting diodes (LEDs)
Follow general instructions, refer to page 217.
With Xenon-headlights, the following lights are
designed with LED technology:▷Parking lights and roadside parking lights.▷Turn signals, incl. side indicators▷Front fog lights.▷Daytime running lights
Contact your service center in the event of a
malfunction.
Turning lamp on the Xenon headlight
Follow general instructions, refer to page 217.
The illustration shows the left side of the en‐
gine compartment.
55-watt bulb, H3.
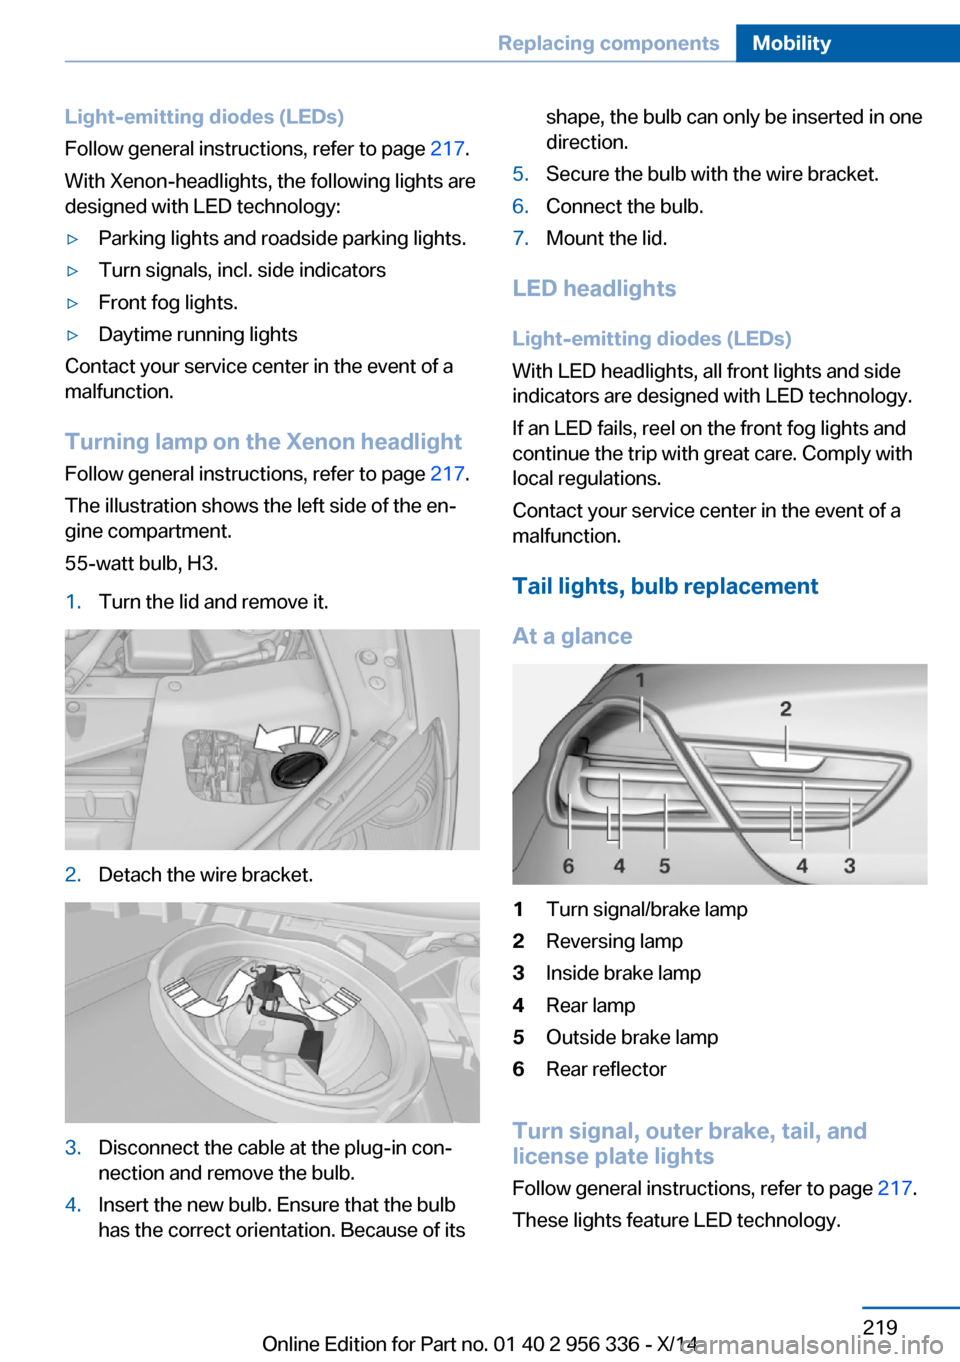
1.Turn the lid and remove it.2.Detach the wire bracket.3.Disconnect the cable at the plug-in con‐
nection and remove the bulb.4.Insert the new bulb. Ensure that the bulb
has the correct orientation. Because of itsshape, the bulb can only be inserted in one
direction.5.Secure the bulb with the wire bracket.6.Connect the bulb.7.Mount the lid.
LED headlights
Light-emitting diodes (LEDs)
With LED headlights, all front lights and side
indicators are designed with LED technology.
If an LED fails, reel on the front fog lights and
continue the trip with great care. Comply with
local regulations.
Contact your service center in the event of a
malfunction.
Tail lights, bulb replacement
At a glance
1Turn signal/brake lamp2Reversing lamp3Inside brake lamp4Rear lamp5Outside brake lamp6Rear reflector
Turn signal, outer brake, tail, and
license plate lights
Follow general instructions, refer to page 217.
These lights feature LED technology.
Seite 219Replacing componentsMobility219
Online Edition for Part no. 01 40 2 956 336 - X/14
Page 225 of 255
Vehicle batteryMaintenance
The battery is maintenance-free.
The added amount of acid is sufficient for the
service life of the battery.
Further information about the battery can be
obtained from your service center.
Battery replacement Use approved vehicle batteries only
Only use vehicle batteries that have been
approved for your vehicle by the manufacturer;
otherwise, the vehicle could be damaged and
systems or functions may not be fully availa‐
ble.◀
After a battery replacement, have the battery
registered on the vehicle by your service cen‐
ter to ensure that all comfort features are fully
available and that any Check Control mes‐
sages of these comfort features are no longer
displayed.
Charging the battery
Note Do not connect charging devices to the12 volt socket in the vehicle
Do not connect battery chargers to the fac‐
tory-installed 12 volt sockets in the vehicle as
this may damage the vehicle battery due to an
increased power consumption.◀
General information Make sure that the battery is always suffi‐
ciently charged to guarantee that the battery
remains usable for its full service life.
The battery may need to be charged in the fol‐
lowing cases:▷When making frequent short-distance
drives.▷If the vehicle is not used for prolonged pe‐
riods, longer than a month.
Starting aid terminals
In the vehicle, only charge the battery via the
starting aid terminals, refer to page 225, in the
engine compartment with the engine off.
Power failure After a temporary power loss, some equipment
needs to be newly initialized or individual set‐
tings updated, e.g.:
▷Seat, mirror, and steering wheel memory:
store the positions again.▷Time: update.▷Date: update.
Disposing of old batteries
Have old batteries disposed of by your
service center or bring them to a recy‐
cling center.
Maintain the battery in an upright position for
transport and storage. Secure the battery so
that it does not tip over during transport.
Fuses Hints Replacing fuses
Never attempt to repair a blown fuse and
do not replace a defective fuse with a substi‐
tute of another color or amperage rating; this
could lead to a circuit overload, ultimately re‐
sulting in a fire in the vehicle.◀
Plastic tweezers and information on the fuse
types and locations are stored in the fuse box
in the cargo area.
Seite 221Replacing componentsMobility221
Online Edition for Part no. 01 40 2 956 336 - X/14
Page 231 of 255
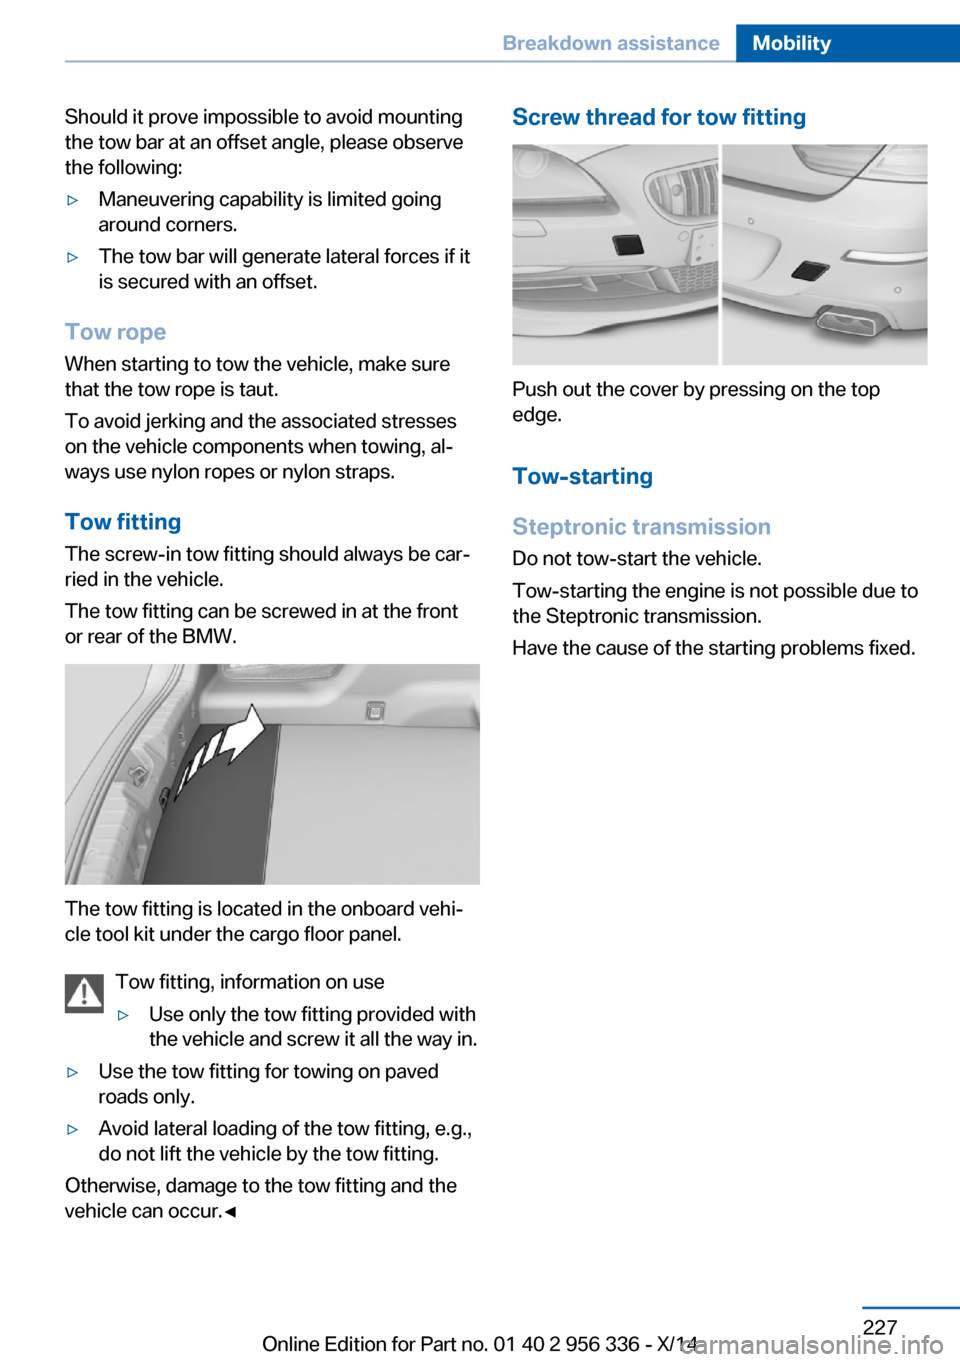
Should it prove impossible to avoid mounting
the tow bar at an offset angle, please observe
the following:▷Maneuvering capability is limited going
around corners.▷The tow bar will generate lateral forces if it
is secured with an offset.
Tow rope
When starting to tow the vehicle, make sure
that the tow rope is taut.
To avoid jerking and the associated stresses
on the vehicle components when towing, al‐
ways use nylon ropes or nylon straps.
Tow fitting
The screw-in tow fitting should always be car‐
ried in the vehicle.
The tow fitting can be screwed in at the front
or rear of the BMW.
The tow fitting is located in the onboard vehi‐
cle tool kit under the cargo floor panel.
Tow fitting, information on use
▷Use only the tow fitting provided with
the vehicle and screw it all the way in.▷Use the tow fitting for towing on paved
roads only.▷Avoid lateral loading of the tow fitting, e.g.,
do not lift the vehicle by the tow fitting.
Otherwise, damage to the tow fitting and the
vehicle can occur.◀
Screw thread for tow fitting
Push out the cover by pressing on the top
edge.
Tow-starting
Steptronic transmission Do not tow-start the vehicle.
Tow-starting the engine is not possible due to
the Steptronic transmission.
Have the cause of the starting problems fixed.
Seite 227Breakdown assistanceMobility227
Online Edition for Part no. 01 40 2 956 336 - X/14
Page 235 of 255
Damage from Velcro® fasteners
Open Velcro® fasteners on pants or
other articles of clothing can damage the seat
covers. Ensure that any Velcro® fasteners are
closed.◀
Caring for special components
Light-alloy wheels When cleaning the vehicle, use only neutral
wheel cleaners having a pH value from 5 to 9.
Do not use abrasive cleaning agents or steam
jets above 140 ℉/60 ℃. Follow the manufac‐
turer's instructions.
Aggressive, acidic or alkaline cleaning agents
can destroy the protective layer of adjacent
components, such as the brake disk.
Chrome surfaces Carefully clean components such as the radia‐
tor grille or door handles with an ample supply of water, possibly with shampoo added, partic‐
ularly when they have been exposed to road
salt.
Rubber components Aside from water, treat only with rubber
cleansers.
When cleaning rubber seals, do not use any
silicon-containing car care products in order to
avoid damage or noises.
Fine wood parts
Clean fine wood facing and fine wood compo‐
nents only with a moist rag. Then dry with a
soft cloth.
Plastic components These include:▷Imitation leather surfaces.▷Roofliner.▷Lamp lenses.▷Instrument cluster cover.▷Matt black spray-coated components.▷Painted parts in the interior.
Clean with a microfiber cloth.
Dampen cloth lightly with water.
Do not soak the roofliner.
No cleansers that contain alcohol or sol‐
vents
Do not use cleansers that contain alcohol or
solvents, such as lacquer thinners, heavy-duty
grease removers, fuel, or such; this could lead
to surface damage.◀
Safety belts
Dirty belt straps impede the reeling action and
thus have a negative impact on safety.
Chemical cleaning
Do not clean chemically; this can destroy
the webbing.◀
Use only a mild soapy solution, with the safety
belts clipped into their buckles.
Do not allow the reels to retract the safety
belts until they are dry.
Carpets and floor mats No objects in the area around the pedals
Keep floor mats, carpets, and any other
objects out of the pedal area; otherwise, the
function of the pedals could be impeded while
driving and create the risk of an accident.
Do not place additional floor mats over existing
mats or other objects.
Only use floor mats that have been approved
for the vehicle and can be properly attached to
floor.
Ensure that the floor mats are securely fas‐
tened again after they were removed for clean‐
ing, e.g.◀
Floor mats can be removed from the car's inte‐
rior for cleaning.
Seite 231CareMobility231
Online Edition for Part no. 01 40 2 956 336 - X/14
Page 245 of 255
BMW Assist, see user'smanual for Navigation, En‐
tertainment and Communi‐
cation
BMW maintenance sys‐ tem 215
Bonus range, ECO PRO 185
Bottle holder, refer to Cu‐ pholder 175
Brake assistant 133
Brake assistant, adaptive 133
Brake discs, break-in 178
Brake force display 130
Brake lights, adaptive 130
Brake lights, brake force dis‐ play 130
Brake lights, bulb replace‐ ment 219
Brake pads, break-in 178
Braking, hints 179
Breakdown assis‐ tance 223, 224
Break-in 178
Brightness of Control Dis‐ play 98
Bulb replacement, front 217
Bulb replacement, rear 219
Button, RES 144
Button, Start/Stop 68
Bypassing, refer to Jump- starting 225
C
California Proposition 65 Warning 7
Calling up mirror adjust‐ ment 43
Calling up seat adjust‐ ment 43
Calling up steering wheel ad‐ justment 43
Camera, care 232
Camera, rearview cam‐ era 153
Camera, Side View 155 Camera, Top View 157
Can holder, refer to Cu‐ pholder 175
Car battery 221
Car care products 229
Care, displays 232
Care, vehicle 229
Cargo 181
Cargo area partition 50
Cargo area, storage compart‐ ments 175
Cargo, securing 182
Cargo straps, securing cargo 182
Car key, refer to Remote con‐ trol 34
Carpet, care 231
Car wash 228
Catalytic converter, refer to Hot exhaust system 178
CBS Condition Based Serv‐ ice 215
CD/Multimedia, see user's manual for Navigation, En‐
tertainment and Communi‐
cation
Center console 16
Central locking system 40
Central screen, refer to Con‐ trol Display 18
Changes, technical, refer to Safety 7
Changing parts 217
Changing wheels 220
Changing wheels/tires 204
Chassis number, see vehicle identification number 9
Check Control 86
Checking the engine oil level electronically 210
Checking the oil level elec‐ tronically 210
Children, seating position 65
Children, transporting safely 65 Child restraint fixing sys‐
tem 65
Child restraint fixing system LATCH 66
Child restraint fixing systems, mounting 65
Child seat, mounting 65
Child seats 65
Chrome parts, care 231
Cigarette lighter 170
Cleaning displays 232
Climate control 162
Climate control wind‐ shield 179
Clock 91
Closing/opening via door lock 39
Closing/opening with remote control 37
Clothes hooks 174
Coasting 187
Coasting with engine decou‐ pled, coasting 187
Coasting with idling en‐ gine 187
Combination reel, refer to Turn signals 74
Combination reel, refer to Wiper system 75
COMFORT+ program, Driving Dynamics Control 139
Comfort Access 41
COMFORT program, Driving Dynamics Control 139
Computer 95
Condensation on win‐ dows 163
Condensation under the vehi‐ cle 180
Condition Based Service CBS 215
Configure driving mode 140
Confirmation signal 43
ConnectedDrive, see user's manual for Navigation, En‐Seite 241Everything from A to ZReference241
Online Edition for Part no. 01 40 2 956 336 - X/14
Page 247 of 255
Emergency Request 223
Emergency service, refer to Roadside Assistance 224
Emergency start function, en‐ gine start 35
Emergency unlocking, trans‐ mission lock 80
Emergency unlocking, trunk lid 41
Energy Control 91
Energy recovery 92
Engine, automatic reel-off 70
Engine, automatic Start/Stop function 70
Engine compartment 208
Engine compartment, work‐ ing in 208
Engine coolant 213
Engine idling when driving, coasting 187
Engine oil 210
Engine oil, adding 211
Engine oil additives 211
Engine oil change 212
Engine oil filler neck 211
Engine oil temperature 90
Engine oil types, alterna‐ tive 212
Engine oil types, ap‐ proved 212
Engine start during malfunc‐ tion 35
Engine start, jump-start‐ ing 225
Engine start, refer to Starting the engine 69
Engine stop 69
Engine temperature 90
Entering/exiting vehicle, as‐ sistance, steering wheel 64
Entering a car wash 228
Equipment, interior 168
Error displays, see Check Control 86
ESP Electronic Stability Pro‐ gram, refer to DSC 133 Exchanging wheels/tires 204
Exhaust system 178
Exterior mirror, automatic dimming feature 63
Exterior mirrors 62
External start 225
External temperature dis‐ play 90
External temperature warn‐ ing 90
Eyes for securing cargo 182
F
Failure message, see Check Control 86
False alarm, refer to Uninten‐ tional alarm 45
Fan, refer to Air flow 163
Filler neck for engine oil 211
Fine wood, care 231
First aid kit 224
Fitting for towing, see tow fit‐ ting 227
Flat tire, changing wheels 220
Flat Tire Monitor FTM 113
Flat tire, Tire Pressure Moni‐ tor TPM 110
Flat tire, warning lamp 111, 114
Flooding 179
Floor carpet, care 231
Floor mats, care 231
Fold-out position, wiper 76
Foot brake 179
Front airbags 106
Front center armrest 174
Front-end collision warning with braking function 116
Front-end collision warning with City Braking func‐
tion 119
Front fog lights 104
Front lights 217 front-seat passenger airbags,
automatic deactivation 108
Front-seat passenger airbags, indicator lamp 108
Front seats 55
Front turn signals, refer to Light-emitting diodes,
LEDs 219
FTM Flat Tire Monitor 113
Fuel 194
Fuel consumption, current 91
Fuel consumption, refer to Average fuel consump‐
tion 95
Fuel filler flap 192
Fuel gauge 90
Fuel lid 192
Fuel quality 194
Fuel recommendation 194
Fuel, tank capacity 238
Fuse 221
G
Garage door opener, refer to Universal Integrated Remote
Control 168
Gasoline 194
Gear change, Steptronic transmission 78
Gear shift indicator 93
General driving notes 178
Glare shield 170
Glove compartment 173
Gross vehicle weight, ap‐ proved 237
H
Handbrake, refer to Parking brake 71
Hand-held transmitter, alter‐ nating code 169
Hazard warning flashers 223
HDC Hill Descent Con‐ trol 135 Seite 243Everything from A to ZReference243
Online Edition for Part no. 01 40 2 956 336 - X/14
Page 248 of 255
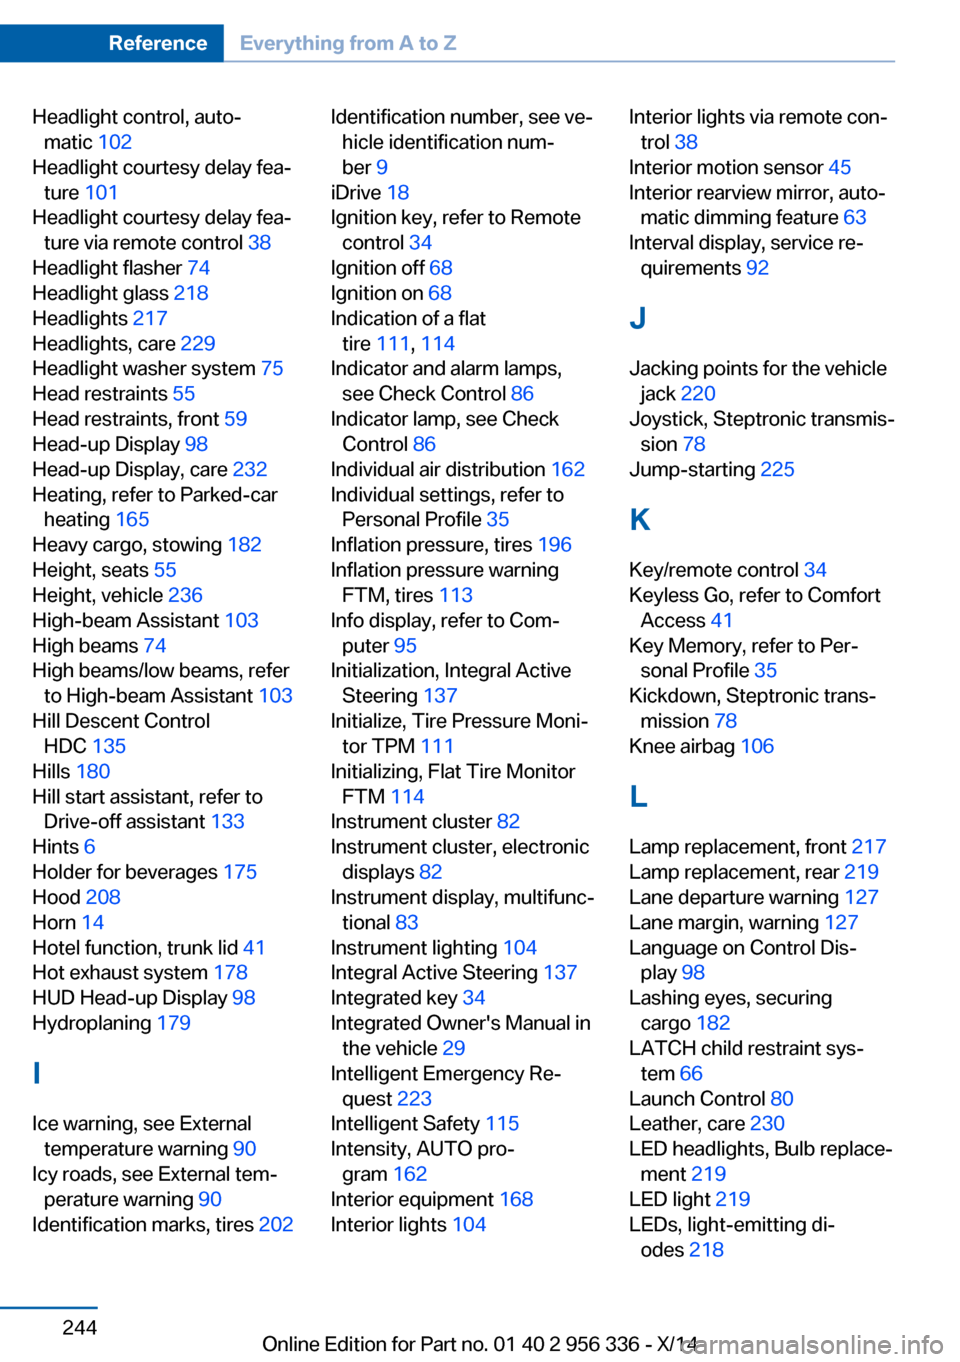
Headlight control, auto‐matic 102
Headlight courtesy delay fea‐ ture 101
Headlight courtesy delay fea‐ ture via remote control 38
Headlight flasher 74
Headlight glass 218
Headlights 217
Headlights, care 229
Headlight washer system 75
Head restraints 55
Head restraints, front 59
Head-up Display 98
Head-up Display, care 232
Heating, refer to Parked-car heating 165
Heavy cargo, stowing 182
Height, seats 55
Height, vehicle 236
High-beam Assistant 103
High beams 74
High beams/low beams, refer to High-beam Assistant 103
Hill Descent Control HDC 135
Hills 180
Hill start assistant, refer to Drive-off assistant 133
Hints 6
Holder for beverages 175
Hood 208
Horn 14
Hotel function, trunk lid 41
Hot exhaust system 178
HUD Head-up Display 98
Hydroplaning 179
I Ice warning, see External temperature warning 90
Icy roads, see External tem‐ perature warning 90
Identification marks, tires 202 Identification number, see ve‐
hicle identification num‐
ber 9
iDrive 18
Ignition key, refer to Remote control 34
Ignition off 68
Ignition on 68
Indication of a flat tire 111 , 114
Indicator and alarm lamps, see Check Control 86
Indicator lamp, see Check Control 86
Individual air distribution 162
Individual settings, refer to Personal Profile 35
Inflation pressure, tires 196
Inflation pressure warning FTM, tires 113
Info display, refer to Com‐ puter 95
Initialization, Integral Active Steering 137
Initialize, Tire Pressure Moni‐ tor TPM 111
Initializing, Flat Tire Monitor FTM 114
Instrument cluster 82
Instrument cluster, electronic displays 82
Instrument display, multifunc‐ tional 83
Instrument lighting 104
Integral Active Steering 137
Integrated key 34
Integrated Owner's Manual in the vehicle 29
Intelligent Emergency Re‐ quest 223
Intelligent Safety 115
Intensity, AUTO pro‐ gram 162
Interior equipment 168
Interior lights 104 Interior lights via remote con‐
trol 38
Interior motion sensor 45
Interior rearview mirror, auto‐ matic dimming feature 63
Interval display, service re‐ quirements 92
J Jacking points for the vehicle jack 220
Joystick, Steptronic transmis‐ sion 78
Jump-starting 225
K
Key/remote control 34
Keyless Go, refer to Comfort Access 41
Key Memory, refer to Per‐ sonal Profile 35
Kickdown, Steptronic trans‐ mission 78
Knee airbag 106
L Lamp replacement, front 217
Lamp replacement, rear 219
Lane departure warning 127
Lane margin, warning 127
Language on Control Dis‐ play 98
Lashing eyes, securing cargo 182
LATCH child restraint sys‐ tem 66
Launch Control 80
Leather, care 230
LED headlights, Bulb replace‐ ment 219
LED light 219
LEDs, light-emitting di‐ odes 218 Seite 244ReferenceEverything from A to Z244
Online Edition for Part no. 01 40 2 956 336 - X/14
Page 250 of 255
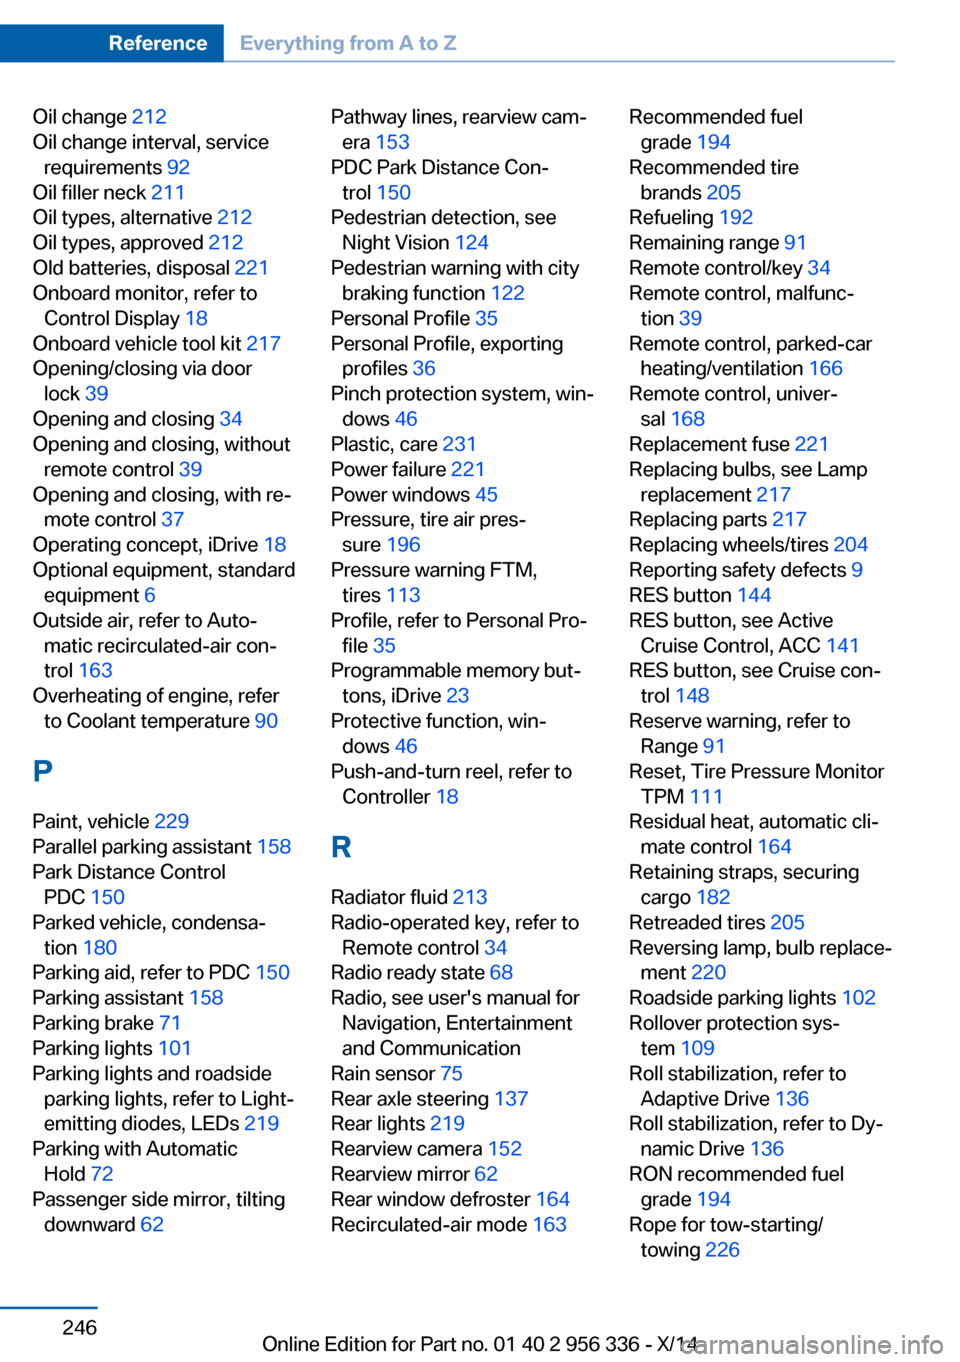
Oil change 212
Oil change interval, service requirements 92
Oil filler neck 211
Oil types, alternative 212
Oil types, approved 212
Old batteries, disposal 221
Onboard monitor, refer to Control Display 18
Onboard vehicle tool kit 217
Opening/closing via door lock 39
Opening and closing 34
Opening and closing, without remote control 39
Opening and closing, with re‐ mote control 37
Operating concept, iDrive 18
Optional equipment, standard equipment 6
Outside air, refer to Auto‐ matic recirculated-air con‐
trol 163
Overheating of engine, refer to Coolant temperature 90
P Paint, vehicle 229
Parallel parking assistant 158
Park Distance Control PDC 150
Parked vehicle, condensa‐ tion 180
Parking aid, refer to PDC 150
Parking assistant 158
Parking brake 71
Parking lights 101
Parking lights and roadside parking lights, refer to Light-
emitting diodes, LEDs 219
Parking with Automatic Hold 72
Passenger side mirror, tilting downward 62 Pathway lines, rearview cam‐
era 153
PDC Park Distance Con‐ trol 150
Pedestrian detection, see Night Vision 124
Pedestrian warning with city braking function 122
Personal Profile 35
Personal Profile, exporting profiles 36
Pinch protection system, win‐ dows 46
Plastic, care 231
Power failure 221
Power windows 45
Pressure, tire air pres‐ sure 196
Pressure warning FTM, tires 113
Profile, refer to Personal Pro‐ file 35
Programmable memory but‐ tons, iDrive 23
Protective function, win‐ dows 46
Push-and-turn reel, refer to Controller 18
R Radiator fluid 213
Radio-operated key, refer to Remote control 34
Radio ready state 68
Radio, see user's manual for Navigation, Entertainment
and Communication
Rain sensor 75
Rear axle steering 137
Rear lights 219
Rearview camera 152
Rearview mirror 62
Rear window defroster 164
Recirculated-air mode 163 Recommended fuel
grade 194
Recommended tire brands 205
Refueling 192
Remaining range 91
Remote control/key 34
Remote control, malfunc‐ tion 39
Remote control, parked-car heating/ventilation 166
Remote control, univer‐ sal 168
Replacement fuse 221
Replacing bulbs, see Lamp replacement 217
Replacing parts 217
Replacing wheels/tires 204
Reporting safety defects 9
RES button 144
RES button, see Active Cruise Control, ACC 141
RES button, see Cruise con‐ trol 148
Reserve warning, refer to Range 91
Reset, Tire Pressure Monitor TPM 111
Residual heat, automatic cli‐ mate control 164
Retaining straps, securing cargo 182
Retreaded tires 205
Reversing lamp, bulb replace‐ ment 220
Roadside parking lights 102
Rollover protection sys‐ tem 109
Roll stabilization, refer to Adaptive Drive 136
Roll stabilization, refer to Dy‐ namic Drive 136
RON recommended fuel grade 194
Rope for tow-starting/ towing 226 Seite 246ReferenceEverything from A to Z246
Online Edition for Part no. 01 40 2 956 336 - X/14