sport mode BMW 6 SERIES CONVERTIBLE 2015 F12 Owner's Manual
[x] Cancel search | Manufacturer: BMW, Model Year: 2015, Model line: 6 SERIES CONVERTIBLE, Model: BMW 6 SERIES CONVERTIBLE 2015 F12Pages: 259, PDF Size: 7.85 MB
Page 49 of 259
Arming and disarming the alarm
system
When you unlock or lock the vehicle, either
with the remote control, Comfort Access or at
the door lock the alarm system is disarmed or
armed at the same time.
Door lock and armed alarm systemUnlocking via the door lock will trigger the
alarm on some country-specific versions.
Trunk lid and armed alarm system The trunk lid can be opened even when the
alarm system is armed.
After the trunk lid is closed, it is locked and
monitored again when the doors are locked.
The hazard warning system flashes once.
Panic mode
You can trigger the alarm system if you find
yourself in a dangerous situation.
Press button on the remote control for
at least 3 seconds.
To switch off the alarm: press any button.
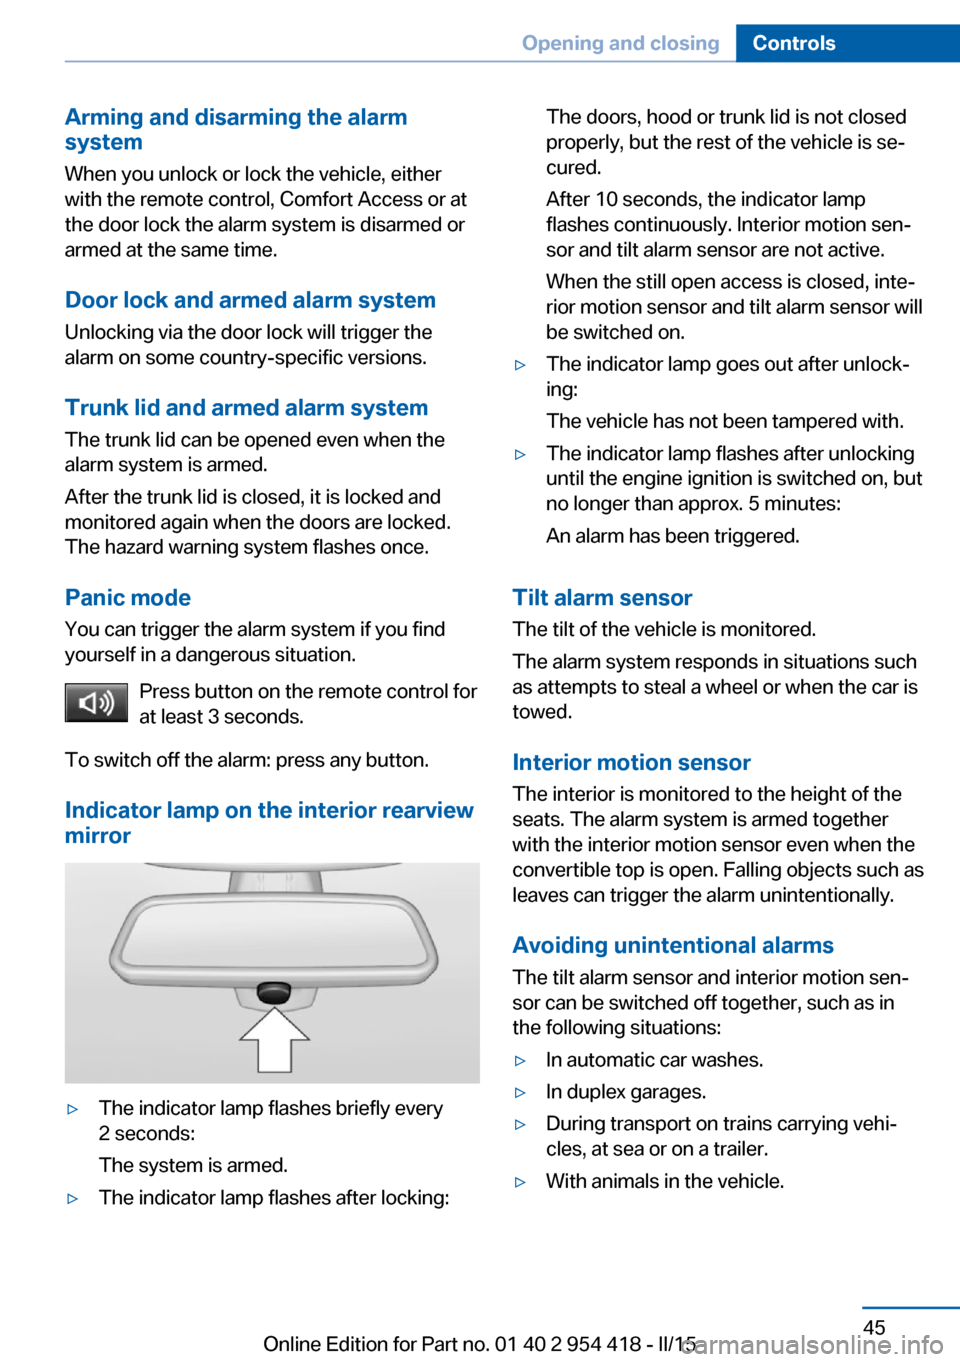
Indicator lamp on the interior rearview
mirror▷The indicator lamp flashes briefly every
2 seconds:
The system is armed.▷The indicator lamp flashes after locking:The doors, hood or trunk lid is not closed
properly, but the rest of the vehicle is se‐
cured.
After 10 seconds, the indicator lamp
flashes continuously. Interior motion sen‐
sor and tilt alarm sensor are not active.
When the still open access is closed, inte‐
rior motion sensor and tilt alarm sensor will
be switched on.▷The indicator lamp goes out after unlock‐
ing:
The vehicle has not been tampered with.▷The indicator lamp flashes after unlocking
until the engine ignition is switched on, but
no longer than approx. 5 minutes:
An alarm has been triggered.
Tilt alarm sensor The tilt of the vehicle is monitored.
The alarm system responds in situations such
as attempts to steal a wheel or when the car is
towed.
Interior motion sensor The interior is monitored to the height of the
seats. The alarm system is armed together
with the interior motion sensor even when the
convertible top is open. Falling objects such as
leaves can trigger the alarm unintentionally.
Avoiding unintentional alarms The tilt alarm sensor and interior motion sen‐
sor can be switched off together, such as in
the following situations:
▷In automatic car washes.▷In duplex garages.▷During transport on trains carrying vehi‐
cles, at sea or on a trailer.▷With animals in the vehicle.Seite 45Opening and closingControls45
Online Edition for Part no. 01 40 2 954 418 - II/15
Page 84 of 259
Sport program and manual mode
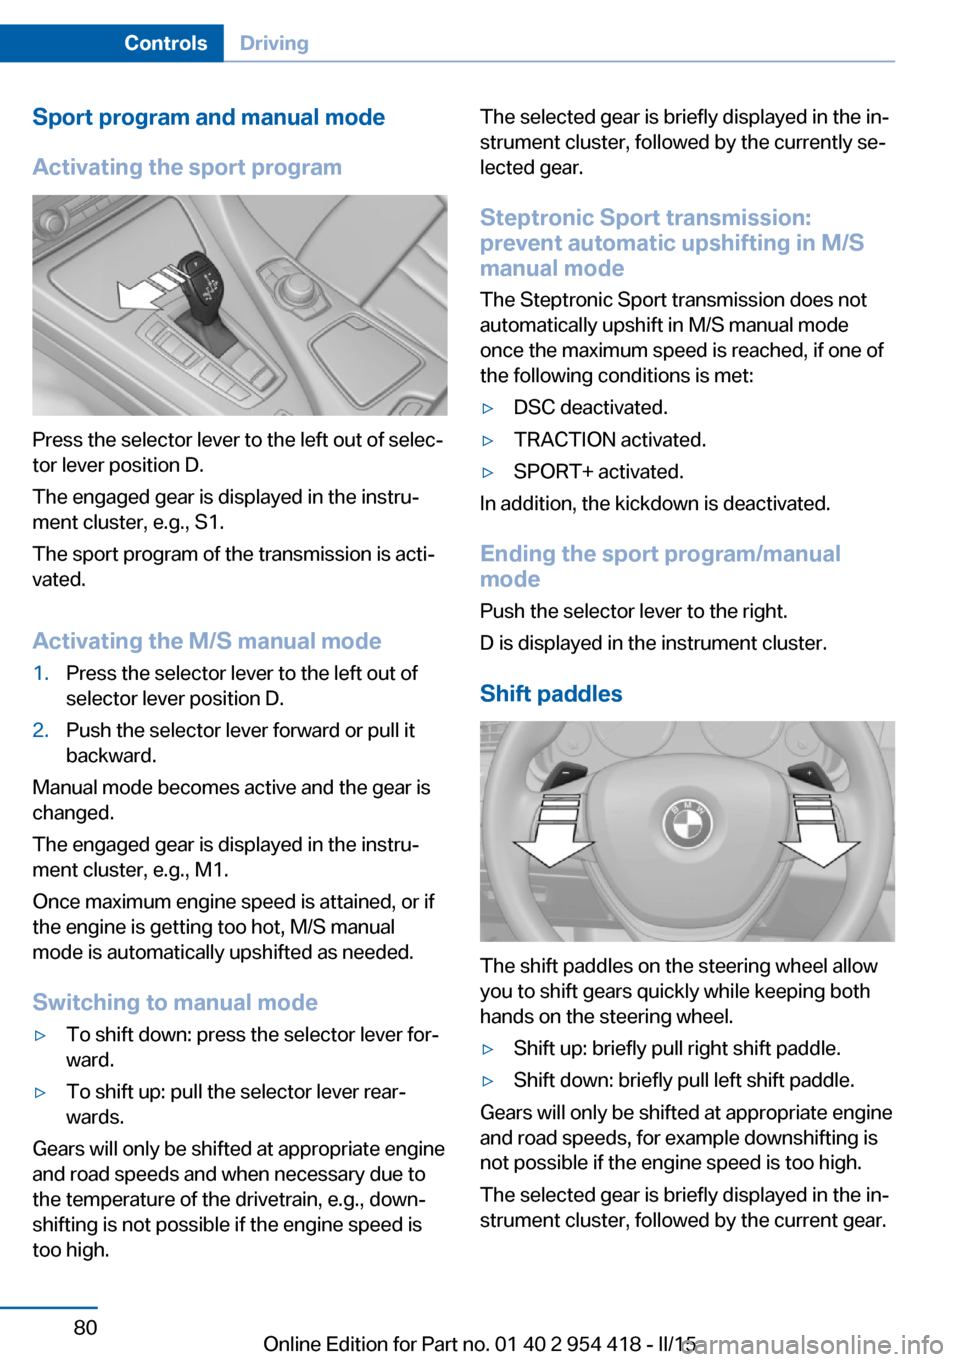
Activating the sport program
Press the selector lever to the left out of selec‐
tor lever position D.
The engaged gear is displayed in the instru‐
ment cluster, e.g., S1.
The sport program of the transmission is acti‐
vated.
Activating the M/S manual mode
1.Press the selector lever to the left out of
selector lever position D.2.Push the selector lever forward or pull it
backward.
Manual mode becomes active and the gear is
changed.
The engaged gear is displayed in the instru‐
ment cluster, e.g., M1.
Once maximum engine speed is attained, or if
the engine is getting too hot, M/S manual
mode is automatically upshifted as needed.
Switching to manual mode
▷To shift down: press the selector lever for‐
ward.▷To shift up: pull the selector lever rear‐
wards.
Gears will only be shifted at appropriate engine
and road speeds and when necessary due to
the temperature of the drivetrain, e.g., down‐
shifting is not possible if the engine speed is
too high.
The selected gear is briefly displayed in the in‐
strument cluster, followed by the currently se‐
lected gear.
Steptronic Sport transmission:
prevent automatic upshifting in M/S
manual mode
The Steptronic Sport transmission does not
automatically upshift in M/S manual mode
once the maximum speed is reached, if one of
the following conditions is met:▷DSC deactivated.▷TRACTION activated.▷SPORT+ activated.
In addition, the kickdown is deactivated.
Ending the sport program/manual
mode
Push the selector lever to the right.
D is displayed in the instrument cluster.
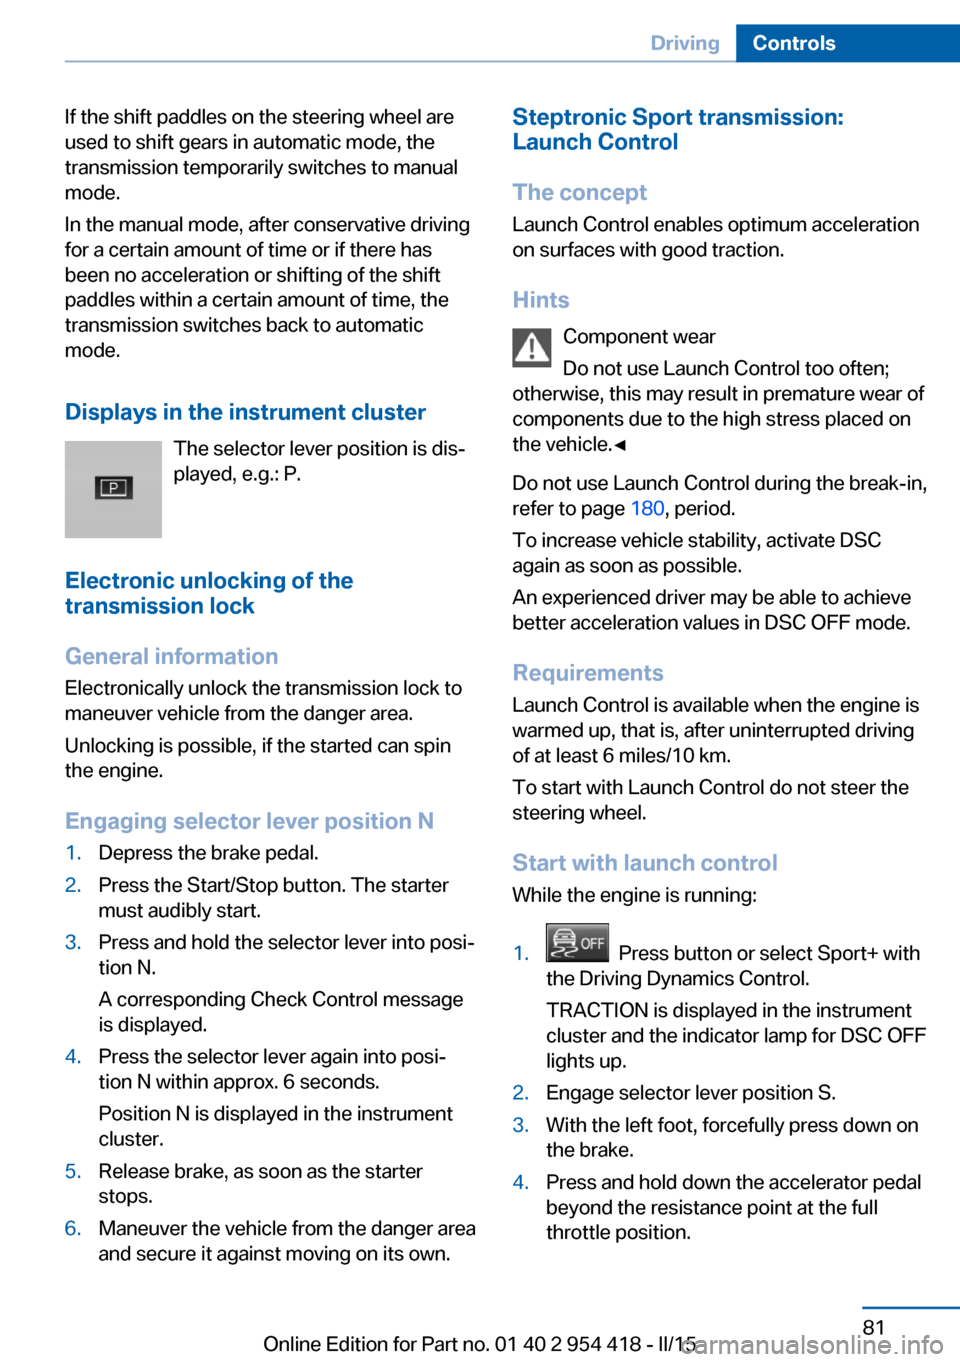
Shift paddles
The shift paddles on the steering wheel allow
you to shift gears quickly while keeping both
hands on the steering wheel.
▷Shift up: briefly pull right shift paddle.▷Shift down: briefly pull left shift paddle.
Gears will only be shifted at appropriate engine
and road speeds, for example downshifting is
not possible if the engine speed is too high.
The selected gear is briefly displayed in the in‐
strument cluster, followed by the current gear.
Seite 80ControlsDriving80
Online Edition for Part no. 01 40 2 954 418 - II/15
Page 85 of 259
If the shift paddles on the steering wheel are
used to shift gears in automatic mode, the
transmission temporarily switches to manual
mode.
In the manual mode, after conservative driving
for a certain amount of time or if there has
been no acceleration or shifting of the shift
paddles within a certain amount of time, the
transmission switches back to automatic
mode.
Displays in the instrument cluster The selector lever position is dis‐
played, e.g.: P.
Electronic unlocking of the
transmission lock
General information
Electronically unlock the transmission lock to
maneuver vehicle from the danger area.
Unlocking is possible, if the started can spin
the engine.
Engaging selector lever position N1.Depress the brake pedal.2.Press the Start/Stop button. The starter
must audibly start.3.Press and hold the selector lever into posi‐
tion N.
A corresponding Check Control message
is displayed.4.Press the selector lever again into posi‐
tion N within approx. 6 seconds.
Position N is displayed in the instrument
cluster.5.Release brake, as soon as the starter
stops.6.Maneuver the vehicle from the danger area
and secure it against moving on its own.Steptronic Sport transmission:
Launch Control
The concept Launch Control enables optimum accelerationon surfaces with good traction.
Hints Component wear
Do not use Launch Control too often;
otherwise, this may result in premature wear of
components due to the high stress placed on
the vehicle.◀
Do not use Launch Control during the break-in,
refer to page 180, period.
To increase vehicle stability, activate DSC
again as soon as possible.
An experienced driver may be able to achieve
better acceleration values in DSC OFF mode.
Requirements Launch Control is available when the engine is
warmed up, that is, after uninterrupted driving
of at least 6 miles/10 km.
To start with Launch Control do not steer the
steering wheel.
Start with launch controlWhile the engine is running:1. Press button or select Sport+ with
the Driving Dynamics Control.
TRACTION is displayed in the instrument
cluster and the indicator lamp for DSC OFF
lights up.2.Engage selector lever position S.3.With the left foot, forcefully press down on
the brake.4.Press and hold down the accelerator pedal
beyond the resistance point at the full
throttle position.Seite 81DrivingControls81
Online Edition for Part no. 01 40 2 954 418 - II/15
Page 89 of 259
7Computer 968Reset miles 91
Switching the change of display on and off
You can set whether the instrument display
automatically changes to the ECO PRO or
SPORT in the display when you switch driving
modes.1."Settings"2."Instrument cluster"3."ECO PRO Info"
Or"Driving mode view"
With Professional Navigation System:
switching zoom function on/off
You can program whether the current speed is
to appear enlarged in the speedometer.
On the Control Display:1."Settings"2."Instrument cluster"3."Magnifier function"
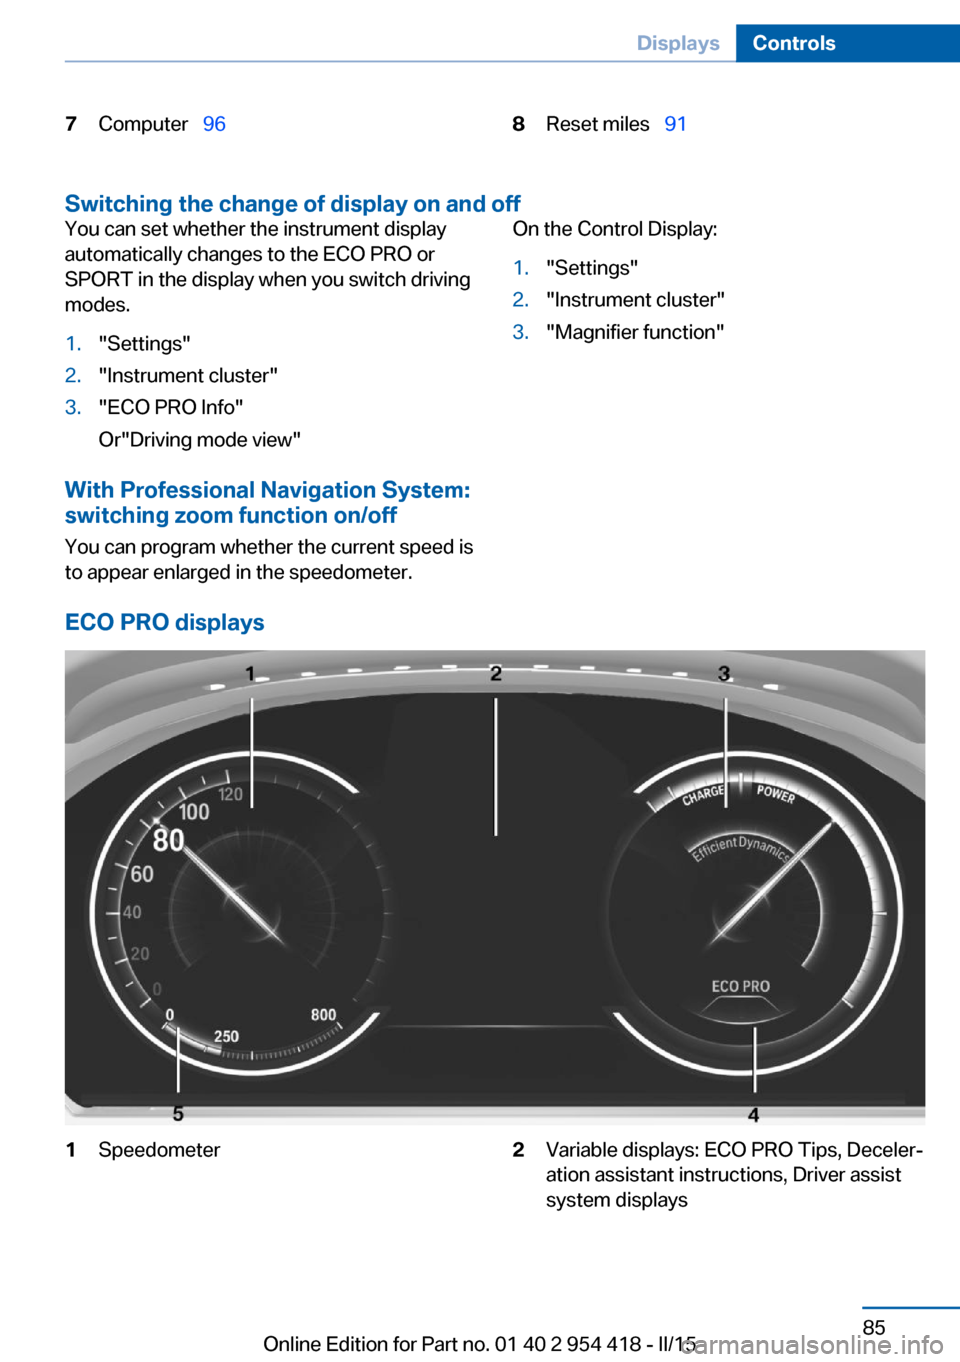
ECO PRO displays
1Speedometer2Variable displays: ECO PRO Tips, Deceler‐
ation assistant instructions, Driver assist
system displaysSeite 85DisplaysControls85
Online Edition for Part no. 01 40 2 954 418 - II/15
Page 91 of 259
General information
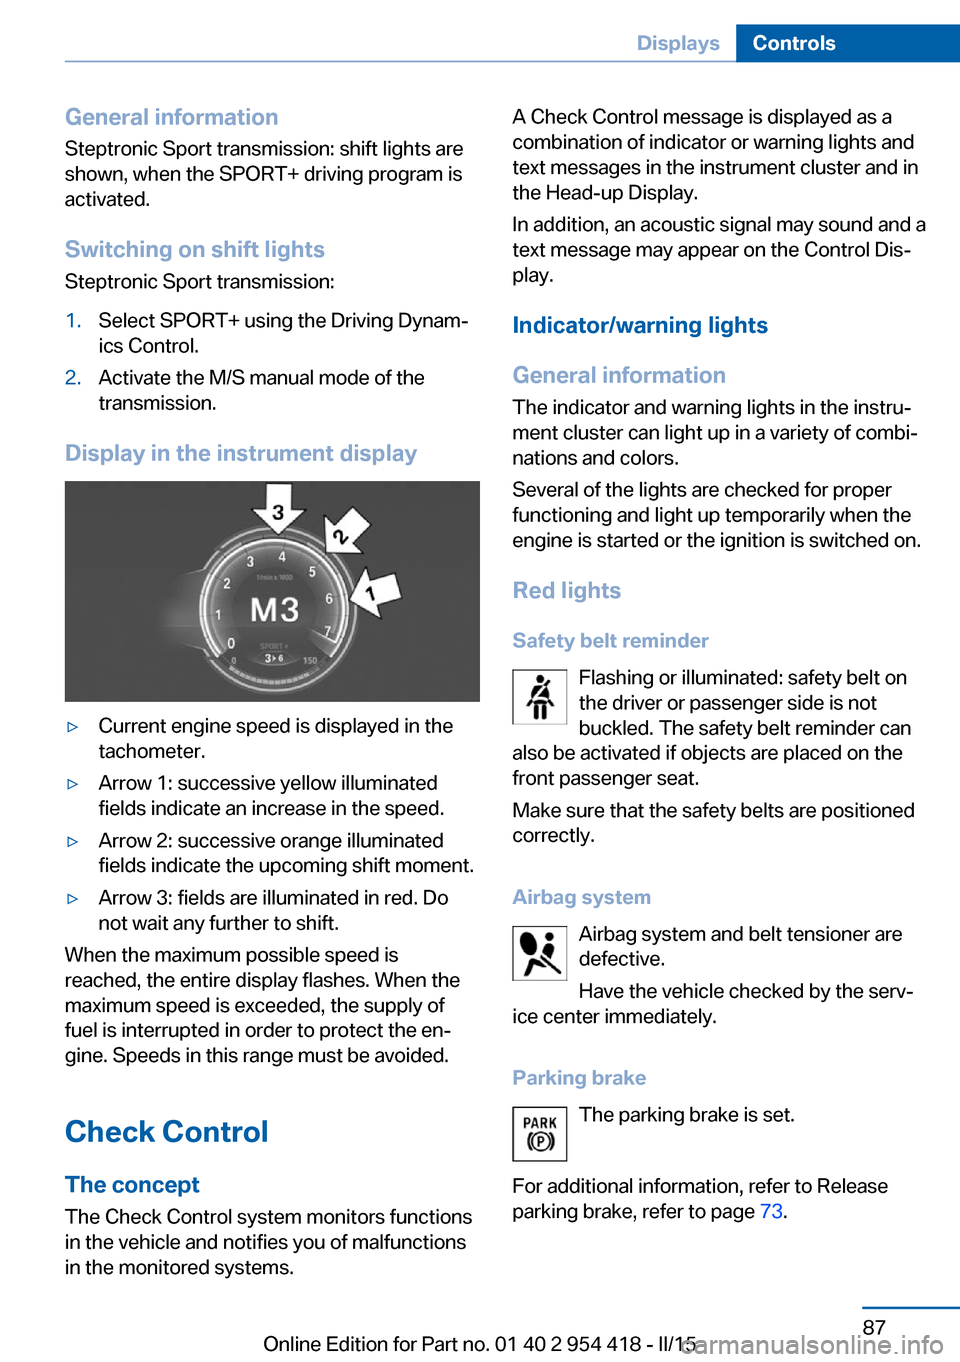
Steptronic Sport transmission: shift lights are
shown, when the SPORT+ driving program is
activated.
Switching on shift lights Steptronic Sport transmission:1.Select SPORT+ using the Driving Dynam‐
ics Control.2.Activate the M/S manual mode of the
transmission.
Display in the instrument display
▷Current engine speed is displayed in the
tachometer.▷Arrow 1: successive yellow illuminated
fields indicate an increase in the speed.▷Arrow 2: successive orange illuminated
fields indicate the upcoming shift moment.▷Arrow 3: fields are illuminated in red. Do
not wait any further to shift.
When the maximum possible speed is
reached, the entire display flashes. When the
maximum speed is exceeded, the supply of
fuel is interrupted in order to protect the en‐
gine. Speeds in this range must be avoided.
Check Control
The concept The Check Control system monitors functions
in the vehicle and notifies you of malfunctions
in the monitored systems.
A Check Control message is displayed as a
combination of indicator or warning lights and
text messages in the instrument cluster and in
the Head-up Display.
In addition, an acoustic signal may sound and a text message may appear on the Control Dis‐
play.
Indicator/warning lights
General information
The indicator and warning lights in the instru‐
ment cluster can light up in a variety of combi‐
nations and colors.
Several of the lights are checked for proper
functioning and light up temporarily when the
engine is started or the ignition is switched on.
Red lights Safety belt reminder Flashing or illuminated: safety belt on
the driver or passenger side is not
buckled. The safety belt reminder can
also be activated if objects are placed on the
front passenger seat.
Make sure that the safety belts are positioned
correctly.
Airbag system Airbag system and belt tensioner aredefective.
Have the vehicle checked by the serv‐
ice center immediately.
Parking brake The parking brake is set.
For additional information, refer to Release
parking brake, refer to page 73.Seite 87DisplaysControls87
Online Edition for Part no. 01 40 2 954 418 - II/15
Page 143 of 259
Overview
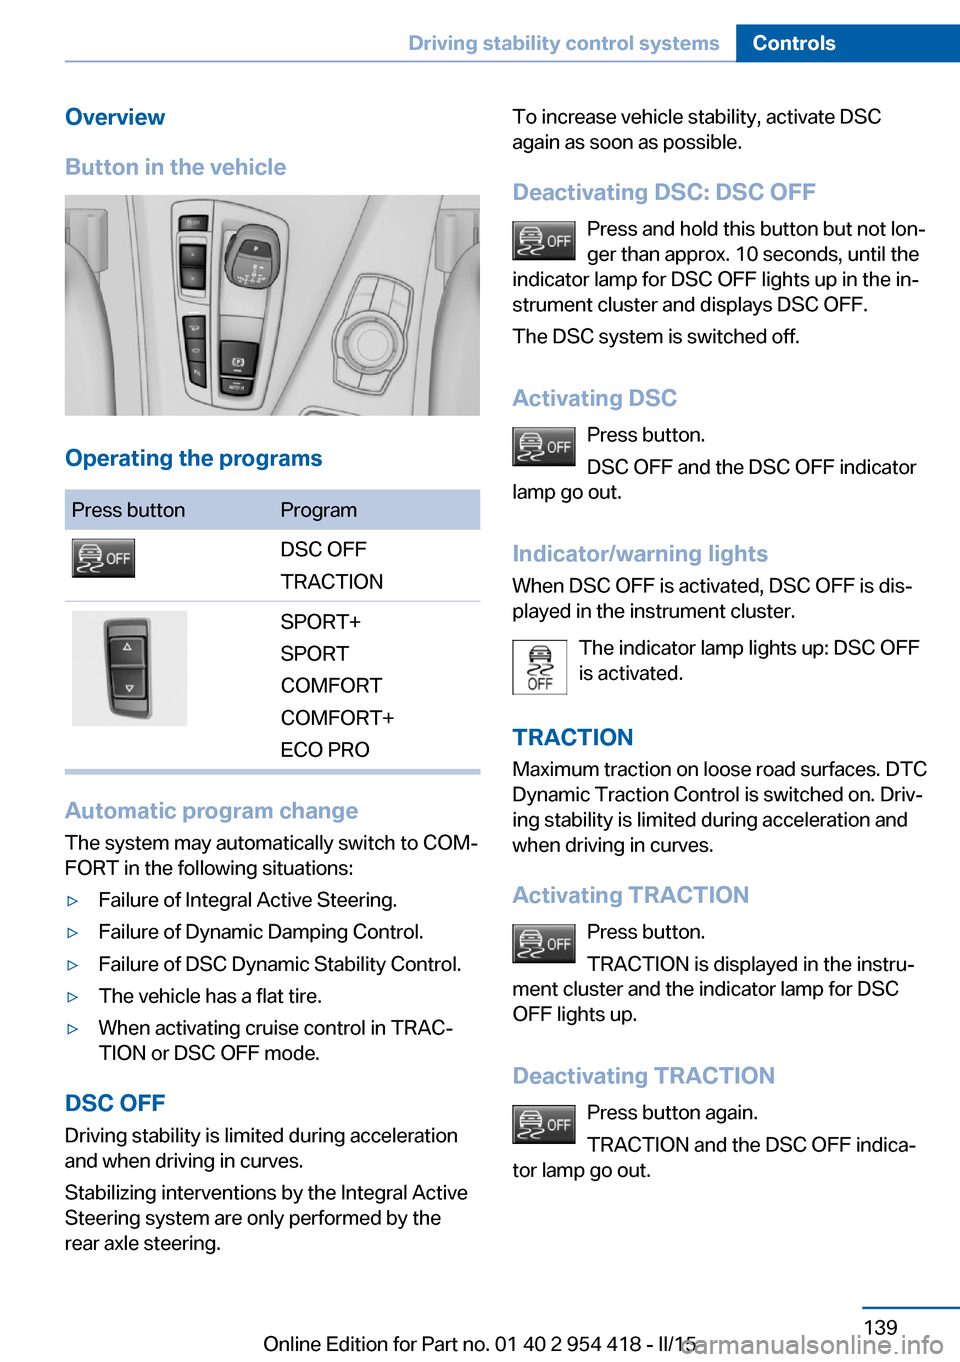
Button in the vehicle
Operating the programs
Press buttonProgramDSC OFF
TRACTIONSPORT+
SPORT
COMFORT
COMFORT+
ECO PRO
Automatic program change
The system may automatically switch to COM‐
FORT in the following situations:
▷Failure of Integral Active Steering.▷Failure of Dynamic Damping Control.▷Failure of DSC Dynamic Stability Control.▷The vehicle has a flat tire.▷When activating cruise control in TRAC‐
TION or DSC OFF mode.
DSC OFF
Driving stability is limited during acceleration
and when driving in curves.
Stabilizing interventions by the Integral Active
Steering system are only performed by the
rear axle steering.
To increase vehicle stability, activate DSC
again as soon as possible.
Deactivating DSC: DSC OFF Press and hold this button but not lon‐
ger than approx. 10 seconds, until the
indicator lamp for DSC OFF lights up in the in‐
strument cluster and displays DSC OFF.
The DSC system is switched off.
Activating DSC Press button.
DSC OFF and the DSC OFF indicator
lamp go out.
Indicator/warning lights
When DSC OFF is activated, DSC OFF is dis‐
played in the instrument cluster.
The indicator lamp lights up: DSC OFF
is activated.
TRACTION
Maximum traction on loose road surfaces. DTC Dynamic Traction Control is switched on. Driv‐
ing stability is limited during acceleration and
when driving in curves.
Activating TRACTION Press button.
TRACTION is displayed in the instru‐
ment cluster and the indicator lamp for DSC
OFF lights up.
Deactivating TRACTION Press button again.
TRACTION and the DSC OFF indica‐
tor lamp go out.Seite 139Driving stability control systemsControls139
Online Edition for Part no. 01 40 2 954 418 - II/15
Page 144 of 259
Indicator/warning lights
If TRACTION is activated, TRACTION is dis‐
played in the instrument cluster.
The indicator lamp lights up: TRAC‐
TION is activated.
SPORT+ Sporty driving with optimized suspension and
adapted engine control with limited driving sta‐
bilization.
Dynamic Traction Control is switched on.
The driver handles several of the stabilization
tasks.
Activating SPORT+ Press button repeatedly until SPORT+
appears in the instrument cluster and
the DSC OFF indicator lamp lights up.
Automatic program change When switching on the adjustable speed limit
or activating cruise control, the program auto‐
matically switches to SPORT mode.
Indicator/warning lights
SPORT+ is displayed in the instrument cluster.
The DSC OFF indicator lamp lights up:
Dynamic Traction Control is activated.
SPORT
Consistently sporty tuning of the suspension
and engine control for greater driving agility
with maximum driving stabilization.
The program can be configured to individual
specifications.
The configuration is stored for the profile cur‐
rently in use.Activating SPORT
Press button repeatedly until SPORT
is displayed in the instrument cluster.
Configuring SPORT When the display is activated on the Control
Display, refer to page 141, the SPORT driving
mode can be set.
After the SPORT driving mode is activated, se‐
lect "Configure SPORT" on the displayed
panel and configure the program.
SPORT can also be configured before it is acti‐
vated:1."Settings"2."SPORT mode" or: "Driving mode"3.Configure driving mode.
This configuration is retrieved when the
SPORT driving mode is activated.
COMFORT For a balanced tuning with maximum driving
stabilization.
Activating COMFORT Press button repeatedly until COM‐
FORT is displayed in the instrument
cluster.
In certain situations, the system automatically
changes to the NORMAL program, automatic
program change, refer to page 139.
COMFORT+
Comfort-oriented tuning of the shock absorb‐ ers and adapted engine control for optimal
traveling comfort with maximum driving stabili‐
zation.
COMFORT+ activation Press button repeatedly until COM‐
FORT+ is displayed in the instrument
cluster.
Seite 140ControlsDriving stability control systems140
Online Edition for Part no. 01 40 2 954 418 - II/15
Page 145 of 259
ECO PROECO PRO, refer to page 186, provides consis‐
tent tuning to minimize fuel consumption for
maximum range with maximum driving stabili‐
zation.
Comfort functions and the engine controller
are adjusted.
The program can be configured to individual
specifications.
Activating ECO PRO Press button repeatedly until ECO
PRO is displayed in the instrument
cluster.
Configuring ECO PRO1.Activate ECO PRO.2."Configure ECO PRO"
Make the desired settings.
Configure driving mode
Settings can be made for the following driving
modes in Driving mode:
▷SPORT mode, refer to page 140.▷ECO PRO mode, refer to page 187.
Displays in the instrument cluster
Selected program The instrument cluster displays
the selected program.
Program selection Pressing the button displays a
list of the selectable programs.
Depending on your vehicle's op‐
tional features, the list in the in‐
strument cluster can differ from
the illustration shown.
Display on the Control Display
Program changes can be displayed briefly on
the Control Display.
To do so, make the following settings:1."Settings"2."Control display"
"Driving mode"3."Driving mode info"Seite 141Driving stability control systemsControls141
Online Edition for Part no. 01 40 2 954 418 - II/15
Page 249 of 259
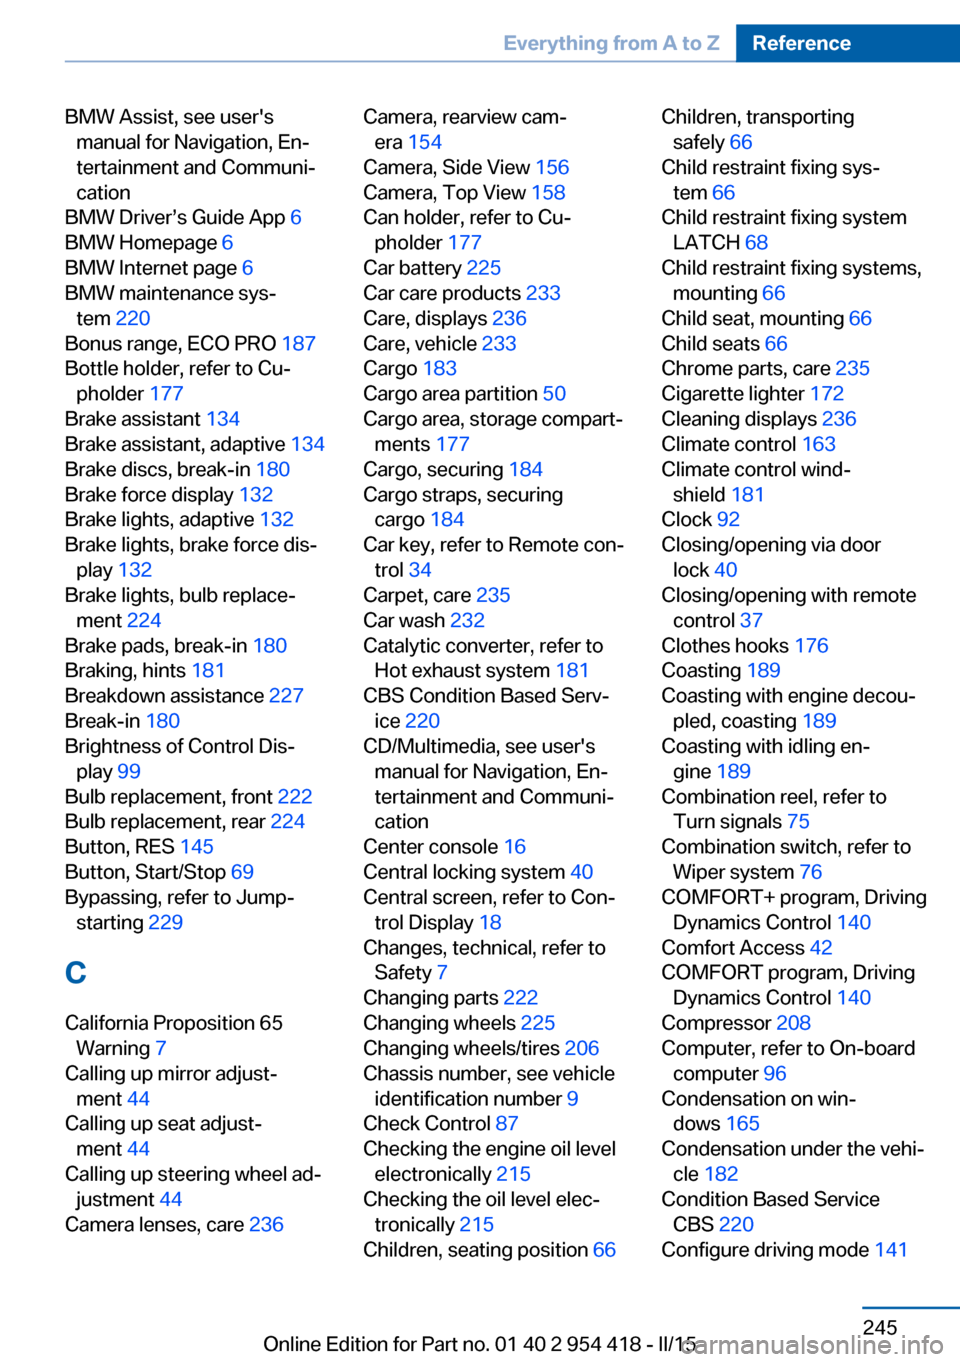
BMW Assist, see user'smanual for Navigation, En‐
tertainment and Communi‐
cation
BMW Driver’s Guide App 6
BMW Homepage 6
BMW Internet page 6
BMW maintenance sys‐ tem 220
Bonus range, ECO PRO 187
Bottle holder, refer to Cu‐ pholder 177
Brake assistant 134
Brake assistant, adaptive 134
Brake discs, break-in 180
Brake force display 132
Brake lights, adaptive 132
Brake lights, brake force dis‐ play 132
Brake lights, bulb replace‐ ment 224
Brake pads, break-in 180
Braking, hints 181
Breakdown assistance 227
Break-in 180
Brightness of Control Dis‐ play 99
Bulb replacement, front 222
Bulb replacement, rear 224
Button, RES 145
Button, Start/Stop 69
Bypassing, refer to Jump- starting 229
C
California Proposition 65 Warning 7
Calling up mirror adjust‐ ment 44
Calling up seat adjust‐ ment 44
Calling up steering wheel ad‐ justment 44
Camera lenses, care 236 Camera, rearview cam‐
era 154
Camera, Side View 156
Camera, Top View 158
Can holder, refer to Cu‐ pholder 177
Car battery 225
Car care products 233
Care, displays 236
Care, vehicle 233
Cargo 183
Cargo area partition 50
Cargo area, storage compart‐ ments 177
Cargo, securing 184
Cargo straps, securing cargo 184
Car key, refer to Remote con‐ trol 34
Carpet, care 235
Car wash 232
Catalytic converter, refer to Hot exhaust system 181
CBS Condition Based Serv‐ ice 220
CD/Multimedia, see user's manual for Navigation, En‐
tertainment and Communi‐
cation
Center console 16
Central locking system 40
Central screen, refer to Con‐ trol Display 18
Changes, technical, refer to Safety 7
Changing parts 222
Changing wheels 225
Changing wheels/tires 206
Chassis number, see vehicle identification number 9
Check Control 87
Checking the engine oil level electronically 215
Checking the oil level elec‐ tronically 215
Children, seating position 66 Children, transporting
safely 66
Child restraint fixing sys‐ tem 66
Child restraint fixing system LATCH 68
Child restraint fixing systems, mounting 66
Child seat, mounting 66
Child seats 66
Chrome parts, care 235
Cigarette lighter 172
Cleaning displays 236
Climate control 163
Climate control wind‐ shield 181
Clock 92
Closing/opening via door lock 40
Closing/opening with remote control 37
Clothes hooks 176
Coasting 189
Coasting with engine decou‐ pled, coasting 189
Coasting with idling en‐ gine 189
Combination reel, refer to Turn signals 75
Combination switch, refer to Wiper system 76
COMFORT+ program, Driving Dynamics Control 140
Comfort Access 42
COMFORT program, Driving Dynamics Control 140
Compressor 208
Computer, refer to On-board computer 96
Condensation on win‐ dows 165
Condensation under the vehi‐ cle 182
Condition Based Service CBS 220
Configure driving mode 141 Seite 245Everything from A to ZReference245
Online Edition for Part no. 01 40 2 954 418 - II/15