seat adjustment BMW 6 SERIES GRAN COUPE 2014 F06 Owner's Manual
[x] Cancel search | Manufacturer: BMW, Model Year: 2014, Model line: 6 SERIES GRAN COUPE, Model: BMW 6 SERIES GRAN COUPE 2014 F06Pages: 253, PDF Size: 5.47 MB
Page 47 of 253
3. Select the symbol.4.Select the desired function:▷"Driver's door only"
Only the driver's door and the fuel filler
flap are unlocked. Pressing again un‐
locks the entire vehicle.▷"All doors"
The entire vehicle is unlocked.
Trunk lid
Depending on optional features and country
version, this setting is not offered in some
cases.
1."Settings"2."Doors/key"3. Select the symbol.4.Select the desired function:▷"Tailgate"
The trunk lid is opened.▷"Tailgate + door(s)"
The trunk lid is opened and the doors
are unlocked.
Confirmation signals from the vehicle
The settings are saved in the active profile, re‐
fer to page 35.
1."Settings"2."Doors/key"3.Deactivate or activate the desired confir‐
mation signals.▷"Acoustic sig. lock/unlock"▷"Flash when lock/unlock"
Automatic locking
The settings are saved in the active profile, re‐fer to page 35.
1."Settings"2."Doors/key"3.Select the desired function:▷"Lock if no door is opened"
The vehicle locks automatically after a
short period of time if no door is
opened.▷"Lock after start driving"
The vehicle locks automatically after
you drive off.
Retrieving the seat, mirror, and
steering wheel settings
The driver's seat, exterior mirror, and steering
wheel position adjusted last will be stored for
the active profile.
When the vehicle is unlocked, these positions
are automatically retrieved if this function was
activated.
Pinch hazard when moving back the seat
If this function is used, first make sure
that the footwell behind the driver's seat is
empty. Otherwise, people might get injured or
objects damaged when the seat is moved
back.◀
The adjustment procedure is interrupted:
▷When a seat position reel is pressed.▷When a button of the seat, mirror, and
steering wheel memory is pressed briefly.
Activating the setting
1."Settings"2."Doors/key"3."Last seat position autom."
Alarm system
The conceptWhen the vehicle is locked, the vehicle alarm
system responds to:
▷Opening a door, the hood or the trunk lid.▷Movements in the interior.Seite 43Opening and closingControls43
Online Edition for Part no. 01 40 2 956 110 - X/14
Page 50 of 253
Pinch protection systemDanger of jamming even with pinch pro‐
tection
Even with the pinch protection system, check
that the window's closing path is clear; other‐
wise, the closing action may not stop in certain
situations, e.g., if thin objects are present.◀
No window accessories
Do not install any accessories in the win‐
dow's range of movement; otherwise, the
pinch protection system will be impaired.◀
If closing force exceeds a specific margin as a
window closes, closing is interrupted.
The window reopens slightly.
Closing without the pinch protection
system
Keep the closing path clear
Monitor closing and make sure that the
closing path of the window is clear; otherwise,
injuries may result.◀
E.g. danger from the outside or ice might pre‐
vent window from closing properly - proceed
as follows:1.Pull the reel past the resistance point and
hold it there.
The pinch protection is limited and the
window reopens slightly if the closing force
exceeds a certain margin.2.Pull the reel past the resistance point again
within approx. 4 seconds and hold it there.
The window closes without jam protection.
Safety reel
General information
The following functions can be locked simulta‐
neously, using the reel:
▷Opening and closing of the rear windows
using the switches in the rear.▷Operation of the roller sunblinds using the
switches in the rear.▷Adjustment of the power rear seats.▷Adjustment of the power head restraints in
the rear.
Switching on and off
Press button.
The LED lights up if the safety func‐
tion is switched on.
Safety reel for rear operation
Press the safety reel when transporting
children in the rear; otherwise, injury may re‐
sult if the windows are closed without supervi‐
sion.◀
Roller sunblinds
General information
The safety reel in the driver's door can be used
to prevent children, e. g., from operating the
roller sunblinds using the switches in the rear.
Press the safety reel in the driver's door. The
LED lights up if the safety function is switched
on.
If you are no longer able to move the roller sun‐
blinds after having activated them consecu‐
tively a number of times, the system is blocked
for a limited time to prevent overheating. Let
the system cool.
The roller sunblinds cannot be moved at low
interior temperatures.
Seite 46ControlsOpening and closing46
Online Edition for Part no. 01 40 2 956 110 - X/14
Page 54 of 253
cle is unlocked via the remote control, the po‐
sition is automatically retrieved if the Function,
refer to page 43, is activated for this purpose.
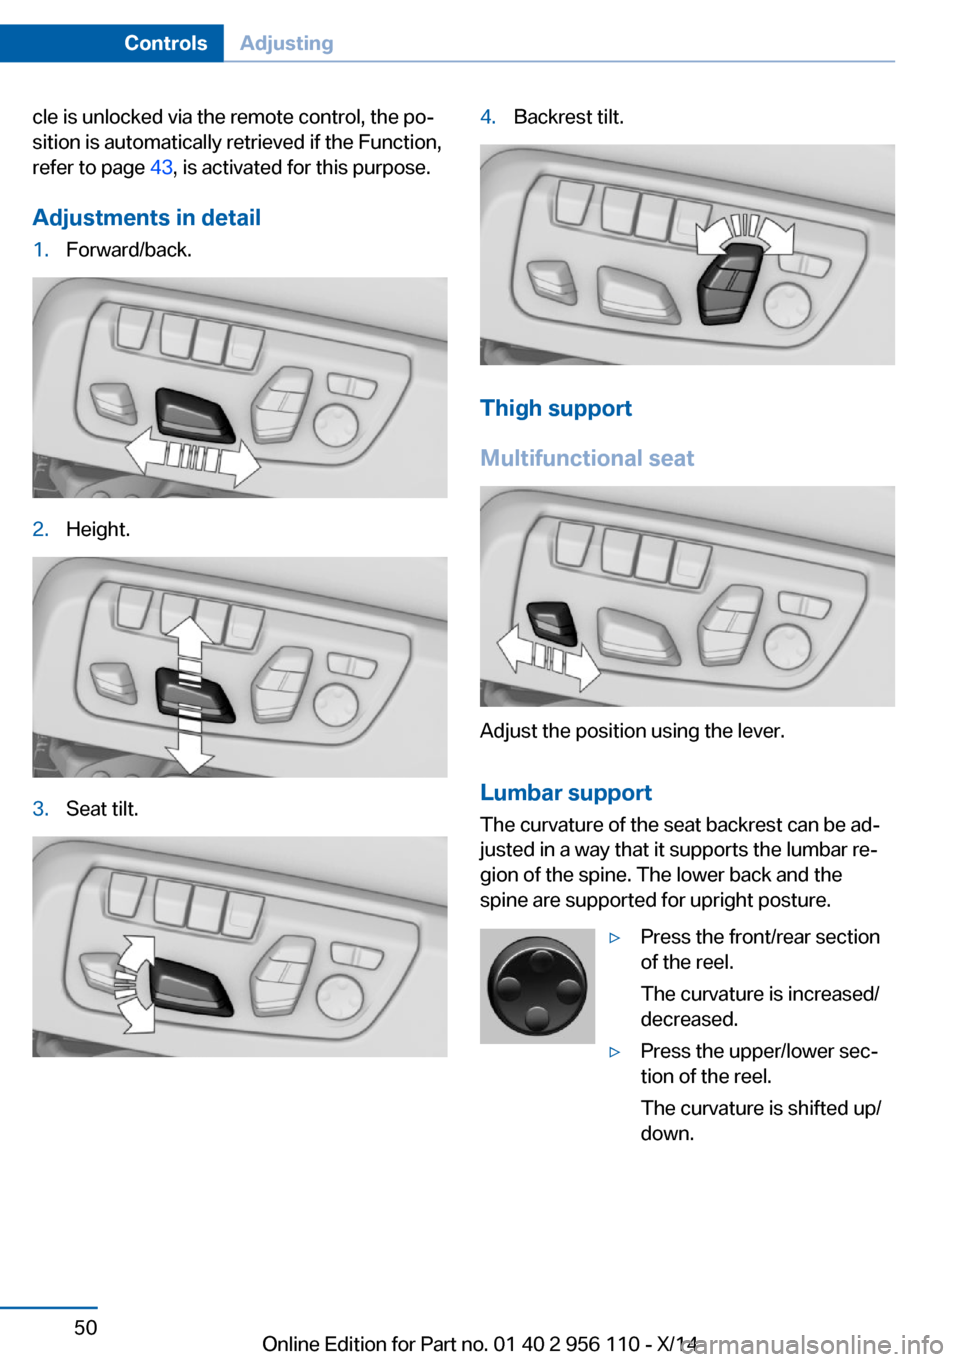
Adjustments in detail1.Forward/back.2.Height.3.Seat tilt.4.Backrest tilt.
Thigh support
Multifunctional seat
Adjust the position using the lever.
Lumbar support
The curvature of the seat backrest can be ad‐
justed in a way that it supports the lumbar re‐
gion of the spine. The lower back and the
spine are supported for upright posture.
▷Press the front/rear section
of the reel.
The curvature is increased/
decreased.▷Press the upper/lower sec‐
tion of the reel.
The curvature is shifted up/
down.Seite 50ControlsAdjusting50
Online Edition for Part no. 01 40 2 956 110 - X/14
Page 55 of 253
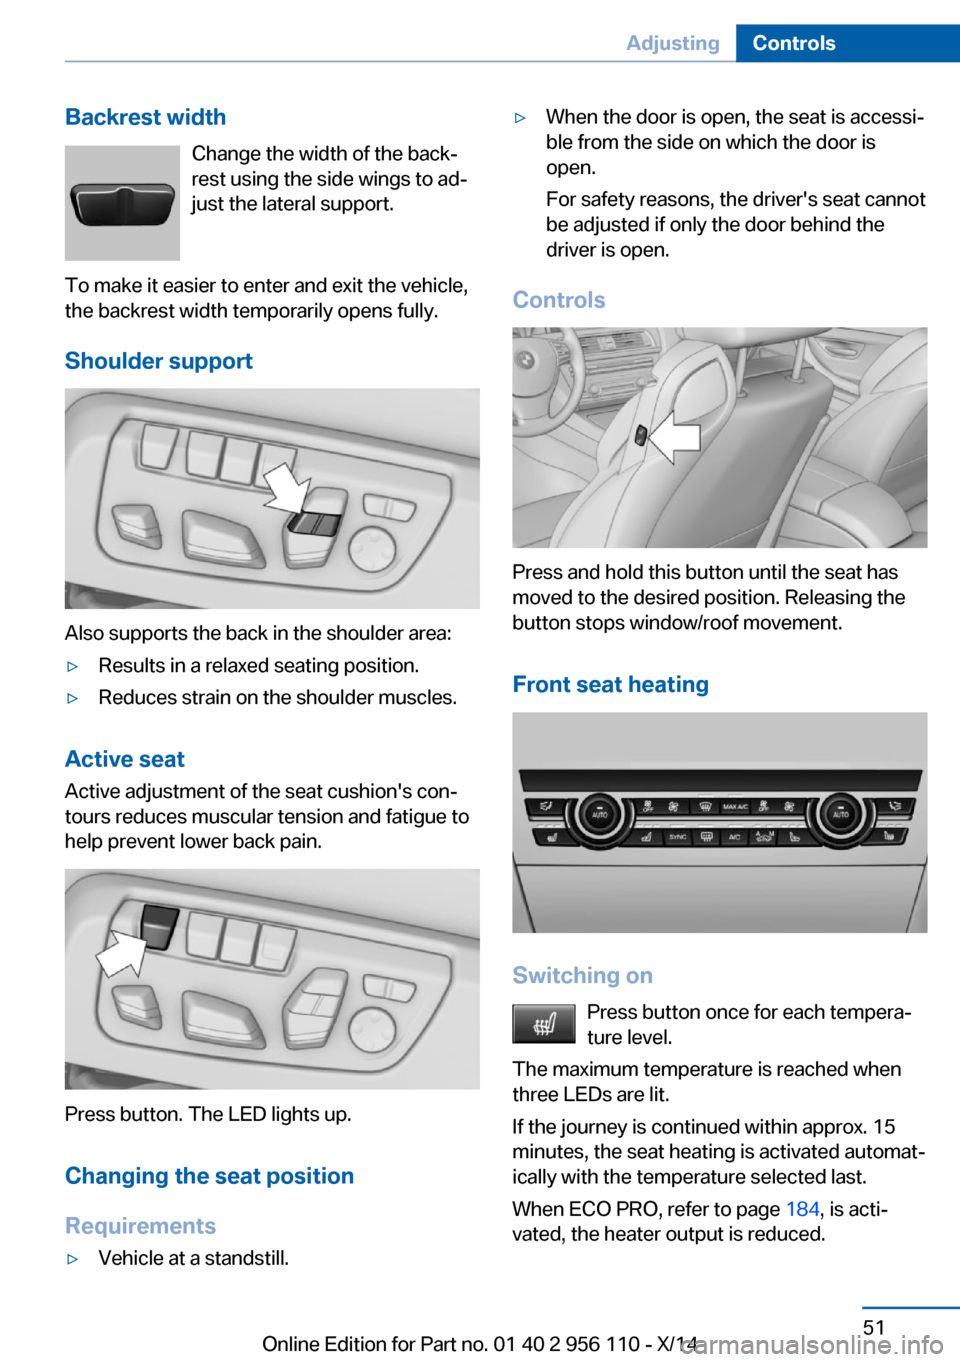
Backrest widthChange the width of the back‐
rest using the side wings to ad‐
just the lateral support.
To make it easier to enter and exit the vehicle,
the backrest width temporarily opens fully.
Shoulder support
Also supports the back in the shoulder area:
▷Results in a relaxed seating position.▷Reduces strain on the shoulder muscles.
Active seat Active adjustment of the seat cushion's con‐
tours reduces muscular tension and fatigue to
help prevent lower back pain.
Press button. The LED lights up.
Changing the seat position
Requirements
▷Vehicle at a standstill.▷When the door is open, the seat is accessi‐
ble from the side on which the door is
open.
For safety reasons, the driver's seat cannot
be adjusted if only the door behind the
driver is open.
Controls
Press and hold this button until the seat has
moved to the desired position. Releasing the
button stops window/roof movement.
Front seat heating
Switching on Press button once for each tempera‐
ture level.
The maximum temperature is reached when
three LEDs are lit.
If the journey is continued within approx. 15
minutes, the seat heating is activated automat‐
ically with the temperature selected last.
When ECO PRO, refer to page 184, is acti‐
vated, the heater output is reduced.
Seite 51AdjustingControls51
Online Edition for Part no. 01 40 2 956 110 - X/14
Page 59 of 253
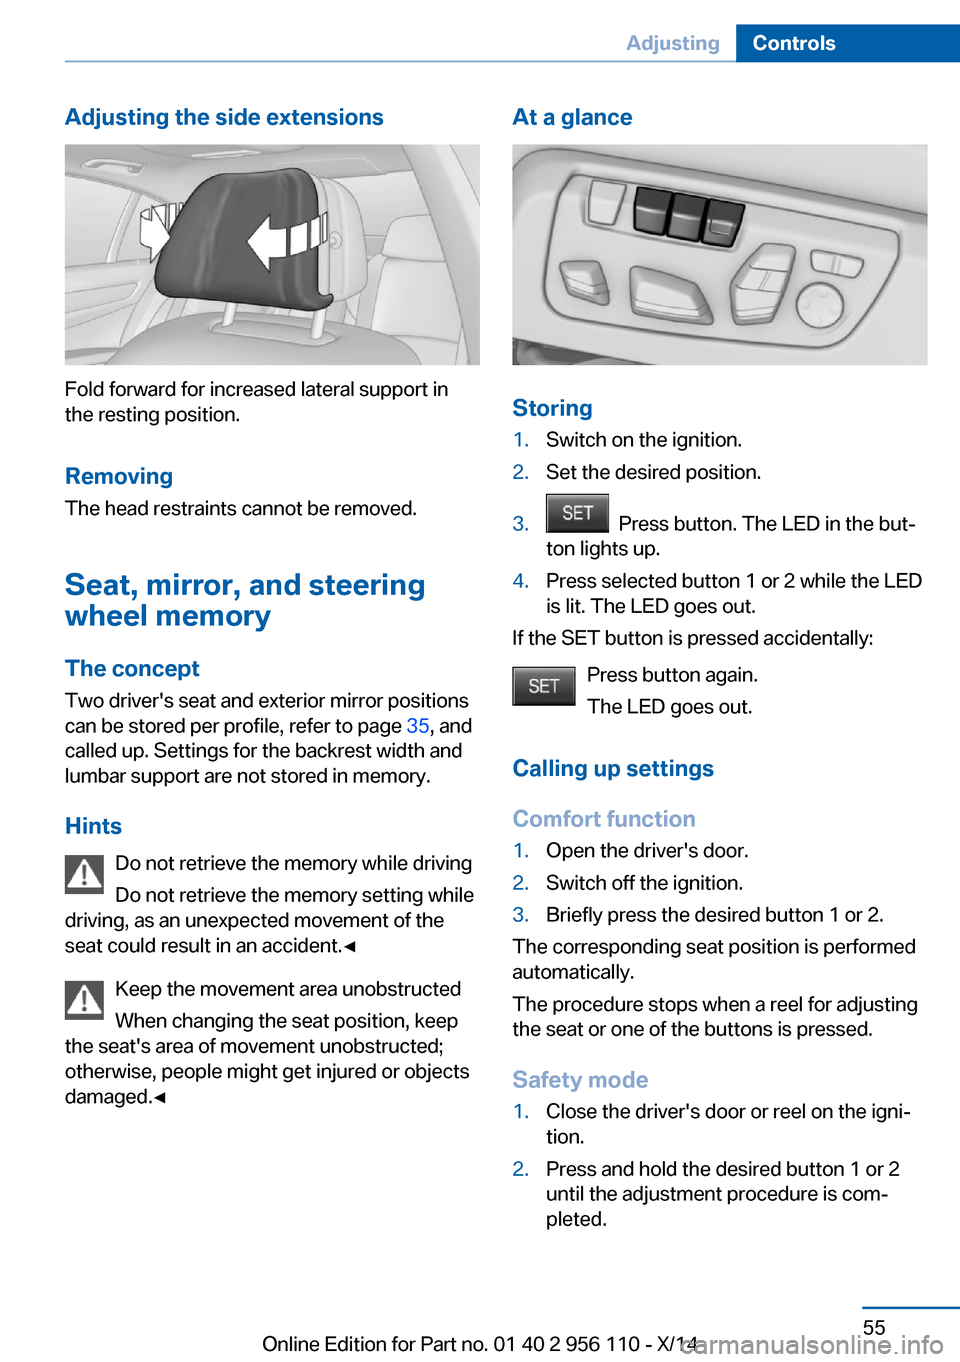
Adjusting the side extensions
Fold forward for increased lateral support in
the resting position.
Removing The head restraints cannot be removed.
Seat, mirror, and steering
wheel memory
The concept
Two driver's seat and exterior mirror positions
can be stored per profile, refer to page 35, and
called up. Settings for the backrest width and
lumbar support are not stored in memory.
Hints Do not retrieve the memory while driving
Do not retrieve the memory setting while
driving, as an unexpected movement of the
seat could result in an accident.◀
Keep the movement area unobstructed
When changing the seat position, keep
the seat's area of movement unobstructed;
otherwise, people might get injured or objects
damaged.◀
At a glance
Storing
1.Switch on the ignition.2.Set the desired position.3. Press button. The LED in the but‐
ton lights up.4.Press selected button 1 or 2 while the LED
is lit. The LED goes out.
If the SET button is pressed accidentally:
Press button again.
The LED goes out.
Calling up settings
Comfort function
1.Open the driver's door.2.Switch off the ignition.3.Briefly press the desired button 1 or 2.
The corresponding seat position is performed
automatically.
The procedure stops when a reel for adjusting
the seat or one of the buttons is pressed.
Safety mode
1.Close the driver's door or reel on the igni‐
tion.2.Press and hold the desired button 1 or 2
until the adjustment procedure is com‐
pleted.Seite 55AdjustingControls55
Online Edition for Part no. 01 40 2 956 110 - X/14
Page 64 of 253
of unexpected movement of the rear seat
backrest.◀
On the front passenger seat
Deactivating airbags Deactivating the front-seat passenger
airbags
If a child restraint system is used in the front
passenger seat, deactivate the front-seat pas‐
senger airbags; otherwise, there is an in‐
creased risk of injury to the child when the air‐
bags are activated, even with a child restraint
system.◀
After installing a child restraint system in the
front passenger seat, make sure that the front,
knee and side airbags on the front passenger
side are deactivated.
Deactivate the front-seat passenger airbags
automatically, refer to page 103.
Seat position and height
Before installing a child restraint system, move
the front passenger seat as far back as possi‐
ble and adjust its height to the highest and
thus best possible position for the belt and to
offer optimal protection in the event of an acci‐
dent.
If the upper anchorage of the safety belt is lo‐
cated in front of the belt guide of the child seat,
move the passenger seat carefully forward un‐
til the best possible belt guide position is
reached.
Backrest width Backrest width for the child seat
Before installing a child restraint system
in the front passenger seat, the backrest width
must be opened completely. Do not change
the adjustment after this; otherwise, the stabil‐
ity of the child seat will be reduced.◀
Adjustable backrest width: before installing a
child restraint system in the front passengerseat, open the backrest width completely. Do
not change the backrest width again and do
not call up a memory position.
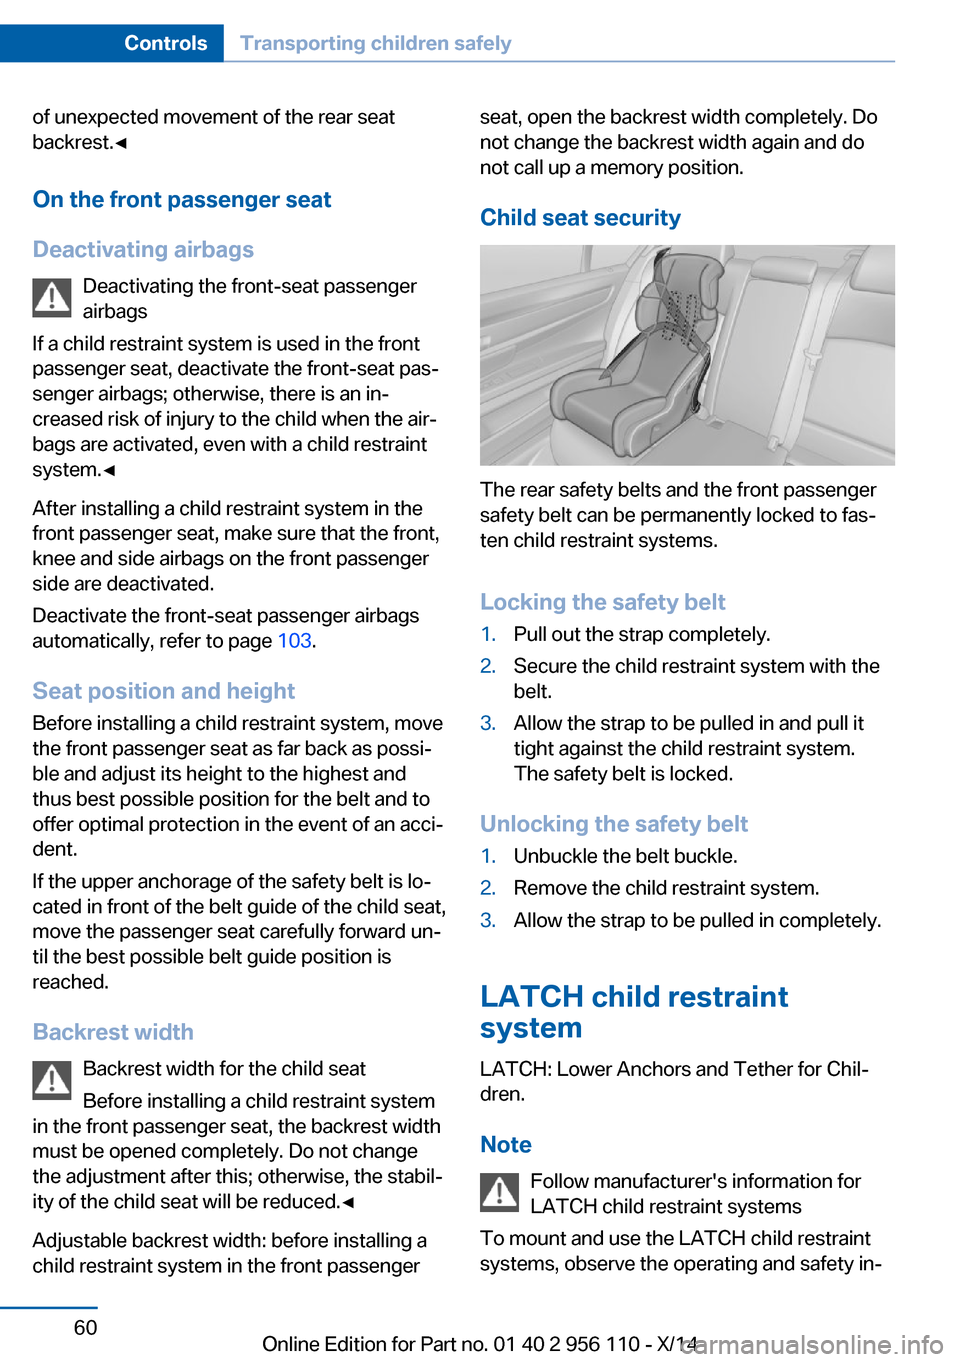
Child seat security
The rear safety belts and the front passenger
safety belt can be permanently locked to fas‐
ten child restraint systems.
Locking the safety belt
1.Pull out the strap completely.2.Secure the child restraint system with the
belt.3.Allow the strap to be pulled in and pull it
tight against the child restraint system.
The safety belt is locked.
Unlocking the safety belt
1.Unbuckle the belt buckle.2.Remove the child restraint system.3.Allow the strap to be pulled in completely.
LATCH child restraint
system
LATCH: Lower Anchors and Tether for Chil‐
dren.
Note Follow manufacturer's information for
LATCH child restraint systems
To mount and use the LATCH child restraint
systems, observe the operating and safety in‐
Seite 60ControlsTransporting children safely60
Online Edition for Part no. 01 40 2 956 110 - X/14
Page 108 of 253
factured. After installing a child seat, make
sure that the indicator lamp for the front-seat
passenger airbags lights up. This indicates
that the child seat has been detected and the
front-seat passenger airbags are not activated.
Strength of the driver's and front-seat
passenger airbag
The explosive power that activates driver's/
front passenger's airbags very much depends
on the positions of the driver's/front passeng‐
er's seat.
With a respective message appearing on Con‐
trol Display calibrate the front seats to keep
the accuracy of this function over the long-
term.
Calibrating the front seats A corresponding message appears on the
Control Display.1.Press the reel and move the respective
seat all the way forward.2.Press the reel forward again. The seat still
moves forward slightly.3.Readjust the seat to the desired position.
The calibration procedure is completed when
the message on the Control Display disap‐
pears.
If the message continues to be displayed, re‐
peat the calibration.
If the message does not disappear after a re‐
peat calibration, have the system checked as
soon as possible.
Unobstructed area of movement
Ensure that the area of movement of the
seats is unobstructed to avoid personal injury
or damage to objects.◀
Tire Pressure Monitor TPM
The concept The system monitors tire inflation pressure in
the four mounted tires. The system warns you
if there is a significant loss of pressure in one
or more tires. For this purpose, sensors in the
tire valves measure the tire inflation pressure
and tire temperature.
Hints Tire damage due to external factors
Sudden tire damage caused by external
circumstances cannot be recognized in ad‐
vance.◀
With use of the system observe further infor‐
mation found under Tire inflation pressure, re‐
fer to page 196.
Functional requirements
The system must have been reset with the
correct tire inflation pressure; otherwise, relia‐
ble signaling of tire inflation pressure loss is
not assured.
Reset the system after each adjustment of the
tire inflation pressure and after every tire or
wheel change.
Always use wheels with TPM electronics to
ensure that the system will operate properly.
Status display The current status of the Tire Pressure Moni‐
tor TPM can be displayed on the Control Dis‐
play, e.g., whether or not the TPM is active.1."Vehicle info"2."Vehicle status"3. "Tire Pressure Monitor (TPM)"
The status is displayed.
Seite 104ControlsSafety104
Online Edition for Part no. 01 40 2 956 110 - X/14
Page 130 of 253
A recommendation to take a break is displayed
only once during an uninterrupted trip.
After a break, another recommendation to take
a break cannot be displayed until after approxi‐
mately 45 minutes.
System limits
The function may be limited in the following
situations, for instance, and will either output
an incorrect warning or no warning at all:▷When the clock is set incorrectly.▷When the vehicle speed is mainly below
about 43 mph/70 km/h.▷With a sporty driving style, such as during
rapid acceleration or when cornering fast.▷In active driving situations, such as when
changing lanes frequently.▷When the road surface is poor.▷In the event of strong side winds.
PreCrash
The concept With this system critical driving situations that
might result in an accident can be detected
above a speed of approx. 20 mph/30 km/h. In these situations, preventive measures are au‐
tomatically taken to minimize the risk of an ac‐
cident as much as possible.
Critical driving situations may include:
Emergency stop.
If the vehicle includes the front-end collision
warning or front-end collision warning with
braking feature, impending collisions with vehi‐
cles driving ahead or stopped in front of you
can also be detected within the system's
range.
Note
Personal responsibility
The system cannot possibly serve as a
substitute for the driver's personal judgment of
the traffic situation. The system may not al‐
ways detect critical situations reliably and in a
timely manner. Adapt speed to traffic situation
and drive alertly; otherwise, a risk to safety may
result.◀
Function
After the safety belt is buckled, the front belts
are automatically pretensioned once after the
vehicle is driven is away.
In critical driving situations, the following indi‐
vidual functions become active as needed:▷The front belts are automatically preten‐
sioned.▷Automatic closing of the windows.▷Automatic closing of the glass sunroof.▷For vehicles equipped with power backrest
adjustment: automatic positioning of the
backrest for the front passenger seat.
After a critical driving situation without an acci‐
dent, the front belts are loosened again. All
other systems can be restored to the desired
setting.
If the belt tension does not loosen automati‐
cally, stop the vehicle and unbuckle the belt
using the red button in the buckle. Fasten the
belt before continuing on your trip.
PostCrash
In the event of an accident, the system can
bring the car to a halt automatically without in‐
tervention by the driver in certain situations.
This can reduce the risk of a further collision
and the consequences thereof.
Depressing the brake pedal can cause the ve‐
hicle to brake harder. This interrupts automatic
braking. Destepping on the gas pedal also in‐ terrupts automatic braking.
Seite 126ControlsSafety126
Online Edition for Part no. 01 40 2 956 110 - X/14
Page 242 of 253
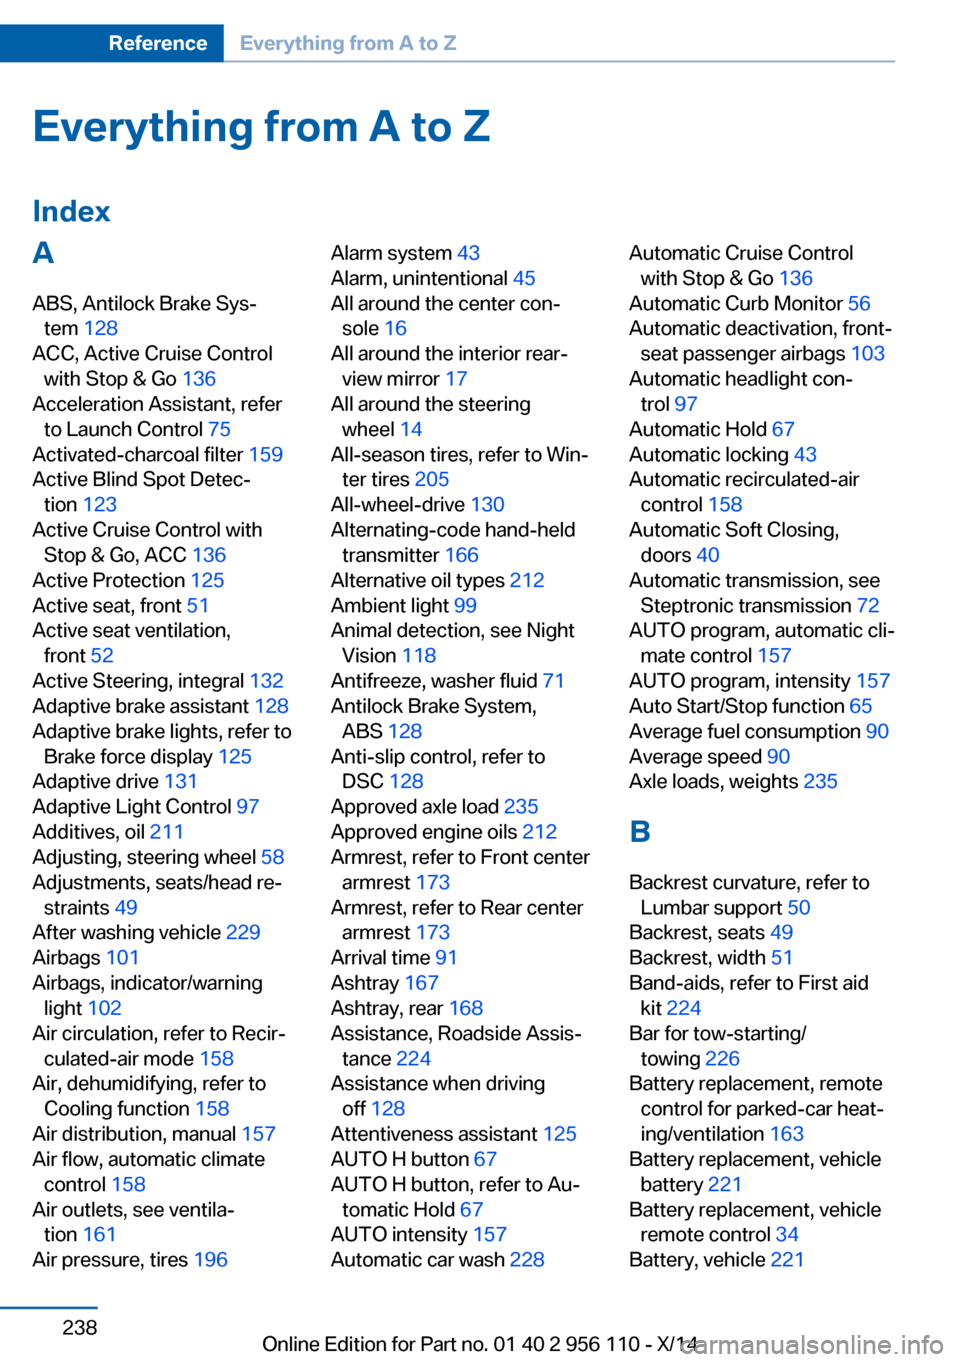
Everything from A to Z
IndexA ABS, Antilock Brake Sys‐ tem 128
ACC, Active Cruise Control with Stop & Go 136
Acceleration Assistant, refer to Launch Control 75
Activated-charcoal filter 159
Active Blind Spot Detec‐ tion 123
Active Cruise Control with Stop & Go, ACC 136
Active Protection 125
Active seat, front 51
Active seat ventilation, front 52
Active Steering, integral 132
Adaptive brake assistant 128
Adaptive brake lights, refer to Brake force display 125
Adaptive drive 131
Adaptive Light Control 97
Additives, oil 211
Adjusting, steering wheel 58
Adjustments, seats/head re‐ straints 49
After washing vehicle 229
Airbags 101
Airbags, indicator/warning light 102
Air circulation, refer to Recir‐ culated-air mode 158
Air, dehumidifying, refer to Cooling function 158
Air distribution, manual 157
Air flow, automatic climate control 158
Air outlets, see ventila‐ tion 161
Air pressure, tires 196 Alarm system 43
Alarm, unintentional 45
All around the center con‐ sole 16
All around the interior rear‐ view mirror 17
All around the steering wheel 14
All-season tires, refer to Win‐ ter tires 205
All-wheel-drive 130
Alternating-code hand-held transmitter 166
Alternative oil types 212
Ambient light 99
Animal detection, see Night Vision 118
Antifreeze, washer fluid 71
Antilock Brake System, ABS 128
Anti-slip control, refer to DSC 128
Approved axle load 235
Approved engine oils 212
Armrest, refer to Front center armrest 173
Armrest, refer to Rear center armrest 173
Arrival time 91
Ashtray 167
Ashtray, rear 168
Assistance, Roadside Assis‐ tance 224
Assistance when driving off 128
Attentiveness assistant 125
AUTO H button 67
AUTO H button, refer to Au‐ tomatic Hold 67
AUTO intensity 157
Automatic car wash 228 Automatic Cruise Control
with Stop & Go 136
Automatic Curb Monitor 56
Automatic deactivation, front- seat passenger airbags 103
Automatic headlight con‐ trol 97
Automatic Hold 67
Automatic locking 43
Automatic recirculated-air control 158
Automatic Soft Closing, doors 40
Automatic transmission, see Steptronic transmission 72
AUTO program, automatic cli‐ mate control 157
AUTO program, intensity 157
Auto Start/Stop function 65
Average fuel consumption 90
Average speed 90
Axle loads, weights 235
B Backrest curvature, refer to Lumbar support 50
Backrest, seats 49
Backrest, width 51
Band-aids, refer to First aid kit 224
Bar for tow-starting/ towing 226
Battery replacement, remote control for parked-car heat‐
ing/ventilation 163
Battery replacement, vehicle battery 221
Battery replacement, vehicle remote control 34
Battery, vehicle 221 Seite 238ReferenceEverything from A to Z238
Online Edition for Part no. 01 40 2 956 110 - X/14