park assist BMW 6 SERIES GRAN COUPE 2017 Owners Manual
[x] Cancel search | Manufacturer: BMW, Model Year: 2017, Model line: 6 SERIES GRAN COUPE, Model: BMW 6 SERIES GRAN COUPE 2017Pages: 261, PDF Size: 5.24 MB
Page 15 of 261
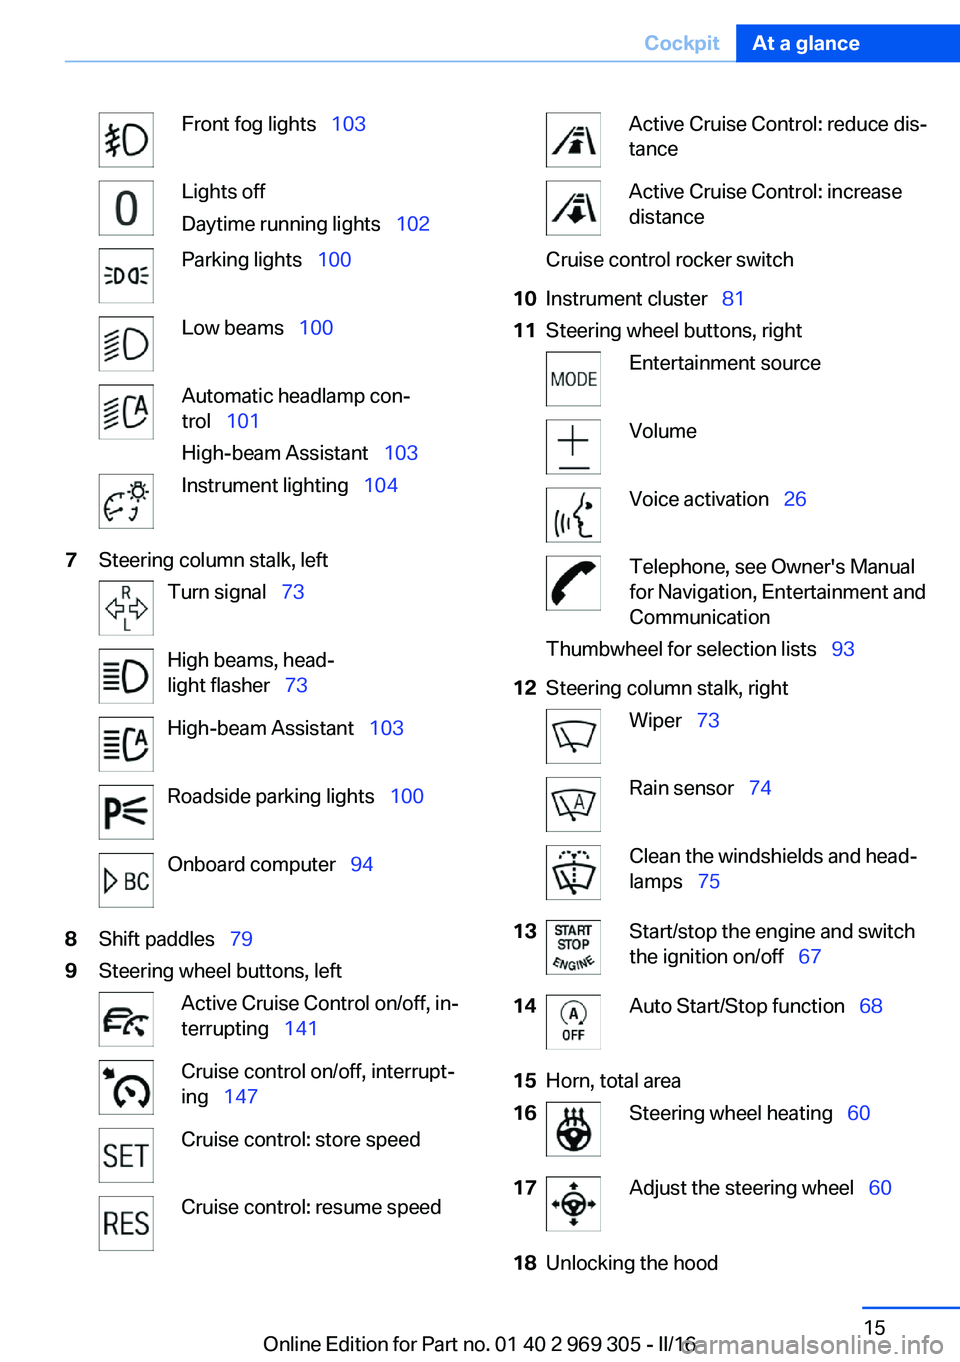
Front fog lights 103Lights off
Daytime running lights 102Parking lights 100Low beams 100Automatic headlamp con‐
trol 101
High-beam Assistant 103Instrument lighting 1047Steering column stalk, leftTurn signal 73High beams, head‐
light flasher 73High-beam Assistant 103Roadside parking lights 100Onboard computer 948Shift paddles 799Steering wheel buttons, leftActive Cruise Control on/off, in‐
terrupting 141Cruise control on/off, interrupt‐
ing 147Cruise control: store speedCruise control: resume speedActive Cruise Control: reduce dis‐
tanceActive Cruise Control: increase
distanceCruise control rocker switch10Instrument cluster 8111Steering wheel buttons, rightEntertainment sourceVolumeVoice activation 26Telephone, see Owner's Manual
for Navigation, Entertainment and
CommunicationThumbwheel for selection lists 9312Steering column stalk, rightWiper 73Rain sensor 74Clean the windshields and head‐
lamps 7513Start/stop the engine and switch
the ignition on/off 6714Auto Start/Stop function 6815Horn, total area16Steering wheel heating 6017Adjust the steering wheel 6018Unlocking the hoodSeite 15CockpitAt a glance15
Online Edition for Part no. 01 40 2 969 305 - II/16
Page 16 of 261
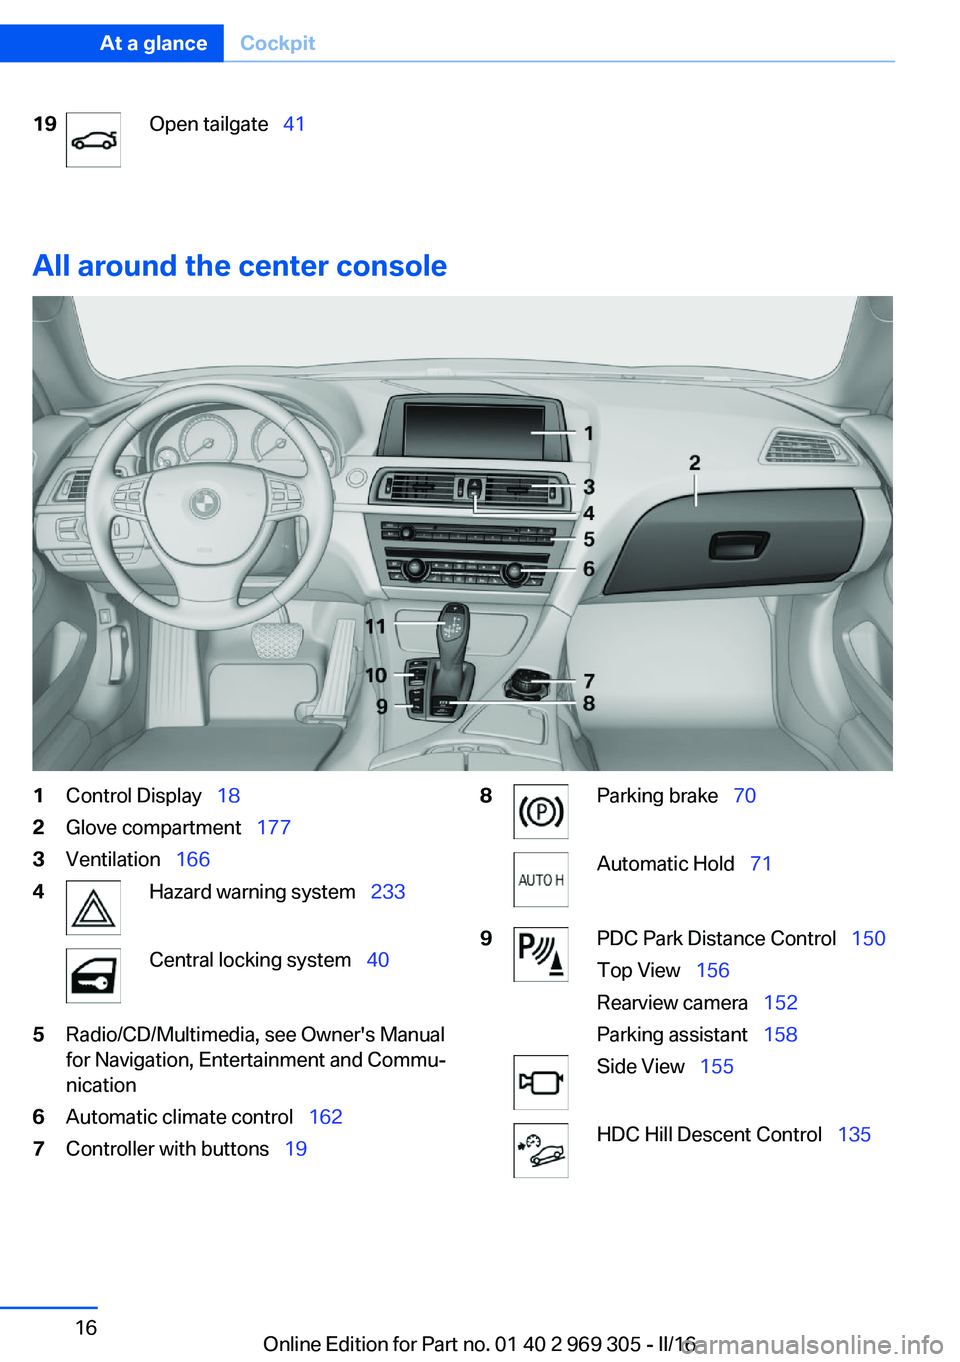
19Open tailgate 41
All around the center console
1Control Display 182Glove compartment 1773Ventilation 1664Hazard warning system 233Central locking system 405Radio/CD/Multimedia, see Owner's Manual
for Navigation, Entertainment and Commu‐
nication6Automatic climate control 1627Controller with buttons 198Parking brake 70Automatic Hold 719PDC Park Distance Control 150
Top View 156
Rearview camera 152
Parking assistant 158Side View 155HDC Hill Descent Control 135Seite 16At a glanceCockpit16
Online Edition for Part no. 01 40 2 969 305 - II/16
Page 69 of 261
▷Vehicle battery is heavily discharged.▷At higher elevations.▷The engine compartment lid is unlocked.▷HDC Hill Descent Control is activated.▷The parking assistant is activated.▷Stop-and-go traffic.▷Selector lever in selector lever position N,
M/S or R.▷Use of fuel with high ethanol content.
Starting the engine
The engine starts automatically under the fol‐
lowing conditions:
▷Steptronic transmission: by releasing the
brake pedal.
When Automatic Hold is activated: press
the accelerator pedal.
After the engine starts, accelerate as usual.
Safety mode
After the engine switches off automatically, it
will not start again automatically if any one of
the following conditions are met:
▷The driver's safety belt is unbuckled and
the driver's door is open.▷The hood was unlocked.
Some indicator lights light up for a varied
length of time.
The engine can only be started via the Start/
Stop button.
Functional limitations
Even if driving off was not intended, the deacti‐
vated engine starts up automatically in the fol‐
lowing situations:
▷Excessive warming of the car's interior
when the cooling function is switched on.▷The steering wheel is turned.▷Fogging of the windows when the auto‐
matic climate control is switched on.▷Vehicle battery is heavily discharged.▷Excessive cooling of the car's interior when
the heating is switched on.
Activating/deactivating the system
manually
Using the button
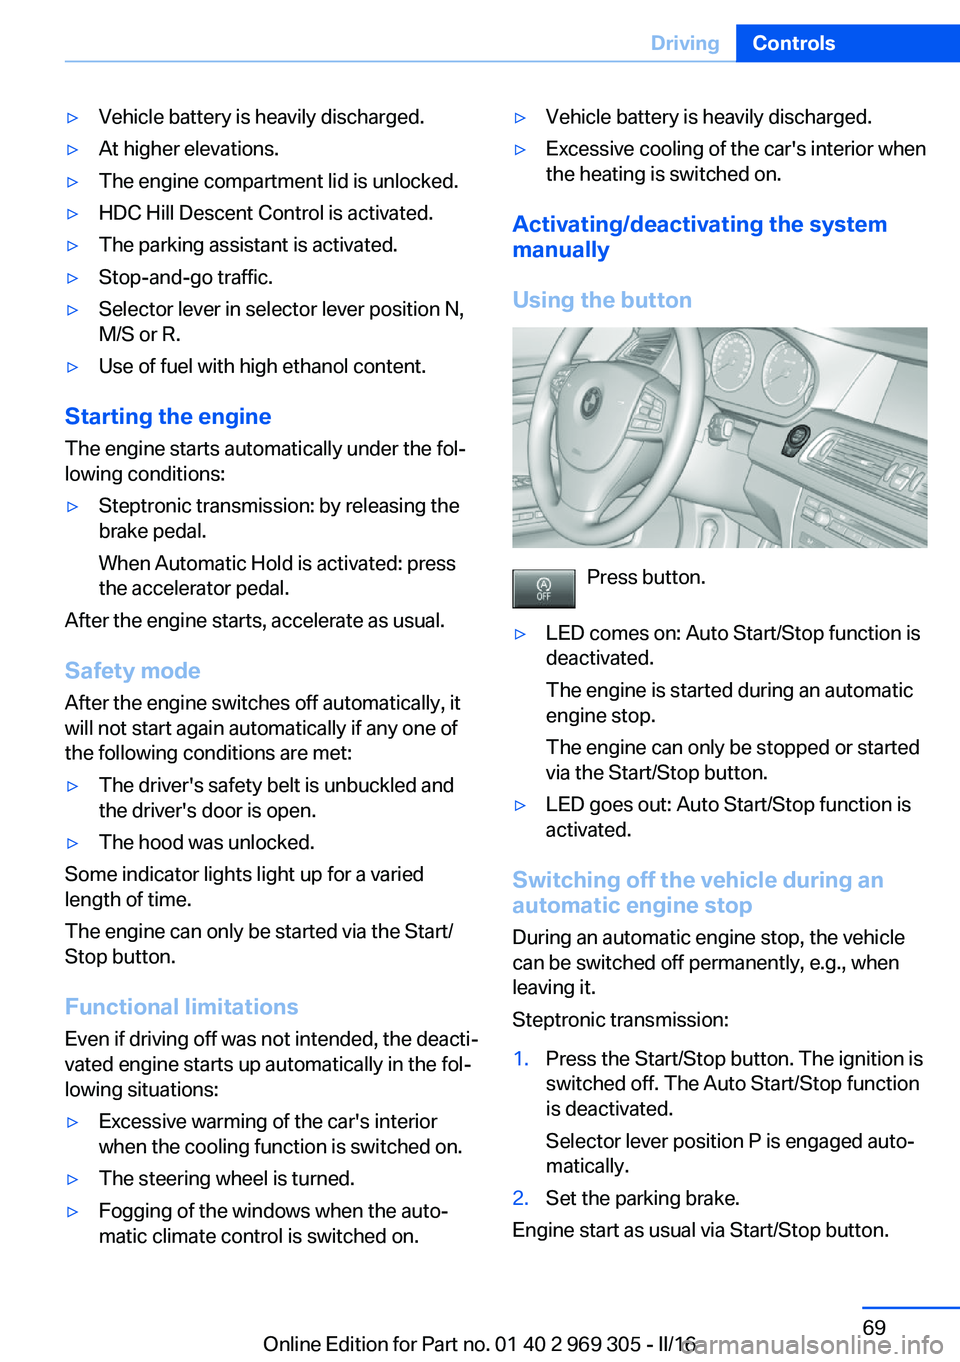
Press button.
▷LED comes on: Auto Start/Stop function is
deactivated.
The engine is started during an automatic
engine stop.
The engine can only be stopped or started
via the Start/Stop button.▷LED goes out: Auto Start/Stop function is
activated.
Switching off the vehicle during an
automatic engine stop
During an automatic engine stop, the vehicle
can be switched off permanently, e.g., when
leaving it.
Steptronic transmission:
1.Press the Start/Stop button. The ignition is
switched off. The Auto Start/Stop function
is deactivated.
Selector lever position P is engaged auto‐
matically.2.Set the parking brake.
Engine start as usual via Start/Stop button.
Seite 69DrivingControls69
Online Edition for Part no. 01 40 2 969 305 - II/16
Page 71 of 261
Releasing
With the ignition switched on:
Steptronic transmission: press the
switch while the brake is pressed or se‐
lector lever position P is set.
The LED and indicator lamp go out.
The parking brake is released.
Automatic release in cars with
Steptronic transmission
For automatic release, step on the accelerator
pedal.
The LED and indicator lamp go out.
The parking brake is automatically released
when you step on the accelerator:▷Engine on.▷Drive mode engaged.▷Driver buckled in and doors closed.
Automatic Hold
The concept This system assists the driver by automatically
setting and releasing the brake, such as when
moving in stop-and-go traffic.
The vehicle is automatically held in place when
it is stationary.
On inclines, the system prevents the vehicle
from rolling backward when driving off.
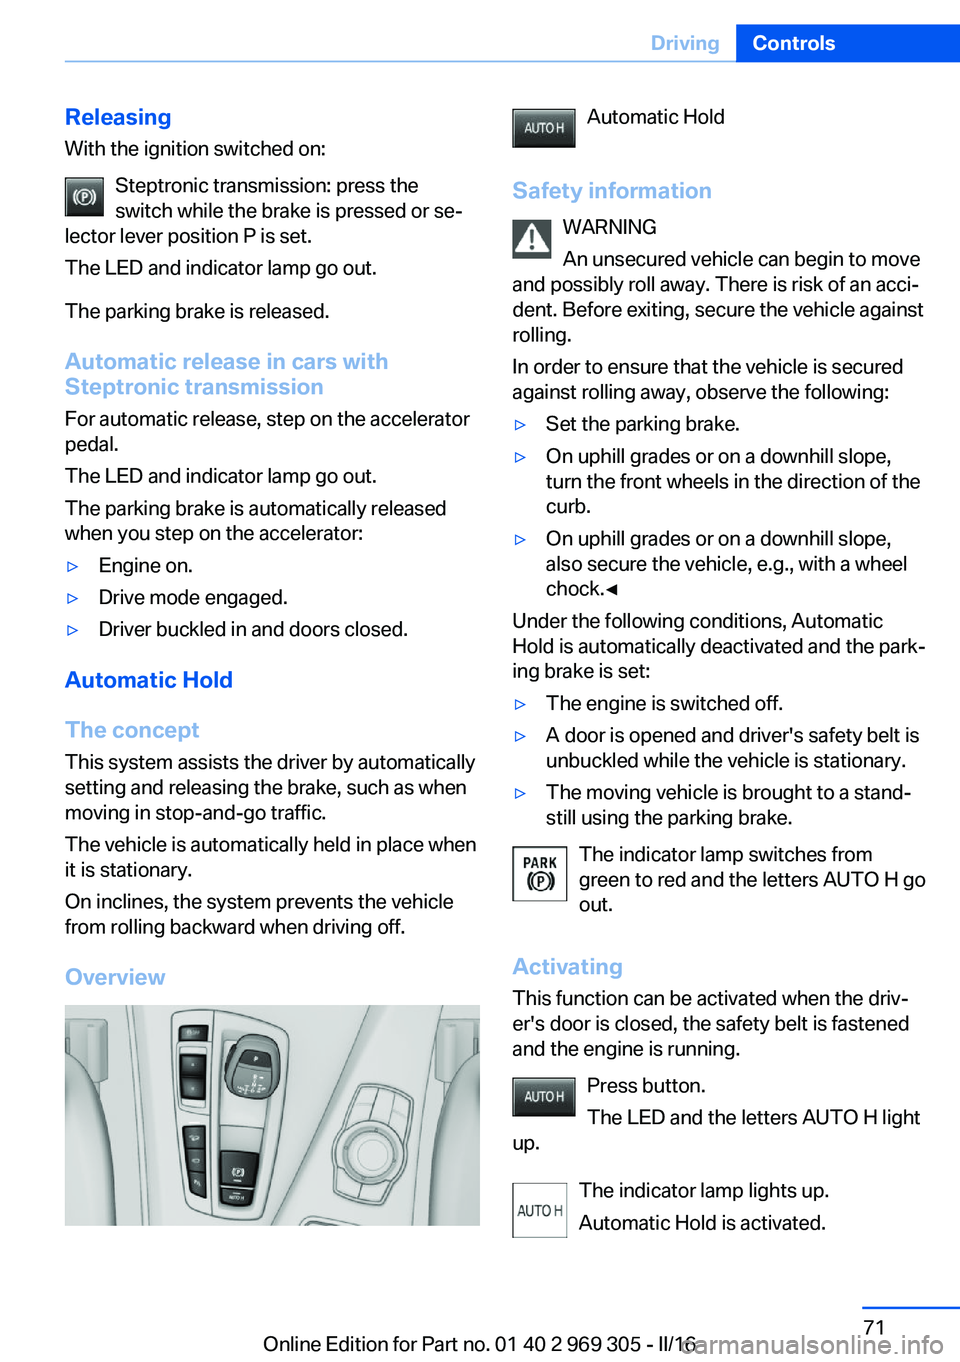
Overview
Automatic Hold
Safety information WARNING
An unsecured vehicle can begin to move
and possibly roll away. There is risk of an acci‐
dent. Before exiting, secure the vehicle against
rolling.
In order to ensure that the vehicle is secured
against rolling away, observe the following:▷Set the parking brake.▷On uphill grades or on a downhill slope,
turn the front wheels in the direction of the
curb.▷On uphill grades or on a downhill slope,
also secure the vehicle, e.g., with a wheel
chock.◀
Under the following conditions, Automatic
Hold is automatically deactivated and the park‐
ing brake is set:
▷The engine is switched off.▷A door is opened and driver's safety belt is
unbuckled while the vehicle is stationary.▷The moving vehicle is brought to a stand‐
still using the parking brake.
The indicator lamp switches from
green to red and the letters AUTO H go out.
Activating
This function can be activated when the driv‐
er's door is closed, the safety belt is fastened
and the engine is running.
Press button.
The LED and the letters AUTO H light
up.
The indicator lamp lights up.
Automatic Hold is activated.
Seite 71DrivingControls71
Online Edition for Part no. 01 40 2 969 305 - II/16
Page 103 of 261
High-beam AssistantThe concept
The high-beam Assistant detects other traffic
participants early on and automatically
switches the high beams on or off depending
on the traffic situation. The assistant ensures
that the high beams are switched on, when‐
ever the traffic situation allows. In the low
speed range, the high beams are not switched
on by the system.
General information
The system responds to light from oncoming
traffic and traffic driving ahead of you, and to
adequate illumination, for example, in towns
and cities.
The driver can intervene at any time and switch
the high beams on and off as usual.
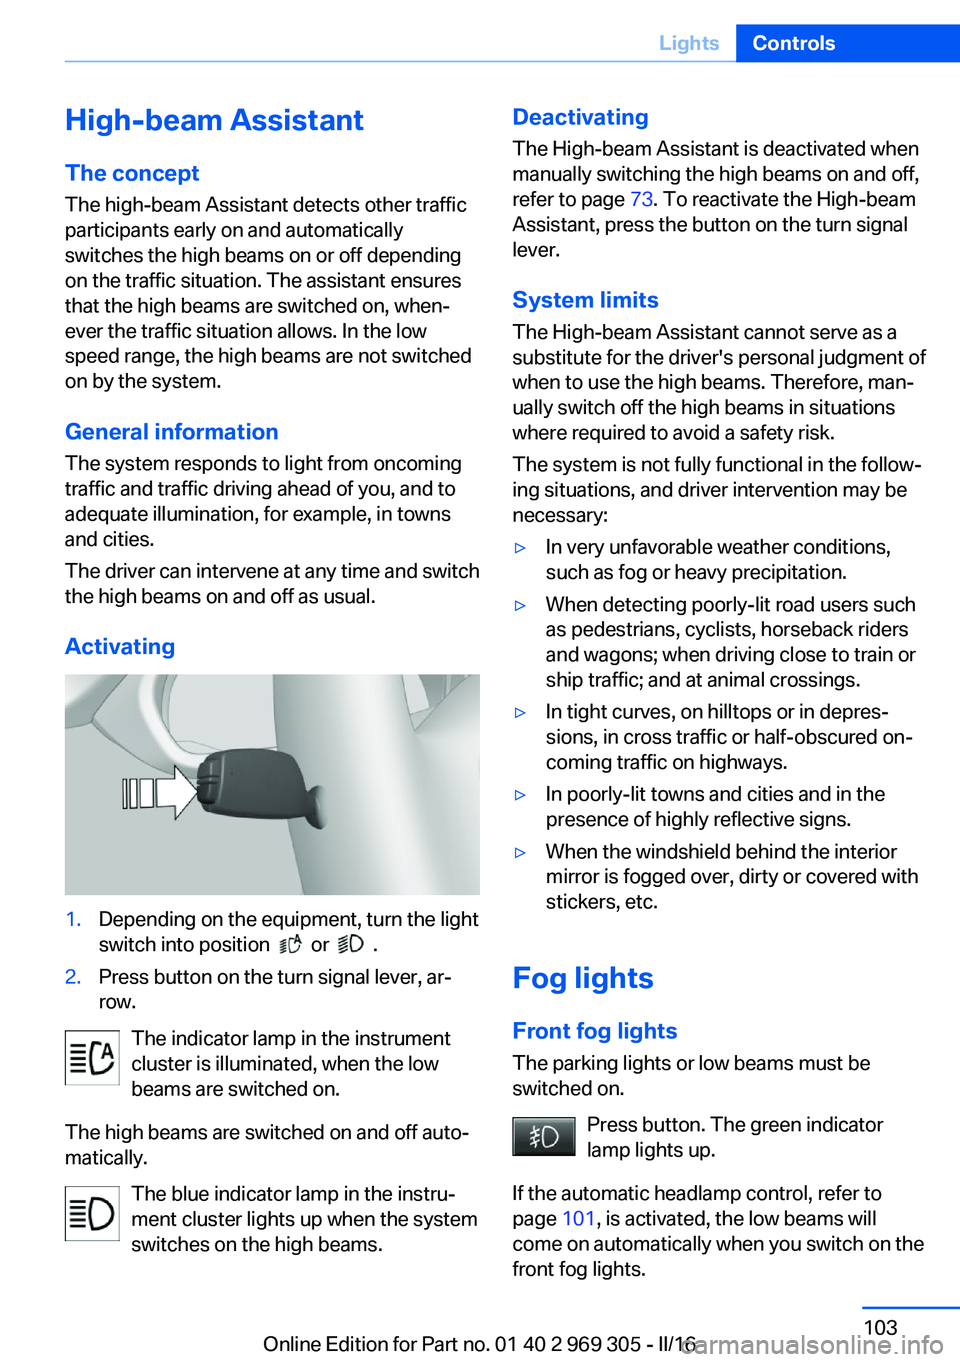
Activating1.Depending on the equipment, turn the light
switch into position
or .
2.Press button on the turn signal lever, ar‐
row.
The indicator lamp in the instrument
cluster is illuminated, when the low
beams are switched on.
The high beams are switched on and off auto‐
matically.
The blue indicator lamp in the instru‐
ment cluster lights up when the system
switches on the high beams.
Deactivating
The High-beam Assistant is deactivated when
manually switching the high beams on and off,
refer to page 73. To reactivate the High-beam
Assistant, press the button on the turn signal
lever.
System limits
The High-beam Assistant cannot serve as a
substitute for the driver's personal judgment of
when to use the high beams. Therefore, man‐
ually switch off the high beams in situations
where required to avoid a safety risk.
The system is not fully functional in the follow‐
ing situations, and driver intervention may be
necessary:▷In very unfavorable weather conditions,
such as fog or heavy precipitation.▷When detecting poorly-lit road users such
as pedestrians, cyclists, horseback riders
and wagons; when driving close to train or
ship traffic; and at animal crossings.▷In tight curves, on hilltops or in depres‐
sions, in cross traffic or half-obscured on‐
coming traffic on highways.▷In poorly-lit towns and cities and in the
presence of highly reflective signs.▷When the windshield behind the interior
mirror is fogged over, dirty or covered with
stickers, etc.
Fog lights
Front fog lights
The parking lights or low beams must be
switched on.
Press button. The green indicator
lamp lights up.
If the automatic headlamp control, refer to
page 101, is activated, the low beams will
come on automatically when you switch on the
front fog lights.
Seite 103LightsControls103
Online Edition for Part no. 01 40 2 969 305 - II/16
Page 133 of 261
Driving stability control systemsVehicle features and optionsThis chapter describes all standard, country-
specific and optional features offered with the
series. It also describes features that are not
necessarily available in your car, e. g., due to
the selected options or country versions. This
also applies to safety-related functions and
systems. The respectively applicable country
provisions must be observed when using the
respective features and systems.
Anti-lock Braking System
ABS
ABS prevents locking of the wheels during
braking.
The vehicle contains its steering power even
during full brake applications, thus increasing
active safety.
ABS is operational every time you start the en‐
gine.
Brake assistant When you apply the brakes rapidly, this system
automatically produces the greatest possible
braking force boost. It reduces the braking dis‐
tance to a minimum during emergency stop.
This system utilizes all of the benefits provided
by ABS.
Do not reduce the pressure on the brake pedal
for the duration of the emergency stop.
Adaptive brake assistant In combination with the Active Cruise Control,
this system ensures that the brakes respond
even more rapidly when braking in critical sit‐
uations.Drive-off assistant
The concept This system supports driving off on inclines.
The parking brake is not required.
Driving off with the drive-off assistant1.Hold the vehicle in place with the foot
brake.2.Release the foot brake and drive off with‐
out delay.
After the foot brake is released, the vehicle is
held in place for approx. 2 seconds.
Depending on the vehicle load, the vehicle may
roll back slightly.
DSC Dynamic Stability
Control
The concept
Within the physical limits, the system helps to
keep the vehicle on a steady course by reduc‐
ing engine speed and by applying brakes to
the individual wheels.
General information
Dynamic Stability Control detect for example
the following unstable driving conditions:
▷Fishtailing, which can lead to oversteering.▷Loss of traction of the front wheels, which
can lead to understeering.
Dynamic Traction Control DTC, refer to
page 134, is a version of the DSC where for‐
ward momentum is optimized.
Information The laws of physics cannot be repealed, not
even with DSC.
Seite 133Driving stability control systemsControls133
Online Edition for Part no. 01 40 2 969 305 - II/16
Page 150 of 261
PDC Park Distance ControlThe concept
PDC is a support when parking. When you
slowly approach an object in the rear - or also
in the front of the vehicle if the feature is availa‐
ble - then the object is reported through:▷Signal tones.▷Visual display.
General information
Ultrasound sensors in the bumpers measure
the distances from objects.
The maneuvering range, depending on the ob‐
stacle and environmental conditions, is approx.
6 ft/2 m.
An acoustic warning is first given with the fol‐
lowing circumstances:
▷By the front sensors and the two rear cor‐
ner sensors at approx. 24 inches/60 cm.▷By the rear middle sensors at approx.
5 ft/1.50 m.▷When a collision is imminent.
Information
WARNING
The system does not release from the
personal responsibility to correctly assess the
traffic situation. Based on the limits of the sys‐
tem, it cannot independently react to all traffic
situations. There is risk of an accident. Adjust
the driving style to the traffic conditions. Watch
traffic closely and actively intervene in the re‐
spective situations.◀
WARNING
Due to high speeds when PDC is acti‐
vated, the warning can be delayed due to
physical circumstances. There is a risk of injury
or risk of property damage. Avoid approaching
an object too fast. Avoid driving off fast while
PDC is not yet active.◀
Overview
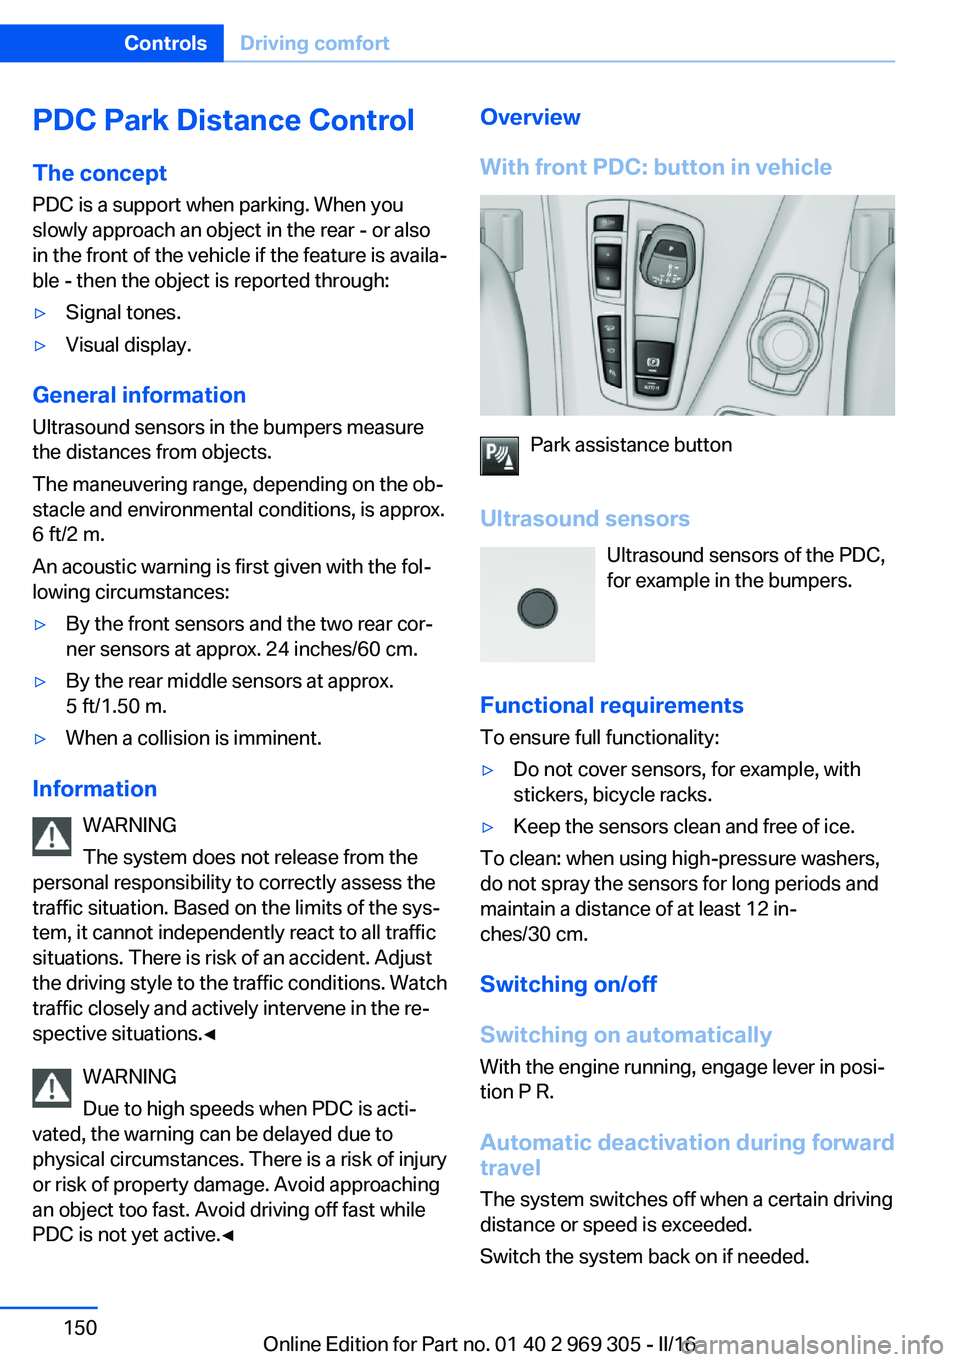
With front PDC: button in vehicle
Park assistance button
Ultrasound sensors Ultrasound sensors of the PDC,
for example in the bumpers.
Functional requirements
To ensure full functionality:
▷Do not cover sensors, for example, with
stickers, bicycle racks.▷Keep the sensors clean and free of ice.
To clean: when using high-pressure washers,
do not spray the sensors for long periods and
maintain a distance of at least 12 in‐
ches/30 cm.
Switching on/off
Switching on automatically
With the engine running, engage lever in posi‐
tion P R.
Automatic deactivation during forward
travel
The system switches off when a certain driving
distance or speed is exceeded.
Switch the system back on if needed.
Seite 150ControlsDriving comfort150
Online Edition for Part no. 01 40 2 969 305 - II/16
Page 151 of 261
With front PDC: switching on/off
manually
Press park assistance button.▷On: the LED lights up.▷Off: the LED goes out.
Display
Signal tones When approaching an object, an intermittent
sound indicates the position of the object. E.g.
if an object is detected to the left rear of the
vehicle, a signal tone sounds from the left rear
speaker.
The shorter the distance to the object, the shorter the intervals.
If the distance to a detected object is less than
approx. 10 inches/25 cm, a continuous tone is
sounded.
With front PDC: if objects are located both in
front of and behind the vehicle, an alternating
continuous signal is sounded.
An interval tone is interrupted with the appro‐
priate equipment after about 3 seconds:
▷If the vehicle stops in front of an object that
is detected by only one of the corner sen‐
sors.▷If moving parallel to a wall.
The signal tone is switched off, when selector
lever position P is engaged on vehicles with
Steptronic transmission.
Volume
The ratio of the PDC signal tone volume to the
entertainment volume can be adjusted.
1."Multimedia", "Radio" or "Settings"2."Tone"3."Volume settings"4."PDC"5.Turn the Controller until the desired set‐
ting is selected.6.Press the Controller.
Settings are stored for the profile currently
used.
Visual warning
The approach of the vehicle to an object can
be shown on the Control Display. Objects that
are farther away are already displayed on the
Control Display before a signal sounds.
A display appears as soon as Park Distance
Control (PDC) is activated.
The range of the sensors is represented in the
colors green, yellow and red.
When the image of the rearview camera is dis‐
played, the switch can be made to PDC:
"Rear view camera"
System limits
Information WARNING
The system can react incorrectly or not
at all due to the system limits. There is risk of
accidents or risk of property damage. Observe
the information regarding the system limits
and actively intervene, if needed.◀
Limits of ultrasonic measurement Ultrasonic measuring might not function under
the following circumstances:
▷For small children and animals.▷For persons with certain clothing, for ex‐
ample coats.▷With external interference of the ultra‐
sound, for example from passing vehicles
or loud machines.▷When sensors are dirty, iced over, dam‐
aged or out of position.Seite 151Driving comfortControls151
Online Edition for Part no. 01 40 2 969 305 - II/16
Page 152 of 261
▷Under certain weather conditions such as
high relative humidity, rain, snowfall, ex‐
treme heat or strong wind.▷With tow bars and trailer couplings of other
vehicles.▷With thin or wedge-shaped objects.▷With moving objects.▷With elevated, protruding objects such as
ledges or cargo.▷With objects with corners and sharp edges.▷With objects with a fine surface structure
such as fences.▷For objects with porous surfaces.▷If cargo protrudes.
Low objects already displayed, for example,
curbs, can move into the blind area of the sen‐
sors before or after a continuous tone sounds.
False warnings
PDC may issue a warning under the following
conditions even though there is no obstacle
within the detection range:
▷In heavy rain.▷When sensors are very dirty or covered
with ice.▷When sensors are covered in snow.▷On rough road surfaces.▷On uneven surfaces, such as speed
bumps.▷In large buildings with right angles and
smooth walls, for example, in underground
garages.▷In automatic car washes.▷Through heavy pollution.▷Due to other ultrasound sources, for exam‐
ple, sweeping machines, high pressure
steam cleaners or neon lights.
Malfunction
A Check Control message is displayed.
The range of the sensors is shown as a shaded
area on the Control Display.
PDC has failed. Have the system checked.
Surround View
The concept Surround View comprises various camera as‐
sistance systems that help the driver when
parking, maneuvering, and at complex exits
and intersections.▷Rearview camera, refer to page 152.▷Side View, refer to page 155.▷Top View, refer to page 156.
Rearview camera
The concept The rearview camera provides assistance in
parking and maneuvering backwards. The area
behind the vehicle is shown on the Control
Display.
Information WARNING
The system does not relieve from the
personal responsibility to correctly assess the
traffic situation. There is risk of an accident.
Adjust the driving style to the traffic condi‐ tions. Watch traffic and vehicle surroundings
closely and actively intervene in the respective
situations.◀
Seite 152ControlsDriving comfort152
Online Edition for Part no. 01 40 2 969 305 - II/16
Page 153 of 261
Overview
Button in the vehicle
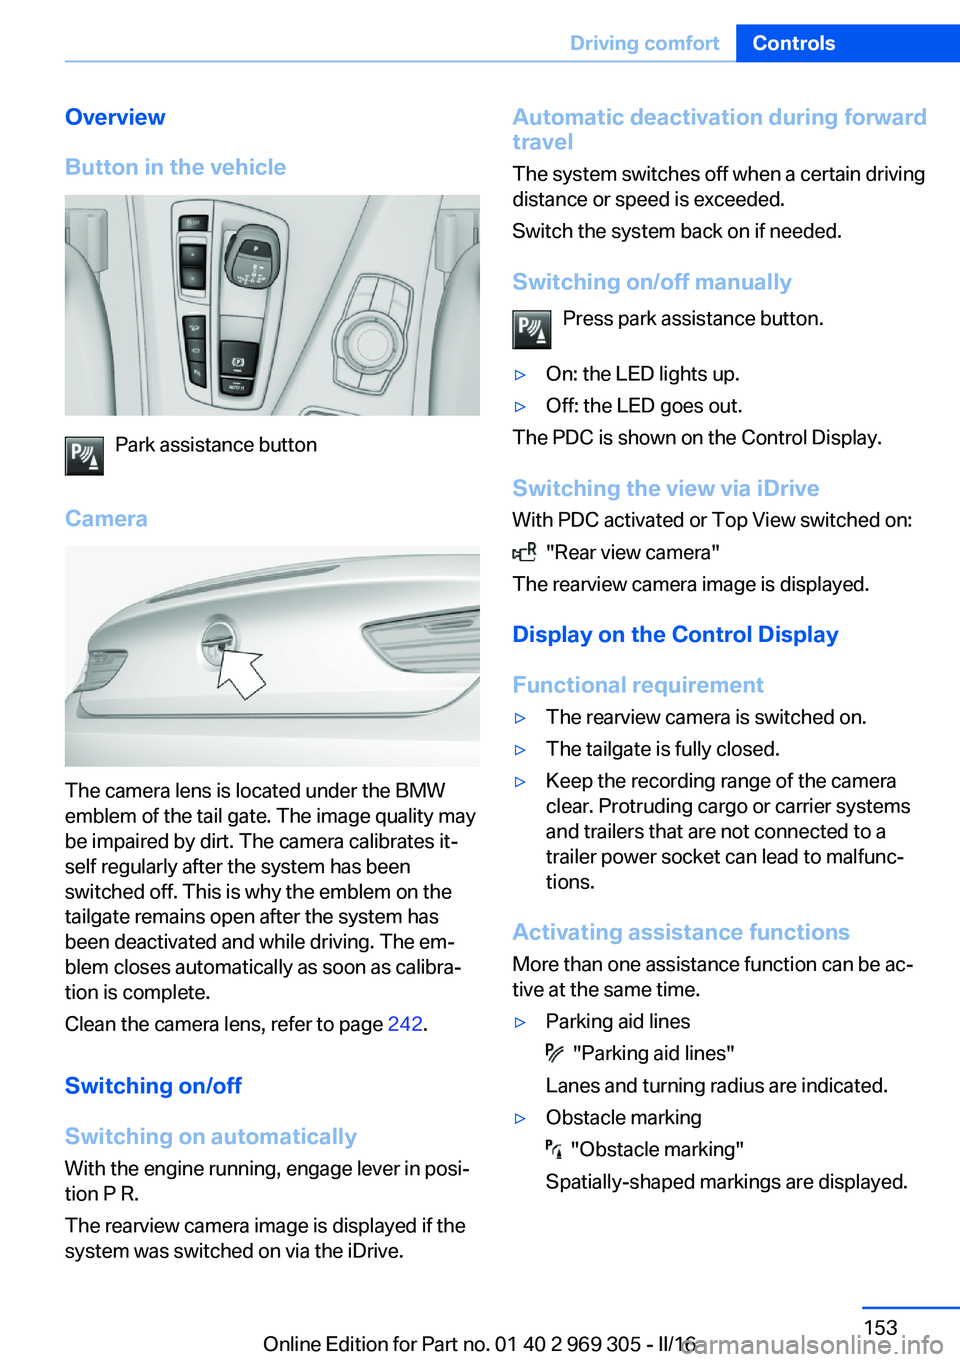
Park assistance button
Camera
The camera lens is located under the BMW
emblem of the tail gate. The image quality may
be impaired by dirt. The camera calibrates it‐
self regularly after the system has been
switched off. This is why the emblem on the
tailgate remains open after the system has
been deactivated and while driving. The em‐
blem closes automatically as soon as calibra‐
tion is complete.
Clean the camera lens, refer to page 242.
Switching on/off
Switching on automatically With the engine running, engage lever in posi‐
tion P R.
The rearview camera image is displayed if the
system was switched on via the iDrive.
Automatic deactivation during forward
travel
The system switches off when a certain driving
distance or speed is exceeded.
Switch the system back on if needed.
Switching on/off manually Press park assistance button.▷On: the LED lights up.▷Off: the LED goes out.
The PDC is shown on the Control Display.
Switching the view via iDrive With PDC activated or Top View switched on:
"Rear view camera"
The rearview camera image is displayed.
Display on the Control Display
Functional requirement
▷The rearview camera is switched on.▷The tailgate is fully closed.▷Keep the recording range of the camera
clear. Protruding cargo or carrier systems
and trailers that are not connected to a
trailer power socket can lead to malfunc‐
tions.
Activating assistance functions
More than one assistance function can be ac‐
tive at the same time.
▷Parking aid lines
"Parking aid lines"
Lanes and turning radius are indicated.
▷Obstacle marking
"Obstacle marking"
Spatially-shaped markings are displayed.
Seite 153Driving comfortControls153
Online Edition for Part no. 01 40 2 969 305 - II/16