instrument cluster BMW 640I COUPE 2013 Owner's Guide
[x] Cancel search | Manufacturer: BMW, Model Year: 2013, Model line: 640I COUPE, Model: BMW 640I COUPE 2013Pages: 232, PDF Size: 8.98 MB
Page 127 of 232
▷Pressing the rocker switch to the resistance
point and holding it there accelerates or de‐
celerates the vehicle without requiring pres‐
sure on the accelerator. After the rocker
switch is released, the vehicle maintains its
final speed. Pressing the switch beyond the
resistance point causes the vehicle to ac‐
celerate more rapidly.
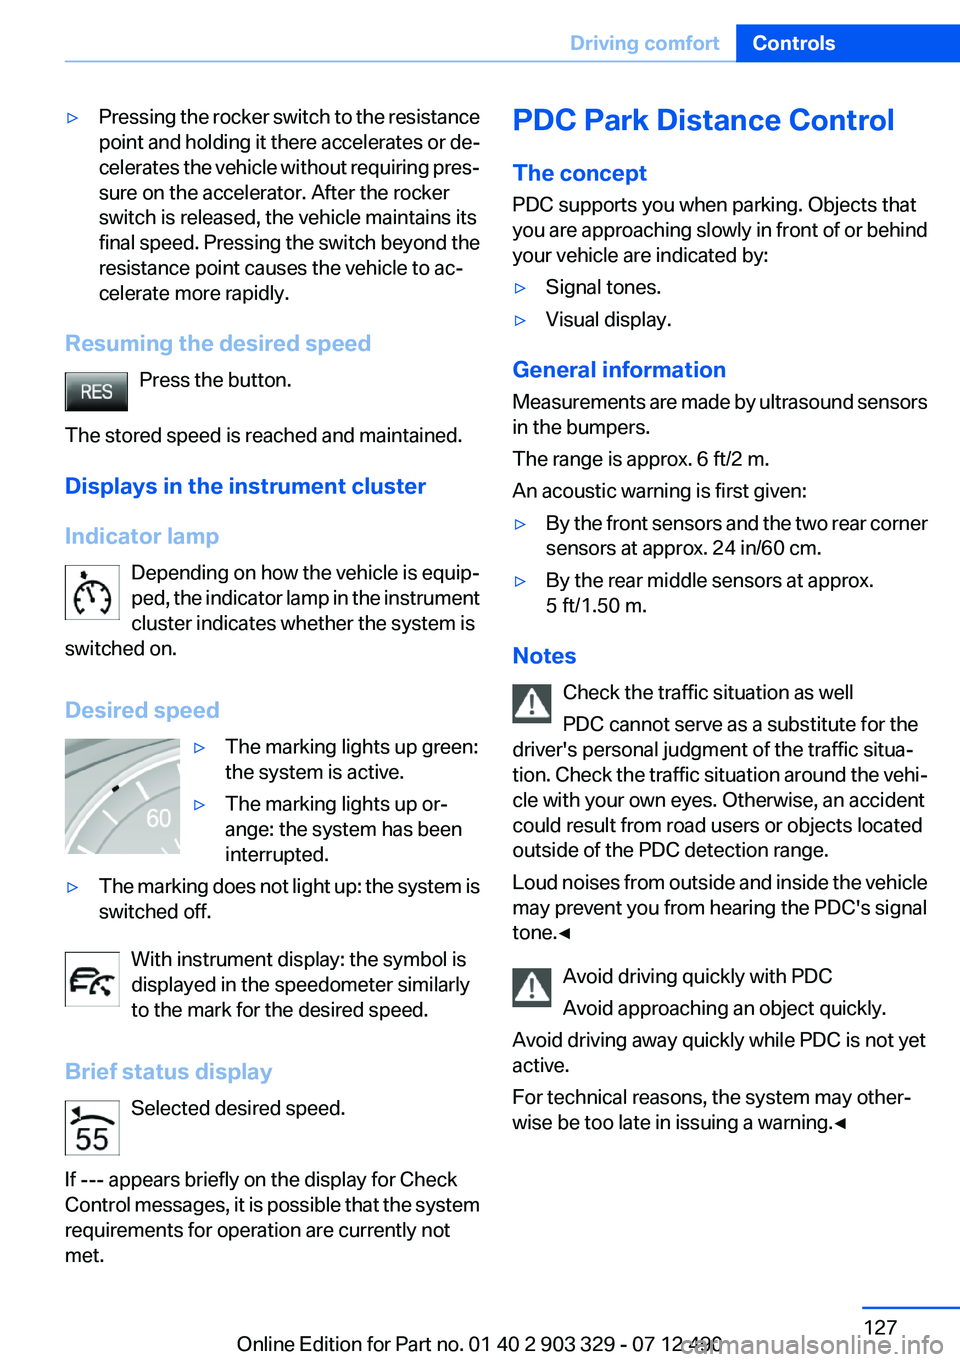
Resuming the desired speed
Press the button.
The stored speed is reached and maintained.
Displays in the instrument cluster
Indicator lamp Depending on how the vehicle is equip‐
ped, the indicator lamp in the instrument
cluster indicates whether the system is
switched on.
Desired speed
▷The marking lights up green:
the system is active.▷The marking lights up or‐
ange: the system has been
interrupted.▷The marking does not light up: the system is
switched off.
With instrument display: the symbol is
displayed in the speedometer similarly
to the mark for the desired speed.
Brief status display Selected desired speed.
If --- appears briefly on the display for Check
Control messages, it is possible that the system
requirements for operation are currently not
met.
PDC Park Distance Control
The concept
PDC supports you when parking. Objects that
you are approaching slowly in front of or behind
your vehicle are indicated by:▷Signal tones.▷Visual display.
General information
Measurements are made by ultrasound sensors
in the bumpers.
The range is approx. 6 ft/2 m.
An acoustic warning is first given:
▷By the front sensors and the two rear corner
sensors at approx. 24 in/60 cm.▷By the rear middle sensors at approx.
5 ft/1.50 m.
Notes
Check the traffic situation as well
PDC cannot serve as a substitute for the
driver's personal judgment of the traffic situa‐
tion. Check the traffic situation around the vehi‐
cle with your own eyes. Otherwise, an accident
could result from road users or objects located
outside of the PDC detection range.
Loud noises from outside and inside the vehicle
may prevent you from hearing the PDC's signal
tone.◀
Avoid driving quickly with PDC
Avoid approaching an object quickly.
Avoid driving away quickly while PDC is not yet
active.
For technical reasons, the system may other‐
wise be too late in issuing a warning.◀
Seite 127Driving comfortControls127
Online Edition for Part no. 01 40 2 903 329 - 07 12 490
Page 164 of 232
The gear shift indicator of your vehicle indicates
the most fuel efficient gear.
Use coasting conditions
When approaching a red light, take your foot off
the accelerator and let the vehicle coast to a halt.
On a downhill gradient, take your foot off the ac‐
celerator and let the vehicle roll.
The flow of fuel is interrupted while coasting.
Switch off the engine during
longer stops
Switch off the engine during longer stops, e.g.,
at traffic lights, railroad crossings or in traffic
congestion.
Auto Start/Stop function
The Auto Start/Stop function of your vehicle au‐
tomatically switches off the engine during a
stop.
If the engine is switched off and then restarted
rather than leaving the engine running con‐
stantly, fuel consumption and emissions are re‐
duced. Savings can begin within a few seconds
of switching off the engine.
Using this system can cause certain compo‐
nents of the vehicle to become worn prema‐
turely.
Iin addition, fuel consumption is also determined
by other factors, such as driving style, road con‐
ditions, maintenance or environmental factors.
Switch off any functions that
are not currently needed
Functions such as seat heating and the rear win‐
dow defroster require a lot of energy and con‐
sume additional fuel, especially in city and stop-
and-go traffic.Therefore, switch off these functions if they are
not actually needed.
Have maintenance carried out
Have vehicles maintained regularly to achieve
optimal vehicle economy and operating life.
Have the maintenance carried out by your serv‐
ice center.
Please also note the BMW Maintenance Sys‐
tem, refer to page 189.
ECO PRO
The concept
ECO PRO supports a driving style that saves on
fuel consumption. For this purpose, the engine
control and comfort functions, e. g. the climate
control output, are adjusted.
In addition, context-sensitive instructions can
be displayed that assist in driving in a manner
that optimizes fuel consumption.
The extension of the range that is achieved as a
result can be displayed in the instrument cluster.
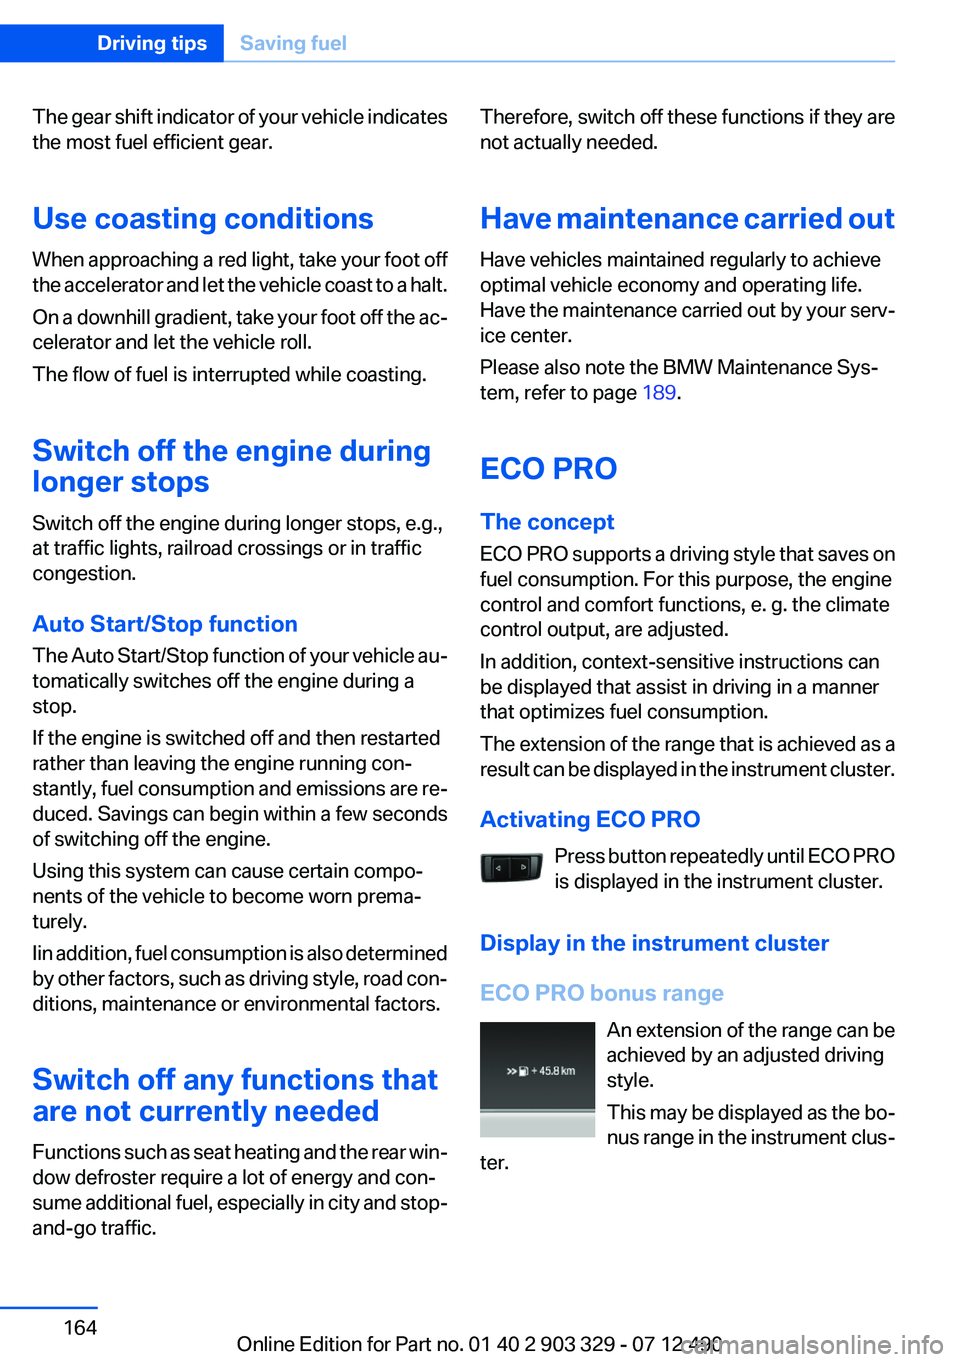
Activating ECO PRO Press button repeatedly until ECO PRO
is displayed in the instrument cluster.
Display in the instrument cluster
ECO PRO bonus range An extension of the range can be
achieved by an adjusted driving
style.
This may be displayed as the bo‐
nus range in the instrument clus‐
ter.Seite 164Driving tipsSaving fuel164
Online Edition for Part no. 01 40 2 903 329 - 07 12 490
Page 165 of 232
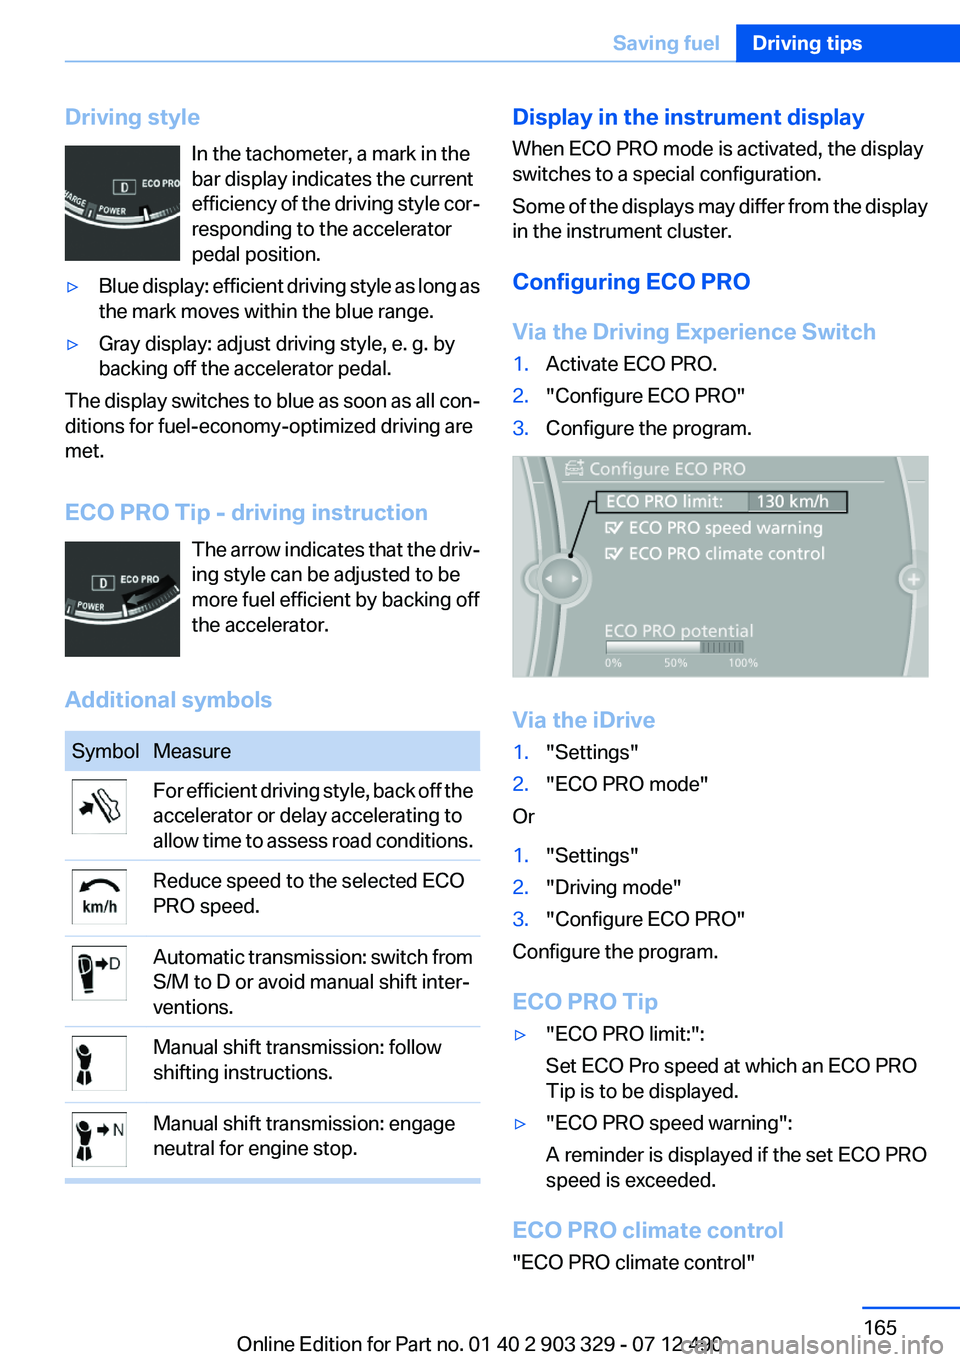
Driving styleIn the tachometer, a mark in the
bar display indicates the current
efficiency of the driving style cor‐
responding to the accelerator
pedal position.▷Blue display: efficient driving style as long as
the mark moves within the blue range.▷Gray display: adjust driving style, e. g. by
backing off the accelerator pedal.
The display switches to blue as soon as all con‐
ditions for fuel-economy-optimized driving are
met.
ECO PRO Tip - driving instruction The arrow indicates that the driv‐
ing style can be adjusted to be
more fuel efficient by backing off
the accelerator.
Additional symbols
SymbolMeasureFor efficient driving style, back off the
accelerator or delay accelerating to
allow time to assess road conditions.Reduce speed to the selected ECO
PRO speed.Automatic transmission: switch from
S/M to D or avoid manual shift inter‐
ventions.Manual shift transmission: follow
shifting instructions.Manual shift transmission: engage
neutral for engine stop.Display in the instrument display
When ECO PRO mode is activated, the display
switches to a special configuration.
Some of the displays may differ from the display
in the instrument cluster.
Configuring ECO PRO
Via the Driving Experience Switch1.Activate ECO PRO.2."Configure ECO PRO"3.Configure the program.
Via the iDrive
1."Settings"2."ECO PRO mode"
Or
1."Settings"2."Driving mode"3."Configure ECO PRO"
Configure the program.
ECO PRO Tip
▷"ECO PRO limit:":
Set ECO Pro speed at which an ECO PRO
Tip is to be displayed.▷"ECO PRO speed warning":
A reminder is displayed if the set ECO PRO
speed is exceeded.
ECO PRO climate control
"ECO PRO climate control"
Seite 165Saving fuelDriving tips165
Online Edition for Part no. 01 40 2 903 329 - 07 12 490
Page 186 of 232
Performing a detailed measurement
In order to perform a detailed measurement of
the engine oil level:1."Vehicle Info"2."Vehicle status"3. "Measure engine oil level"4."Start measurement"
The oil level is checked and displayed via a scale.
Duration: approx. 1 minute.
Adding engine oil
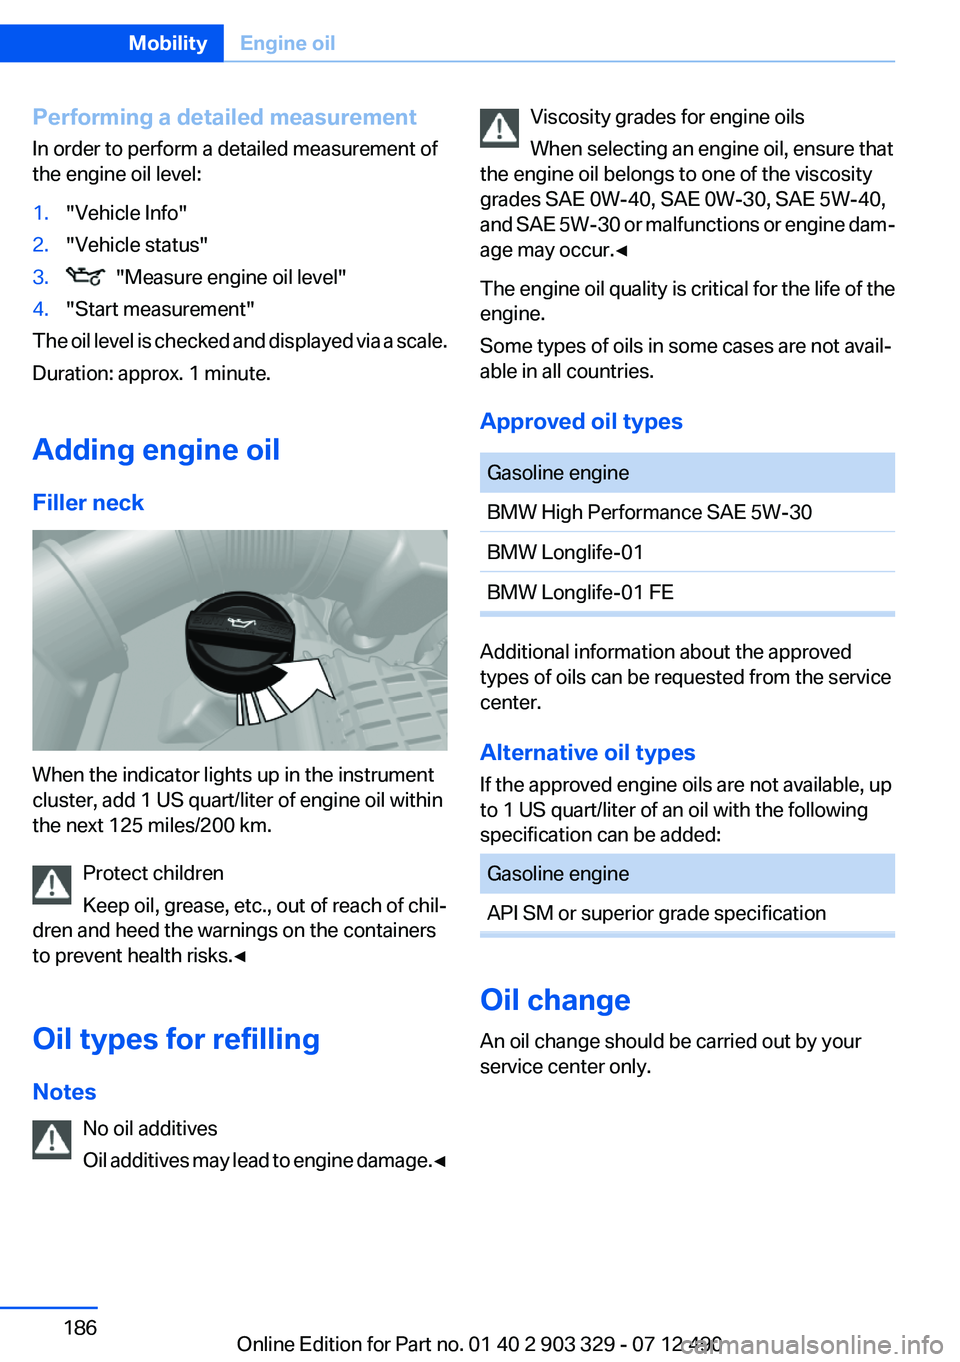
Filler neck
When the indicator lights up in the instrument
cluster, add 1 US quart/liter of engine oil within
the next 125 miles/200 km.
Protect children
Keep oil, grease, etc., out of reach of chil‐
dren and heed the warnings on the containers
to prevent health risks.◀
Oil types for refilling
Notes No oil additives
Oil additives may lead to engine damage. ◀
Viscosity grades for engine oils
When selecting an engine oil, ensure that
the engine oil belongs to one of the viscosity
grades SAE 0W-40, SAE 0W-30, SAE 5W-40,
and SAE 5W-30 or malfunctions or engine dam‐
age may occur.◀
The engine oil quality is critical for the life of the
engine.
Some types of oils in some cases are not avail‐
able in all countries.
Approved oil typesGasoline engineBMW High Performance SAE 5W-30BMW Longlife-01BMW Longlife-01 FE
Additional information about the approved
types of oils can be requested from the service
center.
Alternative oil types
If the approved engine oils are not available, up
to 1 US quart/liter of an oil with the following
specification can be added:
Gasoline engineAPI SM or superior grade specification
Oil change
An oil change should be carried out by your
service center only.
Seite 186MobilityEngine oil186
Online Edition for Part no. 01 40 2 903 329 - 07 12 490
Page 206 of 232
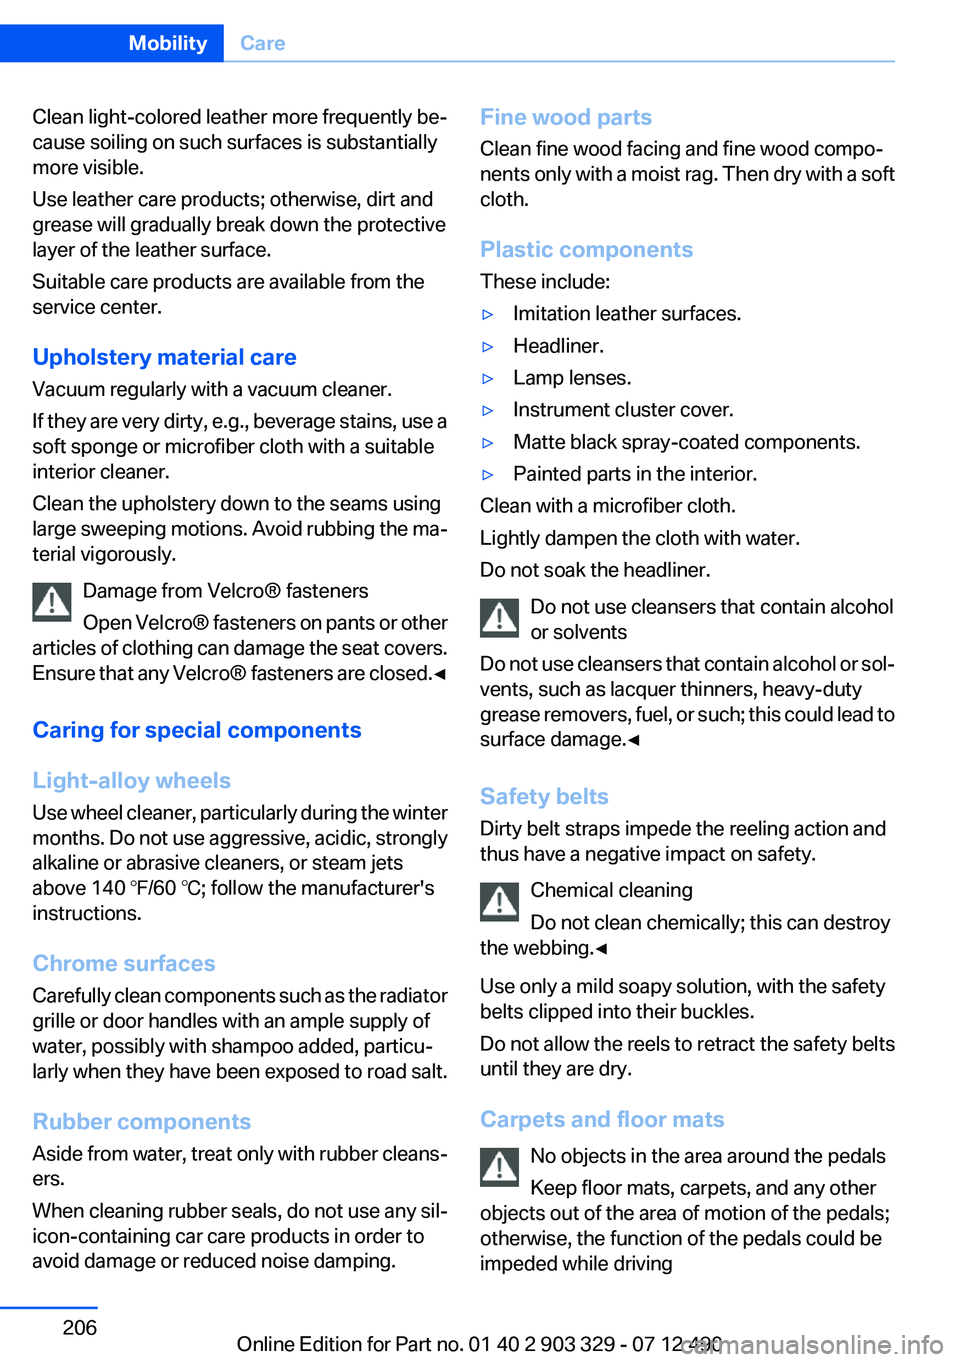
Clean light-colored leather more frequently be‐
cause soiling on such surfaces is substantially
more visible.
Use leather care products; otherwise, dirt and
grease will gradually break down the protective
layer of the leather surface.
Suitable care products are available from the
service center.
Upholstery material care
Vacuum regularly with a vacuum cleaner.
If they are very dirty, e.g., beverage stains, use a
soft sponge or microfiber cloth with a suitable
interior cleaner.
Clean the upholstery down to the seams using
large sweeping motions. Avoid rubbing the ma‐
terial vigorously.
Damage from Velcro® fasteners
Open Velcro® fasteners on pants or other
articles of clothing can damage the seat covers.
Ensure that any Velcro® fasteners are closed. ◀
Caring for special components
Light-alloy wheels
Use wheel cleaner, particularly during the winter
months. Do not use aggressive, acidic, strongly
alkaline or abrasive cleaners, or steam jets
above 140 ℉/60 ℃; follow the manufacturer's
instructions.
Chrome surfaces
Carefully clean components such as the radiator
grille or door handles with an ample supply of
water, possibly with shampoo added, particu‐
larly when they have been exposed to road salt.
Rubber components
Aside from water, treat only with rubber cleans‐
ers.
When cleaning rubber seals, do not use any sil‐
icon-containing car care products in order to
avoid damage or reduced noise damping.Fine wood parts
Clean fine wood facing and fine wood compo‐
nents only with a moist rag. Then dry with a soft
cloth.
Plastic components
These include:▷Imitation leather surfaces.▷Headliner.▷Lamp lenses.▷Instrument cluster cover.▷Matte black spray-coated components.▷Painted parts in the interior.
Clean with a microfiber cloth.
Lightly dampen the cloth with water.
Do not soak the headliner.
Do not use cleansers that contain alcohol
or solvents
Do not use cleansers that contain alcohol or sol‐
vents, such as lacquer thinners, heavy-duty
grease removers, fuel, or such; this could lead to
surface damage.◀
Safety belts
Dirty belt straps impede the reeling action and
thus have a negative impact on safety.
Chemical cleaning
Do not clean chemically; this can destroy
the webbing.◀
Use only a mild soapy solution, with the safety
belts clipped into their buckles.
Do not allow the reels to retract the safety belts
until they are dry.
Carpets and floor mats No objects in the area around the pedals
Keep floor mats, carpets, and any other
objects out of the area of motion of the pedals;
otherwise, the function of the pedals could be
impeded while driving
Seite 206MobilityCare206
Online Edition for Part no. 01 40 2 903 329 - 07 12 490
Page 213 of 232
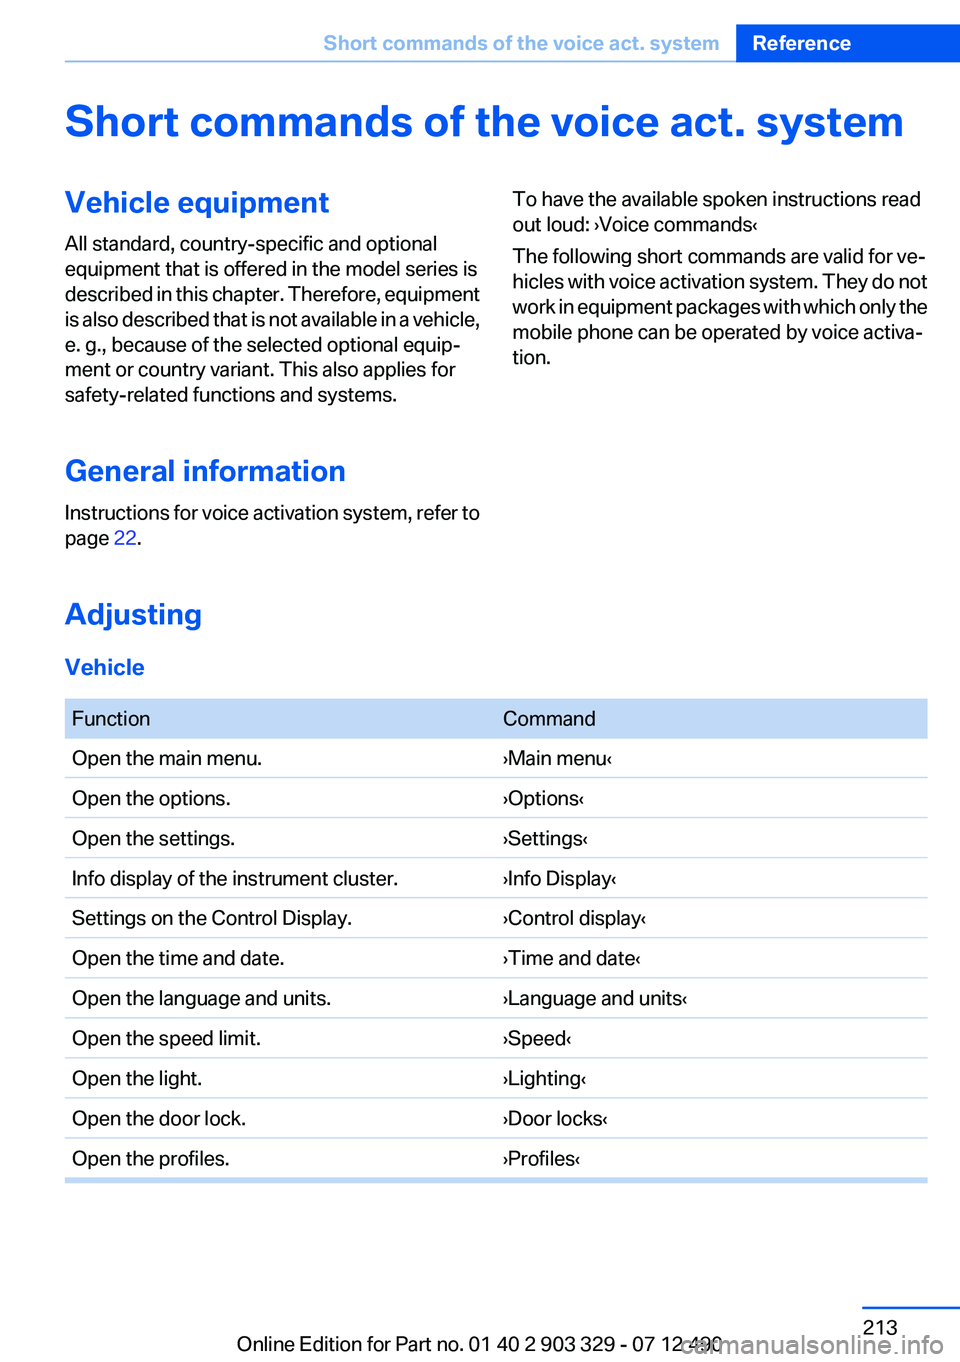
Short commands of the voice act. systemVehicle equipment
All standard, country-specific and optional
equipment that is offered in the model series is
described in this chapter. Therefore, equipment
is also described that is not available in a vehicle,
e. g., because of the selected optional equip‐
ment or country variant. This also applies for
safety-related functions and systems.
General information
Instructions for voice activation system, refer to
page 22.To have the available spoken instructions read
out loud: ›Voice commands‹
The following short commands are valid for ve‐
hicles with voice activation system. They do not
work in equipment packages with which only the
mobile phone can be operated by voice activa‐
tion.
Adjusting
Vehicle
FunctionCommandOpen the main menu.›Main menu‹Open the options.›Options‹Open the settings.›Settings‹Info display of the instrument cluster.›Info Display‹Settings on the Control Display.›Control display‹Open the time and date.›Time and date‹Open the language and units.›Language and units‹Open the speed limit.›Speed‹Open the light.›Lighting‹Open the door lock.›Door locks‹Open the profiles.›Profiles‹Seite 213Short commands of the voice act. systemReference213
Online Edition for Part no. 01 40 2 903 329 - 07 12 490
Page 226 of 232
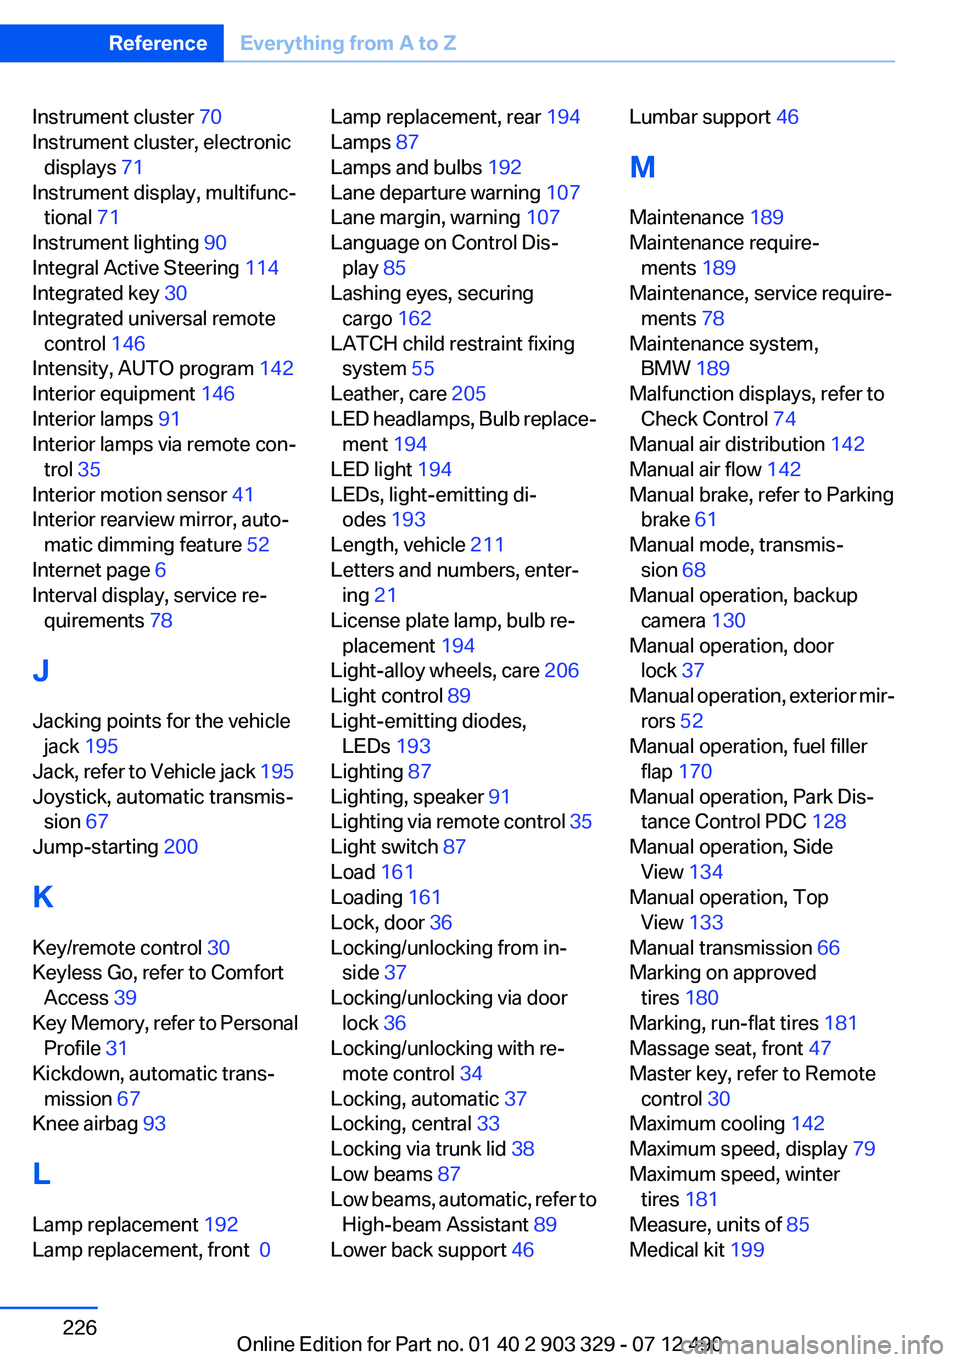
Instrument cluster 70
Instrument cluster, electronic displays 71
Instrument display, multifunc‐ tional 71
Instrument lighting 90
Integral Active Steering 114
Integrated key 30
Integrated universal remote control 146
Intensity, AUTO program 142
Interior equipment 146
Interior lamps 91
Interior lamps via remote con‐ trol 35
Interior motion sensor 41
Interior rearview mirror, auto‐ matic dimming feature 52
Internet page 6
Interval display, service re‐ quirements 78
J
Jacking points for the vehicle jack 195
Jack, refer to Vehicle jack 195
Joystick, automatic transmis‐ sion 67
Jump-starting 200
K
Key/remote control 30
Keyless Go, refer to Comfort Access 39
Key Memory, refer to Personal Profile 31
Kickdown, automatic trans‐ mission 67
Knee airbag 93
L
Lamp replacement 192
Lamp replacement, front 0 Lamp replacement, rear 194
Lamps 87
Lamps and bulbs 192
Lane departure warning 107
Lane margin, warning 107
Language on Control Dis‐ play 85
Lashing eyes, securing cargo 162
LATCH child restraint fixing system 55
Leather, care 205
LED headlamps, Bulb replace‐ ment 194
LED light 194
LEDs, light-emitting di‐ odes 193
Length, vehicle 211
Letters and numbers, enter‐ ing 21
License plate lamp, bulb re‐ placement 194
Light-alloy wheels, care 206
Light control 89
Light-emitting diodes, LEDs 193
Lighting 87
Lighting, speaker 91
Lighting via remote control 35
Light switch 87
Load 161
Loading 161
Lock, door 36
Locking/unlocking from in‐ side 37
Locking/unlocking via door lock 36
Locking/unlocking with re‐ mote control 34
Locking, automatic 37
Locking, central 33
Locking via trunk lid 38
Low beams 87
Low beams, automatic, refer to High-beam Assistant 89
Lower back support 46 Lumbar support 46
M
Maintenance 189
Maintenance require‐ ments 189
Maintenance, service require‐ ments 78
Maintenance system, BMW 189
Malfunction displays, refer to Check Control 74
Manual air distribution 142
Manual air flow 142
Manual brake, refer to Parking brake 61
Manual mode, transmis‐ sion 68
Manual operation, backup camera 130
Manual operation, door lock 37
Manual operation, exterior mir‐ rors 52
Manual operation, fuel filler flap 170
Manual operation, Park Dis‐ tance Control PDC 128
Manual operation, Side View 134
Manual operation, Top View 133
Manual transmission 66
Marking on approved tires 180
Marking, run-flat tires 181
Massage seat, front 47
Master key, refer to Remote control 30
Maximum cooling 142
Maximum speed, display 79
Maximum speed, winter tires 181
Measure, units of 85
Medical kit 199 Seite 226ReferenceEverything from A to Z226
Online Edition for Part no. 01 40 2 903 329 - 07 12 490
Page 227 of 232
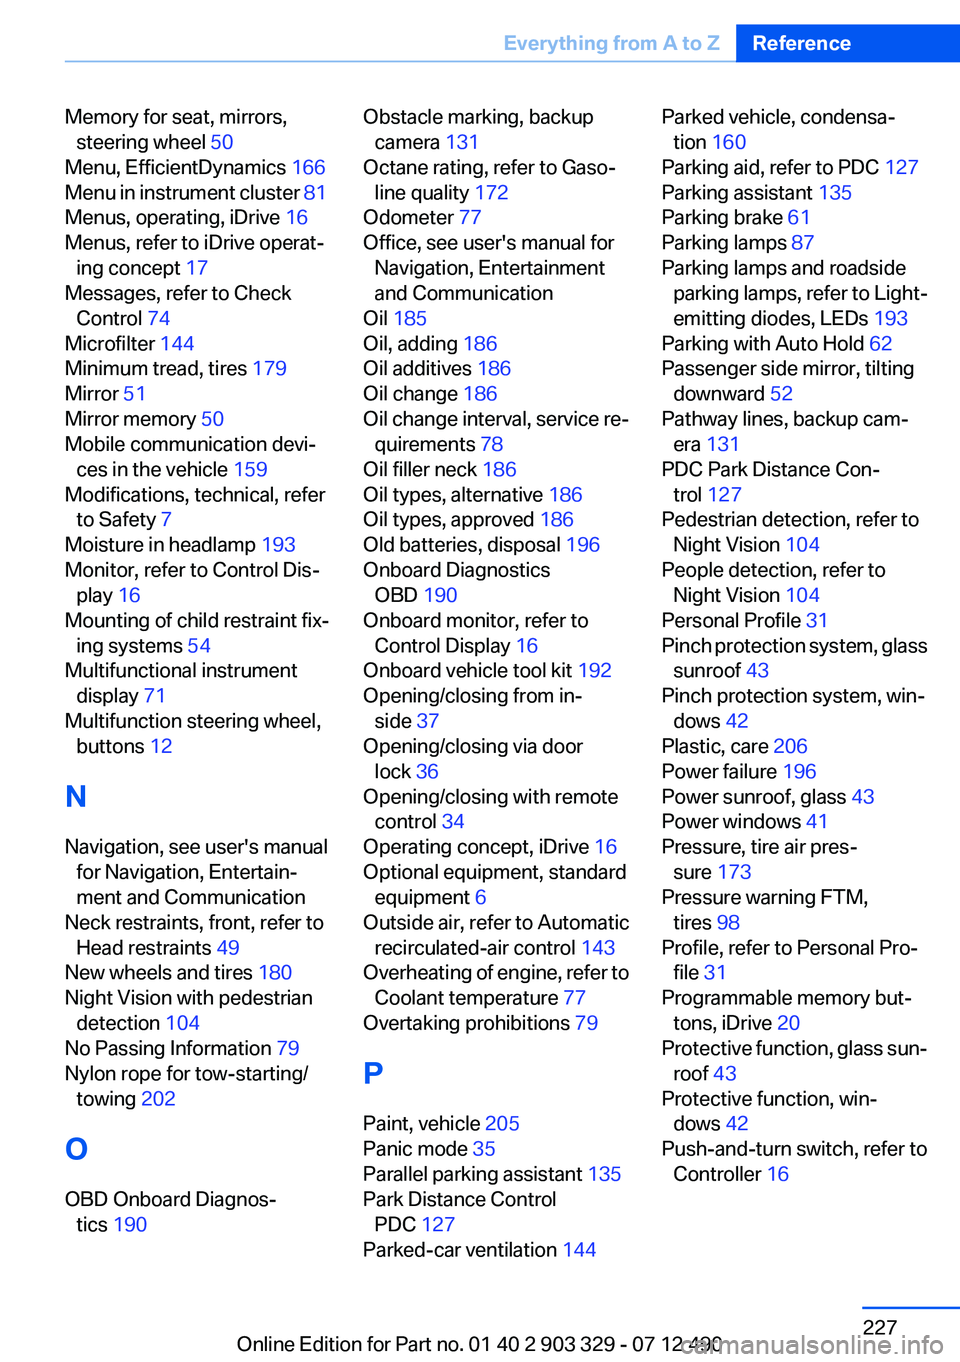
Memory for seat, mirrors,steering wheel 50
Menu, EfficientDynamics 166
Menu in instrument cluster 81
Menus, operating, iDrive 16
Menus, refer to iDrive operat‐ ing concept 17
Messages, refer to Check Control 74
Microfilter 144
Minimum tread, tires 179
Mirror 51
Mirror memory 50
Mobile communication devi‐ ces in the vehicle 159
Modifications, technical, refer to Safety 7
Moisture in headlamp 193
Monitor, refer to Control Dis‐ play 16
Mounting of child restraint fix‐ ing systems 54
Multifunctional instrument display 71
Multifunction steering wheel, buttons 12
N
Navigation, see user's manual for Navigation, Entertain‐
ment and Communication
Neck restraints, front, refer to Head restraints 49
New wheels and tires 180
Night Vision with pedestrian detection 104
No Passing Information 79
Nylon rope for tow-starting/ towing 202
O
OBD Onboard Diagnos‐ tics 190 Obstacle marking, backup
camera 131
Octane rating, refer to Gaso‐ line quality 172
Odometer 77
Office, see user's manual for Navigation, Entertainment
and Communication
Oil 185
Oil, adding 186
Oil additives 186
Oil change 186
Oil change interval, service re‐ quirements 78
Oil filler neck 186
Oil types, alternative 186
Oil types, approved 186
Old batteries, disposal 196
Onboard Diagnostics OBD 190
Onboard monitor, refer to Control Display 16
Onboard vehicle tool kit 192
Opening/closing from in‐ side 37
Opening/closing via door lock 36
Opening/closing with remote control 34
Operating concept, iDrive 16
Optional equipment, standard equipment 6
Outside air, refer to Automatic recirculated-air control 143
Overheating of engine, refer to Coolant temperature 77
Overtaking prohibitions 79
P
Paint, vehicle 205
Panic mode 35
Parallel parking assistant 135
Park Distance Control PDC 127
Parked-car ventilation 144 Parked vehicle, condensa‐
tion 160
Parking aid, refer to PDC 127
Parking assistant 135
Parking brake 61
Parking lamps 87
Parking lamps and roadside parking lamps, refer to Light-
emitting diodes, LEDs 193
Parking with Auto Hold 62
Passenger side mirror, tilting downward 52
Pathway lines, backup cam‐ era 131
PDC Park Distance Con‐ trol 127
Pedestrian detection, refer to Night Vision 104
People detection, refer to Night Vision 104
Personal Profile 31
Pinch protection system, glass sunroof 43
Pinch protection system, win‐ dows 42
Plastic, care 206
Power failure 196
Power sunroof, glass 43
Power windows 41
Pressure, tire air pres‐ sure 173
Pressure warning FTM, tires 98
Profile, refer to Personal Pro‐ file 31
Programmable memory but‐ tons, iDrive 20
Protective function, glass sun‐ roof 43
Protective function, win‐ dows 42
Push-and-turn switch, refer to Controller 16 Seite 227Everything from A to ZReference227
Online Edition for Part no. 01 40 2 903 329 - 07 12 490
Page 228 of 232
R
Radiator fluid 188
Radio-operated key, refer to Remote control 30
Radio ready state 58
Radio, see user's manual for Navigation, Entertainment
and Communication
Rain sensor 65
Rear axle steering 114
Rear lamps 194
Rearview mirror 51
Rear window defroster 143
Recirculated-air mode 143
Recommended tire brands 180
Refueling 170
Remaining range 78
Remote control/key 30
Remote control, malfunc‐ tion 36
Remote control, universal 146
Replacement fuse 196
Replacing parts 192
Replacing wheels/tires 180
Reporting safety defects 8
RES button 121
Reserve warning, refer to Range 78
Reset, Tire Pressure Monitor TPM 96
Residual heat, automatic cli‐ mate control 143
Retaining straps, securing cargo 162
Retreaded tires 180
Reversing lamp, bulb replace‐ ment 195
Roadside parking lamps 88
Roller sunblinds 42
Roll stabilization, refer to Adaptive Drive 114
Roll stabilization, refer to Dy‐ namic Drive 114
RON gasoline quality 172 Rope for tow-starting/tow‐
ing 202
RSC Run Flat System Compo‐ nent, refer to Run-flat
tires 181
Rubber components, care 206
Run-flat tires 181
S
Safe braking 159
Safety 7
Safety belt reminder for driv‐ er's seat and front passenger
seat 49
Safety belts 48
Safety belts, care 206
Safety systems, airbags 92
Saving fuel 0
Screen, refer to Control Dis‐ play 16
Screwdriver 192
Screw thread for tow fit‐ ting 203
Seat belts, refer to Safety belts 48
Seat heating, front 47
Seating position for chil‐ dren 54
Seat, mirror, and steering wheel memory 50
Seats 45
Seat ventilation, front 47
Selection list in instrument cluster 81
Selector lever, automatic transmission 67
Sensors, care 207
Service and warranty 7
Service requirements, Condi‐ tion Based Service CBS 189
Service requirements, dis‐ play 78
Service, Roadside Assis‐ tance 199 Settings on Control Dis‐
play 84
Settings, storing for seat, mir‐ rors, steering wheel 50
Shifting, automatic transmis‐ sion 67
Shifting, manual transmis‐ sion 66
Shift paddles on steering wheel 68
Short commands 213
Shoulder support 47
Side airbags 92
Side View 134
Signaling, horn 12
Signals when unlocking 35
Sitting safely 45
Size 210
Ski bag 149
Smallest turning circle 211
Smoker's package 148
Snow chains 181
Socket 149
Socket, OBD Onboard Diag‐ nostics 190
SOS button 198
Spare fuse 196
Speaker lighting 91
Specified engine oil types 186
Speed, average 82
Speed limit detection, on‐ board computer 83
Speed limiter, display 79
Speed Limit Information 79
Speed limit in the com‐ puter 83
Split screen 20
SPORT+ program, Dynamic Driving Control 116
Sport automatic transmis‐ sion 68
SPORT program, Dynamic Driving Control 116
Sport program, transmis‐ sion 68 Seite 228ReferenceEverything from A to Z228
Online Edition for Part no. 01 40 2 903 329 - 07 12 490