roof BMW 640I COUPE 2013 Owners Manual
[x] Cancel search | Manufacturer: BMW, Model Year: 2013, Model line: 640I COUPE, Model: BMW 640I COUPE 2013Pages: 232, PDF Size: 8.98 MB
Page 15 of 232
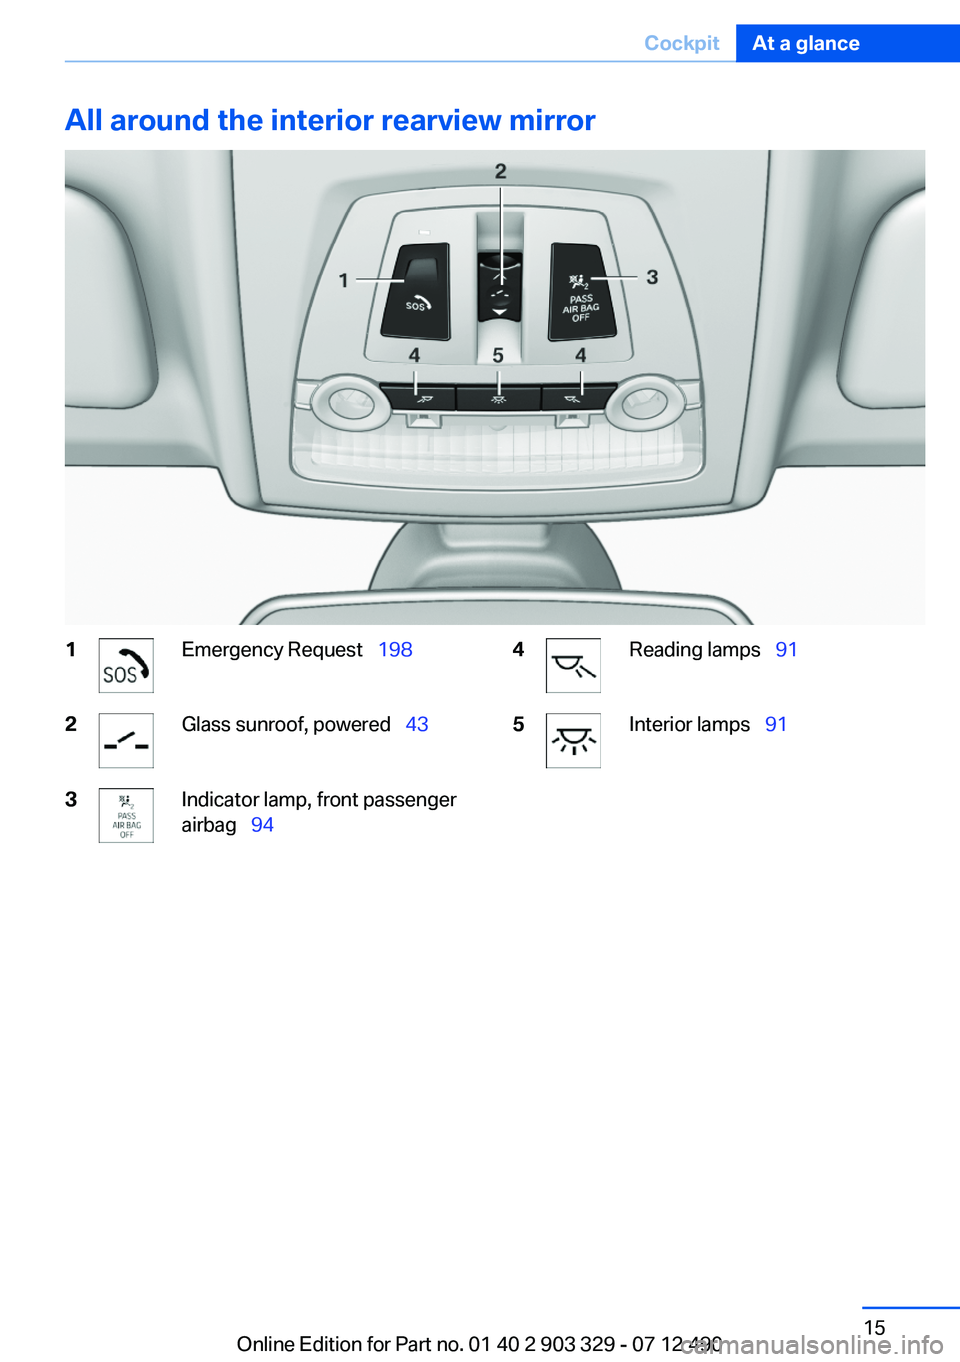
All around the interior rearview mirror1Emergency Request 1982Glass sunroof, powered 433Indicator lamp, front passenger
airbag 944Reading lamps 915Interior lamps 91Seite 15CockpitAt a glance15
Online Edition for Part no. 01 40 2 903 329 - 07 12 490
Page 24 of 232
›Station ...‹ e. g. Classic Radio station▷Keep the doors, windows, and glass sunroof
closed to prevent noise interference.▷Avoid making other noise in the vehicle
while speaking.Seite 24At a glanceVoice activation system24
Online Edition for Part no. 01 40 2 903 329 - 07 12 490
Page 35 of 232
Convenient opening
The remote control can be used to simultane‐
ously open the windows and the glass sunroof.
Press and hold the button on the re‐
mote control.
The windows are opened, the glass sunroof is
tilted and the sliding visor moves back.
Releasing the button stops the motion.
Locking Press the button on the remote control.
Locking from the outside
Do not lock the vehicle from the outside if
there are people in it, as the vehicle cannot be
unlocked from inside without special knowl‐
edge.◀
Switching on interior lamps and
courtesy lamps
Press the button on the remote control
with the vehicle locked.
Panic mode
You can trigger the alarm system if you find
yourself in a dangerous situation.
Press the button on the remote control
for at least 3 seconds.
To switch off the alarm: press any button.
Switching on the headlamp courtesy
delay feature
Briefly press the button on the remote
control.
The duration can be set in the Control Display.
Opening the trunk lid Press the button on the remote control
for approx. 1 second.The trunk lid opens, regardless of whether it was
previously locked or unlocked.
During opening, the trunk lid pivots back and up.
Ensure that adequate clearance is available be‐
fore opening.
In some vehicle equipment variants, the trunk lid
can only be opened using the remote control if
the vehicle was unlocked first.
To avoid locking yourself out of the vehicle, do
not place the remote control into the cargo area.
The trunk lid is locked again as soon as it is
pushed closed.
Confirmation signals from the vehicle1."Settings"2."Door locks"3.Deactivate or activate the desired confirma‐
tion signals.▷"Acoustic sig. lock/unlock"▷"Flash when lock/unlock"
Retrieving the seat, mirror, and
steering wheel settings
The driver's seat, exterior mirror, and steering
wheel positions selected last are stored for the
currently used remote control.
When the vehicle is unlocked, these positions
are automatically retrieved if this function was
activated.
Pinch hazard when moving back the seat
If this function is used, first make sure that
the footwell behind the driver's seat is empty.
Otherwise, people can be injured or objects
damaged when the seat is moved back.◀
The adjustment procedure is interrupted:
▷When a seat position switch is pressed.▷When a button of the seat, mirror, and steer‐
ing wheel memory is pressed briefly.
Activating the setting
1."Settings"Seite 35Opening and closingControls35
Online Edition for Part no. 01 40 2 903 329 - 07 12 490
Page 39 of 232
The trunk lid unlocks.
Comfort Access
The concept
The vehicle can be accessed without activating
the remote control.
All you need to do is to have the remote control
with you, e.g., in your jacket pocket.
The vehicle automatically detects the remote
control when it is nearby or in the passenger
compartment.
Comfort Access supports the following func‐
tions:▷Unlocking/locking of the vehicle.▷Convenient closing.▷Unlocking of the trunk lid separately.▷Starting the engine.
Functional requirements
▷There are no external sources of interfer‐
ence nearby.▷To lock the vehicle, the remote control must
be located outside of the vehicle.▷The next unlocking and locking cycle is not
possible until after approx. 2 seconds.▷The engine can only be started if the remote
control is inside the vehicle.
Comparison with ordinary remote
control
The functions can be controlled by pressing the
buttons of the remote control or Comfort Ac‐
cess.
Unlocking
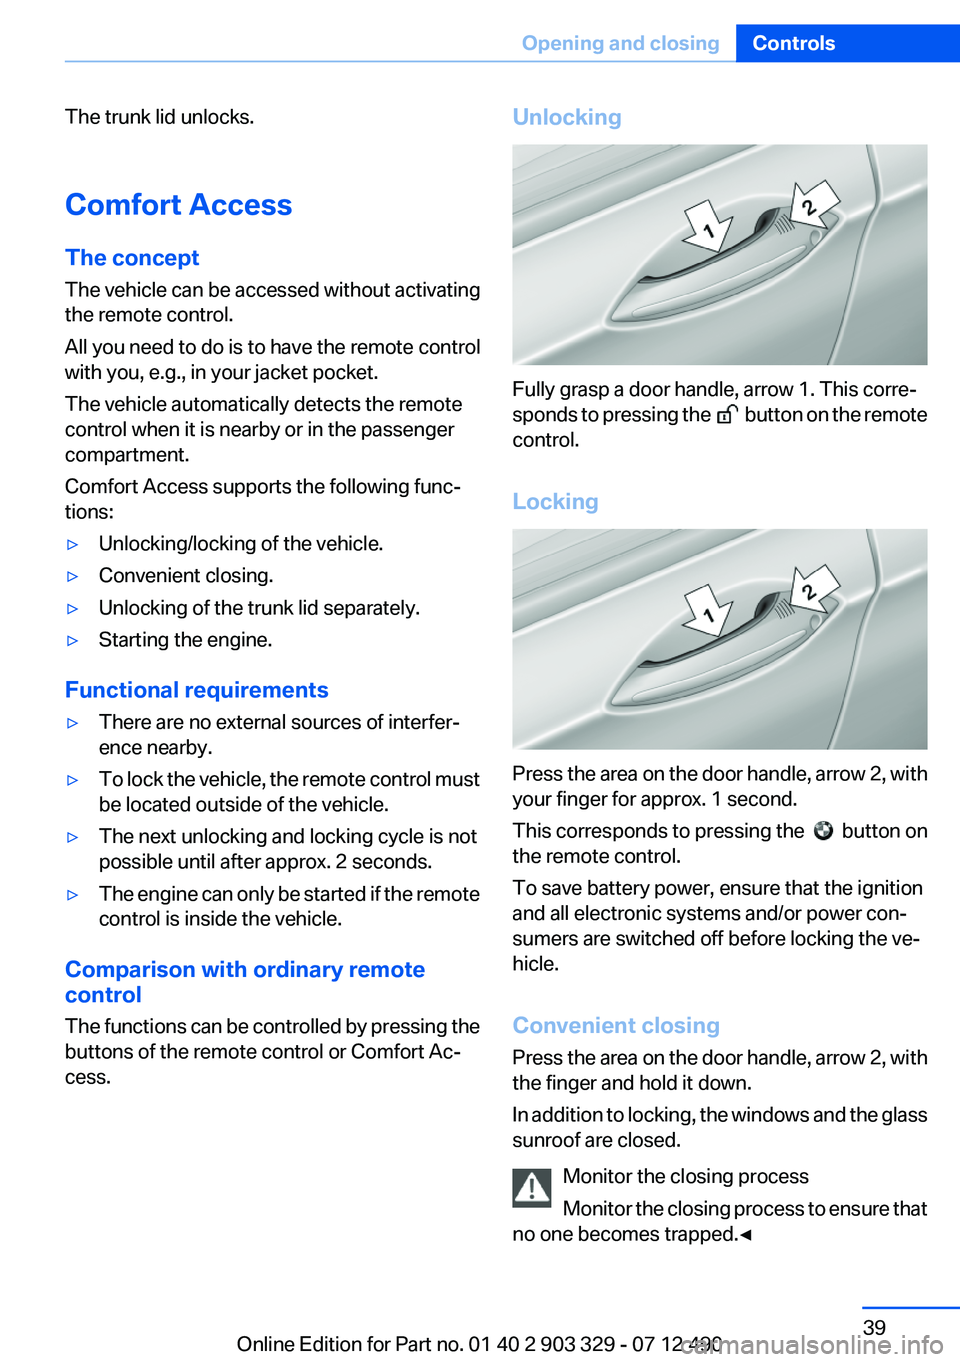
Fully grasp a door handle, arrow 1. This corre‐
sponds to pressing the
button on the remote
control.
Locking
Press the area on the door handle, arrow 2, with
your finger for approx. 1 second.
This corresponds to pressing the
button on
the remote control.
To save battery power, ensure that the ignition
and all electronic systems and/or power con‐
sumers are switched off before locking the ve‐
hicle.
Convenient closing
Press the area on the door handle, arrow 2, with
the finger and hold it down.
In addition to locking, the windows and the glass
sunroof are closed.
Monitor the closing process
Monitor the closing process to ensure that
no one becomes trapped.◀
Seite 39Opening and closingControls39
Online Edition for Part no. 01 40 2 903 329 - 07 12 490
Page 41 of 232
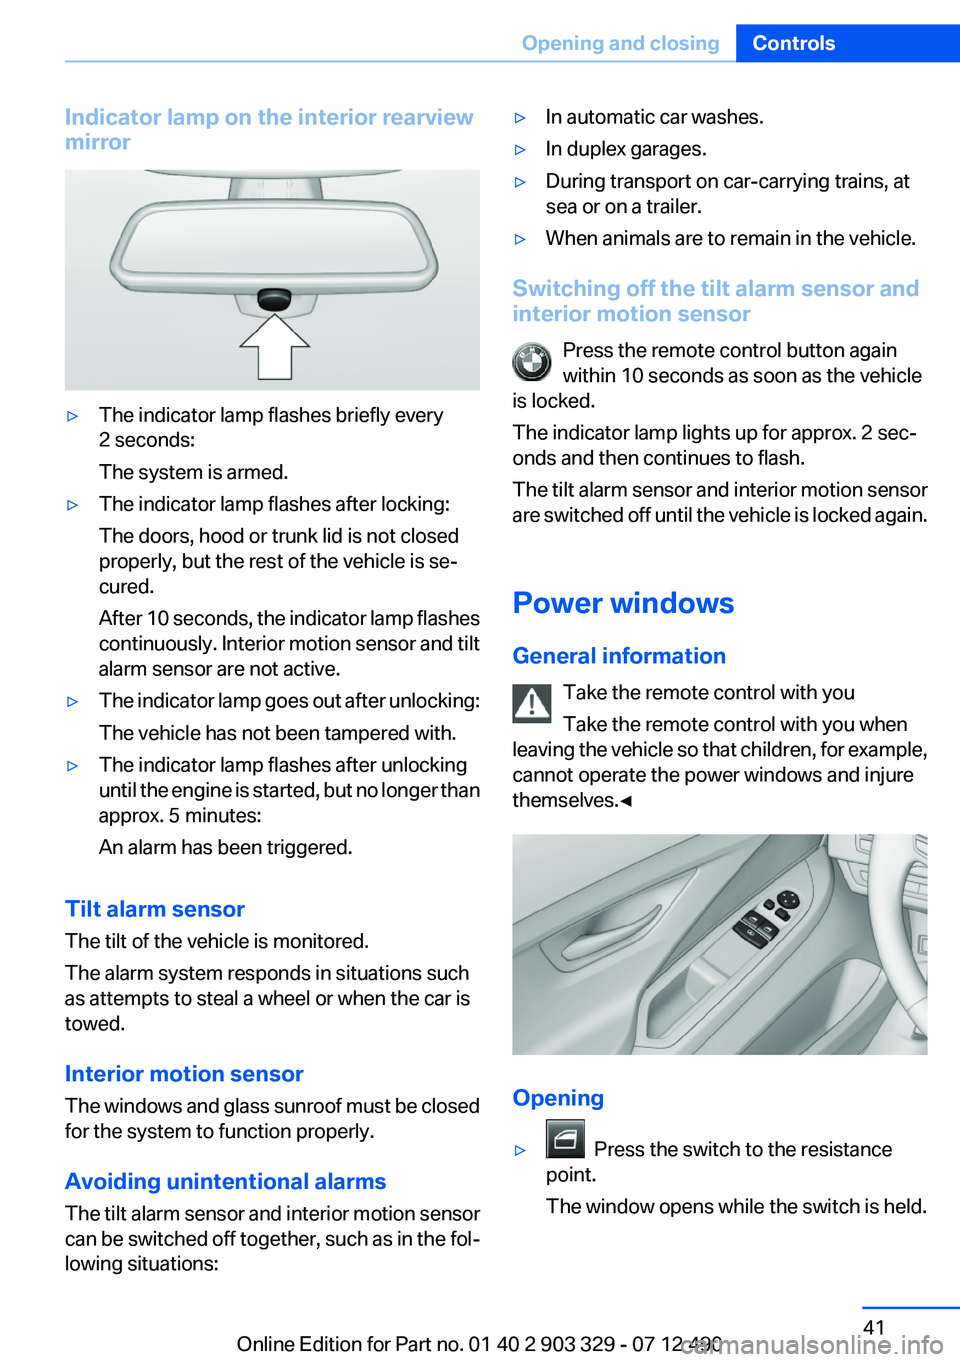
Indicator lamp on the interior rearview
mirror▷The indicator lamp flashes briefly every
2 seconds:
The system is armed.▷The indicator lamp flashes after locking:
The doors, hood or trunk lid is not closed
properly, but the rest of the vehicle is se‐
cured.
After 10 seconds, the indicator lamp flashes
continuously. Interior motion sensor and tilt
alarm sensor are not active.▷The indicator lamp goes out after unlocking:
The vehicle has not been tampered with.▷The indicator lamp flashes after unlocking
until the engine is started, but no longer than
approx. 5 minutes:
An alarm has been triggered.
Tilt alarm sensor
The tilt of the vehicle is monitored.
The alarm system responds in situations such
as attempts to steal a wheel or when the car is
towed.
Interior motion sensor
The windows and glass sunroof must be closed
for the system to function properly.
Avoiding unintentional alarms
The tilt alarm sensor and interior motion sensor
can be switched off together, such as in the fol‐
lowing situations:
▷In automatic car washes.▷In duplex garages.▷During transport on car-carrying trains, at
sea or on a trailer.▷When animals are to remain in the vehicle.
Switching off the tilt alarm sensor and
interior motion sensor
Press the remote control button again
within 10 seconds as soon as the vehicle
is locked.
The indicator lamp lights up for approx. 2 sec‐
onds and then continues to flash.
The tilt alarm sensor and interior motion sensor
are switched off until the vehicle is locked again.
Power windows
General information Take the remote control with you
Take the remote control with you when
leaving the vehicle so that children, for example,
cannot operate the power windows and injure
themselves.◀
Opening
▷ Press the switch to the resistance
point.
The window opens while the switch is held.
Seite 41Opening and closingControls41
Online Edition for Part no. 01 40 2 903 329 - 07 12 490
Page 43 of 232
Roller blind for rear windowPress the button.
Glass sunroof, powered with
tilt function
General information
The glass sunroof is operational when the igni‐
tion is switched on.
Keep the closing path clear
Monitor the closing process and make
sure that the closing path of the glass sunroof is
clear; otherwise, injuries may result.◀
Take the remote control with you
Take the remote control with you when
leaving the vehicle so that children, for example,
cannot operate the roof and injure themselves. ◀
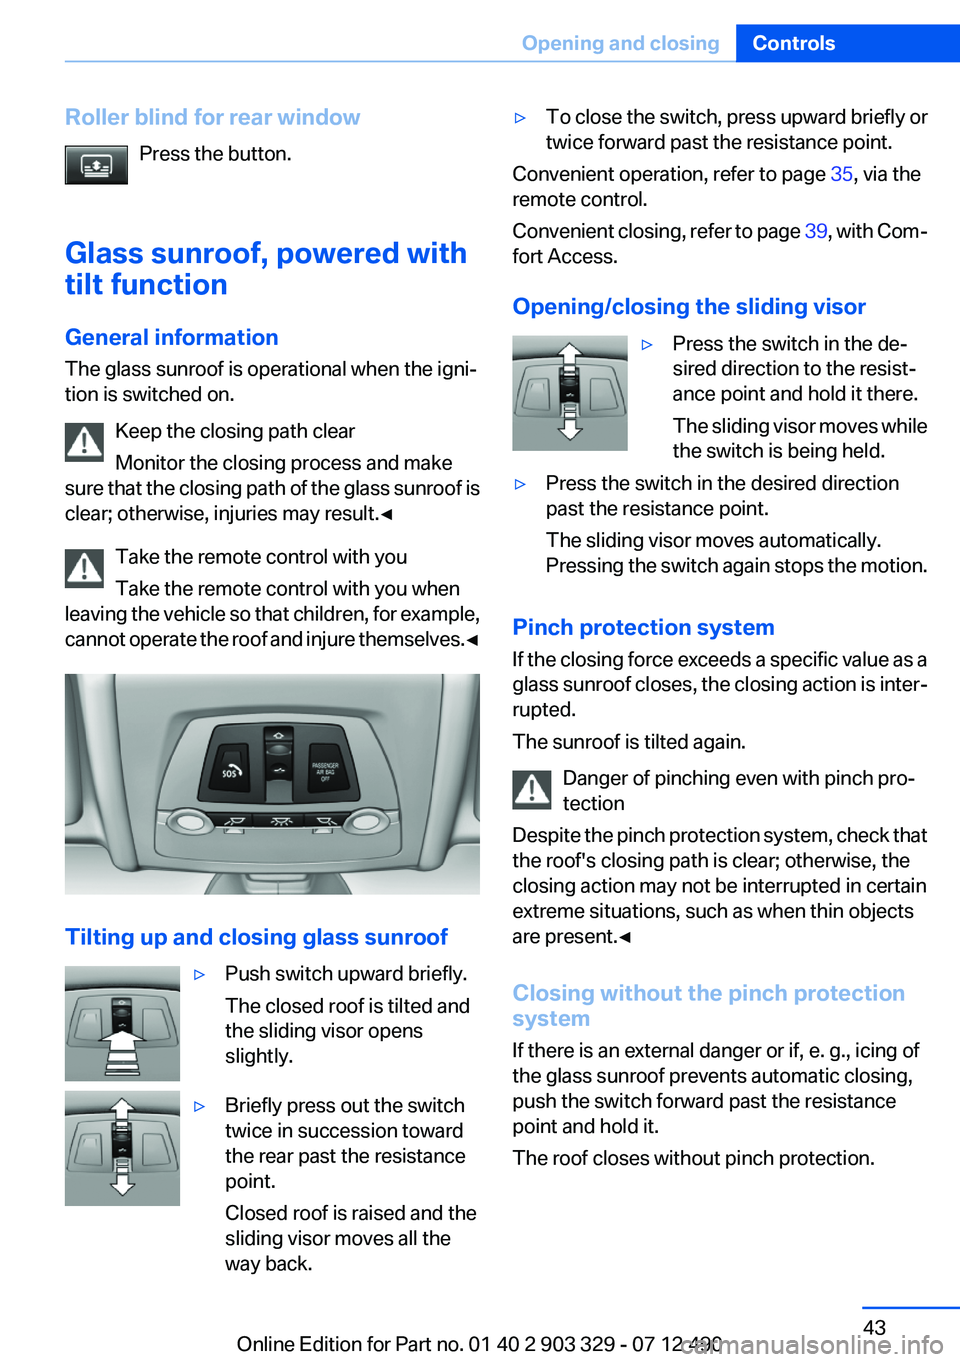
Tilting up and closing glass sunroof
▷Push switch upward briefly.
The closed roof is tilted and
the sliding visor opens
slightly.▷Briefly press out the switch
twice in succession toward
the rear past the resistance
point.
Closed roof is raised and the
sliding visor moves all the
way back.▷To close the switch, press upward briefly or
twice forward past the resistance point.
Convenient operation, refer to page 35, via the
remote control.
Convenient closing, refer to page 39, with Com‐
fort Access.
Opening/closing the sliding visor
▷Press the switch in the de‐
sired direction to the resist‐
ance point and hold it there.
The sliding visor moves while
the switch is being held.▷Press the switch in the desired direction
past the resistance point.
The sliding visor moves automatically.
Pressing the switch again stops the motion.
Pinch protection system
If the closing force exceeds a specific value as a
glass sunroof closes, the closing action is inter‐
rupted.
The sunroof is tilted again.
Danger of pinching even with pinch pro‐
tection
Despite the pinch protection system, check that
the roof's closing path is clear; otherwise, the
closing action may not be interrupted in certain
extreme situations, such as when thin objects
are present.◀
Closing without the pinch protection
system
If there is an external danger or if, e. g., icing of
the glass sunroof prevents automatic closing,
push the switch forward past the resistance
point and hold it.
The roof closes without pinch protection.
Seite 43Opening and closingControls43
Online Edition for Part no. 01 40 2 903 329 - 07 12 490
Page 44 of 232
Initializing after a power failure
After a power failure during the opening or clos‐
ing process, the roof can only be operated to a
limited extent.
Initializing the system
The system can be initialized when the vehicle
is stationary and the engine is running.
During the initialization, the roof closes without
pinch protection.
Keep the closing path clear
Monitor the closing process and make
sure that the closing path of the glass sunroof is
clear; otherwise, injuries may result.◀
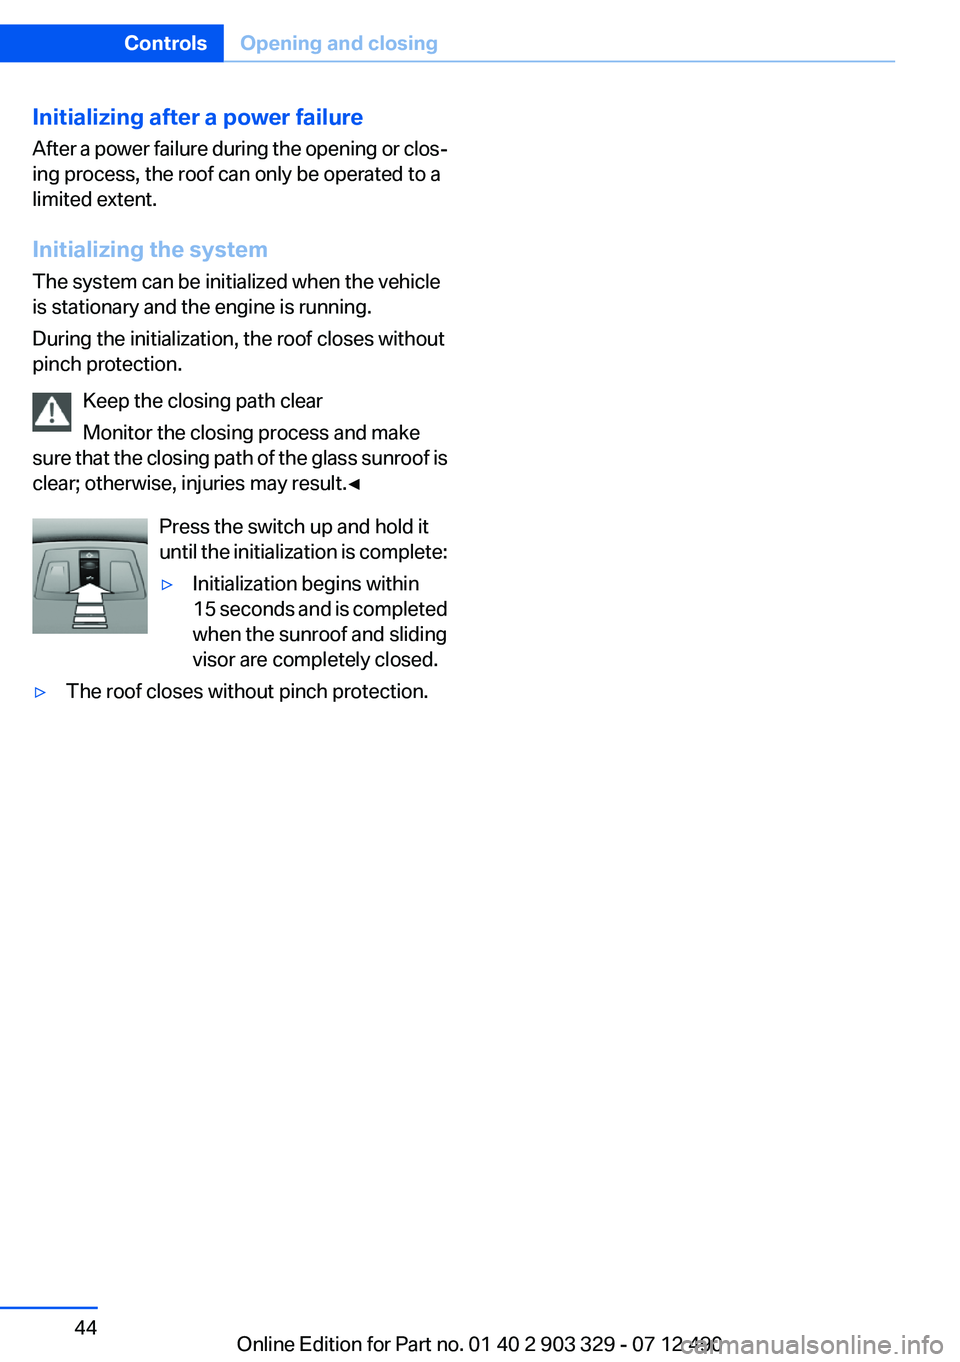
Press the switch up and hold it
until the initialization is complete:▷Initialization begins within
15 seconds and is completed
when the sunroof and sliding
visor are completely closed.▷The roof closes without pinch protection.Seite 44ControlsOpening and closing44
Online Edition for Part no. 01 40 2 903 329 - 07 12 490
Page 93 of 232
Knee airbag
The knee airbag supports the legs in a frontal
impact.
Protective action
Airbags are not triggered in every impact situa‐
tion, e.g., in less severe accidents or rear-end
collisions.
Information on how to ensure the optimal
protective effect of the airbags▷Keep at a distance from the airbags.▷Always grasp the steering wheel on the
steering wheel rim, holding your hands at
the 3 o'clock and 9 o'clock positions, to keep
the danger of injury to your hands or arms as
low as possible if the airbag is triggered.▷There should be no people, animals, or ob‐
jects between an airbag and a person.▷Do not use the cover of the front airbag on
the front passenger side as a storage area.▷Keep the dashboard and window on the
front passenger side clear, i.e., do not cover
with adhesive labels or coverings, and do not
attach holders such as for navigation instru‐
ments and mobile phones.▷Make sure that the front passenger is sitting
correctly, i.e., keeps his or her feet and legs
in the footwell; otherwise, leg injuries can
occur if the front airbag is triggered.▷Do not place slip covers, seat cushions or
other objects on the front passenger seat
that are not approved specifically for seats
with integrated side airbags.▷Do not hang pieces of clothing, such as jack‐
ets, over the backrests.▷Make sure that occupants keep their heads
away from the side airbag and do not rest
against the head airbag; otherwise, injuries
can occur if the airbags are triggered.▷Do not remove the airbag restraint system.▷Do not remove the steering wheel.▷Do not apply adhesive materials to the air‐
bag cover panels, cover them or modify
them in any way.▷Never modify either the individual compo‐
nents or the wiring in the airbag system. This
also applies to steering wheel covers, the
dashboard, the seats, the roof pillars and the
sides of the headliner.◀
Even when all instructions are followed closely,
injury from contact with the airbags cannot be
ruled out in certain situations.
The ignition and inflation noise may lead to
short-term and, in most cases, temporary hear‐
ing impairment in sensitive individuals.
In the case of a malfunction, deactivation
and after triggering of the airbags
Do not touch the individual components imme‐
diately after the system has been triggered; oth‐
erwise, there is the danger of burns.
Only have the airbags checked, repaired or dis‐
mantled and the airbag generator scrapped by
your service center or a workshop that has the
necessary authorization for handling explosives.
Non-professional attempts to service the sys‐
tem could lead to failure in an emergency or un‐
desired triggering of the airbag, either of which
could result in injury.◀
Warnings and information on the airbags are
also found on the sun visors.
Functional readiness of the airbag
system
When the ignition is switch on, the warn‐
ing lamp in the instrument cluster lights
up briefly and thereby indicates the op‐
erational readiness of the entire airbag system
and the belt tensioner.
Airbag system malfunctioning
▷Warning lamp does not come on when the
ignition is turned on.▷The warning lamp lights up continuously.Seite 93SafetyControls93
Online Edition for Part no. 01 40 2 903 329 - 07 12 490
Page 153 of 232
No heavy objects
Do not hang heavy objects from the hooks;
otherwise, they may present a danger to pas‐
sengers during braking and evasive maneu‐
vers.◀
Cupholders
Notes Shatter-proof containers and no hot
drinks
Use light and shatter-proof containers and do
not transport hot drinks. Otherwise, there is the
increased danger of injury in an accident.◀
Unsuitable containers
Do not forcefully push unsuitable contain‐
ers into the cupholders. This may result in dam‐
age.◀
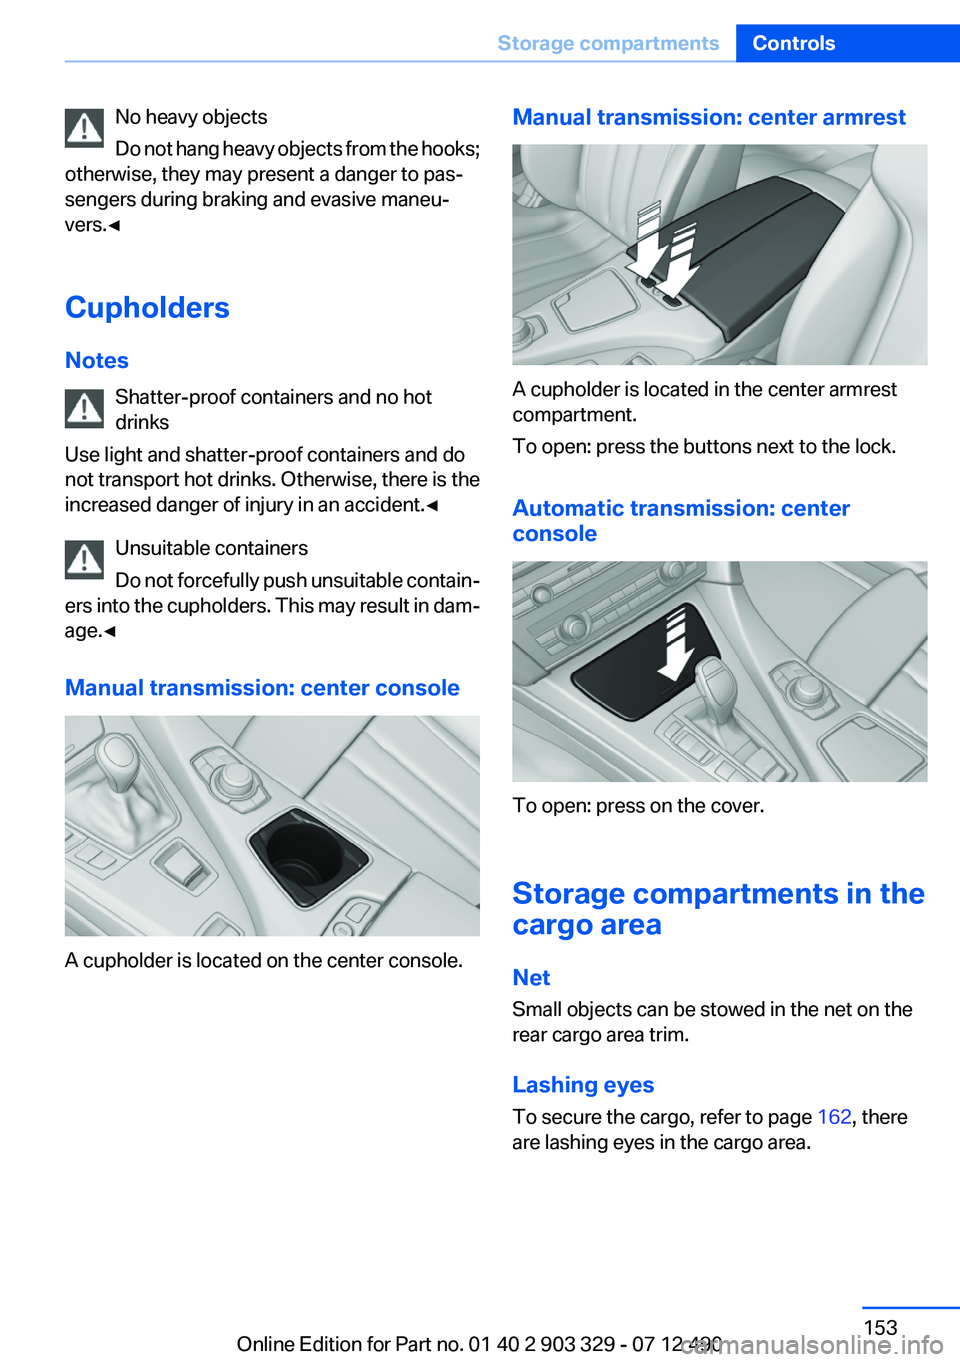
Manual transmission: center console
A cupholder is located on the center console.
Manual transmission: center armrest
A cupholder is located in the center armrest
compartment.
To open: press the buttons next to the lock.
Automatic transmission: center
console
To open: press on the cover.
Storage compartments in the
cargo area
Net
Small objects can be stowed in the net on the
rear cargo area trim.
Lashing eyes
To secure the cargo, refer to page 162, there
are lashing eyes in the cargo area.
Seite 153Storage compartmentsControls153
Online Edition for Part no. 01 40 2 903 329 - 07 12 490
Page 158 of 232
Things to remember when drivingVehicle equipment
All standard, country-specific and optional
equipment that is offered in the model series is
described in this chapter. Therefore, equipment
is also described that is not available in a vehicle,
e. g., because of the selected optional equip‐
ment or country variant. This also applies for
safety-related functions and systems.
Breaking-in period
General information
Moving parts need to be broken in to adjust to
each other.
The following instructions will help achieve a
long vehicle life and good economy.
Engine and differential
Always obey the official speed limit.
Up to 1,200 miles/2,000 km
Do not exceed the maximum engine and road
speed:▷For gasoline engine, 4,500 rpm and
100 mph/160 km/h.
Avoid full-throttle operation and use of the
transmission's kickdown mode for the initial
miles.
From 1,200 miles/2,000 km
The engine and vehicle speed can gradually be
increased.
Tires
Due to technical factors associated with their
manufacture, tires do not achieve their full trac‐
tion potential until after an initial breaking-in pe‐
riod.
Drive conservatively for the first
200 miles/300 km.
Brake system
Brakes require an initial break-in period of ap‐
prox. 300 miles/500 km to achieve optimized
contact and wear patterns between brake pads
and discs. Drive moderately during this break-in
period.
Clutch
The function of the clutch reaches its optimal
level only after a distance driven of approx.
300 miles/500 km. During this break-in period,
engage the clutch gently.
Following part replacement
The same breaking in procedures should be ob‐
served if any of the components mentioned
above have to be renewed in the course of the
vehicle's operating life.
General driving notes
Closing the trunk lid Drive with the trunk lid closed
Only drive with the tailgate closed; other‐
wise, in the event of an accident or braking or
evasive maneuvers, passengers or other road
users may be injured or the vehicle may be dam‐
aged. In addition, exhaust fumes may enter the
passenger compartment.◀
If driving with the tailgate open cannot be
avoided:▷Close all windows and the glass sunroof.▷Greatly increase the blower speed.▷Drive moderately.Seite 158Driving tipsThings to remember when driving158
Online Edition for Part no. 01 40 2 903 329 - 07 12 490