sensor BMW 650I CONVERTIBLE 2008 E64 Owner's Manual
[x] Cancel search | Manufacturer: BMW, Model Year: 2008, Model line: 650I CONVERTIBLE, Model: BMW 650I CONVERTIBLE 2008 E64Pages: 264, PDF Size: 9.07 MB
Page 13 of 264
At a glance
11Reference
Controls
Driving tips
Communications
Navigation
Entertainment
Mobility
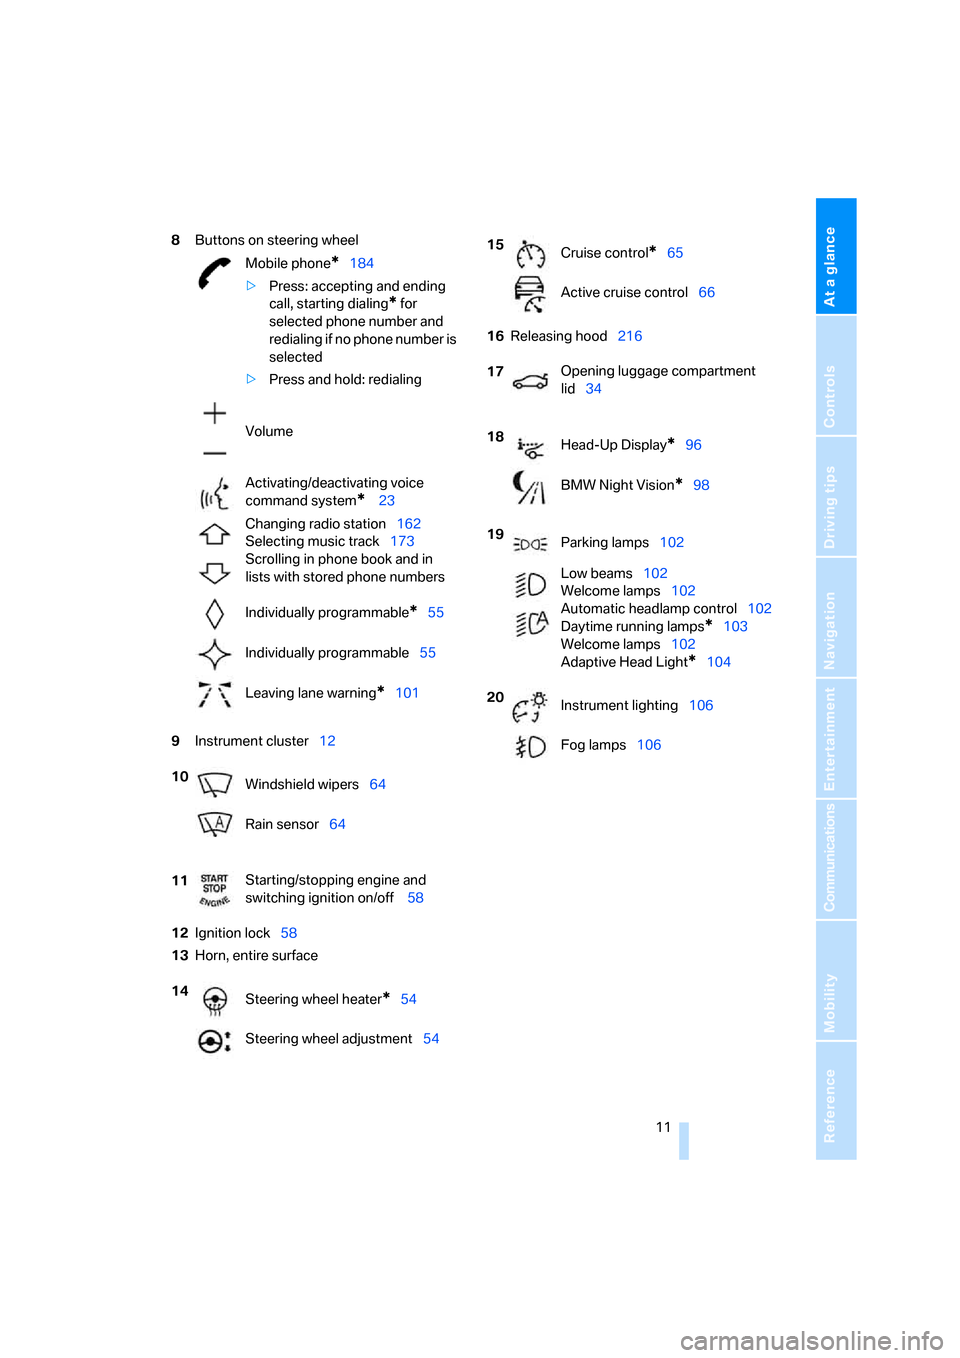
8Buttons on steering wheel
9Instrument cluster12
12Ignition lock58
13Horn, entire surface16Releasing hood216 Mobile phone
*184
>Press: accepting and ending
call, starting dialing
* for
selected phone number and
redialing if no phone number is
selected
>Press and hold: redialing
Volume
Activating/deactivating voice
command system
* 23
Changing radio station162
Selecting music track173
Scrolling in phone book and in
lists with stored phone numbers
Individually programmable
*55
Individually programmable55
Leaving lane warning
*101
10
Windshield wipers64
Rain sensor64
11Starting/stopping engine and
switching ignition on/off 58
14
Steering wheel heater
*54
Steering wheel adjustment54
15
Cruise control*65
Active cruise control66
17Opening luggage compartment
lid34
18
Head-Up Display
*96
BMW Night Vision
*98
19
Parking lamps102
Low beams102
Welcome lamps102
Automatic headlamp control102
Daytime running lamps
*103
Welcome lamps102
Adaptive Head Light
*104
20
Instrument lighting106
Fog lamps106
Page 37 of 264
Controls
35Reference
At a glance
Driving tips
Communications
Navigation
Entertainment
Mobility
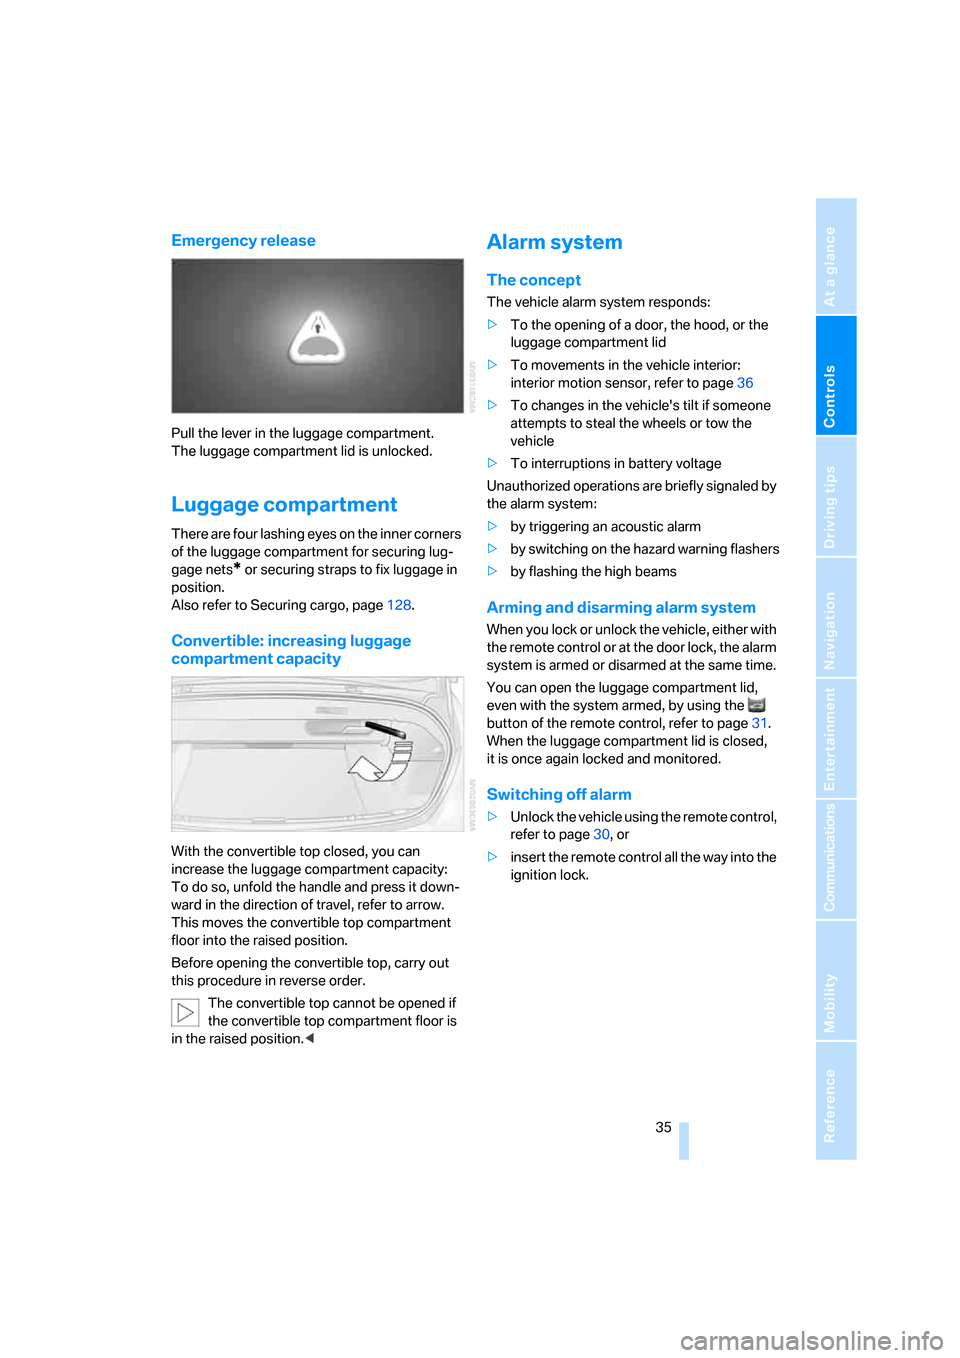
Emergency release
Pull the lever in the luggage compartment.
The luggage compartment lid is unlocked.
Luggage compartment
There are four lashing eyes on the inner corners
of the luggage compartment for securing lug-
gage nets
* or securing straps to fix luggage in
position.
Also refer to Securing cargo, page128.
Convertible: increasing luggage
compartment capacity
With the convertible top closed, you can
increase the luggage compartment capacity:
To do so, unfold the handle and press it down-
ward in the direction of travel, refer to arrow.
This moves the convertible top compartment
floor into the raised position.
Before opening the convertible top, carry out
this procedure in reverse order.
The convertible top cannot be opened if
the convertible top compartment floor is
in the raised position.<
Alarm system
The concept
The vehicle alarm system responds:
>To the opening of a door, the hood, or the
luggage compartment lid
>To movements in the vehicle interior:
interior motion sensor, refer to page36
>To changes in the vehicle's tilt if someone
attempts to steal the wheels or tow the
vehicle
>To interruptions in battery voltage
Unauthorized operations are briefly signaled by
the alarm system:
>by triggering an acoustic alarm
>by switching on
the hazard warning flashers
>by flashing the high beams
Arming and disarming alarm system
When you lock or unlock the vehicle, either with
the remote control or at the door lock, the alarm
system is armed or disarmed at the same time.
You can open the luggage compartment lid,
even with the system armed, by using the
button of the remote control, refer to page31.
When the luggage compartment lid is closed,
it is once again locked and monitored.
Switching off alarm
>Unlock the vehicle using the remote control,
refer to page30, or
>insert the remote control all the way into the
ignition lock.
Page 38 of 264
Opening and closing
36
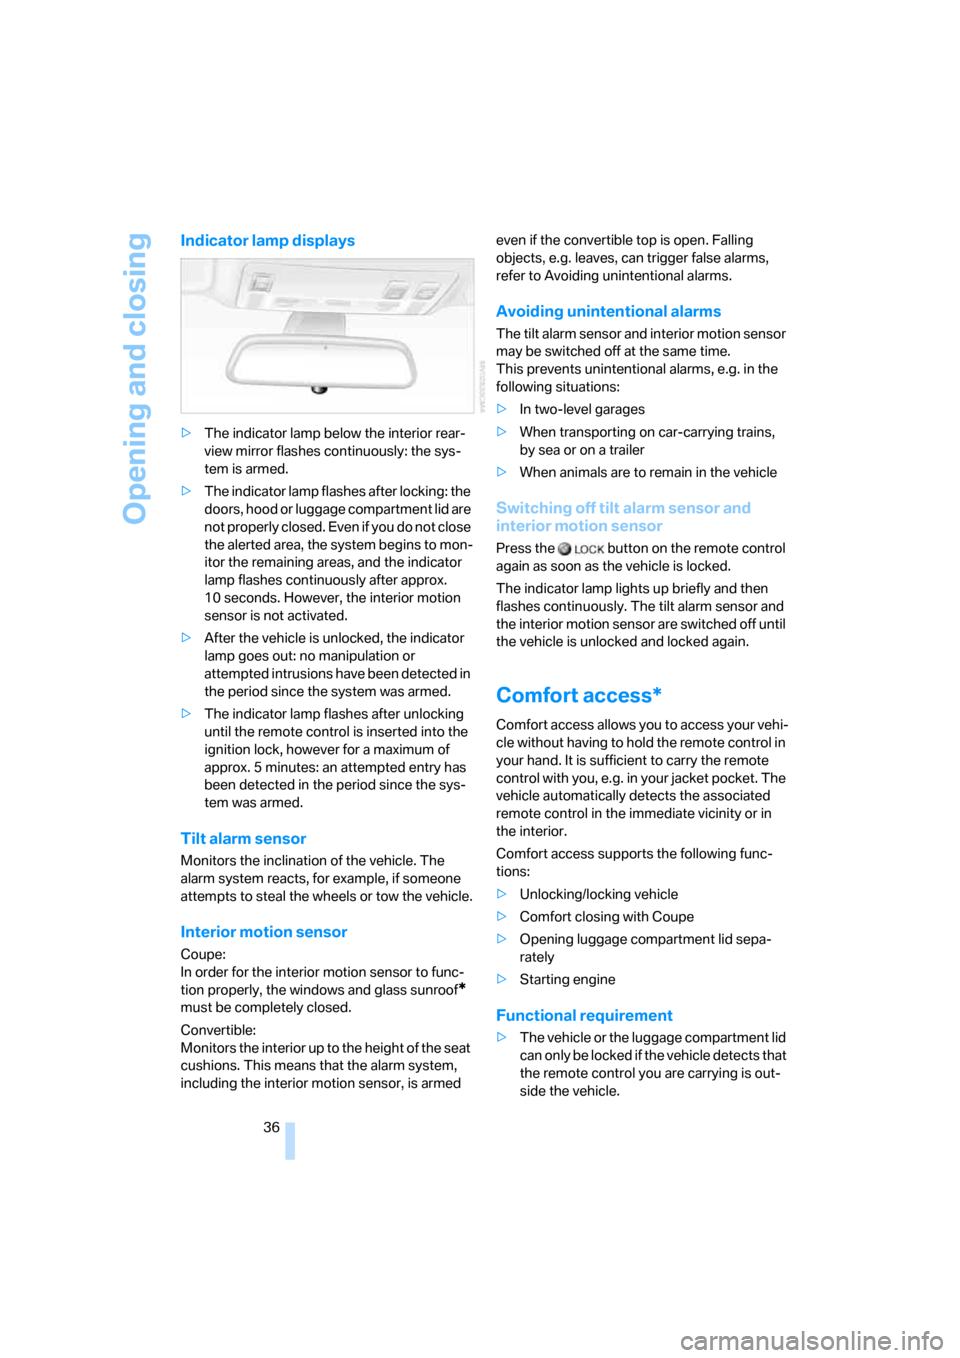
Indicator lamp displays
>The indicator lamp below the interior rear-
view mirror flashes continuously: the sys-
tem is armed.
>The indicator lamp flashes after locking: the
doors, hood or luggage compartment lid are
not properly closed. Even if you do not close
the alerted area, the system begins to mon-
itor the remaining areas, and the indicator
lamp flashes continuously after approx.
10 seconds. However, the interior motion
sensor is not activated.
>After the vehicle is unlocked, the indicator
lamp goes out: no manipulation or
attempted intrusions have been detected in
the period since the system was armed.
>The indicator lamp flashes after unlocking
until the remote control is inserted into the
ignition lock, however for a maximum of
approx. 5 minutes: an attempted entry has
been detected in the period since the sys-
tem was armed.
Tilt alarm sensor
Monitors the inclination of the vehicle. The
alarm system reacts, for example, if someone
attempts to steal the wheels or tow the vehicle.
Interior motion sensor
Coupe:
In order for the interior motion sensor to func-
tion properly, the windows and glass sunroof
*
must be completely closed.
Convertible:
Monitors the interior up to the height of the seat
cushions. This means that the alarm system,
including the interior motion sensor, is armed even if the convertible top is open. Falling
objects, e.g. leaves, can trigger false alarms,
refer to Avoiding unintentional alarms.
Avoiding unintentional alarms
The tilt alarm sensor and interior motion sensor
may be switched off at the same time.
This prevents unintentional alarms, e.g. in the
following situations:
>In two-level garages
>When transporting on car-carrying trains,
by sea or on a trailer
>When animals are to remain in the vehicle
Switching off tilt alarm sensor and
interior motion sensor
Press the button on the remote control
again as soon as the vehicle is locked.
The indicator lamp lights up briefly and then
flashes continuously. The tilt alarm sensor and
the interior motion sensor are switched off until
the vehicle is unlocked and locked again.
Comfort access*
Comfort access allows you to access your vehi-
cle without having to hold the remote control in
your hand. It is sufficient to carry the remote
control with you, e.g. in your jacket pocket. The
vehicle automatically detects the associated
remote control in the immediate vicinity or in
the interior.
Comfort access supports the following func-
tions:
>Unlocking/locking vehicle
>Comfort closing with Coupe
>Opening luggage compartment lid sepa-
rately
>Starting engine
Functional requirement
>The vehicle or the luggage compartment lid
can only be locked if the vehicle detects that
the remote control you are carrying is out-
side the vehicle.
Page 66 of 264
Driving
64
Triple turn signal activation
Press the lever to the resistance point; the turn
signals flash three times.
You can activate or deactivate this function.
iDrive, for operating principle refer to page16.
1.Press the button.
This opens the start menu.
2.Press the controller to open the menu.
3.Select "Settings" and press the controller.
4.Select "Vehicle / Tires" and press the con-
troller.
5.Change to upper field if necessary. Turn the
controller until "Lighting" is selected and
press the controller.
6.Select "Triple turn signal" and press the
controller.
Triple turn signal is activated.
The setting is stored for the remote control cur-
rently in use.
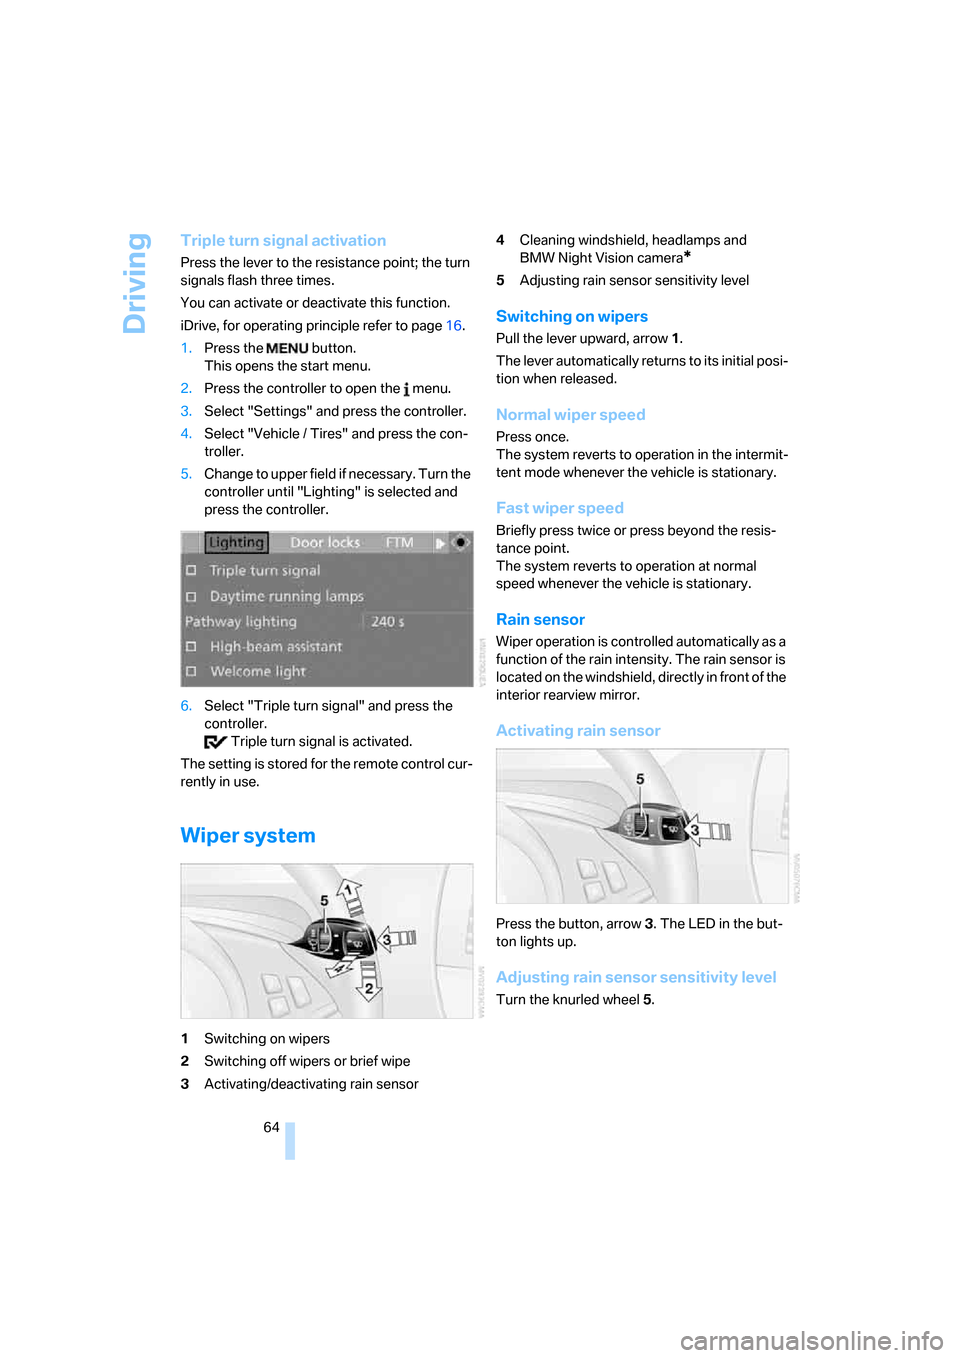
Wiper system
1Switching on wipers
2Switching off wipers or brief wipe
3Activating/deactivating rain sensor4Cleaning windshield, headlamps and
BMW Night Vision camera
*
5Adjusting rain sensor sensitivity level
Switching on wipers
Pull the lever upward, arrow1.
The lever automatically returns to its initial posi-
tion when released.
Normal wiper speed
Press once.
The system reverts to operation in the intermit-
tent mode whenever the vehicle is stationary.
Fast wiper speed
Briefly press twice or press beyond the resis-
tance point.
The system reverts to operation at normal
speed whenever the vehicle is stationary.
Rain sensor
Wiper operation is controlled automatically as a
function of the rain intensity. The rain sensor is
located on the windshield, directly in front of the
interior rearview mirror.
Activating rain sensor
Press the button, arrow3. The LED in the but-
ton lights up.
Adjusting rain sensor sensitivity level
Turn the knurled wheel5.
Page 67 of 264
Controls
65Reference
At a glance
Driving tips
Communications
Navigation
Entertainment
Mobility
Deactivating rain sensor
Press the button again, arrow3. The LED goes
out.
Deactivate the rain sensor when passing
through an automatic car wash. Failure to
do so could result in damage caused by undes-
ired wiper activation.<
Cleaning windshield, headlamps and
BMW Night Vision camera*
Pull the lever, arrow4:
The system sprays washer fluid against the
windshield and activates the wipers for a brief
period.
With the vehicle lighting switched on, the head-
lamps and the BMW Night Vision camera are
also cleaned simultaneously at suitable inter-
vals.
Do not use the washers if there is any
danger that the fluid will freeze on the
windshield. If you do so, your vision could be
obscured. To avoid freezing, use a washer fluid
antifreeze, refer to Washer fluid. Do not use
washers when the washer fluid reservoir is
empty, as this will damage the washer pump.<
Windshield washer nozzles
Both windshield washer nozzles are automati-
cally heated with the engine running or the igni-
tion switched on.
Washer fluid
Washer fluid antifreeze is flammable.
For this reason, keep it away from ignition
sources and store only in the closed original
container out of reach of children. Otherwise,
there is the danger of bodily injury. Always fol-
low the instructions for use provided on the
containers.<
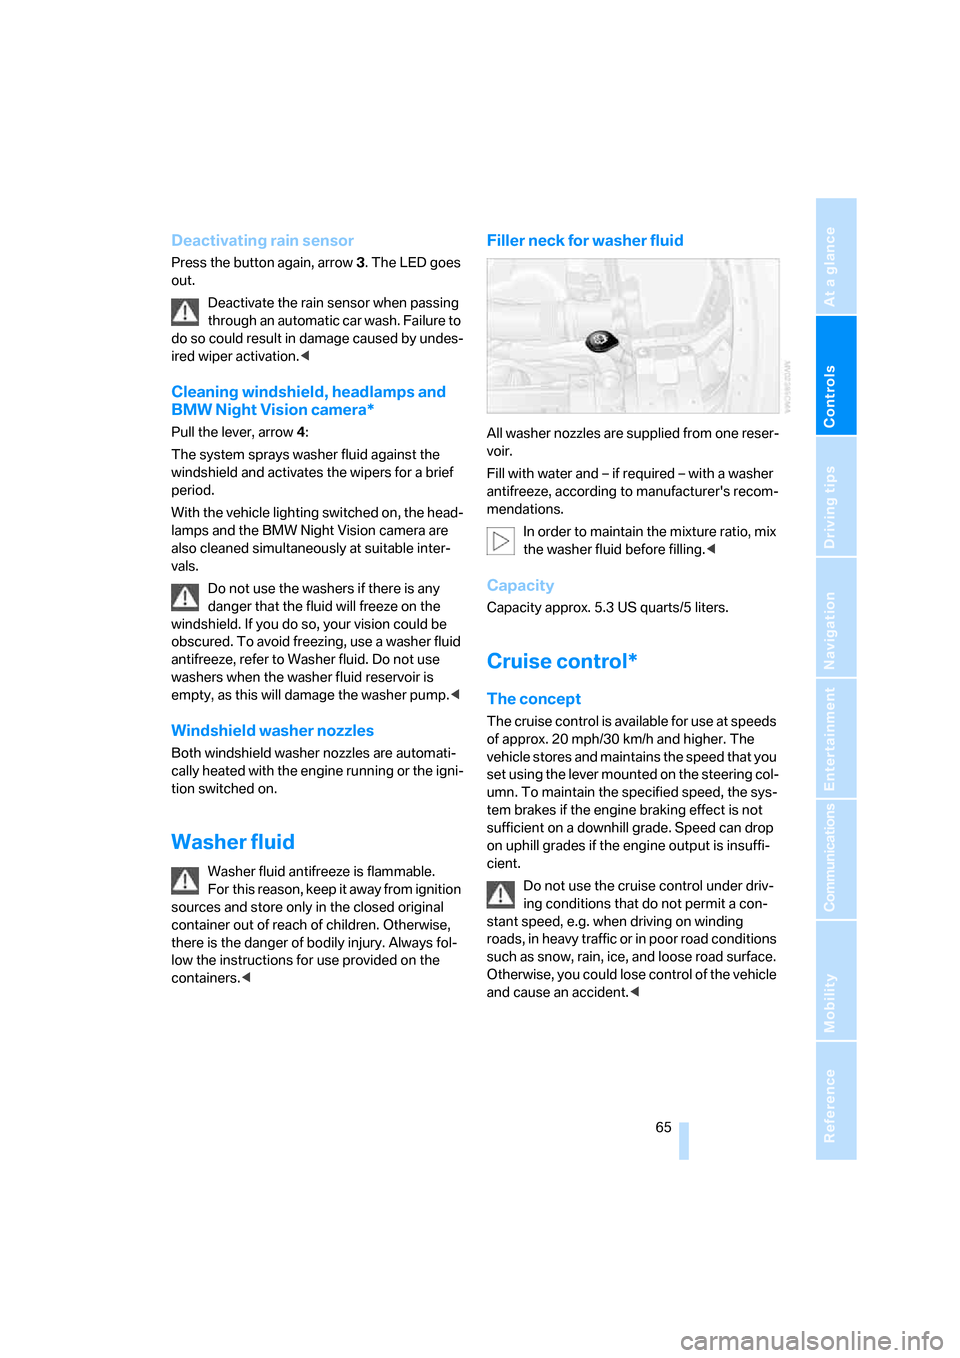
Filler neck for washer fluid
All washer nozzles are supplied from one reser-
voir.
Fill with water and – if required – with a washer
antifreeze, according to manufacturer's recom-
mendations.
In order to maintain the mixture ratio, mix
the washer fluid before filling.<
Capacity
Capacity approx. 5.3 US quarts/5 liters.
Cruise control*
The concept
The cruise control is available for use at speeds
of approx. 20 mph/30 km/h and higher. The
vehicle stores and maintains the speed that you
set using the lever mounted on the steering col-
umn. To maintain the specified speed, the sys-
tem brakes if the engine braking effect is not
sufficient on a downhill grade. Speed can drop
on uphill grades if the engine output is insuffi-
cient.
Do not use the cruise control under driv-
ing conditions that do not permit a con-
stant speed, e.g. when driving on winding
roads, in heavy traffic or in poor road conditions
such as snow, rain, ice, and loose road surface.
Otherwise, you could lose control of the vehicle
and cause an accident.<
Page 71 of 264
Controls
69Reference
At a glance
Driving tips
Communications
Navigation
Entertainment
Mobility
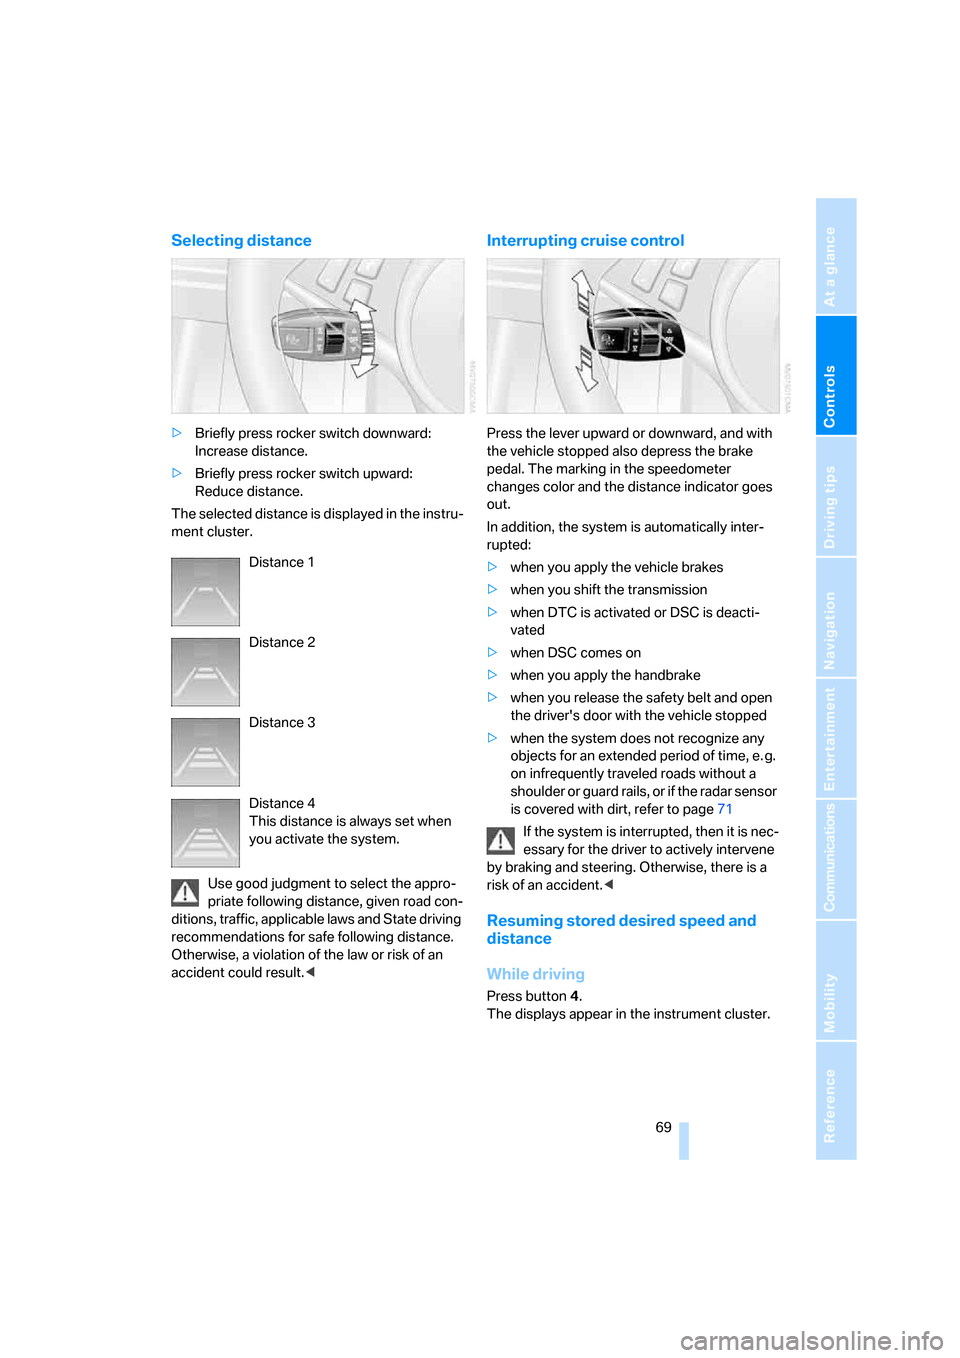
Selecting distance
>Briefly press rocker switch downward:
Increase distance.
>Briefly press rocker switch upward:
Reduce distance.
The selected distance is displayed in the instru-
ment cluster.
Use good judgment to select the appro-
priate following distance, given road con-
ditions, traffic, applicable laws and State driving
recommendations for safe following distance.
Otherwise, a violation of the law or risk of an
accident could result.<
Interrupting cruise control
Press the lever upward or downward, and with
the vehicle stopped also depress the brake
pedal. The marking in the speedometer
changes color and the distance indicator goes
out.
In addition, the system is automatically inter-
rupted:
>when you apply the vehicle brakes
>when you shift the transmission
>when DTC is activated or DSC is deacti-
vated
>when DSC comes on
>when you apply the handbrake
>when you release the safety belt and open
the driver's door with the vehicle stopped
>when the system does not recognize any
objects for an extended period of time, e. g.
on infrequently traveled roads without a
shoulder or guard rails, or if the radar sensor
is covered with dirt, refer to page71
If the system is interrupted, then it is nec-
essary for the driver to actively intervene
by braking and steering. Otherwise, there is a
risk of an accident.<
Resuming stored desired speed and
distance
While driving
Press button4.
The displays appear in the instrument cluster. Distance 1
Distance 2
Distance 3
Distance 4
This distance is always set when
you activate the system.
Page 73 of 264
Controls
71Reference
At a glance
Driving tips
Communications
Navigation
Entertainment
Mobility
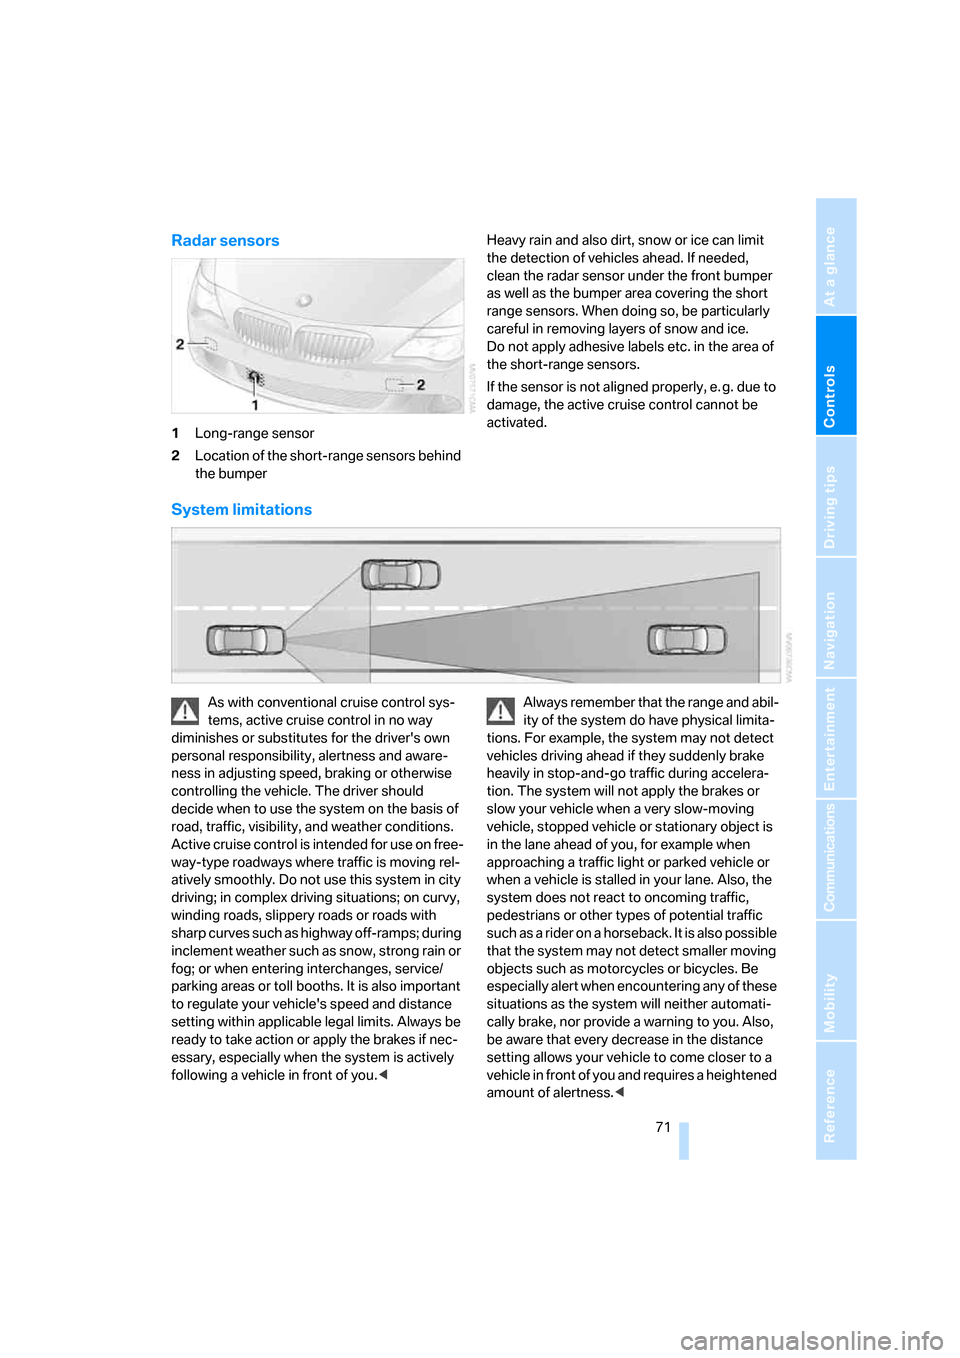
Radar sensors
1Long-range sensor
2Location of the short-range sensors behind
the bumperHeavy rain and also dirt, snow or ice can limit
the detection of vehicles ahead. If needed,
clean the radar sensor under the front bumper
as well as the bumper area covering the short
range sensors. When doing so, be particularly
careful in removing layers of snow and ice.
Do not apply adhesive labels etc. in the area of
the short-range sensors.
If the sensor is not aligned properly, e. g. due to
damage, the active cruise control cannot be
activated.
System limitations
As with conventional cruise control sys-
tems, active cruise control in no way
diminishes or substitutes for the driver's own
personal responsibility, alertness and aware-
ness in adjusting speed, braking or otherwise
controlling the vehicle. The driver should
decide when to use the system on the basis of
road, traffic, visibility, and weather conditions.
Active cruise control is intended for use on free-
way-type roadways where traffic is moving rel-
atively smoothly. Do not use this system in city
driving; in complex driving situations; on curvy,
winding roads, slippery roads or roads with
sharp curves such as highway off-ramps; during
inclement weather such as snow, strong rain or
fog; or when entering interchanges, service/
parking areas or toll booths. It is also important
to regulate your vehicle's speed and distance
setting within applicable legal limits. Always be
ready to take action or apply the brakes if nec-
essary, especially when the system is actively
following a vehicle in front of you.
tions. For example, the system may not detect
vehicles driving ahead if they suddenly brake
heavily in stop-and-go traffic during accelera-
tion. The system will not apply the brakes or
slow your vehicle when a very slow-moving
vehicle, stopped vehicle or stationary object is
in the lane ahead of you, for example when
approaching a traffic light or parked vehicle or
when a vehicle is stalled in your lane. Also, the
system does not react to oncoming traffic,
pedestrians or other types of potential traffic
such as a rider on a horseback. It is also possible
that the system may not detect smaller moving
objects such as motorcycles or bicycles. Be
especially alert when encountering any of these
situations as the system will neither automati-
cally brake, nor provide a warning to you. Also,
be aware that every decrease in the distance
setting allows your vehicle to come closer to a
vehicle in front of you and requires a heightened
amount of alertness.<
Page 87 of 264
Controls
85Reference
At a glance
Driving tips
Communications
Navigation
Entertainment
Mobility
Technology for comfort, convenience and
safety
PDC Park Distance Control*
The concept
The PDC assists you when you are parking.
Acoustic signals and an optical display
* alert
you to the approach of an object from behind
your vehicle. To measure the distance, there
are four ultrasonic sensors in each bumper.
The range of these sensors is approx. 7 ft/2 m.
However, an acoustic warning first sounds for
the sensors at the front and at the two rear cor-
ners at approx. 24 in/60 cm, and for the center
rear sensors at approx. 5 ft/1.50 m.
PDC is a parking aid that can indicate the
presence of objects when they are being
approached slowly, as is usually the case when
parking. Avoid approaching an object at high
speed; otherwise, the physical circumstances
could cause the system warning to be activated
too late.<
Switching on automatically
The system starts to operate approx. one sec-
ond after you shift into reverse or move the
selector lever into position R with the engine
running or the ignition switched on.
Wait this short time before driving off.
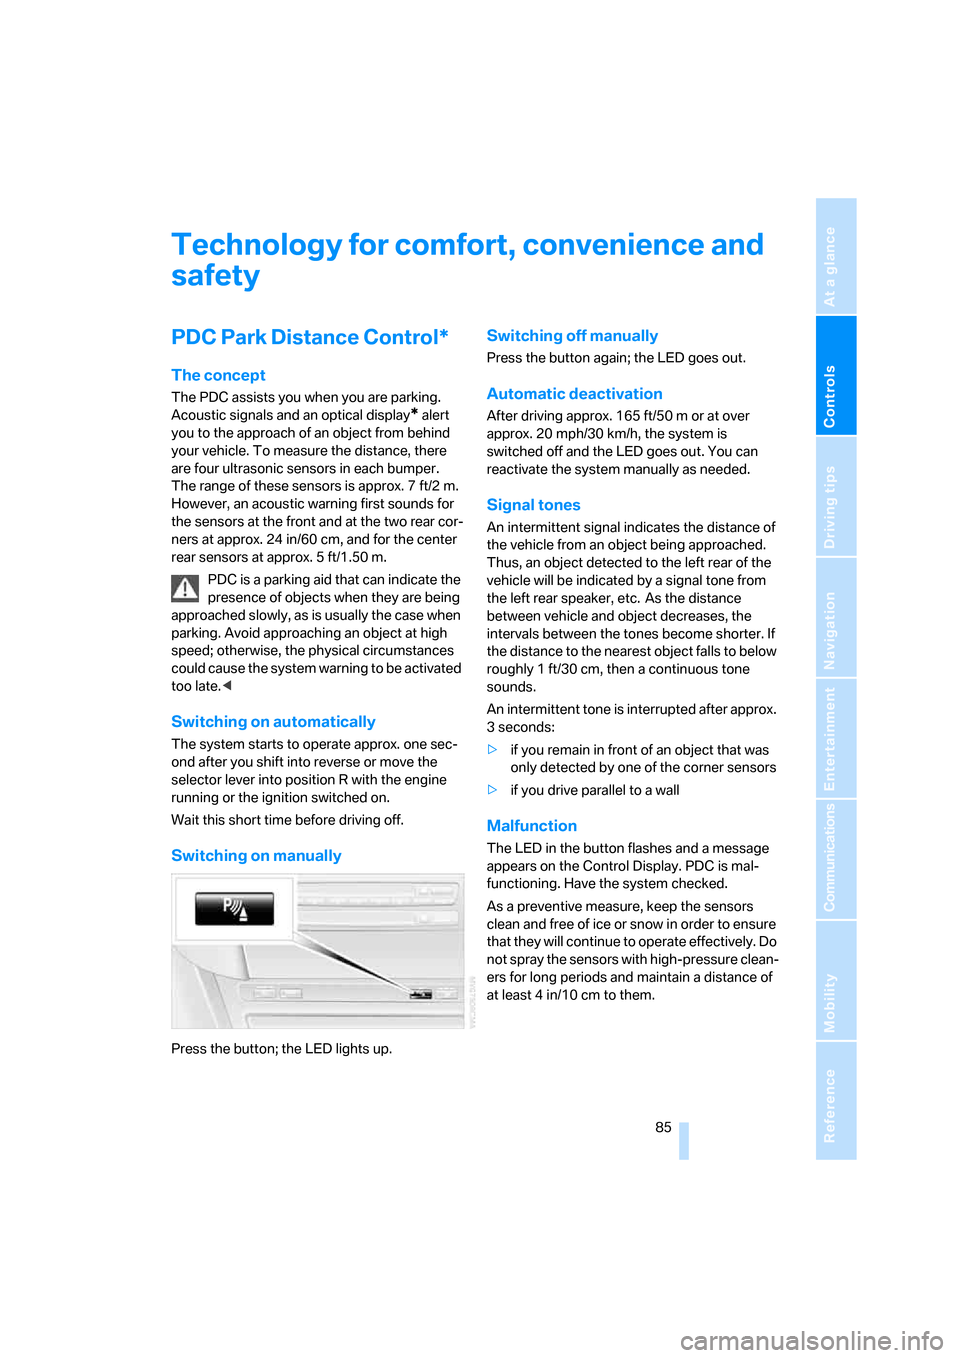
Switching on manually
Press the button; the LED lights up.
Switching off manually
Press the button again; the LED goes out.
Automatic deactivation
After driving approx. 165 ft/50 m or at over
approx. 20 mph/30 km/h, the system is
switched off and the LED goes out. You can
reactivate the system manually as needed.
Signal tones
An intermittent signal indicates the distance of
the vehicle from an object being approached.
Thus, an object detected to the left rear of the
vehicle will be indicated by a signal tone from
the left rear speaker, etc. As the distance
between vehicle and object decreases, the
intervals between the tones become shorter. If
the distance to the nearest object falls to below
roughly 1 ft/30 cm, then a continuous tone
sounds.
An intermittent tone is interrupted after approx.
3seconds:
>if you remain in front of an object that was
only detected by one of the corner sensors
>if you drive parallel to a wall
Malfunction
The LED in the button flashes and a message
appears on the Control Display. PDC is mal-
functioning. Have the system checked.
As a preventive measure, keep the sensors
clean and free of ice or snow in order to ensure
that they will continue to operate effectively. Do
not spray the sensors with high-pressure clean-
ers for long periods and maintain a distance of
at least 4 in/10 cm to them.
Page 88 of 264
Technology for comfort, convenience and safety
86
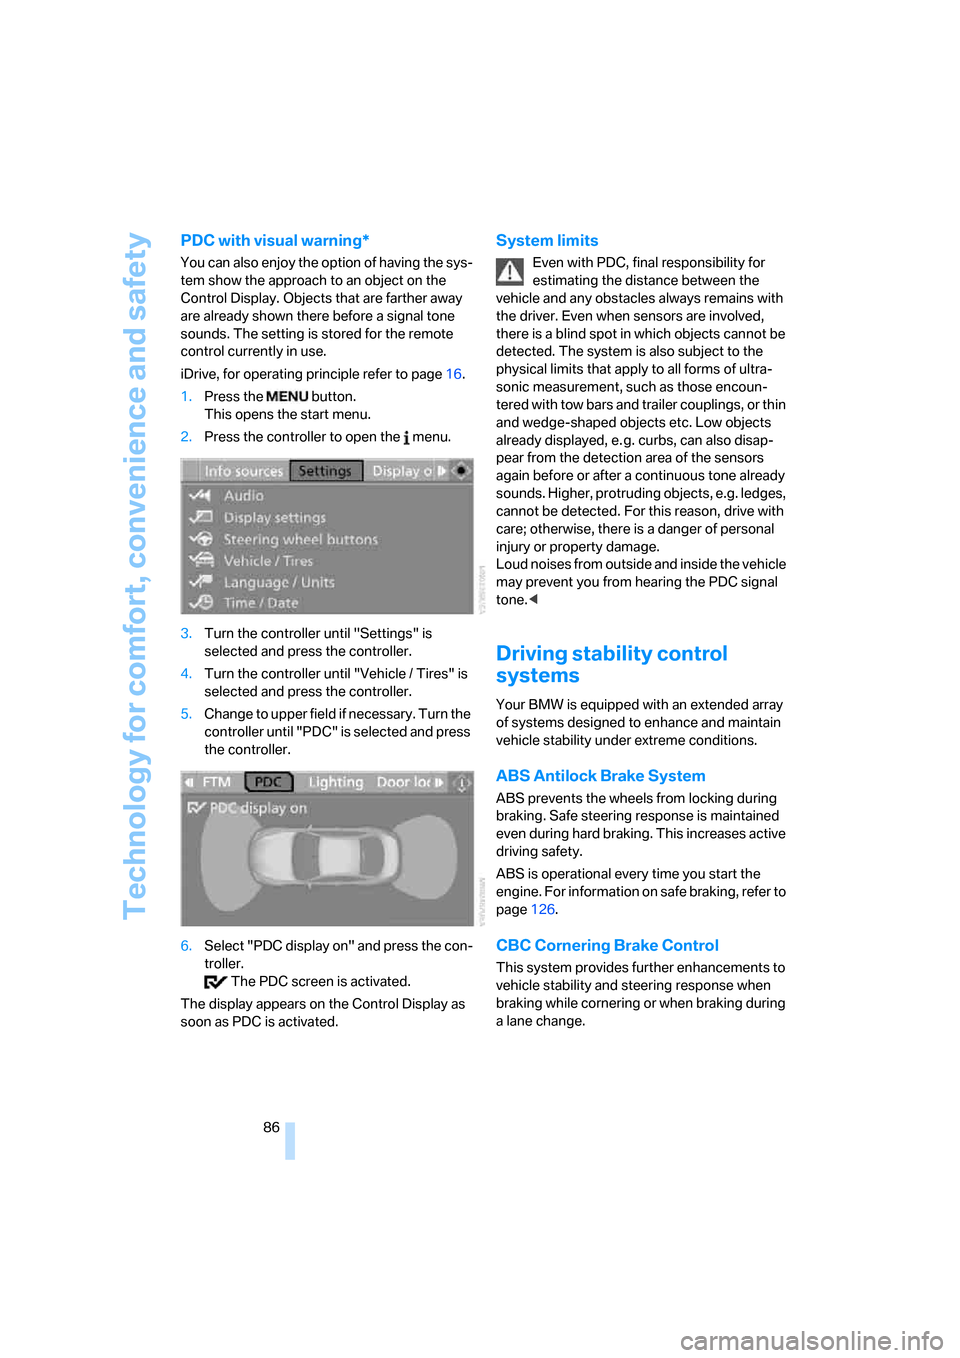
PDC with visual warning*
You can also enjoy the option of having the sys-
tem show the approach to an object on the
Control Display. Objects that are farther away
are already shown there before a signal tone
sounds. The setting is stored for the remote
control currently in use.
iDrive, for operating principle refer to page16.
1.Press the button.
This opens the start menu.
2.Press the controller to open the menu.
3.Turn the controller until "Settings" is
selected and press the controller.
4.Turn the controller until "Vehicle / Tires" is
selected and press the controller.
5.Change to upper field if necessary. Turn the
controller until "PDC" is selected and press
the controller.
6.Select "PDC display on" and press the con-
troller.
The PDC screen is activated.
The display appears on the Control Display as
soon as PDC is activated.
System limits
Even with PDC, final responsibility for
estimating the distance between the
vehicle and any obstacles always remains with
the driver. Even when sensors are involved,
there is a blind spot in which objects cannot be
detected. The system is also subject to the
physical limits that apply to all forms of ultra-
sonic measurement, such as those encoun-
tered with tow bars and trailer couplings, or thin
and wedge-shaped objects etc. Low objects
already displayed, e. g. curbs, can also disap-
pear from the detection area of the sensors
again before or after a continuous tone already
sounds. Higher, protruding objects, e.g. ledges,
cannot be detected. For this reason, drive with
care; otherwise, there is a danger of personal
injury or property damage.
Loud noises from outside and inside the vehicle
may prevent you from hearing the PDC signal
tone.<
Driving stability control
systems
Your BMW is equipped with an extended array
of systems designed to enhance and maintain
vehicle stability under extreme conditions.
ABS Antilock Brake System
ABS prevents the wheels from locking during
braking. Safe steering response is maintained
even during hard braking. This increases active
driving safety.
ABS is operational every time you start the
engine. For information on safe braking, refer to
page126.
CBC Cornering Brake Control
This system provides further enhancements to
vehicle stability and steering response when
braking while cornering or when braking during
a lane change.
Page 104 of 264
Lamps
102
Lamps
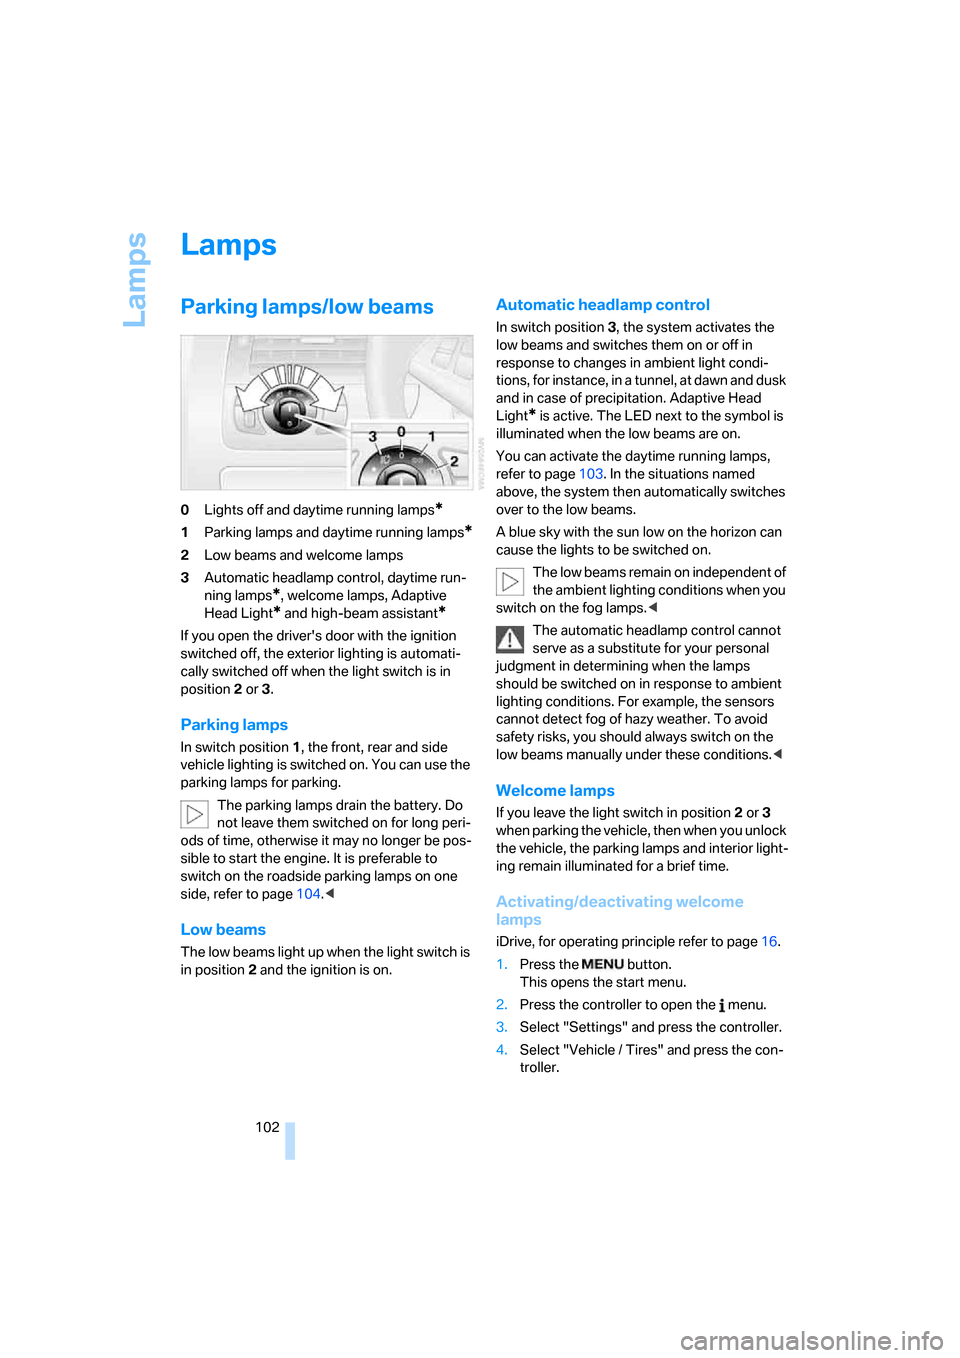
Parking lamps/low beams
0Lights off and daytime running lamps*
1Parking lamps and daytime running lamps*
2Low beams and welcome lamps
3Automatic headlamp control, daytime run-
ning lamps
*, welcome lamps, Adaptive
Head Light
* and high-beam assistant*
If you open the driver's door with the ignition
switched off, the exterior lighting is automati-
cally switched off when the light switch is in
position2 or 3.
Parking lamps
In switch position1, the front, rear and side
vehicle lighting is switched on. You can use the
parking lamps for parking.
The parking lamps drain the battery. Do
not leave them switched on for long peri-
ods of time, otherwise it may no longer be pos-
sible to start the engine. It is preferable to
switch on the roadside parking lamps on one
side, refer to page104.<
Low beams
The low beams light up when the light switch is
in position 2 and the ignition is on.
Automatic headlamp control
In switch position3, the system activates the
low beams and switches them on or off in
response to changes in ambient light condi-
tions, for instance, in a tunnel, at dawn and dusk
and in case of precipitation. Adaptive Head
Light
* is active. The LED next to the symbol is
illuminated when the low beams are on.
You can activate the daytime running lamps,
refer to page103. In the situations named
above, the system then automatically switches
over to the low beams.
A blue sky with the sun low on the horizon can
cause the lights to be switched on.
The low beams remain on independent of
the ambient lighting conditions when you
switch on the fog lamps.<
The automatic headlamp control cannot
serve as a substitute for your personal
judgment in determining when the lamps
should be switched on in response to ambient
lighting conditions. For example, the sensors
cannot detect fog of hazy weather. To avoid
safety risks, you should always switch on the
low beams manually under these conditions.<
Welcome lamps
If you leave the light switch in position2 or 3
when parking the vehicle, then when you unlock
the vehicle, the parking lamps and interior light-
ing remain illuminated for a brief time.
Activating/deactivating welcome
lamps
iDrive, for operating principle refer to page16.
1.Press the button.
This opens the start menu.
2.Press the controller to open the menu.
3.Select "Settings" and press the controller.
4.Select "Vehicle / Tires" and press the con-
troller.