sport mode BMW 650I CONVERTIBLE 2013 Owners Manual
[x] Cancel search | Manufacturer: BMW, Model Year: 2013, Model line: 650I CONVERTIBLE, Model: BMW 650I CONVERTIBLE 2013Pages: 240, PDF Size: 9.64 MB
Page 8 of 240
ditions and homologation requirements in your
country and continental region in order to deliver
the full driving pleasure while the vehicle is op‐
erated under those conditions. If you wish to op‐
erate your vehicle in another country or region,
you may be required to adapt your vehicle to
meet different prevailing operating conditions
and homologation requirements. You should
also be aware of any applicable warranty limita‐
tions or exclusions for such country or region. In
such case, please contact Customer Relations
for further information.
Maintenance
Maintain the vehicle regularly to sustain the road
safety, operational reliability and the New Vehi‐
cle Limited Warranty.
Specifications for required maintenance meas‐
ures:▷BMW Maintenance system▷Service and Warranty Information Booklet
for US models▷Warranty and Service Guide Booklet for
Canadian models
If the vehicle is not maintained according to
these specifications, this could result in serious
damage to the vehicle. Such damage is not cov‐
ered by the BMW New Vehicle Limited War‐
ranty.
Reporting safety defects
For US customers
The following only applies to vehicles owned
and operated in the US.
If you believe that your vehicle has a defect
which could cause a crash or could cause injury
or death, you should immediately inform the Na‐
tional Highway Traffic Safety Administration
NHTSA, in addition to notifying BMW of North
America, LLC, P.O. Box 1227, Westwood, New
Jersey 07675-1227, Telephone
1-800-831-1117.
If NHTSA receives similar complaints, it may
open an investigation, and if it finds that a safety
defect exists in a group of vehicles, it may order
a recall and remedy campaign.
However, NHTSA cannot become involved in
individual problems between you, your dealer,
or BMW of North America, LLC.
To contact NHTSA, you may call the Vehicle
Safety Hotline toll-free at 1-888-327-4236
(TTY: 1-800-424-9153); go to http://www.safe‐
rcar.gov; or write to: Administrator, NHTSA, 400
Seventh Street, SW., Washington, DC 20590.
You can also obtain other information about mo‐
tor vehicle safety from http://www.safercar.gov
For Canadian customers
Canadian customers who wish to report a
safety-related defect to Transport Canada, De‐
fect Investigations and Recalls, may telephone
the toll-free hotline 1-800-333-0510. You can
also obtain other information about motor vehi‐
cle safety from http://www.tc.gc.ca/roadsafety.Seite 8Notes8
Online Edition for Part no. 01 40 2 903 169 - 07 12 490
Page 60 of 240
Transporting children safelyVehicle equipment
All standard, country-specific and optional
equipment that is offered in the model series is
described in this chapter. Therefore, equipment
is also described that is not available in a vehicle,
e. g., because of the selected optional equip‐
ment or country variant. This also applies for
safety-related functions and systems.
The right place for children
Note Children in the vehicle
Do not leave children unattended in the
vehicle; otherwise, they could endanger them‐
selves and other persons, e.g., by opening the
doors.◀
Children should always be in the rear
Accident research shows that the safest place
for children is in the back seat.
Transporting children in the rear
Only transport children younger than
13 years of age or shorter than 5 ft/150 cm in the
rear in child restraint fixing systems provided in
accordance with the age, weight and size of the
child; otherwise, there is an increased risk of in‐
jury in an accident.
Children 13 years of age or older must wear a
safety belt as soon as a suitable child restraint
fixing system can no longer be used, due to their
age, weight and size.◀
Children on the front passenger seat
Should it ever be necessary to use a child re‐
straint fixing system in the front passenger seat,
make sure that the front, knee and side airbags
on the front passenger side are deactivated. Au‐tomatic deactivation of front passenger airbags,
refer to page 99.
Deactivating the front passenger airbags
If a child restraint fixing system is used in
the front passenger seat, the front passenger
airbags must be deactivated; otherwise, there is
an increased risk of injury to the child when the
airbags are triggered, even with a child restraint
fixing system.◀
Installing child restraint fixing
systems
Notes Manufacturer's information for child re‐
straint fixing systems
To select, mount and use child restraint fixing
systems, observe the information provided by
the system manufacturer; otherwise, the pro‐
tective effect can be impaired.◀
On the front passenger seat
Deactivating airbags
After installing a child restraint fixing system in
the front passenger seat, make sure that the
front, knee and side airbags on the front pas‐
senger side are deactivated.
Deactivate the front passenger airbags auto‐
matically, refer to page 99
Deactivating the front passenger airbags
If a child restraint fixing system is used in
the front passenger seat, the front passenger
airbags must be deactivated; otherwise, there is
an increased risk of injury to the child when the
airbags are triggered, even with a child restraint
fixing system.◀Seite 60ControlsTransporting children safely60
Online Edition for Part no. 01 40 2 903 169 - 07 12 490
Page 74 of 240
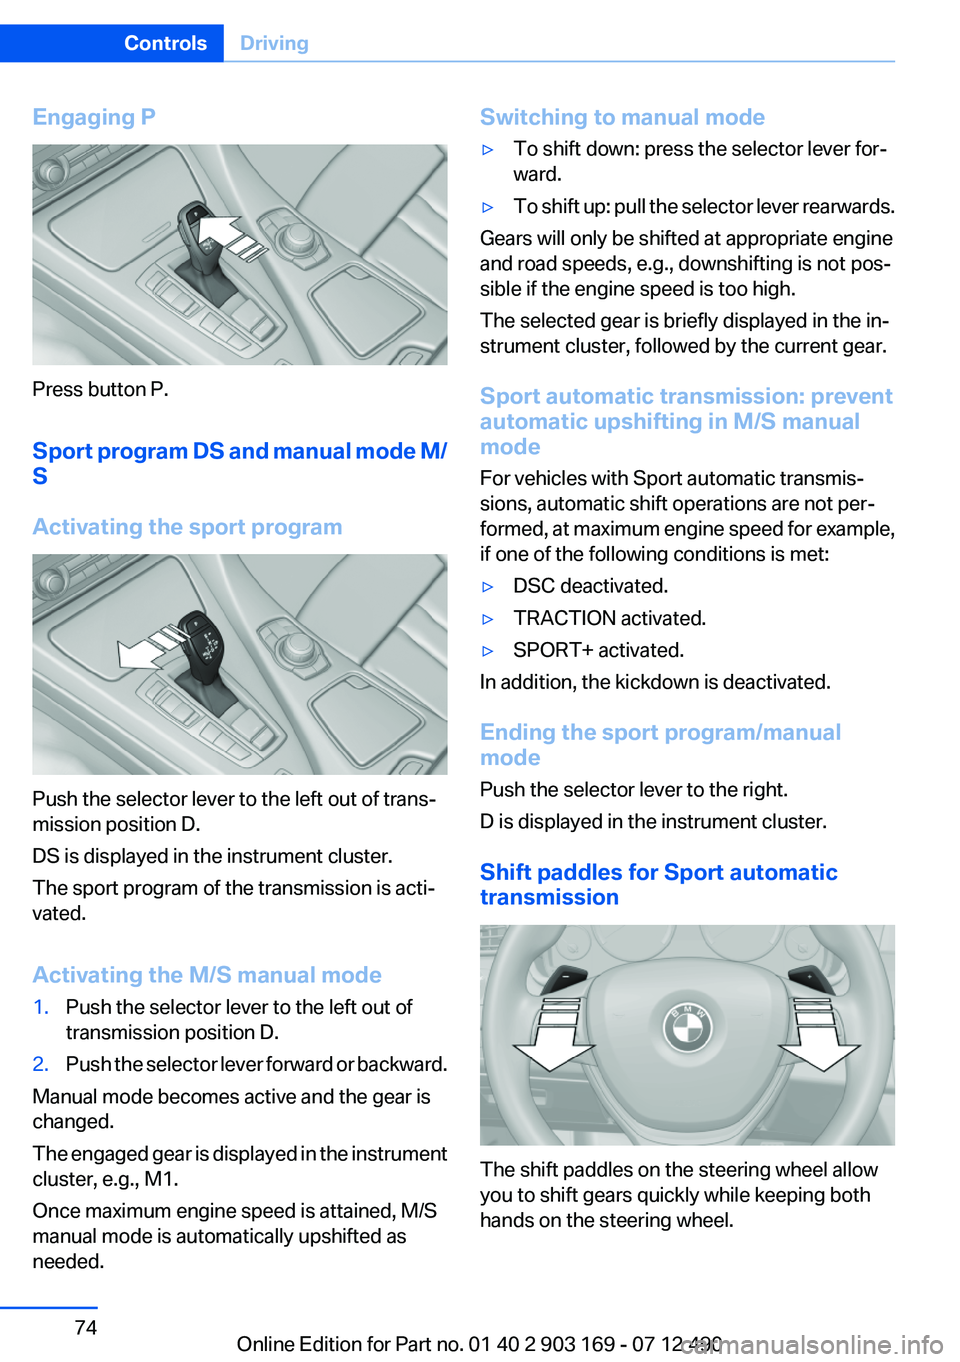
Engaging P
Press button P.
Sport program DS and manual mode M/
S
Activating the sport program
Push the selector lever to the left out of trans‐
mission position D.
DS is displayed in the instrument cluster.
The sport program of the transmission is acti‐
vated.
Activating the M/S manual mode
1.Push the selector lever to the left out of
transmission position D.2.Push the selector lever forward or backward.
Manual mode becomes active and the gear is
changed.
The engaged gear is displayed in the instrument
cluster, e.g., M1.
Once maximum engine speed is attained, M/S
manual mode is automatically upshifted as
needed.
Switching to manual mode▷To shift down: press the selector lever for‐
ward.▷To shift up: pull the selector lever rearwards.
Gears will only be shifted at appropriate engine
and road speeds, e.g., downshifting is not pos‐
sible if the engine speed is too high.
The selected gear is briefly displayed in the in‐
strument cluster, followed by the current gear.
Sport automatic transmission: prevent
automatic upshifting in M/S manual
mode
For vehicles with Sport automatic transmis‐
sions, automatic shift operations are not per‐
formed, at maximum engine speed for example,
if one of the following conditions is met:
▷DSC deactivated.▷TRACTION activated.▷SPORT+ activated.
In addition, the kickdown is deactivated.
Ending the sport program/manual
mode
Push the selector lever to the right.
D is displayed in the instrument cluster.
Shift paddles for Sport automatic
transmission
The shift paddles on the steering wheel allow
you to shift gears quickly while keeping both
hands on the steering wheel.
Seite 74ControlsDriving74
Online Edition for Part no. 01 40 2 903 169 - 07 12 490
Page 78 of 240
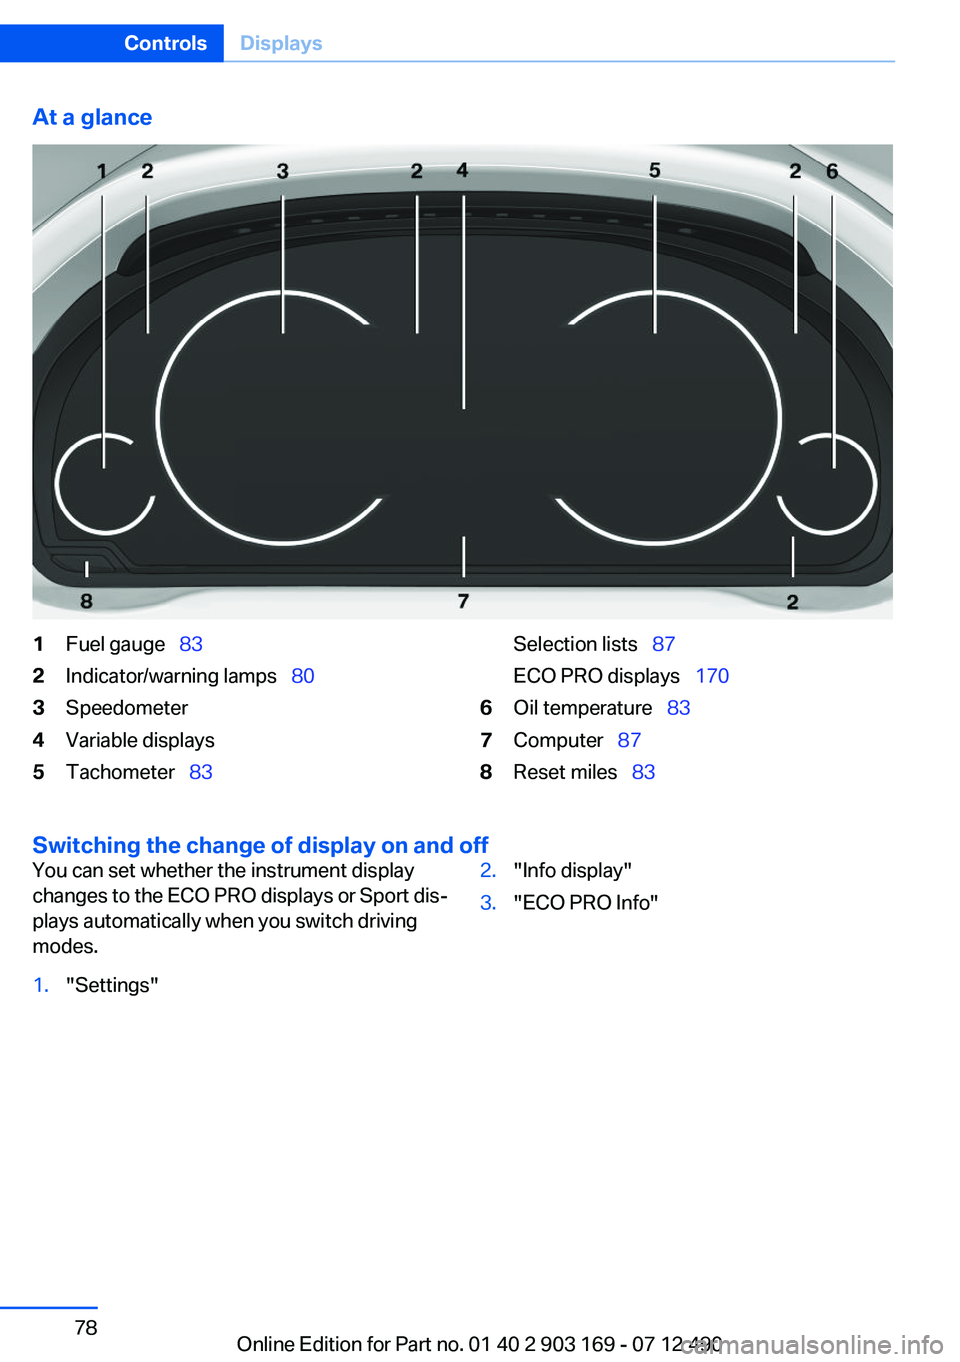
At a glance1Fuel gauge 832Indicator/warning lamps 803Speedometer4Variable displays5Tachometer 83Selection lists 87
ECO PRO displays 1706Oil temperature 837Computer 878Reset miles 83
Switching the change of display on and off
You can set whether the instrument display
changes to the ECO PRO displays or Sport dis‐
plays automatically when you switch driving
modes.1."Settings"2."Info display"3."ECO PRO Info"Seite 78ControlsDisplays78
Online Edition for Part no. 01 40 2 903 169 - 07 12 490
Page 80 of 240
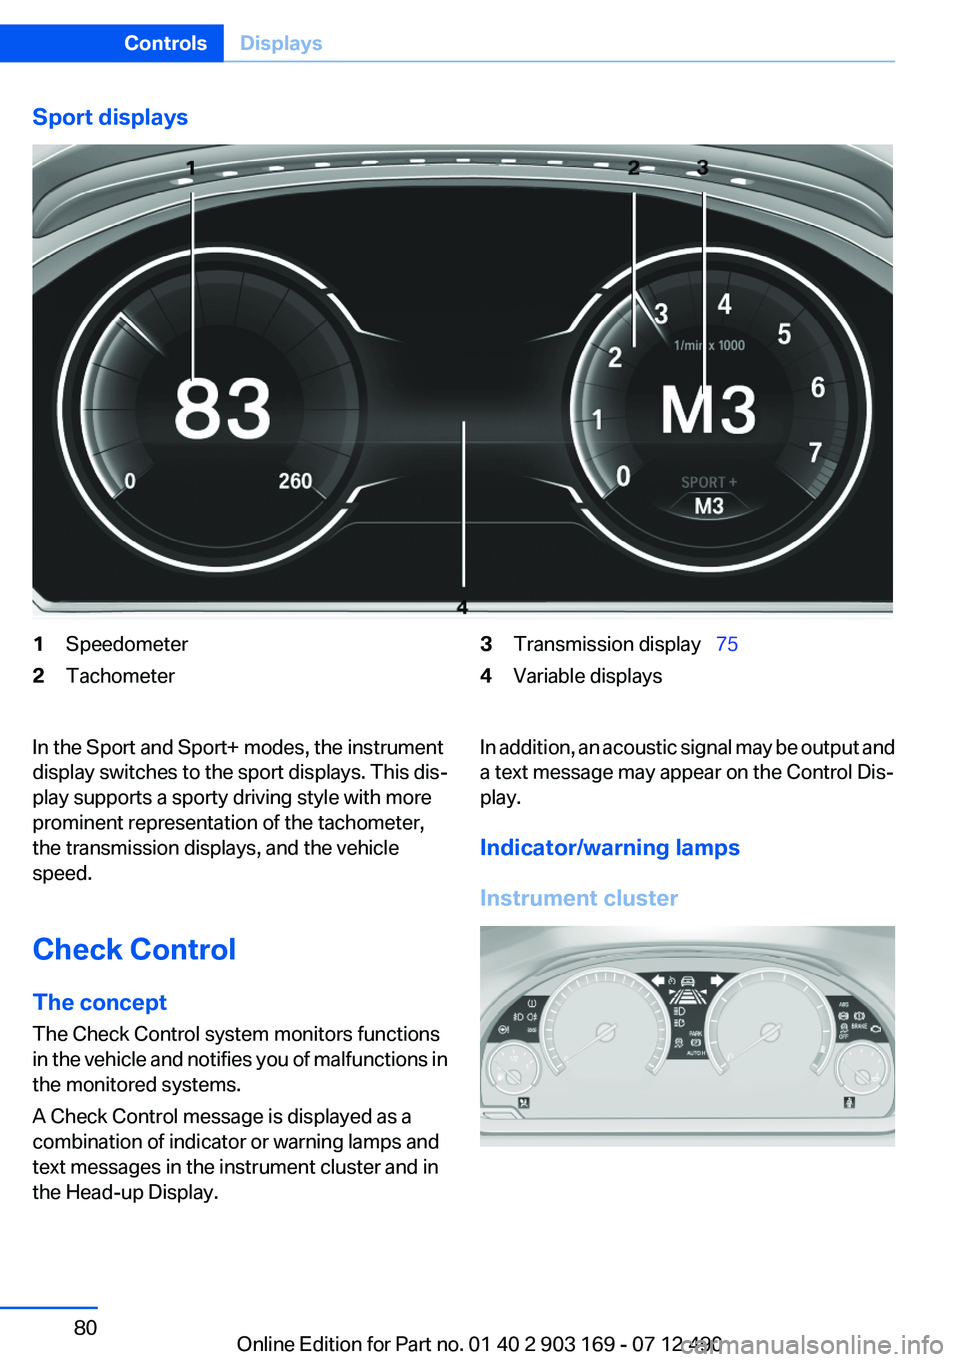
Sport displays1Speedometer2Tachometer3Transmission display 754Variable displaysIn the Sport and Sport+ modes, the instrument
display switches to the sport displays. This dis‐
play supports a sporty driving style with more
prominent representation of the tachometer,
the transmission displays, and the vehicle
speed.
Check Control
The concept
The Check Control system monitors functions
in the vehicle and notifies you of malfunctions in
the monitored systems.
A Check Control message is displayed as a
combination of indicator or warning lamps and
text messages in the instrument cluster and in
the Head-up Display.In addition, an acoustic signal may be output and
a text message may appear on the Control Dis‐
play.
Indicator/warning lamps
Instrument clusterSeite 80ControlsDisplays80
Online Edition for Part no. 01 40 2 903 169 - 07 12 490
Page 124 of 240
Activating SPORTPress the button repeatedly until
SPORT appears in the tachometer.
Configuring SPORT
When the display is activated on the Control
Display, refer to page 125, the SPORTdriving
mode can be set.
After the SPORT driving mode is activated, se‐
lect "Configure SPORT" on the displayed panel
and configure the program.
SPORT can also be configured before it is acti‐
vated:1."Settings"2."SPORT mode" or: "Driving mode"3.Configure driving mode.
This configuration is retrieved when the SPORT
driving mode is activated.
COMFORT
For a balanced tuning with maximum driving sta‐
bilization.
Activating COMFORT Press the button repeatedly until the
program display in the tachometer
goes out.
In certain situations, the system automatically
changes to the NORMAL program, automatic
program change, refer to page 122.
COMFORT+
Comfort-oriented tuning of the shock absorbers
for optimal traveling comfort with maximum
driving stabilization.
Activating COMFORT+ Press the button repeatedly until COM‐
FORT+ appears in the tachometer.
ECO PRO
ECO PRO, refer to page 170, provides consis‐
tent tuning to minimize fuel consumption for
maximum range with maximum driving stabili‐
zation.
Comfort functions and the engine controller are
adjusted.
The program can be configured to individual
specifications.
Activating ECO PRO Press button repeatedly until ECO PRO
is displayed in the instrument cluster.
Configuring ECO PRO1.Activate ECO PRO.2."Configure ECO PRO"
Make the desired settings.
Configure driving mode
Settings can be made for the following driving
modes in Driving mode:
▷SPORT mode, refer to page 124.▷ECO PRO mode, refer to page 171.
Displays in the instrument cluster
Selected program The selected program is dis‐
played in the tachometer.
Seite 124ControlsDriving stability control systems124
Online Edition for Part no. 01 40 2 903 169 - 07 12 490
Page 167 of 240
LoadingVehicle equipment
All standard, country-specific and optional
equipment that is offered in the model series is
described in this chapter. Therefore, equipment
is also described that is not available in a vehicle,
e. g., because of the selected optional equip‐
ment or country variant. This also applies for
safety-related functions and systems.
General information Overloading the vehicle
To avoid exceeding the approved carrying
capacity of the tires, never overload the vehicle.
Overloading can lead to overheating and in‐
creases the rate at which damage develops in‐
side the tires. This could result in a sudden loss
of tire inflation pressure.◀
No fluids in the trunk
Make sure that fluids do not leak into the
trunk; otherwise, the vehicle may be damaged. ◀
Determining the load limit1.Locate the following statement on your ve‐
hicle’s placard:▷The combined weight of occupants and
cargo should never exceed XXX kg or
YYY lbs. Otherwise, damage to the ve‐hicle and unstable driving situations may
result.2.Determine the combined weight of the
driver and passengers that will be riding in
your vehicle.3.Subtract the combined weight of the driver
and passengers from XXX kilograms or YYY
pounds.4.The resulting figure equals the available
amount of cargo and luggage load capacity.
For example, if the YYY amount equals
1,000 lbs and there will be four 150 lbs pas‐
sengers in your vehicle, the amount of avail‐
able cargo and luggage load capacity is
400 lbs: 1,000 lbs minus 600 lbs = 400 lbs.5.Determine the combined weight of luggage
and cargo being loaded on the vehicle. That
weight may not safely exceed the available
cargo and luggage load capacity calculated
in Step 4.
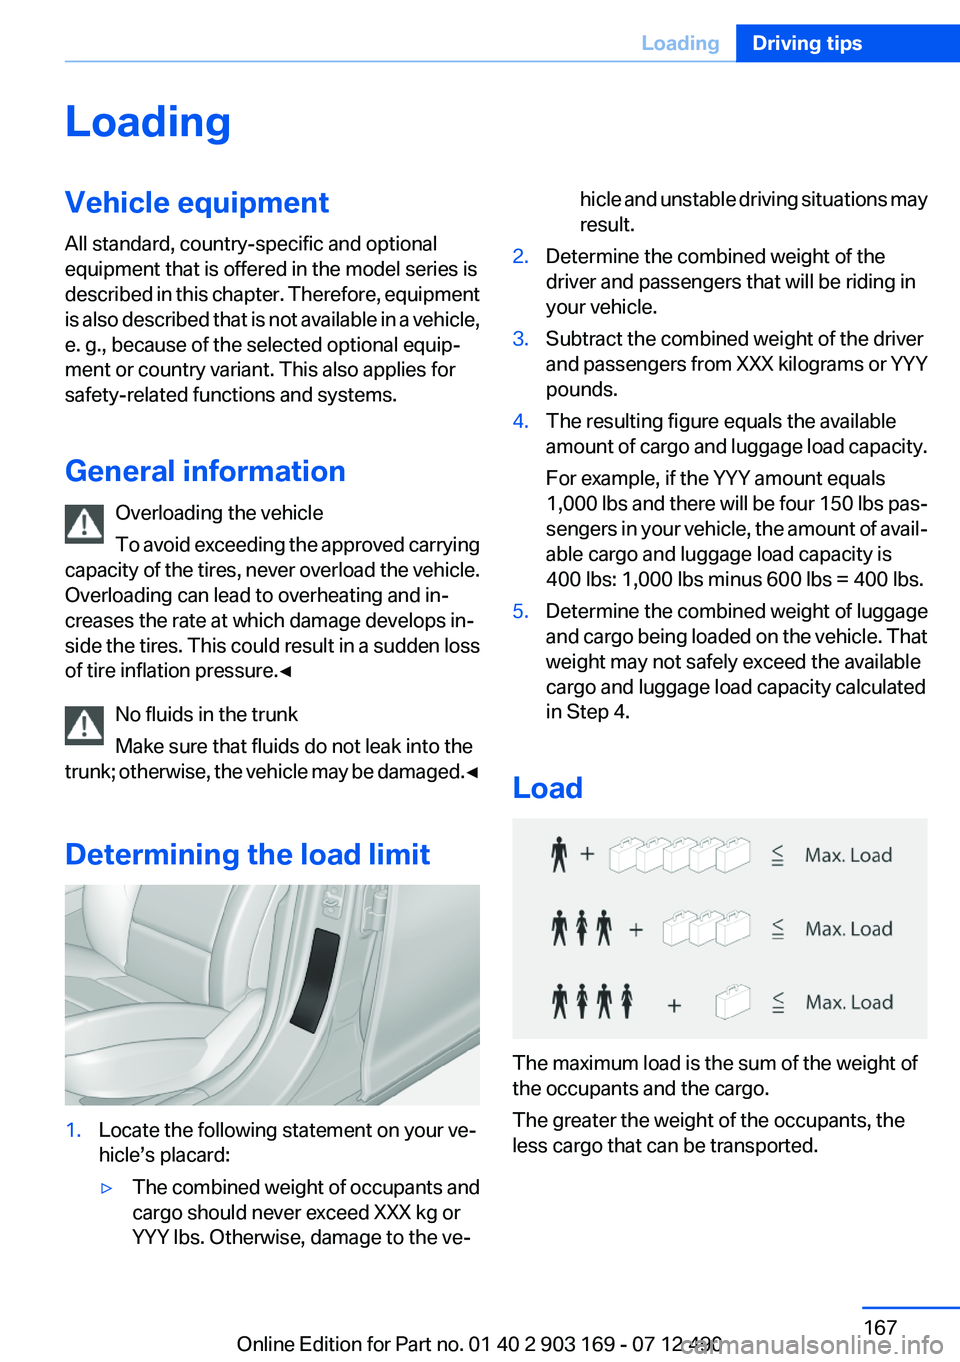
Load
The maximum load is the sum of the weight of
the occupants and the cargo.
The greater the weight of the occupants, the
less cargo that can be transported.
Seite 167LoadingDriving tips167
Online Edition for Part no. 01 40 2 903 169 - 07 12 490
Page 191 of 240
Engine oilVehicle equipment
All standard, country-specific and optional
equipment that is offered in the model series is
described in this chapter. Therefore, equipment
is also described that is not available in a vehicle,
e. g., because of the selected optional equip‐
ment or country variant. This also applies for
safety-related functions and systems.
General information
Engine oil consumption depends on driving
style and driving conditions, e.g., if your driving
style is very sporty engine oil consumption will
be considerably greater.
Therefore, regularly check the engine oil level
after refueling.
Checking the oil level
electronically
Status display
The concept
The oil level is monitored electronically during
driving and shown on the Control Display.
If the oil level reaches the minimum level, a
check control message is displayed.
Requirements
Depending on the previous displays, the status
display appears when the engine is running or
after the vehicle has been driven for at least 30
minutes.
Displaying the oil level1."Vehicle Info"2."Vehicle status"3. "Engine oil level"
Oil level display messages
Different messages appear on the display de‐
pending on the oil level. Pay attention to these
messages.
If oil level is too low, immediately add 1 US
quart/liter of oil.
Take care not to add too much engine oil.
Too much engine oil
Have the vehicle checked immediately;
otherwise, surplus oil can lead to engine dam‐
age.◀
Detailed measurement
The concept
In the detailed measurement the oil level is
checked and displayed via a scale.
During the measurement, the idle speed is in‐
creased somewhat.
General information
A detailed measurement is only possible with
certain engines.
Requirements
▷Manual transmission: shift lever in neutral
position, clutch and accelerator pedals not
depressed.▷Automatic transmission: selector lever in
transmission position N or P and accelerator
not depressed.▷Vehicle is on a level road and the engine is
running at operating temperature.Seite 191Engine oilMobility191
Online Edition for Part no. 01 40 2 903 169 - 07 12 490
Page 210 of 240
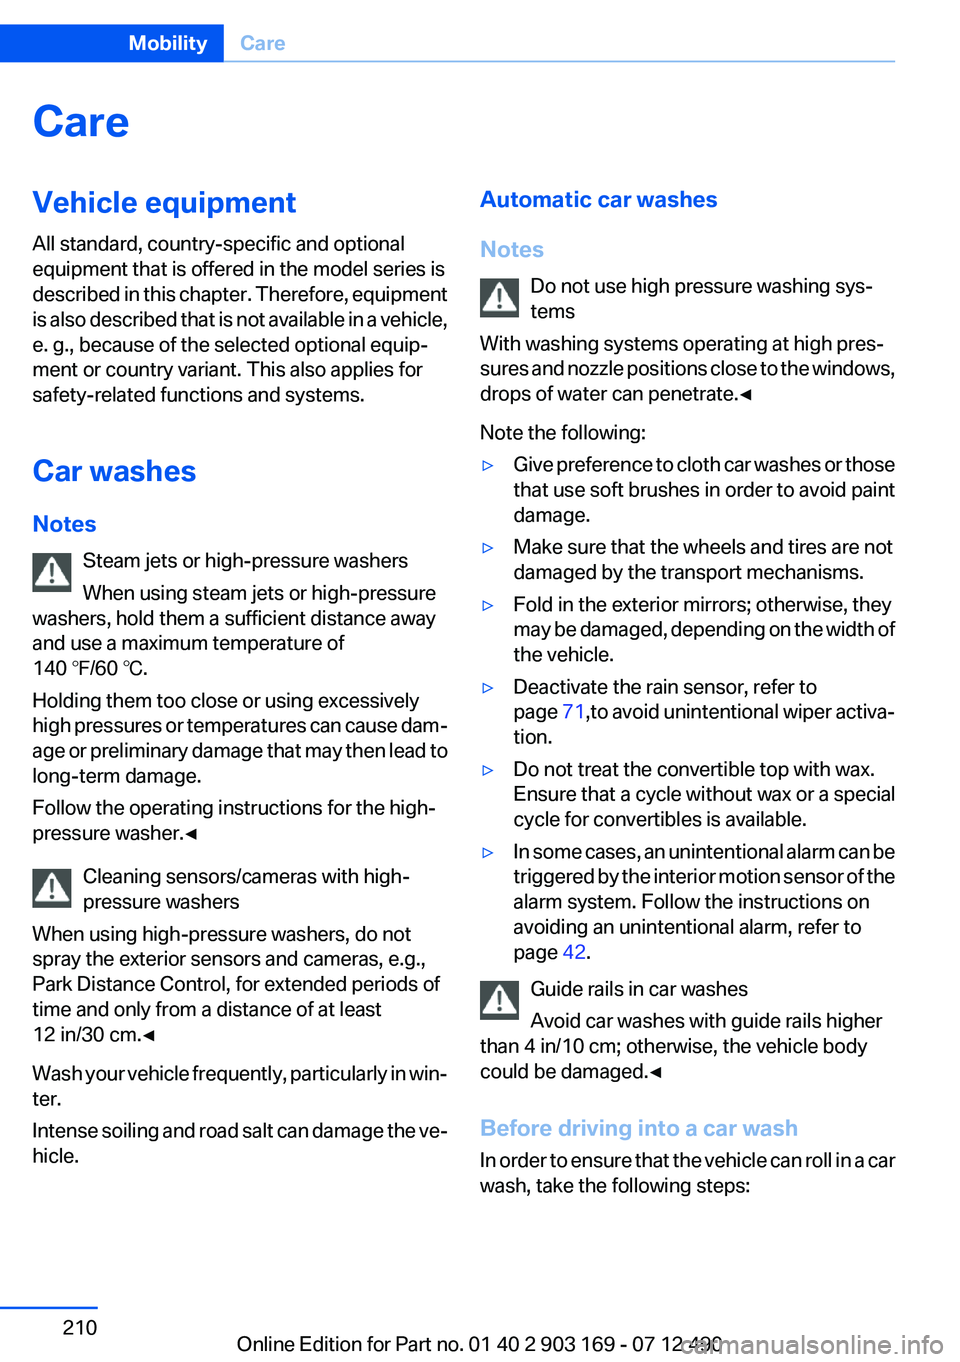
CareVehicle equipment
All standard, country-specific and optional
equipment that is offered in the model series is
described in this chapter. Therefore, equipment
is also described that is not available in a vehicle,
e. g., because of the selected optional equip‐
ment or country variant. This also applies for
safety-related functions and systems.
Car washes
Notes Steam jets or high-pressure washers
When using steam jets or high-pressure
washers, hold them a sufficient distance away
and use a maximum temperature of
140 ℉/60 ℃.
Holding them too close or using excessively
high pressures or temperatures can cause dam‐
age or preliminary damage that may then lead to
long-term damage.
Follow the operating instructions for the high-
pressure washer.◀
Cleaning sensors/cameras with high-
pressure washers
When using high-pressure washers, do not
spray the exterior sensors and cameras, e.g.,
Park Distance Control, for extended periods of
time and only from a distance of at least
12 in/30 cm.◀
Wash your vehicle frequently, particularly in win‐
ter.
Intense soiling and road salt can damage the ve‐
hicle.Automatic car washes
Notes Do not use high pressure washing sys‐
tems
With washing systems operating at high pres‐
sures and nozzle positions close to the windows,
drops of water can penetrate.◀
Note the following:▷Give preference to cloth car washes or those
that use soft brushes in order to avoid paint
damage.▷Make sure that the wheels and tires are not
damaged by the transport mechanisms.▷Fold in the exterior mirrors; otherwise, they
may be damaged, depending on the width of
the vehicle.▷Deactivate the rain sensor, refer to
page 71,to avoid unintentional wiper activa‐
tion.▷Do not treat the convertible top with wax.
Ensure that a cycle without wax or a special
cycle for convertibles is available.▷In some cases, an unintentional alarm can be
triggered by the interior motion sensor of the
alarm system. Follow the instructions on
avoiding an unintentional alarm, refer to
page 42.
Guide rails in car washes
Avoid car washes with guide rails higher
than 4 in/10 cm; otherwise, the vehicle body
could be damaged.◀
Before driving into a car wash
In order to ensure that the vehicle can roll in a car
wash, take the following steps:
Seite 210MobilityCare210
Online Edition for Part no. 01 40 2 903 169 - 07 12 490
Page 231 of 240
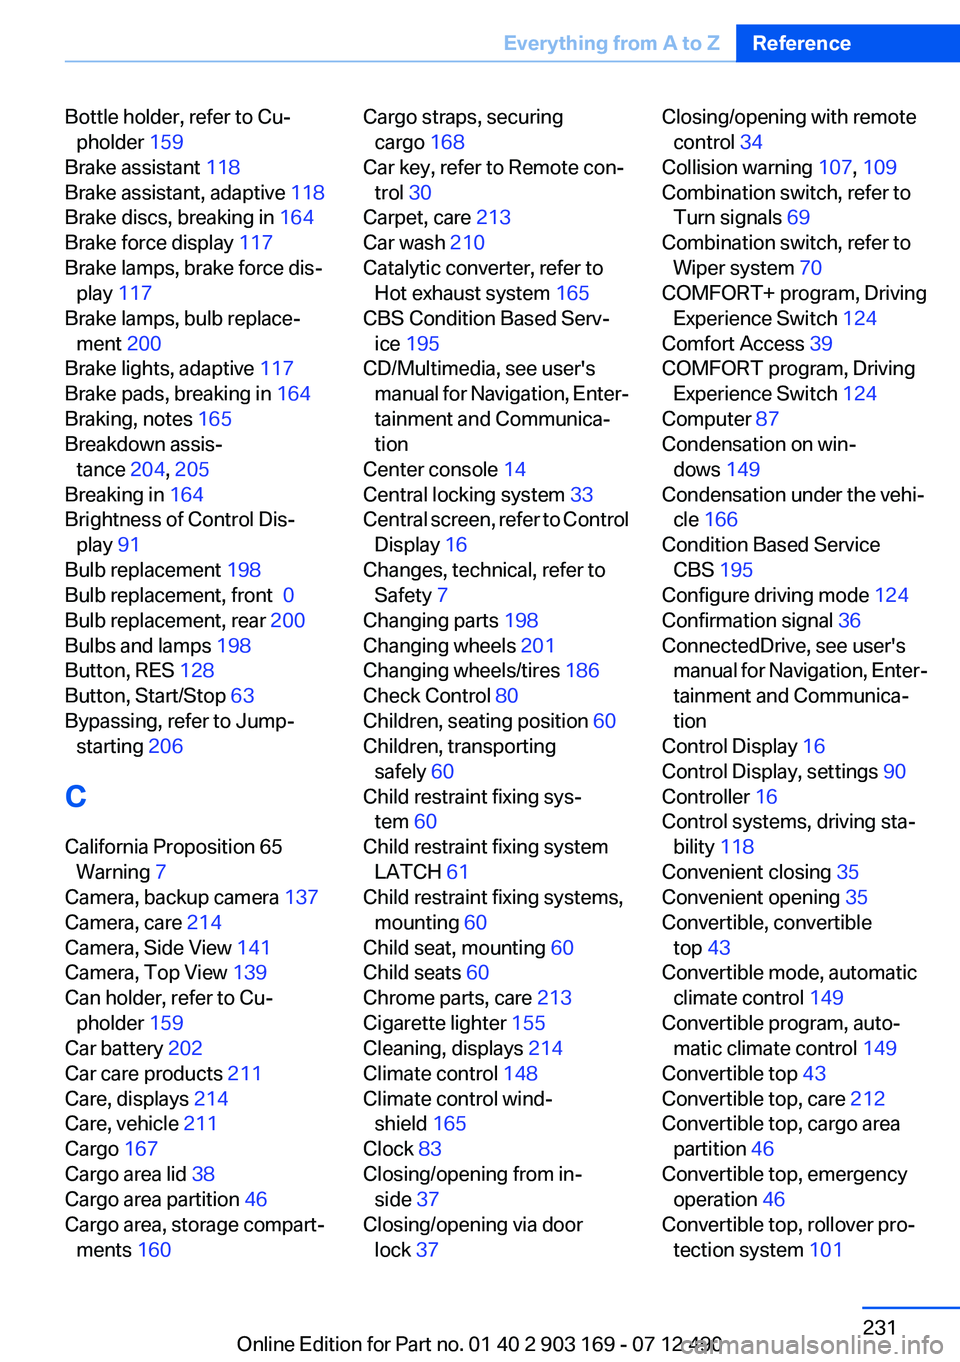
Bottle holder, refer to Cu‐pholder 159
Brake assistant 118
Brake assistant, adaptive 118
Brake discs, breaking in 164
Brake force display 117
Brake lamps, brake force dis‐ play 117
Brake lamps, bulb replace‐ ment 200
Brake lights, adaptive 117
Brake pads, breaking in 164
Braking, notes 165
Breakdown assis‐ tance 204, 205
Breaking in 164
Brightness of Control Dis‐ play 91
Bulb replacement 198
Bulb replacement, front 0
Bulb replacement, rear 200
Bulbs and lamps 198
Button, RES 128
Button, Start/Stop 63
Bypassing, refer to Jump- starting 206
C
California Proposition 65 Warning 7
Camera, backup camera 137
Camera, care 214
Camera, Side View 141
Camera, Top View 139
Can holder, refer to Cu‐ pholder 159
Car battery 202
Car care products 211
Care, displays 214
Care, vehicle 211
Cargo 167
Cargo area lid 38
Cargo area partition 46
Cargo area, storage compart‐ ments 160 Cargo straps, securing
cargo 168
Car key, refer to Remote con‐ trol 30
Carpet, care 213
Car wash 210
Catalytic converter, refer to Hot exhaust system 165
CBS Condition Based Serv‐ ice 195
CD/Multimedia, see user's manual for Navigation, Enter‐
tainment and Communica‐
tion
Center console 14
Central locking system 33
Central screen, refer to Control Display 16
Changes, technical, refer to Safety 7
Changing parts 198
Changing wheels 201
Changing wheels/tires 186
Check Control 80
Children, seating position 60
Children, transporting safely 60
Child restraint fixing sys‐ tem 60
Child restraint fixing system LATCH 61
Child restraint fixing systems, mounting 60
Child seat, mounting 60
Child seats 60
Chrome parts, care 213
Cigarette lighter 155
Cleaning, displays 214
Climate control 148
Climate control wind‐ shield 165
Clock 83
Closing/opening from in‐ side 37
Closing/opening via door lock 37 Closing/opening with remote
control 34
Collision warning 107, 109
Combination switch, refer to Turn signals 69
Combination switch, refer to Wiper system 70
COMFORT+ program, Driving Experience Switch 124
Comfort Access 39
COMFORT program, Driving Experience Switch 124
Computer 87
Condensation on win‐ dows 149
Condensation under the vehi‐ cle 166
Condition Based Service CBS 195
Configure driving mode 124
Confirmation signal 36
ConnectedDrive, see user's manual for Navigation, Enter‐
tainment and Communica‐
tion
Control Display 16
Control Display, settings 90
Controller 16
Control systems, driving sta‐ bility 118
Convenient closing 35
Convenient opening 35
Convertible, convertible top 43
Convertible mode, automatic climate control 149
Convertible program, auto‐ matic climate control 149
Convertible top 43
Convertible top, care 212
Convertible top, cargo area partition 46
Convertible top, emergency operation 46
Convertible top, rollover pro‐ tection system 101 Seite 231Everything from A to ZReference231
Online Edition for Part no. 01 40 2 903 169 - 07 12 490