park assist BMW 650I COUPE 2006 E63 Owner's Manual
[x] Cancel search | Manufacturer: BMW, Model Year: 2006, Model line: 650I COUPE, Model: BMW 650I COUPE 2006 E63Pages: 236, PDF Size: 8.21 MB
Page 11 of 236
Cockpit
10
Cockpit
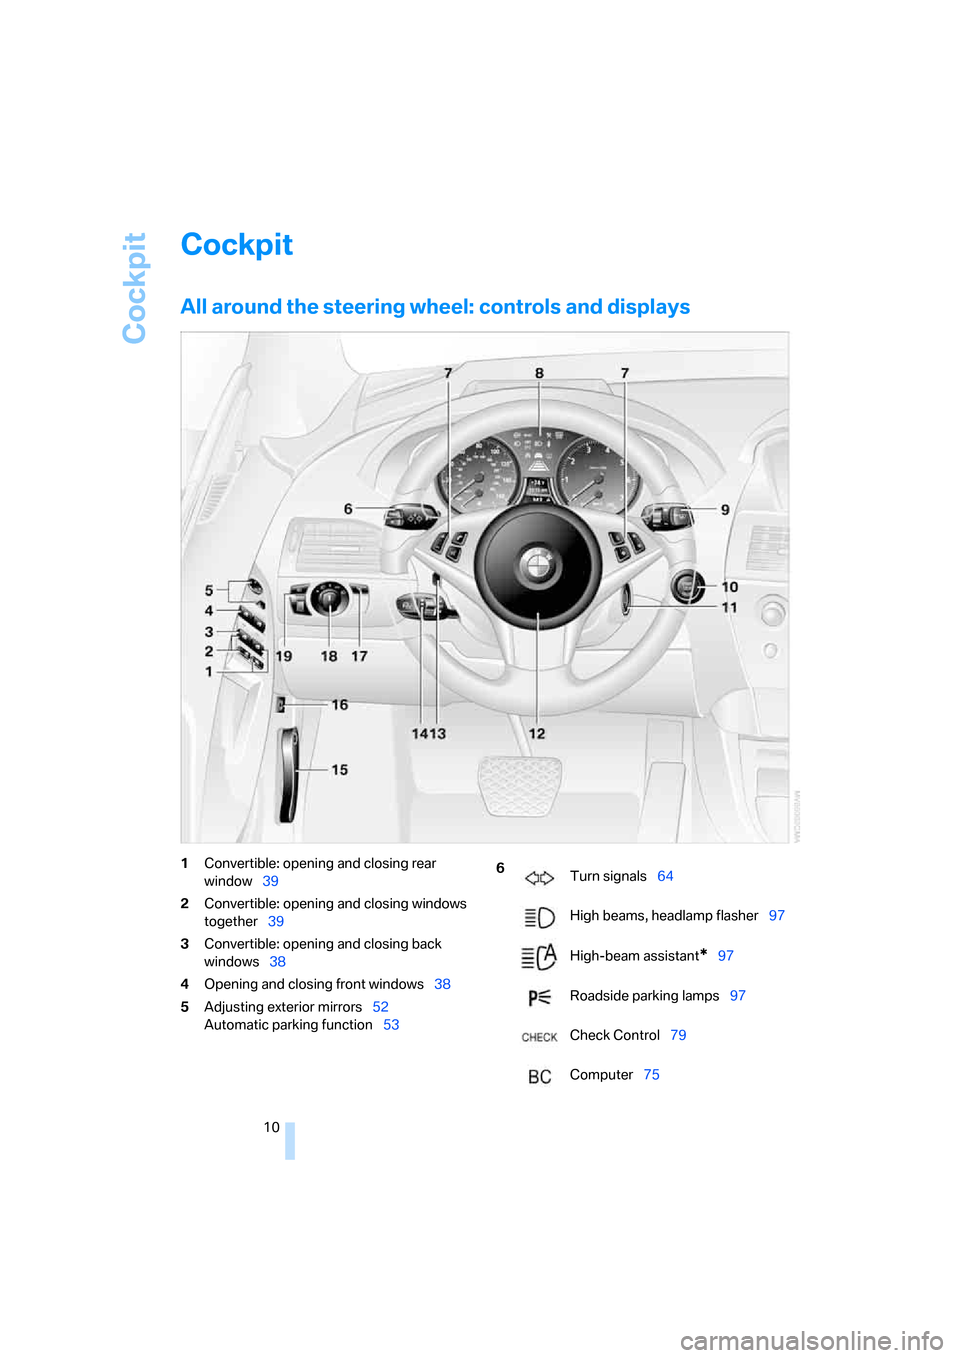
All around the steering wheel: controls and displays
1Convertible: opening and closing rear
window39
2Convertible: opening and closing windows
together39
3Convertible: opening and closing back
windows38
4Opening and closing front windows38
5Adjusting exterior mirrors52
Automatic parking function536
Turn signals64
High beams, headlamp flasher97
High-beam assistant
*97
Roadside parking lamps97
Check Control79
Computer75
Page 18 of 236
At a glance
17Reference
Controls
Driving tips
Communications
Navigation
Entertainment
Mobility
Menu overview
Communication
>Telephone*
>BMW Assist* or TeleService*
Navigation or onboard information
>Navigation system*
>Onboard info, e.g. for displaying of the
average fuel consumption
Entertainment
>Radio
>CD player and CD changer
*
Climate
>Air distribution
>Automatic program
>Parked car ventilation
menu
>Switching off the Control Display
>Tone and display settings
>Settings for your vehicle, e.g. for the central
locking system
>Display of the service requirements and
dates for statutory emission and vehicle
inspections
>Settings for the telephone
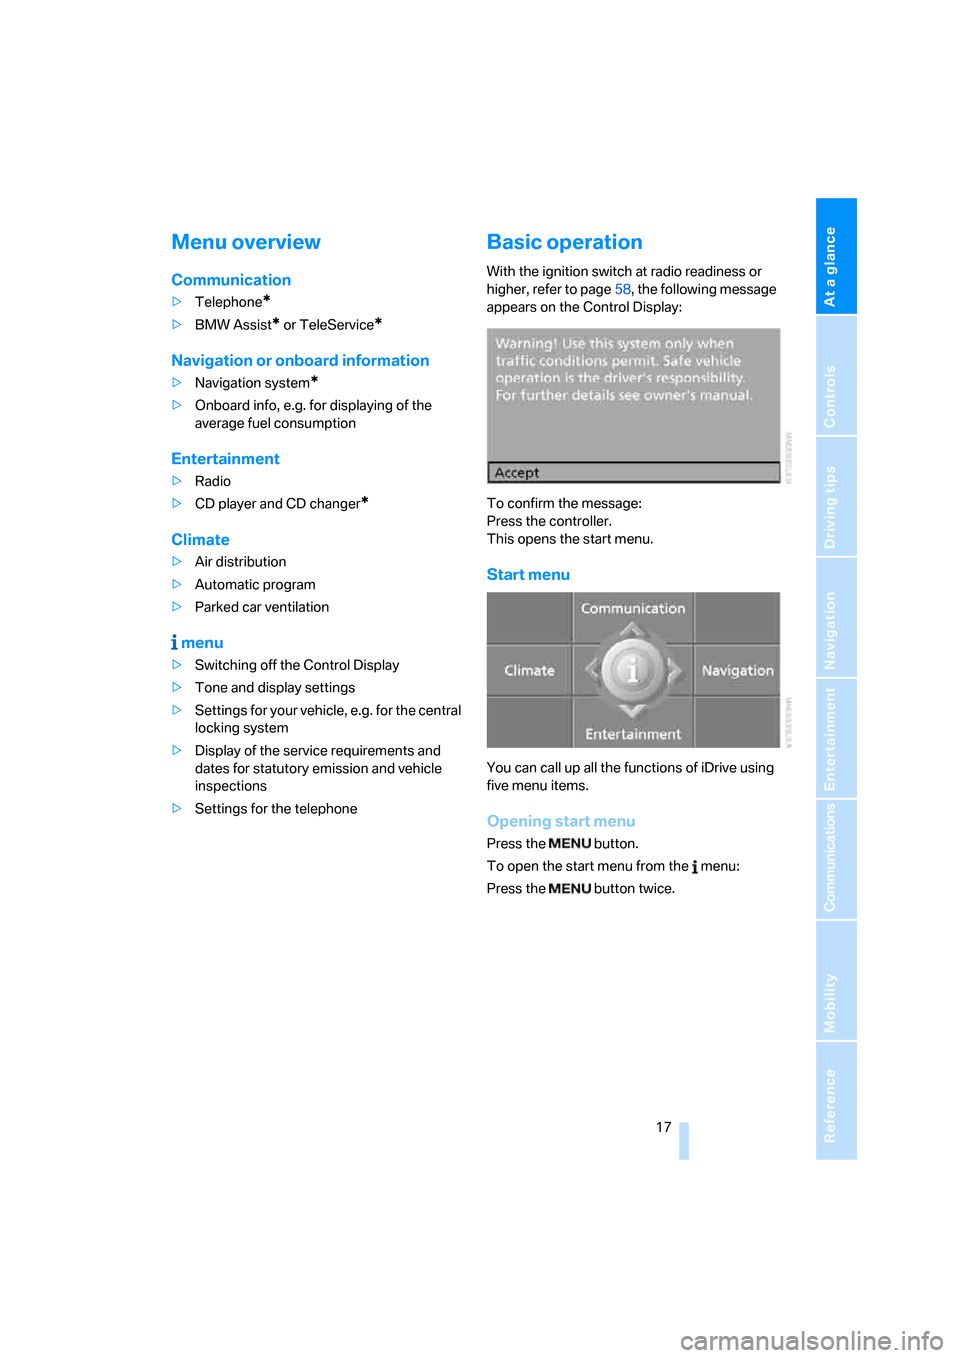
Basic operation
With the ignition switch at radio readiness or
higher, refer to page58, the following message
appears on the Control Display:
To confirm the message:
Press the controller.
This opens the start menu.
Start menu
You can call up all the functions of iDrive using
five menu items.
Opening start menu
Press the button.
To open the start menu from the menu:
Press the button twice.
Page 86 of 236
Controls
85Reference
At a glance
Driving tips
Communications
Navigation
Entertainment
Mobility
Technology for comfort, convenience and
safety
PDC Park Distance Control*
The concept
The PDC assists you when you are parking.
Acoustic signals and an optical display
* alert
you to the approach of an object from behind
your vehicle. To measure the distance, there
are four ultrasonic sensors in each bumper.
The range of these sensors is approx. 7 ft/2 m.
But an acoustic warning first sounds at approx.
24 in/60 cm for the sensors at the front and two
rear corners and at approx. 5 ft/1,50 m for the
center rear sensors.
PDC is a parking aid that can indicate the
presence of objects when they are being
approached slowly, as is usually the case when
parking. Avoid approaching an object at high
speed; otherwise, the physical circumstances
could cause the system warning to be activated
too late.<
Automatically activating
With the engine running or the ignition switched
on, the system starts to operate automatically
approx. 1 second after you shift into reverse.
Wait this short period before driving.
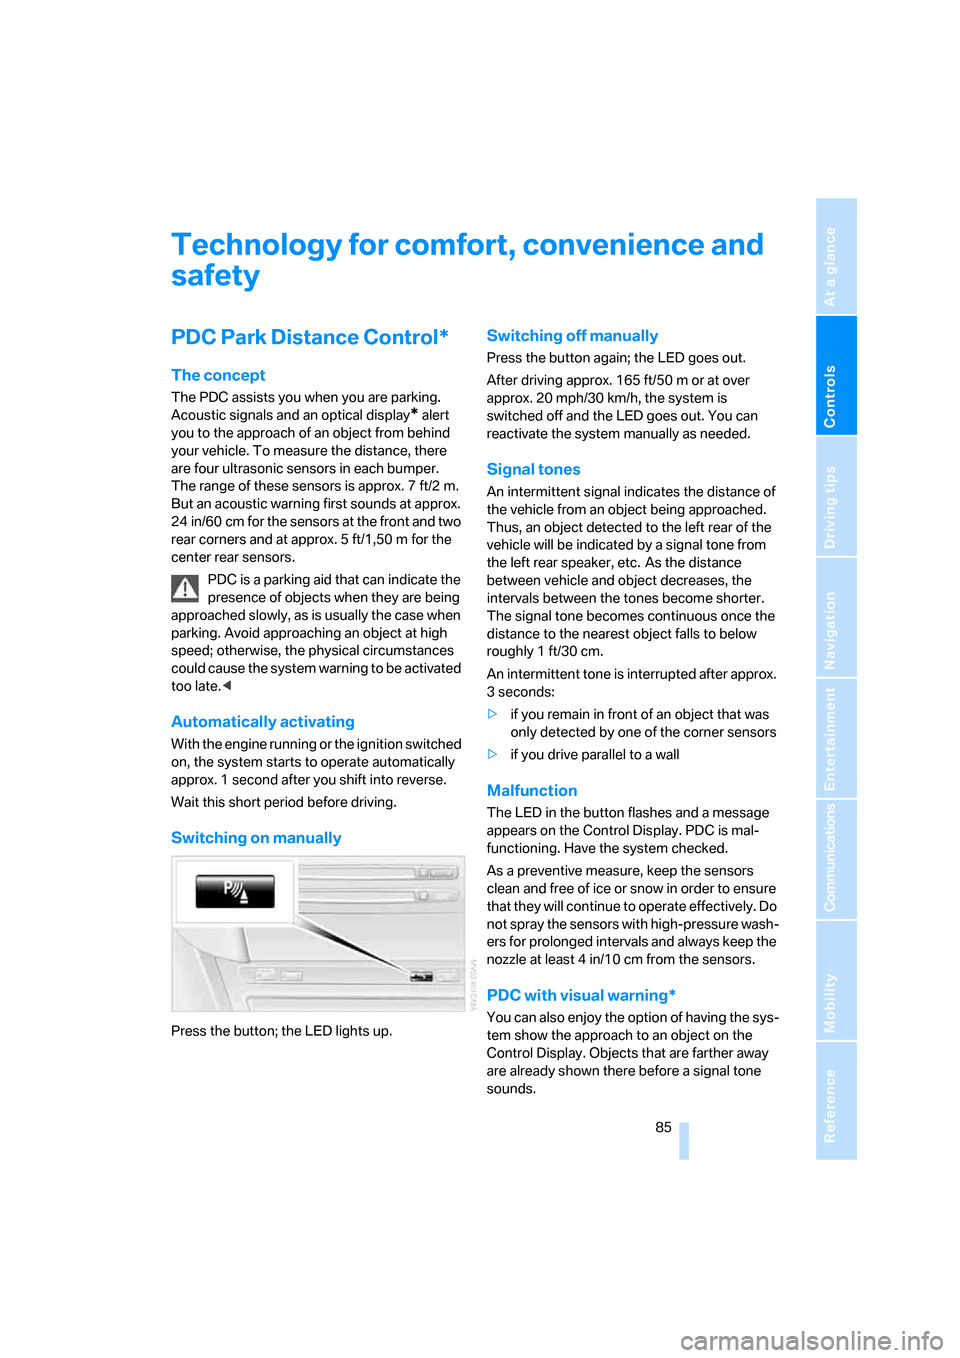
Switching on manually
Press the button; the LED lights up.
Switching off manually
Press the button again; the LED goes out.
After driving approx. 165 ft/50 m or at over
approx. 20 mph/30 km/h, the system is
switched off and the LED goes out. You can
reactivate the system manually as needed.
Signal tones
An intermittent signal indicates the distance of
the vehicle from an object being approached.
Thus, an object detected to the left rear of the
vehicle will be indicated by a signal tone from
the left rear speaker, etc. As the distance
between vehicle and object decreases, the
intervals between the tones become shorter.
The signal tone becomes continuous once the
distance to the nearest object falls to below
roughly 1 ft/30 cm.
An intermittent tone is interrupted after approx.
3seconds:
>if you remain in front of an object that was
only detected by one of the corner sensors
>if you drive parallel to a wall
Malfunction
The LED in the button flashes and a message
appears on the Control Display. PDC is mal-
functioning. Have the system checked.
As a preventive measure, keep the sensors
clean and free of ice or snow in order to ensure
that they will continue to operate effectively. Do
not spray the sensors with high-pressure wash-
ers for prolonged intervals and always keep the
nozzle at least 4 in/10 cm from the sensors.
PDC with visual warning*
You can also enjoy the option of having the sys-
tem show the approach to an object on the
Control Display. Objects that are farther away
are already shown there before a signal tone
sounds.
Page 97 of 236
Lamps
96
Lamps
Parking lamps/low beams
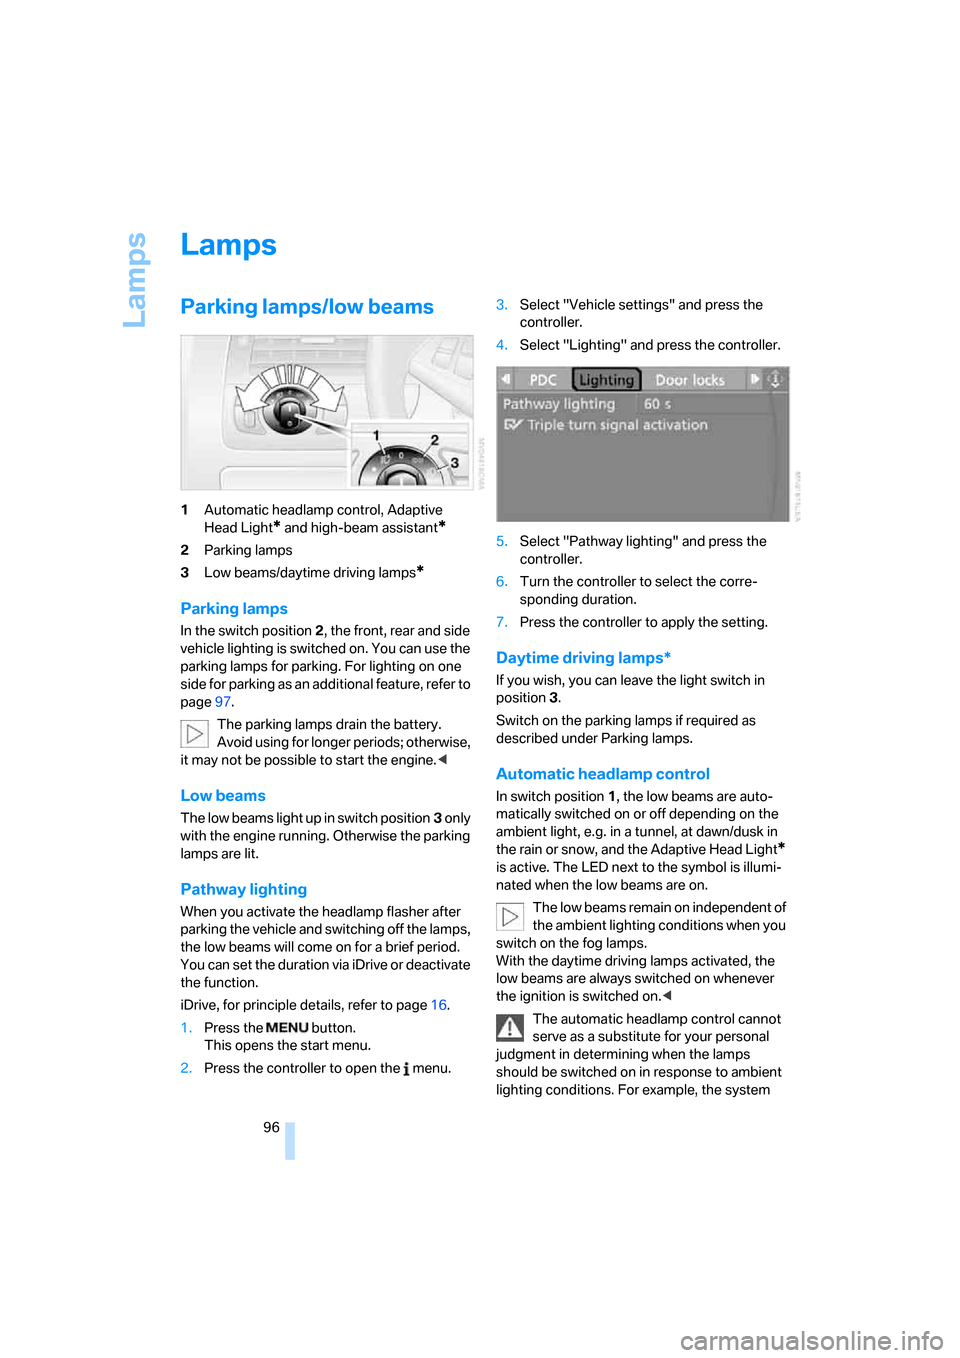
1Automatic headlamp control, Adaptive
Head Light
* and high-beam assistant*
2Parking lamps
3Low beams/daytime driving lamps
*
Parking lamps
In the switch position2, the front, rear and side
vehicle lighting is switched on. You can use the
parking lamps for parking. For lighting on one
side for parking as an additional feature, refer to
page97.
The parking lamps drain the battery.
Avoid using for longer periods; otherwise,
it may not be possible to start the engine.<
Low beams
The low beams light up in switch position3 only
with the engine running. Otherwise the parking
lamps are lit.
Pathway lighting
When you activate the headlamp flasher after
parking the vehicle and switching off the lamps,
the low beams will come on for a brief period.
You can set the duration via iDrive or deactivate
the function.
iDrive, for principle details, refer to page16.
1.Press the button.
This opens the start menu.
2.Press the controller to open the menu.3.Select "Vehicle settings" and press the
controller.
4.Select "Lighting" and press the controller.
5.Select "Pathway lighting" and press the
controller.
6.Turn the controller to select the corre-
sponding duration.
7.Press the controller to apply the setting.
Daytime driving lamps*
If you wish, you can leave the light switch in
position3.
Switch on the parking lamps if required as
described under Parking lamps.
Automatic headlamp control
In switch position1, the low beams are auto-
matically switched on or off depending on the
ambient light, e.g. in a tunnel, at dawn/dusk in
the rain or snow, and the Adaptive Head Light
*
is active. The LED next to the symbol is illumi-
nated when the low beams are on.
The low beams remain on independent of
the ambient lighting conditions when you
switch on the fog lamps.
With the daytime driving lamps activated, the
low beams are always switched on whenever
the ignition is switched on.<
The automatic headlamp control cannot
serve as a substitute for your personal
judgment in determining when the lamps
should be switched on in response to ambient
lighting conditions. For example, the system
Page 98 of 236
Controls
97Reference
At a glance
Driving tips
Communications
Navigation
Entertainment
Mobility
cannot detect fog. To avoid safety risks, you
should always switch on the lamps manually
under these conditions.<
Adaptive Head Light*
The concept
Adaptive Head Light is a variable headlamp
control system that enables better illumination
of the road surface. Depending on the steering
angle and other parameters, the light from the
headlamp follows the course of the road.
Activating Adaptive Head Light
In switch position1, the Adaptive Head Light is
active and the automatic headlamp control is
switched on.
To avoid blinding oncoming traffic, the Adaptive
Head Light is not active when driving in reverse
and points toward the passenger side when the
vehicle is stopped.
Malfunction
The LED next to the symbol for automatic head-
lamp control flashes. The Adaptive Head Light
is malfunctioning or has failed. Have the system
checked as soon as possible.
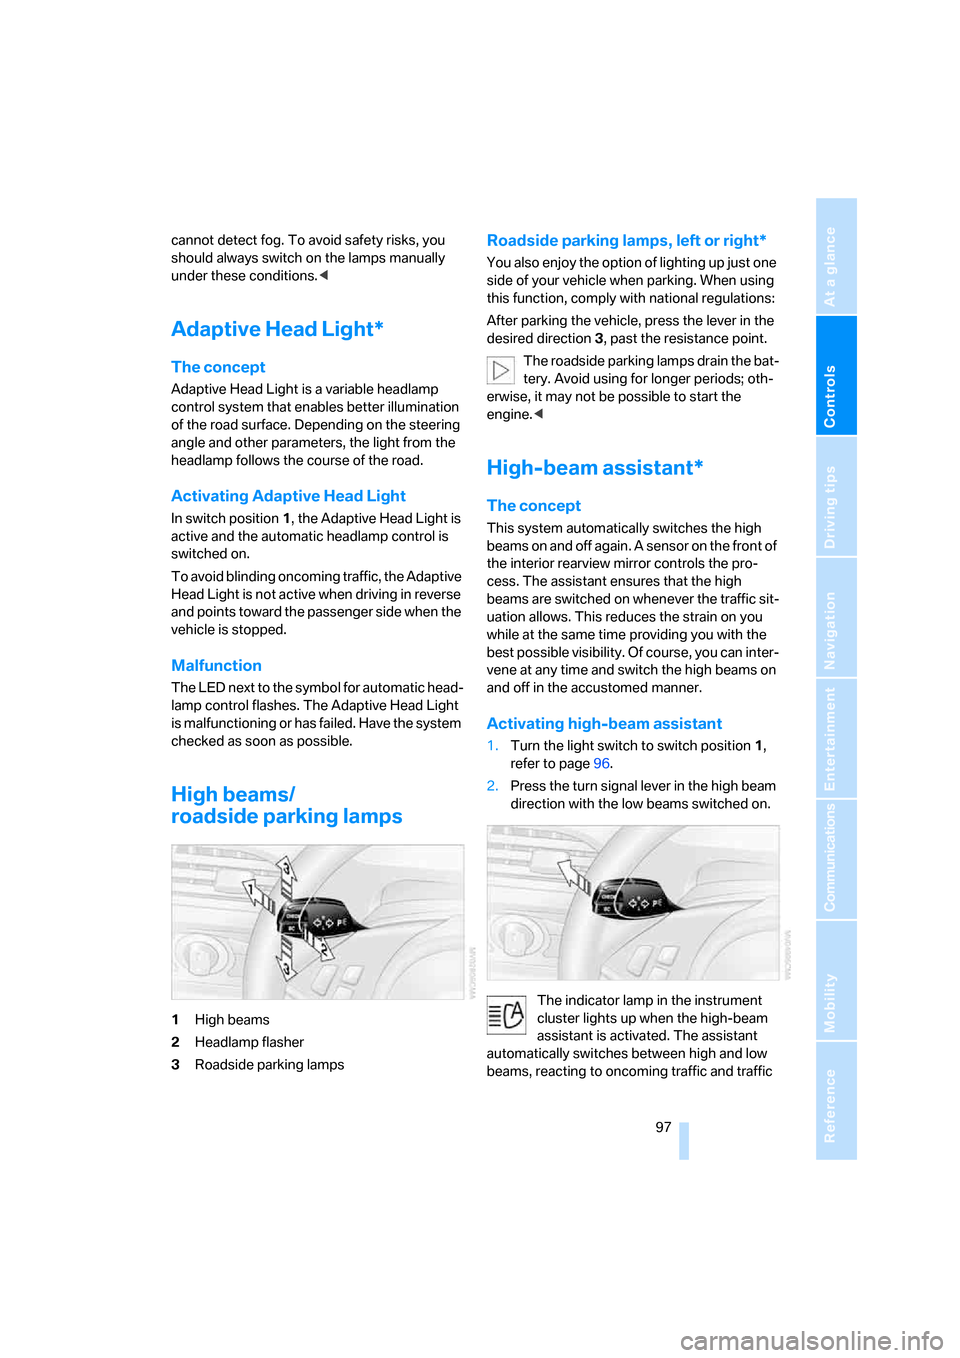
High beams/
roadside parking lamps
1High beams
2Headlamp flasher
3Roadside parking lamps
Roadside parking lamps, left or right*
You also enjoy the option of lighting up just one
side of your vehicle when parking. When using
this function, comply with national regulations:
After parking the vehicle, press the lever in the
desired direction3, past the resistance point.
The roadside parking lamps drain the bat-
tery. Avoid using for longer periods; oth-
erwise, it may not be possible to start the
engine.<
High-beam assistant*
The concept
This system automatically switches the high
beams on and off again. A sensor on the front of
the interior rearview mirror controls the pro-
cess. The assistant ensures that the high
beams are switched on whenever the traffic sit-
uation allows. This reduces the strain on you
while at the same time providing you with the
best possible visibility. Of course, you can inter-
vene at any time and switch the high beams on
and off in the accustomed manner.
Activating high-beam assistant
1.Turn the light switch to switch position1,
refer to page96.
2.Press the turn signal lever in the high beam
direction with the low beams switched on.
The indicator lamp in the instrument
cluster lights up when the high-beam
assistant is activated. The assistant
automatically switches between high and low
beams, reacting to oncoming traffic and traffic
Page 99 of 236
Lamps
98 ahead and to well-lit areas such as towns and
cities.
Manually switching between high and
low beams
You can intervene at any time if you wish or the
situation requires.
>If the high-beam assistant has switched on
the high beams, but you want to use the low
beams, simply switch to the low beams with
the turn signal lever. This also deactivates
the high-beam assistant.
To reactivate the system, briefly press the
turn signal lever in the high beam direction
again.
>If the high-beam assistant has switched on
the low beams, but you want to use the high
beams, switch to the high beams in the
accustomed manner. The system is deacti-
vated in the process and you must switch to
the low beams manually.
To reactivate the system, briefly press the
turn signal lever in the high beam direction
again.
>You use the headlamp flasher in the usual
way when the low beams are on.
System limits
The high-beam assistant cannot replace
personal decisions about the benefits of
using high beams. In situations that require
them, you should switch to the low beams man-
ually to avoid a safety risk.<
In the following sample situations, the system
either does not function or functions only in a
limited way and a personal reaction may be
required:
>Under extremely unfavorable weather con-
ditions, such as heavy fog or precipitation
>To make out poorly-lit road users such as
pedestrians, cyclists, people on horseback,
horse-drawn vehicles, train or ship traffic
close to the road and wild animals crossing
the road>In tight curves, on steep hilltops or in
depressions, with cross traffic or partially
concealed oncoming traffic on the freeway
>In poorly lit places and with highly reflective
signs
>In the low speed range
>When the windshield is fogged up, dirty or
covered with stickers, decals, etc. in the
area of the interior rearview mirror
>When the sensor is dirty. Clean the sensor
on the front side of the interior rearview mir-
ror with a cloth moistened with a small
amount of glass cleaner.
Front fog lamps
The parking lamps or low beams must
be switched on for the fog lamps to
operate. The green indicator lamp in
the instrument cluster lights up when the fog
lamps are switched on.
The fog lamps are switched off whenever the
high beams are switched on.
If the automatic headlamp control is acti-
vated, the low beams will come on auto-
matically when you switch on the fog lamps.<
Page 115 of 236
Things to remember when driving
114
Things to remember when driving
Breaking-in
Moving parts need time to adjust to one
another. To ensure that your vehicle continues
to provide optimized economy of operation
throughout an extended service life, we request
that you devote careful attention to the follow-
ing section.
Engine and differential
Always obey all official speed limits.
Up to 1,200 miles/2,000 km
Drive at changing engine and driving speeds,
however do not exceed 4,500 rpm or 100 mph/
160 km/h.
Avoid full-throttle operation and use of the
transmission's kick-down mode during these
initial miles.
From 1,200 miles/2,000 km
The engine and vehicle speed can gradually be
increased.
SMG Sequential Manual Gearbox
Do not use the acceleration assistant during the
break-in period, refer to page64.
Tires
Due to technical factors associated with their
manufacture, tires do not achieve their full
traction potential until after an initial break-in
period. It is therefore important to drive reserv-
edly during the first 200 miles/300 km.
Brake system
Brakes require an initial break-in period of
approx. 300 miles/500 km to achieve optimized
contact and wear patterns between brake pads
and rotors. Drive in a reserved manner during
this break-in period.
Clutch
The function of the clutch is only at its opti-
mized level after a distance driven of approx.
300 miles/500 km. During this break-in period,
engage the clutch gently.
Following part replacement
Observe the break-in instructions again if com-
ponents mentioned above must be replaced
after subsequent driving operation.
General driving notes
Closing luggage compartment lid
Only drive with the luggage compartment
lid completely closed, otherwise exhaust
can penetrate into the passenger compart-
ment.<
If special circumstances should make it abso-
lutely necessary to operate the vehicle with the
luggage compartment lid open:
1.Coupe: close both windows and the glass
sunroof.
Convertible: with closed top, close all win-
dows.
2.Increase the air volume of the automatic
climate control to a high level, refer to
page102.
Hot exhaust system
As in all vehicles, extremely high temper-
atures are generated in the exhaust sys-
tem. Do not remove the heat shields installed
adjacent to it, and never apply undercoating to
them. When driving, standing at idle and while
parking, take care to avoid possible contact
between the hot exhaust system and any highly
flammable materials such as hay, leaves, grass,
etc. Such contact could lead to a fire, and with it
the risk of serious property damage as well as
personal injury.<
Page 116 of 236
Driving tips
115Reference
At a glance
Controls
Communications
Navigation
Entertainment
Mobility
Mobile communications devices in
vehicle
BMW advises against using mobile com-
munications devices, e.g. mobile phones,
inside the vehicle without a direct connection
to an external antenna. Otherwise, the vehicle
electronics and mobile communications device
can interfere with one another. In addition, there
is no assurance that the radiation emitted dur-
ing transmission will be conveyed out of the
vehicle interior.<
Hydroplaning
When driving on wet or slushy roads,
reduce road speed. If you do not, a wedge
of water can form between tires and road sur-
face. This phenomenon is referred to as hydro-
planing, and is characterized by a partial or
complete loss of contact between the tires and
the road surface, ultimately undermining your
ability to steer and brake the vehicle.<
The risk of hydroplaning increases as the tread
depth of the tires decreases, also refer to Mini-
mum tire tread on page187.
Driving through water
Do not drive through water on the road if
it is deeper than 1 ft/30 cm, and then only
at walking speed at the most. Otherwise, the
vehicle's engine, electrical systems and trans-
mission may be damaged.<
Using handbrake on inclines
On inclines, do not hold the vehicle with
the clutch; use the handbrake. Otherwise
greater clutch wear will result.<
SMG Sequential Manual Gearbox
Start off quickly on slopes. Do not hold
the vehicle on a hill by applying the throt-
tle, but engage the handbrake instead. Other-
wise overheating can occur in the transmission
region.<
Starting assistant
The starting assistant enables you to start off
conveniently on slopes. The parking brake is
not required for this purpose.
1.Hold the vehicle with the footbrake.
2.Release the footbrake and immediately
drive off quickly.
The starting assistant holds the vehicle
for approx. 2 seconds after releasing the
footbrake. Depending on the load, the vehicle
may also roll back slightly during this time.
After releasing the footbrake, immediately start
quickly; otherwise, the starting assistant no
longer holds the vehicle after approx. 2 seconds
and it begins to roll back.<
Braking safely
Your BMW is equipped with ABS as a standard
feature. In situations that require it, it is best to
brake with full force. Since the vehicle maintains
steering responsiveness, you can still avoid
possible obstacles with a minimum of steering
effort.
Pulsation at the brake pedal combines with
sounds from the hydraulic circuits to indicate to
the driver that ABS is in its active mode.
Do not drive with your foot resting on the
brake pedal. Even light but consistent
pedal pressure can lead to high temperatures,
brake wear and possibly even brake failure.<
Driving in wet conditions
When driving on wet roads or in heavy rain, it is
a good idea to apply light pressure to the brake
pedal every few miles. Monitor traffic conditions
to ensure that this maneuver does not endan-
ger other road users. The heat generated in this
process helps dry the pads and rotors to ensure
that full braking efficiency will then be available
when you need it.
Hills
To prevent overheating and thus reduced
efficiency of the brake system, downshift
to a gear in which only minimal brake applica-
tions are needed when descending long or
Page 117 of 236
Things to remember when driving
116 steep downhill stretches. Even light but consis-
tent pedal pressure can lead to high tempera-
tures, brake wear and possibly even brake fail-
ure.<
The braking action of the engine can be further
increased by downshifting in the manual mode
of the automatic transmission, possibly as far as
first gear, refer to page63. This prevents an
excessive load on the brakes.
Do not drive with the clutch depressed, in
idle or with the engine switched off; other-
wise, there will be no engine braking action or
power-assisted braking and steering.
Never allow floor mats, carpets or any other
objects to protrude into the area of movement
of the pedals and impair their operation.<
Corrosion on brake rotors
When the vehicle is driven only occasionally,
during extended periods when the vehicle is not
used at all, and in operating conditions where
brake applications are less frequent, there is an
increased tendency for corrosion to form on
rotors, while contaminants accumulate on the
brake pads. This occurs because the minimum
pressure which must be exerted by the pads
during brake applications to clean the rotors is
not reached.
Should corrosion form on the brake rotors, the
brakes will tend to respond with a pulsating
effect that even extended application will fail to
cure.
When vehicle is parked
Condensation forms in the automatic climate
control during operation, and then exits under
the vehicle. Traces of condensed water under
the vehicle are therefore normal.
Before driving into a car wash
To prevent the exterior mirrors on this vehicle
from being damaged, always fold them in by
hand before entering an automatic car wash.
With comfort access and automatic
transmission
Insert the remote control into the ignition lock.
The engine can be switched off in the selector
lever position N. Also refer to page37.
Cargo loading
To avoid loading the tires beyond their
approved carrying capacity, never over-
load the vehicle. Overloading can lead to over-
heating and increases the rate at which damage
develops inside the tires. The ultimate result
can assume the form of a sudden blow-out.<
Determining loading limit
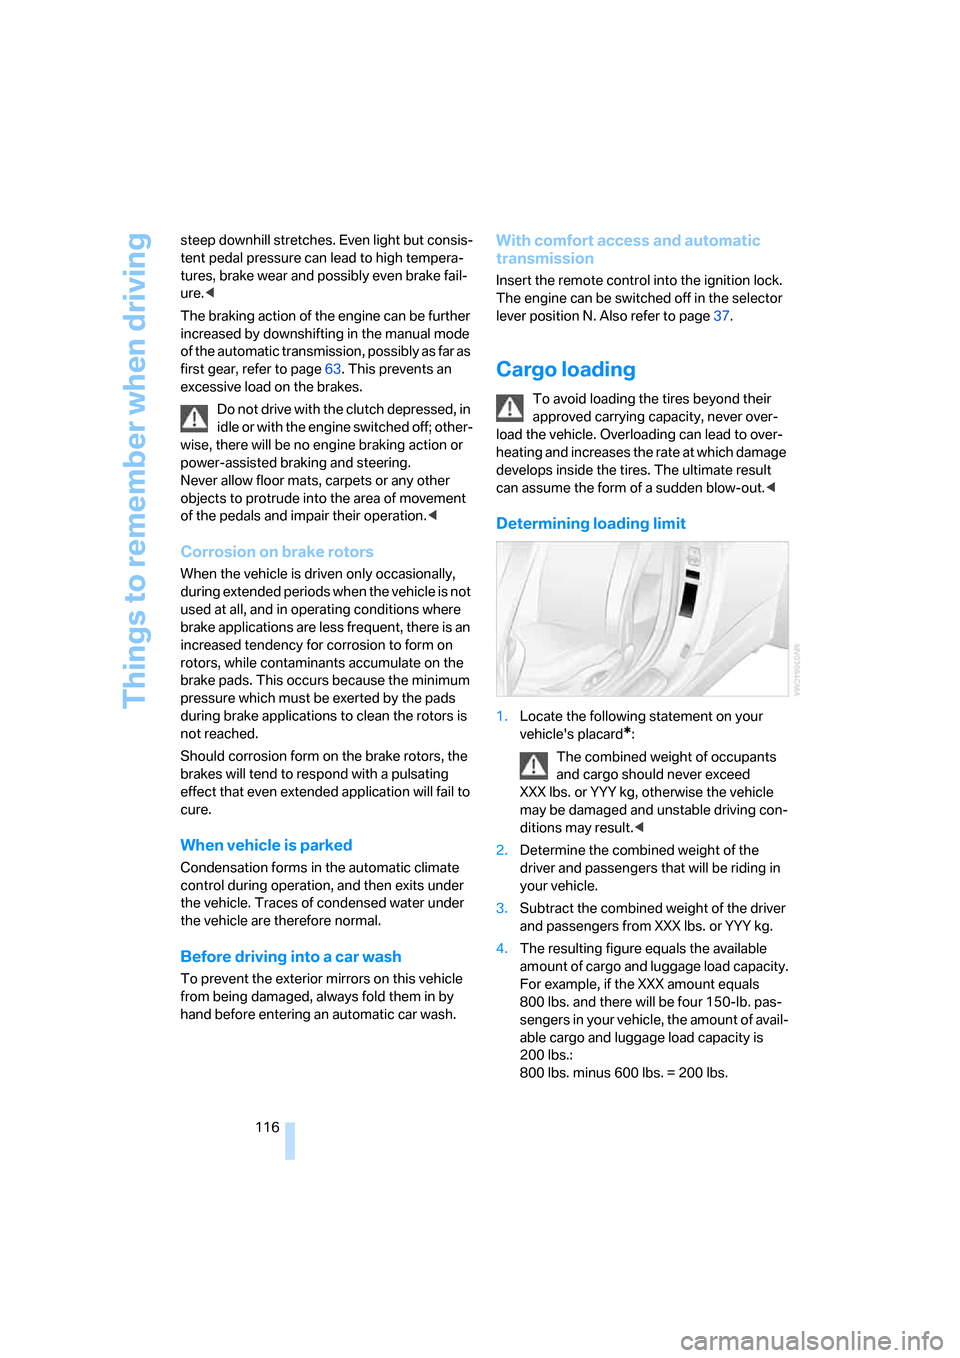
1.Locate the following statement on your
vehicle's placard
*:
The combined weight of occupants
and cargo should never exceed
XXX lbs. or YYY kg, otherwise the vehicle
may be damaged and unstable driving con-
ditions may result.<
2.Determine the combined weight of the
driver and passengers that will be riding in
your vehicle.
3.Subtract the combined weight of the driver
and passengers from XXX lbs. or YYY kg.
4.The resulting figure equals the available
amount of cargo and luggage load capacity.
For example, if the XXX amount equals
800 lbs. and there will be four 150-lb. pas-
sengers in your vehicle, the amount of avail-
able cargo and luggage load capacity is
200 lbs.:
800 lbs. minus 600 lbs. = 200 lbs.
Page 204 of 236
Mobility
203Reference
At a glance
Controls
Driving tips
Communications
Navigation
Entertainment
First-aid kit*
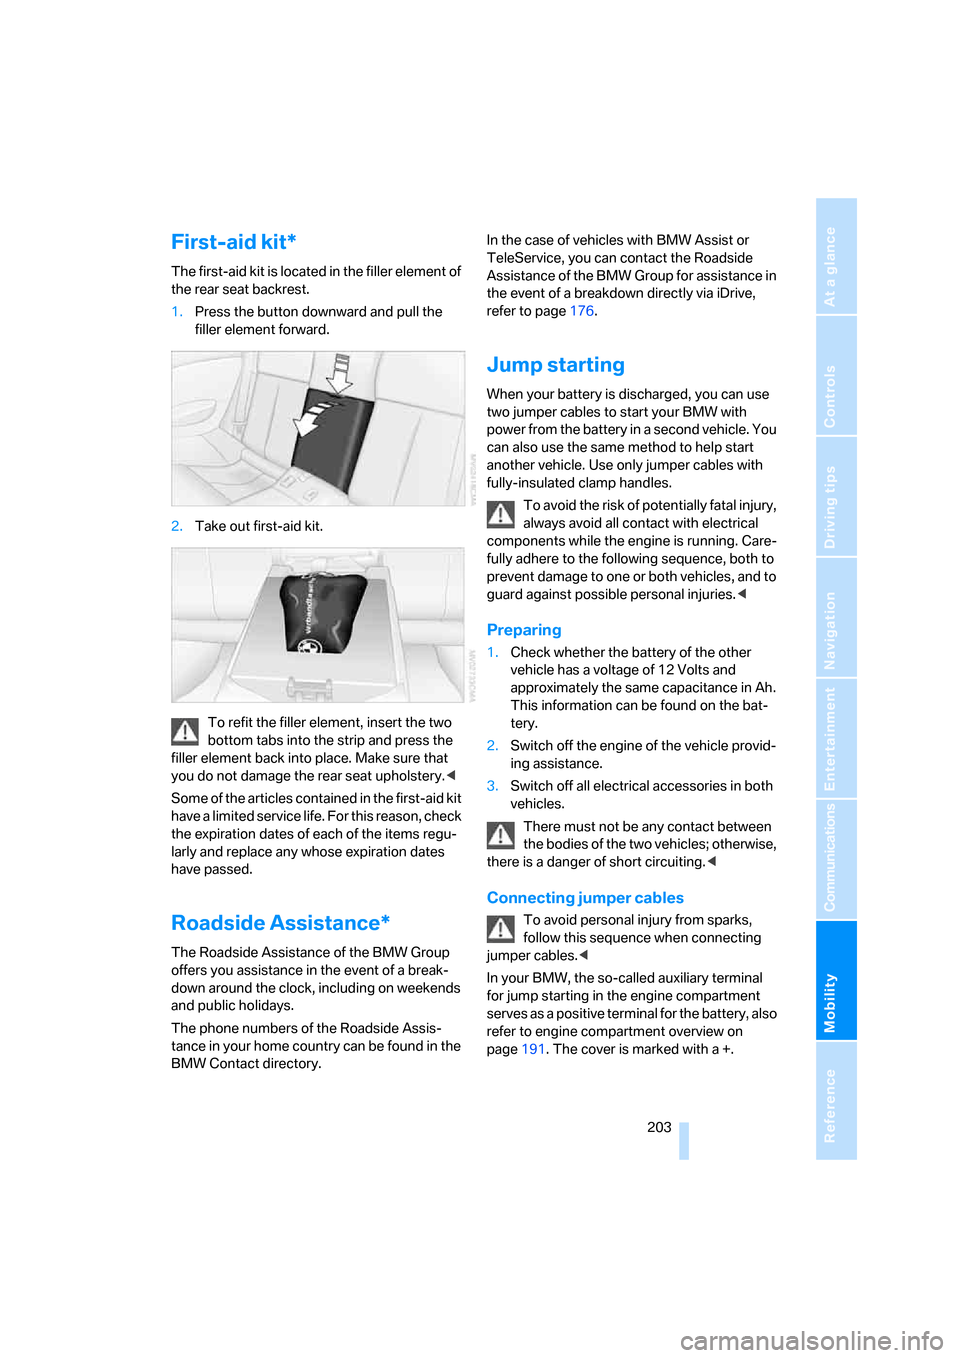
The first-aid kit is located in the filler element of
the rear seat backrest.
1.Press the button downward and pull the
filler element forward.
2.Take out first-aid kit.
To refit the filler element, insert the two
bottom tabs into the strip and press the
filler element back into place. Make sure that
you do not damage the rear seat upholstery.<
Some of the articles contained in the first-aid kit
have a limited service life. For this reason, check
the expiration dates of each of the items regu-
larly and replace any whose expiration dates
have passed.
Roadside Assistance*
The Roadside Assistance of the BMW Group
offers you assistance in the event of a break-
down around the clock, including on weekends
and public holidays.
The phone numbers of the Roadside Assis-
tance in your home country can be found in the
BMW Contact directory.In the case of vehicles with BMW Assist or
TeleService, you can contact the Roadside
Assistance of the BMW Group for assistance in
the event of a breakdown directly via iDrive,
refer to page176.
Jump starting
When your battery is discharged, you can use
two jumper cables to start your BMW with
power from the battery in a second vehicle. You
can also use the same method to help start
another vehicle. Use only jumper cables with
fully-insulated clamp handles.
To avoid the risk of potentially fatal injury,
always avoid all contact with electrical
components while the engine is running. Care-
fully adhere to the following sequence, both to
prevent damage to one or both vehicles, and to
guard against possible personal injuries.<
Preparing
1.Check whether the battery of the other
vehicle has a voltage of 12 Volts and
approximately the same capacitance in Ah.
This information can be found on the bat-
tery.
2.Switch off the engine of the vehicle provid-
ing assistance.
3.Switch off all electrical accessories in both
vehicles.
There must not be any contact between
the bodies of the two vehicles; otherwise,
there is a danger of short circuiting.<
Connecting jumper cables
To avoid personal injury from sparks,
follow this sequence when connecting
jumper cables.<
In your BMW, the so-called auxiliary terminal
for jump starting in the engine compartment
serves as a positive terminal for the battery, also
refer to engine compartment overview on
page191. The cover is marked with a +.