ABS BMW 650I COUPE 2009 E63 Owner's Manual
[x] Cancel search | Manufacturer: BMW, Model Year: 2009, Model line: 650I COUPE, Model: BMW 650I COUPE 2009 E63Pages: 272, PDF Size: 9.16 MB
Page 47 of 272
Controls
45Reference
At a glance
Driving tips
Communications
Navigation
Entertainment
Mobility
To avoid putting excessive strain on the
battery, only move the convertible top
when the engine is running if possible.
Before closing the convertible top, remove for-
eign objects from the windshield frame, as
these might inhibit closing of the convertible
top.<
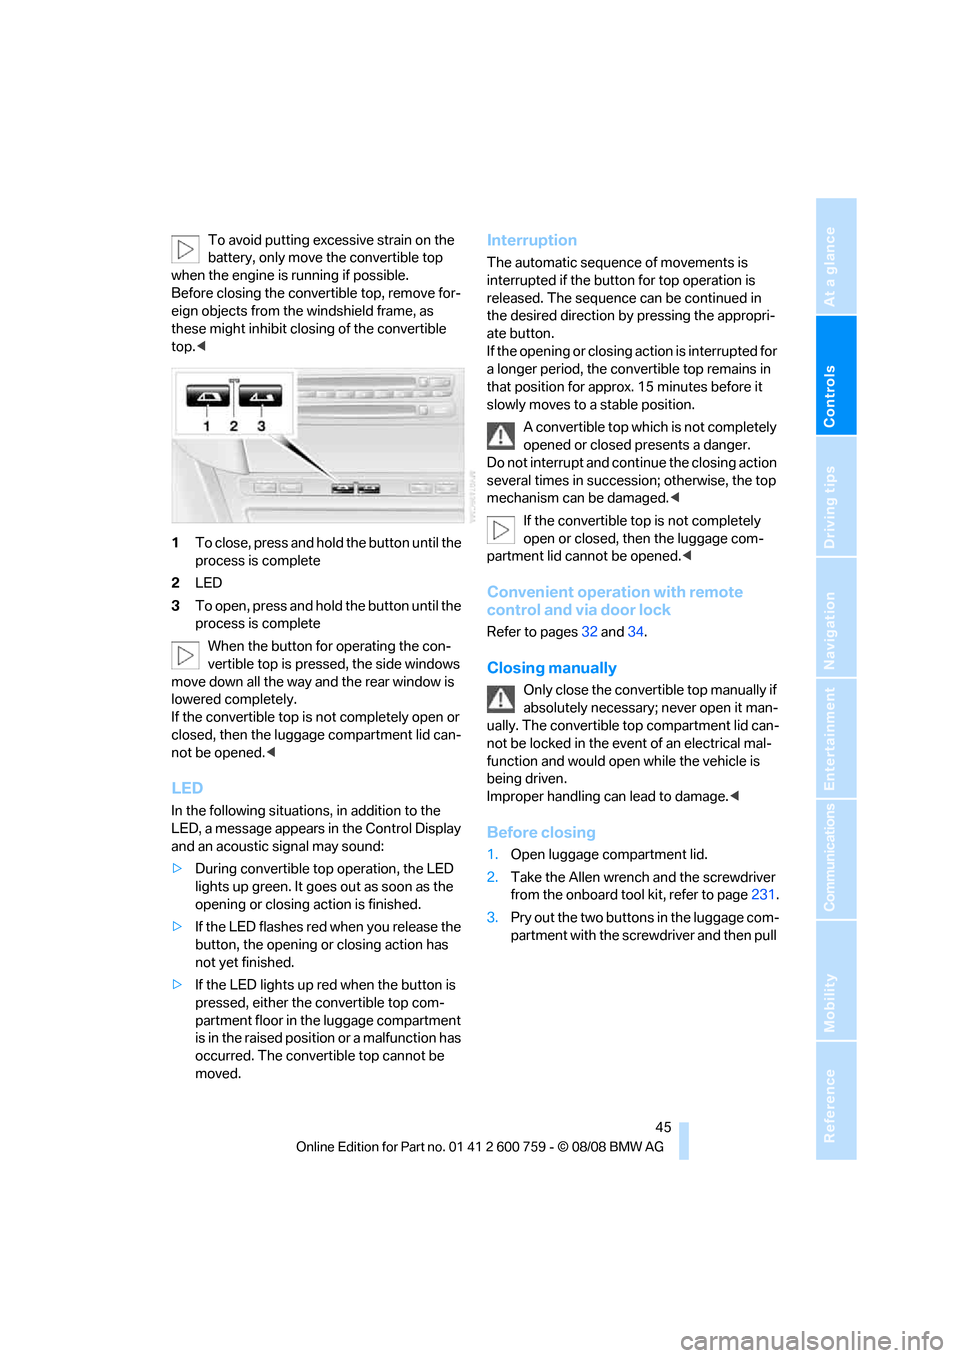
1To close, press and hold the button until the
process is complete
2LED
3To open, press and hold the button until the
process is complete
When the button for operating the con-
vertible top is pressed, the side windows
move down all the way and the rear window is
lowered completely.
If the convertible top is not completely open or
closed, then the luggage compartment lid can-
not be opened.<
LED
In the following situations, in addition to the
LED, a message appears in the Control Display
and an acoustic signal may sound:
>During convertible top operation, the LED
lights up green. It goes out as soon as the
opening or closing action is finished.
>If the LED flashes red when you release the
button, the opening or closing action has
not yet finished.
>If the LED lights up red when the button is
pressed, either the convertible top com-
partment floor in the luggage compartment
is in the raised position or a malfunction has
occurred. The convertible top cannot be
moved.
Interruption
The automatic sequence of movements is
interrupted if the button for top operation is
released. The sequence can be continued in
the desired direction by pressing the appropri-
ate button.
If the opening or closing action is interrupted for
a longer period, the convertible top remains in
that position for approx. 15 minutes before it
slowly moves to a stable position.
A convertible top which is not completely
opened or closed presents a danger.
Do not interrupt and continue the closing action
several times in succession; otherwise, the top
mechanism can be damaged.<
If the convertible top is not completely
open or closed, then the luggage com-
partment lid cannot be opened.<
Convenient operation with remote
control and via door lock
Refer to pages32 and34.
Closing manually
Only close the convertible top manually if
absolutely necessary; never open it man-
ually. The convertible top compartment lid can-
not be locked in the event of an electrical mal-
function and would open while the vehicle is
being driven.
Improper handling can lead to damage.<
Before closing
1.Open luggage compartment lid.
2.Take the Allen wrench and the screwdriver
from the onboard tool kit, refer to page231.
3.Pry out the two buttons in the luggage com-
partment with the screwdriver and then pull
Page 74 of 272
Driving
72 If you are stopped behind a vehicle with the
brake pedal depressed and the system is inter-
rupted or deactivated:
1.Press button4 to activate a stored desired
speed or select a desired speed with the
lever, arrow1 or arrow2.
2.Release the brake pedal.
3.If the vehicle in front of you drives off, briefly
depress the accelerator pedal or press
button4.
Deactivating system
>Press the lever upward or downward twice
while driving.
>When stopped, do the same with the brake
pedal depressed.
>Switch off the ignition.
The displays turn off, and the stored desired
speed and distance are deleted.
Displays in instrument cluster
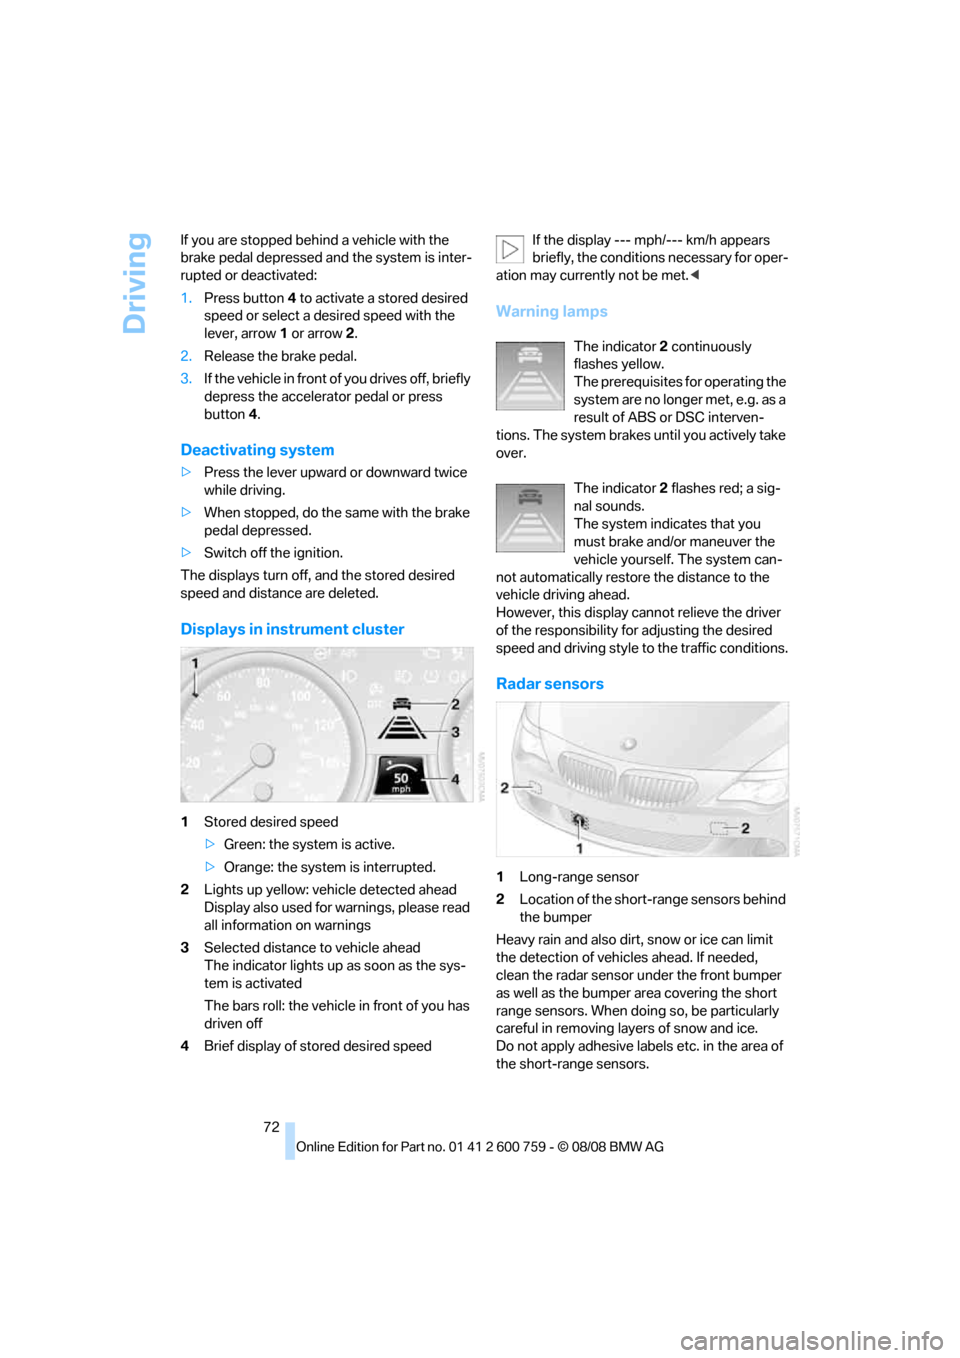
1Stored desired speed
>Green: the system is active.
>Orange: the system is interrupted.
2Lights up yellow: vehicle detected ahead
Display also used for warnings, please read
all information on warnings
3Selected distance to vehicle ahead
The indicator lights up as soon as the sys-
tem is activated
The bars roll: the vehicle in front of you has
driven off
4Brief display of stored desired speedIf the display --- mph/--- km/h appears
briefly, the conditions necessary for oper-
ation may currently not be met.<
Warning lamps
The indicator2 continuously
flashes yellow.
The prerequisites for operating the
system are no longer met, e.g. as a
result of ABS or DSC interven-
tions. The system brakes until you actively take
over.
The indicator2 flashes red; a sig-
nal sounds.
The system indicates that you
must brake and/or maneuver the
vehicle yourself. The system can-
not automatically restore the distance to the
vehicle driving ahead.
However, this display cannot relieve the driver
of the responsibility for adjusting the desired
speed and driving style to the traffic conditions.
Radar sensors
1Long-range sensor
2Location of the short-range sensors behind
the bumper
Heavy rain and also dirt, snow or ice can limit
the detection of vehicles ahead. If needed,
clean the radar sensor under the front bumper
as well as the bumper area covering the short
range sensors. When doing so, be particularly
careful in removing layers of snow and ice.
Do not apply adhesive labels etc. in the area of
the short-range sensors.
Page 90 of 272
Technology for comfort, convenience and safety
88 a signal tone sounds. The setting is stored for
the remote control currently in use.
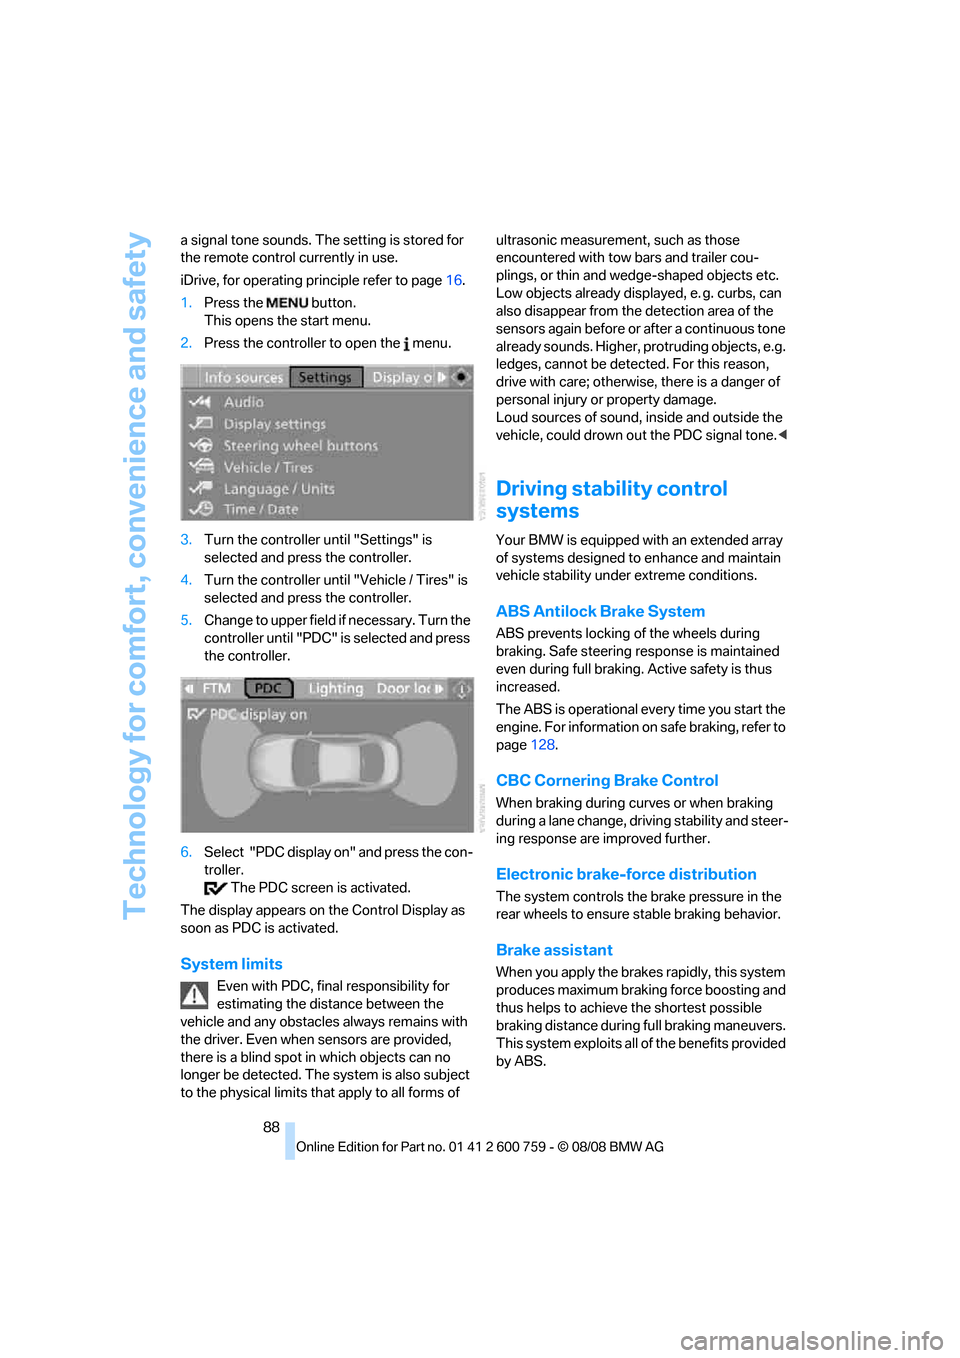
iDrive, for operating principle refer to page16.
1.Press the button.
This opens the start menu.
2.Press the controller to open the menu.
3.Turn the controller until "Settings" is
selected and press the controller.
4.Turn the controller until "Vehicle / Tires" is
selected and press the controller.
5.Change to upper field if necessary. Turn the
controller until "PDC" is selected and press
the controller.
6.Select "PDC display on" and press the con-
troller.
The PDC screen is activated.
The display appears on the Control Display as
soon as PDC is activated.
System limits
Even with PDC, final responsibility for
estimating the distance between the
vehicle and any obstacles always remains with
the driver. Even when sensors are provided,
there is a blind spot in which objects can no
longer be detected. The system is also subject
to the physical limits that apply to all forms of ultrasonic measurement, such as those
encountered with tow bars and trailer cou-
plings, or thin and wedge-shaped objects etc.
Low objects already displayed, e. g. curbs, can
also disappear from the detection area of the
sensors again before or after a continuous tone
already sounds. Higher, protruding objects, e.g.
ledges, cannot be detected. For this reason,
drive with care; otherwise, there is a danger of
personal injury or property damage.
Loud sources of sound, inside and outside the
vehicle, could drown out the PDC signal tone.<
Driving stability control
systems
Your BMW is equipped with an extended array
of systems designed to enhance and maintain
vehicle stability under extreme conditions.
ABS Antilock Brake System
ABS prevents locking of the wheels during
braking. Safe steering response is maintained
even during full braking. Active safety is thus
increased.
The ABS is operational every time you start the
engine. For information on safe braking, refer to
page128.
CBC Cornering Brake Control
When braking during curves or when braking
during a lane change, driving stability and steer-
ing response are improved further.
Electronic brake-force distribution
The system controls the brake pressure in the
rear wheels to ensure stable braking behavior.
Brake assistant
When you apply the brakes rapidly, this system
produces maximum braking force boosting and
thus helps to achieve the shortest possible
braking distance during full braking maneuvers.
This system exploits all of the benefits provided
by ABS.
Page 92 of 272
Technology for comfort, convenience and safety
90
For better control
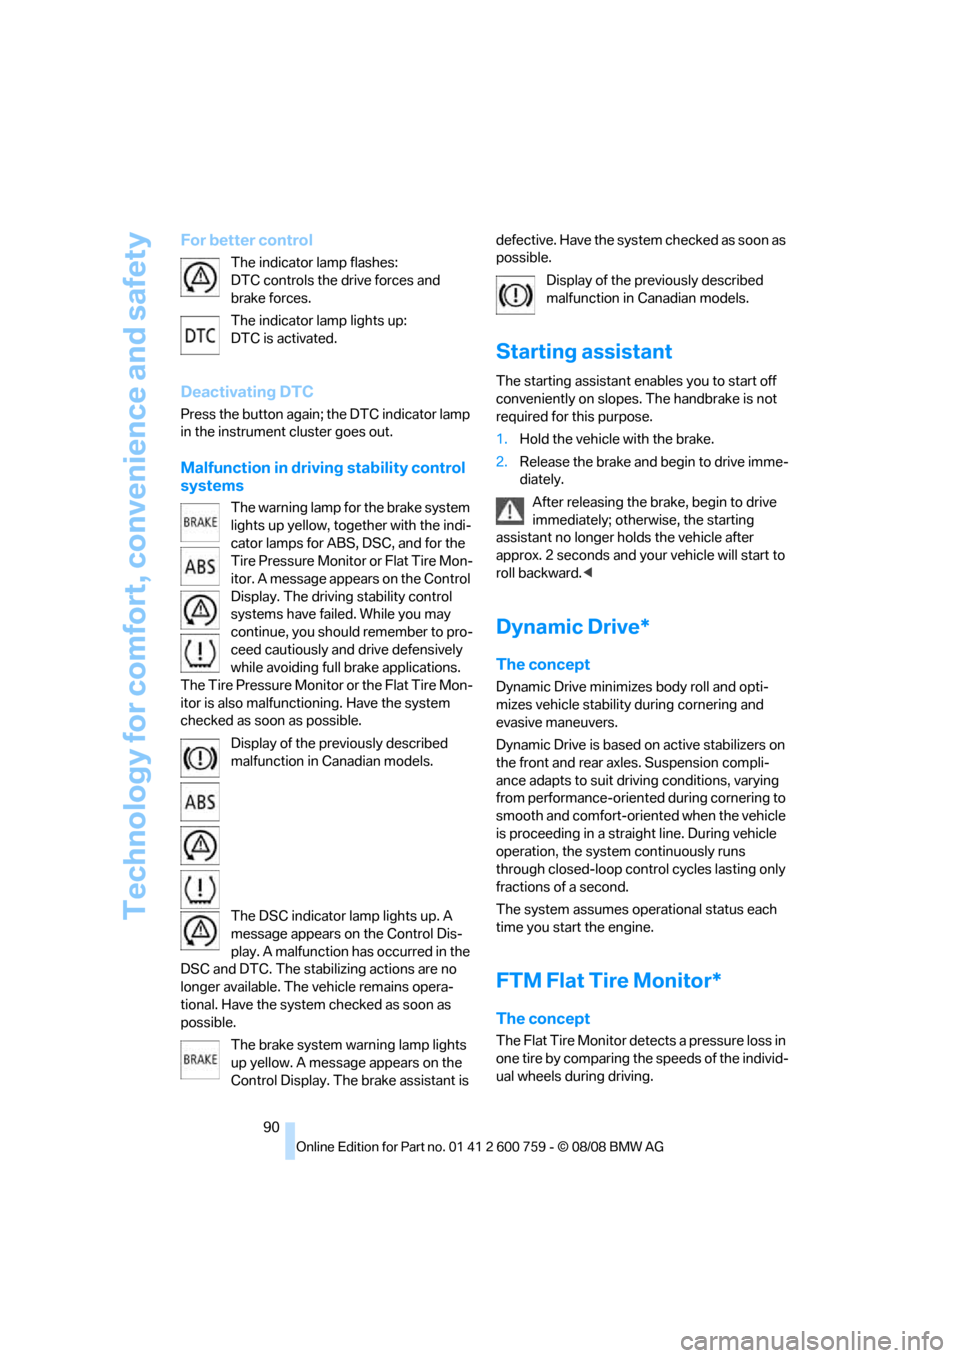
The indicator lamp flashes:
DTC controls the drive forces and
brake forces.
The indicator lamp lights up:
DTC is activated.
Deactivating DTC
Press the button again; the DTC indicator lamp
in the instrument cluster goes out.
Malfunction in driving stability control
systems
The warning lamp for the brake system
lights up yellow, together with the indi-
cator lamps for ABS, DSC, and for the
Tire Pressure Monitor or Flat Tire Mon-
itor. A message appears on the Control
Display. The driving stability control
systems have failed. While you may
continue, you should remember to pro-
ceed cautiously and drive defensively
while avoiding full brake applications.
The Tire Pressure Monitor or the Flat Tire Mon-
itor is also malfunctioning. Have the system
checked as soon as possible.
Display of the previously described
malfunction in Canadian models.
The DSC indicator lamp lights up. A
message appears on the Control Dis-
play. A malfunction has occurred in the
DSC and DTC. The stabilizing actions are no
longer available. The vehicle remains opera-
tional. Have the system checked as soon as
possible.
The brake system warning lamp lights
up yellow. A message appears on the
Control Display. The brake assistant is defective. Have the system checked as soon as
possible.
Display of the previously described
malfunction in Canadian models.
Starting assistant
The starting assistant enables you to start off
conveniently on slopes. The handbrake is not
required for this purpose.
1.Hold the vehicle with the brake.
2.Release the brake and begin to drive imme-
diately.
After releasing the brake, begin to drive
immediately; otherwise, the starting
assistant no longer holds the vehicle after
approx. 2 seconds and your vehicle will start to
roll backward.<
Dynamic Drive*
The concept
Dynamic Drive minimizes body roll and opti-
mizes vehicle stability during cornering and
evasive maneuvers.
Dynamic Drive is based on active stabilizers on
the front and rear axles. Suspension compli-
ance adapts to suit driving conditions, varying
from performance-oriented during cornering to
smooth and comfort-oriented when the vehicle
is proceeding in a straight line. During vehicle
operation, the system continuously runs
through closed-loop control cycles lasting only
fractions of a second.
The system assumes operational status each
time you start the engine.
FTM Flat Tire Monitor*
The concept
The Flat Tire Monitor detects a pressure loss in
one tire by comparing the speeds of the individ-
ual wheels during driving.
Page 124 of 272
Practical interior accessories
122
Loading
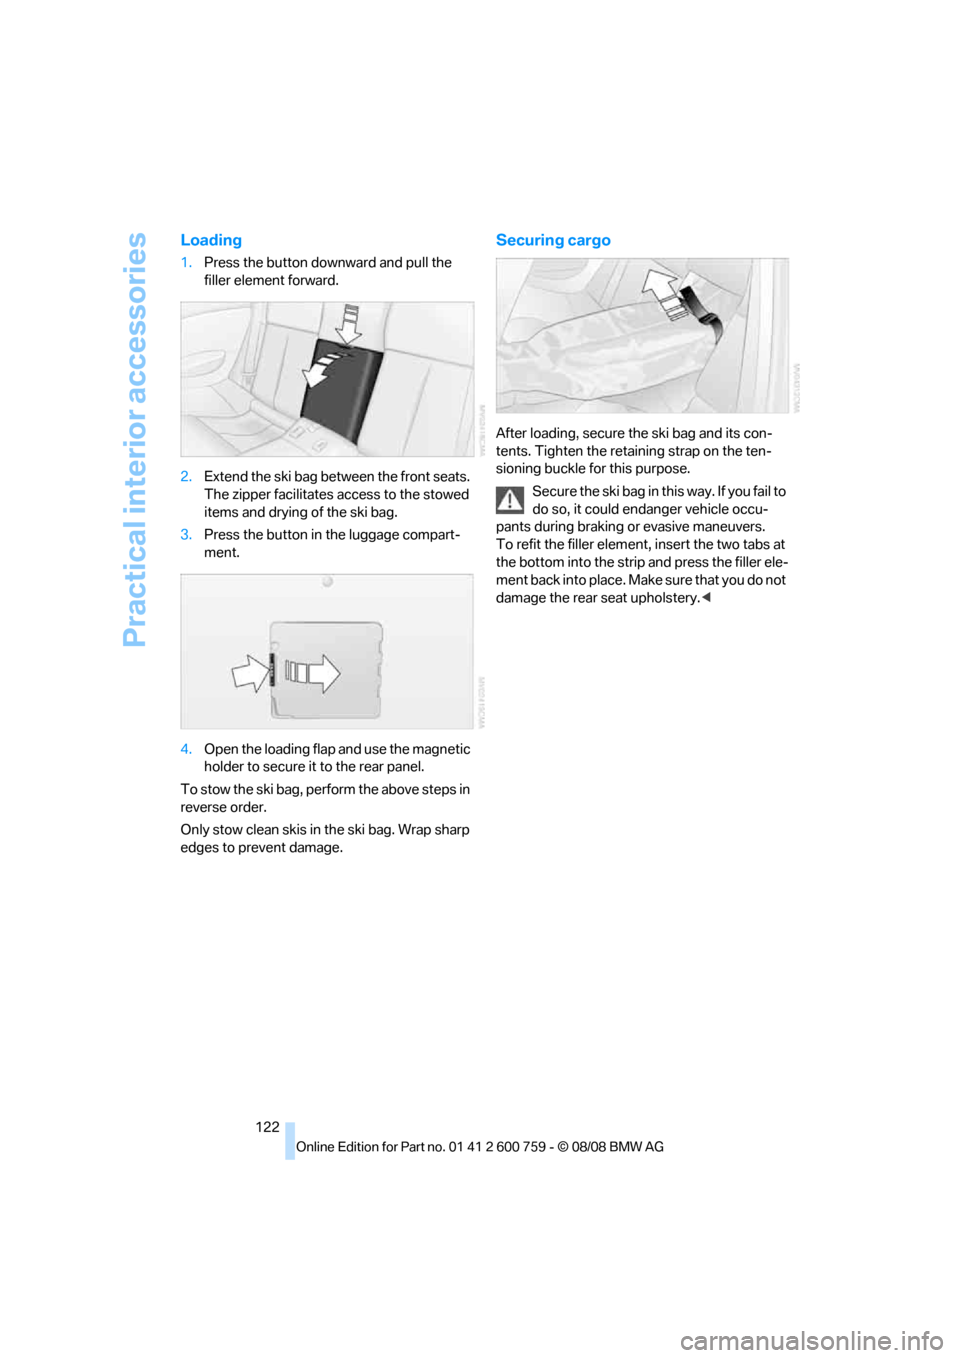
1.Press the button downward and pull the
filler element forward.
2.Extend the ski bag between the front seats.
The zipper facilitates access to the stowed
items and drying of the ski bag.
3.Press the button in the luggage compart-
ment.
4.Open the loading flap and use the magnetic
holder to secure it to the rear panel.
To stow the ski bag, perform the above steps in
reverse order.
Only stow clean skis in the ski bag. Wrap sharp
edges to prevent damage.
Securing cargo
After loading, secure the ski bag and its con-
tents. Tighten the retaining strap on the ten-
sioning buckle for this purpose.
Secure the ski bag in this way. If you fail to
do so, it could endanger vehicle occu-
pants during braking or evasive maneuvers.
To refit the filler element, insert the two tabs at
the bottom into the strip and press the filler ele-
ment back into place. Make sure that you do not
damage the rear seat upholstery.<
Page 129 of 272
Driving tips
127Reference
At a glance
Controls
Communications
Navigation
Entertainment
Mobility
Thinking ahead when driving
Avoid unnecessary acceleration and braking.
To do so, maintain the appropriate distance
from the vehicle in front of you. An anticipatory
and smooth driving style reduces fuel con-
sumption.
Avoiding high engine speeds
Use 1st gear only for starting off. Accelerate
rapidly in 2nd gear and above. Avoid high
engine speeds in doing so and shift into the
next gear early.
When you have reached the desired speed,
shift into the highest possible gear and drive
with the lowest possible engine speed while
maintaining a constant a vehicle speed.
In general: driving at a low engine speed
reduces fuel consumption and minimizes wear.
Taking advantage of coasting
When approaching a red light, let off the gas
and allow the vehicle to coast to a stop in the
highest possible gear.
On steep roadways, let off the gas and allow the
vehicle to roll in the appropriate gear.
The flow of fuel is interrupted when coasting.
Switching off the engine during longer
stops
Switch off the engine at longer stops such as
traffic signals, railroad crossings, or in traffic
jams. Even having the engine switched off for
approx. 4 seconds results in fuel savings.
Switching off functions currently not
required
Functions such as the cooling function of the
automatic climate control, seat heating or rear
window defroster draw large amounts of power
and consume additional fuel. Their influence is
particularly pronounced in city traffic and stop &
go operation. For this reason, it is a good idea to
switch these functions off when they are not
really needed.
Having maintenance carried out
Have the vehicle serviced regularly in order to
achieve the optimum economy and service life
of your vehicle. BMW recommends having the
maintenance performed by a BMW center. Also
please pay attention to the BMW maintenance
system, refer to page225.
General driving notes
Closing luggage compartment lid
Only drive with the luggage compartment
lid completely closed, otherwise exhaust
can penetrate into the passenger compart-
ment.<
If it is absolutely necessary to drive with the lug-
gage compartment lid open:
1.Coupe: close both windows and the glass
sunroof.
Convertible: with closed top, close all win-
dows.
2.Increase the air volume of the automatic cli-
mate control to a high level, refer to
page112.
Hot exhaust system
As in all vehicles, extremely high temper-
atures are generated on the exhaust sys-
tem. Do not remove the heat shields installed
adjacent to it, and never apply undercoating to
them. When driving, standing at idle and while
parking take care to avoid possible contact
between the hot exhaust system and any highly
flammable materials such as hay, leaves, grass,
etc. Such contact could lead to a fire, and with it
the risk of serious property damage as well as
personal injury. Do not touch hot exhaust tail
pipes. Otherwise there is a risk of burns.<
Hydroplaning
When driving on wet or slushy roads,
reduce road speed. If you do not, a wedge
of water can form between tires and road sur-
face. This phenomenon is referred to as hydro-
planing, and is characterized by a partial or
complete loss of contact between the tires and
Page 130 of 272
Things to remember when driving
128 the road surface, ultimately undermining your
ability to steer and brake the vehicle.<
The risk of hydroplaning increases as the tread
depth of the tires decreases, refer also to Mini-
mum tire tread on page217.
Driving through water
Do not drive through water on the road if it
is deeper than 1 ft/30 cm, and then only at
walking speed at the most. Otherwise, the vehi-
cle's engine, the electrical systems and the
transmission may be damaged.<
Using handbrake on inclines
On inclines, do not hold the vehicle in
place for a long time by riding the clutch;
use the handbrake. Otherwise greater clutch
wear will result.<
Braking safely
Your BMW is equipped with ABS as a standard
feature. In situations that require it, it is best to
brake with full force. Since the vehicle maintains
steering responsiveness, you can still avoid
possible obstacles with a minimum of steering
effort.
Pulsation of the brake pedal, combined with
sounds from the hydraulic circuits, indicate that
ABS is in its active mode.
Do not drive with your foot resting on the
brake pedal. Even light but consistent
pedal pressure can lead to high temperatures,
brake wear and possibly even brake failure.<
Driving in wet conditions
When roads are wet or there is heavy rain,
briefly exert gentle pressure on the brake pedal
every few miles. Monitor traffic conditions to
ensure that this maneuver does not endanger
other road users. The heat generated in this
process helps dry the pads and rotors to ensure
that full braking efficiency will then be available
when you need it.
Hills
To prevent overheating and thus reduced
efficiency of the brake system, downshift to a gear in which only minimal brake applica-
tions are needed when descending long or
steep downhill stretches. Even light but consis-
tent pressure on the brake can lead to high tem-
peratures, brake wear and possibly even brake
failure.<
The braking effect of the engine can be further
increased by downshifting, if necessary all the
way down into first gear. This strategy helps
you avoid placing excessive loads on the brake
system. For information on downshifting in the
manual mode of the sport automatic transmis-
sion, refer to page63.
Do not drive with the clutch depressed, in
idle or with the engine switched off, other-
wise there will be no engine braking action or
support of the braking force and steering.
Never allow floor mats, carpets or any other
objects to protrude into the area of movement
of the pedals and impair their operation.<
Corrosion on brake rotors
When the vehicle is driven only occasionally,
during extended periods when the vehicle is not
used at all, and in operating conditions where
brake applications are less frequent, there is an
increased tendency for corrosion to form on
rotors, while contaminants accumulate on the
brake pads. This occurs because the minimum
pressure which must be exerted by the pads
during brake applications to clean the rotors is
not reached.
Should corrosion form on the brake rotors, the
brakes will tend to respond with a pulsating
effect that even extended application will fail to
cure.
When vehicle is parked
Condensation forms in the air conditioner sys-
tem during operation, and then exits under the
vehicle. Traces of condensed water under the
vehicle are therefore normal.
Before driving into a car wash
To prevent the exterior mirrors on this vehicle
from being damaged, always fold them in by
hand before entering an automatic car wash.
Page 220 of 272
Wheels and tires
218
Run-flat tires
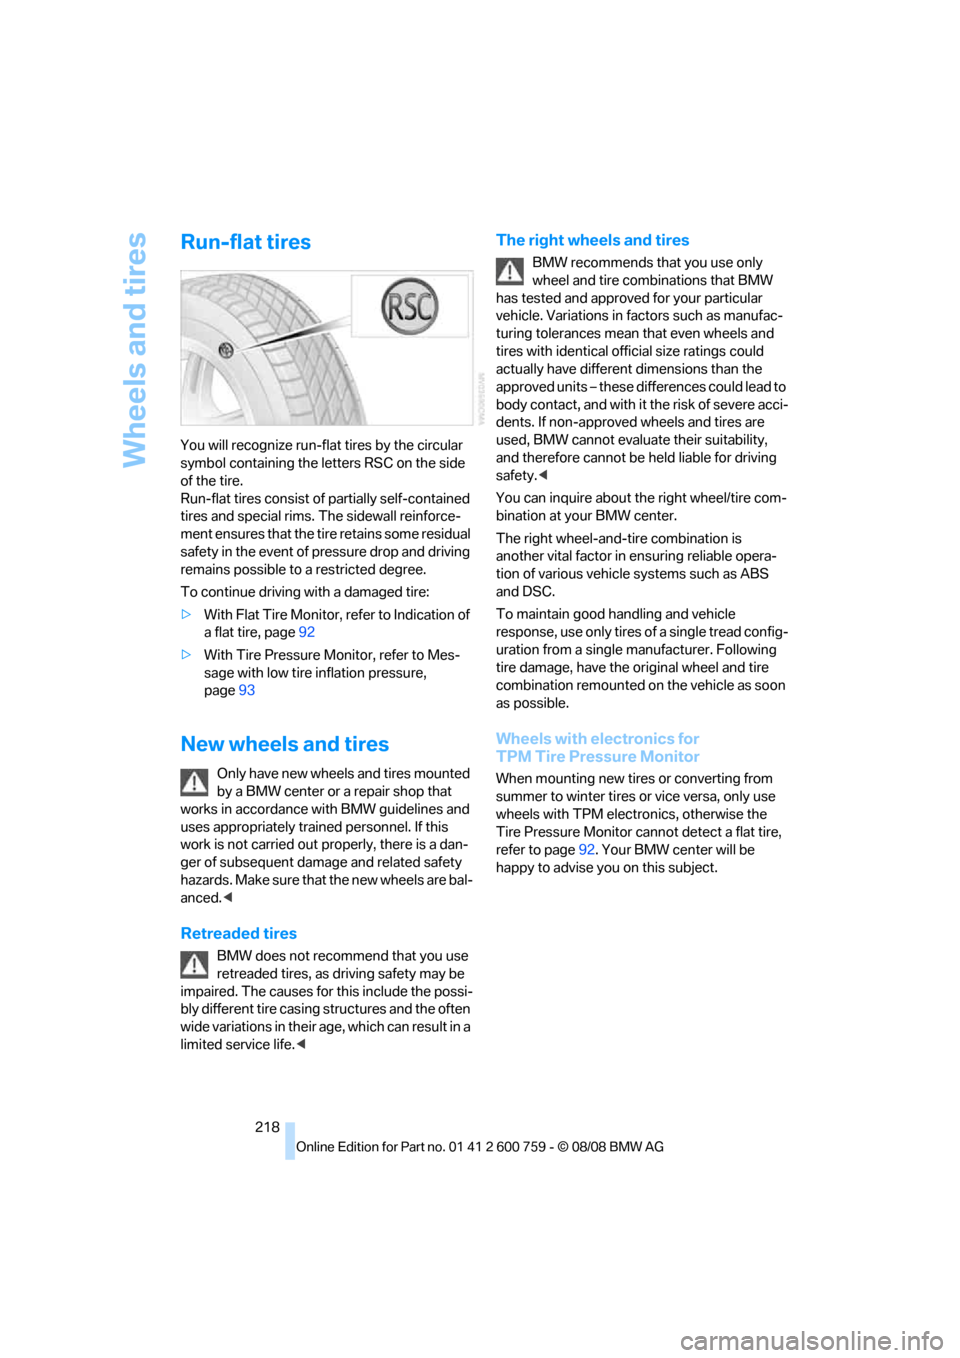
You will recognize run-flat tires by the circular
symbol containing the letters RSC on the side
of the tire.
Run-flat tires consist of partially self-contained
tires and special rims. The sidewall reinforce-
ment ensures that the tire retains some residual
safety in the event of pressure drop and driving
remains possible to a restricted degree.
To continue driving with a damaged tire:
>With Flat Tire Monitor, refer to Indication of
a flat tire, page92
>With Tire Pressure Monitor, refer to Mes-
sage with low tire inflation pressure,
page93
New wheels and tires
Only have new wheels and tires mounted
by a BMW center or a repair shop that
works in accordance with BMW guidelines and
uses appropriately trained personnel. If this
work is not carried out properly, there is a dan-
ger of subsequent damage and related safety
hazards. Make sure that the new wheels are bal-
anced.<
Retreaded tires
BMW does not recommend that you use
retreaded tires, as driving safety may be
impaired. The causes for this include the possi-
bly different tire casing structures and the often
wide variations in their age, which can result in a
limited service life.<
The right wheels and tires
BMW recommends that you use only
wheel and tire combinations that BMW
has tested and approved for your particular
vehicle. Variations in factors such as manufac-
turing tolerances mean that even wheels and
tires with identical official size ratings could
actually have different dimensions than the
approved units – these differences could lead to
body contact, and with it the risk of severe acci-
dents. If non-approved wheels and tires are
used, BMW cannot evaluate their suitability,
and therefore cannot be held liable for driving
safety.<
You can inquire about the right wheel/tire com-
bination at your BMW center.
The right wheel-and-tire combination is
another vital factor in ensuring reliable opera-
tion of various vehicle systems such as ABS
and DSC.
To maintain good handling and vehicle
response, use only tires of a single tread config-
uration from a single manufacturer. Following
tire damage, have the original wheel and tire
combination remounted on the vehicle as soon
as possible.
Wheels with electronics for
TPM Tire Pressure Monitor
When mounting new tires or converting from
summer to winter tires or vice versa, only use
wheels with TPM electronics, otherwise the
Tire Pressure Monitor cannot detect a flat tire,
refer to page92. Your BMW center will be
happy to advise you on this subject.
Page 233 of 272
Mobility
231Reference
At a glance
Controls
Driving tips
Communications
Navigation
Entertainment
Replacing components
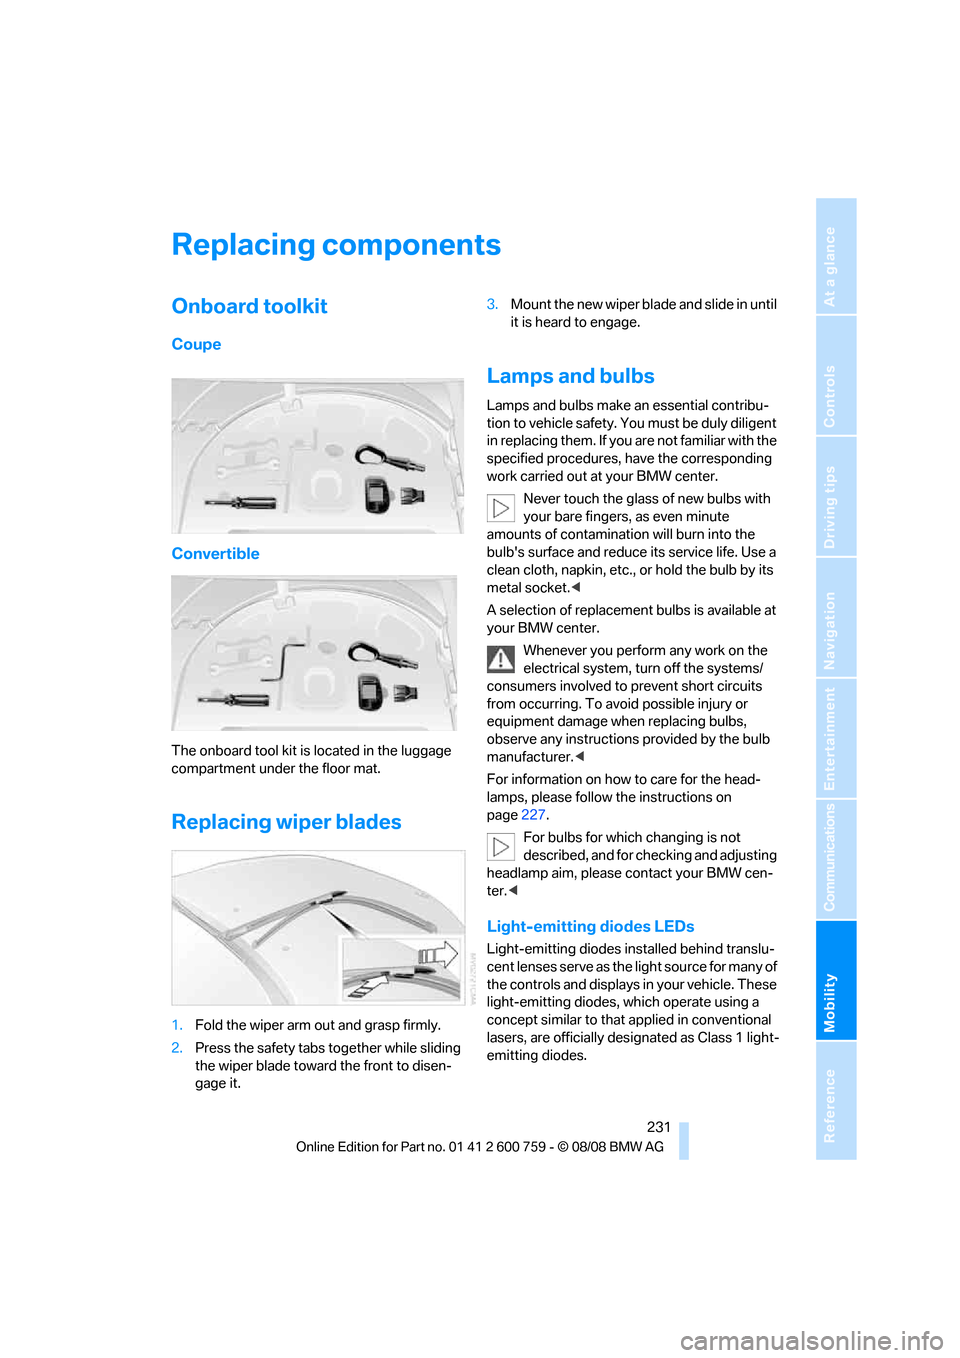
Onboard toolkit
Coupe
Convertible
The onboard tool kit is located in the luggage
compartment under the floor mat.
Replacing wiper blades
1.Fold the wiper arm out and grasp firmly.
2.Press the safety tabs together while sliding
the wiper blade toward the front to disen-
gage it.3.Mount the new wiper blade and slide in until
it is heard to engage.
Lamps and bulbs
Lamps and bulbs make an essential contribu-
tion to vehicle safety. You must be duly diligent
in replacing them. If you are not familiar with the
specified procedures, have the corresponding
work carried out at your BMW center.
Never touch the glass of new bulbs with
your bare fingers, as even minute
amounts of contamination will burn into the
bulb's surface and reduce its service life. Use a
clean cloth, napkin, etc., or hold the bulb by its
metal socket.<
A selection of replacement bulbs is available at
your BMW center.
Whenever you perform any work on the
electrical system, turn off the systems/
consumers involved to prevent short circuits
from occurring. To avoid possible injury or
equipment damage when replacing bulbs,
observe any instructions provided by the bulb
manufacturer.<
For information on how to care for the head-
lamps, please follow the instructions on
page227.
For bulbs for which changing is not
described, and for checking and adjusting
headlamp aim, please contact your BMW cen-
ter.<
Light-emitting diodes LEDs
Light-emitting diodes installed behind translu-
c e n t l e n s e s s e r v e a s t h e l i g h t s o u r c e f o r m a n y o f
the controls and displays in your vehicle. These
light-emitting diodes, which operate using a
concept similar to that applied in conventional
lasers, are officially designated as Class 1 light-
emitting diodes.
Page 238 of 272
Giving and receiving assistance
236
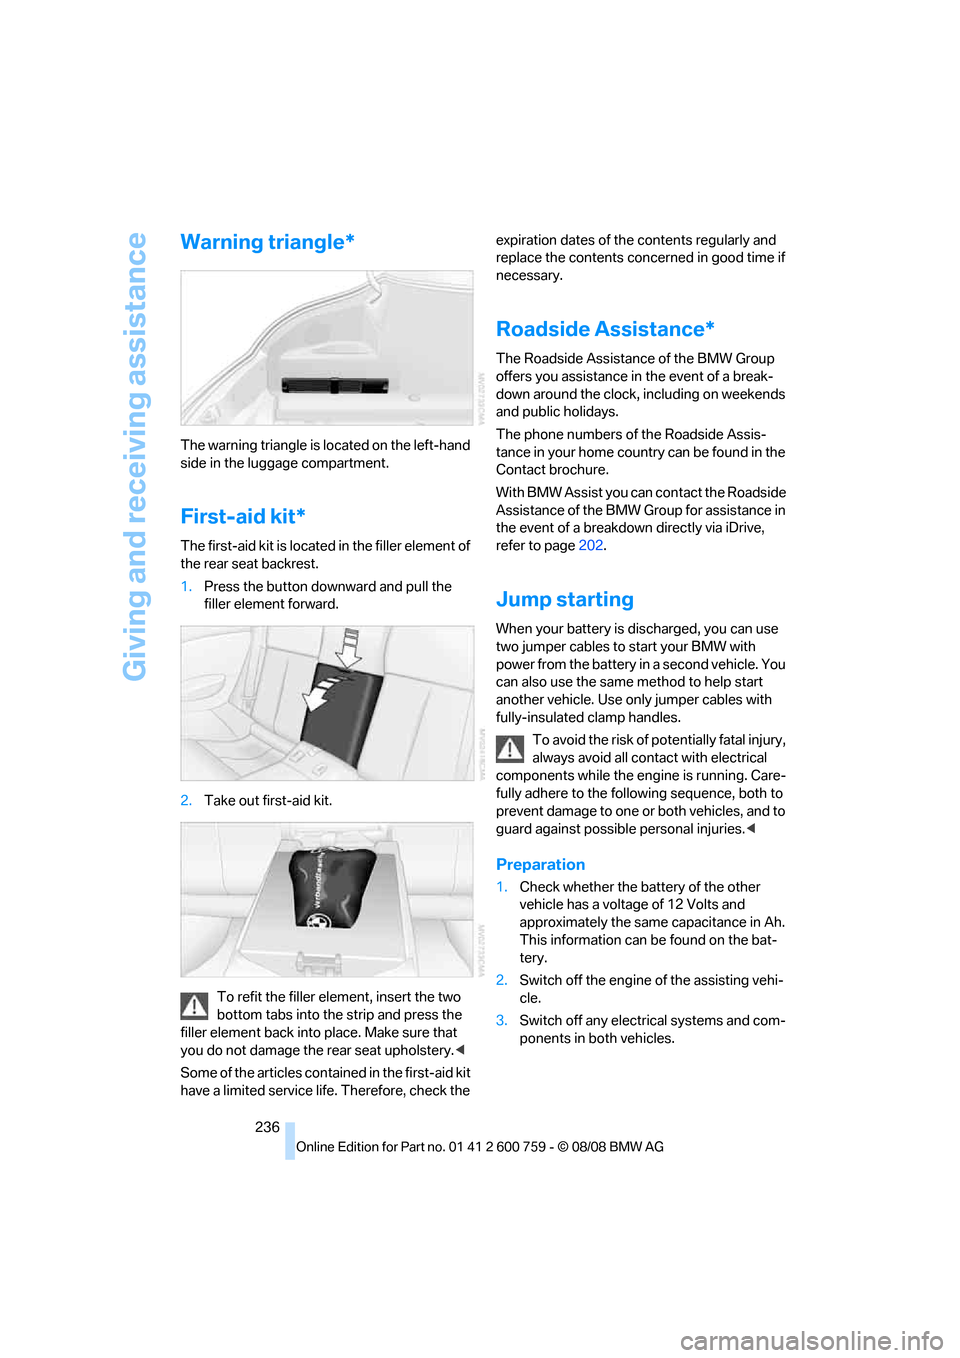
Warning triangle*
The warning triangle is located on the left-hand
side in the luggage compartment.
First-aid kit*
The first-aid kit is located in the filler element of
the rear seat backrest.
1.Press the button downward and pull the
filler element forward.
2.Take out first-aid kit.
To refit the filler element, insert the two
bottom tabs into the strip and press the
filler element back into place. Make sure that
you do not damage the rear seat upholstery.<
Some of the articles contained in the first-aid kit
have a limited service life. Therefore, check the expiration dates of the contents regularly and
replace the contents concerned in good time if
necessary.
Roadside Assistance*
The Roadside Assistance of the BMW Group
offers you assistance in the event of a break-
down around the clock, including on weekends
and public holidays.
The phone numbers of the Roadside Assis-
tance in your home country can be found in the
Contact brochure.
With BMW Assist you can contact the Roadside
Assistance of the BMW Group for assistance in
the event of a breakdown directly via iDrive,
refer to page202.
Jump starting
When your battery is discharged, you can use
two jumper cables to start your BMW with
power from the battery in a second vehicle. You
can also use the same method to help start
another vehicle. Use only jumper cables with
fully-insulated clamp handles.
To avoid the risk of potentially fatal injury,
always avoid all contact with electrical
components while the engine is running. Care-
fully adhere to the following sequence, both to
prevent damage to one or both vehicles, and to
guard against possible personal injuries.<
Preparation
1.Check whether the battery of the other
vehicle has a voltage of 12 Volts and
approximately the same capacitance in Ah.
This information can be found on the bat-
tery.
2.Switch off the engine of the assisting vehi-
cle.
3.Switch off any electrical systems and com-
ponents in both vehicles.