climate control BMW 650I COUPE 2014 User Guide
[x] Cancel search | Manufacturer: BMW, Model Year: 2014, Model line: 650I COUPE, Model: BMW 650I COUPE 2014Pages: 237, PDF Size: 7.53 MB
Page 155 of 237
The parked-car heating warms the vehicle in‐
terior, making snow and ice easier to remove.
With the ignition switched off, the air is auto‐
matically routed to the windshield, to the side
windows, and into the footwell.
The systems can be switched on and off di‐
rectly or by using two preset departure times.
The switch-on time is automatically deter‐
mined based on the temperature. The systems
promptly switch on before the selected depar‐
ture time.
Operation takes place on the iDrive or the re‐
mote control.
Note Parked-car heating in enclosed areas
Do not operate the parked-car heating in
enclosed areas, as breathing of the harmful ex‐
haust fumes may lead to loss of consciousness
and death. The exhaust gases contain carbon
monoxide, an odorless and colorless but highly
toxic gas. Switch off the parked-car heating
when refueling.◀
At external temperatures below 32 ℉/0 ℃, wa‐
ter vapor occurs that emerges from below the
vehicle.
Functional requirements
Parked-car ventilation▷With remote control or when the departure
time is preselected: depends on internal,
external and set temperature.▷Direct operation via iDrive: any external
temperature.▷In direct mode via remote control: external
temperature above approx. 59 ℉/15 ℃.
Open the vents to allow air to flow out.
Parked-car heating
▷With remote control or when the departure
time is preselected: depends on internal,
external and set temperature.▷Direct operation via iDrive: any external
temperature.▷In direct mode via remote control: external
temperature below approx. 59 ℉/15 ℃.▷The battery is sufficiently charged.▷The fuel tank is filled to above the reserve
range.
If the parked-car heating has not been used for
several months, it may be necessary to switch
the system on again after several minutes.
Switching on/off directly
1."Settings"2."Climate"3."Activate ind. heating" or
"Activate comf. ventilation"
The symbol on the automatic climate con‐
trol flashes if the system is switched on.
The system continues to run for some time af‐
ter being switched off.
Preselecting the departure time
1."Settings"2."Climate"3."Dep. time 1:" or "Dep. time 2:"4.Set the desired time.
Activating the departure time
1."Settings"2."Climate"3."Activate depart. time 1" or "Activate
depart. time 2"
The symbol on the automatic climate con‐
trol lights up when the departure time is acti‐
vated.
The symbol on the automatic climate con‐
trol flashes when the system has been
switched on.
The system will only be switched on within the
next 24 hours. After that, it needs to reacti‐
vated.
Seite 155Climate controlControls155
Online Edition for Part no. 0140 2 910 771 - VI/13
Page 156 of 237
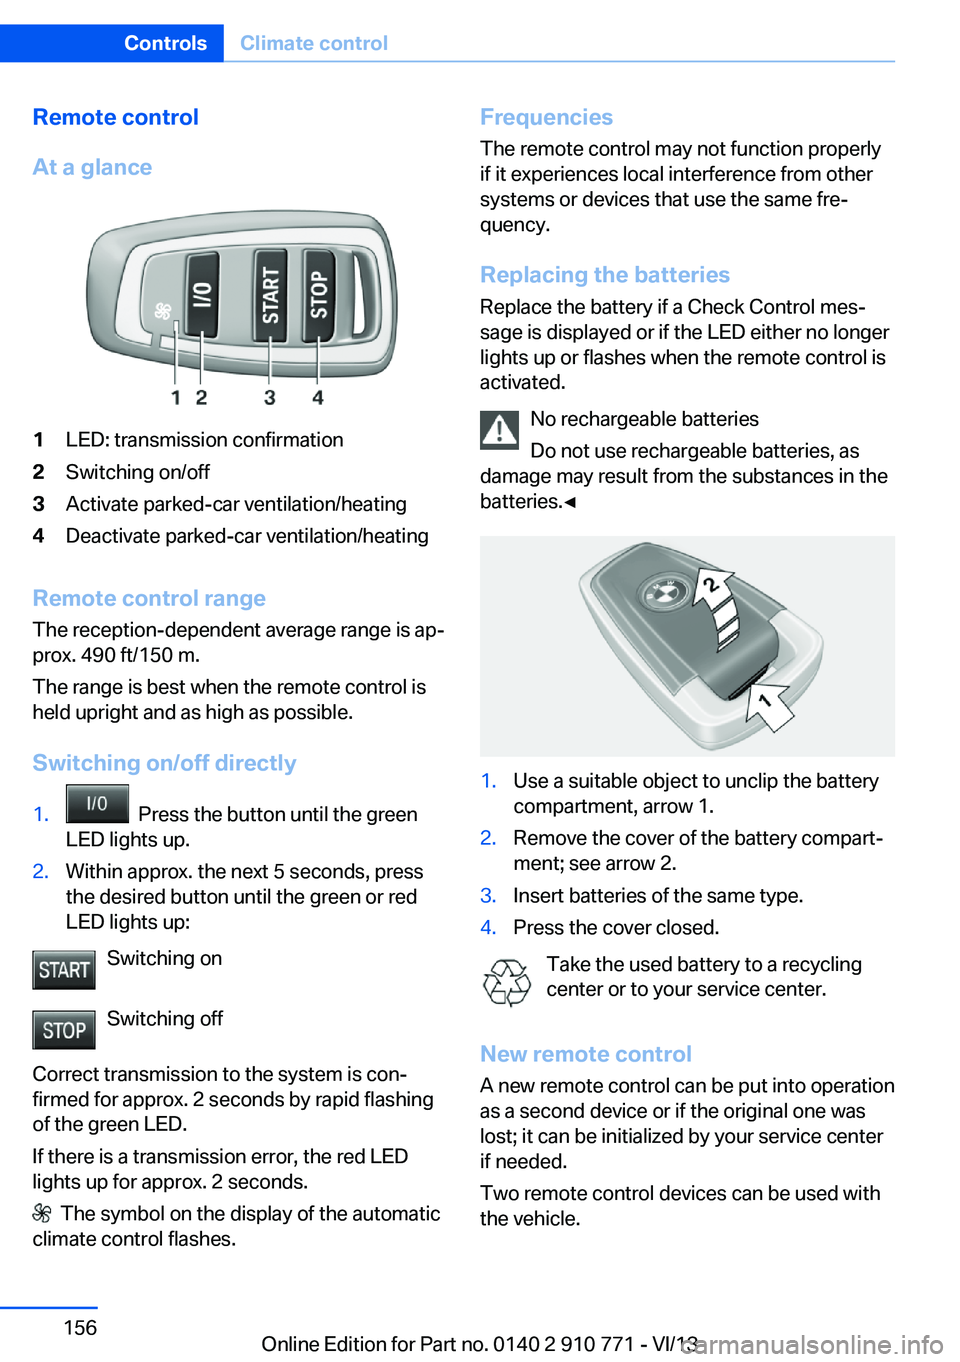
Remote control
At a glance1LED: transmission confirmation2Switching on/off3Activate parked-car ventilation/heating4Deactivate parked-car ventilation/heating
Remote control range The reception-dependent average range is ap‐
prox. 490 ft/150 m.
The range is best when the remote control is
held upright and as high as possible.
Switching on/off directly
1. Press the button until the green
LED lights up.2.Within approx. the next 5 seconds, press
the desired button until the green or red
LED lights up:
Switching on
Switching off
Correct transmission to the system is con‐
firmed for approx. 2 seconds by rapid flashing
of the green LED.
If there is a transmission error, the red LED
lights up for approx. 2 seconds.
The symbol on the display of the automatic
climate control flashes.
Frequencies
The remote control may not function properly
if it experiences local interference from other
systems or devices that use the same fre‐
quency.
Replacing the batteries
Replace the battery if a Check Control mes‐
sage is displayed or if the LED either no longer
lights up or flashes when the remote control is
activated.
No rechargeable batteries
Do not use rechargeable batteries, as
damage may result from the substances in the
batteries.◀1.Use a suitable object to unclip the battery
compartment, arrow 1.2.Remove the cover of the battery compart‐
ment; see arrow 2.3.Insert batteries of the same type.4.Press the cover closed.
Take the used battery to a recycling
center or to your service center.
New remote control A new remote control can be put into operation
as a second device or if the original one was
lost; it can be initialized by your service center
if needed.
Two remote control devices can be used with
the vehicle.
Seite 156ControlsClimate control156
Online Edition for Part no. 0140 2 910 771 - VI/13
Page 169 of 237
sition mode, or when parked. Such contact
could lead to a fire, and with it the risk of seri‐
ous personal injury as well as property dam‐
age.
Do not touch hot exhaust pipes; otherwise,
there is the danger of getting burned.◀
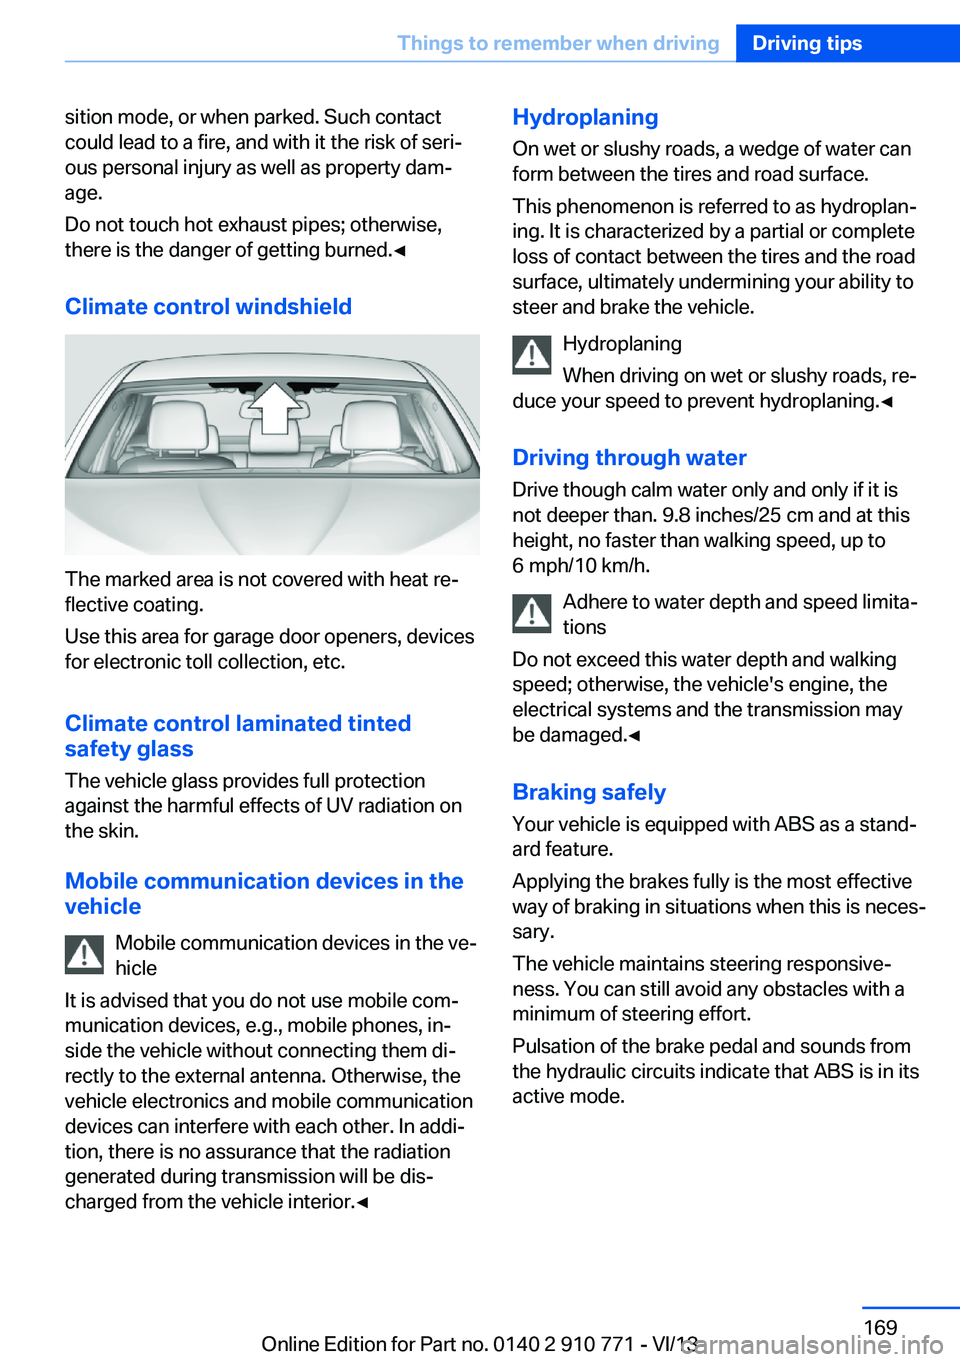
Climate control windshield
The marked area is not covered with heat re‐
flective coating.
Use this area for garage door openers, devices
for electronic toll collection, etc.
Climate control laminated tinted
safety glass
The vehicle glass provides full protection
against the harmful effects of UV radiation on
the skin.
Mobile communication devices in thevehicle
Mobile communication devices in the ve‐
hicle
It is advised that you do not use mobile com‐
munication devices, e.g., mobile phones, in‐
side the vehicle without connecting them di‐
rectly to the external antenna. Otherwise, the
vehicle electronics and mobile communication
devices can interfere with each other. In addi‐
tion, there is no assurance that the radiation
generated during transmission will be dis‐
charged from the vehicle interior.◀
Hydroplaning
On wet or slushy roads, a wedge of water can
form between the tires and road surface.
This phenomenon is referred to as hydroplan‐
ing. It is characterized by a partial or complete
loss of contact between the tires and the road
surface, ultimately undermining your ability to
steer and brake the vehicle.
Hydroplaning
When driving on wet or slushy roads, re‐
duce your speed to prevent hydroplaning.◀
Driving through water Drive though calm water only and only if it is
not deeper than. 9.8 inches/25 cm and at this
height, no faster than walking speed, up to 6 mph/10 km/h.
Adhere to water depth and speed limita‐
tions
Do not exceed this water depth and walking
speed; otherwise, the vehicle's engine, the
electrical systems and the transmission may
be damaged.◀
Braking safely
Your vehicle is equipped with ABS as a stand‐
ard feature.
Applying the brakes fully is the most effective
way of braking in situations when this is neces‐
sary.
The vehicle maintains steering responsive‐
ness. You can still avoid any obstacles with a
minimum of steering effort.
Pulsation of the brake pedal and sounds from
the hydraulic circuits indicate that ABS is in its
active mode.Seite 169Things to remember when drivingDriving tips169
Online Edition for Part no. 0140 2 910 771 - VI/13
Page 170 of 237
Objects in the area around the pedalsNo objects in the area around the pedals
Keep floor mats, carpets, and any other
objects out of the area of motion of the pedals;
otherwise, the function of the pedals could be
impeded while driving
Do not place additional floor mats over existing
mats or other objects.
Only use floor mats that have been approved
for the vehicle and can be properly fixed in
place.
Ensure that the floor mats are securely fas‐
tened again after they were removed for clean‐
ing, for example.◀
Driving in wet conditions When roads are wet coated with road salt or
there is heavy rain, briefly exert gentle pres‐
sure on the brake pedal every few miles.
Ensure that this action does not endanger
other road users.
The heat generated in this process helps dry
the brake discs and pads.
In this way braking efficiency will be available
when you need it.
Hills
Drive long or steep downhill gradients in the
gear in which the least braking is required.
Otherwise, the brake system may overheat, re‐
sulting in a reduction in the brake system effi‐ ciency.
You can increase the engine's braking effect
by shifting down, going all the way to first gear,
if necessary.
Avoid load on the brakes
Avoid placing excessive load on the
brake system. Light but consistent brake pres‐
sure can lead to high temperatures, brake wear
and possibly even brake failure.◀Do not drive in neutral
Do not drive in neutral or with the engine
stopped, as doing so disables engine braking.
In addition, steering and brake assist is un‐
available with the engine stopped.◀
Brake disc corrosion The corrosion on the brake discs and the con‐
tamination on the brake pads are furthered by:▷Low mileage.▷Extended periods when the vehicle is not
used at all.▷Infrequent use of the brakes.
Corrosion occurs when the minimum pressure
that must be exerted by the pads during brake
applications to clean the discs is not reached.
Should corrosion form on the brake discs, the
brakes will tend to respond with a pulsating ef‐
fect that generally cannot be corrected.
Condensation under the parked
vehicle
When using the automatic climate control,
condensation water develops that exits under‐
neath the vehicle.
Traces of water under the vehicle like this are
normal.
Seite 170Driving tipsThings to remember when driving170
Online Edition for Part no. 0140 2 910 771 - VI/13
Page 174 of 237
On a downhill gradient, take your foot off the
accelerator and let the vehicle roll.
The flow of fuel is interrupted while coasting.
Switch off the engine during
longer stops
Switch off the engine during longer stops, e.g.,
at traffic lights, railroad crossings or in traffic
congestion.
Automatic Engine Start/Stop Function
The Auto Start/Stop function of your vehicle
automatically switches off the engine during a
stop.
If the engine is switched off and then restarted
rather than leaving the engine running con‐
stantly, fuel consumption and emissions are
reduced. Savings can begin within a few sec‐
onds of switching off the engine.
Using this system can cause certain compo‐
nents of the vehicle to become worn prema‐
turely.
In addition, fuel consumption is also deter‐
mined by other factors, such as driving style,
road conditions, maintenance or environmental
factors.
Switch off any functions that
are not currently needed
Functions such as seat heating and the rear
window defroster require a lot of energy and
consume additional fuel, especially in city and
stop-and-go traffic.
Therefore, switch off these functions if they
are not actually needed.Have maintenance carried
out
Have vehicles maintained regularly to achieve
optimal vehicle economy and operating life.
Have the maintenance carried out by your
service center.
Please also note the BMW Maintenance Sys‐
tem, refer to page 202.
ECO PRO
The concept ECO PRO supports a driving style that saves
on fuel consumption. For this purpose, the en‐
gine control and comfort functions, e. g. the
climate control output, are adjusted.
In addition, context-sensitive instructions can
be displayed that assist in driving in a manner
that optimizes fuel consumption.
The extension of the range that is achieved as
a result can be displayed in the instrument
cluster.
At a glance
The system includes the following
EfficientDynamics functions and displays:▷ECO PRO bonus range, refer to page 175.▷ECO PRO tips driving instruction, refer to
page 176▷ECO PRO climate control, refer to
page 175.
Activating ECO PRO
Press button repeatedly until ECO
PRO is displayed in the instrument
cluster.
Configuring ECO PRO
Via the Driving Dynamics Control
1.Activate ECO PRO.Seite 174Driving tipsSaving fuel174
Online Edition for Part no. 0140 2 910 771 - VI/13
Page 175 of 237
2."Configure ECO PRO"3.Configure the program.
Via the iDrive
1."Settings"2."ECO PRO mode"
Or
1."Settings"2."Driving mode"3."Configure ECO PRO"
Configure the program.
ECO PRO Tip
▷"Tip at:":
Set ECO Pro speed at which an ECO PRO
Tip is to be displayed.▷"ECO PRO speed warning":
A reminder is displayed if the set ECO PRO
speed is exceeded.
ECO PRO climate control
"ECO PRO climate control"
The climate control is adjusted to be fuel-effi‐
cient.
By making a slight change to the set tempera‐
ture, or slowly adjusting the rate of heating or
cooling of the passenger compartment, fuel
consumption can be economized.
The outputs of the seat heater and the exterior
mirror heating are also reduced.
The exterior mirror heating is made available
when outside temperatures are very cold.
ECO PRO potentialThe percentage of potential savings that can
be achieved with the current configuration is
displayed.
Display in the instrument cluster
Display in the instrument display
When ECO PRO mode is activated, the display
switches to a special configuration.
Some of the displays may differ from the dis‐
play in the instrument cluster.
ECO PRO bonus range An extension of the range can
be achieved by an adjusted driv‐
ing style.
This may be displayed as the
bonus range in the instrument
cluster.
The bonus range is shown in the range display.
The bonus range is automatically reset every
time the vehicle is refueled.
Driving style
In the tachometer, a mark in the bar display in‐
dicates the current efficiency of the driving
style.
Mark in the CHARGE area, arrow 1: display for
energy recovered by coasting or when braking.
Mark in the POWER area, arrow 2: display
when accelerating.
The efficiency of the driving style is shown by
the color of the bar:
▷Blue display: efficient driving style as long
as the mark moves within the blue range.▷Gray display: adjust driving style, e. g. by
backing off the accelerator pedal.Seite 175Saving fuelDriving tips175
Online Edition for Part no. 0140 2 910 771 - VI/13
Page 176 of 237
The display switches to blue as soon as all
conditions for fuel-economy-optimized driving
are met.
ECO PRO Tip - driving instruction The arrow indicates that the
driving style can be adjusted to
be more fuel efficient by backing
off the accelerator for instance.
Note The driving style display and ECO PRO tips in
the instrument cluster appear when the ECO
PRO display is activated.
Activating driving style and ECO PRO tips:1."Settings"2."Info display"3."ECO PRO Info"
In the instrument display:
1."Settings"2."Info display"3."Driving mode view"
ECO PRO tip - Symbols An additional symbol and a text instruction are
displayed.
SymbolMeasureFor efficient driving style, back off
the accelerator or delay accelerating
to allow time to assess road condi‐
tions.Reduce speed to the selected ECO
PRO speed.Automatic transmission: switch
from M/S to D and avoid manual
shift interventions.Indications on the Control Display
EfficientDynamics Information on fuel consumption and technol‐
ogy can be displayed during driving.1."Vehicle Info"2."EfficientDynamics"
Displaying fuel consumption history
The average fuel consumption can be dis‐
played within an adjustable time frame.
Vertical bars show consumption for the se‐
lected time frame.
Trip interruptions are represented below the
bar on the time axis.
"Consumption history"
Adjusting fuel consumption history time frame
Select the symbol.
Resetting fuel consumption history
1.Open "Options".2."Reset consumption history"
Displaying EfficientDynamics info
The current efficiency can be displayed.
"EfficientDynamics info"
The following systems are displayed:
▷Automatic engine start-stop function.▷Energy recovery.▷Climate control output.▷Coasting.
Display ECO PRO tips
"ECO PRO Tips"
The setting is stored for the profile currently in
use.
Seite 176Driving tipsSaving fuel176
Online Edition for Part no. 0140 2 910 771 - VI/13
Page 192 of 237
Tire age
DOT … 1013: the tire was manufactured in the
10th week 2013.
Recommendation
Regardless of wear, replace tires at least every
6 years.
Uniform Tire Quality GradingQuality grades can be found where applicable
on the tire sidewall between tread shoulder
and maximum section width.
For example: Treadwear 200; Traction AA;
Temperature A
DOT Quality Grades
Treadwear
Traction AA A B C
Temperature A B C
All passenger car tires must conform to Fed‐
eral Safety Requirements in addition to these
grades.
TreadwearThe treadwear grade is a comparative rating
based on the wear rate of the tire when tested
under controlled conditions on a specified gov‐
ernment test course. For example, a tire graded 150 would wear one and one-half, 1 g,
times as well on the government course as a
tire graded 100. The relative performance of
tires depends upon the actual conditions of
their use, however, and may depart signifi‐
cantly from the norm due to variations in driv‐
ing habits, service practices and differences in
road characteristics and climate.
Traction
The traction grades, from highest to lowest, are AA, A, B, and C.
Those grades represent the tire's ability to
stop on wet pavement as measured under
controlled conditions on specified governmenttest surfaces of asphalt and concrete. A tire
marked C may have poor traction performance.
The traction grade assigned to this tire is
based on straight-ahead braking traction tests,
and does not include acceleration, cornering,
hydroplaning, or peak traction characteristics.
Temperature
The temperature grades are A, the highest, B,
and C, representing the tire's resistance to the
generation of heat and its ability to dissipate
heat when tested under controlled conditions
on a specified indoor laboratory test wheel.
Sustained high temperature can cause the ma‐
terial of the tire to degenerate and reduce tire
life, and excessive temperature can lead to
sudden tire failure. The grade C corresponds
to a level of performance which all passenger
car tires must meet under the Federal Motor
Vehicle Safety Standard No. 109. Grades Band
A represent higher levels of performance on
the laboratory test wheel than the minimum re‐
quired by law.
Temperature grade for this tire
The temperature grade for this tire is es‐
tablished for a tire that is properly inflated and
not overloaded. Excessive speed, underinfla‐
tion, or excessive loading, either separately or
in combination, can cause heat buildup and
possible tire failure.
If necessary, have the vehicle towed.◀
RSC – Run-flat tires
Run-flat tires, refer to page 195, are labeled
with a circular symbol containing the letters RSC marked on the sidewall.
M+S
Winter and all-season tires with better cold
weather performance than summer tires.Seite 192MobilityWheels and tires192
Online Edition for Part no. 0140 2 910 771 - VI/13
Page 226 of 237
Everything from A to Z
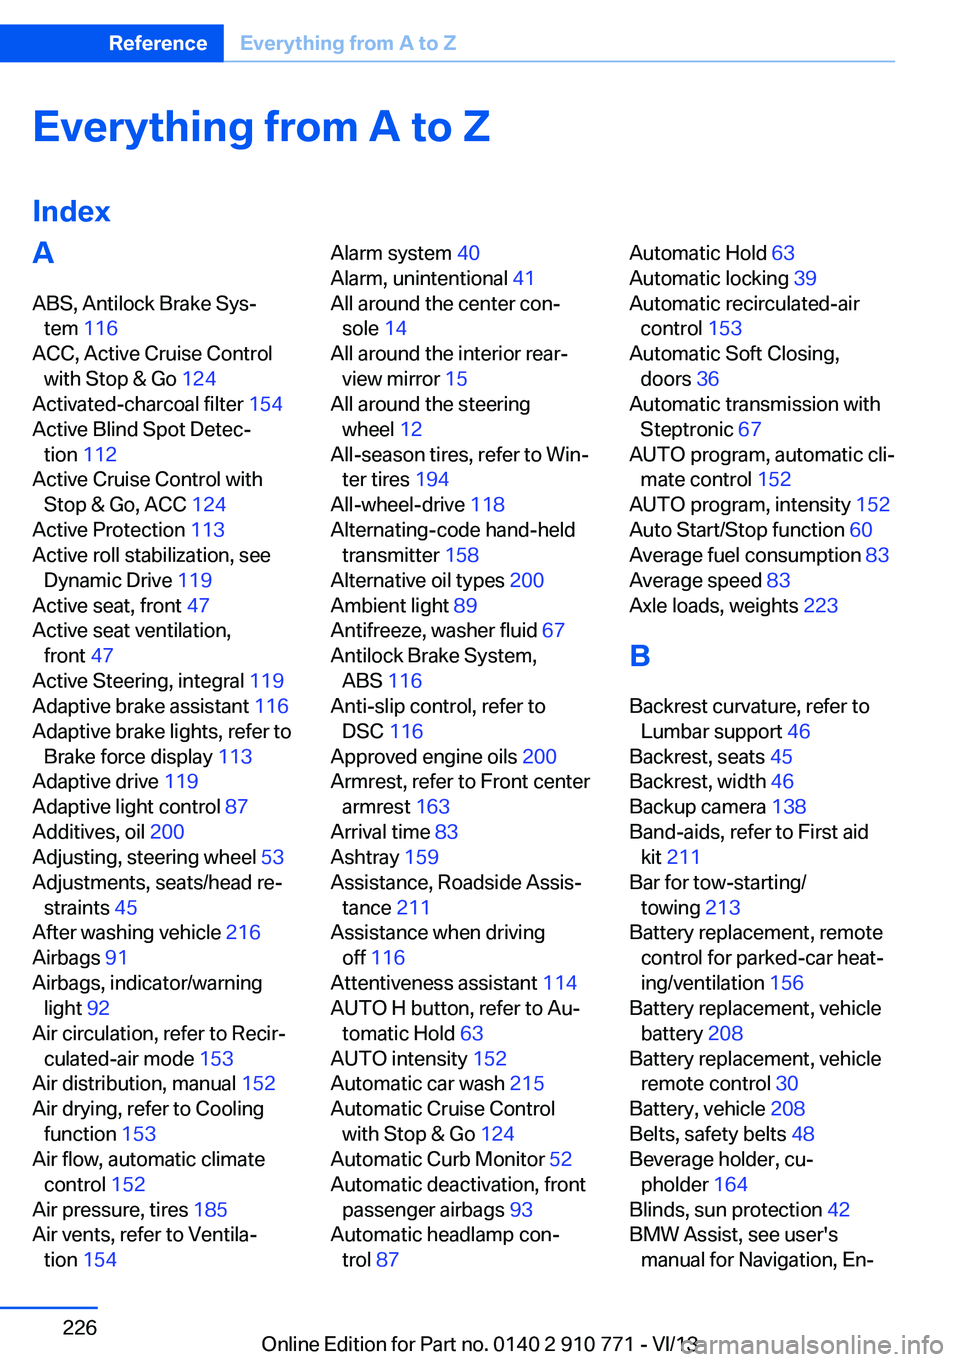
IndexA ABS, Antilock Brake Sys‐ tem 116
ACC, Active Cruise Control with Stop & Go 124
Activated-charcoal filter 154
Active Blind Spot Detec‐ tion 112
Active Cruise Control with Stop & Go, ACC 124
Active Protection 113
Active roll stabilization, see Dynamic Drive 119
Active seat, front 47
Active seat ventilation, front 47
Active Steering, integral 119
Adaptive brake assistant 116
Adaptive brake lights, refer to Brake force display 113
Adaptive drive 119
Adaptive light control 87
Additives, oil 200
Adjusting, steering wheel 53
Adjustments, seats/head re‐ straints 45
After washing vehicle 216
Airbags 91
Airbags, indicator/warning light 92
Air circulation, refer to Recir‐ culated-air mode 153
Air distribution, manual 152
Air drying, refer to Cooling function 153
Air flow, automatic climate control 152
Air pressure, tires 185
Air vents, refer to Ventila‐ tion 154 Alarm system 40
Alarm, unintentional 41
All around the center con‐ sole 14
All around the interior rear‐ view mirror 15
All around the steering wheel 12
All-season tires, refer to Win‐ ter tires 194
All-wheel-drive 118
Alternating-code hand-held transmitter 158
Alternative oil types 200
Ambient light 89
Antifreeze, washer fluid 67
Antilock Brake System, ABS 116
Anti-slip control, refer to DSC 116
Approved engine oils 200
Armrest, refer to Front center armrest 163
Arrival time 83
Ashtray 159
Assistance, Roadside Assis‐ tance 211
Assistance when driving off 116
Attentiveness assistant 114
AUTO H button, refer to Au‐ tomatic Hold 63
AUTO intensity 152
Automatic car wash 215
Automatic Cruise Control with Stop & Go 124
Automatic Curb Monitor 52
Automatic deactivation, front passenger airbags 93
Automatic headlamp con‐ trol 87 Automatic Hold 63
Automatic locking 39
Automatic recirculated-air control 153
Automatic Soft Closing, doors 36
Automatic transmission with Steptronic 67
AUTO program, automatic cli‐ mate control 152
AUTO program, intensity 152
Auto Start/Stop function 60
Average fuel consumption 83
Average speed 83
Axle loads, weights 223
B Backrest curvature, refer to Lumbar support 46
Backrest, seats 45
Backrest, width 46
Backup camera 138
Band-aids, refer to First aid kit 211
Bar for tow-starting/ towing 213
Battery replacement, remote control for parked-car heat‐
ing/ventilation 156
Battery replacement, vehicle battery 208
Battery replacement, vehicle remote control 30
Battery, vehicle 208
Belts, safety belts 48
Beverage holder, cu‐ pholder 164
Blinds, sun protection 42
BMW Assist, see user's manual for Navigation, En‐Seite 226ReferenceEverything from A to Z226
Online Edition for Part no. 0140 2 910 771 - VI/13
Page 227 of 237
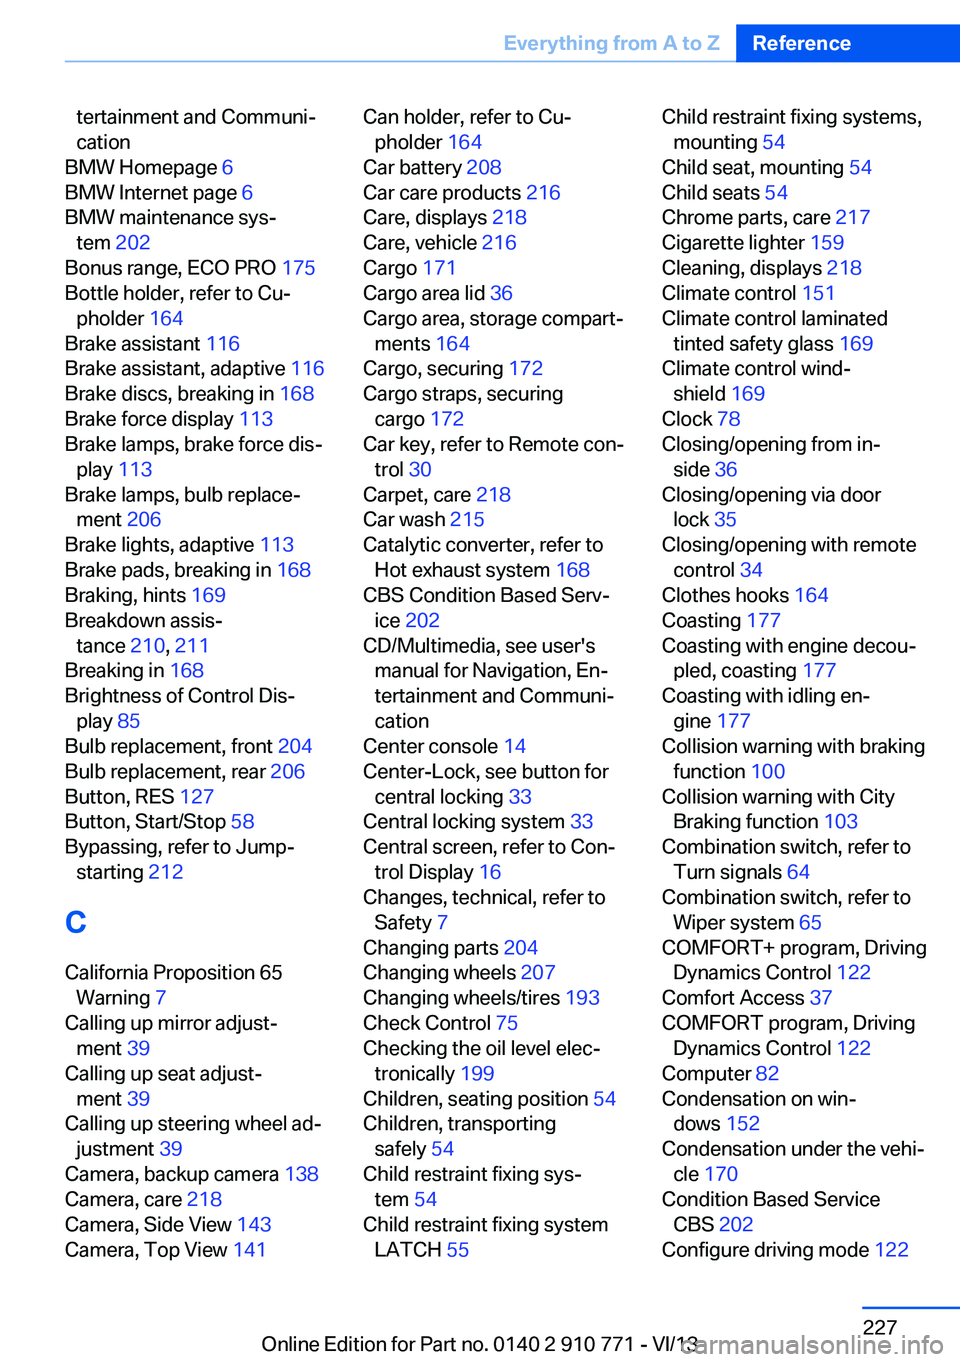
tertainment and Communi‐
cation
BMW Homepage 6
BMW Internet page 6
BMW maintenance sys‐ tem 202
Bonus range, ECO PRO 175
Bottle holder, refer to Cu‐ pholder 164
Brake assistant 116
Brake assistant, adaptive 116
Brake discs, breaking in 168
Brake force display 113
Brake lamps, brake force dis‐ play 113
Brake lamps, bulb replace‐ ment 206
Brake lights, adaptive 113
Brake pads, breaking in 168
Braking, hints 169
Breakdown assis‐ tance 210, 211
Breaking in 168
Brightness of Control Dis‐ play 85
Bulb replacement, front 204
Bulb replacement, rear 206
Button, RES 127
Button, Start/Stop 58
Bypassing, refer to Jump- starting 212
C
California Proposition 65 Warning 7
Calling up mirror adjust‐ ment 39
Calling up seat adjust‐ ment 39
Calling up steering wheel ad‐ justment 39
Camera, backup camera 138
Camera, care 218
Camera, Side View 143
Camera, Top View 141 Can holder, refer to Cu‐
pholder 164
Car battery 208
Car care products 216
Care, displays 218
Care, vehicle 216
Cargo 171
Cargo area lid 36
Cargo area, storage compart‐ ments 164
Cargo, securing 172
Cargo straps, securing cargo 172
Car key, refer to Remote con‐ trol 30
Carpet, care 218
Car wash 215
Catalytic converter, refer to Hot exhaust system 168
CBS Condition Based Serv‐ ice 202
CD/Multimedia, see user's manual for Navigation, En‐
tertainment and Communi‐
cation
Center console 14
Center-Lock, see button for central locking 33
Central locking system 33
Central screen, refer to Con‐ trol Display 16
Changes, technical, refer to Safety 7
Changing parts 204
Changing wheels 207
Changing wheels/tires 193
Check Control 75
Checking the oil level elec‐ tronically 199
Children, seating position 54
Children, transporting safely 54
Child restraint fixing sys‐ tem 54
Child restraint fixing system LATCH 55 Child restraint fixing systems,
mounting 54
Child seat, mounting 54
Child seats 54
Chrome parts, care 217
Cigarette lighter 159
Cleaning, displays 218
Climate control 151
Climate control laminated tinted safety glass 169
Climate control wind‐ shield 169
Clock 78
Closing/opening from in‐ side 36
Closing/opening via door lock 35
Closing/opening with remote control 34
Clothes hooks 164
Coasting 177
Coasting with engine decou‐ pled, coasting 177
Coasting with idling en‐ gine 177
Collision warning with braking function 100
Collision warning with City Braking function 103
Combination switch, refer to Turn signals 64
Combination switch, refer to Wiper system 65
COMFORT+ program, Driving Dynamics Control 122
Comfort Access 37
COMFORT program, Driving Dynamics Control 122
Computer 82
Condensation on win‐ dows 152
Condensation under the vehi‐ cle 170
Condition Based Service CBS 202
Configure driving mode 122 Seite 227Everything from A to ZReference227
Online Edition for Part no. 0140 2 910 771 - VI/13