height adjustment BMW 650I COUPE&CONVERTIBLE 2006 Owners Manual
[x] Cancel search | Manufacturer: BMW, Model Year: 2006, Model line: 650I COUPE&CONVERTIBLE, Model: BMW 650I COUPE&CONVERTIBLE 2006Pages: 242, PDF Size: 8.47 MB
Page 49 of 242

Adjustments
48
Seats
Note before adjusting
Never attempt to adjust your seat while
operating the vehicle. The seat could
respond with unexpected movement and the
ensuing loss of vehicle control could lead to an
accident.
On the front passenger side as well, do not tilt
the backrest too far toward the rear. Failure to
observe this precaution can prevent the belt
from providing effective protection against
injury, as the passenger could slide under the
belt in an accident.<
Also follow the instructions regarding damage
to the safety belt on page52.
Convertible: with the wind deflector fitted,
do not incline the front seat backrests too
far backward if the seat is to be moved back to
the end position. Otherwise, the wind deflector
will be damaged.<
Seat adjustment
To ensure that the safety systems con-
tinue to provide optimized protection,
please follow the adjustment instructions on
page47.<
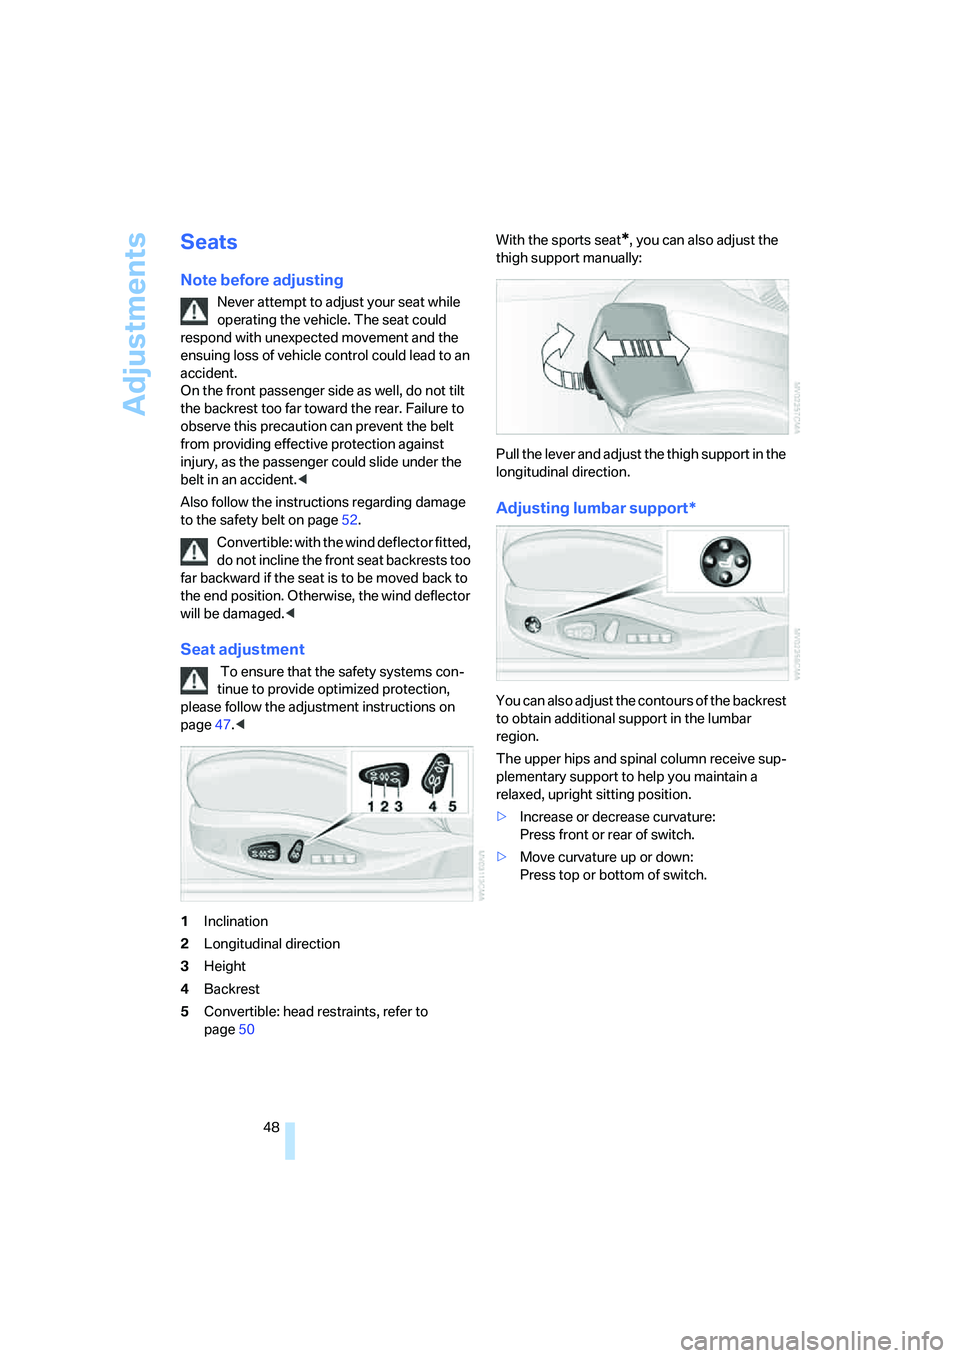
1Inclination
2Longitudinal direction
3Height
4Backrest
5Convertible: head restraints, refer to
page50With the sports seat
*, you can also adjust the
thigh support manually:
Pull the lever and adjust the thigh support in the
longitudinal direction.
Adjusting lumbar support*
You can also adjust the contours of the backrest
to obtain additional support in the lumbar
region.
The upper hips and spinal column receive sup-
plementary support to help you maintain a
relaxed, upright sitting position.
>Increase or decrease curvature:
Press front or rear of switch.
>Move curvature up or down:
Press top or bottom of switch.
Page 51 of 242

Adjustments
50 7.Select "After unlocking" or "After door
opened".
8.Press the controller.
To cancel the request:
Select "Deactivated" and press the controller.
When using this feature, always make
sure that the footwell behind the driver's
seat is empty and unobstructed. If you fail to do
so, any persons or objects behind the seat
could be injured or damaged by a rearward
movement of the seat.<
Front head restraints
A correctly adjusted head restraint reduces the
risk of injury to cervical vertebrae in an accident.
Adjust the head restraint so that its center
is approx. at ear level. Otherwise, there is
increased danger of injury in the event of an
accident.<
Coupe
Adjusting height
>To raise: pull the head restraint upward.
>To lower: slide the head restraint down-
ward.To reach the lowest position, press the
button, refer to arrow 1.<
Adjusting tilt angle
Swivel the head restraints.
Removal
1.Pull the head restraint upward to the stop.
2.Press the button, arrow1, and remove the
head restraint.
Only remove head restraint when no pas-
senger is seated in the respective seat, as
otherwise you will be in violation of the law.
Reinstall head restraint before passengers use
the respective seat.<
Installation
Insert head restraint into the sockets and
adjust.
Convertible
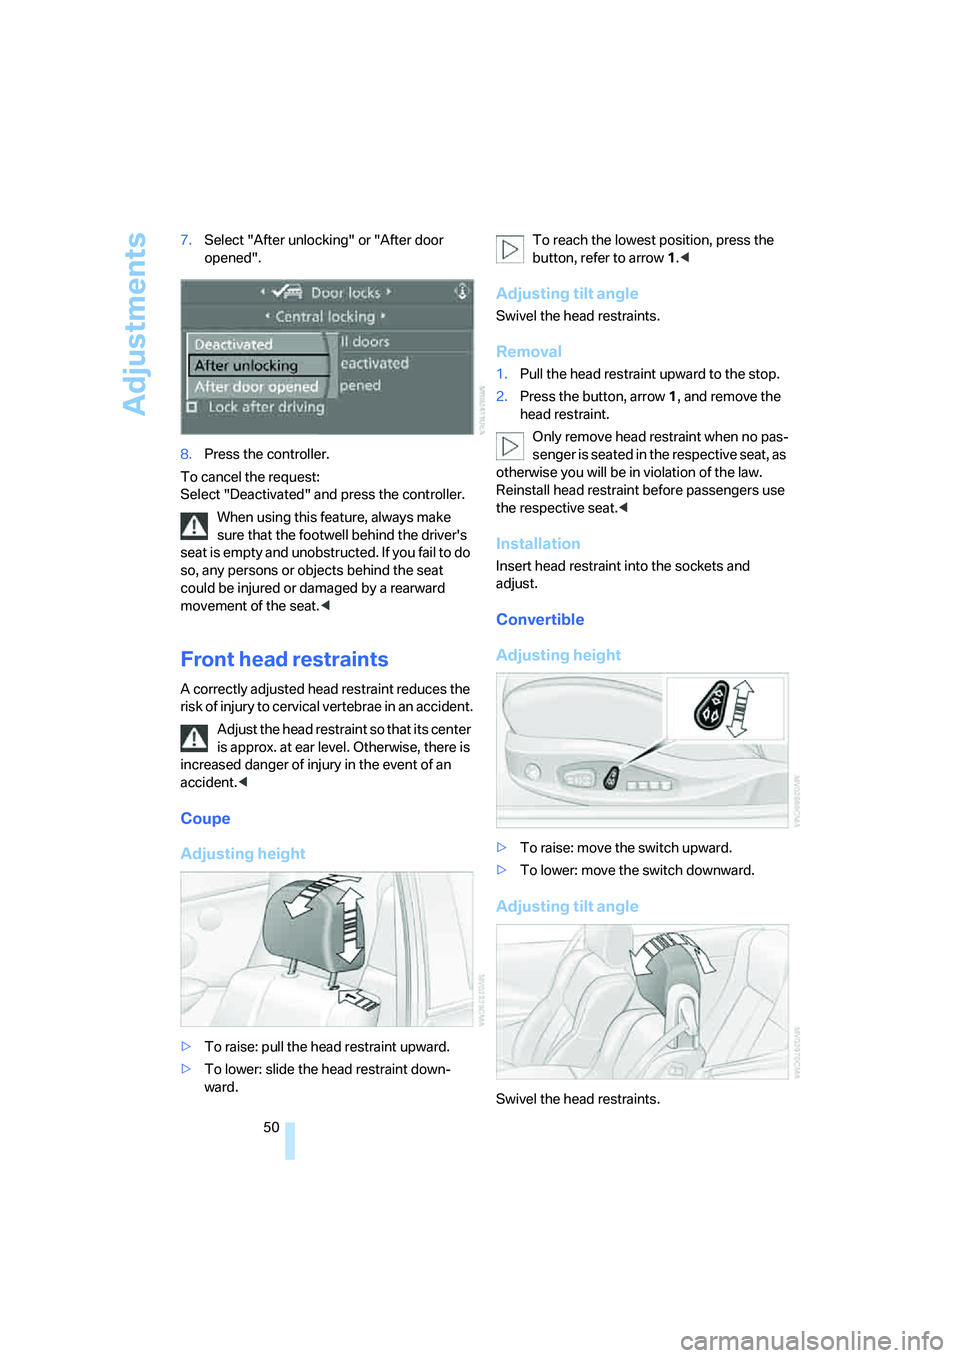
Adjusting height
>To raise: move the switch upward.
>To lower: move the switch downward.
Adjusting tilt angle
Swivel the head restraints.
Page 230 of 242

Reference 229
At a glance
Controls
Driving tips
Communications
Navigation
Entertainment
Mobility
Headlamps
– care, refer to the Caring for
your vehicle brochure
– cleaning, refer to Wiper
system66
– replacing bulbs201
Head Light, refer to Adaptive
Head Light101
Head restraints
– front50
– removing50
– sitting safely47
"Head-Up Display"96
Head-Up Display95
Heated
– mirrors, refer to Automatic
functions53
– rear window106
– seats52
– steering wheel54
Heater105
Heating
– exterior mirrors53
– interior104
– rear window106
– residual heat107
– seats52
– steering wheel54
Heating with engine switched
off, refer to Residual
heat107
Heavy cargo, refer to Securing
cargo121
Height, refer to
Dimensions215
Height adjustment
– seats48
– steering wheel53
High-beam assistant102
High beams101
– headlamp flasher101
– indicator lamp13
– replacing bulbs202
High Definition Radio152
High water, refer to Driving
through water119
Hills119
"Home address" in
navigation134Homepage4
Hood194
Horn10
Hotel function33
– unlocking manually33
Hot exhaust system118
"Hour memo"83
"House number" for desti-
nation entry128
Hydraulic brake assistant,
refer to DBC Dynamic Brake
Control86
Hydroplaning119
– also refer to Minimum tread
depth191
I
IBOC, refer to High Definition
Radio152
Ice, refer to Outside temper-
ature warning74
ID3-Tag, refer to Information
about track159
iDrive16
– adjusting brightness83
– assistance window20
– changing date and time82
– changing language84
– changing menu page19
– changing settings82
– changing unit of measure
units and display form84
– controller16
– controls16
– displaying menus17
– selecting menu item19
– selecting or confirming
entry19
– start menu17
– status information20
– symbols18
Ignition58
– switched off58
– switched on58
Ignition key, refer to Keys/
remote control28
Ignition key position 1, refer to
Radio readiness58Ignition key position 2, refer to
Ignition on58
Ignition lock58
– starting engine with comfort
access37
Indicator/warning lamps
– active steering92
– airbags94
– DSC13,87
– DTC13,87
– Flat Tire Monitor89
– fog lamps13,103
– handbrake13,60
– safety belt warning52
– TPM Tire Pressure
Monitor91
Indicator and warning lamps,
overview13
Individually programmable
buttons on steering
wheel54
Individual settings, refer to
Personal Profile29
Inflation pressure, refer to Tire
inflation pressure188
Inflation pressure monitoring
– refer to Flat Tire Monitor88
– refer to Tire Pressure
Monitor89
Information
– on another location130
– on current position130
– on destination location130
"Information" for
navigation130
"Information on
destination"132
Initializing
– Flat Tire Monitor88
– radio, refer to Storing
stations150
– refer to Power failure204
– seat, mirror and steering
wheel memory49
– time and date82
"Input map"130
Installation location
– CD changer161
– navigation drive124