check engine light BMW 650I COUPE&CONVERTIBLE 2008 Owners Manual
[x] Cancel search | Manufacturer: BMW, Model Year: 2008, Model line: 650I COUPE&CONVERTIBLE, Model: BMW 650I COUPE&CONVERTIBLE 2008Pages: 264, PDF Size: 9.07 MB
Page 15 of 264
At a glance
13Reference
Controls
Driving tips
Communications
Navigation
Entertainment
Mobility
Indicator and warning lamps
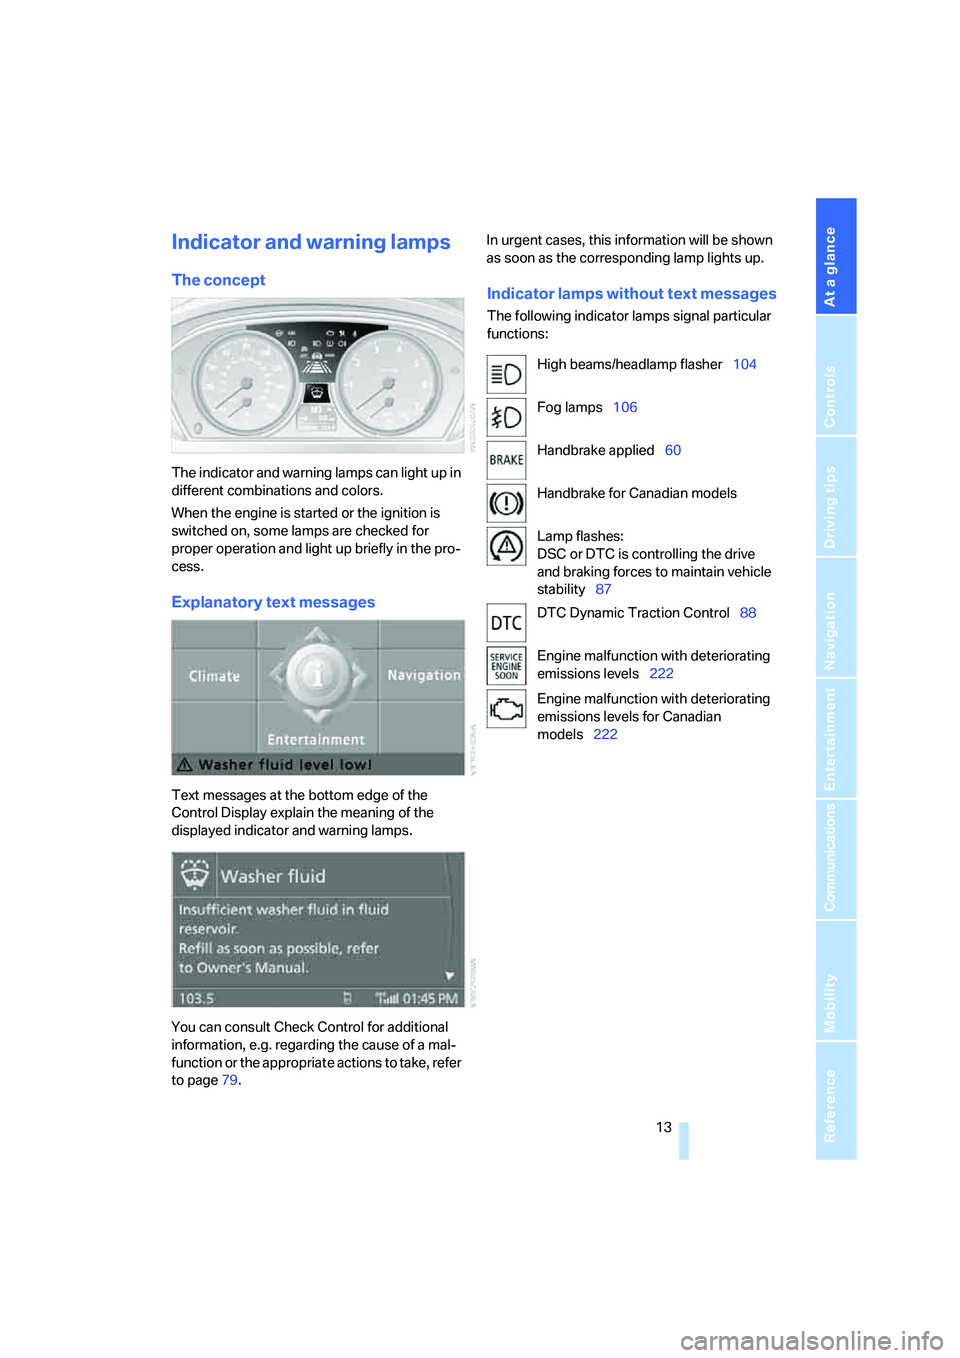
The concept
The indicator and warning lamps can light up in
different combinations and colors.
When the engine is started or the ignition is
switched on, some lamps are checked for
proper operation and light up briefly in the pro-
cess.
Explanatory text messages
Text messages at the bottom edge of the
Control Display explain the meaning of the
displayed indicator and warning lamps.
You can consult Check Control for additional
information, e.g. regarding the cause of a mal-
function or the appropriate actions to take, refer
to page79.In urgent cases, this information will be shown
as soon as the corresponding lamp lights up.
Indicator lamps without text messages
The following indicator lamps signal particular
functions:
High beams/headlamp flasher104
Fog lamps106
Handbrake applied60
Handbrake for Canadian models
Lamp flashes:
DSC or DTC is controlling the drive
and braking forces to maintain vehicle
stability87
DTC Dynamic Traction Control88
Engine malfunction with deteriorating
emissions levels222
Engine malfunction with deteriorating
emissions levels for Canadian
models222
Page 39 of 264
Controls
37Reference
At a glance
Driving tips
Communications
Navigation
Entertainment
Mobility
>The next unlocking and locking cycle is not
possible until after approx. 2 seconds.
>The engine can only be started if the vehicle
detects that the remote control is located in
the vehicle.
Comparison with ordinary remote
control
You can control the functions mentioned previ-
ously with the comfort access or by pressing
the buttons on the remote control. Before doing
so, please familiarize yourself with the informa-
tion on opening and closing, starting on
page28.
The special features when using comfort
access are described below.
Should a short delay occur when opening
or closing the windows, the glass sunroof
or the convertible top, the system is checking
whether a remote control is located in the vehi-
cle. Please repeat opening or closing if neces-
sary.<
Unlocking
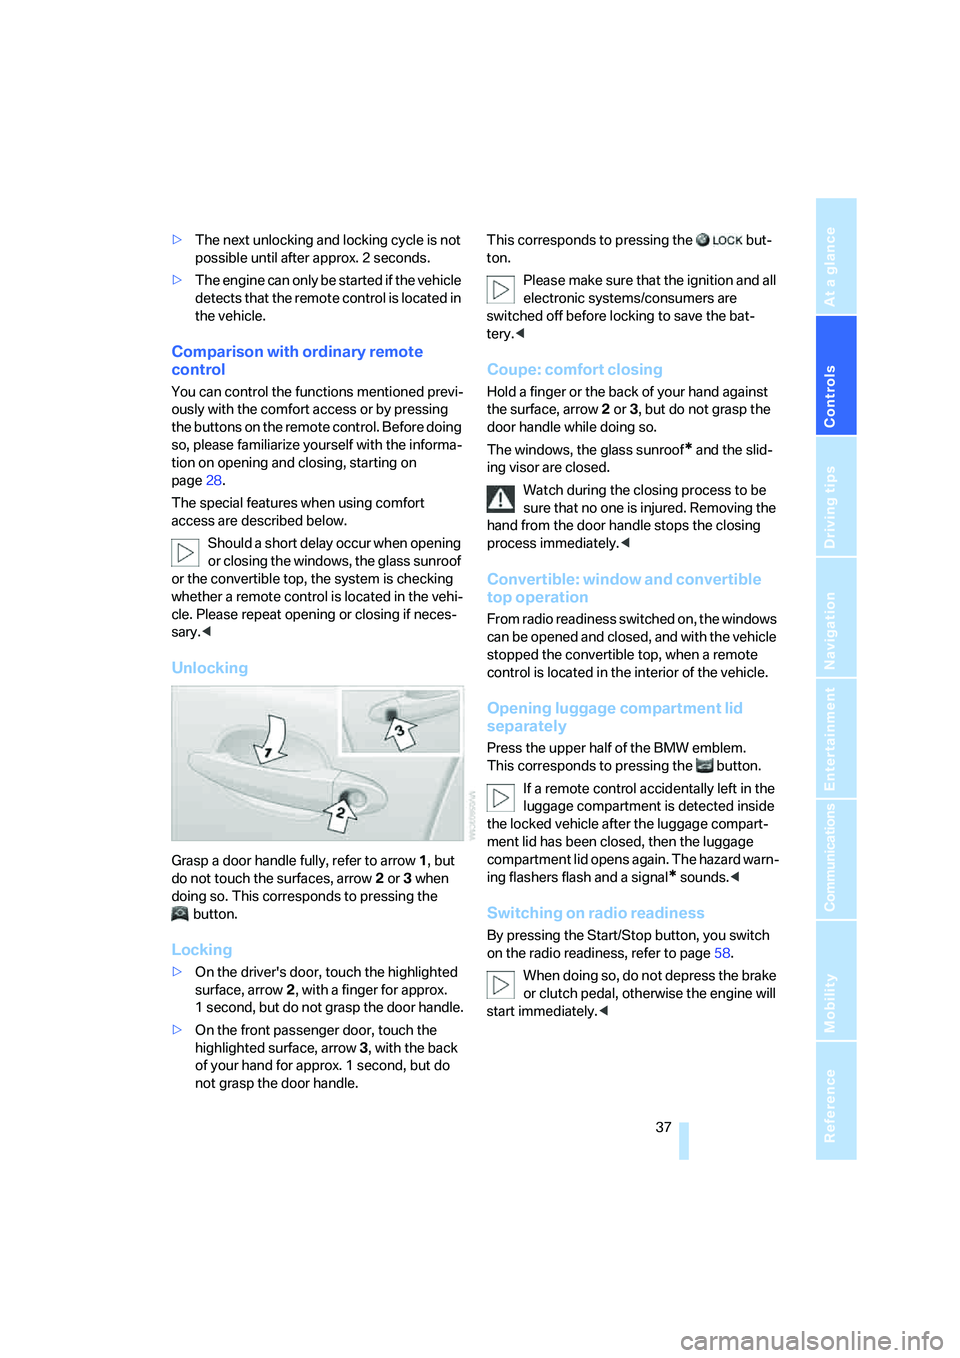
Grasp a door handle fully, refer to arrow1, but
do not touch the surfaces, arrow2 or 3 when
doing so. This corresponds to pressing the
button.
Locking
>On the driver's door, touch the highlighted
surface, arrow2, with a finger for approx.
1 second, but do not grasp the door handle.
>On the front passenger door, touch the
highlighted surface, arrow3, with the back
of your hand for approx. 1 second, but do
not grasp the door handle.This corresponds to pressing the but-
ton.
Please make sure that the ignition and all
electronic systems/consumers are
switched off before locking to save the bat-
tery.<
Coupe: comfort closing
Hold a finger or the back of your hand against
the surface, arrow2 or 3, but do not grasp the
door handle while doing so.
The windows, the glass sunroof
* and the slid-
ing visor are closed.
Watch during the closing process to be
sure that no one is injured. Removing the
hand from the door handle stops the closing
process immediately.<
Convertible: window and convertible
top operation
From radio readiness switched on, the windows
can be opened and closed, and with the vehicle
stopped the convertible top, when a remote
control is located in the interior of the vehicle.
Opening luggage compartment lid
separately
Press the upper half of the BMW emblem.
This corresponds to pressing the button.
If a remote control accidentally left in the
luggage compartment is detected inside
the locked vehicle after the luggage compart-
ment lid has been closed, then the luggage
compartment lid opens again. The hazard warn-
ing flashers flash and a signal
* sounds.<
Switching on radio readiness
By pressing the Start/Stop button, you switch
on the radio readiness, refer to page58.
When doing so, do not depress the brake
or clutch pedal, otherwise the engine will
start immediately.<
Page 76 of 264
Everything under control
74
Everything under control
Odometer, outside
temperature display, clock
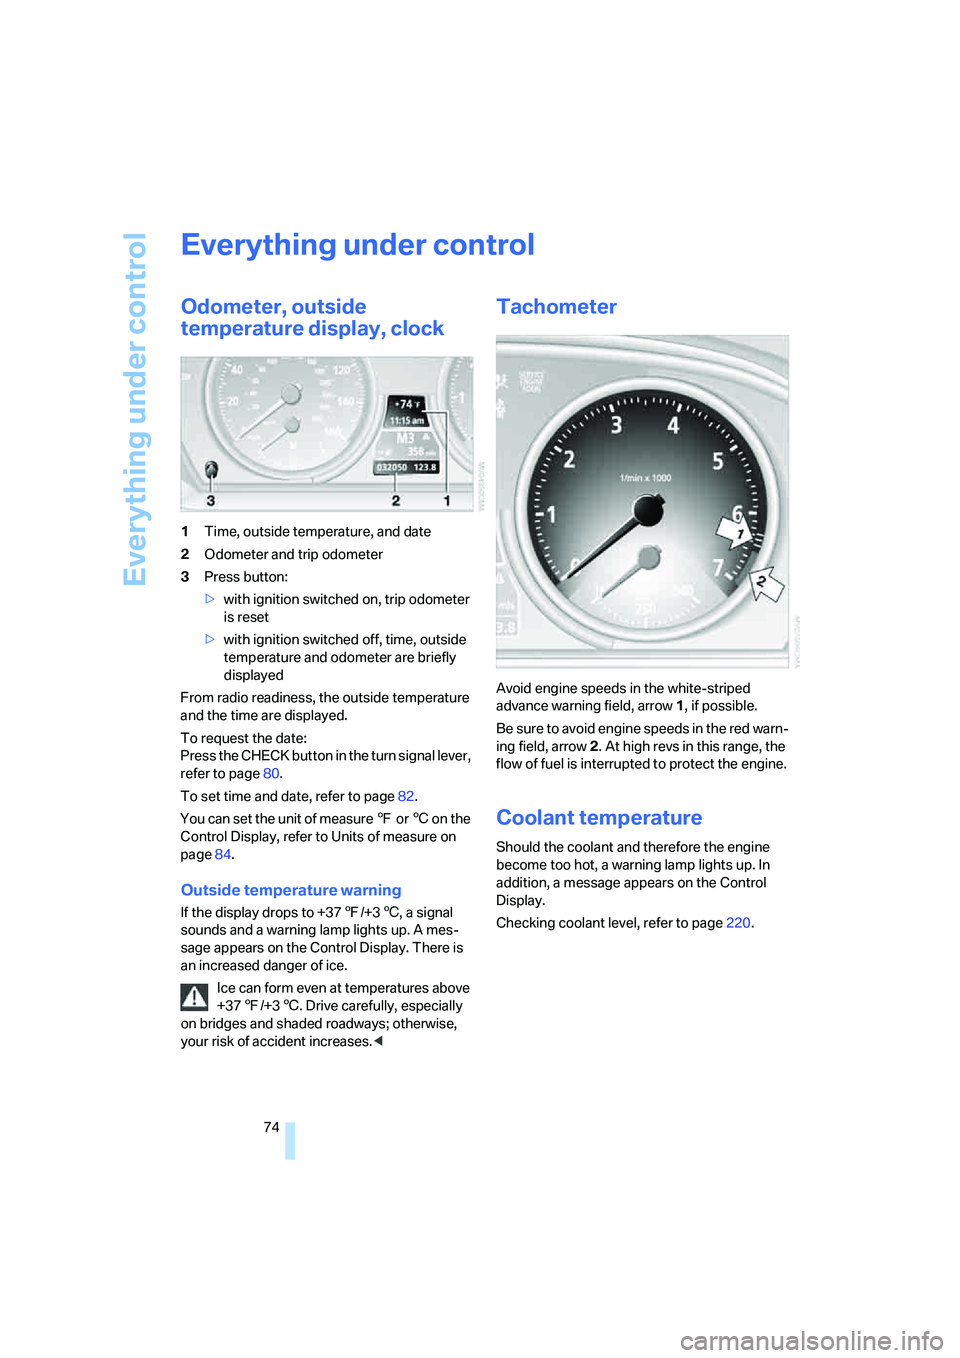
1Time, outside temperature, and date
2Odometer and trip odometer
3Press button:
>with ignition switched on, trip odometer
is reset
>with ignition switched off, time, outside
temperature and odometer are briefly
displayed
From radio readiness, the outside temperature
and the time are displayed.
To request the date:
Press the CHECK button in the turn signal lever,
refer to page80.
To set time and date, refer to page82.
You can set the unit of measure 7 or 6 on the
Control Display, refer to Units of measure on
page84.
Outside temperature warning
If the display drops to +377/+36, a signal
sounds and a warning lamp lights up. A mes-
sage appears on the Control Display. There is
an increased danger of ice.
Ice can form even at temperatures above
+377/+36. Drive carefully, especially
on bridges and shaded roadways; otherwise,
your risk of accident increases.<
Tachometer
Avoid engine speeds in the white-striped
advance warning field, arrow1, if possible.
Be sure to avoid engine speeds in the red warn-
ing field, arrow2. At high revs in this range, the
flow of fuel is interrupted to protect the engine.
Coolant temperature
Should the coolant and therefore the engine
become too hot, a warning lamp lights up. In
addition, a message appears on the Control
Display.
Checking coolant level, refer to page220.
Page 87 of 264
Controls
85Reference
At a glance
Driving tips
Communications
Navigation
Entertainment
Mobility
Technology for comfort, convenience and
safety
PDC Park Distance Control*
The concept
The PDC assists you when you are parking.
Acoustic signals and an optical display
* alert
you to the approach of an object from behind
your vehicle. To measure the distance, there
are four ultrasonic sensors in each bumper.
The range of these sensors is approx. 7 ft/2 m.
However, an acoustic warning first sounds for
the sensors at the front and at the two rear cor-
ners at approx. 24 in/60 cm, and for the center
rear sensors at approx. 5 ft/1.50 m.
PDC is a parking aid that can indicate the
presence of objects when they are being
approached slowly, as is usually the case when
parking. Avoid approaching an object at high
speed; otherwise, the physical circumstances
could cause the system warning to be activated
too late.<
Switching on automatically
The system starts to operate approx. one sec-
ond after you shift into reverse or move the
selector lever into position R with the engine
running or the ignition switched on.
Wait this short time before driving off.
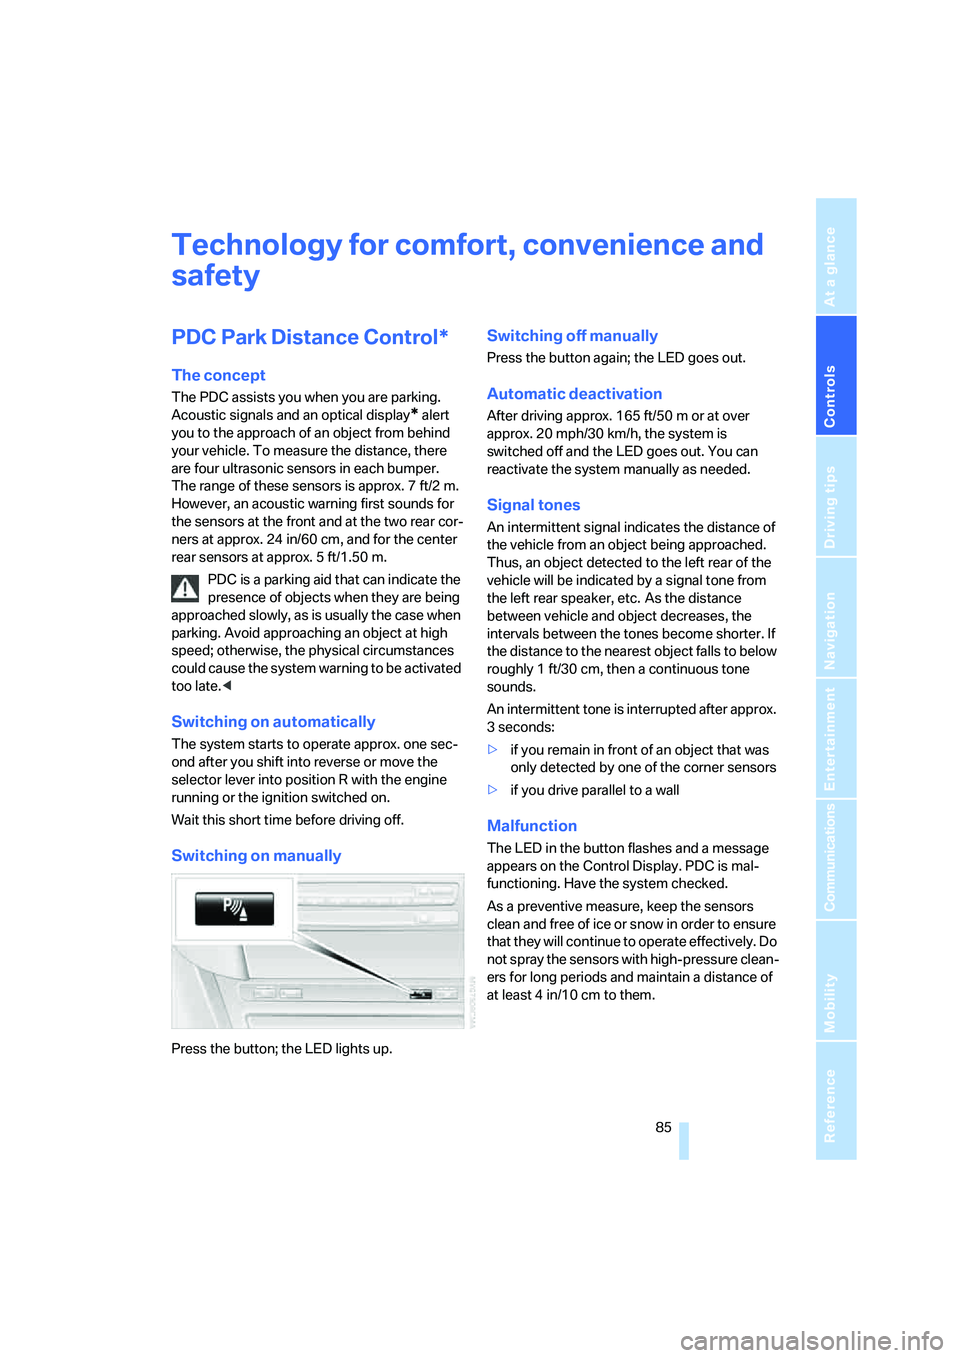
Switching on manually
Press the button; the LED lights up.
Switching off manually
Press the button again; the LED goes out.
Automatic deactivation
After driving approx. 165 ft/50 m or at over
approx. 20 mph/30 km/h, the system is
switched off and the LED goes out. You can
reactivate the system manually as needed.
Signal tones
An intermittent signal indicates the distance of
the vehicle from an object being approached.
Thus, an object detected to the left rear of the
vehicle will be indicated by a signal tone from
the left rear speaker, etc. As the distance
between vehicle and object decreases, the
intervals between the tones become shorter. If
the distance to the nearest object falls to below
roughly 1 ft/30 cm, then a continuous tone
sounds.
An intermittent tone is interrupted after approx.
3seconds:
>if you remain in front of an object that was
only detected by one of the corner sensors
>if you drive parallel to a wall
Malfunction
The LED in the button flashes and a message
appears on the Control Display. PDC is mal-
functioning. Have the system checked.
As a preventive measure, keep the sensors
clean and free of ice or snow in order to ensure
that they will continue to operate effectively. Do
not spray the sensors with high-pressure clean-
ers for long periods and maintain a distance of
at least 4 in/10 cm to them.
Page 92 of 264
Technology for comfort, convenience and safety
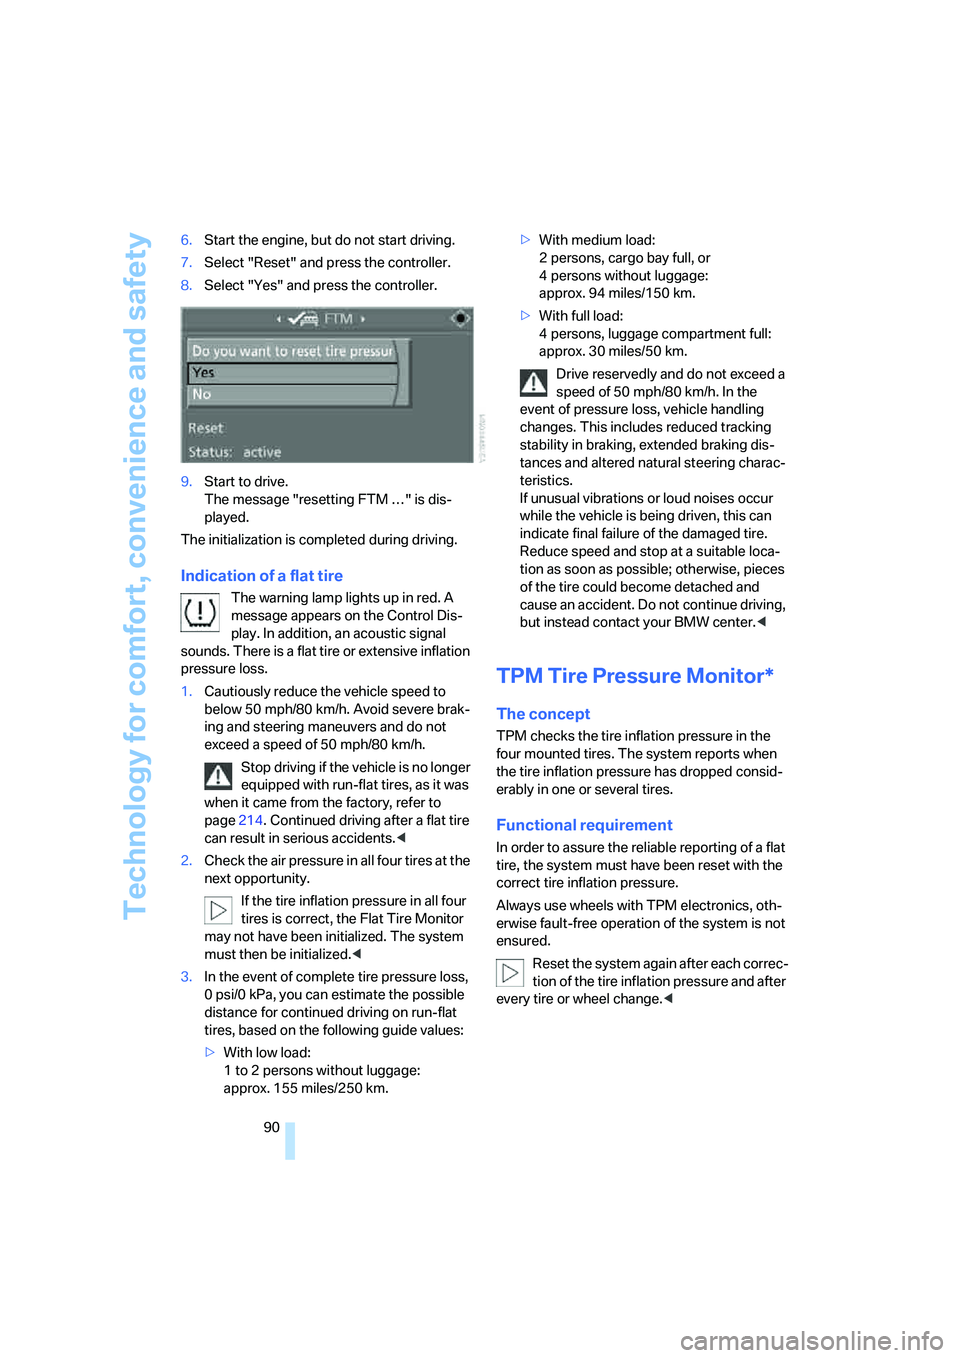
90 6.Start the engine, but do not start driving.
7.Select "Reset" and press the controller.
8.Select "Yes" and press the controller.
9.Start to drive.
The message "resetting FTM …" is dis-
played.
The initialization is completed during driving.
Indication of a flat tire
The warning lamp lights up in red. A
message appears on the Control Dis-
play. In addition, an acoustic signal
sounds. There is a flat tire or extensive inflation
pressure loss.
1.Cautiously reduce the vehicle speed to
below 50 mph/80 km/h. Avoid severe brak-
ing and steering maneuvers and do not
exceed a speed of 50 mph/80 km/h.
Stop driving if the vehicle is no longer
equipped with run-flat tires, as it was
when it came from the factory, refer to
page214. Continued driving after a flat tire
can result in serious accidents.<
2.Check the air pressure in all four tires at the
next opportunity.
If the tire inflation pressure in all four
tires is correct, the Flat Tire Monitor
may not have been initialized. The system
must then be initialized.<
3.In the event of complete tire pressure loss,
0 psi/0 kPa, you can estimate the possible
distance for continued driving on run-flat
tires, based on the following guide values:
>With low load:
1 to 2 persons without luggage:
approx. 155 miles/250 km.>With medium load:
2 persons, cargo bay full, or
4 persons without luggage:
approx. 94 miles/150 km.
>With full load:
4 persons, luggage compartment full:
approx. 30 miles/50 km.
Drive reservedly and do not exceed a
speed of 50 mph/80 km/h. In the
event of pressure loss, vehicle handling
changes. This includes reduced tracking
stability in braking, extended braking dis-
tances and altered natural steering charac-
teristics.
If unusual vibrations or loud noises occur
while the vehicle is being driven, this can
indicate final failure of the damaged tire.
Reduce speed and stop at a suitable loca-
tion as soon as possible; otherwise, pieces
of the tire could become detached and
cause an accident. Do not continue driving,
but instead contact your BMW center.<
TPM Tire Pressure Monitor*
The concept
TPM checks the tire inflation pressure in the
four mounted tires. The system reports when
the tire inflation pressure has dropped consid-
erably in one or several tires.
Functional requirement
In order to assure the reliable reporting of a flat
tire, the system must have been reset with the
correct tire inflation pressure.
Always use wheels with TPM electronics, oth-
erwise fault-free operation of the system is not
ensured.
Reset the system again after each correc-
tion of the tire inflation pressure and after
every tire or wheel change.<
Page 117 of 264
Controls
115Reference
At a glance
Driving tips
Communications
Navigation
Entertainment
Mobility
Practical interior accessories
Integrated universal remote
control*
The concept
The integrated universal remote control can
replace as many as three hand-held transmit-
ters for various remote-controlled accessories,
such as garage and gate or lighting systems.
The integrated universal remote control regis-
ters and stores signals from the original hand-
held transmitters.
The signal of an original hand-held transmitter
can be programmed on one of the three mem-
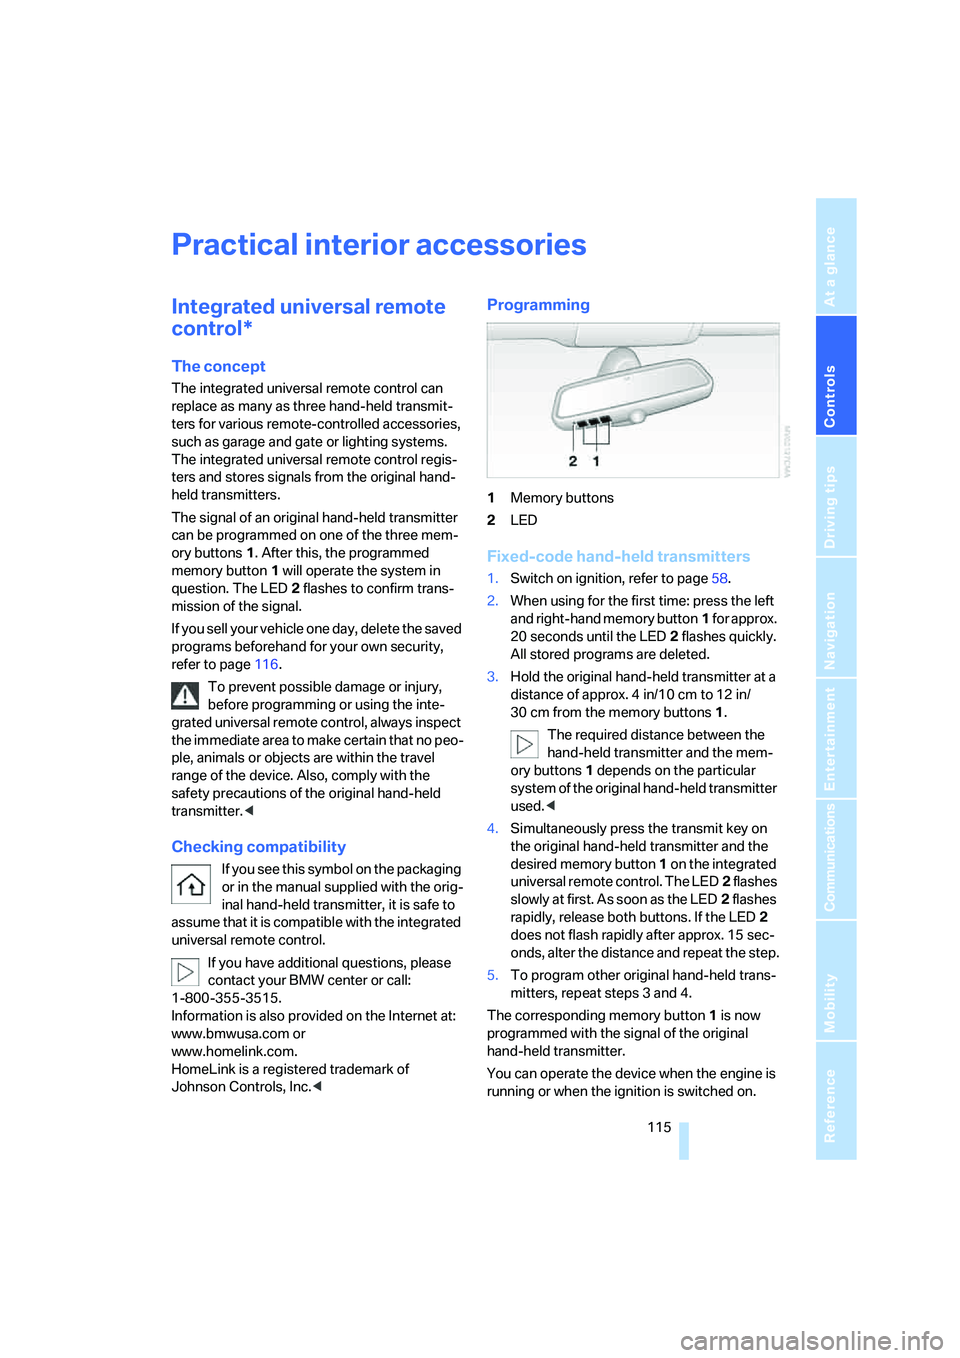
ory buttons1. After this, the programmed
memory button1 will operate the system in
question. The LED2 flashes to confirm trans-
mission of the signal.
If you sell your vehicle one day, delete the saved
programs beforehand for your own security,
refer to page116.
To prevent possible damage or injury,
before programming or using the inte-
grated universal remote control, always inspect
the immediate area to make certain that no peo-
ple, animals or objects are within the travel
range of the device. Also, comply with the
safety precautions of the original hand-held
transmitter.<
Checking compatibility
If you see this symbol on the packaging
or in the manual supplied with the orig-
inal hand-held transmitter, it is safe to
assume that it is compatible with the integrated
universal remote control.
If you have additional questions, please
contact your BMW center or call:
1-800-355-3515.
Information is also provided on the Internet at:
www.bmwusa.com or
www.homelink.com.
HomeLink is a registered trademark of
Johnson Controls, Inc.<
Programming
1Memory buttons
2LED
Fixed-code hand-held transmitters
1.Switch on ignition, refer to page58.
2.When using for the first time: press the left
and right-hand memory button1 for approx.
20 seconds until the LED2 flashes quickly.
All stored programs are deleted.
3.Hold the original hand-held transmitter at a
distance of approx. 4 in/10 cm to 12 in/
30 cm from the memory buttons1.
The required distance between the
hand-held transmitter and the mem-
ory buttons1 depends on the particular
system of the original hand-held transmitter
used.<
4.Simultaneously press the transmit key on
the original hand-held transmitter and the
desired memory button 1 on the integrated
universal remote control. The LED2 flashes
slowly at first. As soon as the LED2 flashes
rapidly, release both buttons. If the LED2
does not flash rapidly after approx. 15 sec-
onds, alter the distance and repeat the step.
5.To program other original hand-held trans-
mitters, repeat steps 3 and 4.
The corresponding memory button 1 is now
programmed with the signal of the original
hand-held transmitter.
You can operate the device when the engine is
running or when the ignition is switched on.
Page 224 of 264
Maintenance
222
Socket for OBD Onboard
Diagnostics interface
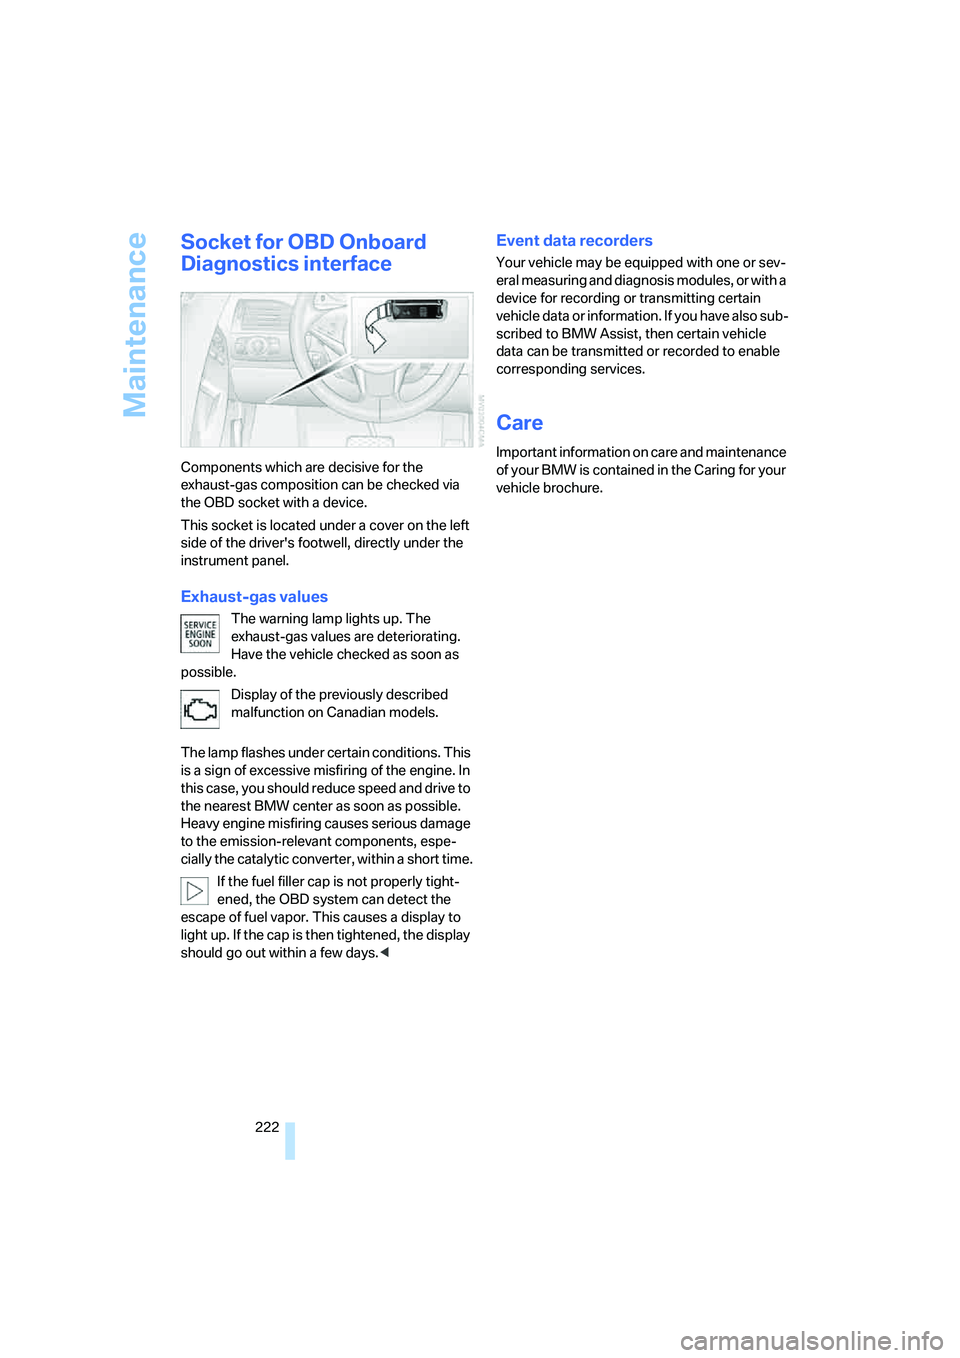
Components which are decisive for the
exhaust-gas composition can be checked via
the OBD socket with a device.
This socket is located under a cover on the left
side of the driver's footwell, directly under the
instrument panel.
Exhaust-gas values
The warning lamp lights up. The
exhaust-gas values are deteriorating.
Have the vehicle checked as soon as
possible.
Display of the previously described
malfunction on Canadian models.
The lamp flashes under certain conditions. This
is a sign of excessive misfiring of the engine. In
this case, you should reduce speed and drive to
the nearest BMW center as soon as possible.
Heavy engine misfiring causes serious damage
to the emission-relevant components, espe-
cially the catalytic converter, within a short time.
If the fuel filler cap is not properly tight-
ened, the OBD system can detect the
escape of fuel vapor. This causes a display to
light up. If the cap is then tightened, the display
should go out within a few days.<
Event data recorders
Your vehicle may be equipped with one or sev-
eral measuring and diagnosis modules, or with a
device for recording or transmitting certain
vehicle data or information. If you have also sub-
scribed to BMW Assist, then certain vehicle
data can be transmitted or recorded to enable
corresponding services.
Care
Important information on care and maintenance
of your BMW is contained in the Caring for your
vehicle brochure.
Page 231 of 264
Mobility
229Reference
At a glance
Controls
Driving tips
Communications
Navigation
Entertainment
There must not be any contact between
the bodies of the two vehicles; otherwise,
there is a danger of short circuiting.<
Connecting jumper cables
To avoid personal injury from sparks, fol-
low this sequence when connecting
jumper cables.<
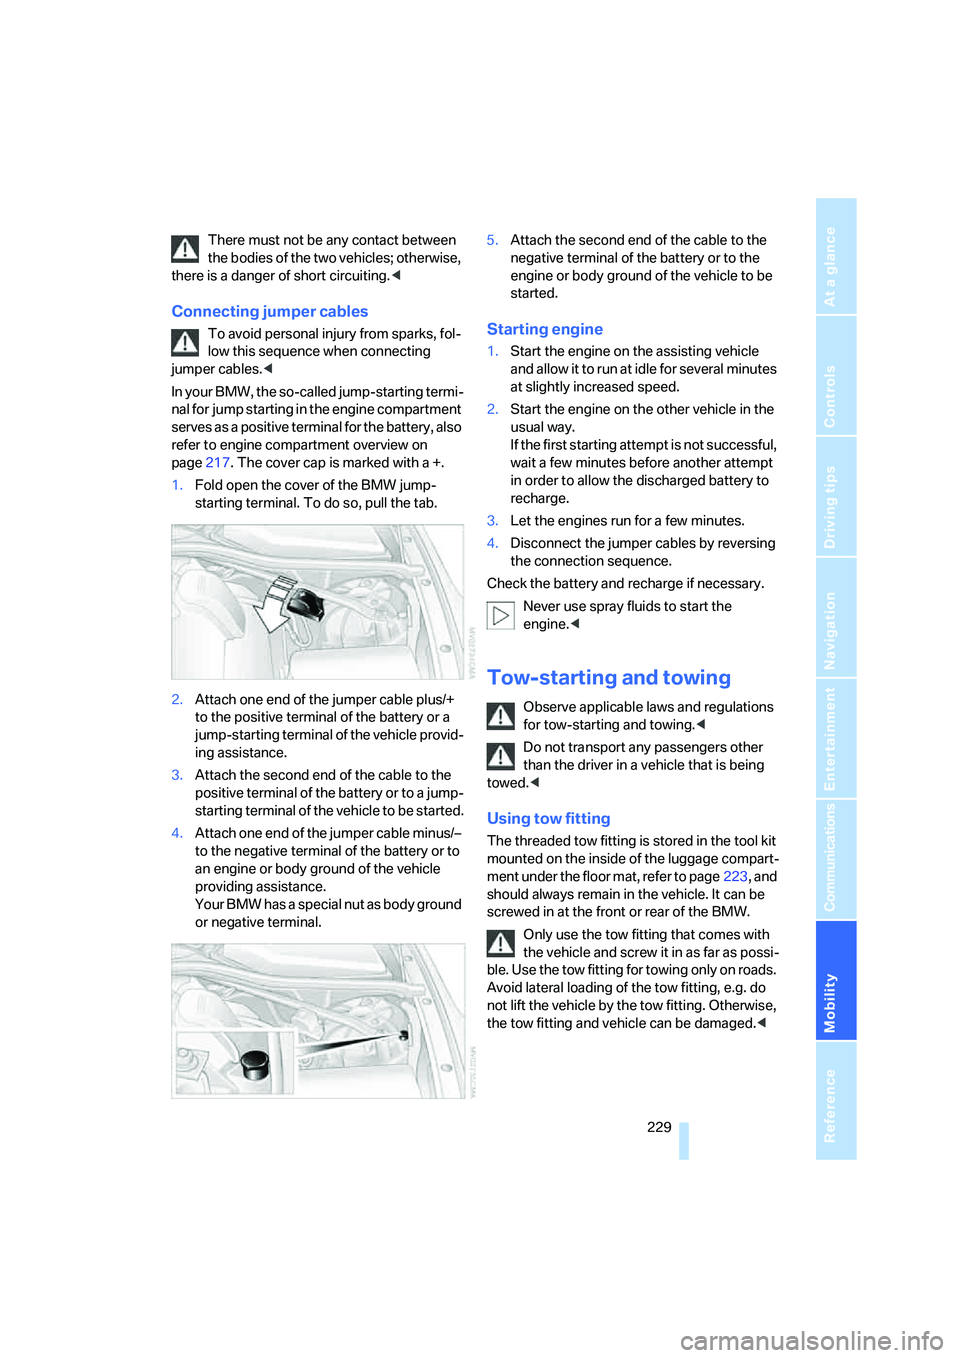
In your BMW, the so-called jump-starting termi-
nal for jump starting in the engine compartment
serves as a positive terminal for the battery, also
refer to engine compartment overview on
page217. The cover cap is marked with a +.
1.Fold open the cover of the BMW jump-
starting terminal. To do so, pull the tab.
2.Attach one end of the jumper cable plus/+
to the positive terminal of the battery or a
jump-starting terminal of the vehicle provid-
ing assistance.
3.Attach the second end of the cable to the
positive terminal of the battery or to a jump-
starting terminal of the vehicle to be started.
4.Attach one end of the jumper cable minus/–
to the negative terminal of the battery or to
an engine or body ground of the vehicle
providing assistance.
Your BMW has a special nut as body ground
or negative terminal.5.Attach the second end of the cable to the
negative terminal of the battery or to the
engine or body ground of the vehicle to be
started.Starting engine
1.Start the engine on the assisting vehicle
and allow it to run at idle for several minutes
at slightly increased speed.
2.Start the engine on the other vehicle in the
usual way.
If the first starting attempt is not successful,
wait a few minutes before another attempt
in order to allow the discharged battery to
recharge.
3.Let the engines run for a few minutes.
4.Disconnect the jumper cables by reversing
the connection sequence.
Check the battery and recharge if necessary.
Never use spray fluids to start the
engine.<
Tow-starting and towing
Observe applicable laws and regulations
for tow-starting and towing.<
Do not transport any passengers other
than the driver in a vehicle that is being
towed.<
Using tow fitting
The threaded tow fitting is stored in the tool kit
mounted on the inside of the luggage compart-
ment under the floor mat, refer to page223, and
should always remain in the vehicle. It can be
screwed in at the front or rear of the BMW.
Only use the tow fitting that comes with
the vehicle and screw it in as far as possi-
ble. Use the tow fitting for towing only on roads.
Avoid lateral loading of the tow fitting, e.g. do
not lift the vehicle by the tow fitting. Otherwise,
the tow fitting and vehicle can be damaged.<
Page 247 of 264
Reference 245
At a glance
Controls
Driving tips
Communications
Navigation
Entertainment
Mobility
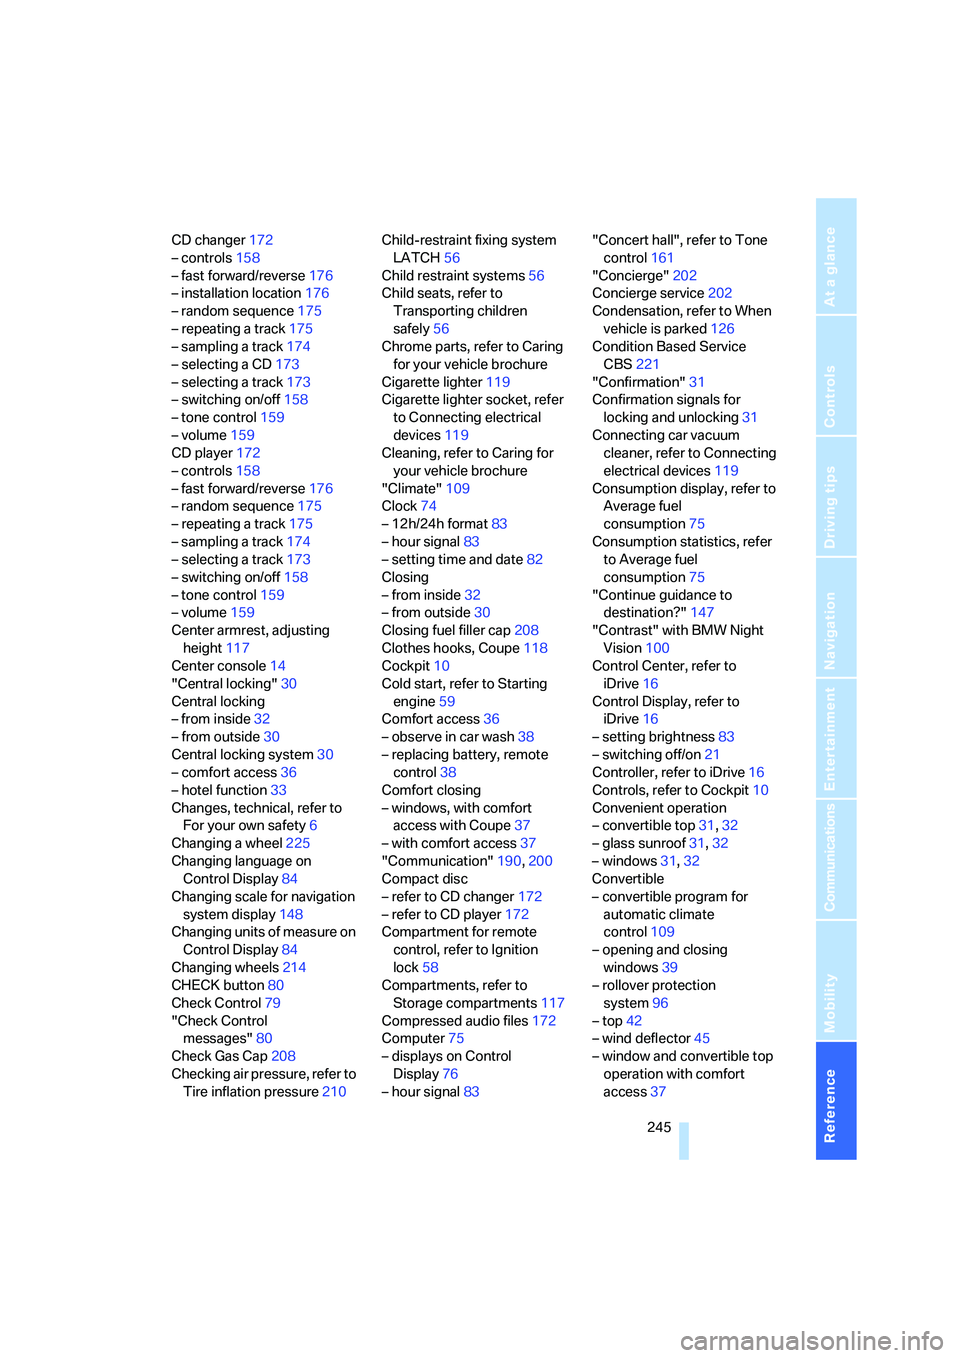
CD changer172
– controls158
– fast forward/reverse176
– installation location176
– random sequence175
– repeating a track175
– sampling a track174
– selecting a CD173
– selecting a track173
– switching on/off158
– tone control159
– volume159
CD player172
– controls158
– fast forward/reverse176
– random sequence175
– repeating a track175
– sampling a track174
– selecting a track173
– switching on/off158
– tone control159
– volume159
Center armrest, adjusting
height117
Center console14
"Central locking"30
Central locking
– from inside32
– from outside30
Central locking system30
– comfort access36
– hotel function33
Changes, technical, refer to
For your own safety6
Changing a wheel225
Changing language on
Control Display84
Changing scale for navigation
system display148
Changing units of measure on
Control Display84
Changing wheels214
CHECK button80
Check Control79
"Check Control
messages"80
Check Gas Cap208
Checking air pressure, refer to
Tire inflation pressure210Child-restraint fixing system
LATCH56
Child restraint systems56
Child seats, refer to
Transporting children
safely56
Chrome parts, refer to Caring
for your vehicle brochure
Cigarette lighter
119
Cigarette lighter socket, refer
to Connecting electrical
devices119
Cleaning, refer to Caring for
your vehicle brochure
"Climate"109
Clock74
– 12h/24h format83
– hour signal83
– setting time and date82
Closing
– from inside32
– from outside30
Closing fuel filler cap208
Clothes hooks, Coupe118
Cockpit10
Cold start, refer to Starting
engine59
Comfort access36
– observe in car wash38
– replacing battery, remote
control38
Comfort closing
– windows, with comfort
access with Coupe37
– with comfort access37
"Communication"190,200
Compact disc
– refer to CD changer172
– refer to CD player172
Compartment for remote
control, refer to Ignition
lock58
Compartments, refer to
Storage compartments117
Compressed audio files172
Computer75
– displays on Control
Display76
– hour signal83"Concert hall", refer to Tone
control161
"Concierge"202
Concierge service202
Condensation, refer to When
vehicle is parked126
Condition Based Service
CBS221
"Confirmation"31
Confirmation signals for
locking and unlocking31
Connecting car vacuum
cleaner, refer to Connecting
electrical devices119
Consumption display, refer to
Average fuel
consumption75
Consumption statistics, refer
to Average fuel
consumption75
"Continue guidance to
destination?"147
"Contrast" with BMW Night
Vision100
Control Center, refer to
iDrive16
Control Display, refer to
iDrive16
– setting brightness83
– switching off/on21
Controller, refer to iDrive16
Controls, refer to Cockpit10
Convenient operation
– convertible top31,32
– glass sunroof31,32
– windows31,32
Convertible
– convertible program for
automatic climate
control109
– opening and closing
windows39
– rollover protection
system96
– top42
– wind deflector45
– window and convertible top
operation with comfort
access37
Page 249 of 264
Reference 247
At a glance
Controls
Driving tips
Communications
Navigation
Entertainment
Mobility
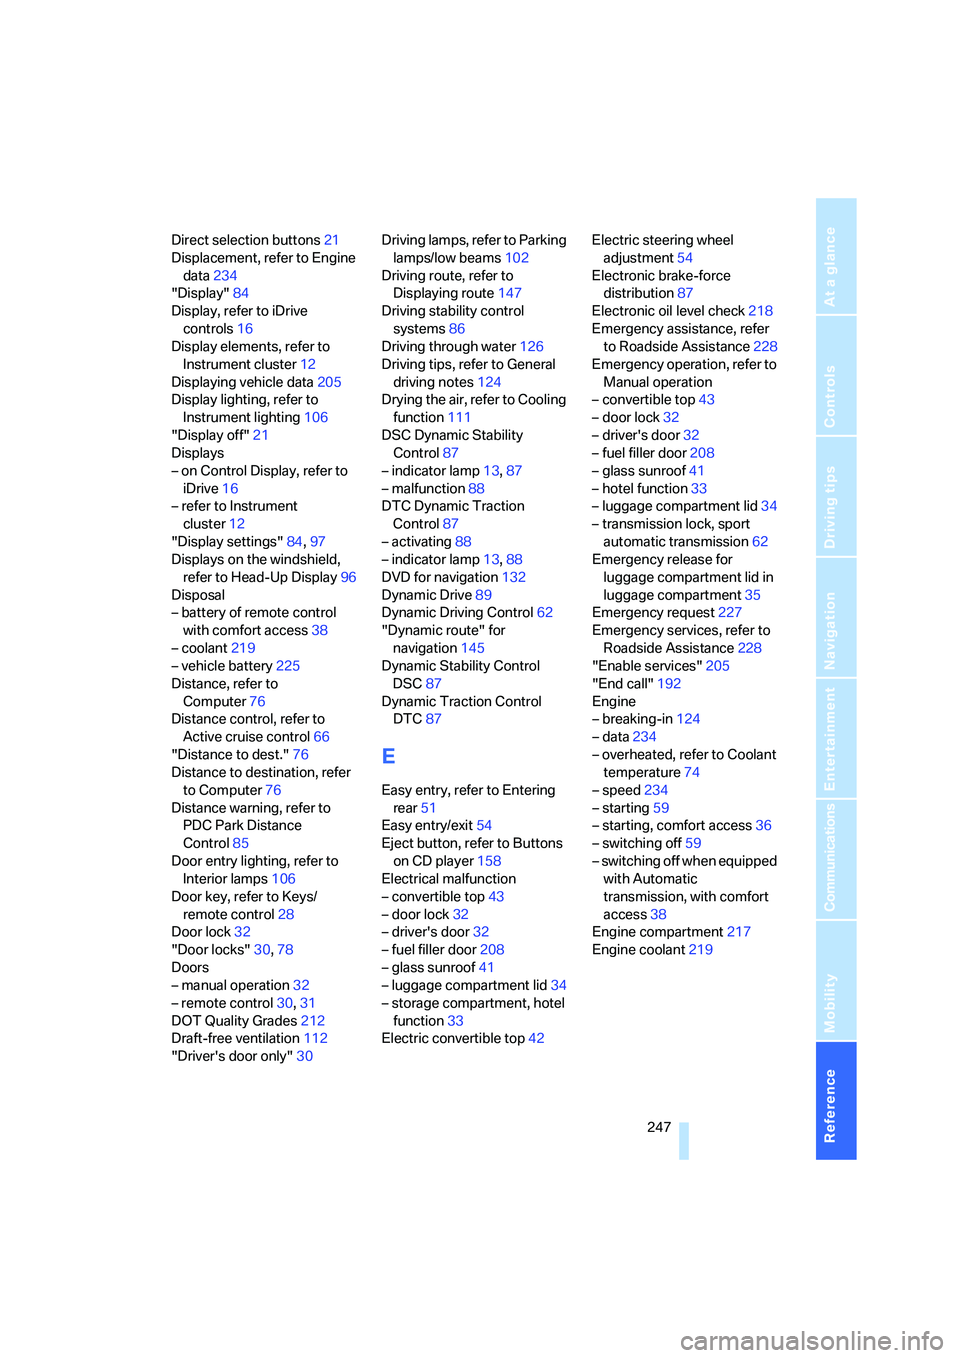
Direct selection buttons21
Displacement, refer to Engine
data234
"Display"84
Display, refer to iDrive
controls16
Display elements, refer to
Instrument cluster12
Displaying vehicle data205
Display lighting, refer to
Instrument lighting106
"Display off"21
Displays
– on Control Display, refer to
iDrive16
– refer to Instrument
cluster12
"Display settings"84,97
Displays on the windshield,
refer to Head-Up Display96
Disposal
– battery of remote control
with comfort access38
– coolant219
– vehicle battery225
Distance, refer to
Computer76
Distance control, refer to
Active cruise control66
"Distance to dest."76
Distance to destination, refer
to Computer76
Distance warning, refer to
PDC Park Distance
Control85
Door entry lighting, refer to
Interior lamps106
Door key, refer to Keys/
remote control28
Door lock32
"Door locks"30,78
Doors
– manual operation32
– remote control30,31
DOT Quality Grades212
Draft-free ventilation112
"Driver's door only"30Driving lamps, refer to Parking
lamps/low beams102
Driving route, refer to
Displaying route147
Driving stability control
systems86
Driving through water126
Driving tips, refer to General
driving notes124
Drying the air, refer to Cooling
function111
DSC Dynamic Stability
Control
87
– indicator lamp13,87
– malfunction88
DTC Dynamic Traction
Control87
– activating88
– indicator lamp13,88
DVD for navigation132
Dynamic Drive89
Dynamic Driving Control62
"Dynamic route" for
navigation145
Dynamic Stability Control
DSC87
Dynamic Traction Control
DTC87
E
Easy entry, refer to Entering
rear51
Easy entry/exit54
Eject button, refer to Buttons
on CD player158
Electrical malfunction
– convertible top43
– door lock32
– driver's door32
– fuel filler door208
– glass sunroof41
– luggage compartment lid34
– storage compartment, hotel
function33
Electric convertible top42Electric steering wheel
adjustment54
Electronic brake-force
distribution87
Electronic oil level check218
Emergency assistance, refer
to Roadside Assistance228
Emergency operation, refer to
Manual operation
– convertible top43
– door lock32
– driver's door32
– fuel filler door208
– glass sunroof41
– hotel function33
– luggage compartment lid34
– transmission lock, sport
automatic transmission62
Emergency release for
luggage compartment lid in
luggage compartment35
Emergency request227
Emergency services, refer to
Roadside Assistance228
"Enable services"205
"End call"192
Engine
– breaking-in124
– data234
– overheated, refer to Coolant
temperature74
– speed234
– starting59
– starting, comfort access36
– switching off59
– switching off when equipped
with Automatic
transmission, with comfort
access38
Engine compartment217
Engine coolant219