seats BMW 650I XDRIVE CONVERTIBLE 2013 Owners Manual
[x] Cancel search | Manufacturer: BMW, Model Year: 2013, Model line: 650I XDRIVE CONVERTIBLE, Model: BMW 650I XDRIVE CONVERTIBLE 2013Pages: 240, PDF Size: 9.64 MB
Page 51 of 240
AdjustingVehicle equipment
All standard, country-specific and optional
equipment that is offered in the model series is
described in this chapter. Therefore, equipment
is also described that is not available in a vehicle,
e. g., because of the selected optional equip‐
ment or country variant. This also applies for
safety-related functions and systems.
Sitting safely
The ideal seating position can make a vital con‐
tribution to relaxed, fatigue-free driving.
The seating position plays an important role in
an accident in combination with:▷Safety belts, refer to page 54.▷Head restraints, refer to page 55.▷Airbags, refer to page 98.
Seats
Adjusting
General information Do not adjust the seat while driving
Do not adjust the driver's seat while driv‐
ing, or the seat could respond with unexpected
movement and the ensuing loss of vehicle con‐
trol could lead to an accident.◀
Do not incline the backrest too far to the
rear
Also on the front passenger side, do not incline
the backrest on the front passenger side too far
to the rear during driving, or there is a risk of
slipping under the safety belt in the event of an
accident. This would eliminate the protection
normally provided by the belt.◀
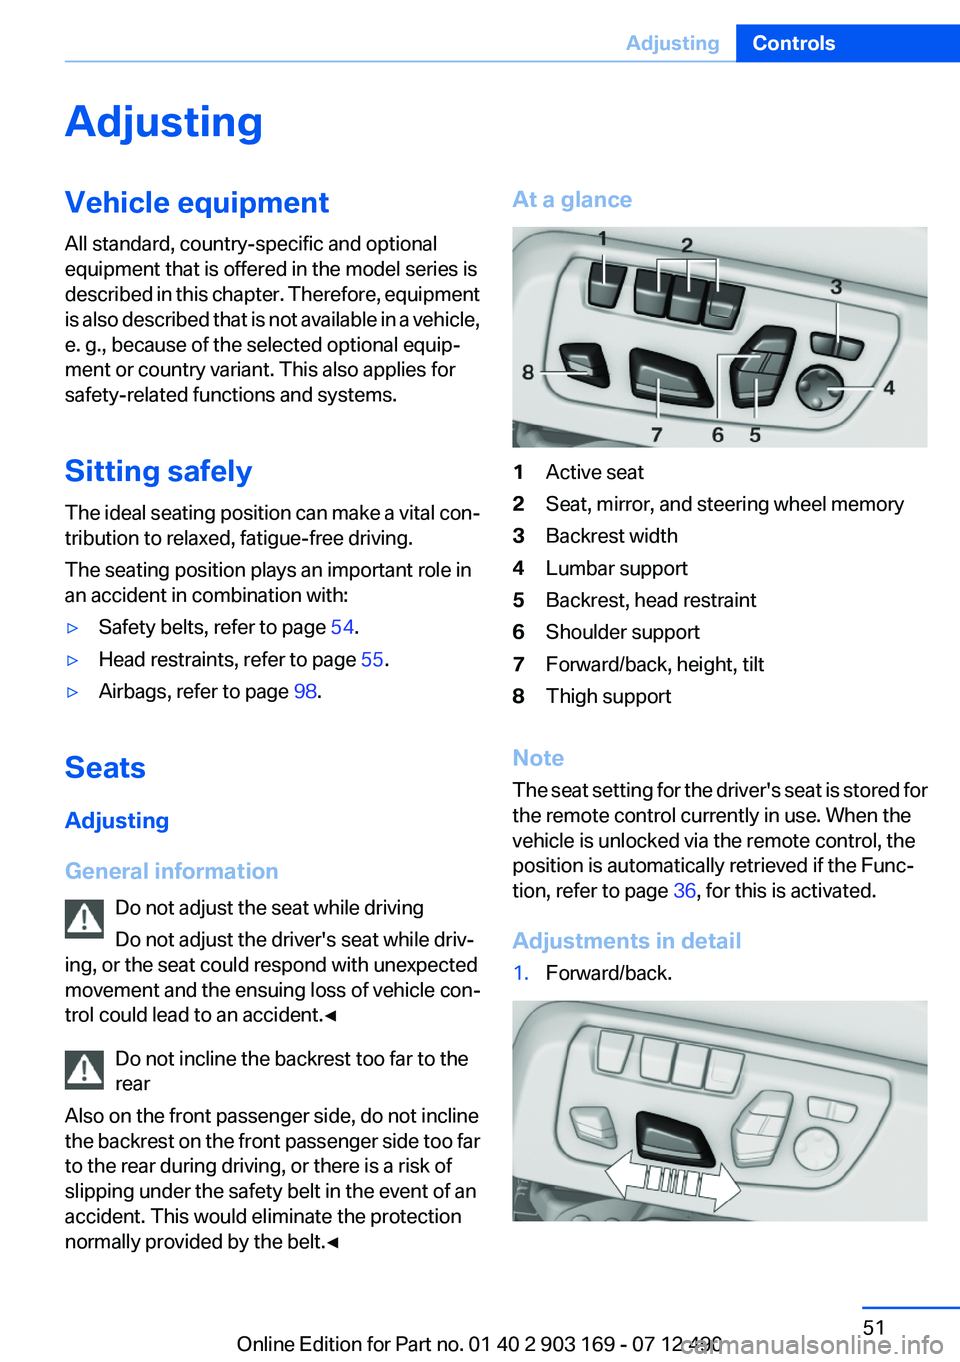
At a glance1Active seat2Seat, mirror, and steering wheel memory3Backrest width4Lumbar support5Backrest, head restraint6Shoulder support7Forward/back, height, tilt8Thigh support
Note
The seat setting for the driver's seat is stored for
the remote control currently in use. When the
vehicle is unlocked via the remote control, the
position is automatically retrieved if the Func‐
tion, refer to page 36, for this is activated.
Adjustments in detail
1.Forward/back.Seite 51AdjustingControls51
Online Edition for Part no. 01 40 2 903 169 - 07 12 490
Page 54 of 240
Switching onPress the button once for each ventila‐
tion level.
The highest level is active when three LEDs are
lit.
If when the seat ventilation is turned on the Max‐
imum Cooling function is activated, the seat
ventilation automatically switches to the highest
level. When the Maximum Cooling function is
switched off, the unit switches back to the pre‐
viously set level.
After a short time, the system automatically
moves down one level in order to prevent ex‐
cessive cooling.
Switching off Press the button longer.
The LEDs go out.
Safety belts
Seats with safety belt
The vehicle has four seats, each of which is
equipped with a safety belt.
Notes
Always make sure that safety belts are being
worn by all occupants before driving away.
Although airbags enhance safety by providing
added protection, they are not a substitute for
safety belts.
One person per safety belt
Never allow more than one person to wear
a single safety belt. Never allow infants or small
children to ride on a passenger's lap.◀
Putting on the belt
Lay the belt, without twisting, snugly
across the lap and shoulders, as close to the
body as possible. Make sure that the belt lies low
around the hips in the lap area and does not
press on the abdomen. Otherwise, the belt can
slip over the hips in the lap area in a frontal im‐
pact and injure the abdomen.
The safety belt must not lie across the neck, rub
on sharp edges, be routed over solid or breaka‐
ble objects, or be pinched.◀
Reduction of restraining effect
Avoid wearing clothing that prevents the
belt from fitting properly, and pull the shoulder
belt periodically to readjust the tension across
your lap; otherwise, the retention effect of the
safety belt may be reduced.◀
Buckling the belt
Make sure you hear the latch plate engage in the
belt buckle.
Unbuckling the belt
1.Hold the belt firmly.2.Press the red button in the belt buckle.3.Guide the belt back into its reel.Seite 54ControlsAdjusting54
Online Edition for Part no. 01 40 2 903 169 - 07 12 490
Page 55 of 240
Safety belt reminder for driver's seat
and front passenger seat
The indicator lamp flashes or lights up
and a signal sounds. Make sure that the
safety belts are positioned correctly.
The safety belt reminder is active at speeds
above approx. 5 mph/8 km/h. It can also be ac‐
tivated if objects are placed on the front pas‐
senger seat.
Damage to safety belts
In the case of strain caused by accidents or
damage:
Have the safety belts, including the safety belt
tensioners, replaced and have the belt anchors
checked.
Checking and replacing safety belts
Have the work performed only by your
service center; otherwise, it cannot be ensured
that this safety feature will function properly.◀
Head restraints (front)
Correctly adjusted head restraint
A correctly adjusted head restraint reduces the
risk of injury to cervical vertebrae in the event of
an accident.
Adjusting the head restraint
Correctly adjust the head restraints of all
occupied seats; otherwise, there is an increased
risk of injury in an accident.◀
Height
Adjust the head restraint so that its center is ap‐
proximately at ear level.
Distance
Adjust the distance so that the head restraint is
as close as possible to the back of the head.Active head restraint
In the event of a rear-end collision with a certain
severity, the active head restraint automatically
reduces the distance from the head.
Reduced protective function▷Do not use seat or head restraint cov‐
ers.▷Do not hang objects, e.g., clothes hangers,
on the head restraints.▷Only attach accessories approved by BMW
to the seat or head restraint.
Otherwise, the protective function of the active
head restraint will be impaired and the personal
safety of the occupants will be endangered.◀
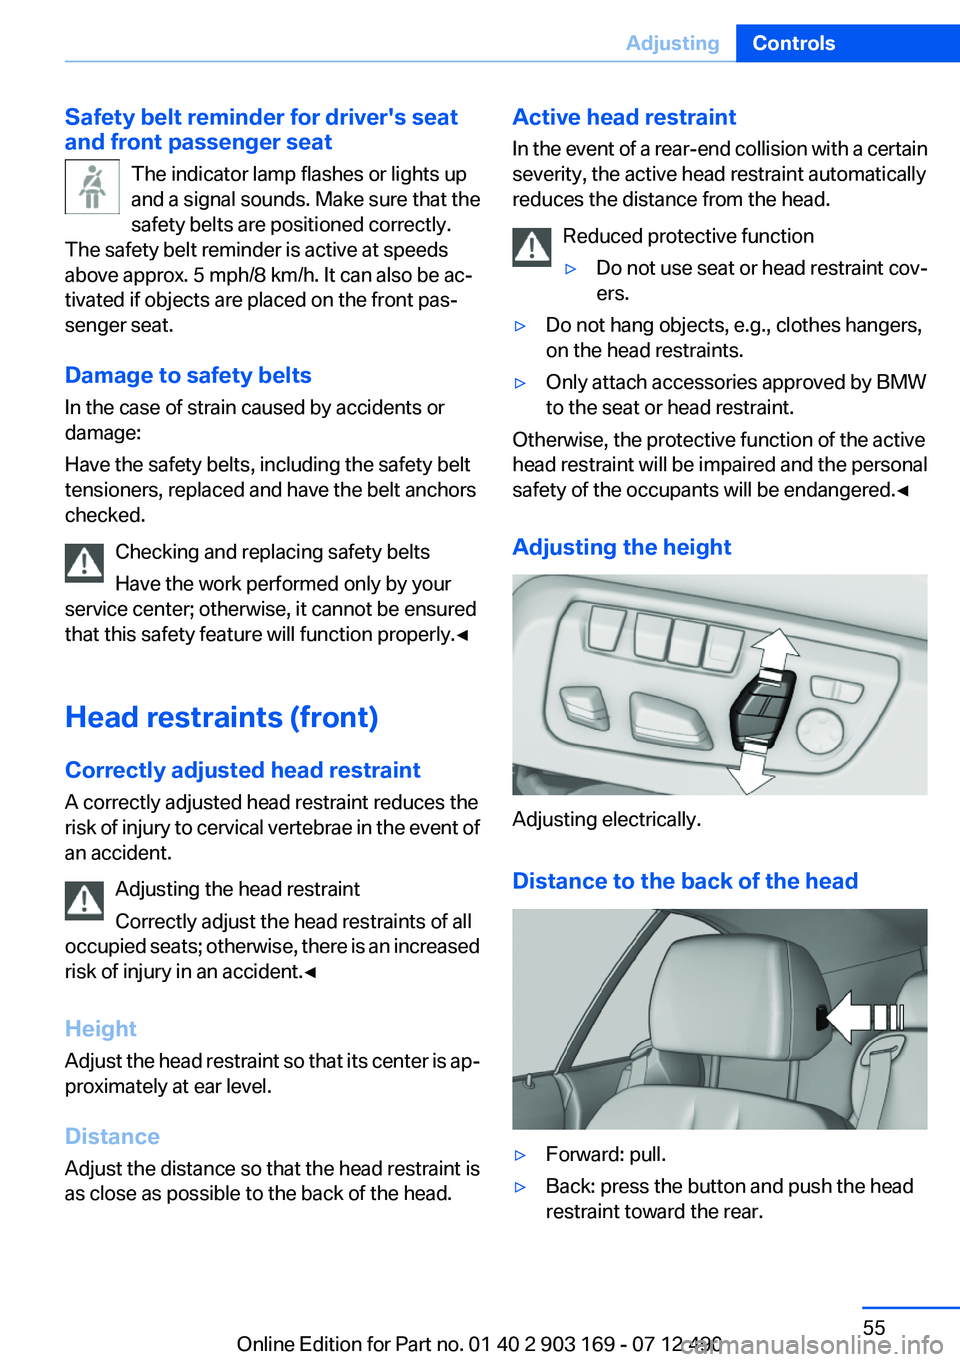
Adjusting the height
Adjusting electrically.
Distance to the back of the head
▷Forward: pull.▷Back: press the button and push the head
restraint toward the rear.Seite 55AdjustingControls55
Online Edition for Part no. 01 40 2 903 169 - 07 12 490
Page 99 of 240
▷Keep at a distance from the airbags.▷Always grasp the steering wheel on the
steering wheel rim, holding your hands at
the 3 o'clock and 9 o'clock positions, to keep
the danger of injury to your hands or arms as
low as possible if the airbag is triggered.▷There should be no people, animals, or ob‐
jects between an airbag and a person.▷Do not use the cover of the front airbag on
the front passenger side as a storage area.▷Keep the dashboard and window on the
front passenger side clear, i.e., do not cover
with adhesive labels or coverings, and do not
attach holders such as for navigation instru‐
ments and mobile phones.▷Make sure that the front passenger is sitting
correctly, i.e., keeps his or her feet and legs
in the footwell; otherwise, leg injuries can
occur if the front airbag is triggered.▷Do not place slip covers, seat cushions or
other objects on the front passenger seat
that are not approved specifically for seats
with integrated side airbags.▷Do not hang pieces of clothing, such as jack‐
ets, over the backrests.▷Make sure that occupants keep their heads
away from the side airbag; otherwise, inju‐
ries can occur if the airbags are deployed.▷Do not remove the airbag restraint system.▷Do not remove the steering wheel.▷Do not apply adhesive materials to the air‐
bag cover panels, cover them or modify
them in any way.▷Never modify either the individual compo‐
nents or the wiring in the airbag system. This
also applies to steering wheel covers, the
dashboard, and the seats.◀
Even when all instructions are followed closely,
injury from contact with the airbags cannot be
ruled out in certain situations.
The ignition and inflation noise may lead to
short-term and, in most cases, temporary hear‐
ing impairment in sensitive individuals.
In the case of a malfunction, deactivation
and after triggering of the airbags
Do not touch the individual components imme‐
diately after the system has been triggered; oth‐
erwise, there is the danger of burns.
Only have the airbags checked, repaired or dis‐
mantled and the airbag generator scrapped by
your service center or a workshop that has the
necessary authorization for handling explosives.
Non-professional attempts to service the sys‐
tem could lead to failure in an emergency or un‐
desired triggering of the airbag, either of which
could result in injury.◀
Warnings and information on the airbags are
also found on the sun visors.
Functional readiness of the airbag
system
When the ignition is switch on, the warn‐
ing lamp in the instrument cluster lights
up briefly and thereby indicates the op‐
erational readiness of the entire airbag system
and the belt tensioner.
Airbag system malfunctioning▷Warning lamp does not come on when the
ignition is turned on.▷The warning lamp lights up continuously.
When there is a malfunction, have the air‐
bag system checked immediately
When there is a malfunction, have the airbag
system checked immediately; otherwise, there
is a risk that the system does not function as ex‐
pected in the event of an accident despite cor‐
responding severity of the accident.◀
Automatic deactivation of the front
passenger airbags
The system determines whether the front pas‐
senger seat is occupied by measuring the re‐
sistance of the human body.
Seite 99SafetyControls99
Online Edition for Part no. 01 40 2 903 169 - 07 12 490
Page 100 of 240
The front, knee, and side airbag on the front
passenger side are activated or deactivated ac‐
cordingly.
Leave feet in the footwell
Make sure that the front passenger keeps
his or her feet in the footwell; otherwise, the front
passenger airbags may not function properly.◀
Child restraint fixing system in the front
passenger seat
Before transporting a child on the front passen‐
ger seat, see the safety notes and instructions
under Children on the front passenger seat.◀
Malfunction of the automatic
deactivation system
When transporting older children and adults, the
front passenger airbags may be deactivated in
certain sitting positions. In this case, the indica‐
tor lamp for the front passenger airbags lights
up.
In this case, change the sitting position so that
the front passenger airbags are activated and
the indicator lamp goes out.
If it is not possible to activate the airbags, have
the person sit in the rear.
To make sure that the occupied seat cushion
can be evaluated correctly▷Do not attach covers, cushions, ball mats or
other items to the front passenger seat un‐
less they are specifically recommended by
the manufacturer of your vehicle.▷Do not place any electronic devices on the
passenger seat if a child restraint system is
to be installed on it.▷Do not place objects under the seat that
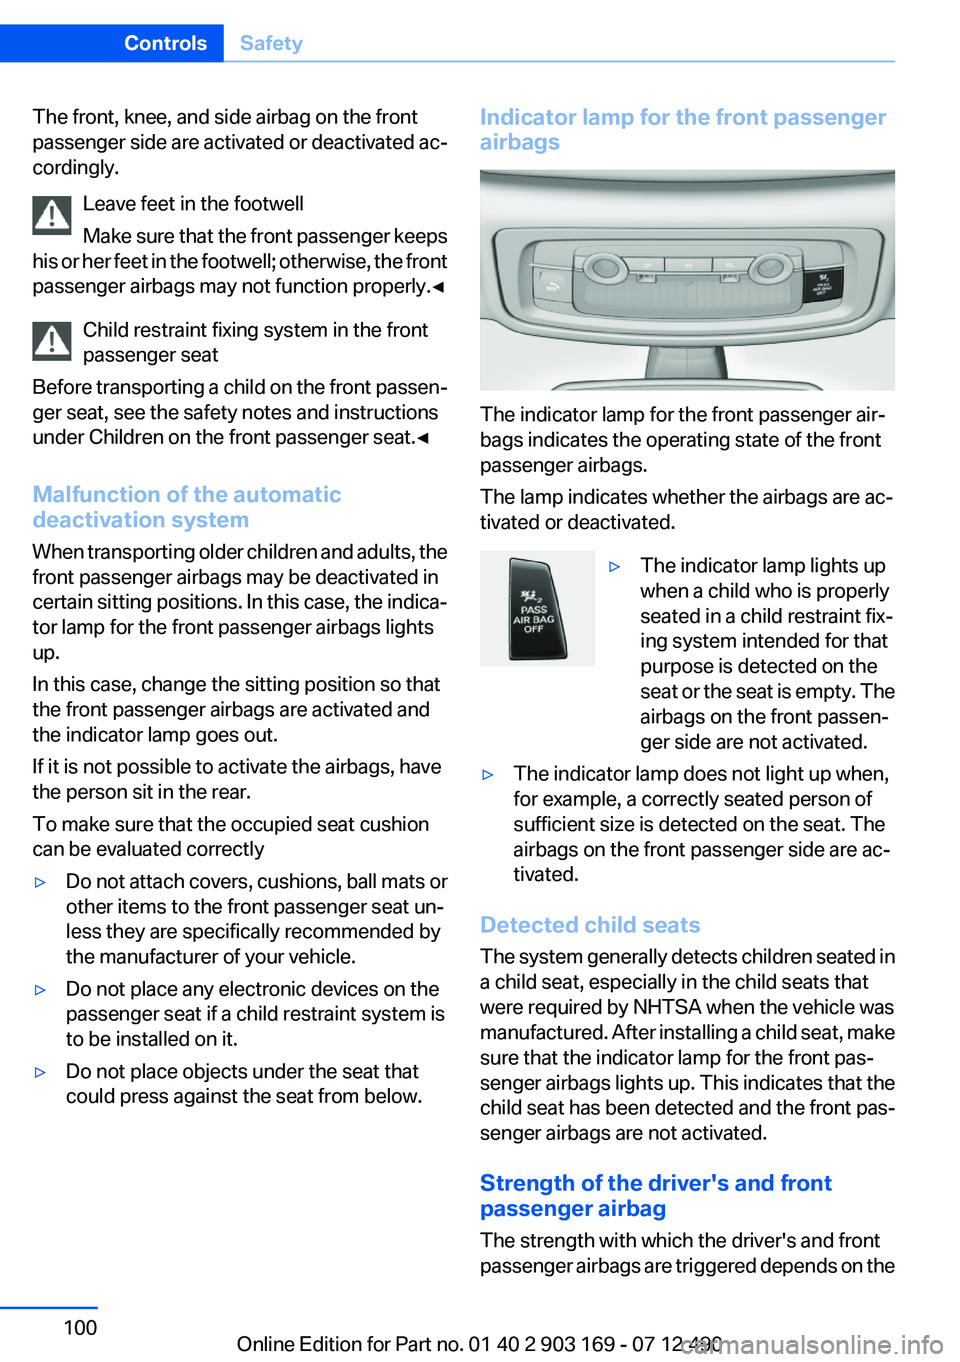
could press against the seat from below.Indicator lamp for the front passenger
airbags
The indicator lamp for the front passenger air‐
bags indicates the operating state of the front
passenger airbags.
The lamp indicates whether the airbags are ac‐
tivated or deactivated.
▷The indicator lamp lights up
when a child who is properly
seated in a child restraint fix‐
ing system intended for that
purpose is detected on the
seat or the seat is empty. The
airbags on the front passen‐
ger side are not activated.▷The indicator lamp does not light up when,
for example, a correctly seated person of
sufficient size is detected on the seat. The
airbags on the front passenger side are ac‐
tivated.
Detected child seats
The system generally detects children seated in
a child seat, especially in the child seats that
were required by NHTSA when the vehicle was
manufactured. After installing a child seat, make
sure that the indicator lamp for the front pas‐
senger airbags lights up. This indicates that the
child seat has been detected and the front pas‐
senger airbags are not activated.
Strength of the driver's and front
passenger airbag
The strength with which the driver's and front
passenger airbags are triggered depends on the
Seite 100ControlsSafety100
Online Edition for Part no. 01 40 2 903 169 - 07 12 490
Page 101 of 240
position of the driver's and front passenger
seats.
To maintain the accuracy of this function over
the long-term, calibrate the front seats when a
corresponding message appears on the Control
Display.
Calibrating the front seats
A corresponding message appears on the Con‐
trol Display.1.Move the respective seat forward all the
way.2.Move the respective seat forward again. It
moves forward briefly.3.Readjust the seat to the desired position.
The calibration procedure is completed when
the message on the Control Display disappears.
If the message continues to be displayed, repeat
the calibration.
If the message does not disappear after a repeat
calibration, have the system checked as soon as
possible.
Unobstructed area of movement
Ensure that the area of movement of the
seats is unobstructed to avoid personal injury or
damage to objects.◀
Rollover protection system
The concept
The rollover protection system is automatically
activated in the event of a sufficiently serious
accident or if the longitudinal axis is tilted ex‐
cessively. The safety frames located behind the
rear headrests extend within fractions of a sec‐
ond.
Supplementing the reinforced front windshield
frame, the rollover protection system further in‐
creases passenger safety.
Maintaining movement space
Always keep the movement space of the
rollover protection system clear. Otherwise,
there may be damage or injuries when the roll‐
over protection system is triggered.◀
Triggered rollover protection system After deployment or damage
After deployment of the rollover protec‐
tion system or in the event of damage, have the
system checked and replaced.
Have this work performed only by your service
center; otherwise, it cannot be ensured that this
safety feature will function properly.◀
Do not move convertible top
When the rollover protection system is ex‐
tended, do not move the convertible top. Oth‐
erwise, damages or injuries may result.◀
If the rollover protection system was not placed
under any stress after an automatic triggering, it
can be pushed back by hand, e.g. to close the
convertible top. Three people are necessary for
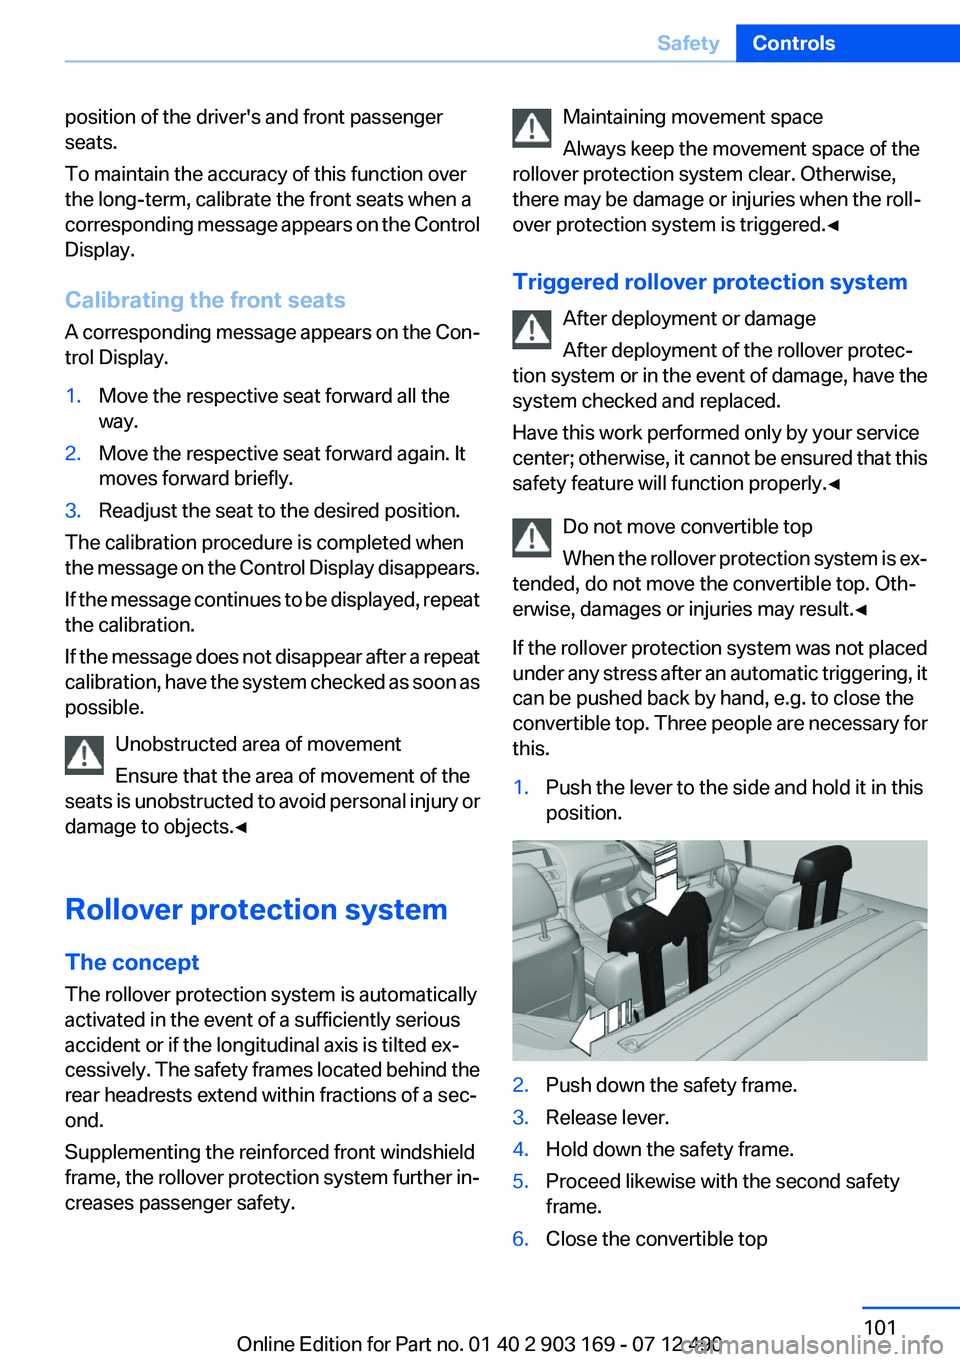
this.1.Push the lever to the side and hold it in this
position.2.Push down the safety frame.3.Release lever.4.Hold down the safety frame.5.Proceed likewise with the second safety
frame.6.Close the convertible topSeite 101SafetyControls101
Online Edition for Part no. 01 40 2 903 169 - 07 12 490
Page 158 of 240
Storage compartmentsVehicle equipment
All standard, country-specific and optional
equipment that is offered in the model series is
described in this chapter. Therefore, equipment
is also described that is not available in a vehicle,
e. g., because of the selected optional equip‐
ment or country variant. This also applies for
safety-related functions and systems.
Notes No loose objects in the passenger com‐
partment
Do not stow any objects in the passenger com‐
partment without securing them; otherwise,
they may present a danger to occupants for in‐
stance during braking and avoidance maneu‐
vers.◀
Do not place anti-slip mats on the dash‐
board
Do not place anti-slip mats on the dashboard.
The mat materials could damage the dash‐
board.◀
Storage compartments
The following storage compartments are avail‐
able in the vehicle interior:▷Glove compartment on the front passenger
side, refer to page 158.▷Storage compartment on the center con‐
sole: manual transmission.▷Storage compartment in the center armrest,
refer to page 159.▷Compartments in the doors.▷Pockets on the backrests of the front seats.▷Net in the front passenger footwell.Glove compartment
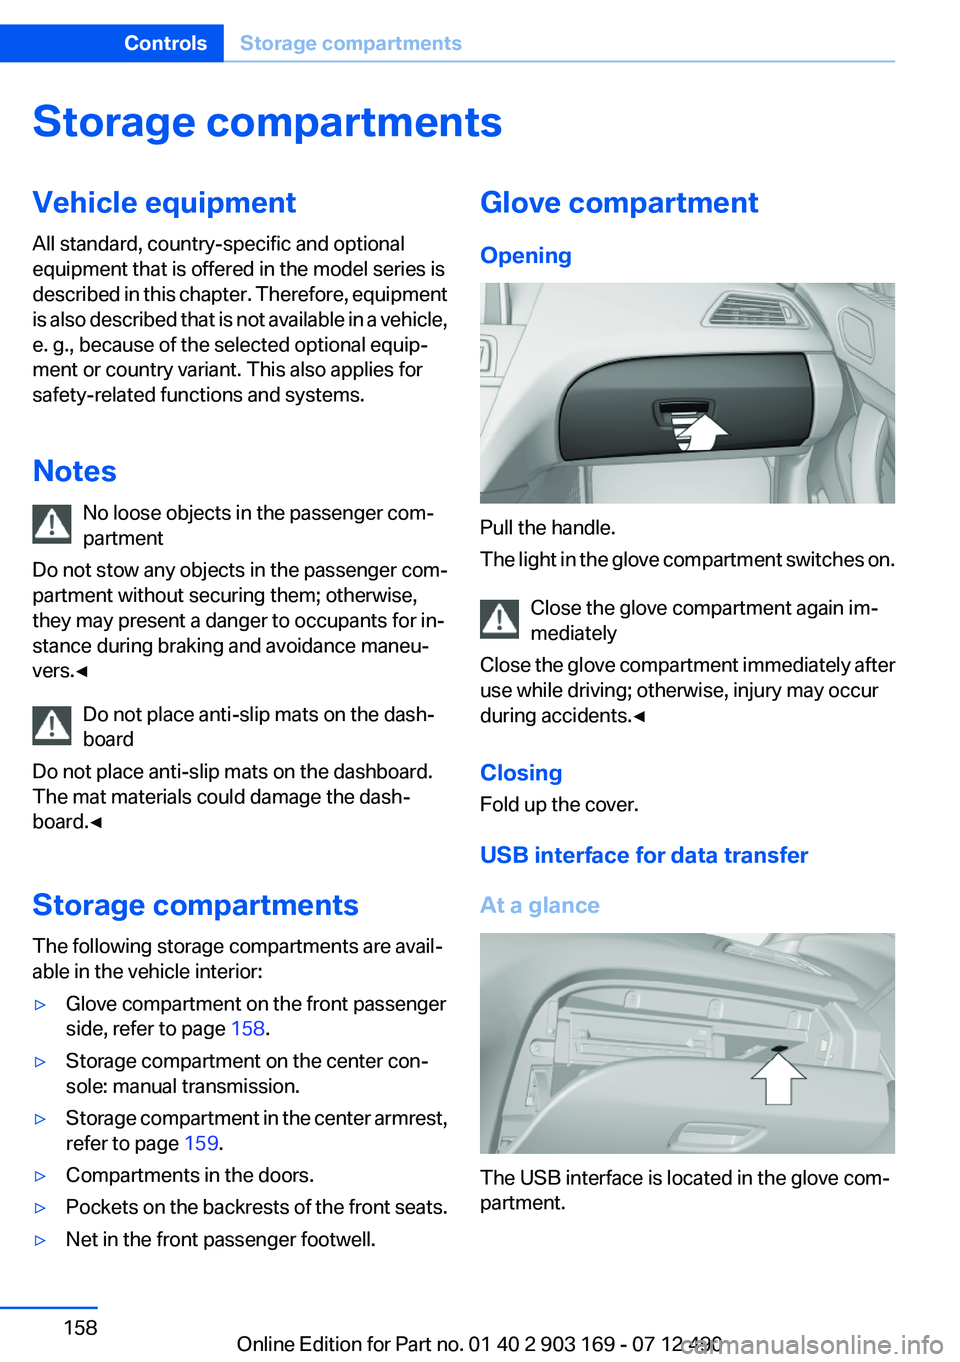
Opening
Pull the handle.
The light in the glove compartment switches on.
Close the glove compartment again im‐
mediately
Close the glove compartment immediately after
use while driving; otherwise, injury may occur
during accidents.◀
Closing
Fold up the cover.
USB interface for data transfer
At a glance
The USB interface is located in the glove com‐
partment.
Seite 158ControlsStorage compartments158
Online Edition for Part no. 01 40 2 903 169 - 07 12 490
Page 159 of 240
General information
Connection for importing and exporting data on
USB devices, e.g.:▷Personal Profile settings, refer to page 31.▷Music collection, see user's manual for Nav‐
igation, Entertainment and Communication.
Notes
Observe the following when connecting:
▷Do not use force when plugging the con‐
nector into the USB interface.▷Do not connect devices such as fans or
lamps to the USB interface.▷Do not connect USB hard drives.▷Do not use the USB interface to recharge
external devices.
Front center armrest
Opening
A storage compartment is located in the center
armrest between the front seats.
Press the buttons next to the lock.
Locking the storage compartment
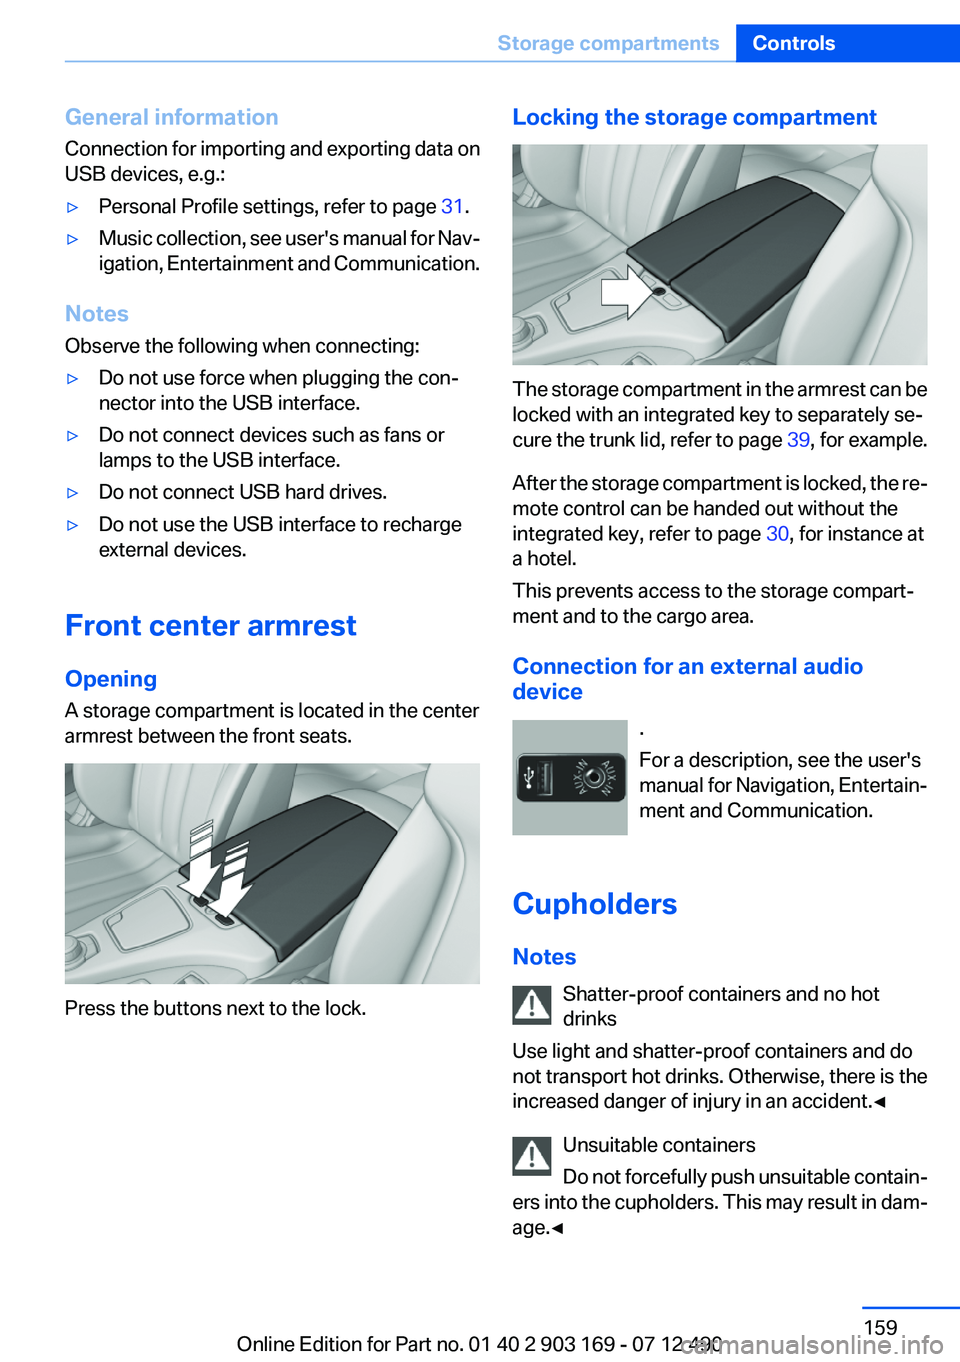
The storage compartment in the armrest can be
locked with an integrated key to separately se‐
cure the trunk lid, refer to page 39, for example.
After the storage compartment is locked, the re‐
mote control can be handed out without the
integrated key, refer to page 30, for instance at
a hotel.
This prevents access to the storage compart‐
ment and to the cargo area.
Connection for an external audio
device
.
For a description, see the user's
manual for Navigation, Entertain‐
ment and Communication.
Cupholders
Notes Shatter-proof containers and no hot
drinks
Use light and shatter-proof containers and do
not transport hot drinks. Otherwise, there is the
increased danger of injury in an accident.◀
Unsuitable containers
Do not forcefully push unsuitable contain‐
ers into the cupholders. This may result in dam‐
age.◀
Seite 159Storage compartmentsControls159
Online Edition for Part no. 01 40 2 903 169 - 07 12 490
Page 230 of 240
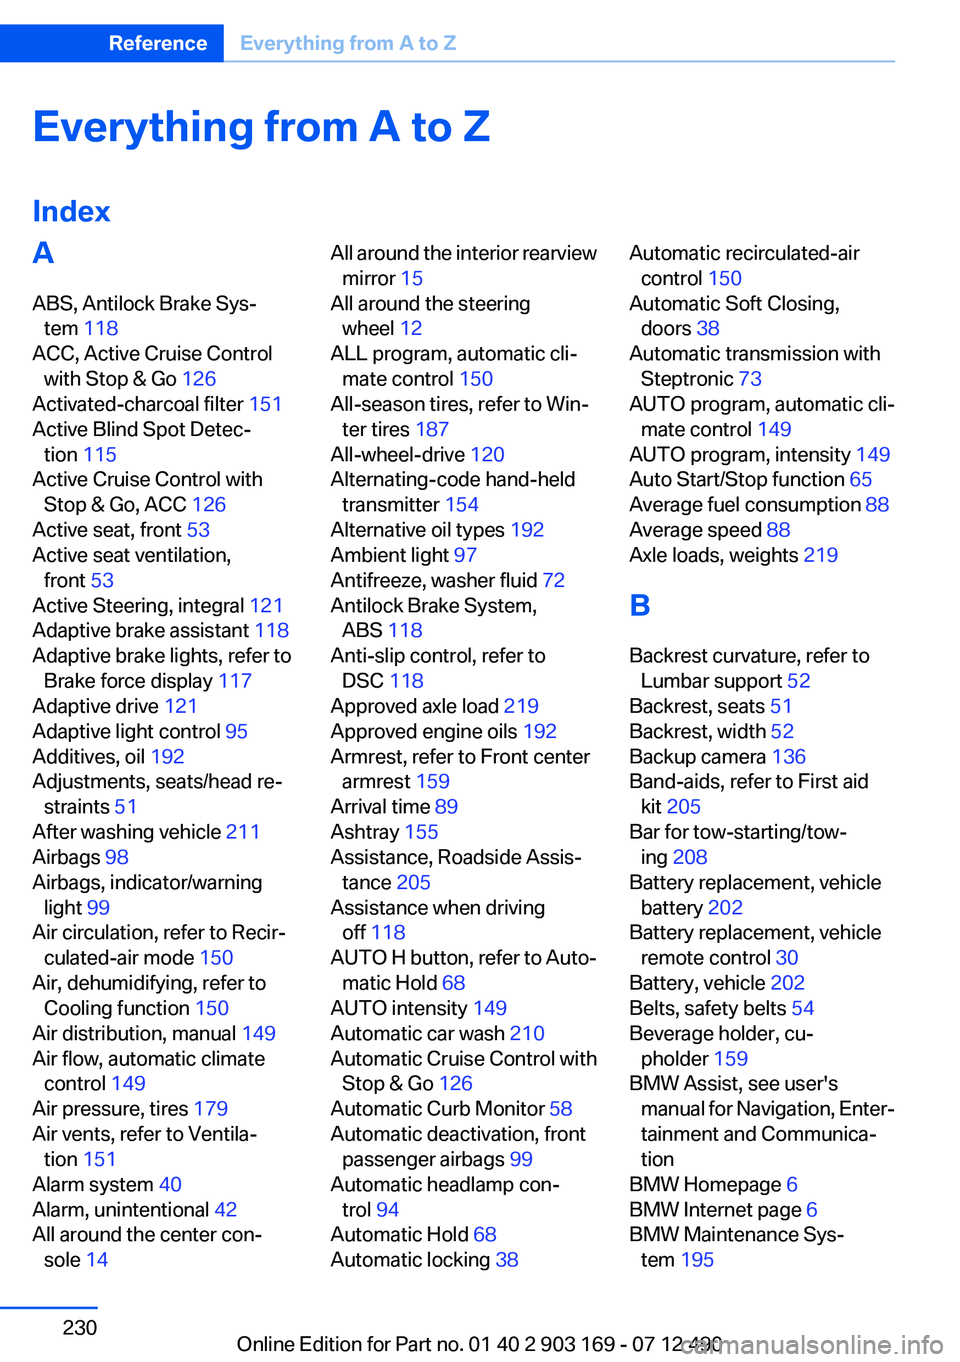
Everything from A to Z
IndexA
ABS, Antilock Brake Sys‐ tem 118
ACC, Active Cruise Control with Stop & Go 126
Activated-charcoal filter 151
Active Blind Spot Detec‐ tion 115
Active Cruise Control with Stop & Go, ACC 126
Active seat, front 53
Active seat ventilation, front 53
Active Steering, integral 121
Adaptive brake assistant 118
Adaptive brake lights, refer to Brake force display 117
Adaptive drive 121
Adaptive light control 95
Additives, oil 192
Adjustments, seats/head re‐ straints 51
After washing vehicle 211
Airbags 98
Airbags, indicator/warning light 99
Air circulation, refer to Recir‐ culated-air mode 150
Air, dehumidifying, refer to Cooling function 150
Air distribution, manual 149
Air flow, automatic climate control 149
Air pressure, tires 179
Air vents, refer to Ventila‐ tion 151
Alarm system 40
Alarm, unintentional 42
All around the center con‐ sole 14 All around the interior rearview
mirror 15
All around the steering wheel 12
ALL program, automatic cli‐ mate control 150
All-season tires, refer to Win‐ ter tires 187
All-wheel-drive 120
Alternating-code hand-held transmitter 154
Alternative oil types 192
Ambient light 97
Antifreeze, washer fluid 72
Antilock Brake System, ABS 118
Anti-slip control, refer to DSC 118
Approved axle load 219
Approved engine oils 192
Armrest, refer to Front center armrest 159
Arrival time 89
Ashtray 155
Assistance, Roadside Assis‐ tance 205
Assistance when driving off 118
AUTO H button, refer to Auto‐ matic Hold 68
AUTO intensity 149
Automatic car wash 210
Automatic Cruise Control with Stop & Go 126
Automatic Curb Monitor 58
Automatic deactivation, front passenger airbags 99
Automatic headlamp con‐ trol 94
Automatic Hold 68
Automatic locking 38 Automatic recirculated-air
control 150
Automatic Soft Closing, doors 38
Automatic transmission with Steptronic 73
AUTO program, automatic cli‐ mate control 149
AUTO program, intensity 149
Auto Start/Stop function 65
Average fuel consumption 88
Average speed 88
Axle loads, weights 219
B
Backrest curvature, refer to Lumbar support 52
Backrest, seats 51
Backrest, width 52
Backup camera 136
Band-aids, refer to First aid kit 205
Bar for tow-starting/tow‐ ing 208
Battery replacement, vehicle battery 202
Battery replacement, vehicle remote control 30
Battery, vehicle 202
Belts, safety belts 54
Beverage holder, cu‐ pholder 159
BMW Assist, see user's manual for Navigation, Enter‐
tainment and Communica‐
tion
BMW Homepage 6
BMW Internet page 6
BMW Maintenance Sys‐ tem 195 Seite 230ReferenceEverything from A to Z230
Online Edition for Part no. 01 40 2 903 169 - 07 12 490
Page 231 of 240
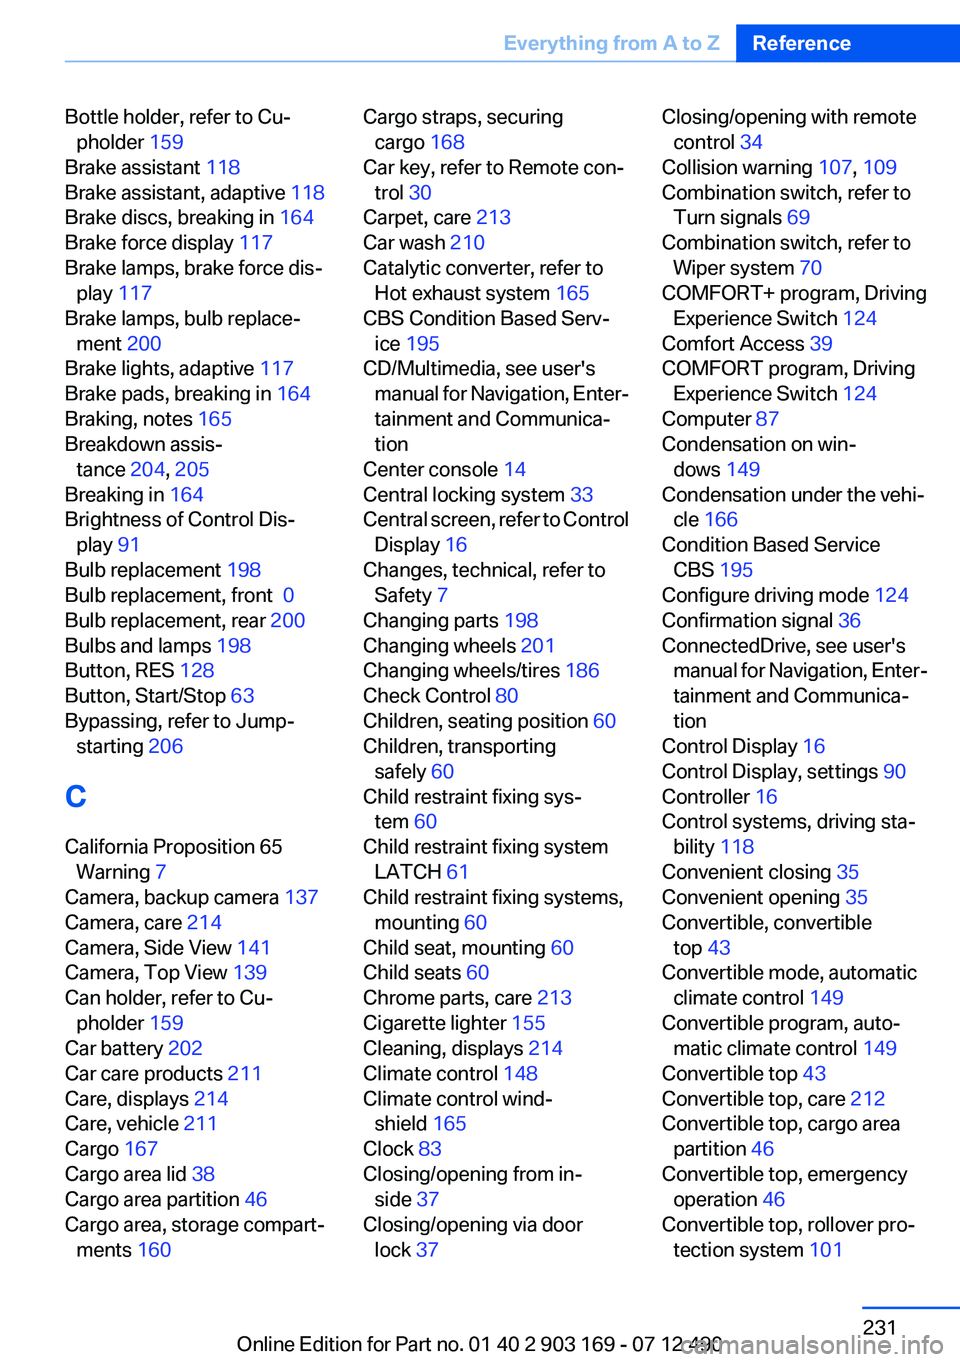
Bottle holder, refer to Cu‐pholder 159
Brake assistant 118
Brake assistant, adaptive 118
Brake discs, breaking in 164
Brake force display 117
Brake lamps, brake force dis‐ play 117
Brake lamps, bulb replace‐ ment 200
Brake lights, adaptive 117
Brake pads, breaking in 164
Braking, notes 165
Breakdown assis‐ tance 204, 205
Breaking in 164
Brightness of Control Dis‐ play 91
Bulb replacement 198
Bulb replacement, front 0
Bulb replacement, rear 200
Bulbs and lamps 198
Button, RES 128
Button, Start/Stop 63
Bypassing, refer to Jump- starting 206
C
California Proposition 65 Warning 7
Camera, backup camera 137
Camera, care 214
Camera, Side View 141
Camera, Top View 139
Can holder, refer to Cu‐ pholder 159
Car battery 202
Car care products 211
Care, displays 214
Care, vehicle 211
Cargo 167
Cargo area lid 38
Cargo area partition 46
Cargo area, storage compart‐ ments 160 Cargo straps, securing
cargo 168
Car key, refer to Remote con‐ trol 30
Carpet, care 213
Car wash 210
Catalytic converter, refer to Hot exhaust system 165
CBS Condition Based Serv‐ ice 195
CD/Multimedia, see user's manual for Navigation, Enter‐
tainment and Communica‐
tion
Center console 14
Central locking system 33
Central screen, refer to Control Display 16
Changes, technical, refer to Safety 7
Changing parts 198
Changing wheels 201
Changing wheels/tires 186
Check Control 80
Children, seating position 60
Children, transporting safely 60
Child restraint fixing sys‐ tem 60
Child restraint fixing system LATCH 61
Child restraint fixing systems, mounting 60
Child seat, mounting 60
Child seats 60
Chrome parts, care 213
Cigarette lighter 155
Cleaning, displays 214
Climate control 148
Climate control wind‐ shield 165
Clock 83
Closing/opening from in‐ side 37
Closing/opening via door lock 37 Closing/opening with remote
control 34
Collision warning 107, 109
Combination switch, refer to Turn signals 69
Combination switch, refer to Wiper system 70
COMFORT+ program, Driving Experience Switch 124
Comfort Access 39
COMFORT program, Driving Experience Switch 124
Computer 87
Condensation on win‐ dows 149
Condensation under the vehi‐ cle 166
Condition Based Service CBS 195
Configure driving mode 124
Confirmation signal 36
ConnectedDrive, see user's manual for Navigation, Enter‐
tainment and Communica‐
tion
Control Display 16
Control Display, settings 90
Controller 16
Control systems, driving sta‐ bility 118
Convenient closing 35
Convenient opening 35
Convertible, convertible top 43
Convertible mode, automatic climate control 149
Convertible program, auto‐ matic climate control 149
Convertible top 43
Convertible top, care 212
Convertible top, cargo area partition 46
Convertible top, emergency operation 46
Convertible top, rollover pro‐ tection system 101 Seite 231Everything from A to ZReference231
Online Edition for Part no. 01 40 2 903 169 - 07 12 490