Adjusting BMW 7 SERIES 2014 F01 Owner's Manual
[x] Cancel search | Manufacturer: BMW, Model Year: 2014, Model line: 7 SERIES, Model: BMW 7 SERIES 2014 F01Pages: 265, PDF Size: 5.68 MB
Page 9 of 265
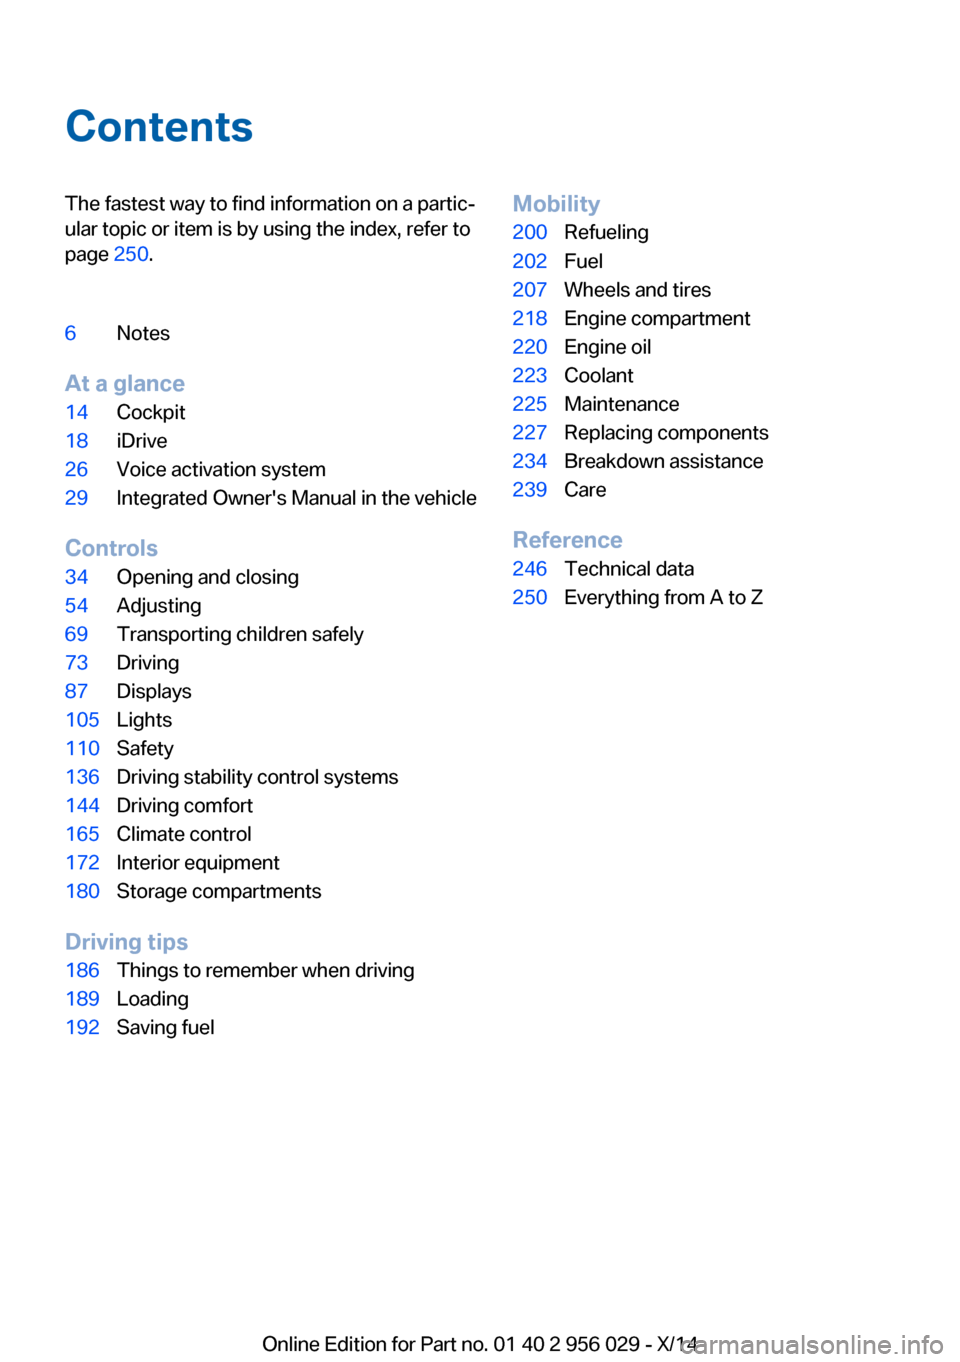
ContentsThe fastest way to find information on a partic‐
ular topic or item is by using the index, refer to
page 250.6Notes
At a glance
14Cockpit18iDrive26Voice activation system29Integrated Owner's Manual in the vehicle
Controls
34Opening and closing54Adjusting69Transporting children safely73Driving87Displays105Lights110Safety136Driving stability control systems144Driving comfort165Climate control172Interior equipment180Storage compartments
Driving tips
186Things to remember when driving189Loading192Saving fuelMobility200Refueling202Fuel207Wheels and tires218Engine compartment220Engine oil223Coolant225Maintenance227Replacing components234Breakdown assistance239Care
Reference
246Technical data250Everything from A to Z
Online Edition for Part no. 01 40 2 956 029 - X/14
Page 31 of 265
Executing functions using short
commands
Execute functions on the main menu via short
commands. It almost doesn't matter which
menu item is selected, e.g., ›Vehicle status‹.
List of short commands for the voice activation
system, see Navigation, Entertainment, Com‐
munication Owner's Manual.
Help dialog for the voice activation
system
Calling up help dialog: ›Help‹
Additional commands for the help dialog:▷›Help with examples‹: announces informa‐
tion about the current operating options
and the most important commands for
them.▷›Help with voice activation‹: information
about the principle of operation for the
voice activation system is announced.
One example: open the tone
settings
Via the main menu The commands of the menu items are spoken
just as they are selected via the controller.
1.Turn on the Entertainment sound output if
needed.2. Press button on the steering
wheel.3.›Radio‹4.›Tone‹
Via short command
The desired tone settings can also be started
via a short command.
1.Turn on the Entertainment sound output if
needed.2. Press button on the steering
wheel.3.›Tone‹
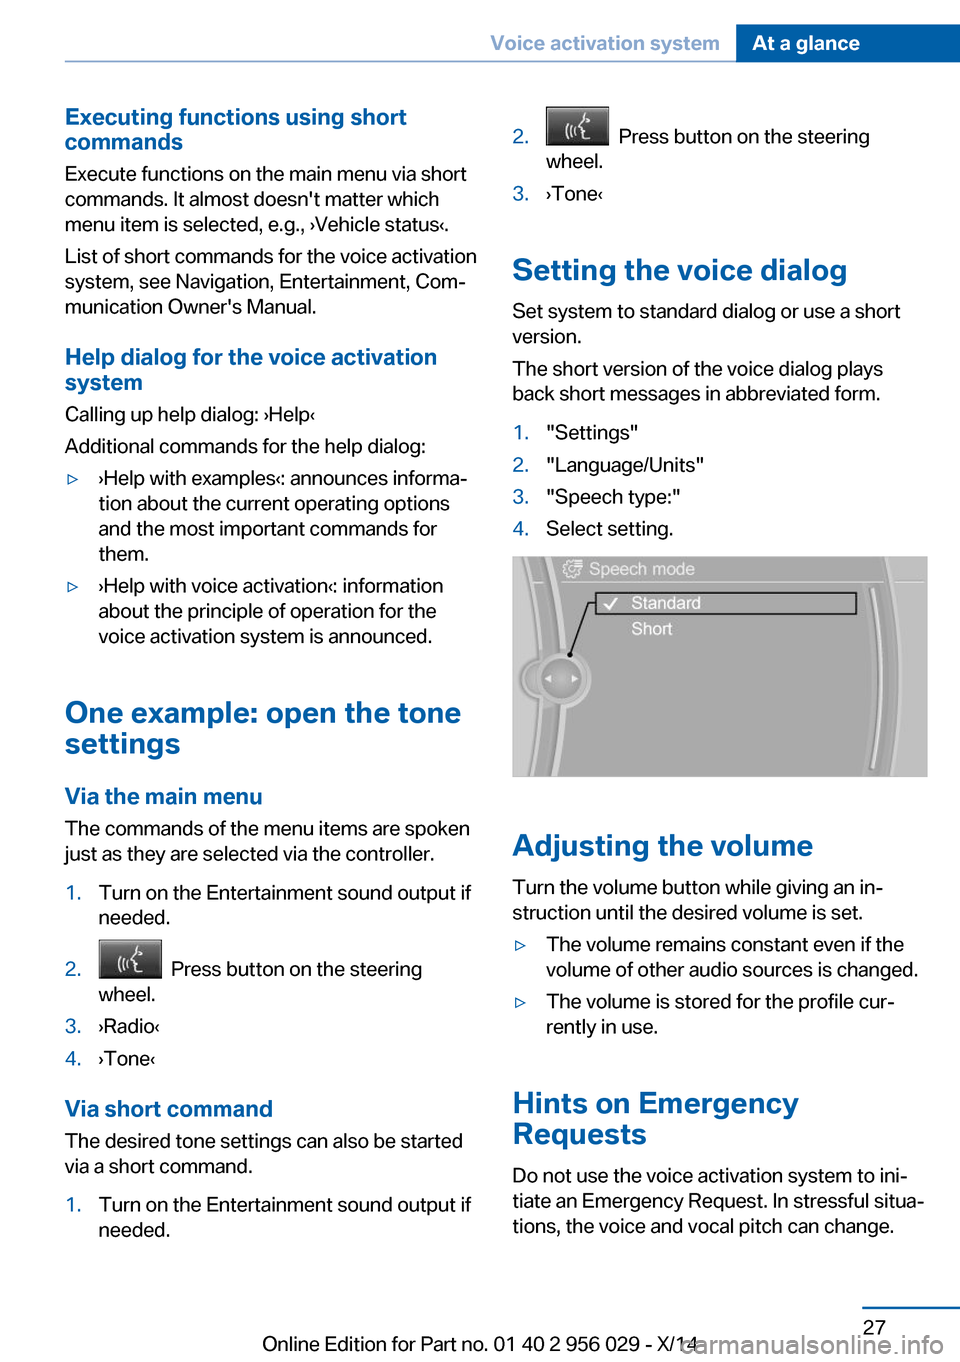
Setting the voice dialog
Set system to standard dialog or use a short
version.
The short version of the voice dialog plays
back short messages in abbreviated form.
1."Settings"2."Language/Units"3."Speech type:"4.Select setting.
Adjusting the volume
Turn the volume button while giving an in‐
struction until the desired volume is set.
▷The volume remains constant even if the
volume of other audio sources is changed.▷The volume is stored for the profile cur‐
rently in use.
Hints on Emergency
Requests
Do not use the voice activation system to ini‐
tiate an Emergency Request. In stressful situa‐
tions, the voice and vocal pitch can change.
Seite 27Voice activation systemAt a glance27
Online Edition for Part no. 01 40 2 956 029 - X/14
Page 40 of 265
▷Your personal settings will be recognized
and activated even if the vehicle had been
operated with another remote control.
Adjusting
The settings for the following systems and
functions are saved in the active profile. The
scope of storable settings is country- and
equipment-dependable.
▷Unlocking and locking.▷Lights.▷Climate control.▷Radio.▷Instrument cluster.▷Programmable memory buttons.▷Volumes, tone.▷Control Display.▷Navigation.▷TV.▷Park Distance Control PDC.▷Rearview camera▷Side View.▷Head-up Display.▷Driving Dynamics Control.▷Driver's seat position, exterior mirror posi‐
tion, steering wheel position.▷Cruise control.▷Intelligent Safety.▷Active Blind Spot Detection.▷Night vision.
Profile management
Opening profiles Regardless of the remote control in use a dif‐
ferent profile may be activated.
1."Settings"2."Profiles"3.Select a profile.The activated profile is assigned to the cur‐
rently used remote control.
Renaming profiles1."Settings"2."Profiles"3."Options"4."Rename current profile"
Resetting profiles The settings of the active profile are reset to
their default values.
1."Settings"2."Profiles"3."Options"4."Reset current profile"
Exporting profiles
Most settings of the active profile and the
saved contacts can be exported.
This can be helpful for securing and retrieving
personal settings, before delivering the vehicle
to a workshop, e.g. Profiles can be taken to an‐
other vehicle equipped with the Personal Pro‐
file function.
The following export options are available:
▷Via BMW Online.▷Via the USB port to a USB device.
Popular file systems for USB devices are
supported. FAT32 and exFAT are the rec‐
ommended formats for profile export.
Other formats may not support the export.1."Settings"2."Profiles"3."Export profile"4.BMW Online: "BMW Online"
USB port: "USB device"Seite 36ControlsOpening and closing36
Online Edition for Part no. 01 40 2 956 029 - X/14
Page 50 of 265
Preventing inadvertent opening
In situations where the trunk lid is not to
be opened with no-touch activation, ensure
that the remote control is located beyond the
range of the sensor, at least 5 ft/1.50 m from
the rear of the car.
Otherwise, the trunk lid may be opened inad‐
vertently, for example by an unintentional or
misinterpreted movement of the foot.◀
Closing The hazard warning system flashes on and an
acoustic signal sounds before the trunk lid closes.
When closing, the trunk lid pivots back and
down.
The closing of the trunk lid has no effect on the
locking of the vehicle.
Another foot movement can interrupt the clos‐
ing operation.
Avoiding unintentional closing
In situations in which the opened trunk
lid should not to be closed with no-touch acti‐
vation, ensure that the remote control is lo‐
cated beyond the range of the sensor, at least
5 ft/1.50 m from the rear of the car.
Otherwise, the trunk lid may be closed inadver‐
tently, for example by an unintentional or mis‐
interpreted movement of the foot.◀
Keep the closing path clear
Make sure that the closing path of the
trunk lid is clear; otherwise, injuries may re‐
sult.◀
Do not place the remote control in the
cargo area
Take the remote control with you and do not
leave it in the cargo area; otherwise, the re‐
mote control is locked inside the vehicle when
the trunk lid is closed.◀Malfunction
Remote control detection by the vehicle can
among others be malfunctioning under the fol‐
lowing circumstances:▷Interference of the radio connection from
transmission towers or other equipment
with high transmit power.▷Shielding of the remote control due to
metal objects.▷Interference of the radio connection from
mobile phones or other electronic devices
in direct proximity.
Do not transport the remote control together
with metal objects or electronic devices.
In the case of a malfunction, unlock and lock
the vehicle using the buttons of the remote
control or using the integrated key, refer to
page 39.
Adjusting
Unlocking The settings are saved in the active profile, re‐
fer to page 35.
Doors
1."Settings"2."Doors/key"3. Select the symbol.4.Select the desired function:▷"Driver's door only"
Only the driver's door and the fuel filler
flap are unlocked. Pressing again un‐
locks the entire vehicle.▷"All doors"
The entire vehicle is unlocked.Seite 46ControlsOpening and closing46
Online Edition for Part no. 01 40 2 956 029 - X/14
Page 58 of 265
AdjustingVehicle features and options
This chapter describes all standard, country-
specific and optional features offered with the
series. It also describes features that are not
necessarily available in your car, e. g., due to
the selected options or country versions. This
also applies to safety-related functions and
systems.
Sitting safely
The ideal seating position can make a vital
contribution to relaxed, fatigue-free driving.
The seating position plays an important role in
an accident in combination with:▷Safety belts, refer to page 60.▷Head restraints, refer to page 61.▷Airbags, refer to page 110.
Front seats
Hints Do not adjust the seat while driving
Do not adjust the driver's seat while driv‐
ing, or the seat could respond with unexpected
movement and the ensuing loss of vehicle
control could lead to an accident.◀
Do not incline the backrest too far to the
rear
Also on the front passenger side, do not incline
the backrest on the front passenger side too
far to the rear while driving, or there is a risk of
slipping under the safety belt in the event of an
accident. This would eliminate the protection
normally provided by the belt.◀
Keep the movement area unobstructed
When changing the seat position, keep
the seat's area of movement unobstructed;
otherwise, people might get injured or objects
damaged.◀
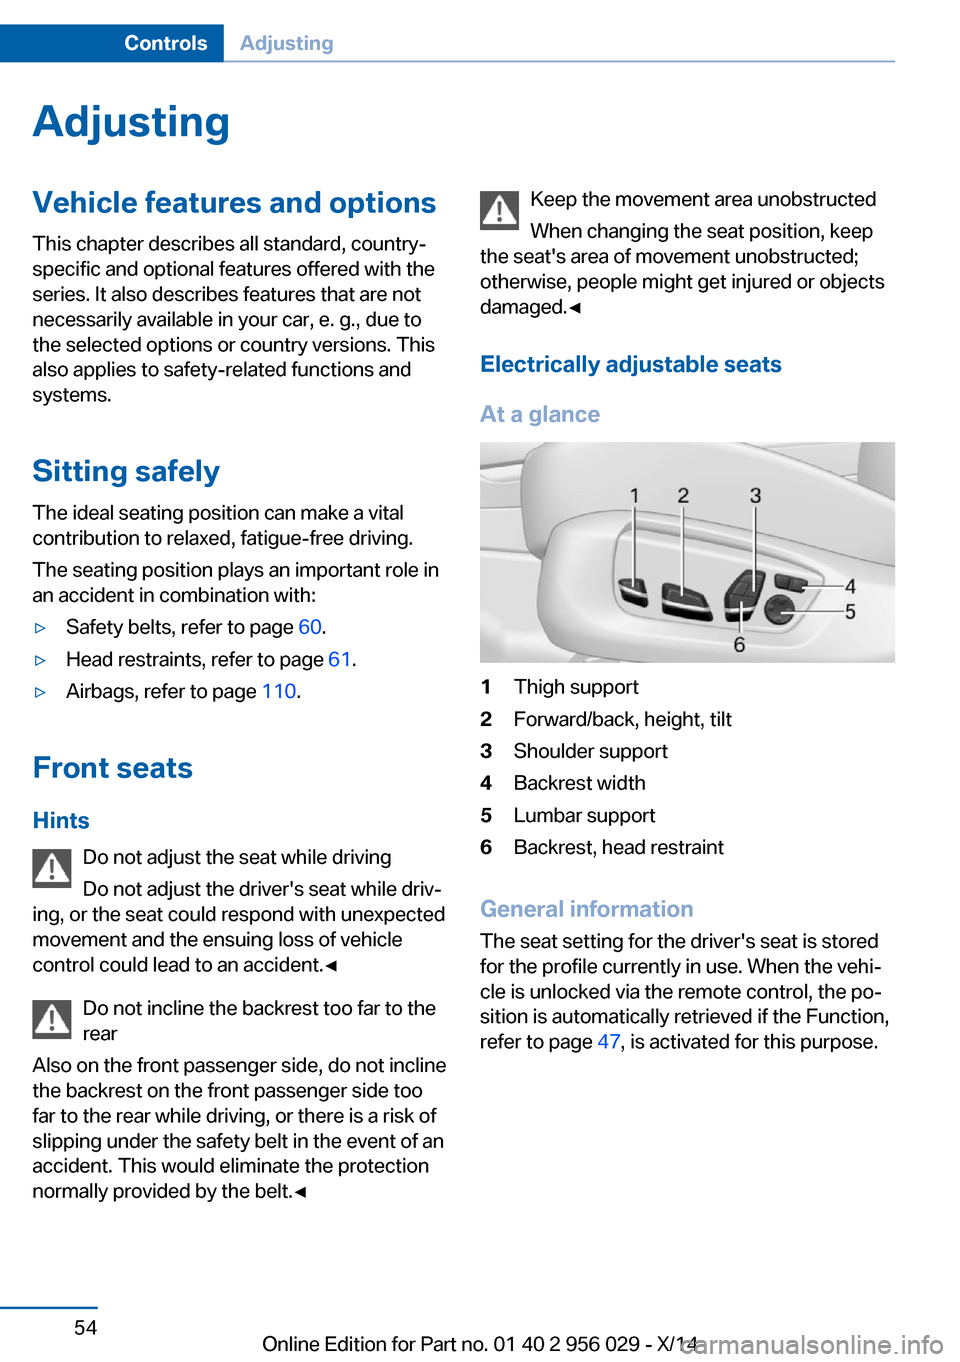
Electrically adjustable seats
At a glance1Thigh support2Forward/back, height, tilt3Shoulder support4Backrest width5Lumbar support6Backrest, head restraint
General information
The seat setting for the driver's seat is stored
for the profile currently in use. When the vehi‐
cle is unlocked via the remote control, the po‐
sition is automatically retrieved if the Function,
refer to page 47, is activated for this purpose.
Seite 54ControlsAdjusting54
Online Edition for Part no. 01 40 2 956 029 - X/14
Page 59 of 265
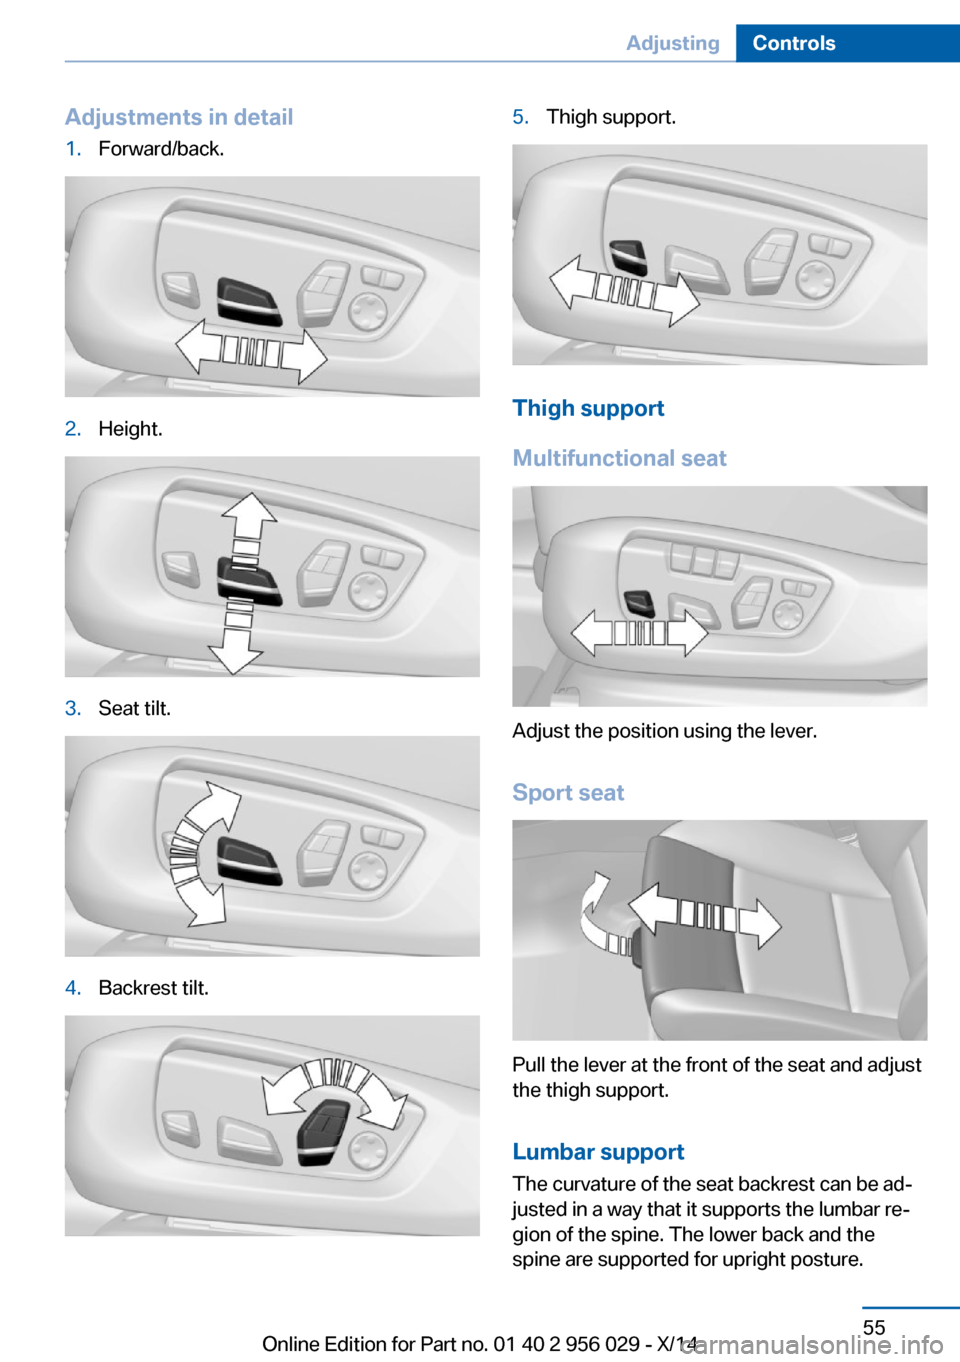
Adjustments in detail1.Forward/back.2.Height.3.Seat tilt.4.Backrest tilt.5.Thigh support.
Thigh support
Multifunctional seat
Adjust the position using the lever.
Sport seat
Pull the lever at the front of the seat and adjust
the thigh support.
Lumbar support The curvature of the seat backrest can be ad‐
justed in a way that it supports the lumbar re‐
gion of the spine. The lower back and the
spine are supported for upright posture.
Seite 55AdjustingControls55
Online Edition for Part no. 01 40 2 956 029 - X/14
Page 60 of 265
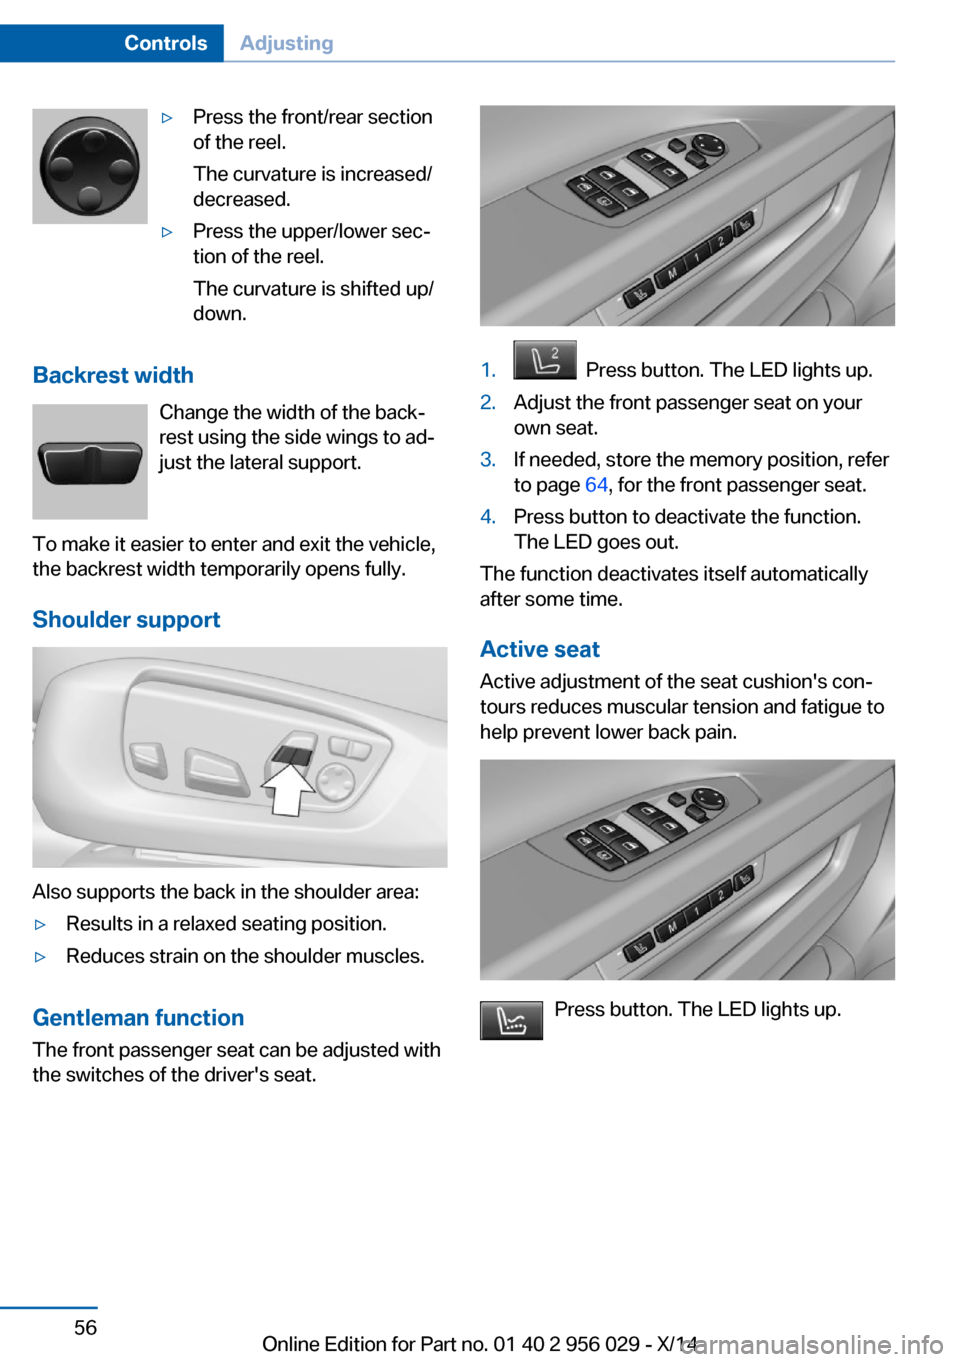
▷Press the front/rear section
of the reel.
The curvature is increased/
decreased.▷Press the upper/lower sec‐
tion of the reel.
The curvature is shifted up/
down.
Backrest width
Change the width of the back‐
rest using the side wings to ad‐
just the lateral support.
To make it easier to enter and exit the vehicle,
the backrest width temporarily opens fully.
Shoulder support
Also supports the back in the shoulder area:
▷Results in a relaxed seating position.▷Reduces strain on the shoulder muscles.
Gentleman function
The front passenger seat can be adjusted with
the switches of the driver's seat.
1. Press button. The LED lights up.2.Adjust the front passenger seat on your
own seat.3.If needed, store the memory position, refer
to page 64, for the front passenger seat.4.Press button to deactivate the function.
The LED goes out.
The function deactivates itself automatically
after some time.
Active seat
Active adjustment of the seat cushion's con‐
tours reduces muscular tension and fatigue to
help prevent lower back pain.
Press button. The LED lights up.
Seite 56ControlsAdjusting56
Online Edition for Part no. 01 40 2 956 029 - X/14
Page 61 of 265
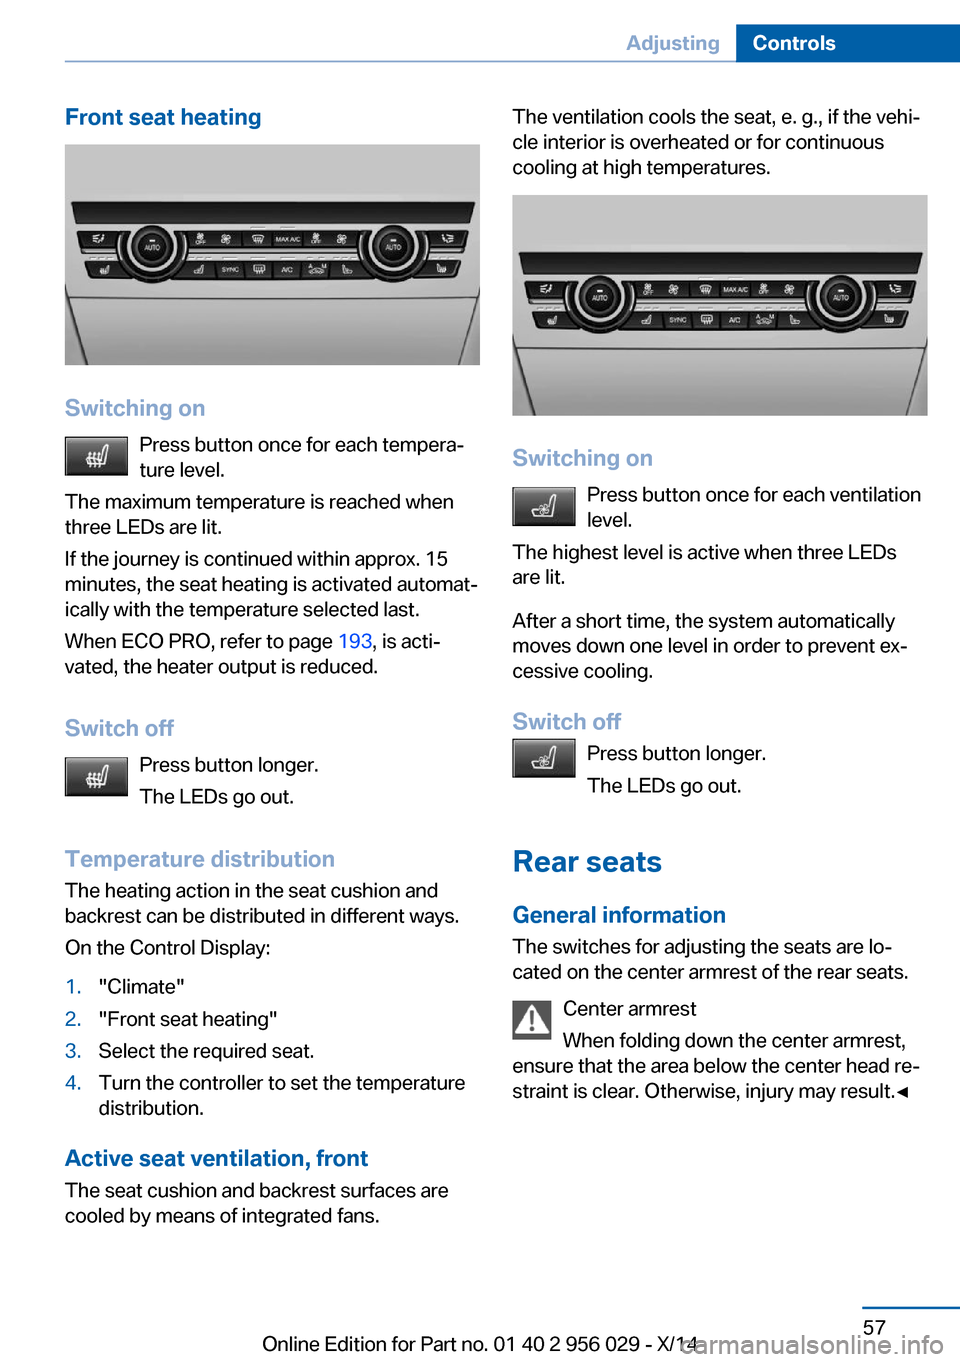
Front seat heating
Switching onPress button once for each tempera‐
ture level.
The maximum temperature is reached when
three LEDs are lit.
If the journey is continued within approx. 15
minutes, the seat heating is activated automat‐
ically with the temperature selected last.
When ECO PRO, refer to page 193, is acti‐
vated, the heater output is reduced.
Switch off Press button longer.
The LEDs go out.
Temperature distribution
The heating action in the seat cushion and
backrest can be distributed in different ways.
On the Control Display:
1."Climate"2."Front seat heating"3.Select the required seat.4.Turn the controller to set the temperature
distribution.
Active seat ventilation, front
The seat cushion and backrest surfaces are
cooled by means of integrated fans.
The ventilation cools the seat, e. g., if the vehi‐
cle interior is overheated or for continuous
cooling at high temperatures.
Switching on
Press button once for each ventilation
level.
The highest level is active when three LEDs
are lit.
After a short time, the system automatically
moves down one level in order to prevent ex‐
cessive cooling.
Switch off Press button longer.
The LEDs go out.
Rear seats General information The switches for adjusting the seats are lo‐
cated on the center armrest of the rear seats.
Center armrest
When folding down the center armrest,
ensure that the area below the center head re‐
straint is clear. Otherwise, injury may result.◀
Seite 57AdjustingControls57
Online Edition for Part no. 01 40 2 956 029 - X/14
Page 62 of 265
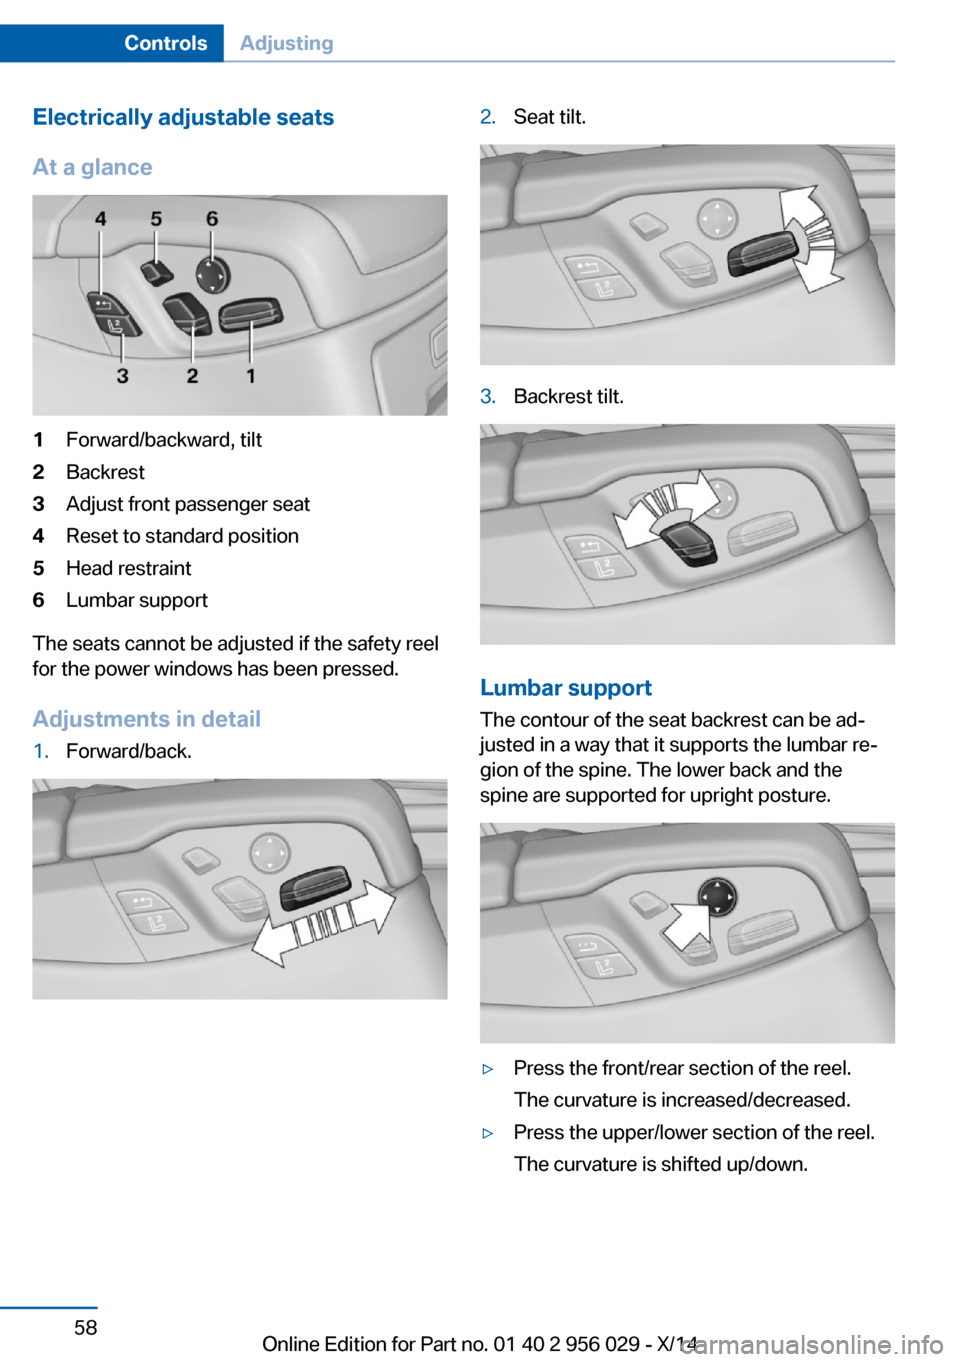
Electrically adjustable seats
At a glance1Forward/backward, tilt2Backrest3Adjust front passenger seat4Reset to standard position5Head restraint6Lumbar support
The seats cannot be adjusted if the safety reel
for the power windows has been pressed.
Adjustments in detail
1.Forward/back.2.Seat tilt.3.Backrest tilt.
Lumbar support
The contour of the seat backrest can be ad‐
justed in a way that it supports the lumbar re‐
gion of the spine. The lower back and the
spine are supported for upright posture.
▷Press the front/rear section of the reel.
The curvature is increased/decreased.▷Press the upper/lower section of the reel.
The curvature is shifted up/down.Seite 58ControlsAdjusting58
Online Edition for Part no. 01 40 2 956 029 - X/14
Page 63 of 265
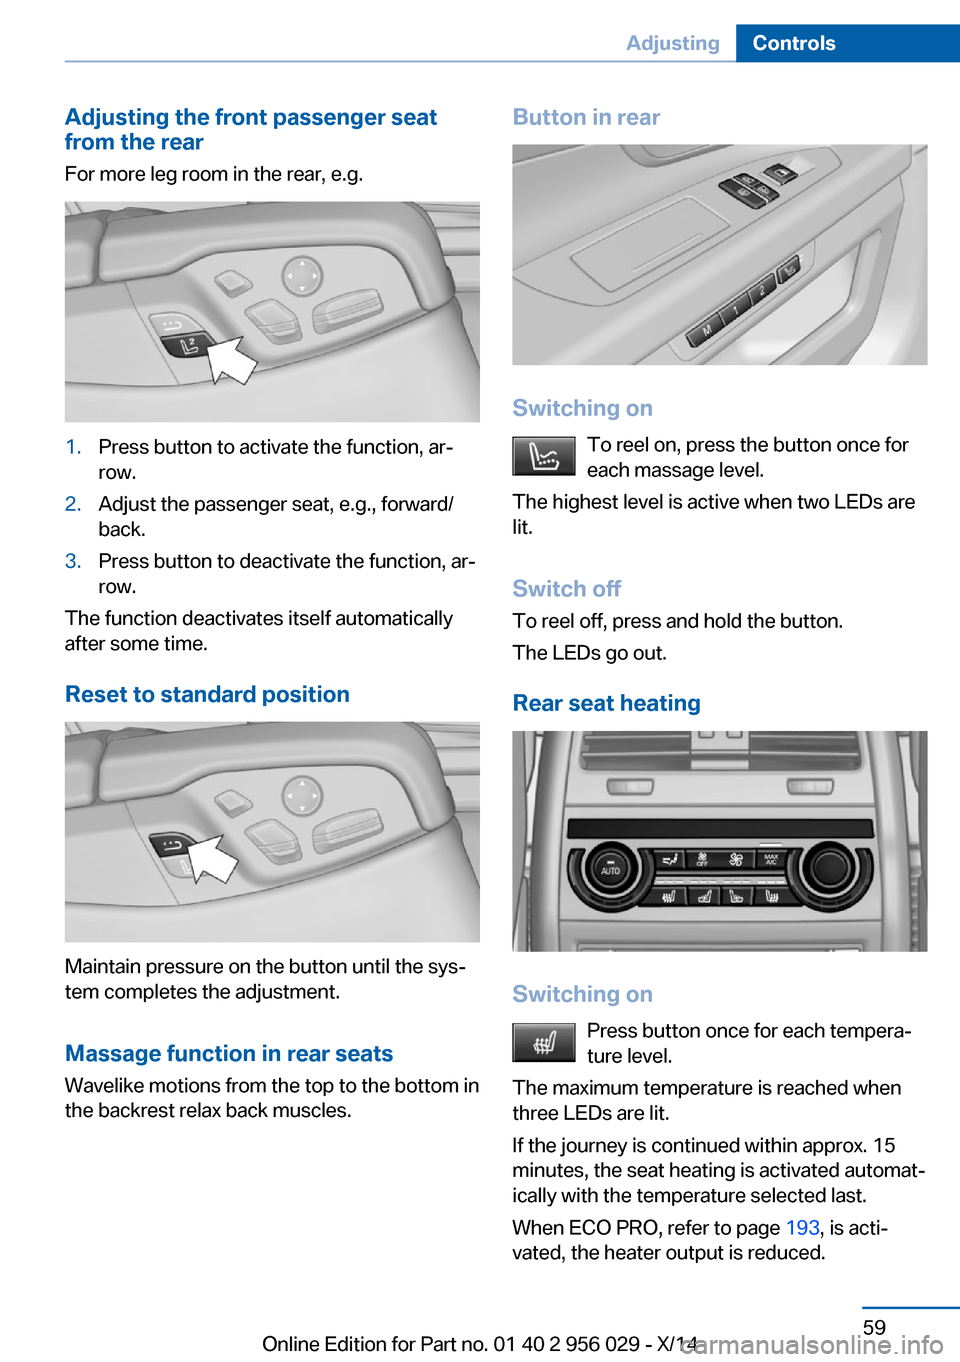
Adjusting the front passenger seat
from the rear
For more leg room in the rear, e.g.1.Press button to activate the function, ar‐
row.2.Adjust the passenger seat, e.g., forward/
back.3.Press button to deactivate the function, ar‐
row.
The function deactivates itself automatically
after some time.
Reset to standard position
Maintain pressure on the button until the sys‐
tem completes the adjustment.
Massage function in rear seats
Wavelike motions from the top to the bottom in
the backrest relax back muscles.
Button in rear
Switching on
To reel on, press the button once for
each massage level.
The highest level is active when two LEDs are
lit.
Switch off To reel off, press and hold the button.
The LEDs go out.
Rear seat heating
Switching on Press button once for each tempera‐
ture level.
The maximum temperature is reached when
three LEDs are lit.
If the journey is continued within approx. 15
minutes, the seat heating is activated automat‐
ically with the temperature selected last.
When ECO PRO, refer to page 193, is acti‐
vated, the heater output is reduced.
Seite 59AdjustingControls59
Online Edition for Part no. 01 40 2 956 029 - X/14