engine overheat BMW 7 SERIES 2015 G11 Owner's Manual
[x] Cancel search | Manufacturer: BMW, Model Year: 2015, Model line: 7 SERIES, Model: BMW 7 SERIES 2015 G11Pages: 314, PDF Size: 7.9 MB
Page 97 of 314
DrivingVehicle features and options
This chapter describes all standard, country-
specific and optional features offered with the
series. It also describes features that are not
necessarily available in your car, e. g., due to
the selected options or country versions. This
also applies to safety-related functions and
systems. The respectively applicable country
provisions must be observed when using the
respective features and systems.
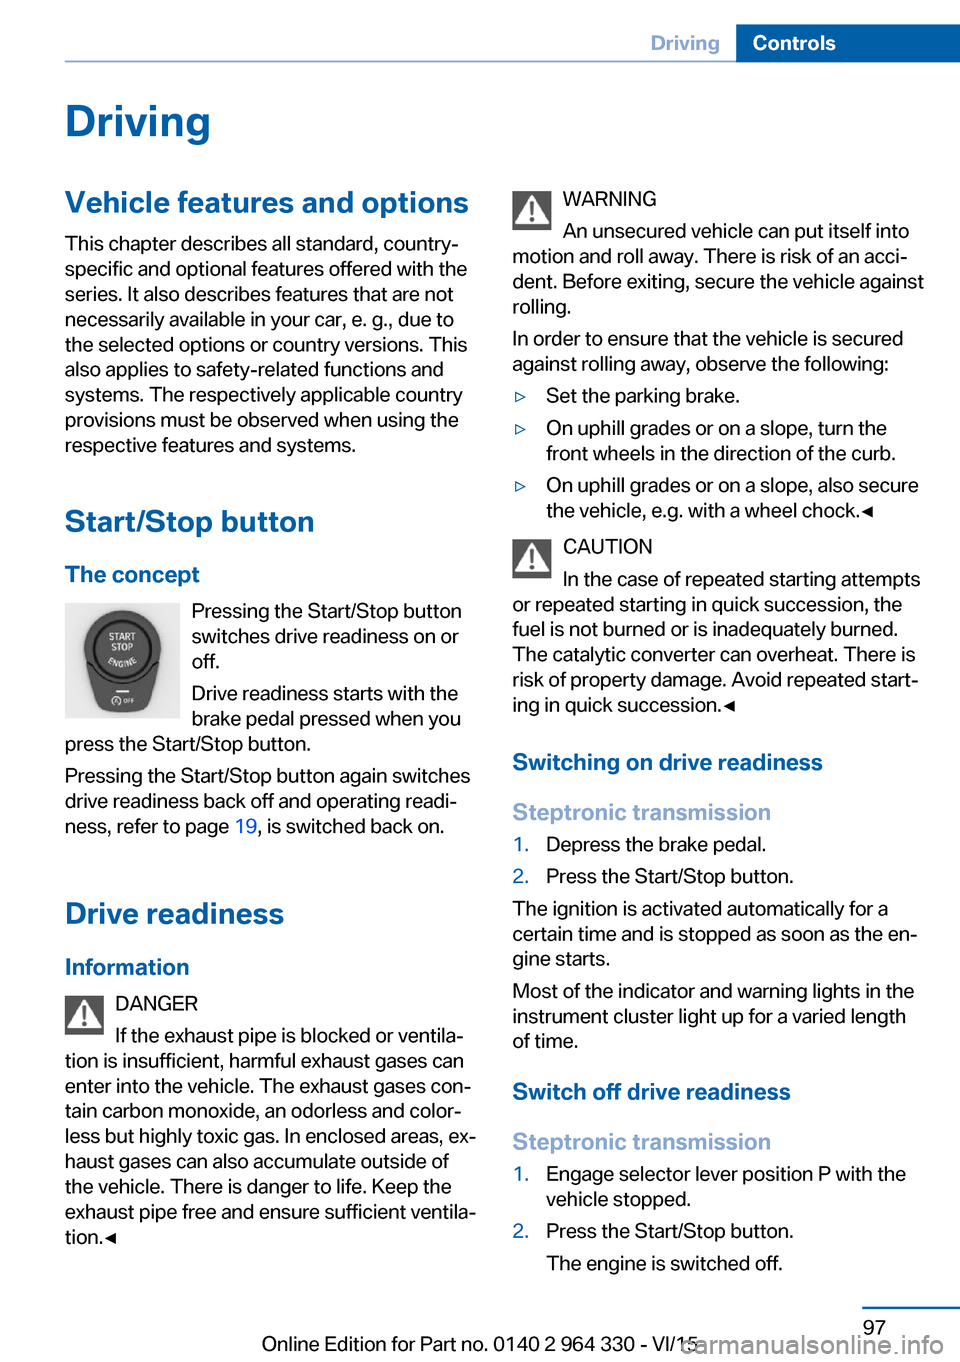
Start/Stop button The concept Pressing the Start/Stop button
switches drive readiness on or
off.
Drive readiness starts with the
brake pedal pressed when you
press the Start/Stop button.
Pressing the Start/Stop button again switches
drive readiness back off and operating readi‐
ness, refer to page 19, is switched back on.
Drive readiness
Information DANGER
If the exhaust pipe is blocked or ventila‐
tion is insufficient, harmful exhaust gases can
enter into the vehicle. The exhaust gases con‐
tain carbon monoxide, an odorless and color‐
less but highly toxic gas. In enclosed areas, ex‐
haust gases can also accumulate outside of
the vehicle. There is danger to life. Keep the
exhaust pipe free and ensure sufficient ventila‐
tion.◀WARNING
An unsecured vehicle can put itself into
motion and roll away. There is risk of an acci‐
dent. Before exiting, secure the vehicle against
rolling.
In order to ensure that the vehicle is secured
against rolling away, observe the following:▷Set the parking brake.▷On uphill grades or on a slope, turn the
front wheels in the direction of the curb.▷On uphill grades or on a slope, also secure
the vehicle, e.g. with a wheel chock.◀
CAUTION
In the case of repeated starting attempts
or repeated starting in quick succession, the
fuel is not burned or is inadequately burned.
The catalytic converter can overheat. There is
risk of property damage. Avoid repeated start‐
ing in quick succession.◀
Switching on drive readiness
Steptronic transmission
1.Depress the brake pedal.2.Press the Start/Stop button.
The ignition is activated automatically for a
certain time and is stopped as soon as the en‐
gine starts.
Most of the indicator and warning lights in the
instrument cluster light up for a varied length
of time.
Switch off drive readiness
Steptronic transmission
1.Engage selector lever position P with the
vehicle stopped.2.Press the Start/Stop button.
The engine is switched off.Seite 97DrivingControls97
Online Edition for Part no. 0140 2 964 330 - VI/15
Page 224 of 314
Switching onThe cooler can be operated at two levels.1.Turn on operations.2. Press button once for each cooling
level.
The highest cooling power is active when
two LEDs are lit.
If the cooler was switched on the last time op‐
erating readiness was switched off, it will like‐
wise be switched on the next time operating
readiness is switched on.
Switch off Press button repeatedly until the LEDs go out.
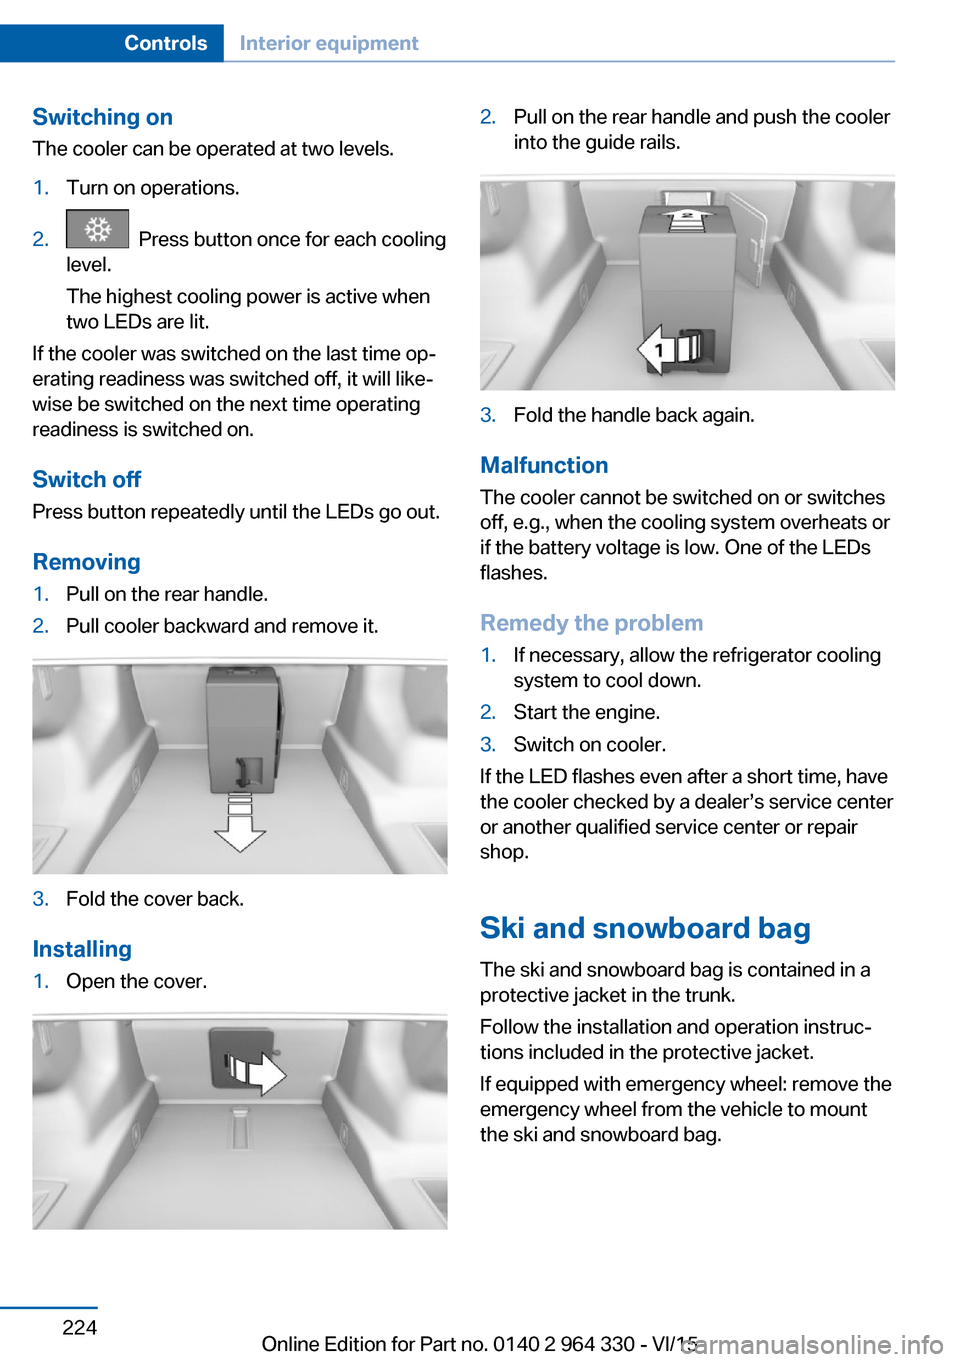
Removing
1.Pull on the rear handle.2.Pull cooler backward and remove it.3.Fold the cover back.
Installing
1.Open the cover.2.Pull on the rear handle and push the cooler
into the guide rails.3.Fold the handle back again.
Malfunction
The cooler cannot be switched on or switches
off, e.g., when the cooling system overheats or
if the battery voltage is low. One of the LEDs
flashes.
Remedy the problem
1.If necessary, allow the refrigerator cooling
system to cool down.2.Start the engine.3.Switch on cooler.
If the LED flashes even after a short time, have
the cooler checked by a dealer’s service center
or another qualified service center or repair
shop.
Ski and snowboard bag The ski and snowboard bag is contained in a
protective jacket in the trunk.
Follow the installation and operation instruc‐
tions included in the protective jacket.
If equipped with emergency wheel: remove the
emergency wheel from the vehicle to mount
the ski and snowboard bag.
Seite 224ControlsInterior equipment224
Online Edition for Part no. 0140 2 964 330 - VI/15
Page 236 of 314
Driving in wet conditionsWhen roads are wet, salted, or in heavy rain,
press brake pedal ever so gently every few
miles.
Ensure that this action does not endanger
other traffic.
The heat generated in this process helps dry
the brake discs and pads.
In this way braking efficiency will be available
when you need it.
Hills WARNING
Light but consistent brake pressure can
lead to high temperatures, brakes wearing out
and possibly even brake failure. There is risk of
an accident. Avoid placing excessive stress on
the brake system.◀
WARNING
In idle or with the engine switched off,
safety-relevant functions are restricted or not
available anymore, e.g. braking effect of the
engine or braking force and steering support.
There is risk of an accident. Do not drive in idle
or with the engine switched off.◀
Drive long or steep downhill gradients in the
gear that requires least braking efforts. Other‐
wise the brakes may overheat and reduce
brake efficiency.
You can increase the engine's braking effect
by shifting down, going all the way to first gear,
if needed.
Brake disc corrosion
Corrosion on the brake discs and contamina‐
tion on the brake pads are furthered by the fol‐
lowing circumstances:▷Low mileage.▷Extended periods when the vehicle is not
used at all.▷Infrequent use of the brakes.Corrosion will built up when the maximum
pressure applied to the brake pads during
braking is not reached - thus discs don't get
cleaned.
Corrosion buildup on the brake discs will cause
a pulsating effect on the brakes in their re‐
sponse - generally that cannot be corrected.
Condensation under the parked
vehicle
When using the automatic climate control,
condensation water develops collecting under‐
neath the vehicle.
These traces of water under the vehicle are
normal.Seite 236Driving tipsThings to remember when driving236
Online Edition for Part no. 0140 2 964 330 - VI/15
Page 262 of 314
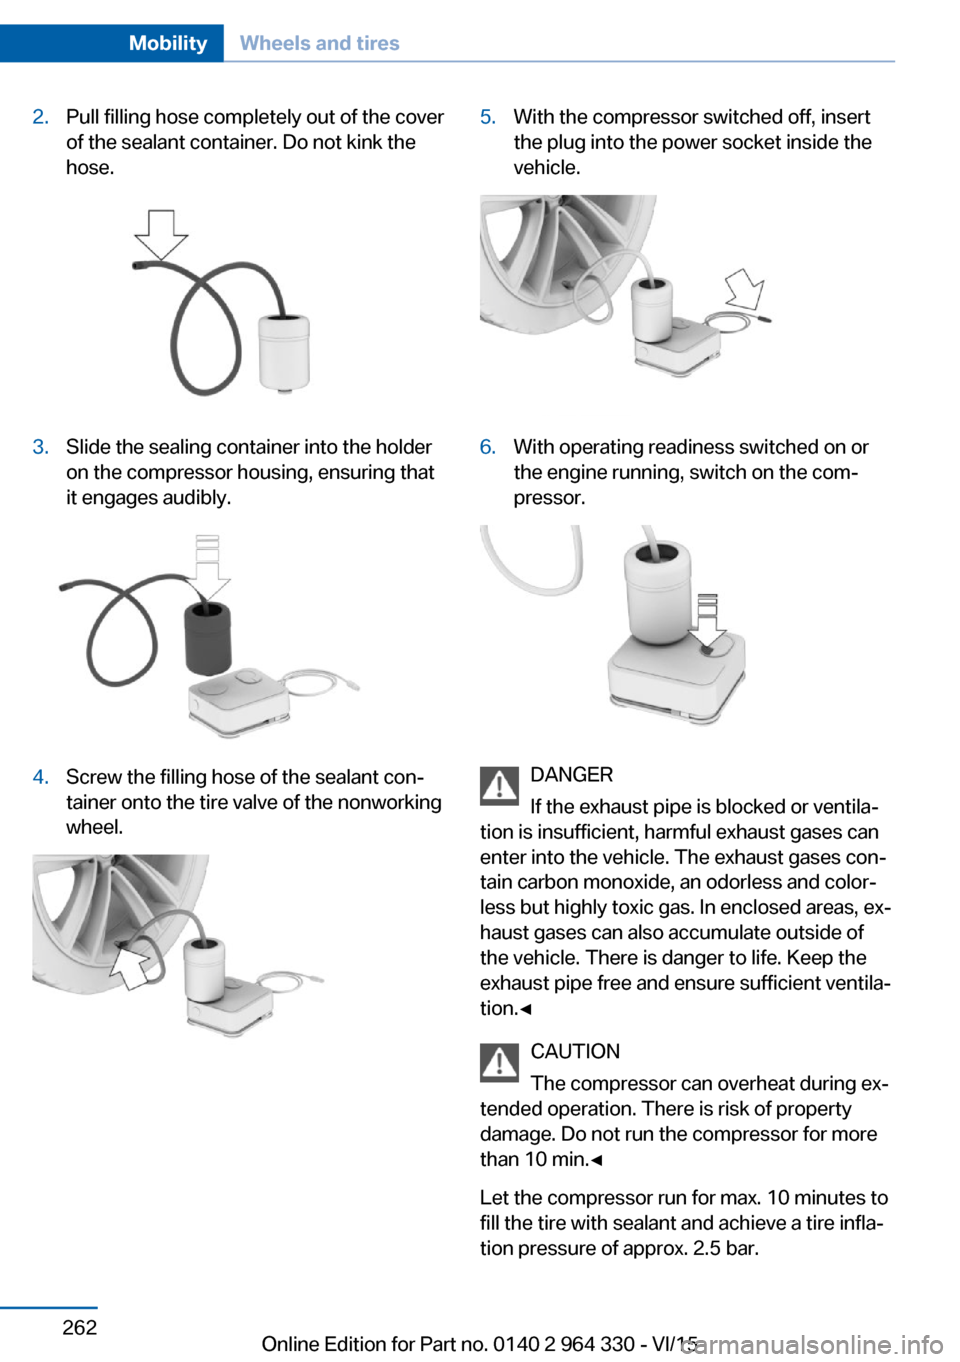
2.Pull filling hose completely out of the cover
of the sealant container. Do not kink the
hose.3.Slide the sealing container into the holder
on the compressor housing, ensuring that
it engages audibly.4.Screw the filling hose of the sealant con‐
tainer onto the tire valve of the nonworking
wheel.5.With the compressor switched off, insert
the plug into the power socket inside the
vehicle.6.With operating readiness switched on or
the engine running, switch on the com‐
pressor.
DANGER
If the exhaust pipe is blocked or ventila‐
tion is insufficient, harmful exhaust gases can
enter into the vehicle. The exhaust gases con‐
tain carbon monoxide, an odorless and color‐
less but highly toxic gas. In enclosed areas, ex‐
haust gases can also accumulate outside of
the vehicle. There is danger to life. Keep the
exhaust pipe free and ensure sufficient ventila‐
tion.◀
CAUTION
The compressor can overheat during ex‐
tended operation. There is risk of property
damage. Do not run the compressor for more
than 10 min.◀
Let the compressor run for max. 10 minutes to
fill the tire with sealant and achieve a tire infla‐
tion pressure of approx. 2.5 bar.
Seite 262MobilityWheels and tires262
Online Edition for Part no. 0140 2 964 330 - VI/15
Page 308 of 314
Moisture in headlight 282
Monitor, see Control Dis‐ play 21
Mounting of child restraint systems 94
Moving sun visor 217
Multifunction steering wheel, buttons 14
Multimedia 6
N
Navigation 6
Near-field communication 42
Neck restraints, front, see Head restraints 82
Neck restraints, rear, see Head restraints 83
Neutral cleaner, see wheel cleaner 293
New wheels and tires 258
NFC, see near-field commu‐ nication 42
Night Vision 147
Night Vision device, see Night Vision 147
Nylon rope for tow-starting/ towing 289
O OBD Onboard Diagnosis 280
OBD, see OBD Onboard Di‐ agnosis 280
Object detection, see Night Vision 147
Octane rating, see Recom‐ mended fuel grade 252
Odometer 123
Oil 273
Oil, adding 274
Oil additives 275
Oil change 275
Oil change interval, service requirements 119
Oil filler neck 274 Oil types, alternative 275
Oil types, suitable 275
Old batteries, disposal 285
Onboard computer, Control Display 125
On-board computer, instru‐ ment cluster 122
Onboard monitor, see Control Display 21
Onboard vehicle tool kit 281
Opening and closing 54
Opening the trunk lid with no- touch activation 66
Opening via door lock 62
Opening without remote con‐ trol 62
Opening with remote control, closing with remote control,
unlocking with remote con‐
trol 60
Operating concept, iDrive 21
Operating readiness 19
Operating via iDrive 22
Operating with the control‐ ler 22
Operation via touchscreen 25
Optional equipment, standard equipment 7
Outside air, see AUC 205
Overheating of engine, see Coolant temperature 118
Own Safety 7
P Paint, vehicle 292
Pairing device 41
Pairing mobile phone 41
Pairing smartphone 41
Pairing telephone 41
Panorama View, see Sur‐ round View 187
Panoramic glass sunroof 73
Parallel parking assistant 193
Park Distance Control PDC 180 Parked vehicle, condensa‐
tion 236
Parking aid, see PDC 180
Parking assistant 193
Parking brake 100
Parking lights 129
Parking with Automatic Hold 100
Parts and accessories 7
Passenger side mirror, tilting downward 85
PDC Park Distance Con‐ trol 180
Pedestrian detection, see Night Vision 147
Pedestrian warning with City braking function 144
Personal profile, see pro‐ files 58
Pillows 84
Pinch protection system, glass sunroof 75
Pinch protection system, win‐ dows 71
Plastic, care 293
Post Crash — iBrake 161
Power failure 285
Power sunroof, glass 73
Power windows 70
Prescribed engine oil types 275
Pressure, tire air pres‐ sure 254
Pressure warning FTM, tires 268
Profiles 58
Profiles, see profiles 58
Programmable memory but‐ tons, iDrive 28
Protective function, glass sunroof 75
Protective function, win‐ dows 71
Push-and-turn switch, see Controller 22 Seite 308ReferenceEverything from A to Z308
Online Edition for Part no. 0140 2 964 330 - VI/15