Control BMW 7 SERIES 2016 G11 Owner's Guide
[x] Cancel search | Manufacturer: BMW, Model Year: 2016, Model line: 7 SERIES, Model: BMW 7 SERIES 2016 G11Pages: 314, PDF Size: 7.9 MB
Page 32 of 314
System limits
Gesture recognition by the camera can be dis‐
turbed by the following circumstances:▷The camera objective is covered.▷The camera objective is contaminated.
Clean the camera lenses, refer to
page 294.▷The gesture is executed outside of the de‐
tection range.▷The gesture can only be executed while
the vehicle is stationary.Seite 32At a glanceBMW gesture control32
Online Edition for Part no. 0140 2 964 330 - VI/15
Page 33 of 314
Voice activation systemVehicle features and options
This chapter describes all standard, country-
specific and optional features offered with the
series. It also describes features that are not
necessarily available in your car, e. g., due to
the selected options or country versions. This
also applies to safety-related functions and
systems. The respectively applicable country
provisions must be observed when using the
respective features and systems.
The concept▷Most functions displayed on the Control
Display can be operated by voice com‐
mands via the voice activation system. The
system supports you with announcements
during input.▷Functions that can only be used when the
vehicle is stationary cannot be used via the
voice activation system.▷The system uses a special microphone on
the driver's side.▷›...‹ Verbal instructions in the Owner's
Manual to use with the voice activation
system.
Requirements
Via the Control Display, set a language that is
also supported by the voice activation system
so that the spoken commands can be identi‐
fied.
Set the language, refer to page 38.
Using voice activation
Activating the voice activation system1. Press button on the steering
wheel.2.Wait for the signal.3.Say the command.
A command that is recognized by the voice
activation system is announced and dis‐
played in the instrument cluster.
This symbol in the instrument cluster
indicates that the voice activation sys‐
tem is active.
If no other commands are available, use func‐
tion via iDrive.
Terminating the voice activation
system
Briefly press the button on the steer‐
ing wheel or ›Cancel‹.
Possible commands Most menu items on the Control Display can
be voiced as commands.
Commends from other menus can also be
spoken.
You may select lists such as phone lists via
voice activation. Read these lists out loud ex‐
actly as they show in the respective list.
Displaying possible commands Displayed in the top area of the Control Display
are:
▷Possible commands for the current menu.▷Possible commands from other menus.Seite 33Voice activation systemAt a glance33
Online Edition for Part no. 0140 2 964 330 - VI/15
Page 34 of 314
▷Status of the voice recognition.▷Status of the encrypted connection.
Help on the voice activation system
▷To have the available spoken instructions
read out loud: ›Voice commands‹.▷Have information about the principle of op‐
eration for the voice activation system be
announced: ›General information on voice
control‹.▷Announce help for the current
menu: ›Help‹.
One example: open the tone
settings
The commands of the menu items are spoken
just as they are selected via the controller.
1.Turn on the Entertainment sound output if
needed.2. Press button on the steering
wheel.3.›Media and radio‹4.›Tone‹
Adjusting
Setting the voice dialog
Set system to standard dialog or use a short
version.
The short version of the voice dialog plays
back short messages in abbreviated form.
About iDrive:
1."My Vehicle"2."System settings"3."Language"4."Speech mode:"5.Select desired setting.Selecting the input language For some languages, the input language can
be selected.
About iDrive:1."My Vehicle"2."System settings"3."Language"4."Voice control:"5.Select desired setting.
Activating encrypted connection
By activating an encrypted connection, the
quality of voice recognition will be improved.
About iDrive:
1."My Vehicle"2."System settings"3."Language"4."Speech recognition via server"
Encrypted connection active.
Adjusting the volume Turn the volume button during the spoken in‐
structions until the desired volume is set.
▷The volume remains constant even if the
volume of other audio sources is changed.▷The volume is stored for the drive profile
currently used.
Information on Emergency
Requests
Do not use the voice activation system to ini‐
tiate an Emergency Request. In stressful situa‐
tions, the voice and vocal pitch can change.
This can unnecessarily delay the establish‐
ment of a phone connection.
Instead, use the SOS button, refer to
page 286, close to the interior mirror.
Seite 34At a glanceVoice activation system34
Online Edition for Part no. 0140 2 964 330 - VI/15
Page 36 of 314
BMW Touch CommandVehicle features and options
This chapter describes all standard, country-
specific and optional features offered with the
series. It also describes features that are not
necessarily available in your car, e. g., due to
the selected options or country versions. This
also applies to safety-related functions and
systems. The respectively applicable country
provisions must be observed when using the
respective features and systems.
BMW Touch Command The concept
Important functions of the vehicle can be used
via BMW Touch Command.▷Seat adjustments for front passenger seat
and seats in the rear.▷Climate control in the rear.▷Sun protection.▷Ambient light.▷Ambient light accent.▷Bowers & Wilkins loudspeaker lighting.▷Audio sources front.▷Rear entertainment.▷Some functions of the telephone in the
rear.
General information
Depending on the vehicle's equipment, BMW
Touch Command is located in the rear console
or in the center armrest in the rear.
Control elements at a glance
Control elements1BMW Touch Command2Switching on/off3Removing
Tray
The tray in the center armrest in the rear has
the following functions:
▷Storage and locking.▷Recharge the battery.
Insert BMW Touch Command into the tray
with the screen facing upward to ensure
proper locking. To charge the battery, insert
BMW Touch Command with the multifunction
socket to the left.
Buttons on the BMW Touch Command
Press but‐
tonFunctionDisplay list of last used applica‐
tions.Display BMW application, press
button twice as needed.Back.Seite 36At a glanceBMW Touch Command36
Online Edition for Part no. 0140 2 964 330 - VI/15
Page 38 of 314
General settingsVehicle features and optionsThis chapter describes all standard, country-
specific and optional features offered with the
series. It also describes features that are not
necessarily available in your car, e. g., due to
the selected options or country versions. This
also applies to safety-related functions and
systems. The respectively applicable country
provisions must be observed when using the
respective features and systems.
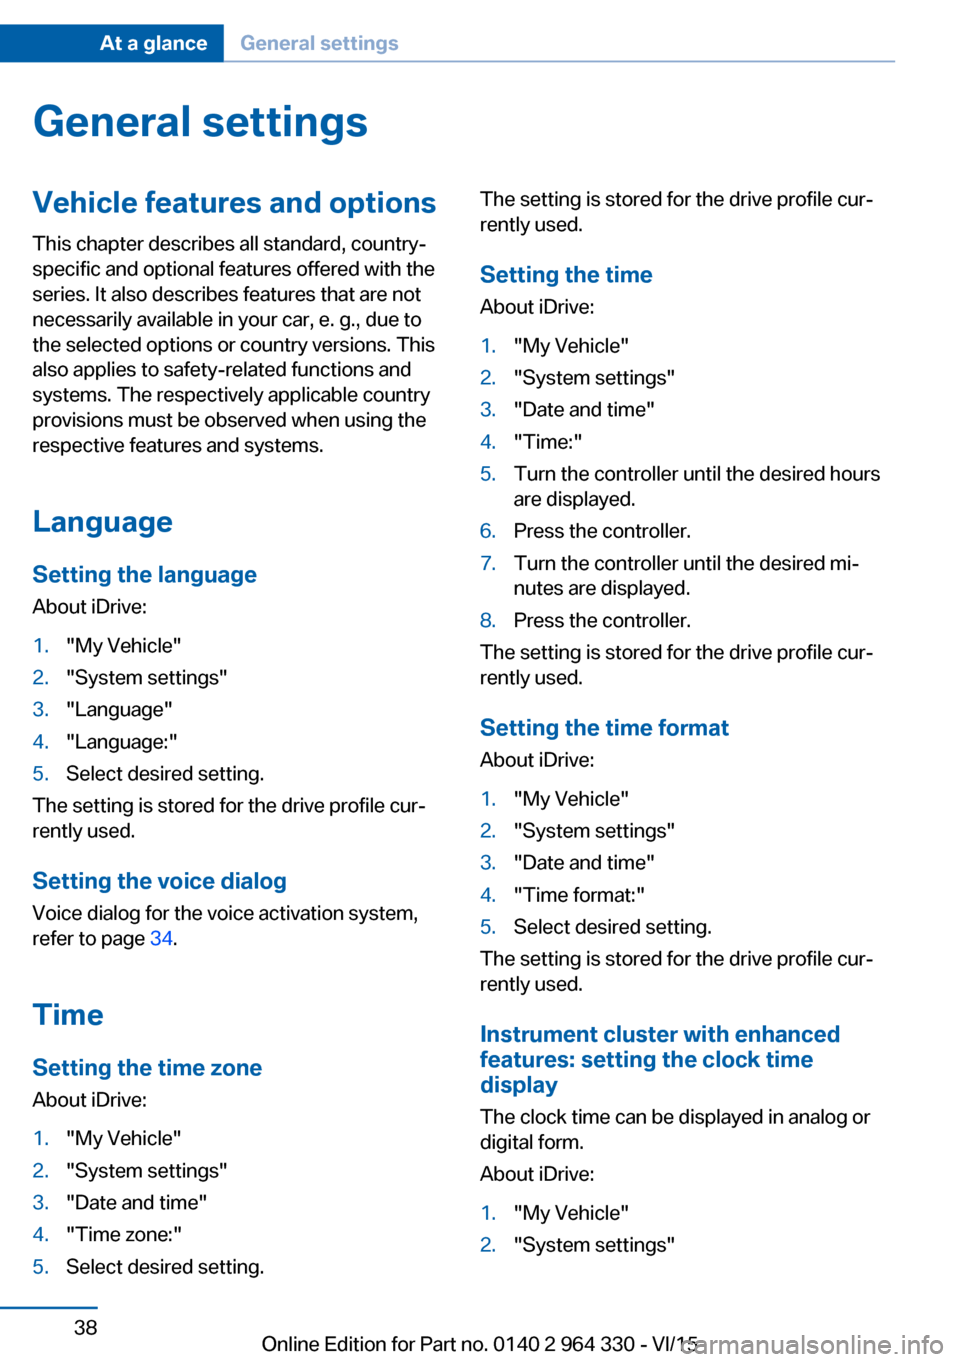
Language Setting the language
About iDrive:1."My Vehicle"2."System settings"3."Language"4."Language:"5.Select desired setting.
The setting is stored for the drive profile cur‐
rently used.
Setting the voice dialog Voice dialog for the voice activation system,
refer to page 34.
Time Setting the time zoneAbout iDrive:
1."My Vehicle"2."System settings"3."Date and time"4."Time zone:"5.Select desired setting.The setting is stored for the drive profile cur‐
rently used.
Setting the time About iDrive:1."My Vehicle"2."System settings"3."Date and time"4."Time:"5.Turn the controller until the desired hours
are displayed.6.Press the controller.7.Turn the controller until the desired mi‐
nutes are displayed.8.Press the controller.
The setting is stored for the drive profile cur‐
rently used.
Setting the time format
About iDrive:
1."My Vehicle"2."System settings"3."Date and time"4."Time format:"5.Select desired setting.
The setting is stored for the drive profile cur‐
rently used.
Instrument cluster with enhanced
features: setting the clock time
display
The clock time can be displayed in analog or
digital form.
About iDrive:
1."My Vehicle"2."System settings"Seite 38At a glanceGeneral settings38
Online Edition for Part no. 0140 2 964 330 - VI/15
Page 39 of 314
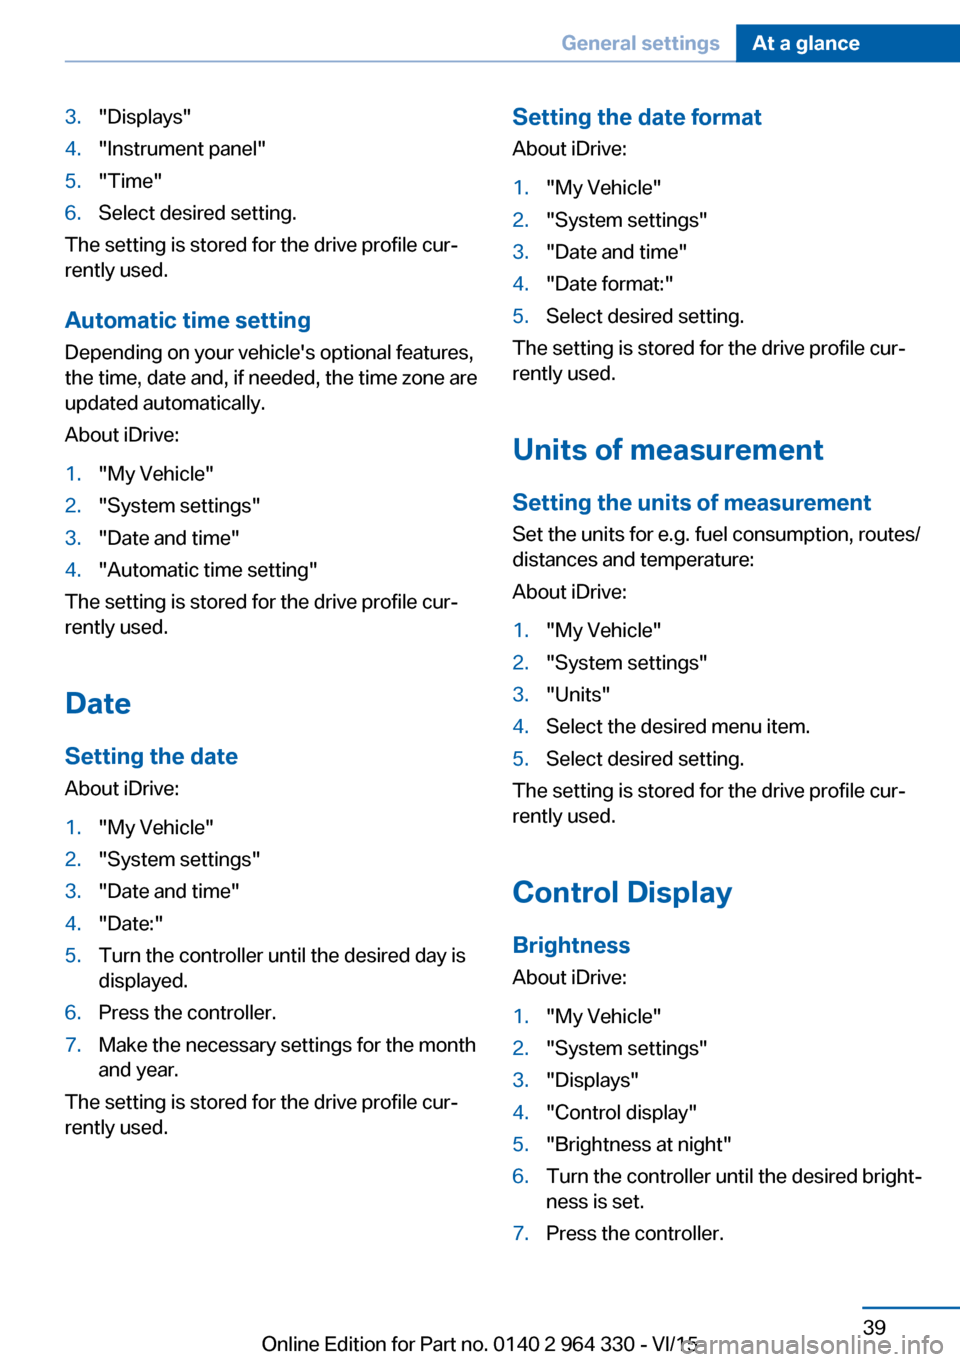
3."Displays"4."Instrument panel"5."Time"6.Select desired setting.
The setting is stored for the drive profile cur‐
rently used.
Automatic time setting Depending on your vehicle's optional features,
the time, date and, if needed, the time zone are
updated automatically.
About iDrive:
1."My Vehicle"2."System settings"3."Date and time"4."Automatic time setting"
The setting is stored for the drive profile cur‐
rently used.
Date Setting the date
About iDrive:
1."My Vehicle"2."System settings"3."Date and time"4."Date:"5.Turn the controller until the desired day is
displayed.6.Press the controller.7.Make the necessary settings for the month
and year.
The setting is stored for the drive profile cur‐
rently used.
Setting the date format
About iDrive:1."My Vehicle"2."System settings"3."Date and time"4."Date format:"5.Select desired setting.
The setting is stored for the drive profile cur‐
rently used.
Units of measurement Setting the units of measurement Set the units for e.g. fuel consumption, routes/
distances and temperature:
About iDrive:
1."My Vehicle"2."System settings"3."Units"4.Select the desired menu item.5.Select desired setting.
The setting is stored for the drive profile cur‐
rently used.
Control Display Brightness
About iDrive:
1."My Vehicle"2."System settings"3."Displays"4."Control display"5."Brightness at night"6.Turn the controller until the desired bright‐
ness is set.7.Press the controller.Seite 39General settingsAt a glance39
Online Edition for Part no. 0140 2 964 330 - VI/15
Page 40 of 314
The setting is stored for the drive profile cur‐
rently used.
Depending on the light conditions, the bright‐
ness settings may not be clearly visible.
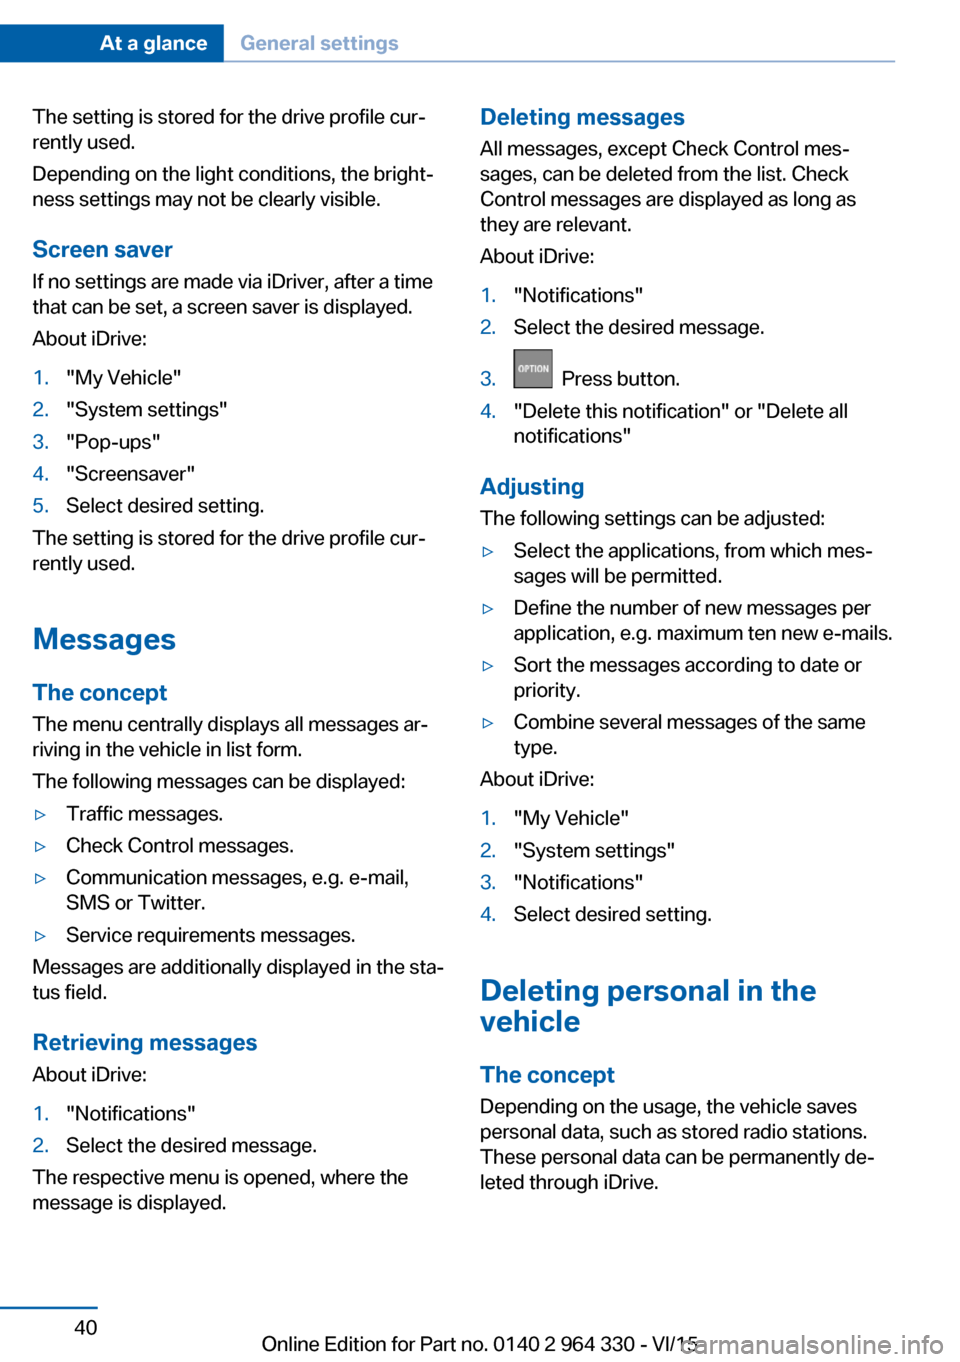
Screen saver
If no settings are made via iDriver, after a time
that can be set, a screen saver is displayed.
About iDrive:1."My Vehicle"2."System settings"3."Pop-ups"4."Screensaver"5.Select desired setting.
The setting is stored for the drive profile cur‐
rently used.
Messages The concept
The menu centrally displays all messages ar‐
riving in the vehicle in list form.
The following messages can be displayed:
▷Traffic messages.▷Check Control messages.▷Communication messages, e.g. e-mail,
SMS or Twitter.▷Service requirements messages.
Messages are additionally displayed in the sta‐
tus field.
Retrieving messages About iDrive:
1."Notifications"2.Select the desired message.
The respective menu is opened, where the
message is displayed.
Deleting messages
All messages, except Check Control mes‐
sages, can be deleted from the list. Check
Control messages are displayed as long as
they are relevant.
About iDrive:1."Notifications"2.Select the desired message.3. Press button.4."Delete this notification" or "Delete all
notifications"
Adjusting
The following settings can be adjusted:
▷Select the applications, from which mes‐
sages will be permitted.▷Define the number of new messages per
application, e.g. maximum ten new e-mails.▷Sort the messages according to date or
priority.▷Combine several messages of the same
type.
About iDrive:
1."My Vehicle"2."System settings"3."Notifications"4.Select desired setting.
Deleting personal in the
vehicle
The concept
Depending on the usage, the vehicle saves
personal data, such as stored radio stations.
These personal data can be permanently de‐
leted through iDrive.
Seite 40At a glanceGeneral settings40
Online Edition for Part no. 0140 2 964 330 - VI/15
Page 42 of 314
InformationWARNING
Operating the integrated information
system and communication devices while driv‐
ing can distract from traffic. It is possible to
lose control of the vehicle. There is risk of an
accident. Only use the systems or devices
when the traffic situation allows. If necessary
stop and use the systems and devices while
the vehicle is stationary.◀
Compatible devices
General information
Details on which mobile phones and external
devices with a Bluetooth interface are sup‐
ported can be obtained at www.bmwusa.com/
bluetooth.
When pairing a mobile phone as telephone or
additional telephone, it is displayed which fea‐
tures are supported, e.g. brief messages.▷"Close and do not show again"
With the next pairing of the mobile phone,
there is no display of which features the
mobile phone supports.▷"OK"
With the next pairing of the mobile phone,
there is another display of which features
the mobile phone supports.
It is possible to choose whether there is a dis‐
play when pairing the mobile phone of which
features are supported.
About iDrive:
1."My Vehicle"2."System settings"3."Mobile devices"4.Select device.5."Hint for Office functions"
Malfunctions may occur with other devices or
software versions.
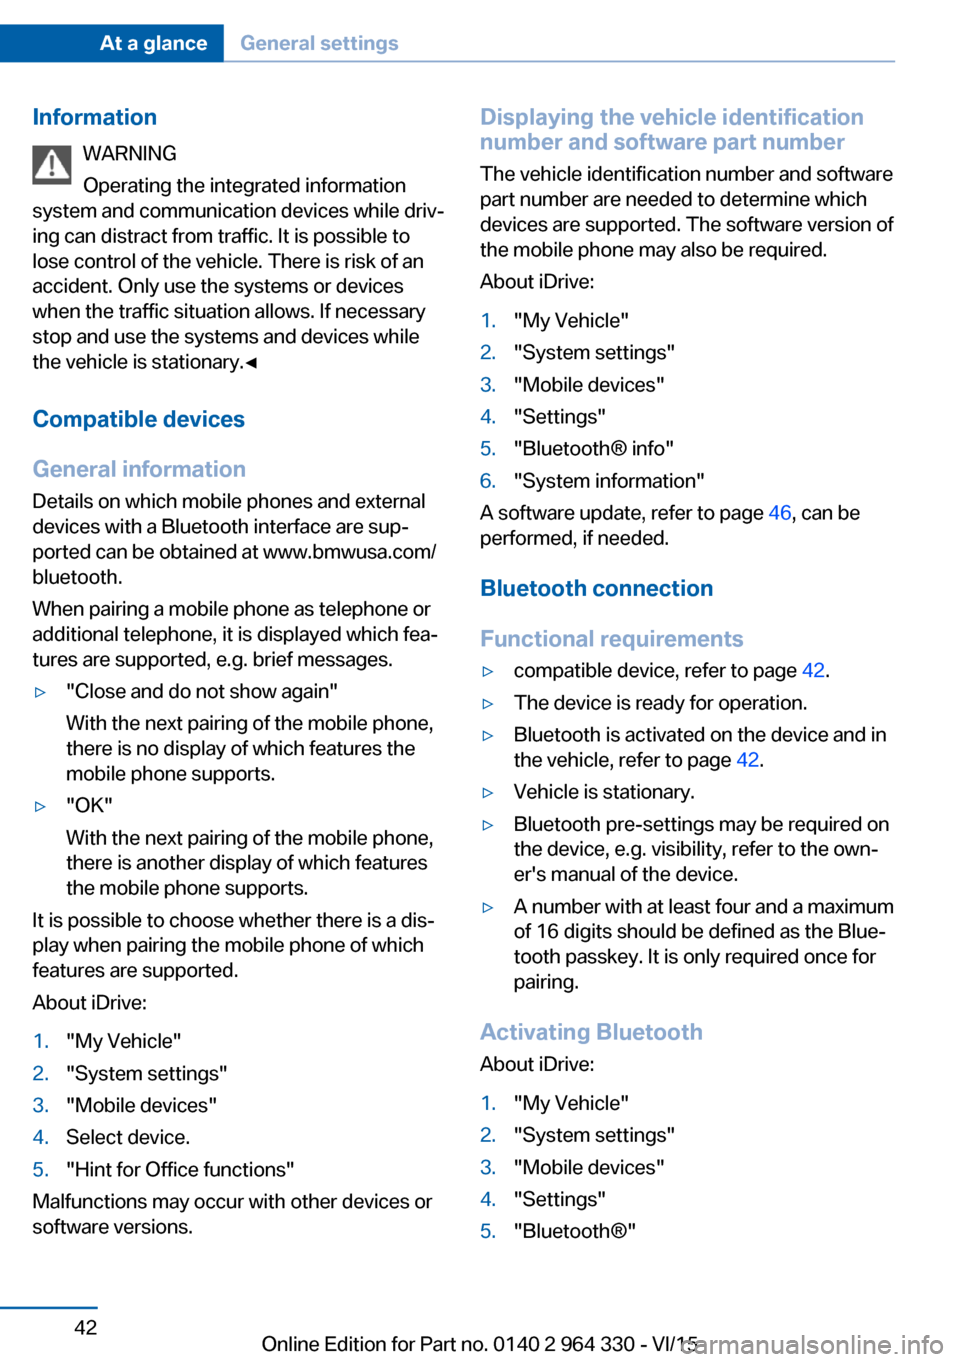
Displaying the vehicle identification
number and software part number
The vehicle identification number and software
part number are needed to determine which
devices are supported. The software version of
the mobile phone may also be required.
About iDrive:1."My Vehicle"2."System settings"3."Mobile devices"4."Settings"5."Bluetooth® info"6."System information"
A software update, refer to page 46, can be
performed, if needed.
Bluetooth connection
Functional requirements
▷compatible device, refer to page 42.▷The device is ready for operation.▷Bluetooth is activated on the device and in
the vehicle, refer to page 42.▷Vehicle is stationary.▷Bluetooth pre-settings may be required on
the device, e.g. visibility, refer to the own‐
er's manual of the device.▷A number with at least four and a maximum
of 16 digits should be defined as the Blue‐
tooth passkey. It is only required once for
pairing.
Activating Bluetooth
About iDrive:
1."My Vehicle"2."System settings"3."Mobile devices"4."Settings"5."Bluetooth®"Seite 42At a glanceGeneral settings42
Online Edition for Part no. 0140 2 964 330 - VI/15
Page 43 of 314
Activating/deactivating telephone
functions
To use all supported functions of the mobile
phone, the following functions must be acti‐
vated prior to pairing.
About iDrive:1."My Vehicle"2."System settings"3."Mobile devices"4."Settings"5.Select desired setting:▷"Office"
Activate functions to transmit short
messages, e-mails, calendars, tasks,
notes, and reminders to the vehicle.
Costs can be incurred by transmitting
all data to the vehicle.▷"Contact images"
Activate function to show the contact
pictures.6.Move the controller to the left.
Connecting the device via passkey
entry
Pair the vehicle entirely on the front or rear
Control Display.
About iDrive:
1."My Vehicle"2."System settings"3."Mobile devices"4."Connect new device"5.Select the functions for which the device is
to be used:▷ "Telephone"▷ "Bluetooth® audio"▷ "Apps"
The Bluetooth name of the vehicle is dis‐
played on the Control Display.
6.Search for Bluetooth devices in the sur‐
roundings of the device.
The Bluetooth name of the vehicle appears
on the device display. Select the Bluetooth
name of the vehicle.7.Enter and confirm the same passkey on
the device and via iDrive.
or
Compare the control number on the Con‐
trol Display with the control number on the
display of the device. Confirm the control
number on the device and on the Control
Display.8.The device is connected and displayed in
the device list.
There is a display of which features the
mobile phone supports, refer to page 42.
If pairing was unsuccessful: What to do if..., re‐
fer to page 47.
Connecting the device via near-field
communication, NFC
With near-field communication, NDC, data can
be transmitted over short distances using radio
technology.
Overview
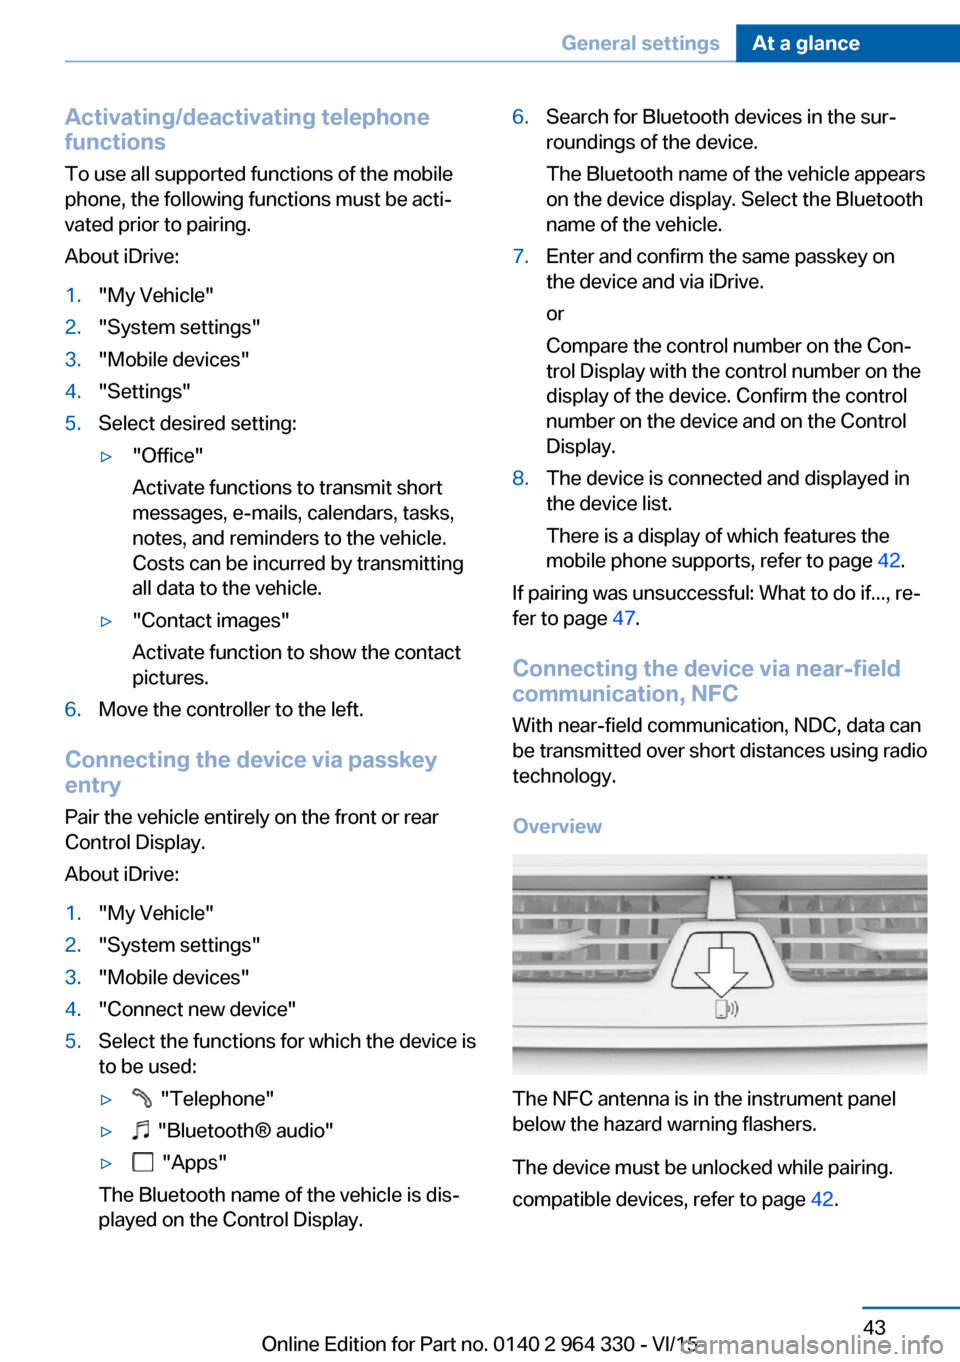
The NFC antenna is in the instrument panel
below the hazard warning flashers.
The device must be unlocked while pairing.
compatible devices, refer to page 42.
Seite 43General settingsAt a glance43
Online Edition for Part no. 0140 2 964 330 - VI/15
Page 44 of 314
Pairing is also possible while driving.1.Activate the NFC function on the device,
see the owner's manual of the device2.Hold the device close to the NFC antenna.3.Compare the control number on the Con‐
trol Display with the control number on the
display of the device. Confirm the control
number on the device and on the Control
Display.
or
Confirm the connection on the device.4.The device is connected and displayed in
the device list.
There is a display of which features the
mobile phone supports, refer to page 42.
Depending on which functions are already oc‐
cupied, the device is connected with the
phone, additional phone, or music function.
If pairing was unsuccessful: What to do if..., re‐
fer to page 47.
Pairing the snap-in adapter in the rear
with the vehicle
▷The Bluetooth passkey on the back of the
snap-in adapter is known.▷The snap-in adapter is installed in the cen‐
ter armrest.▷Operating readiness is switched on.▷The SIM card is inserted in the snap-in
adapter or the SIM Access Profile is active.
About iDrive:
1."My Vehicle"2."System settings"3."Mobile devices"4."Connect new device"5.Press the button on the snap-in
adapter for approx. 3 seconds, until the
signal tone sounds once.
The LED above the button flashes green.6.Enter the Bluetooth passkey for the snap-
in adapter at the Control Display.7. "Telephone"8.The device is connected and displayed in
the device list.
WLAN connection
Functional requirements
▷ConnectedDrive contract.▷Data contract with a service provider.▷WLAN-capable device.▷WLAN activated on the device.▷WLAN hotspot activated in the vehicle.▷Vehicle is stationary.▷Operating readiness switched on.
Activating WLAN hotspot
About iDrive:
1."My Vehicle"2."System settings"3."Mobile devices"4."Settings"5."Internet hotspot"
Connecting device with WLAN
hotspot
About iDrive:
1."My Vehicle"2."System settings"3."Mobile devices"4."Connect new device"5. "Internet hotspot"
Hotspot name and hotspot code are dis‐
played on the Control Display.6.Search for WLAN networks on the device.
Select network name on the device.7.Enter hotspot code on the device and con‐
nect.Seite 44At a glanceGeneral settings44
Online Edition for Part no. 0140 2 964 330 - VI/15