belt BMW 7 SERIES LONG 2015 G12 User Guide
[x] Cancel search | Manufacturer: BMW, Model Year: 2015, Model line: 7 SERIES LONG, Model: BMW 7 SERIES LONG 2015 G12Pages: 314, PDF Size: 7.9 MB
Page 115 of 314
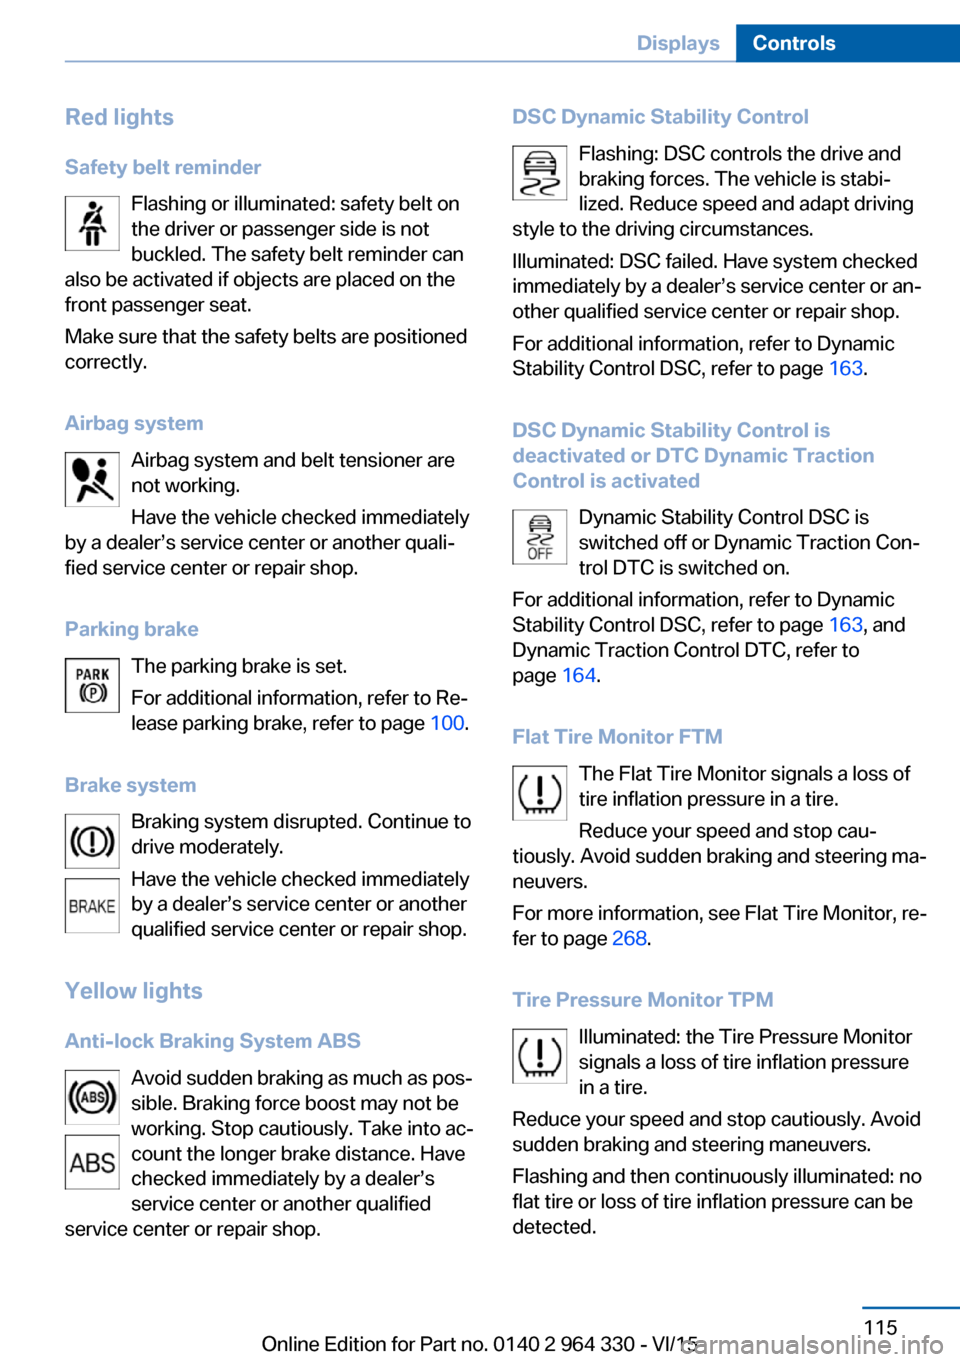
Red lightsSafety belt reminder Flashing or illuminated: safety belt on
the driver or passenger side is not
buckled. The safety belt reminder can
also be activated if objects are placed on the
front passenger seat.
Make sure that the safety belts are positioned
correctly.
Airbag system Airbag system and belt tensioner are
not working.
Have the vehicle checked immediately
by a dealer’s service center or another quali‐
fied service center or repair shop.
Parking brake The parking brake is set.
For additional information, refer to Re‐
lease parking brake, refer to page 100.
Brake system Braking system disrupted. Continue to
drive moderately.
Have the vehicle checked immediately
by a dealer’s service center or another
qualified service center or repair shop.
Yellow lights
Anti-lock Braking System ABS Avoid sudden braking as much as pos‐
sible. Braking force boost may not be
working. Stop cautiously. Take into ac‐
count the longer brake distance. Have
checked immediately by a dealer’s
service center or another qualified
service center or repair shop.DSC Dynamic Stability Control
Flashing: DSC controls the drive and
braking forces. The vehicle is stabi‐
lized. Reduce speed and adapt driving
style to the driving circumstances.
Illuminated: DSC failed. Have system checked
immediately by a dealer’s service center or an‐
other qualified service center or repair shop.
For additional information, refer to Dynamic
Stability Control DSC, refer to page 163.
DSC Dynamic Stability Control is
deactivated or DTC Dynamic Traction
Control is activated
Dynamic Stability Control DSC is
switched off or Dynamic Traction Con‐
trol DTC is switched on.
For additional information, refer to Dynamic
Stability Control DSC, refer to page 163, and
Dynamic Traction Control DTC, refer to
page 164.
Flat Tire Monitor FTM The Flat Tire Monitor signals a loss of
tire inflation pressure in a tire.
Reduce your speed and stop cau‐
tiously. Avoid sudden braking and steering ma‐
neuvers.
For more information, see Flat Tire Monitor, re‐
fer to page 268.
Tire Pressure Monitor TPM Illuminated: the Tire Pressure Monitor
signals a loss of tire inflation pressure
in a tire.
Reduce your speed and stop cautiously. Avoid
sudden braking and steering maneuvers.
Flashing and then continuously illuminated: no
flat tire or loss of tire inflation pressure can be
detected.Seite 115DisplaysControls115
Online Edition for Part no. 0140 2 964 330 - VI/15
Page 136 of 314
SafetyVehicle features and options
This chapter describes all standard, country-
specific and optional features offered with the
series. It also describes features that are not
necessarily available in your car, e. g., due tothe selected options or country versions. This
also applies to safety-related functions and
systems. The respectively applicable country
provisions must be observed when using the
respective features and systems.
Airbags
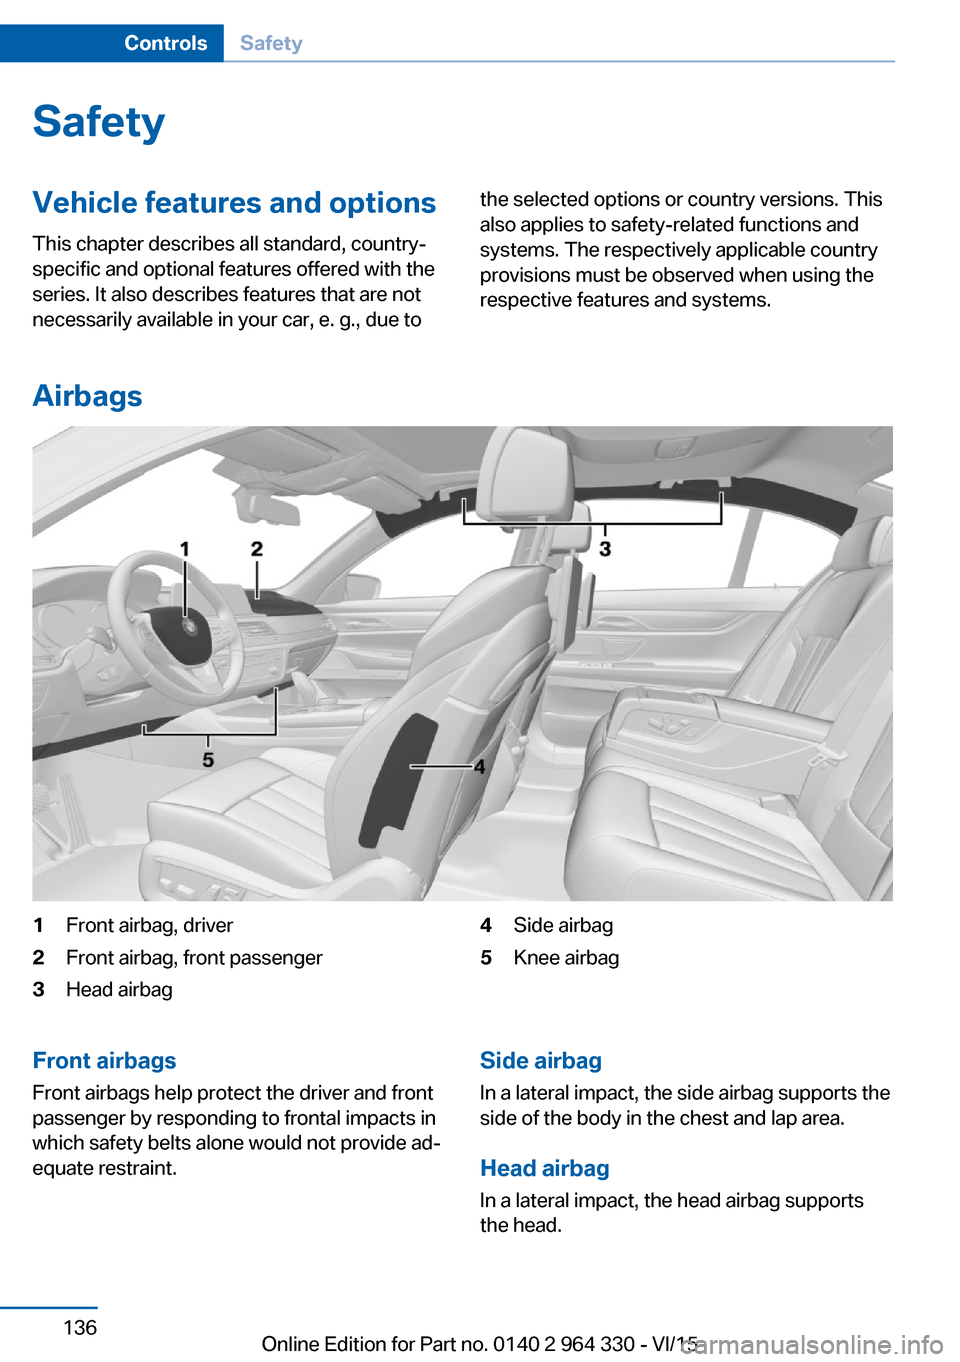
1Front airbag, driver2Front airbag, front passenger3Head airbag4Side airbag5Knee airbagFront airbags
Front airbags help protect the driver and front
passenger by responding to frontal impacts in
which safety belts alone would not provide ad‐
equate restraint.Side airbag
In a lateral impact, the side airbag supports the
side of the body in the chest and lap area.
Head airbag In a lateral impact, the head airbag supports
the head.Seite 136ControlsSafety136
Online Edition for Part no. 0140 2 964 330 - VI/15
Page 138 of 314
spective accident severity. There is risk of
injuries or danger to life. Have the airbag sys‐
tem checked, repaired, dismantled and scrap‐
ped by a dealer’s service center or another
qualified service center or repair shop.◀
Correct function When drive readiness is switched on,
the warning lamp in the instrument
cluster lights up briefly and thereby in‐
dicates the function readiness of the entire air‐
bag system and the belt tensioners.
Airbag system malfunctioning▷Warning lamp does not come on when
drive readiness is switched on.▷The warning lamp lights up continuously.
Automatic deactivation of the front-
seat passenger airbags
The concept The system reads if the front passenger seat is
occupied by measuring the human body's re‐
sistance.
Front, knee and side airbag on the front pas‐
senger's side are either activated or deacti‐
vated.
Information Before transporting a child on the front pas‐
senger seat, refer to the safety notes and in‐
structions for children on the front passenger
seat, see Children.
WARNING
The ensure the front-seat passenger air‐
bag function, it must be detected, whether a
person occupies the front passenger seat. The
entire seat cushion area must be used for this
purpose. There is risk of injuries or danger to
life. Make sure that the front passenger keeps
his or her feet in the floor area.◀
Malfunction of the automatic
deactivation system
When transporting older children and adults,
the front-seat passenger airbags may be deac‐
tivated in certain sitting positions. In this case,
the indicator lamp for the front-seat passenger
airbags lights up.
In this case, change the sitting position so that
the front-seat passenger airbags are activated
and the indicator lamp goes out.
If it is not possible to activate the airbags, have
the person sit in the rear.
To enable correct recognition of the occupied
seat cushion▷Do not attach covers, cushions, ball mats
or other items to the front passenger seat
unless they are specifically determined to
be safe for use on the front passenger
seat.▷Do not place any electronic devices on the
passenger seat if a child restraint system is
to be installed on it.▷Do not place objects under the seat that
could press against the seat from below.▷No moisture in or on the seat.
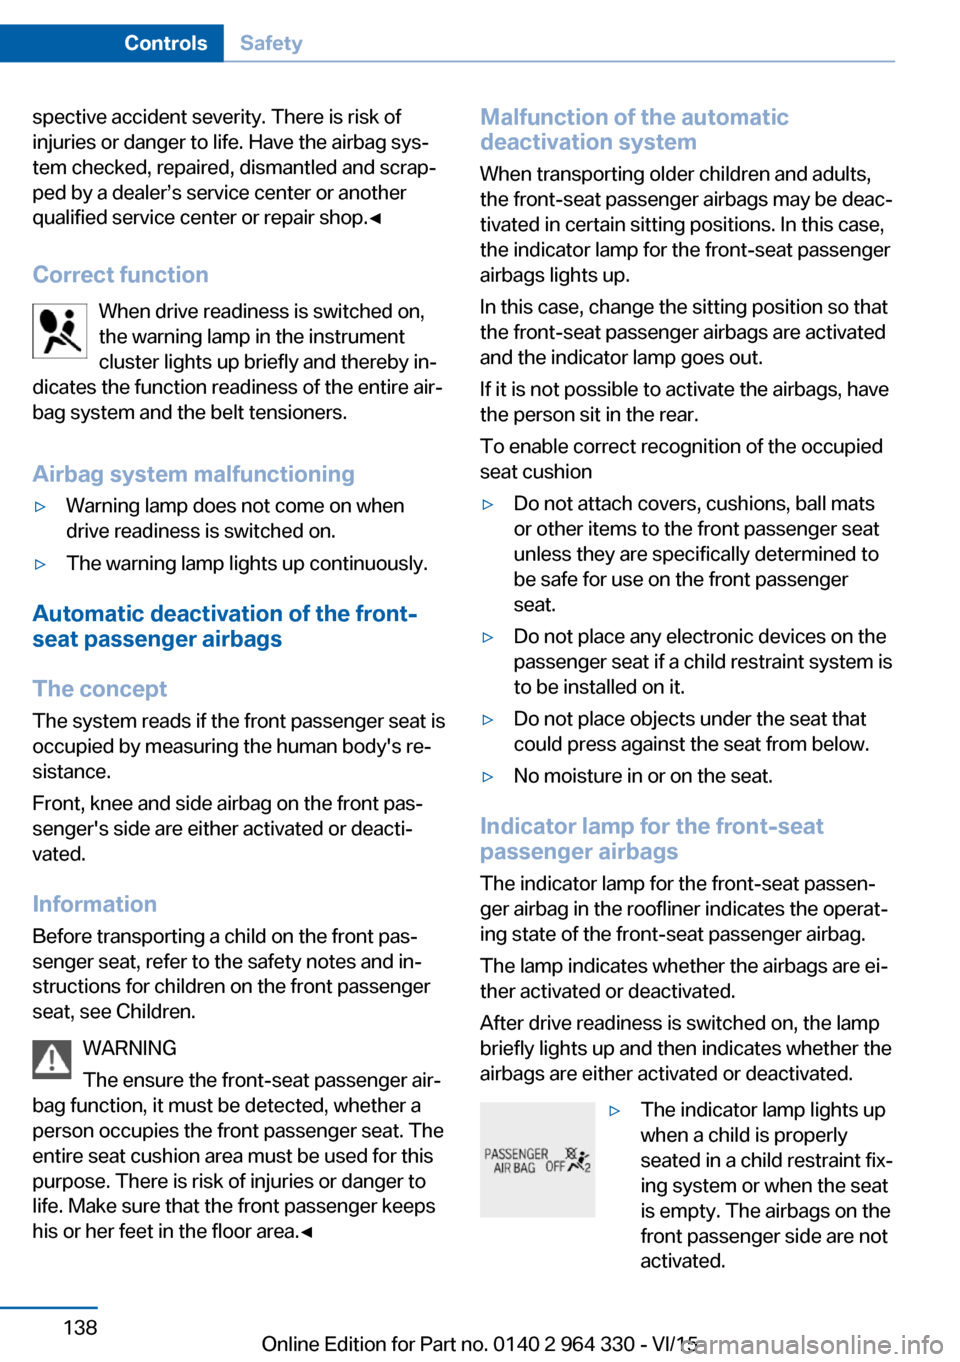
Indicator lamp for the front-seat
passenger airbags
The indicator lamp for the front-seat passen‐
ger airbag in the roofliner indicates the operat‐
ing state of the front-seat passenger airbag.
The lamp indicates whether the airbags are ei‐
ther activated or deactivated.
After drive readiness is switched on, the lamp
briefly lights up and then indicates whether the
airbags are either activated or deactivated.
▷The indicator lamp lights up
when a child is properly
seated in a child restraint fix‐
ing system or when the seat
is empty. The airbags on the
front passenger side are not
activated.Seite 138ControlsSafety138
Online Edition for Part no. 0140 2 964 330 - VI/15
Page 160 of 314
▷NBG009014A.
Compliance statement:
This device complies with part 15 of the FCC
Rules. Operation is subject to the following
two conditions:
▷This device may not cause harmful inter‐
ference, and▷this device must accept any interference
received, including interference that may
cause undesired operation.
Any unauthorized modifications or changes to
these devices could void the user's authority to
operate this equipment.
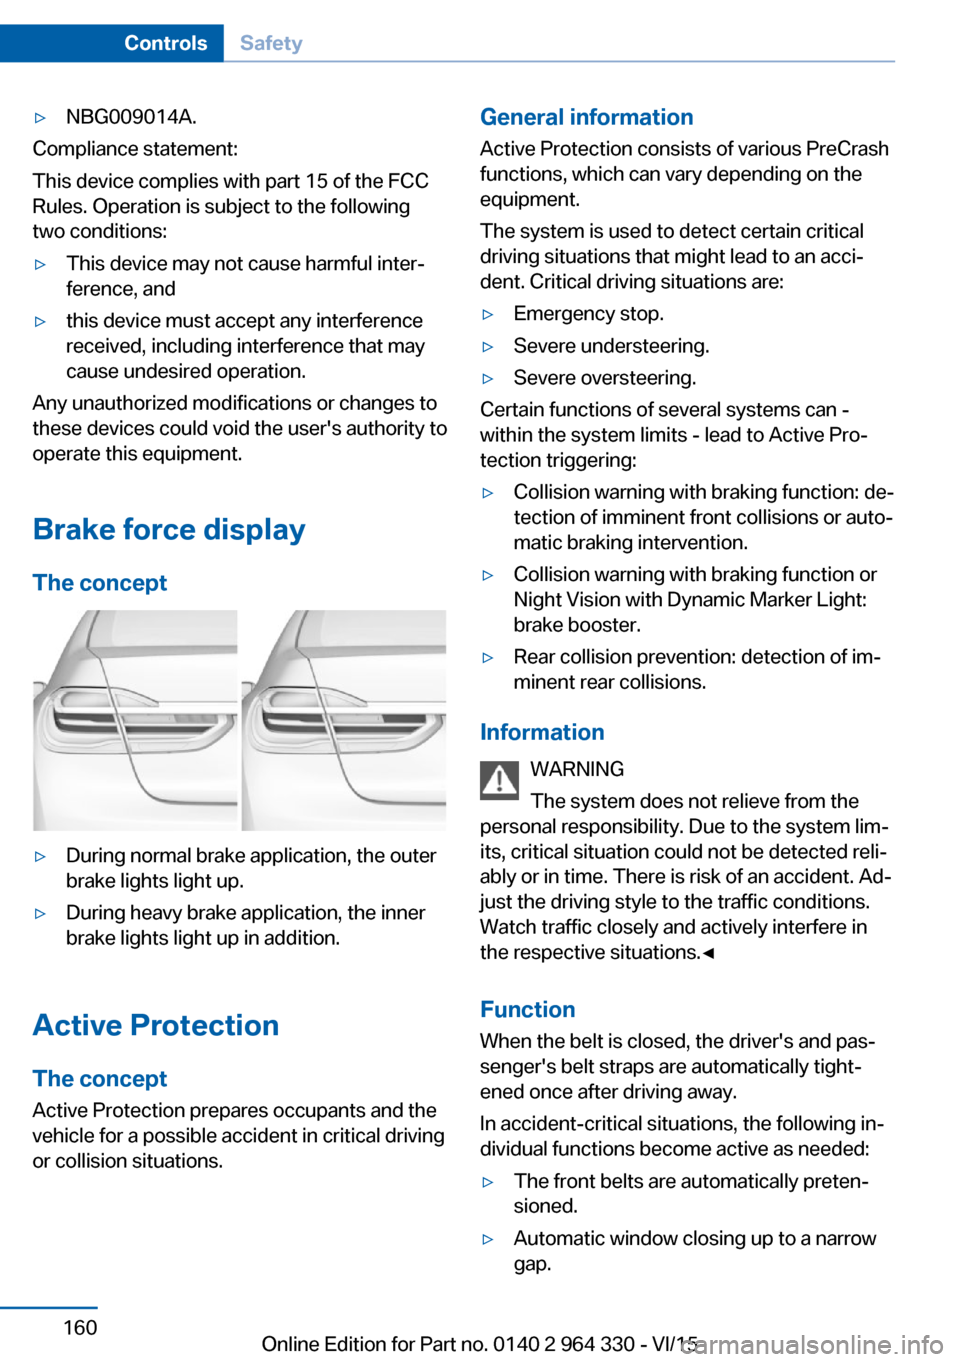
Brake force display
The concept
▷During normal brake application, the outer
brake lights light up.▷During heavy brake application, the inner
brake lights light up in addition.
Active Protection
The concept
Active Protection prepares occupants and the
vehicle for a possible accident in critical driving
or collision situations.
General information
Active Protection consists of various PreCrash
functions, which can vary depending on the
equipment.
The system is used to detect certain critical
driving situations that might lead to an acci‐
dent. Critical driving situations are:▷Emergency stop.▷Severe understeering.▷Severe oversteering.
Certain functions of several systems can -
within the system limits - lead to Active Pro‐
tection triggering:
▷Collision warning with braking function: de‐
tection of imminent front collisions or auto‐
matic braking intervention.▷Collision warning with braking function or
Night Vision with Dynamic Marker Light:
brake booster.▷Rear collision prevention: detection of im‐
minent rear collisions.
Information
WARNING
The system does not relieve from the
personal responsibility. Due to the system lim‐
its, critical situation could not be detected reli‐
ably or in time. There is risk of an accident. Ad‐
just the driving style to the traffic conditions.
Watch traffic closely and actively interfere in
the respective situations.◀
Function
When the belt is closed, the driver's and pas‐
senger's belt straps are automatically tight‐
ened once after driving away.
In accident-critical situations, the following in‐
dividual functions become active as needed:
▷The front belts are automatically preten‐
sioned.▷Automatic window closing up to a narrow
gap.Seite 160ControlsSafety160
Online Edition for Part no. 0140 2 964 330 - VI/15
Page 161 of 314
▷Automatic closing of the glass sunroof, in‐
cluding sliding visor.▷For vehicles equipped with Comfort seats
in the front: automatic positioning of the
backrest for the front passenger seat.▷For vehicles equipped with Comfort seats
in the rear: automatic positioning of the
backrests for the rear passenger seats.
After a critical driving situation without an acci‐
dent, the front belts are loosened again. All
other systems can be restored to the desired
setting.
If the belt tension does not loosen automati‐
cally, stop the vehicle and unbuckle the belt
using the red button in the buckle. Fasten the
belt before continuing on your trip.
Post Crash — iBrake The conceptIn certain accident situations, e.g. collision, the
system can bring the vehicle to a halt automat‐
ically without driver intervention. This can re‐
duce the risk of a further collision and the con‐
sequences thereof.
At standstill After coming to a halt, the brake is released
automatically.
Harder vehicle braking
It can be necessary to bring the vehicle in cer‐
tain situations to a halt quicker.
Here, a higher braking pressure must be gen‐
erated for a short period when pressing the brake pedal than during automatic braking.
This interrupts automatic braking.
Interrupting automatic braking It can be necessary to interrupt automatic
braking in certain situations,e.g. for an evasive
maneuver.
Interrupt automatic braking:
▷By pressing the brake pedal.▷By pressing the accelerator pedal.
Attentiveness assistant
The concept The system can detect increasing lack of alert‐
ness or fatigue of the driver during long, mo‐
notonous journeys, e.g., on highways. In this
situation, it is recommended that the driver
takes a break.
Information WARNING
The system does not relieve from the
personal responsibility to correctly assess
one's physical state. An increasing lack of
alertness or fatigue may not be detected or not
be detected in time. There is risk of an acci‐
dent. Make sure that the driver is rested and
alert. Adjust the driving style to the traffic con‐
ditions.◀
Function
The system is switched on each time drive
readiness is switched on.
After travel has begun, the system is trained
about the driver, so that increasing lack of alertness or fatigue can be detected.
This procedure takes the following criteria into
account:
▷Personal driving style, e.g., steering behav‐
ior.▷Driving conditions, e.g., length of trip.
Starting at approximately 43 mph/70 km/h, the
system is active and can display a recommen‐
dation to take a break.
Seite 161SafetyControls161
Online Edition for Part no. 0140 2 964 330 - VI/15
Page 170 of 314
Switch off
To switch off the system while standing, step
on brake pedal at the same time.
Press button on the steering wheel.
The displays go out. The stored desired speed
is deleted.
Interrupting When active, press the button on the
steering wheel.
If interrupting the system while stationary,
press on the brake pedal at the same time.
The system is automatically interrupted in the
following situations:▷When the brakes are applied.▷When selector lever position D is disen‐
gaged.▷When DTC Dynamic Traction Control is
activated or DSC is deactivated.▷When DSC is actively controlling stability.▷If the safety belt and the driver's door are
opened while the vehicle is standing still.▷If the system has not detected objects for
an extended period, e.g., on a road with
very little traffic without curb or shoulder
markings.▷If the detection range of the radar is dis‐
rupted, e.g., by dirt or heavy fog.▷After a longer stationary period when the
vehicle has been braked to a stop by the
system.
Maintaining, storing, and changing the
speed
Information WARNING
The desired speed can be incorrectly ad‐
justed or called up by mistake. There is risk of
an accident. Adjust the desired speed to the
traffic conditions. Watch traffic closely and ac‐
tively interfere in the respective situations.◀
WARNING
Risk of accident due to too high speed
differences to other vehicles, e.g. in the follow‐
ing situations:▷When fast approaching a slowly moving
vehicle.▷Suddenly swerving vehicle onto the own
lane.▷When fast approaching standing vehicles.
There is risk of injuries or danger to life. Watch
traffic closely and actively interfere in the re‐
spective situations.◀
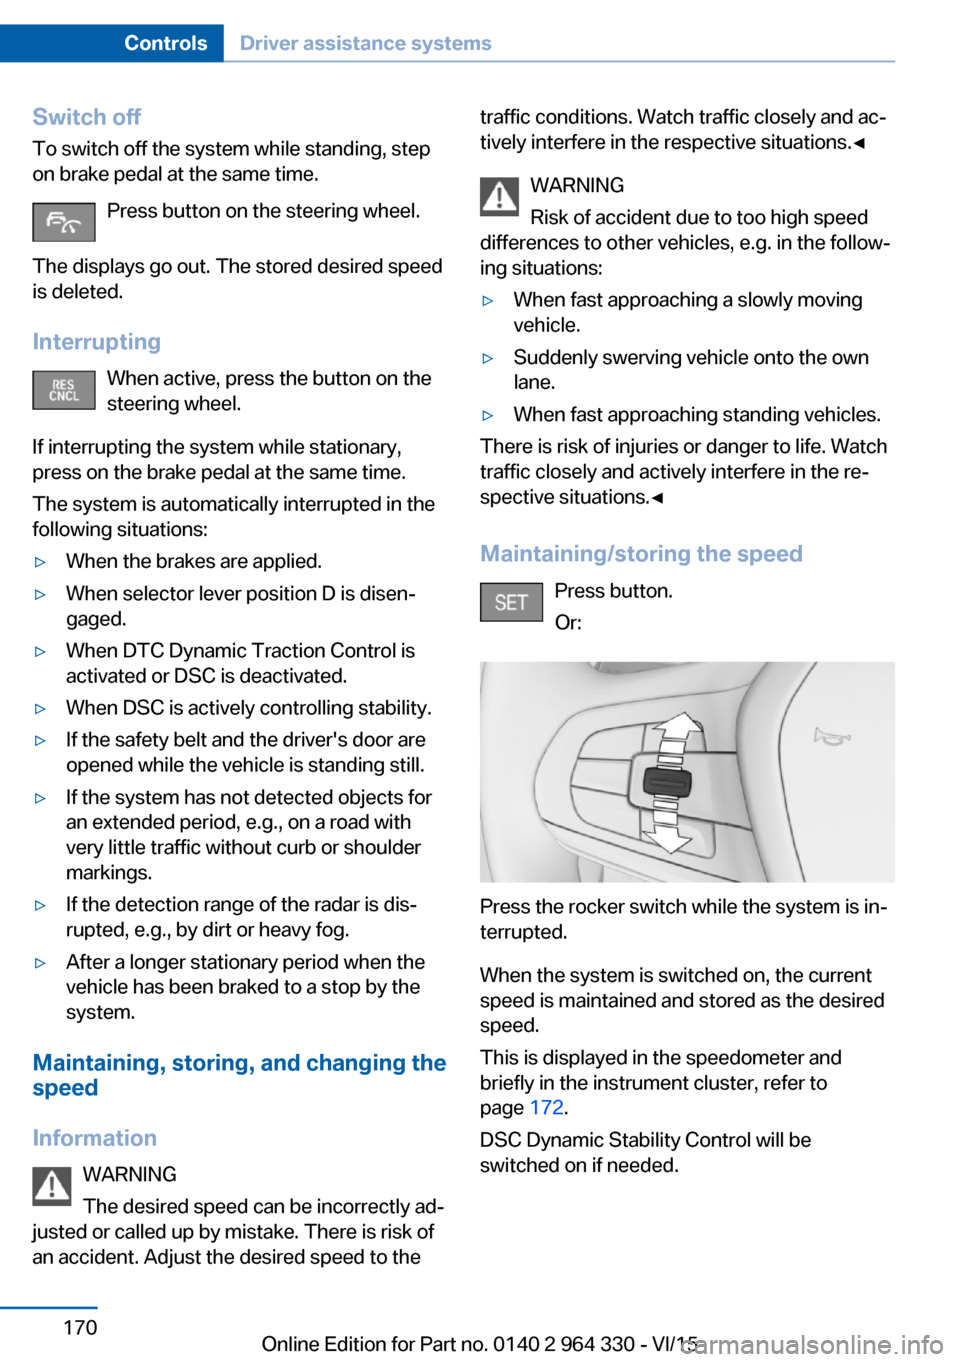
Maintaining/storing the speed Press button.
Or:
Press the rocker switch while the system is in‐
terrupted.
When the system is switched on, the current
speed is maintained and stored as the desired
speed.
This is displayed in the speedometer and
briefly in the instrument cluster, refer to
page 172.
DSC Dynamic Stability Control will be
switched on if needed.
Seite 170ControlsDriver assistance systems170
Online Edition for Part no. 0140 2 964 330 - VI/15
Page 195 of 314
▷Width of gap between two objects: your
vehicle's width plus approx. 2.3 ft/0.7 m up
to maximum 16 ft/5 m.▷Minimum depth: your vehicle's length.
The depth of diagonal parking spaces must
be estimated by the driver. Dur to technical
limitations, the system can approximate
the depth of diagonal parking spaces only.
Regarding the parking procedure
▷Doors and trunk lid closed.▷Parking brake released.▷Driver's safety belt fastened.
Switching on/off
Switching on with the button Press button.
The LED lights up.
The current status of the parking space search
is indicated on the Control Display.
Parking assistant is activated automatically.
Switching on with reverse gear
Shift into reverse.
The current status of the parking space search
is indicated on the Control Display.
To activate:
"Parking Assistant"
Switch off
The system can be deactivated as follows:
▷Press button.
Signal tone for switching suitable
parking spaces on/off
About iDrive:
1."My Vehicle"2."Vehicle settings"3."Parking"4."Parking Assistant"5."Sound if parking space detected"
Settings are stored.
Display on the Control Display
System activated/deactivated
SymbolMeaning Gray: the system is not available.
White: the system is available but
not activated. The system is activated.
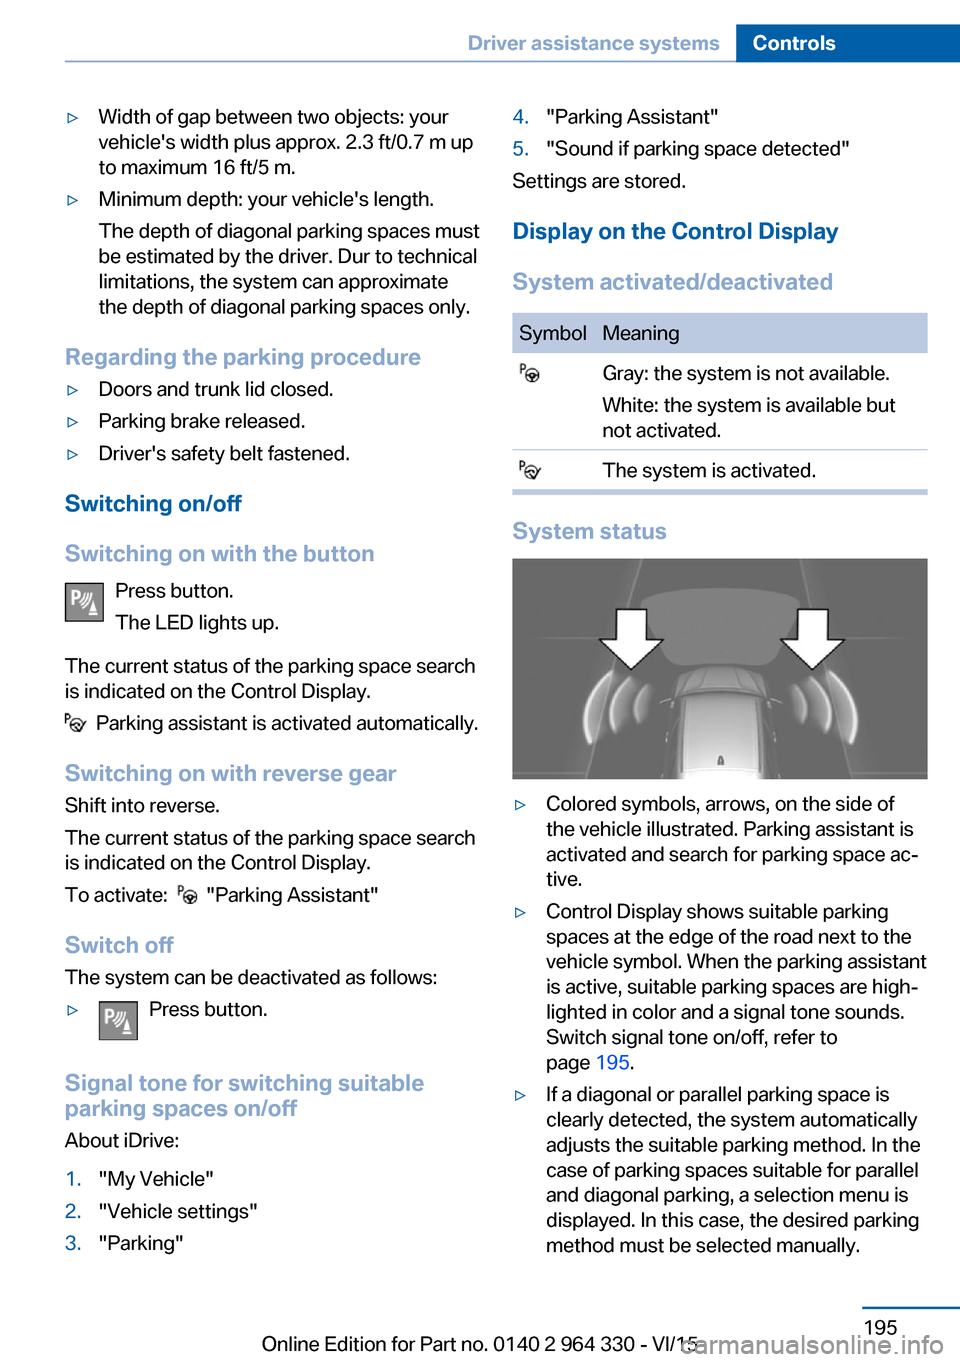
System status
▷Colored symbols, arrows, on the side of
the vehicle illustrated. Parking assistant is
activated and search for parking space ac‐
tive.▷Control Display shows suitable parking
spaces at the edge of the road next to the
vehicle symbol. When the parking assistant
is active, suitable parking spaces are high‐
lighted in color and a signal tone sounds.
Switch signal tone on/off, refer to
page 195.▷If a diagonal or parallel parking space is
clearly detected, the system automatically
adjusts the suitable parking method. In the
case of parking spaces suitable for parallel
and diagonal parking, a selection menu is
displayed. In this case, the desired parking
method must be selected manually.Seite 195Driver assistance systemsControls195
Online Edition for Part no. 0140 2 964 330 - VI/15
Page 196 of 314
▷The parking procedure is ac‐
tive. Steering control has
been taken over by system.▷Parking space search is always active
whenever the vehicle is moving forward
slow and straight, even if the system is de‐
activated. When the system is deactivated,
the displays on the Control Display are
shown in gray.
Parking using the parking assistant
1. Press the button or shift into reverse
to switch on the parking assistant. Activate
parking assistant if necessary.
The parking assistant is activated.
2.Drive by the row of parked vehicles at a
speed of up to approx. 22 mph/35 km/h
and at a distance of maximum 5 ft/1.5 m.
The status of the parking space search and
possible parking spaces are displayed on
the Control Display.3.Follow the instructions on the Control Dis‐
play.
Hold down the parking assistant button for
the duration of the parking procedure. At
the end of the parking procedure, the P se‐
lector lever position is set.
The end of the parking procedure is indi‐
cated on the Control Display.4.Adjust the parking position yourself if
needed.
Interrupting manually
The parking assistant can be interrupted at any
time:
▷ "Parking Assistant" Select the symbol
on the Control Display.▷Release button during the parking
procedure.Interrupting automatically
The system is interrupted automatically in the
following situations:▷If the driver grasps the steering wheel or if
he takes over steering.▷Possible on snow-covered or slippery road
surfaces.▷When there are obstacles that are hard to
overcome, such as curbs.▷When there are obstacles that suddenly
arise.▷If the Park Distance Control PDC displays
clearances that are too small.▷If a maximum number of parking attempts
or the time taken for parking is exceeded.▷When switching to another function on the
Control Display.▷When the button is released.▷If the tailgate is open.▷If doors are open.▷When setting the parking brake.▷During acceleration.▷When the brake pedal remains pressed for
an extended period while the vehicle is sta‐
tionary.▷When unfastening the driver's safety belt.
A Check Control message is displayed.
Resume An interrupted parking procedure can be con‐
tinued if needed.
Follow the instructions on the Control Display.
System limits
No parking assistance
The parking assistant does not offer assis‐
tance in the following situations:
▷In tight curves.Seite 196ControlsDriver assistance systems196
Online Edition for Part no. 0140 2 964 330 - VI/15
Page 238 of 314
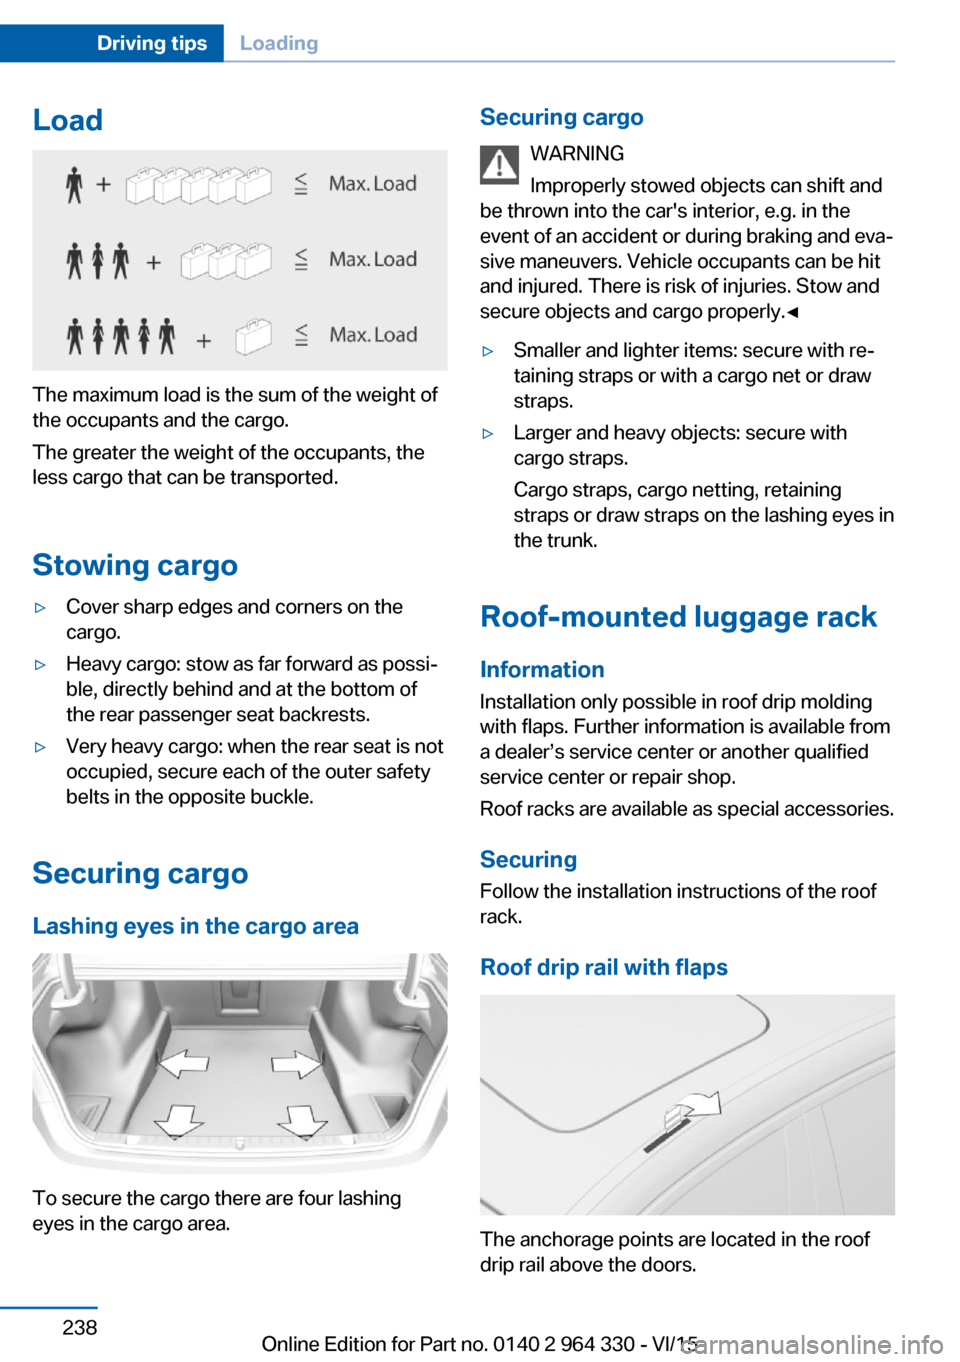
Load
The maximum load is the sum of the weight of
the occupants and the cargo.
The greater the weight of the occupants, the
less cargo that can be transported.
Stowing cargo
▷Cover sharp edges and corners on the
cargo.▷Heavy cargo: stow as far forward as possi‐
ble, directly behind and at the bottom of
the rear passenger seat backrests.▷Very heavy cargo: when the rear seat is not
occupied, secure each of the outer safety
belts in the opposite buckle.
Securing cargo
Lashing eyes in the cargo area
To secure the cargo there are four lashing
eyes in the cargo area.
Securing cargo
WARNING
Improperly stowed objects can shift and
be thrown into the car's interior, e.g. in the
event of an accident or during braking and eva‐
sive maneuvers. Vehicle occupants can be hit
and injured. There is risk of injuries. Stow and
secure objects and cargo properly.◀▷Smaller and lighter items: secure with re‐
taining straps or with a cargo net or draw
straps.▷Larger and heavy objects: secure with
cargo straps.
Cargo straps, cargo netting, retaining
straps or draw straps on the lashing eyes in
the trunk.
Roof-mounted luggage rack
Information
Installation only possible in roof drip molding
with flaps. Further information is available from
a dealer’s service center or another qualified
service center or repair shop.
Roof racks are available as special accessories.
Securing
Follow the installation instructions of the roof
rack.
Roof drip rail with flaps
The anchorage points are located in the roof
drip rail above the doors.
Seite 238Driving tipsLoading238
Online Edition for Part no. 0140 2 964 330 - VI/15
Page 293 of 314
Clean light-colored leather more frequently be‐
cause soiling on such surfaces is substantially
more visible.
Use leather care products; otherwise, dirt and
grease will gradually break down the protective
layer of the leather surface.
Suitable care products are available from a
dealer’s service center or another qualified
service center or repair shop.
Upholstery material careVacuum regularly with a vacuum cleaner.
If upholstery is very dirty, e.g., with beverage
stains, use a soft sponge or microfiber cloth
with a suitable interior cleaner.
Clean the upholstery down to the seams using
large sweeping motions. Avoid rubbing the
material vigorously.
CAUTION
Open Velcro® fasteners on articles of
clothing can damage the seat covers. There is
risk of property damage. Ensure that any Vel‐
cro® fasteners are closed.◀
Caring for special components
Light-alloy wheels When cleaning the vehicle, use only neutral
wheel cleaners having a pH value from 5 to 9.
Do not use abrasive cleaning agents or steam jets above 140 ℉/60 ℃. Follow the manufac‐
turer's instructions.
Aggressive, acidic or alkaline cleaning agents
can destroy the protective layer of adjacent
components, such as the brake disk.
Chrome surfaces
Carefully clean components such as the radia‐
tor grille or door handles with an ample supply
of water, possibly with shampoo added, partic‐
ularly when they have been exposed to road
salt.Rubber components
Environmental influences can cause surface
soiling of rubber parts and a loss of gloss. For
cleaning, use only water and suitable care
products, the manufacturer of your vehicle rec‐
ommends original BMW care products.
Treat especially worn rubber parts with rubber
care agents at regular intervals. When cleaning
rubber seals, do not use any silicon-containing
car care products in order to avoid damage or
noises.
Fine wood partsClean fine wood facing and fine wood compo‐
nents only with a moist rag. Then dry with a
soft cloth.
Plastic components
These include:▷Imitation leather surfaces.▷Roofliner.▷Lamp lenses.▷Instrument cluster cover.▷Matt black spray-coated components.▷Painted parts in the interior.
Clean with a microfiber cloth.
Dampen cloth lightly with water.
Do not soak the roofliner.
CAUTION
Cleansers that contain alcohol or sol‐
vents, such as lacquer thinners, heavy-duty
grease removers, fuel, or such, can damage
plastic parts. There is risk of property damage.
Clean with a microfiber cloth. Dampen cloth
lightly with water.◀
Safety belts
Dirty belt straps impede the reeling action and
thus have a negative impact on safety.
Seite 293CareMobility293
Online Edition for Part no. 0140 2 964 330 - VI/15