high beam BMW 740I 1998 Owners Manual
[x] Cancel search | Manufacturer: BMW, Model Year: 1998, Model line: 740I, Model: BMW 740I 1998Pages: 211, PDF Size: 1.68 MB
Page 12 of 211
11n
Controls and features
Operation, care and maintenance
Lamps:
Parking lamps/Low beams96
Instrument panel lighting96
High beams/Parking lamps97
Fog lamps97
Interior lamps97
Reading lamps98
Controlling the climate
for pleasant driving:
Automatic climate control100
Rear passenger-area air
conditioning105
Seat heating106
Steering wheel heating106
Roller sun blind107
Independent ventilation
system107
Cabin convenience:
Integrated Universal
Remote Control108
Glove compartment110
Center armrests111
Additional storage areas113
Cup holder113
Cellular phone113
Ashtray114
Cigarette lighter115
Rear footrests115
Loading and transporting cargo:
Ski bag116
Cargo loading118
Roof-mounted luggage rack118
Special operating instructions:
Break-in procedure122
Driving notes123
Catalytic converter124
Antilock Brake System
(ABS)125
Disc brakes126
Brake system128
Winter operation128
Power steering130
Level control system130
Cellular phone131
Radio reception131
Wheels and tires:
Tire inflation pressure132
Tire condition132
Tire replacement133
Tire rotation133
Wheel and tire
combinations134
Winter tires135
Snow chains135
Approved wheel and tire
specifications136
Under the hood:
Hood137
Engine compartment138
Washer fluids142
Washer nozzles142
Engine oil143
Coolant146
Brake fluid147
Oil for power steering/
Level control system148
Vehicle Identification
Number148
Care and maintenance:
The BMW Maintenance
System149
Caring for your car150
Airbags156
Vehicle storage156
Laws and regulations:
Technical modifications to the
vehicle157
OBD connector158
Page 18 of 211

17n
RepairsIndexOverview Controls Car care Technology Data
1 Parking lamps/Low beams96
2
>
Turn signal68
>
Parking lamp97
>
High beams97
>
Headlamp flasher68
>
Onboard computer89
3 Horn: The entire surface
4 Fog lamps97
5 Wiper/Washer lever68
6 Central locking system32
7 Hazard warning system24
8 Rear window defroster70
9 Electric steering wheel
adjustment49
10 Parking brake release handle61
11 Parking brake pedal61
Cockpit
Page 20 of 211
19n
RepairsIndexOverview Controls Car care Technology Data
Instrument cluster
1 Fuel gauge with lamp for fuel
reserve range73
2 Turn signal indicators22
3 Speedometer
4 Indicator lamp for high beam
headlamps22
5 Tachometer and
Energy Control72, 73
6 Coolant temperature gauge74
7 Indicator and warning lamps for
>
Parking brake21
>
Hydraulic brake system/Dynamic
Brake Control (DBC)
*
20, 21
>
ABS21
>
Airbag21
>
Please fasten safety belts21
>
Cruise control22
8 Check button75
9 Program display for automatic
transmission64, 67
10 Outside temperature display7211 Indicator lamp for Automatic
Stability Control plus Traction
(ASC+T)/Dynamic Stability
Control (DSC)
*
21
12 Trip odometer72
13 Check Control display75
14 Odometer72
15 Service Interval Display74, 149
16 Reset button for trip odometer72
17 Indicator and warning lamps for
>
Fog lamps22
>
Battery charge current20
>
Engine oil pressure20
>
Check Engine lamp21
You can display the outside tem-
perature and distance driven in
different units of measurement.
<
Page 23 of 211

22n
Indicator and warning lamps
Green: For your information
Turn signal
Flashes when the turn signals
are in operation. Rapid flashing
indicates a system malfunction.
For additional information: Refer to
page 68.
Cruise control
Lights up when the cruise con-
trol is activated. Available for
operation via the multi-function steering
wheel.
For additional information: Refer to
page 70.
Fog lamps
Lights up whenever you switch
on the fog lamps.
For additional information: Refer to
page 97.
Blue: For your information
High beam
Lights up when the high beams
are on or the headlamp flasher
is actuated.
For additional information: Refer to
pages 68, 97.
Page 30 of 211
Overview
Controls and features
Operation, care
and maintenance
Owner service procedures
Technical data
Index Advanced technology
29n
RepairsIndexOverview Controls Car care Technology Data
Parking brake61
Automatic transmission62
Automatic transmission with
Steptronic65
Indicator/Headlamp flasher68
Washer/Wiper system/Rain
sensor68
Rear window defroster70
Cruise control70
Everything under control:
Odometer, outside temperature
display72
Tachometer72
Energy control73
Fuel gauge73
Temperature gauge74
Service Interval Display74
Check Control75
Multi-Information Display
(MID)78
Digital clock79
Onboard computer84
Technology for safety and
convenience:
Park Distance Control (PDC)90
Automatic Stability Control plus
Traction (ASC+T)/Dynamic Sta-
bility Control (DSC)92
Electronic Damper Control
(EDC)93
Tire Pressure Control (RDC)94Lamps:
Parking lamps/Low beams96
Instrument panel rheostat96
High beams/Parking lamps97
Fog lamps97
Interior lamps97
Reading lamps98
Controlling the climate
for pleasant driving:
Automatic climate control100
Rear passenger-area air
conditioning105
Seat heating106
Steering wheel heating106
Rear window blind107
Independent ventilation
system107
Cabin convenience:
Integrated Universal
Remote control108
Glove compartment110
Center armrests111
Additional storage areas113
Cup holder113
Cellular phone113
Ashtray114
Cigarette lighter115
Rear footrests115
Loading and transporting cargo:
Ski bag116
Cargo loading118
Roof-mounted luggage rack118
Page 41 of 211
40n
Alarm systemThe vehicle alarm system responds:
>When a door, the hood or the lug-
gage compartment lid is opened
>To movement inside the vehicle (inte-
rior motion sensor)
>To variations in the vehicle tilt sensor
such as occur during attempts to
steal the wheels or tow the vehicle
>To interruption of battery voltage.
The system responds to unauthorized
vehicle entry and attempted theft by si-
multaneously activating the following:
>Sounding an acoustical alarm for
30 seconds
>The hazard warning flashers are acti-
vated for approx. five minutes
>The high beams flash on and off in
the same rhythm.
To arm and disarm the alarm
systemWhen the vehicle is locked or unlocked
by using a key or with the remote con-
trol, the alarm system is also simulta-
neously armed or disarmed.
The interior motion sensor is activated
approx. 30 seconds after you have fin-
ished locking the car.
The system indicates that it has been
correctly armed by switching on the
hazard flashers for a single cycle and by
emitting an acoustical signal.
When the system is active, you can still
gain access to the luggage compart-
ment by pressing button 3 on the re-
mote control transmitter. When the lid is
closed, it is armed once again.
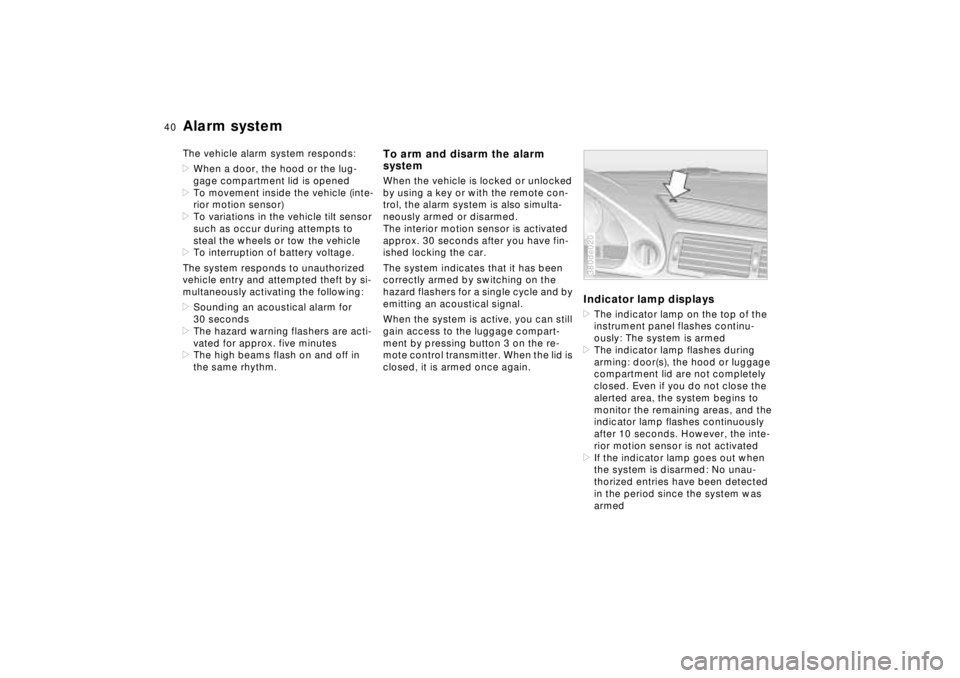
Indicator lamp displays>The indicator lamp on the top of the
instrument panel flashes continu-
ously: The system is armed
>The indicator lamp flashes during
arming: door(s), the hood or luggage
compartment lid are not completely
closed. Even if you do not close the
alerted area, the system begins to
monitor the remaining areas, and the
indicator lamp flashes continuously
after 10 seconds. However, the inte-
rior motion sensor is not activated
>If the indicator lamp goes out when
the system is disarmed: No unau-
thorized entries have been detected
in the period since the system was
armed380de020
Page 69 of 211
68n
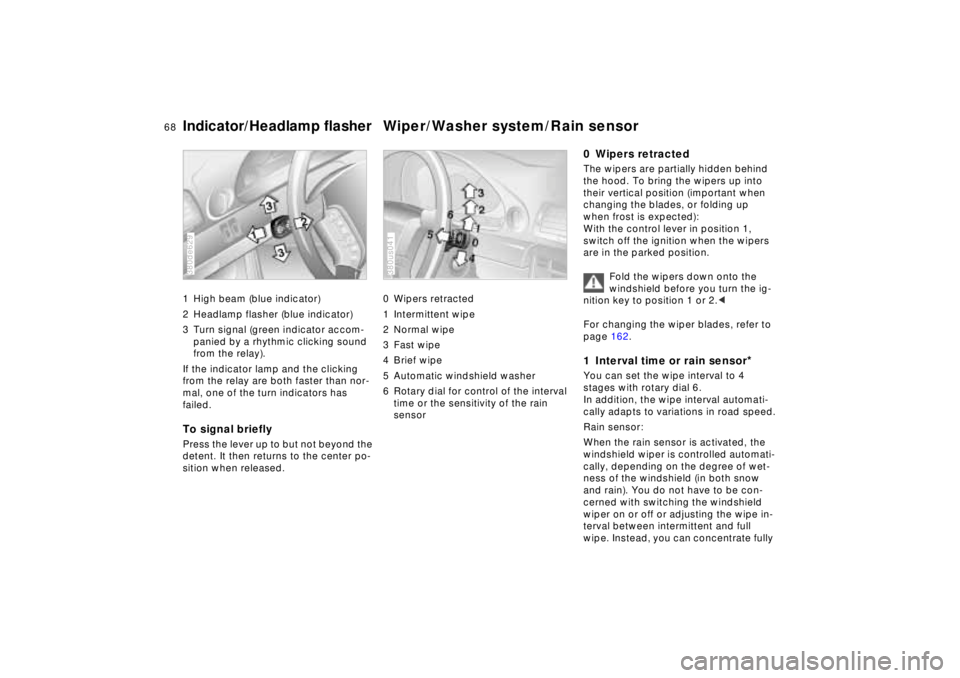
Indicator/Headlamp flasher Wiper/Washer system/Rain sensor1 High beam (blue indicator)
2 Headlamp flasher (blue indicator)
3 Turn signal (green indicator accom-
panied by a rhythmic clicking sound
from the relay).
If the indicator lamp and the clicking
from the relay are both faster than nor-
mal, one of the turn indicators has
failed.To signal brieflyPress the lever up to but not beyond the
detent. It then returns to the center po-
sition when released.380de629
0 Wipers retracted
1 Intermittent wipe
2 Normal wipe
3 Fast wipe
4 Brief wipe
5 Automatic windshield washer
6 Rotary dial for control of the interval
time or the sensitivity of the rain
sensor380us041
0 Wipers retractedThe wipers are partially hidden behind
the hood. To bring the wipers up into
their vertical position (important when
changing the blades, or folding up
when frost is expected):
With the control lever in position 1,
switch off the ignition when the wipers
are in the parked position.
Fold the wipers down onto the
windshield before you turn the ig-
nition key to position 1 or 2.<
For changing the wiper blades, refer to
page 162.1 Interval time or rain sensor
*
You can set the wipe interval to 4
stages with rotary dial 6.
In addition, the wipe interval automati-
cally adapts to variations in road speed.
Rain sensor:
When the rain sensor is activated, the
windshield wiper is controlled automati-
cally, depending on the degree of wet-
ness of the windshield (in both snow
and rain). You do not have to be con-
cerned with switching the windshield
wiper on or off or adjusting the wipe in-
terval between intermittent and full
wipe. Instead, you can concentrate fully
Page 77 of 211

76n
Check ControlPriority 2
These alerts for problems are reported
for 20 seconds when the ignition key is
in position 2. The status reports remain
after the message disappears. You can
view the message again by pressing the
CHECK button.
>TRUNK LID OPEN
This message is given only when ini-
tially starting off.
>DOOR OPEN
This is displayed after a minimum
vehicle speed is exceeded.
>FASTEN SEAT BELTS
*
In addition, the indicator lamp with
the safety belt symbol appears and
an acoustic signal is heard.
>WASHER FLUID LOW
The washer fluid is too low. Top up
the fluid at the earliest opportunity.
Refer to page 142.
>CHECK ENGINE OIL
Add engine oil as soon as possible.
Refer to page 143.
>OUTSIDE TEMPERATURE 247
(–5.06)
This display is only an example. The
current reading appears at an outside
temperature of 37.57 (+36) and
below. Refer also to page 72.>TIRE PRESSURE SET
*
The RDC has imported the current in-
flation pressure in the tires as the tar-
get values which the system will
monitor.
Refer to page 94.
>CHECK TIRE PRESSURE
*
Check and correct the tire inflation
pressure to specifications at the earli-
est opportunity (next stop for fuel).
Refer to page 94.
>TIRE CHECK INACTIVE
*
A temporary interference of the RDC
or a system fault. Refer to page 95
>BRAKE LAMP CIRCUIT
A bulb has failed or the circuit has a
malfunction. Refer to pages 163, 176
or consult an authorized BMW center.
>CHECK LOWBEAMS
CHECK SIDE LAMPS
CHECK REAR LAMPS
CHECK FRONT FOGLAMPS
CHECK LICPLATE LAMP
CHECK TRAILER LIGHTS
CHECK HIGHBEAMS
CHECK BACKUP LAMPS
Defective bulb or circuit. Refer to
pages 163, 176 or consult an autho-
rized BMW center.
>TRANS. FAILSAFE PROG
Please consult the nearest authorized
BMW center. Refer to pages 64, 67.>CHECK BRAKE LININGS
Have the brake pads inspected by
your BMW center. Refer to page 126.
>REMOTE KEY BATTERY
Change the battery. Refer to
page 168.
>CHECK COOLANT LEVEL
The coolant is too low. Top up at the
next opportunity. Refer to page 146.
>ENGINE FAILSAFE PROG
Fault in the Electronic Engine Power
Control EML. When braking, higher
brake application pressure may be
necessary and brake pedal travel may
be significantly longer.
Please have the system inspected by
your authorized BMW center.
Page 98 of 211
97n
RepairsIndexOverview Controls Car care Technology Data
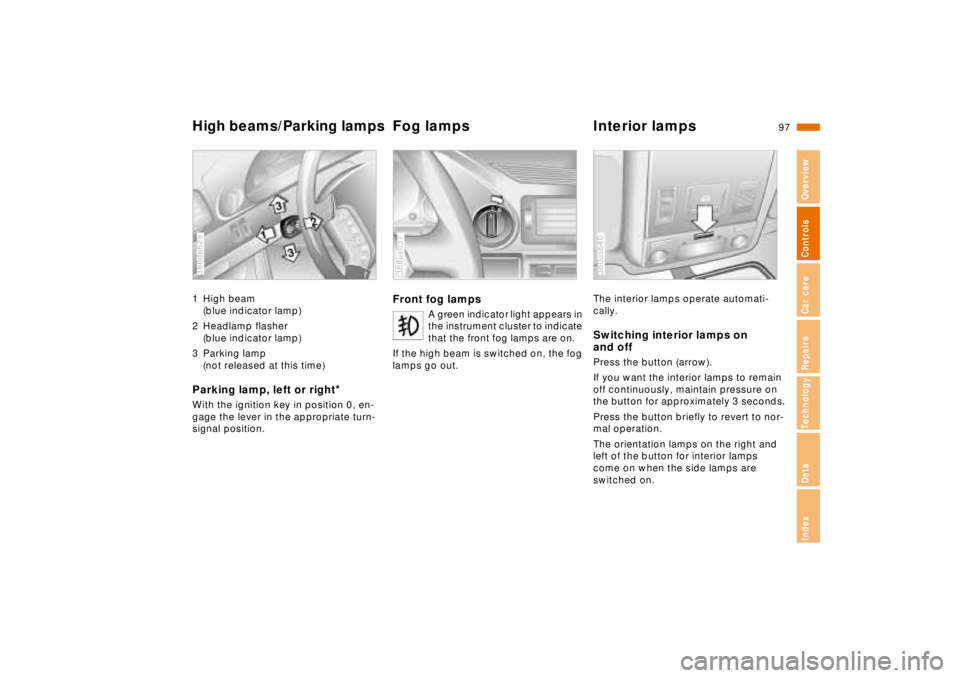
High beams/Parking lampsFog lamps Interior lamps1 High beam
(blue indicator lamp)
2 Headlamp flasher
(blue indicator lamp)
3 Parking lamp
(not released at this time)Parking lamp, left or right
*
With the ignition key in position 0, en-
gage the lever in the appropriate turn-
signal position.380de629
Front fog lamps
A green indicator light appears in
the instrument cluster to indicate
that the front fog lamps are on.
If the high beam is switched on, the fog
lamps go out.
380us037
The interior lamps operate automati-
cally.Switching interior lamps on
and offPress the button (arrow).
If you want the interior lamps to remain
off continuously, maintain pressure on
the button for approximately 3 seconds.
Press the button briefly to revert to nor-
mal operation.
The orientation lamps on the right and
left of the button for interior lamps
come on when the side lamps are
switched on.380us640
Page 164 of 211
163n
RepairsIndexOverview Controls Car care Technology Data
Lamps and bulbsThe lamps and bulbs make essential
contributions to the safety of your vehi-
cle. Observe the following instructions
during bulb replacement carefully. If
you are not familiar with any of the pro-
cedures, consult your authorized BMW
center.
Do not touch the glass portion of a
new bulb with your bare hands
since even small amounts of impurities
burn in to the surface, thus reducing the
service life of the bulb. Use a clean
cloth, paper napkin, or a similar mate-
rial, or hold the bulb by its metallic
base.<
A replacement bulb set is available from
your BMW center.
Whenever working on the electri-
cal system, switch off the electri-
cal accessory you are working on or
disconnect the cable from the negative
terminal of the battery. Failure to do this
could result in short circuits.
To prevent injuries and damage, comply
with any instructions provided by the
bulb manufacturer.<
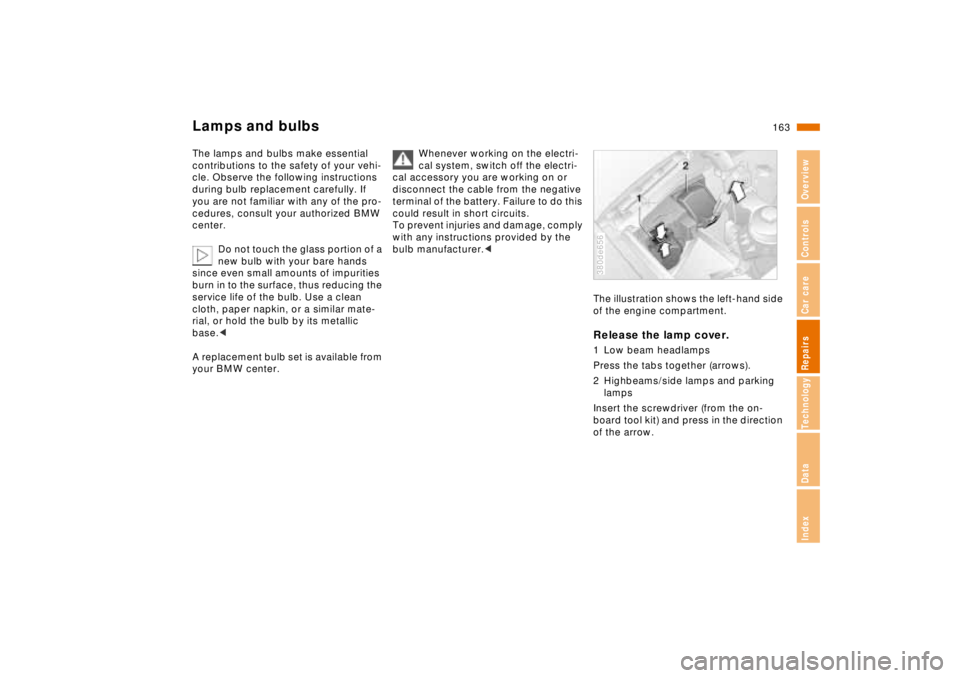
The illustration shows the left-hand side
of the engine compartment.Release the lamp cover.1 Low beam headlamps
Press the tabs together (arrows).
2 Highbeams/side lamps and parking
lamps
Insert the screwdriver (from the on-
board tool kit) and press in the direction
of the arrow.380de656