run flat BMW 740I 2014 Owners Manual
[x] Cancel search | Manufacturer: BMW, Model Year: 2014, Model line: 740I, Model: BMW 740I 2014Pages: 251, PDF Size: 5.75 MB
Page 104 of 251
5.Start the initialization with "Perform reset".6.Drive away.
The initialization is completed while driving,
which can be interrupted at any time.
The initialization automatically continues when
driving resumes.
Indication of a flat tire The yellow warning lamp lights up. A
Check Control message is displayed.
There is a flat tire or a major loss in tire
inflation pressure.
1.Reduce your speed and stop cautiously.
Avoid sudden braking and steering maneu‐
vers.2.Check whether the vehicle is fitted with
regular tires or run-flat tires.
Run-flat tires, refer to page 208, are la‐
beled with a circular symbol containing the
letters RSC marked on the tire sidewall.
Do not continue driving without run-flat
tires
Do not continue driving if the vehicle is not
equipped with run-flat tires; continued driving
may result in serious accidents.◀
When a flat tire is indicated, DSC Dynamic Sta‐
bility Control is switched on if necessary.
System limits Sudden tire damage
Sudden serious tire damage caused by
external influences cannot be indicated in ad‐
vance.◀
A natural, even pressure loss in all four tires
cannot be detected. Therefore, check the tire
inflation pressure regularly.
The system could be delayed or malfunction in
the following situations:
▷When the system has not been initialized.▷When driving on a snowy or slippery road
surface.▷Sporty driving style: slip in the drive
wheels, high lateral acceleration.▷When driving with snow chains.
Actions in the event of a flat tire
Normal tires
1.Identify the damaged tire.
Do this by checking the air pressure in all
four tires.
If the tire inflation pressure in all four tires
is correct, the Flat Tire Monitor may not
have been initialized. In this case, initialize
the system.
If an identification is not possible, please
contact the service center.2.Rectify the flat tire.
Run-flat tires
Maximum speed
You can continue driving with a damaged tire
at speeds up to 50 mph/80 km/h.
Continued driving with a flat tire
If continuing to drive with a damaged tire:
1.Avoid sudden braking and steering maneu‐
vers.2.Do not exceed a speed of 50 mph/80 km/h.3.Check the air pressure in all four tires at
the next opportunity.
If the tire inflation pressure in all four tires
is correct, the Flat Tire Monitor may not
have been initialized. In this case, initialize
the system.
Possible driving distance with complete loss of
tire inflation pressure:
The possible driving distance after a loss of tire
inflation pressure depends on the cargo load
and the driving style and conditions.
Seite 104ControlsSafety104
Online Edition for Part no. 01 40 2 909 749 - VI/13
Page 106 of 251
All wheels are yellowA flat tire or major drop in inflation pressure in
several tires.
Wheels, gray The system cannot detect a flat tire. Reasons
for this may be:▷The system is being reset.▷Malfunction.
Additional information
The status display additionally shows the cur‐
rent tire inflation pressures and tire tempera‐
tures. The values shown are current measure‐
ment values and may vary depending on
driving style or weather conditions.
Carry out reset Reset the system after each correction of the
tire inflation pressure and after every tire or
wheel change.
1."Vehicle Info"2."Vehicle status"3. "Perform reset"4.Start the engine - do not drive away.5.Carry out the reset with "Perform reset".6.Drive away.
The tires are shown in gray and the status is
displayed.
After driving faster than 19 mph/30 km/h for a
short period, the tire inflation pressures set are
accepted as reference values. The reset is
completed automatically during driving.
After a successfully completed Reset, the
wheels on the Control Display are shown in
green and "Tire Pressure Monitor (TPM)
active" is displayed.
The trip can be interrupted at any time. If you
drive away again, the reset resumes automati‐
cally.
Low tire pressure message
The yellow warning lamp lights up. A
Check Control message is displayed.▷There is a flat tire or a major loss in
tire inflation pressure.▷No reset was performed for the system.
The system therefore issues a warning
based on the tire pressures before the last
reset.1.Reduce your speed and stop cautiously.
Avoid sudden braking and steering maneu‐
vers.2.Check whether the vehicle is fitted with
regular tires or run-flat tires.
Run-flat tires, refer to page 208, are la‐
beled with a circular symbol containing the
letters RSC marked on the tire sidewall.
Do not continue driving without run-flat
tires
Do not continue driving if the vehicle is not
equipped with run-flat tires; continued driving
may result in serious accidents.◀
When a low inflation pressure is indicated,
DSC Dynamic Stability Control is switched on
if necessary.
Actions in the event of a flat tire
Normal tires
1.Identify the damaged tire.
Do this by checking the air pressure in all
four tires.
If the tire inflation pressure in all four tires
is correct, it is possible that a reset was not
carried out for the Tire Pressure Monitor. In
that case, carry out a reset.
If an identification is not possible, please
contact the service center.2.Rectify the flat tire.
Use of tire sealant, e.g., the Mobility Sys‐
tem, may damage the TPM wheel elec‐Seite 106ControlsSafety106
Online Edition for Part no. 01 40 2 909 749 - VI/13
Page 107 of 251
tronics. In this case, have the electronics
checked at the next opportunity and have
them replaced if necessary.
Run-flat tires
Maximum speed
You can continue driving with a damaged tire
at speeds up to 50 mph/80 km/h.
Continued driving with a flat tire
If continuing to drive with a damaged tire:
1.Avoid sudden braking and steering maneu‐
vers.2.Do not exceed a speed of 50 mph/80 km/h.3.Check the air pressure in all four tires at
the next opportunity.
If the tire inflation pressure in all four tires
is correct, it is possible that a reset was not
carried out for the Tire Pressure Monitor. In
that case, carry out a reset.
Possible driving distance with complete loss of
tire inflation pressure:
The possible driving distance after a loss of tire
inflation pressure depends on the cargo load
and the driving style and conditions.
For a vehicle containing an average load, the
possible driving distance is approx.
50 miles/80 km.
When the vehicle is driven with a damaged tire,
its handling characteristics change, e.g., re‐
duced lane stability during braking, a longer
braking distance, and altered self-steering
properties. Adjust your driving style accord‐
ingly. Avoid abrupt steering maneuvers or driv‐
ing over obstacles, e.g., curbs, potholes, etc.
Because the possible driving distance de‐
pends on how the vehicle is used during the
trip, the actual distance may be smaller or
greater depending on the driving speed, road
conditions, external temperature, cargo load,
etc.
Continued driving with a flat tire
Drive moderately and do not exceed a
speed of 50 mph/80 km/h.
A loss of tire inflation pressure results in a
change in the handling characteristics, e.g., re‐
duced lane stability during braking, a longer
braking distance and altered self-steering
properties.◀
Final tire failure
Vibrations or loud noises while driving
can indicate the final failure of the tire. Reduce
speed and stop; otherwise, pieces of the tire
could come loose and cause an accident. Do
not continue driving, and contact your service
center.◀
Required inflation pressure check
message
A Check Control message is displayed.
Check the tire inflation pressure and carry out
a reset of the system.
In some cases, a wheel was changed without
having carried out a reset.
System limits
The system does not function properly if a re‐
set has not been carried out, e.g., a flat tire is
reported even though the tire inflation pres‐
sures are correct.
The tire pressure depends on the temperature
of the tire. If the tire temperature rises, e.g.,
due to driving or because of the heat of the
Sun, the tire inflation pressure increases also.
The tire pressure is reduced when the tire
temperature falls again. This behavior may
cause a warning to be issued if temperatures
fall very sharply.
Malfunction The yellow warning lamp flashes and
then lights up continuously. A CheckSeite 107SafetyControls107
Online Edition for Part no. 01 40 2 909 749 - VI/13
Page 185 of 251
LoadingVehicle equipment
All standard, country-specific and optional
equipment that is offered in the model series is
described in this chapter. Therefore, equip‐
ment is also described that is not available in a
vehicle, e. g., because of the selected optional
equipment or country variant. This also applies
for safety-related functions and systems.
Hints Overloading the vehicle
To avoid exceeding the approved carry‐
ing capacity of the tires, never overload the ve‐
hicle. Overloading can lead to overheating and
increases the rate at which damage develops
inside the tires. This could result in a sudden
loss of tire inflation pressure.◀
No fluids in the trunk
Make sure that fluids do not leak into the
trunk; otherwise, the vehicle may be dam‐
aged.◀
Determining the load limit1.Locate the following statement on your ve‐
hicle’s placard:▷The combined weight of occupants
and cargo should never exceed XXX kg
or YYY lbs. Otherwise, damage to thevehicle and unstable driving situations
may result.2.Determine the combined weight of the
driver and passengers that will be riding in
your vehicle.3.Subtract the combined weight of the driver
and passengers from XXX kilograms or
YYY pounds.4.The resulting figure equals the available
amount of cargo and luggage load ca‐
pacity.
For example, if the YYY amount equals
1,000 lbs and there will be four 150 lbs
passengers in your vehicle, the amount of
available cargo and luggage load capacity
is 400 lbs: 1,000 lbs minus 600 lbs =
400 lbs.5.Determine the combined weight of lug‐
gage and cargo being loaded on the vehi‐
cle. That weight may not safely exceed the
available cargo and luggage load capacity
calculated in Step 4.
Load
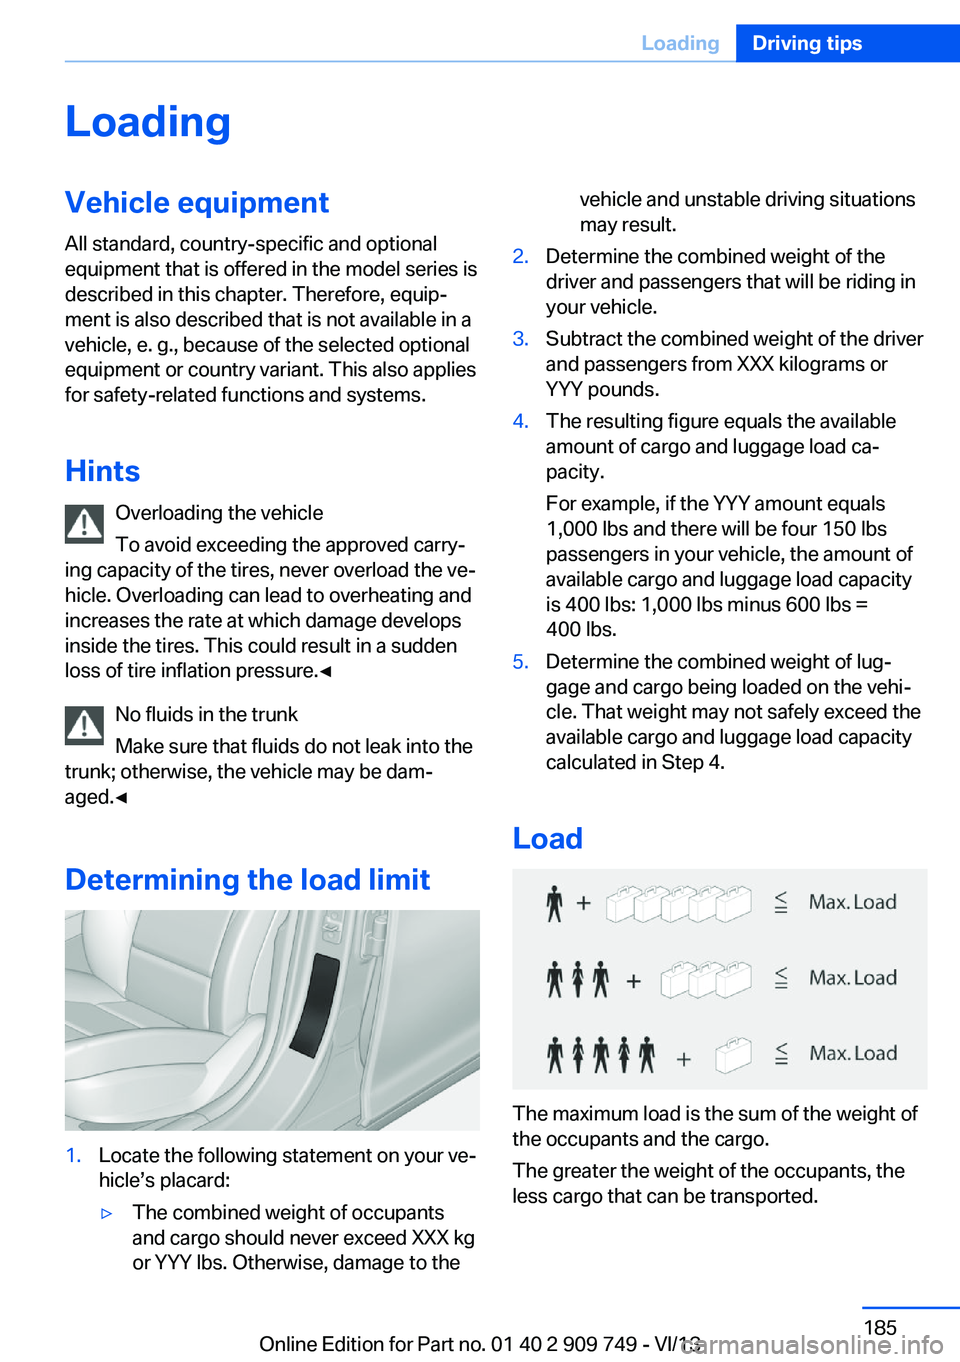
The maximum load is the sum of the weight of
the occupants and the cargo.
The greater the weight of the occupants, the
less cargo that can be transported.
Seite 185LoadingDriving tips185
Online Edition for Part no. 01 40 2 909 749 - VI/13
Page 205 of 251
xxxx: manufacturer code for the tire brand
xxx: tire size and tire design
1013: tire age
Tires with DOT codes meet the guidelines of
the U.S. Department of Transportation.
Tire age DOT … 1013: the tire was manufactured in the
10th week 2013.
Recommendation
Regardless of wear, replace tires at least every
6 years.
Uniform Tire Quality Grading
Quality grades can be found where applicable
on the tire sidewall between tread shoulder
and maximum section width.
For example: Treadwear 200; Traction AA;
Temperature A
DOT Quality Grades Treadwear
Traction AA A B C
Temperature A B C
All passenger car tires must conform to Fed‐
eral Safety Requirements in addition to these
grades.
Treadwear The treadwear grade is a comparative rating
based on the wear rate of the tire when tested
under controlled conditions on a specified gov‐
ernment test course. For example, a tire graded 150 would wear one and one-half, 1 g,times as well on the government course as a
tire graded 100. The relative performance of
tires depends upon the actual conditions of
their use, however, and may depart signifi‐
cantly from the norm due to variations in driv‐
ing habits, service practices and differences in
road characteristics and climate.Traction
The traction grades, from highest to lowest,
are AA, A, B, and C.
Those grades represent the tire's ability to
stop on wet pavement as measured under
controlled conditions on specified government
test surfaces of asphalt and concrete. A tire
marked C may have poor traction performance.
The traction grade assigned to this tire is
based on straight-ahead braking traction tests,
and does not include acceleration, cornering,
hydroplaning, or peak traction characteristics.
Temperature
The temperature grades are A, the highest, B,
and C, representing the tire's resistance to the
generation of heat and its ability to dissipate
heat when tested under controlled conditions
on a specified indoor laboratory test wheel.
Sustained high temperature can cause the ma‐
terial of the tire to degenerate and reduce tire
life, and excessive temperature can lead to
sudden tire failure. The grade C corresponds
to a level of performance which all passenger
car tires must meet under the Federal Motor
Vehicle Safety Standard No. 109. Grades Band
A represent higher levels of performance on
the laboratory test wheel than the minimum re‐
quired by law.
Temperature grade for this tire
The temperature grade for this tire is es‐
tablished for a tire that is properly inflated and
not overloaded. Excessive speed, underinfla‐
tion, or excessive loading, either separately or
in combination, can cause heat buildup and
possible tire failure.
If necessary, have the vehicle towed.◀
RSC – Run-flat tires
Run-flat tires, refer to page 208, are labeled
with a circular symbol containing the letters
RSC marked on the sidewall.Seite 205Wheels and tiresMobility205
Online Edition for Part no. 01 40 2 909 749 - VI/13
Page 208 of 251
Maximum speed of winter tiresIf the maximum speed of the vehicle is higher
than the permissible speed for the winter tires,
then display a corresponding sign in the field
of vision. You can obtain this sign from the tire
specialist or from your service center.
Maximum speed for winter tires
Do not exceed the maximum speed for
the winter tires; otherwise, tire damage and ac‐
cidents can occur.◀
Run-flat tires If you are already using run-flat tires, for your
own safety you should replace them only with
the same kind. No spare tire is available in the
case of a flat tire. Your service center will be
glad to advise you.
Rotating wheels between axles The manufacturer of your vehicle advises
against switching wheels between the front
and rear axles.
This can impair the handling characteristics.
StorageStore wheels and tires in a cool, dry place with
as little exposure to light as possible.
Always protect tires against all contact with oil,
grease and fuels.
Do not exceed the maximum tire inflation pres‐
sure indicated on the side wall of the tire.Run-flat tires
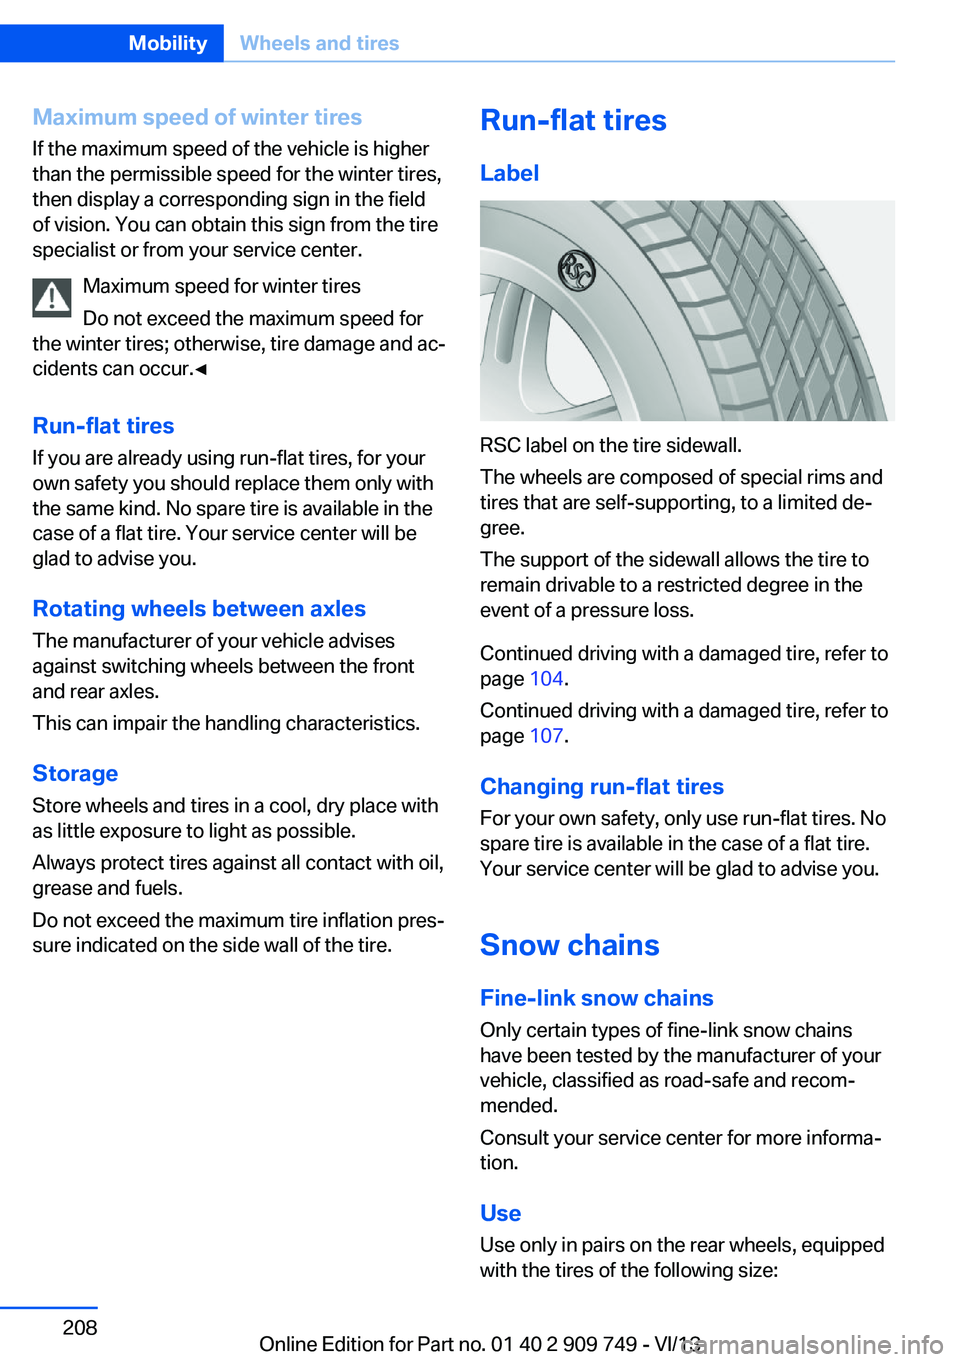
Label
RSC label on the tire sidewall.
The wheels are composed of special rims and
tires that are self-supporting, to a limited de‐
gree.
The support of the sidewall allows the tire to
remain drivable to a restricted degree in the
event of a pressure loss.
Continued driving with a damaged tire, refer to
page 104.
Continued driving with a damaged tire, refer to
page 107.
Changing run-flat tires
For your own safety, only use run-flat tires. No
spare tire is available in the case of a flat tire.
Your service center will be glad to advise you.
Snow chains
Fine-link snow chains
Only certain types of fine-link snow chains
have been tested by the manufacturer of your
vehicle, classified as road-safe and recom‐
mended.
Consult your service center for more informa‐
tion.
Use Use only in pairs on the rear wheels, equipped
with the tires of the following size:
Seite 208MobilityWheels and tires208
Online Edition for Part no. 01 40 2 909 749 - VI/13
Page 222 of 251
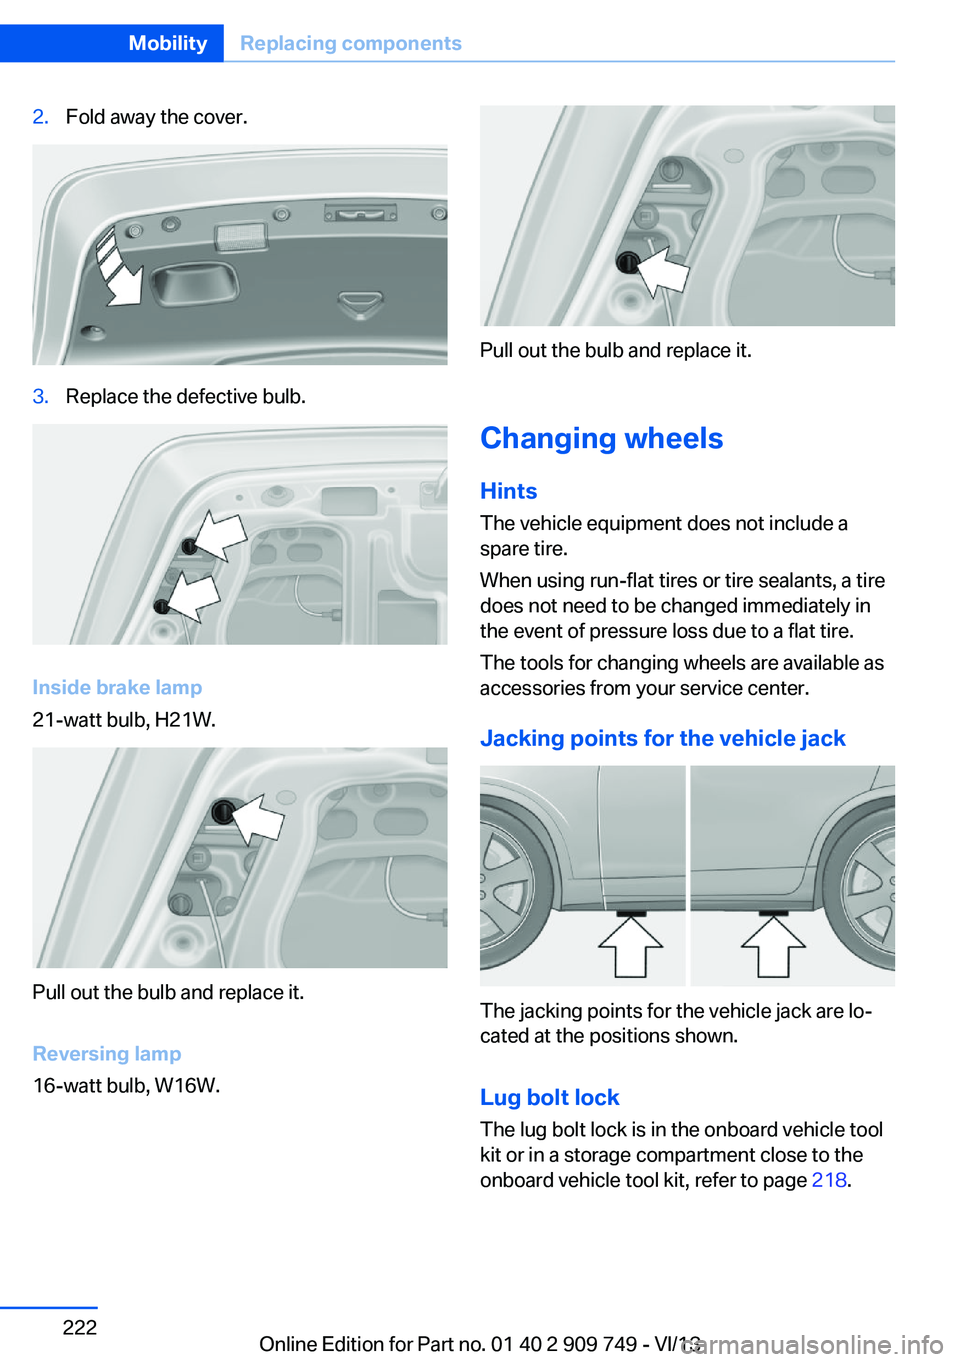
2.Fold away the cover.3.Replace the defective bulb.
Inside brake lamp
21-watt bulb, H21W.
Pull out the bulb and replace it.
Reversing lamp
16-watt bulb, W16W.
Pull out the bulb and replace it.
Changing wheels
Hints
The vehicle equipment does not include a
spare tire.
When using run-flat tires or tire sealants, a tire
does not need to be changed immediately in
the event of pressure loss due to a flat tire.
The tools for changing wheels are available as
accessories from your service center.
Jacking points for the vehicle jack
The jacking points for the vehicle jack are lo‐
cated at the positions shown.
Lug bolt lock
The lug bolt lock is in the onboard vehicle tool
kit or in a storage compartment close to the
onboard vehicle tool kit, refer to page 218.
Seite 222MobilityReplacing components222
Online Edition for Part no. 01 40 2 909 749 - VI/13
Page 243 of 251
Emergency unlocking, trunklid 39
Energy Control 87
Energy recovery 87
Engine, automatic Start/Stop function 68
Engine, automatic switch- off 68
Engine compartment 210
Engine compartment, work‐ ing in 210
Engine coolant 215
Engine idling when driving, coasting 192
Engine oil 212
Engine oil, adding 213
Engine oil additives 213
Engine oil change 213
Engine oil filler neck 213
Engine oil temperature 85
Engine oil types, alterna‐ tive 213
Engine oil types, ap‐ proved 213
Engine start during malfunc‐ tion 31
Engine start, jump-start‐ ing 226
Engine start, refer to Starting the engine 67
Engine stop 67
Engine temperature 85
Entering/exiting vehicle, as‐ sistance, steering wheel 60
Entering a car wash 230
Equipment, interior 168
ESP Electronic Stability Pro‐ gram, refer to DSC 125
Exchanging wheels/tires 206
Exhaust system 182
Exterior mirror, automatic dimming feature 59
Exterior mirrors 58
External start 226
External temperature dis‐ play 86 External temperature warn‐
ing 86
Eyes for securing cargo 186
F
Failure message, refer to Check Control 83
False alarm, refer to Uninten‐ tional alarm 44
Fan, refer to Air flow 161
Fault displays, refer to Check Control 83
Filler neck for engine oil 213
Fine wood, care 232
First aid kit 226
Fitting for towing, refer to Tow fitting 229
Flat tire, changing wheels 222
Flat Tire Monitor FTM 103
Flat tire, Tire Pressure Moni‐ tor TPM 105
Flat tire, warning lamp 104, 106
Flooding 183
Floor carpet, care 233
Floor mats, care 233
Folding table in the rear 173
Fold-out position, windshield wipers 75
Foot brake 183
Front airbags 100
Front fog lamps 98
Front fog lamps, bulb replace‐ ment 221
Front passenger airbags, au‐ tomatic deactivation 102
Front passenger airbags, indi‐ cator lamp 102
Front passenger seat, adjust‐ ing 49
Front turn signals, refer to Light-emitting diodes,
LEDs 220
FTM Flat Tire Monitor 103 Fuel 198
Fuel cap 196
Fuel consumption, current 87
Fuel consumption, refer to Average fuel consump‐
tion 91
Fuel filler flap 196
Fuel gauge 85
Fuel quality 198
Fuel recommendation 198
Fuel, tank capacity 239
Fuse 224
G
Garage door opener, refer to Integrated universal remote
control 168
Gasoline 198
Gasoline quality 198
Gear change, automatic transmission 77
Gear shift indicator 88
General driving notes 182
Gentleman function 49
Glass sunroof, powered 46
Glove compartment 176
Gross vehicle weight, ap‐ proved 237
Gross weight, permissible for trailer towing 237
H
Handbrake, refer to Parking brake 70
Hand-held transmitter, alter‐ nating code 169
Hazard warning flashers 225
HDC Hill Descent Con‐ trol 127
Head airbags 100
Headlamp control, auto‐ matic 96
Headlamp courtesy delay fea‐ ture 95 Seite 243Everything from A to ZReference243
Online Edition for Part no. 01 40 2 909 749 - VI/13
Page 244 of 251
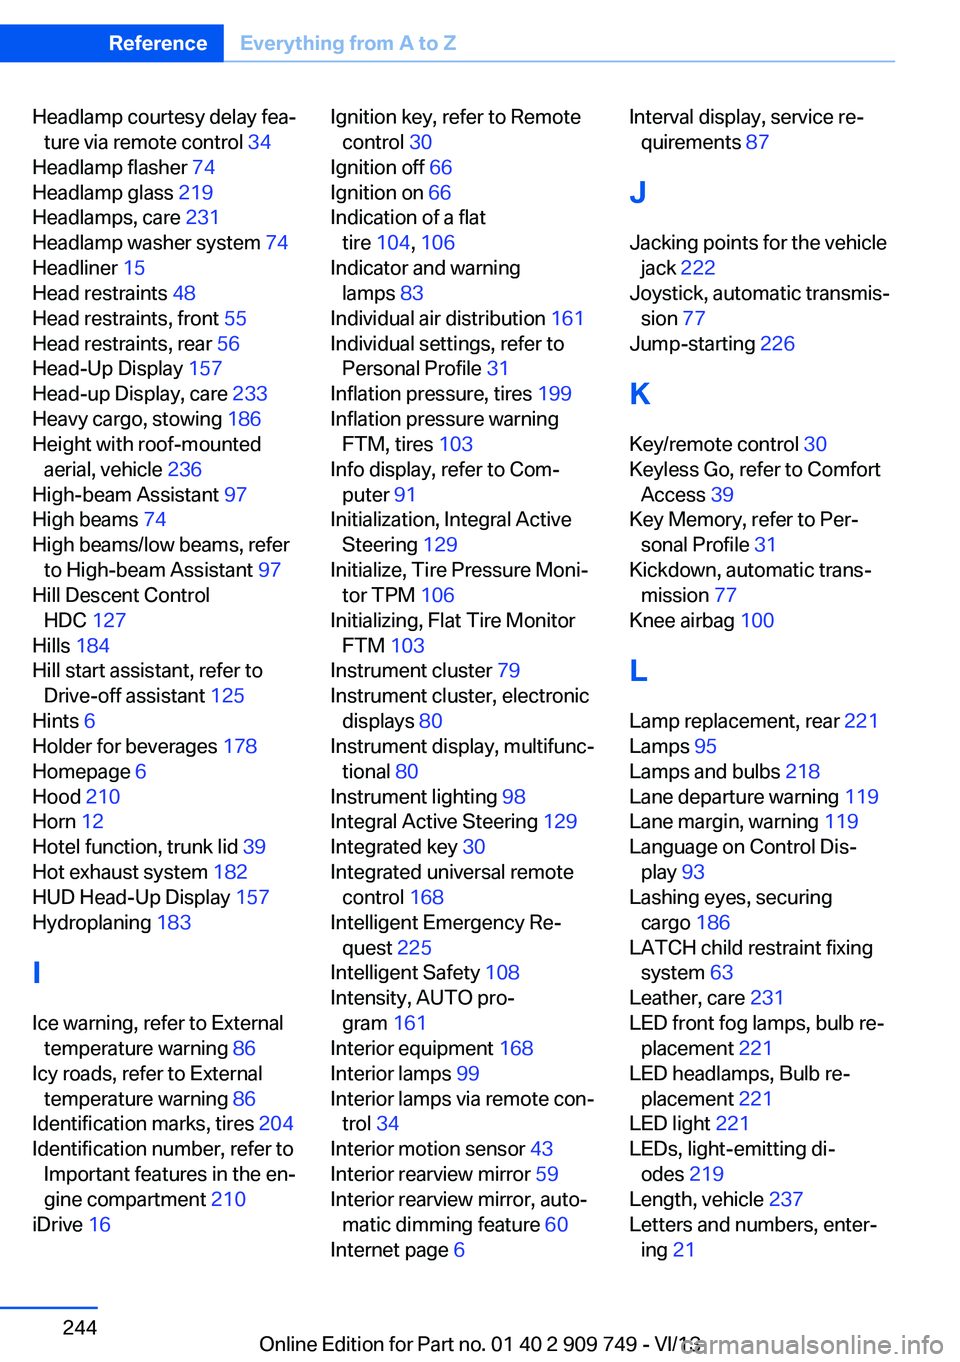
Headlamp courtesy delay fea‐ture via remote control 34
Headlamp flasher 74
Headlamp glass 219
Headlamps, care 231
Headlamp washer system 74
Headliner 15
Head restraints 48
Head restraints, front 55
Head restraints, rear 56
Head-Up Display 157
Head-up Display, care 233
Heavy cargo, stowing 186
Height with roof-mounted aerial, vehicle 236
High-beam Assistant 97
High beams 74
High beams/low beams, refer to High-beam Assistant 97
Hill Descent Control HDC 127
Hills 184
Hill start assistant, refer to Drive-off assistant 125
Hints 6
Holder for beverages 178
Homepage 6
Hood 210
Horn 12
Hotel function, trunk lid 39
Hot exhaust system 182
HUD Head-Up Display 157
Hydroplaning 183
I Ice warning, refer to External temperature warning 86
Icy roads, refer to External temperature warning 86
Identification marks, tires 204
Identification number, refer to Important features in the en‐
gine compartment 210
iDrive 16 Ignition key, refer to Remote
control 30
Ignition off 66
Ignition on 66
Indication of a flat tire 104 , 106
Indicator and warning lamps 83
Individual air distribution 161
Individual settings, refer to Personal Profile 31
Inflation pressure, tires 199
Inflation pressure warning FTM, tires 103
Info display, refer to Com‐ puter 91
Initialization, Integral Active Steering 129
Initialize, Tire Pressure Moni‐ tor TPM 106
Initializing, Flat Tire Monitor FTM 103
Instrument cluster 79
Instrument cluster, electronic displays 80
Instrument display, multifunc‐ tional 80
Instrument lighting 98
Integral Active Steering 129
Integrated key 30
Integrated universal remote control 168
Intelligent Emergency Re‐ quest 225
Intelligent Safety 108
Intensity, AUTO pro‐ gram 161
Interior equipment 168
Interior lamps 99
Interior lamps via remote con‐ trol 34
Interior motion sensor 43
Interior rearview mirror 59
Interior rearview mirror, auto‐ matic dimming feature 60
Internet page 6 Interval display, service re‐
quirements 87
J Jacking points for the vehicle jack 222
Joystick, automatic transmis‐ sion 77
Jump-starting 226
K
Key/remote control 30
Keyless Go, refer to Comfort Access 39
Key Memory, refer to Per‐ sonal Profile 31
Kickdown, automatic trans‐ mission 77
Knee airbag 100
L Lamp replacement, rear 221
Lamps 95
Lamps and bulbs 218
Lane departure warning 119
Lane margin, warning 119
Language on Control Dis‐ play 93
Lashing eyes, securing cargo 186
LATCH child restraint fixing system 63
Leather, care 231
LED front fog lamps, bulb re‐ placement 221
LED headlamps, Bulb re‐ placement 221
LED light 221
LEDs, light-emitting di‐ odes 219
Length, vehicle 237
Letters and numbers, enter‐ ing 21 Seite 244ReferenceEverything from A to Z244
Online Edition for Part no. 01 40 2 909 749 - VI/13
Page 245 of 251
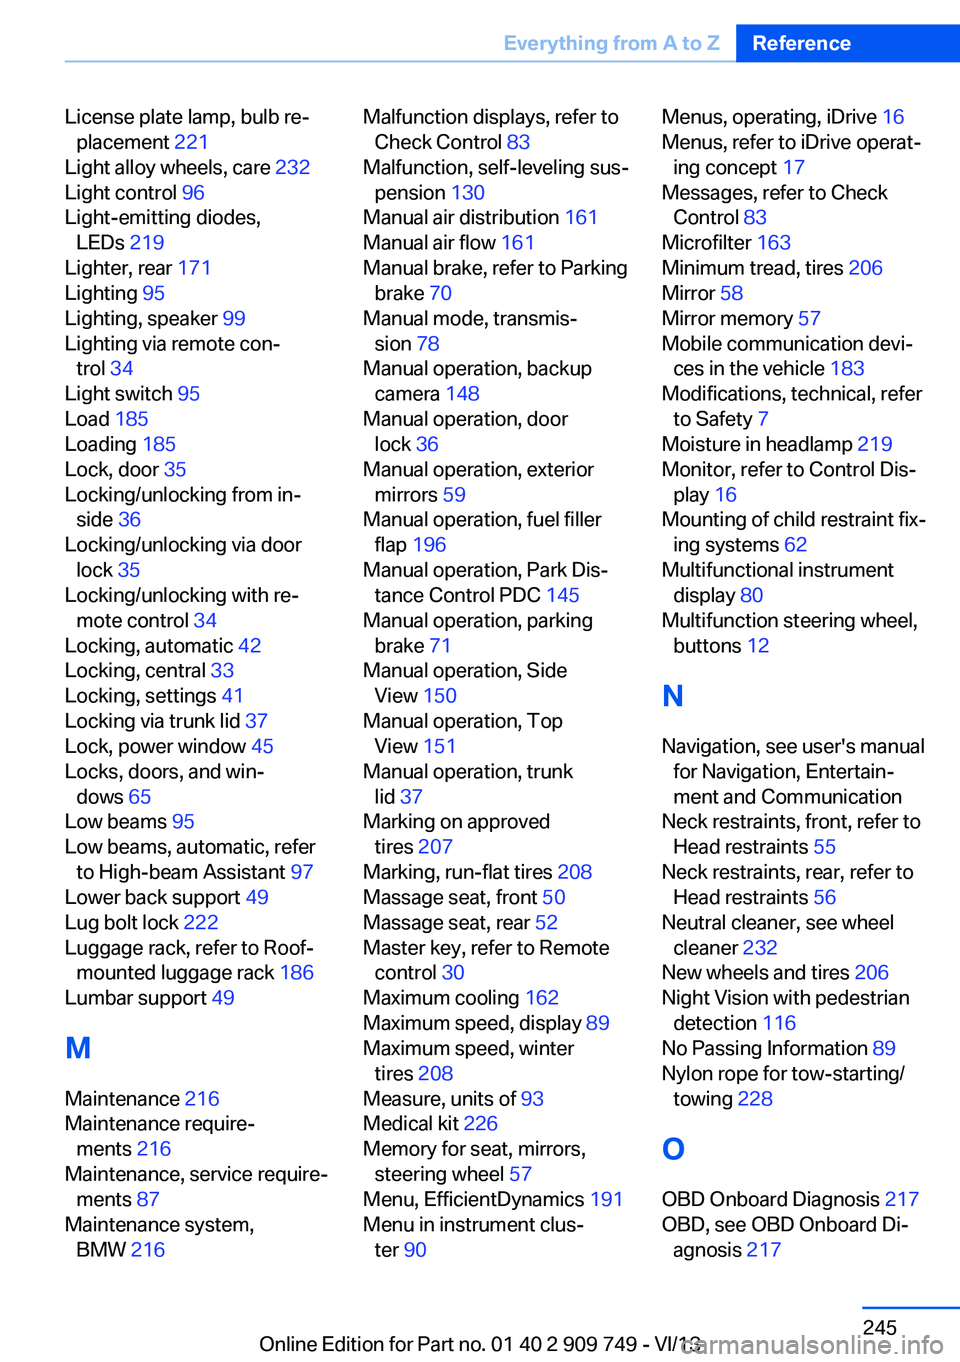
License plate lamp, bulb re‐placement 221
Light alloy wheels, care 232
Light control 96
Light-emitting diodes, LEDs 219
Lighter, rear 171
Lighting 95
Lighting, speaker 99
Lighting via remote con‐ trol 34
Light switch 95
Load 185
Loading 185
Lock, door 35
Locking/unlocking from in‐ side 36
Locking/unlocking via door lock 35
Locking/unlocking with re‐ mote control 34
Locking, automatic 42
Locking, central 33
Locking, settings 41
Locking via trunk lid 37
Lock, power window 45
Locks, doors, and win‐ dows 65
Low beams 95
Low beams, automatic, refer to High-beam Assistant 97
Lower back support 49
Lug bolt lock 222
Luggage rack, refer to Roof- mounted luggage rack 186
Lumbar support 49
M
Maintenance 216
Maintenance require‐ ments 216
Maintenance, service require‐ ments 87
Maintenance system, BMW 216 Malfunction displays, refer to
Check Control 83
Malfunction, self-leveling sus‐ pension 130
Manual air distribution 161
Manual air flow 161
Manual brake, refer to Parking brake 70
Manual mode, transmis‐ sion 78
Manual operation, backup camera 148
Manual operation, door lock 36
Manual operation, exterior mirrors 59
Manual operation, fuel filler flap 196
Manual operation, Park Dis‐ tance Control PDC 145
Manual operation, parking brake 71
Manual operation, Side View 150
Manual operation, Top View 151
Manual operation, trunk lid 37
Marking on approved tires 207
Marking, run-flat tires 208
Massage seat, front 50
Massage seat, rear 52
Master key, refer to Remote control 30
Maximum cooling 162
Maximum speed, display 89
Maximum speed, winter tires 208
Measure, units of 93
Medical kit 226
Memory for seat, mirrors, steering wheel 57
Menu, EfficientDynamics 191
Menu in instrument clus‐ ter 90 Menus, operating, iDrive 16
Menus, refer to iDrive operat‐ ing concept 17
Messages, refer to Check Control 83
Microfilter 163
Minimum tread, tires 206
Mirror 58
Mirror memory 57
Mobile communication devi‐ ces in the vehicle 183
Modifications, technical, refer to Safety 7
Moisture in headlamp 219
Monitor, refer to Control Dis‐ play 16
Mounting of child restraint fix‐ ing systems 62
Multifunctional instrument display 80
Multifunction steering wheel, buttons 12
N Navigation, see user's manual for Navigation, Entertain‐
ment and Communication
Neck restraints, front, refer to Head restraints 55
Neck restraints, rear, refer to Head restraints 56
Neutral cleaner, see wheel cleaner 232
New wheels and tires 206
Night Vision with pedestrian detection 116
No Passing Information 89
Nylon rope for tow-starting/ towing 228
O OBD Onboard Diagnosis 217
OBD, see OBD Onboard Di‐ agnosis 217 Seite 245Everything from A to ZReference245
Online Edition for Part no. 01 40 2 909 749 - VI/13