sound system BMW 745i 2005 E65 Owner's Manual
[x] Cancel search | Manufacturer: BMW, Model Year: 2005, Model line: 745i, Model: BMW 745i 2005 E65Pages: 239, PDF Size: 8.03 MB
Page 53 of 239
Controls
51Reference
At a glance
Driving tips
Communications
Navigation
Entertainment
Mobility
You can also adjust the height of the head
restraint electrically.
To prevent possible personal injury
and property damage, always ensure
that the area above the head restraints is
clear and unobstructed before extending
them upward.<
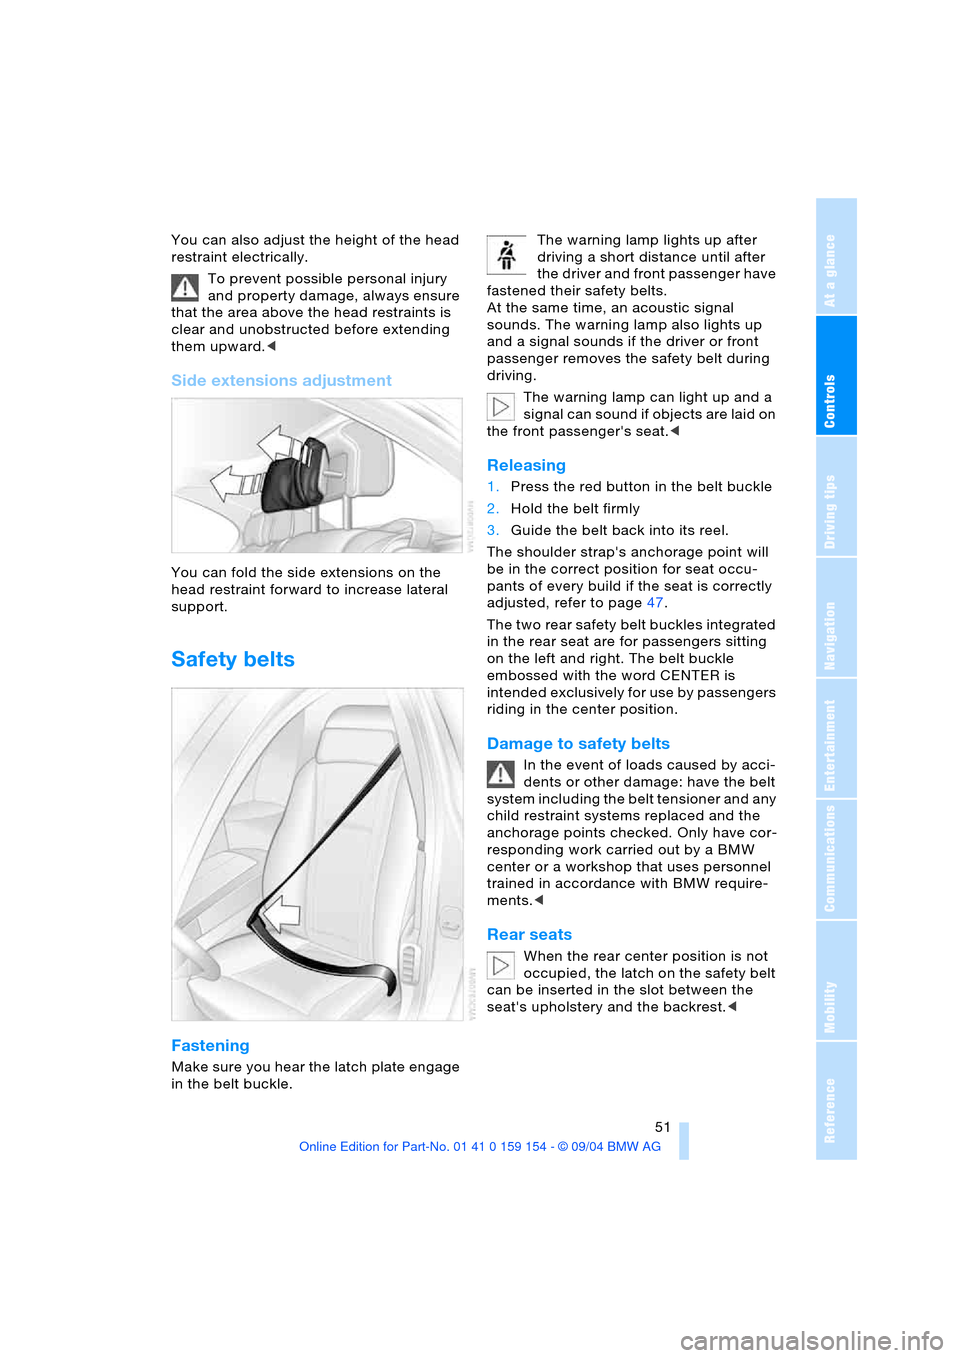
Side extensions adjustment
You can fold the side extensions on the
head restraint forward to increase lateral
support.
Safety belts
Fastening
Make sure you hear the latch plate engage
in the belt buckle. The warning lamp lights up after
driving a short distance until after
the driver and front passenger have
fastened their safety belts.
At the same time, an acoustic signal
sounds. The warning lamp also lights up
and a signal sounds if the driver or front
passenger removes the safety belt during
driving.
The warning lamp can light up and a
signal can sound if objects are laid on
the front passenger's seat.<
Releasing
1.Press the red button in the belt buckle
2.Hold the belt firmly
3.Guide the belt back into its reel.
The shoulder strap's anchorage point will
be in the correct position for seat occu-
pants of every build if the seat is correctly
adjusted, refer to page47.
The two rear safety belt buckles integrated
in the rear seat are for passengers sitting
on the left and right. The belt buckle
embossed with the word CENTER is
intended exclusively for use by passengers
riding in the center position.
Damage to safety belts
In the event of loads caused by acci-
dents or other damage: have the belt
system including the belt tensioner and any
child restraint systems replaced and the
anchorage points checked. Only have cor-
responding work carried out by a BMW
center or a workshop that uses personnel
trained in accordance with BMW require-
ments.<
Rear seats
When the rear center position is not
occupied, the latch on the safety belt
can be inserted in the slot between the
seat's upholstery and the backrest.<
Page 65 of 239
Controls
63Reference
At a glance
Driving tips
Communications
Navigation
Entertainment
Mobility
gong will sound and a message will appear
in the Info Display.
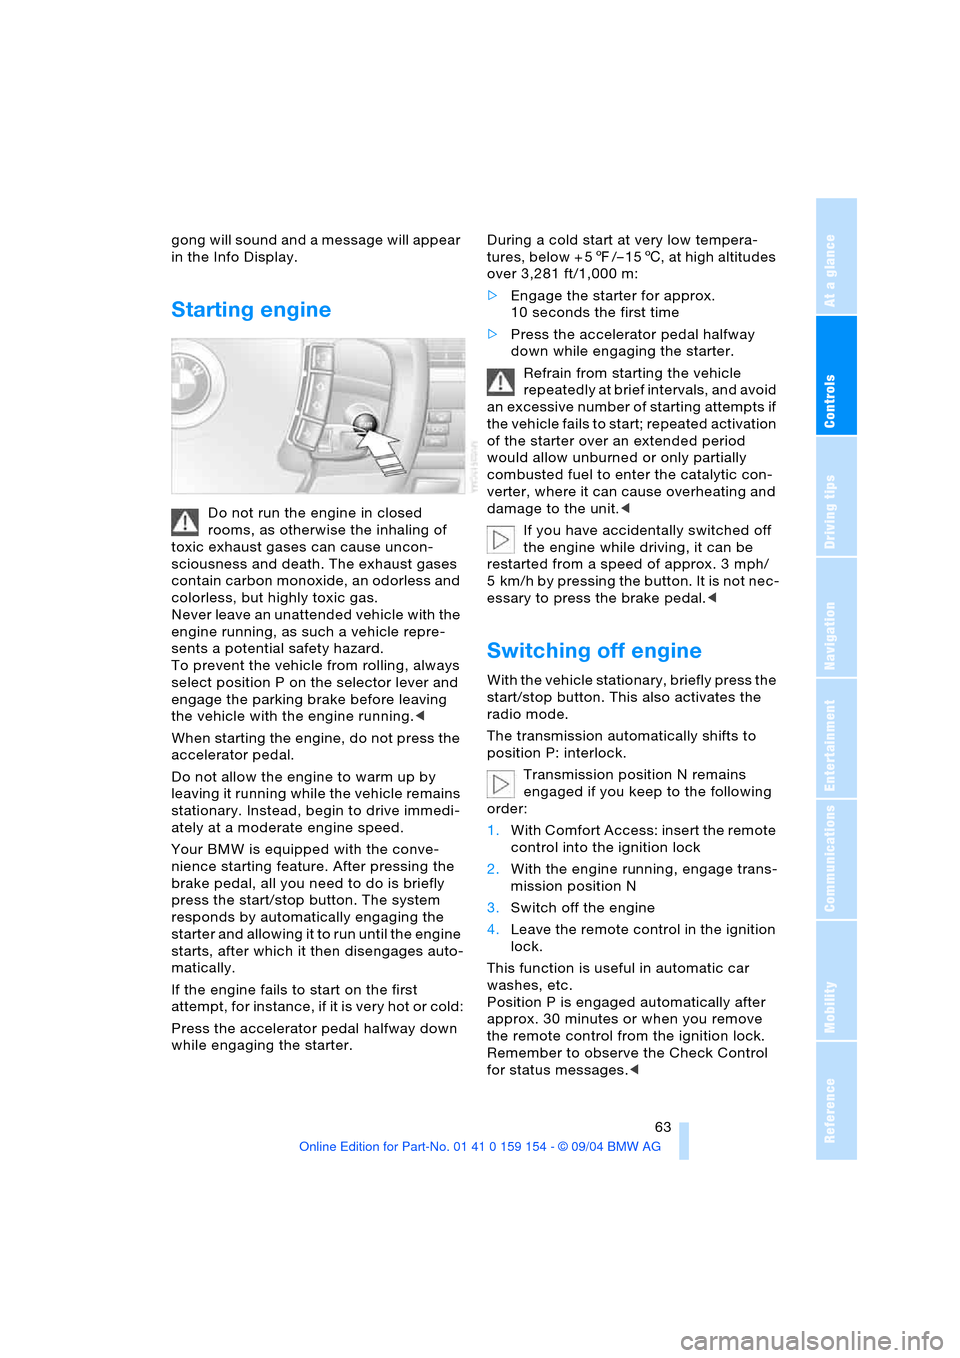
Starting engine
Do not run the engine in closed
rooms, as otherwise the inhaling of
toxic exhaust gases can cause uncon-
sciousness and death. The exhaust gases
contain carbon monoxide, an odorless and
colorless, but highly toxic gas.
Never leave an unattended vehicle with the
engine running, as such a vehicle repre-
sents a potential safety hazard.
To prevent the vehicle from rolling, always
select position P on the selector lever and
engage the parking brake before leaving
the vehicle with the engine running.<
When starting the engine, do not press the
accelerator pedal.
Do not allow the engine to warm up by
leaving it running while the vehicle remains
stationary. Instead, begin to drive immedi-
ately at a moderate engine speed.
Your BMW is equipped with the conve-
nience starting feature. After pressing the
brake pedal, all you need to do is briefly
press the start/stop button. The system
responds by automatically engaging the
starter and allowing it to run until the engine
starts, after which it then disengages auto-
matically.
If the engine fails to start on the first
attempt, for instance, if it is very hot or cold:
Press the accelerator pedal halfway down
while engaging the starter.During a cold start at very low tempera-
tures, below + 57/– 156, at high altitudes
over 3,281 ft/1,000 m:
>Engage the starter for approx.
10 seconds the first time
>Press the accelerator pedal halfway
down while engaging the starter.
Refrain from starting the vehicle
repeatedly at brief intervals, and avoid
an excessive number of starting attempts if
the vehicle fails to start; repeated activation
of the starter over an extended period
would allow unburned or only partially
combusted fuel to enter the catalytic con-
verter, where it can cause overheating and
damage to the unit.<
If you have accidentally switched off
the engine while driving, it can be
restarted from a speed of approx. 3 mph/
5 km/h by pressing the button. It is not nec-
essary to press the brake pedal.<
Switching off engine
With the vehicle stationary, briefly press the
start/stop button. This also activates the
radio mode.
The transmission automatically shifts to
position P: interlock.
Transmission position N remains
engaged if you keep to the following
order:
1.With Comfort Access: insert the remote
control into the ignition lock
2.With the engine running, engage trans-
mission position N
3.Switch off the engine
4.Leave the remote control in the ignition
lock.
This function is useful in automatic car
washes, etc.
Position P is engaged automatically after
approx. 30 minutes or when you remove
the remote control from the ignition lock.
Remember to observe the Check Control
for status messages.<
Page 66 of 239
Driving
64 Should exceptional circumstances
render it necessary for you to switch
off the engine while the vehicle is moving,
press the start/stop button for approxi-
mately 1 second.
If you maintain pressure on the start/stop
button for longer than two seconds while
switching off the ignition, the remote con-
trol will be ejected.<
Before leaving the vehicle, remove
the remote control from the ignition
lock; with Comfort Access, always take the
remote control with you.<
Parking brake
The concept
Your BMW is equipped with an electrome-
chanical parking brake.
The parking brake is primarily intended to
prevent the vehicle from rolling while
parked.
You can operate or use the parking brake in
two different ways:
>Manually, by briefly pressing the button
>Automatically, through activation of the
Automatic Hold mode, refer to page65.
An electrohydraulic mechanism then
engages the parking brake to prevent the
rear wheels from turning whenever you
switch off the engine.
When the engine is running, parking brake
engagement is controlled by the brake sys-
tem's hydraulic circuits, which act on the
disc brakes at the front and rear wheels.
Brake pedal feel
Because this function is activated using
the brake system's hydraulic circuits, the
response of the brake pedal may change
slightly. Engagement may also be accom-
panied by activation noise – this is normal.
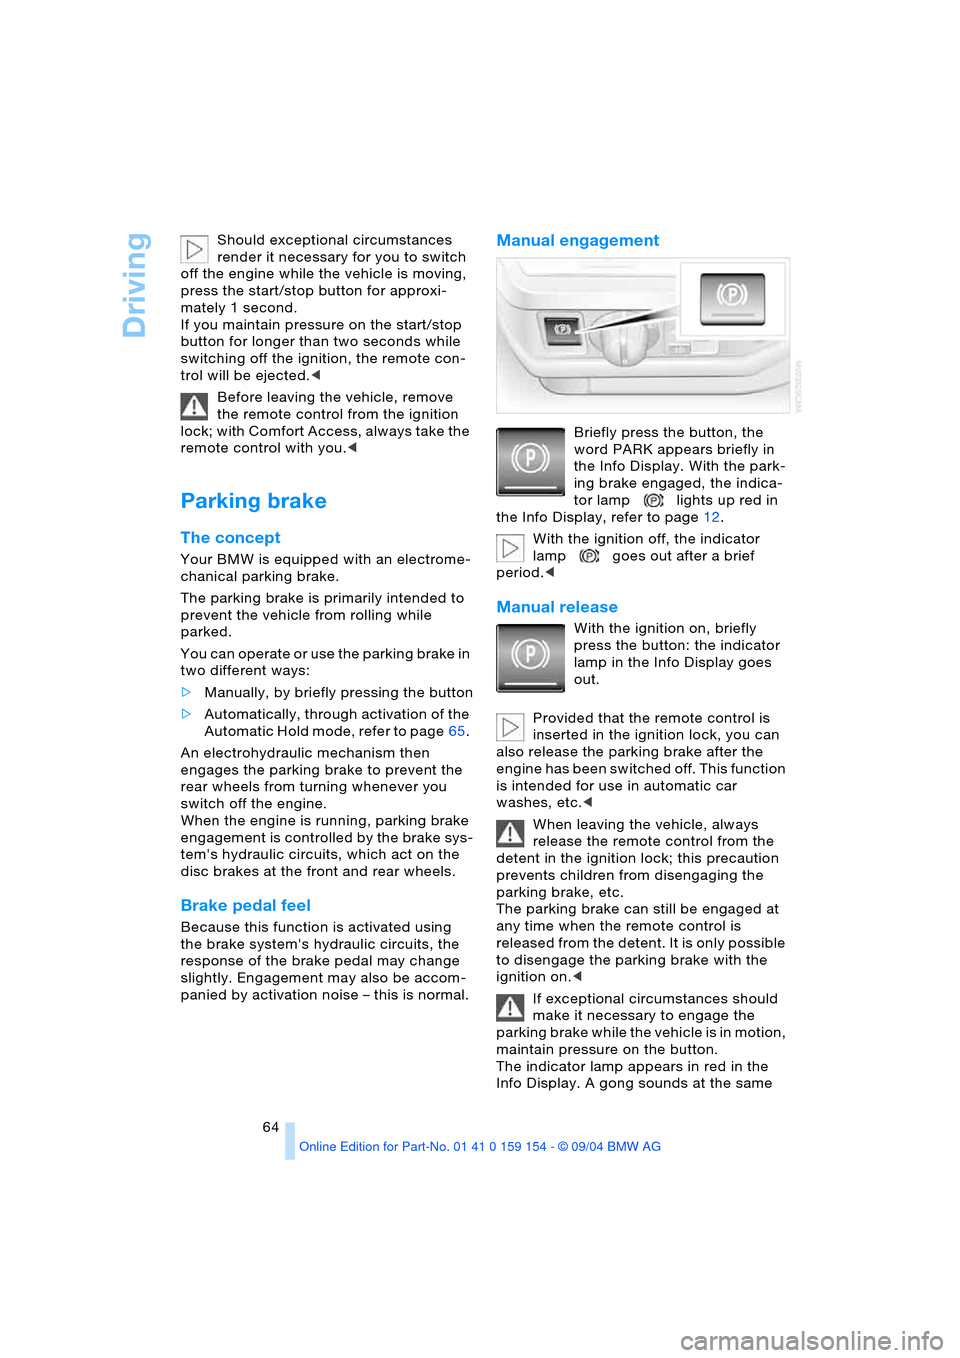
Manual engagement
Briefly press the button, the
word PARK appears briefly in
the Info Display. With the park-
ing brake engaged, the indica-
tor lamp lights up red in
the Info Display, refer to page12.
With the ignition off, the indicator
lamp goes out after a brief
period.<
Manual release
With the ignition on, briefly
press the button: the indicator
lamp in the Info Display goes
out.
Provided that the remote control is
inserted in the ignition lock, you can
also release the parking brake after the
engine has been switched off. This function
is intended for use in automatic car
washes, etc.<
When leaving the vehicle, always
release the remote control from the
detent in the ignition lock; this precaution
prevents children from disengaging the
parking brake, etc.
The parking brake can still be engaged at
any time when the remote control is
released from the detent. It is only possible
to disengage the parking brake with the
ignition on.<
If exceptional circumstances should
make it necessary to engage the
parking brake while the vehicle is in motion,
maintain pressure on the button.
The indicator lamp appears in red in the
Info Display. A gong sounds at the same
Page 78 of 239
Driving
76 The vehicle brake lamps will automatically
illuminate to signal a following driver to take
action. In addition, it may be necessary for
the vehicle to downshift to maintain the dis-
tance setting selected. If the vehicle ahead
speeds up or when the lane ahead
becomes clear, your vehicle will accelerate
to the speed you have selected by increas-
ing the throttle setting and shifting gears as
needed.
Active cruise control is not and must
not be used as a collision avoidance/
warning system.<
Since this active cruise control sys-
tem is a new technology and operates
differently from conventional cruise control
systems which you may be accustomed,
you are strongly urged to read all of the
pages relating to this system before use.
Pay special attention to the information
contained in the Things to know about
active cruise control section in this manual
beginning on page78.<
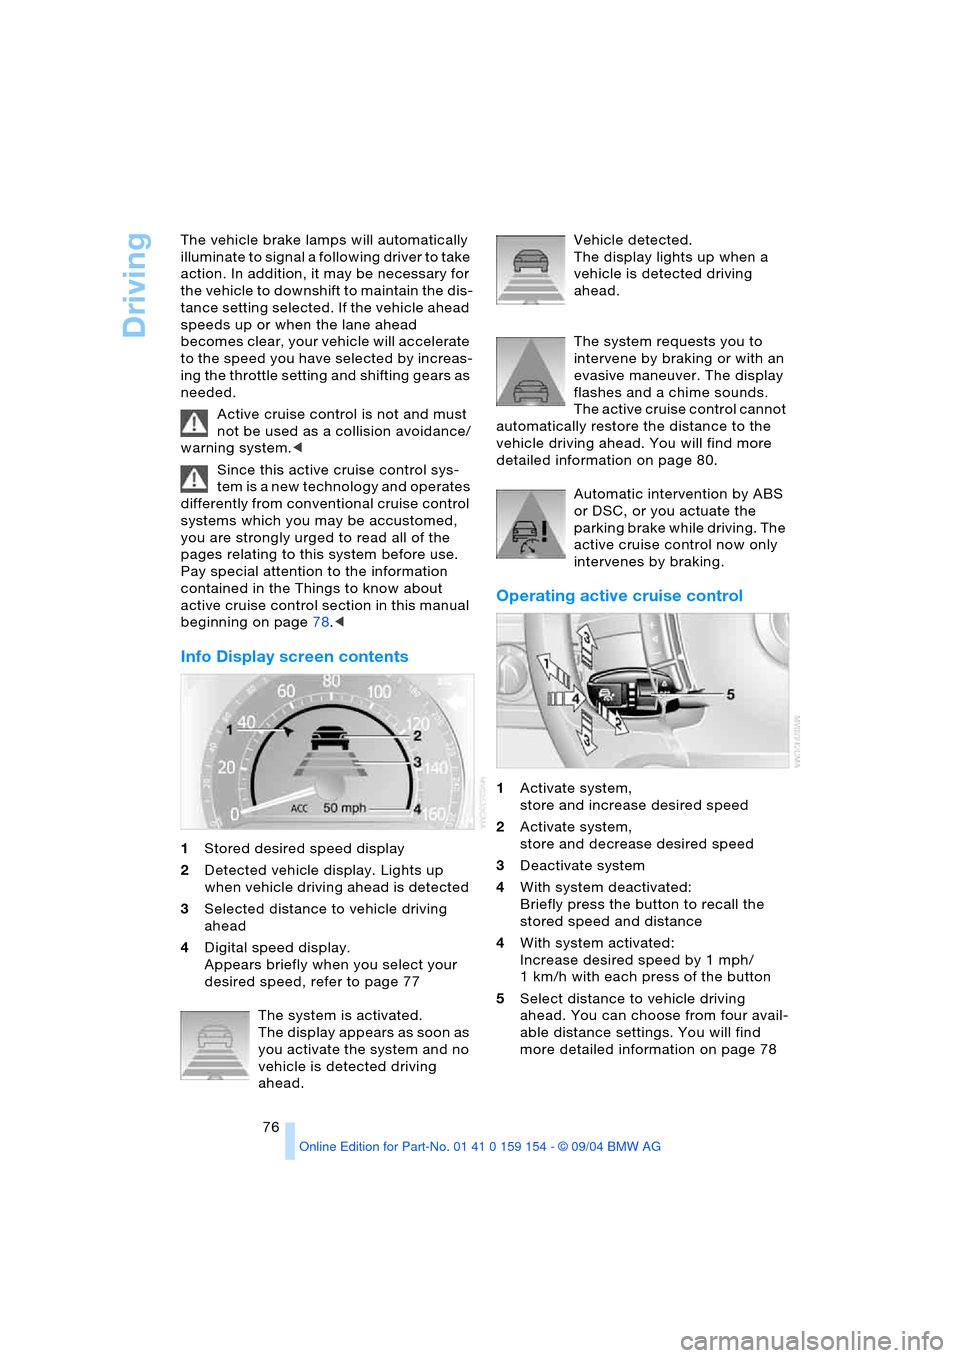
Info Display screen contents
1Stored desired speed display
2Detected vehicle display. Lights up
when vehicle driving ahead is detected
3Selected distance to vehicle driving
ahead
4Digital speed display.
Appears briefly when you select your
desired speed, refer to page 77
The system is activated.
The display appears as soon as
you activate the system and no
vehicle is detected driving
ahead. Vehicle detected.
The display lights up when a
vehicle is detected driving
ahead.
The system requests you to
intervene by braking or with an
evasive maneuver. The display
flashes and a chime sounds.
The active cruise control cannot
automatically restore the distance to the
vehicle driving ahead. You will find more
detailed information on page 80.
Automatic intervention by ABS
or DSC, or you actuate the
parking brake while driving. The
active cruise control now only
intervenes by braking.
Operating active cruise control
1Activate system,
store and increase desired speed
2Activate system,
store and decrease desired speed
3Deactivate system
4With system deactivated:
Briefly press the button to recall the
stored speed and distance
4With system activated:
Increase desired speed by 1 mph/
1 km/h with each press of the button
5Select distance to vehicle driving
ahead. You can choose from four avail-
able distance settings. You will find
more detailed information on page 78
Page 79 of 239
Controls
77Reference
At a glance
Driving tips
Communications
Navigation
Entertainment
Mobility
Adjust your desired speed to the traf-
fic conditions and remain ready to
brake at all times. Great differences in
speed to the vehicles driving ahead, e.g.
when quickly approaching a truck or when
another vehicle swerves into your lane,
cannot be compensated for by the sys-
tem.<
Activate system
From approx. 20 mph/30 km/h you can
activate the system by pressing the lever
forward or pulling it back:
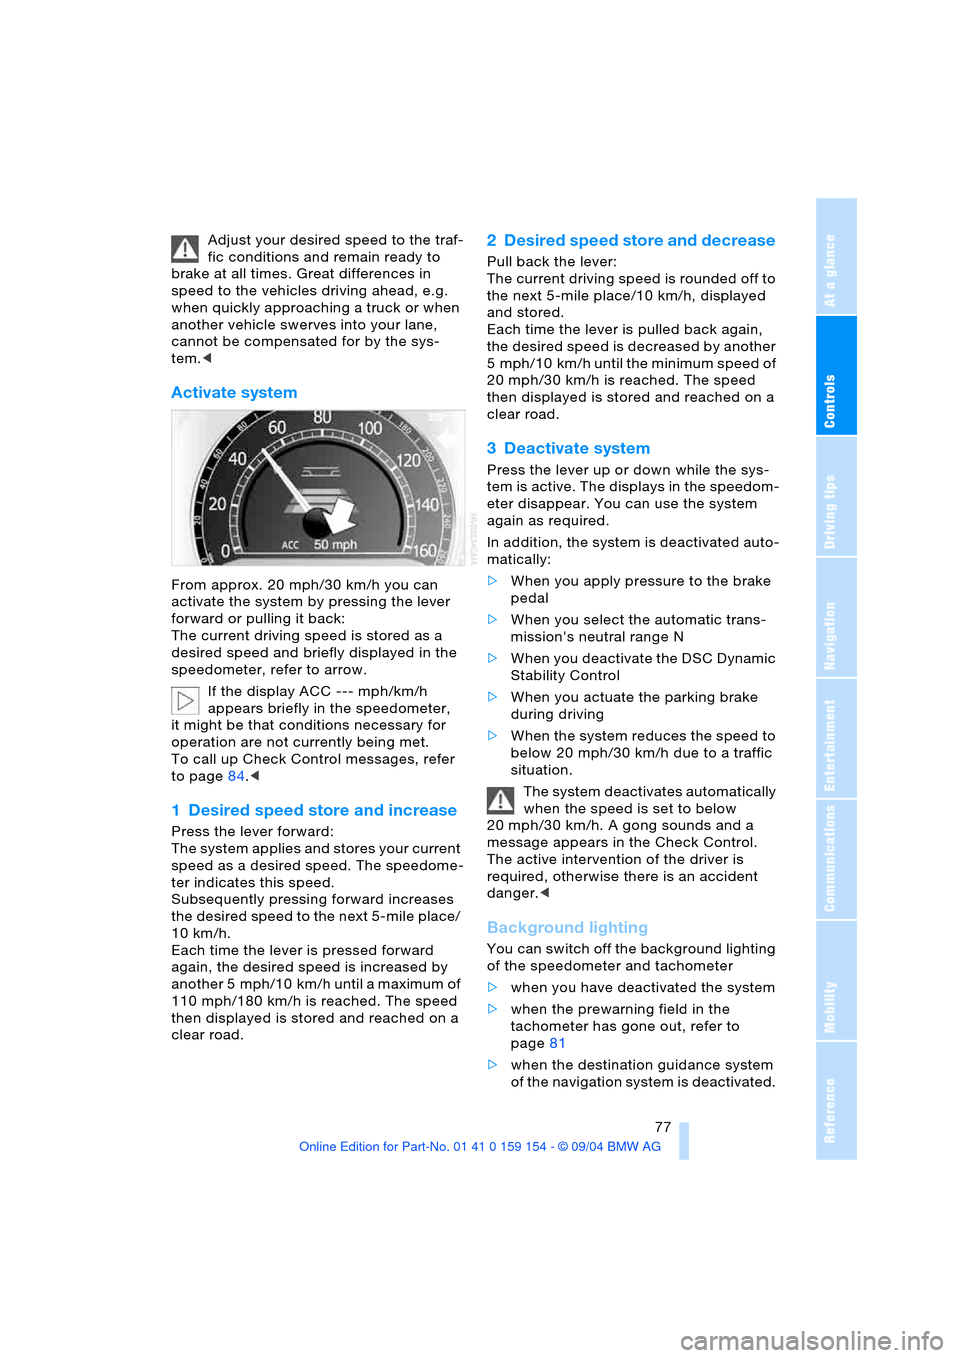
The current driving speed is stored as a
desired speed and briefly displayed in the
speedometer, refer to arrow.
If the display ACC --- mph/km/h
appears briefly in the speedometer,
it might be that conditions necessary for
operation are not currently being met.
To call up Check Control messages, refer
to page84.<
1 Desired speed store and increase
Press the lever forward:
The system applies and stores your current
speed as a desired speed. The speedome-
ter indicates this speed.
Subsequently pressing forward increases
the desired speed to the next 5-mile place/
10 km/h.
Each time the lever is pressed forward
again, the desired speed is increased by
another 5 mph/10 km/h until a maximum of
110 mph/180 km/h is reached. The speed
then displayed is stored and reached on a
clear road.
2 Desired speed store and decrease
Pull back the lever:
The current driving speed is rounded off to
the next 5-mile place/10 km/h, displayed
and stored.
Each time the lever is pulled back again,
the desired speed is decreased by another
5 mph/10 km/h until the minimum speed of
20 mph/30 km/h is reached. The speed
then displayed is stored and reached on a
clear road.
3 Deactivate system
Press the lever up or down while the sys-
tem is active. The displays in the speedom-
eter disappear. You can use the system
again as required.
In addition, the system is deactivated auto-
matically:
>When you apply pressure to the brake
pedal
>When you select the automatic trans-
mission's neutral range N
>When you deactivate the DSC Dynamic
Stability Control
>When you actuate the parking brake
during driving
>When the system reduces the speed to
below 20 mph/30 km/h due to a traffic
situation.
The system deactivates automatically
when the speed is set to below
20 mph/30 km/h. A gong sounds and a
message appears in the Check Control.
The active intervention of the driver is
required, otherwise there is an accident
danger.<
Background lighting
You can switch off the background lighting
of the speedometer and tachometer
>when you have deactivated the system
>when the prewarning field in the
tachometer has gone out, refer to
page81
>when the destination guidance system
of the navigation system is deactivated.
Page 82 of 239
Driving
80 In approaching a curve, it is possible that
active cruise control would react briefly to
a vehicle in the adjacent lane. In addition,
the system can sense if your vehicle is in
a curve and may not accelerate. If your
vehicle decelerates in either case, you can
choose to overcome the deceleration by
briefly pressing the accelerator pedal.
Driver interventions
Remember actions by the driver
always supersede and take priority
over the system's automatic actions. Any-
time the driver presses down on the accel-
erator pedal, any automatic braking action
by the system is interrupted until the pedal
is fully released. After doing this, release
the accelerator and the system again con-
trols your cruising speed and distance set-
ting. While driving with activated system,
resting your foot on the accelerator pedal
will cause the system not to brake even if
necessary. Be certain that floormats or
other objects on the vehicle floor do not
interfere with movement of the accelerator
pedal.<
While active cruise control is capable
of braking your vehicle automatically
when you approach a slower vehicle
ahead, it is important to be aware that the
ability of the system to apply the brakes is
also limited, if you are driving down a steep
grade or when you reduce your desired
speed sharply. The system cannot stop
your vehicle. It uses only a portion of brak-
ing system capacity and does not utilize the
full capacity of the vehicle braking system.
Therefore, the system cannot decrease
your speed for large differences in speed
between your vehicle and the vehicle ahead. Examples: during emergency brak-
ing, when you approach a vehicle traveling
at a much lower speed than your own
speed such as approaching a toll booth or
when a much slower vehicle cuts in front of
you at close range.<
Whenever active cruise control
recognizes a situation that
requires driver braking because
the system capacity has been
reached or has been exceeded,
the system alerts the driver by flashing this
symbol in the instrument cluster and
sounding a chime.
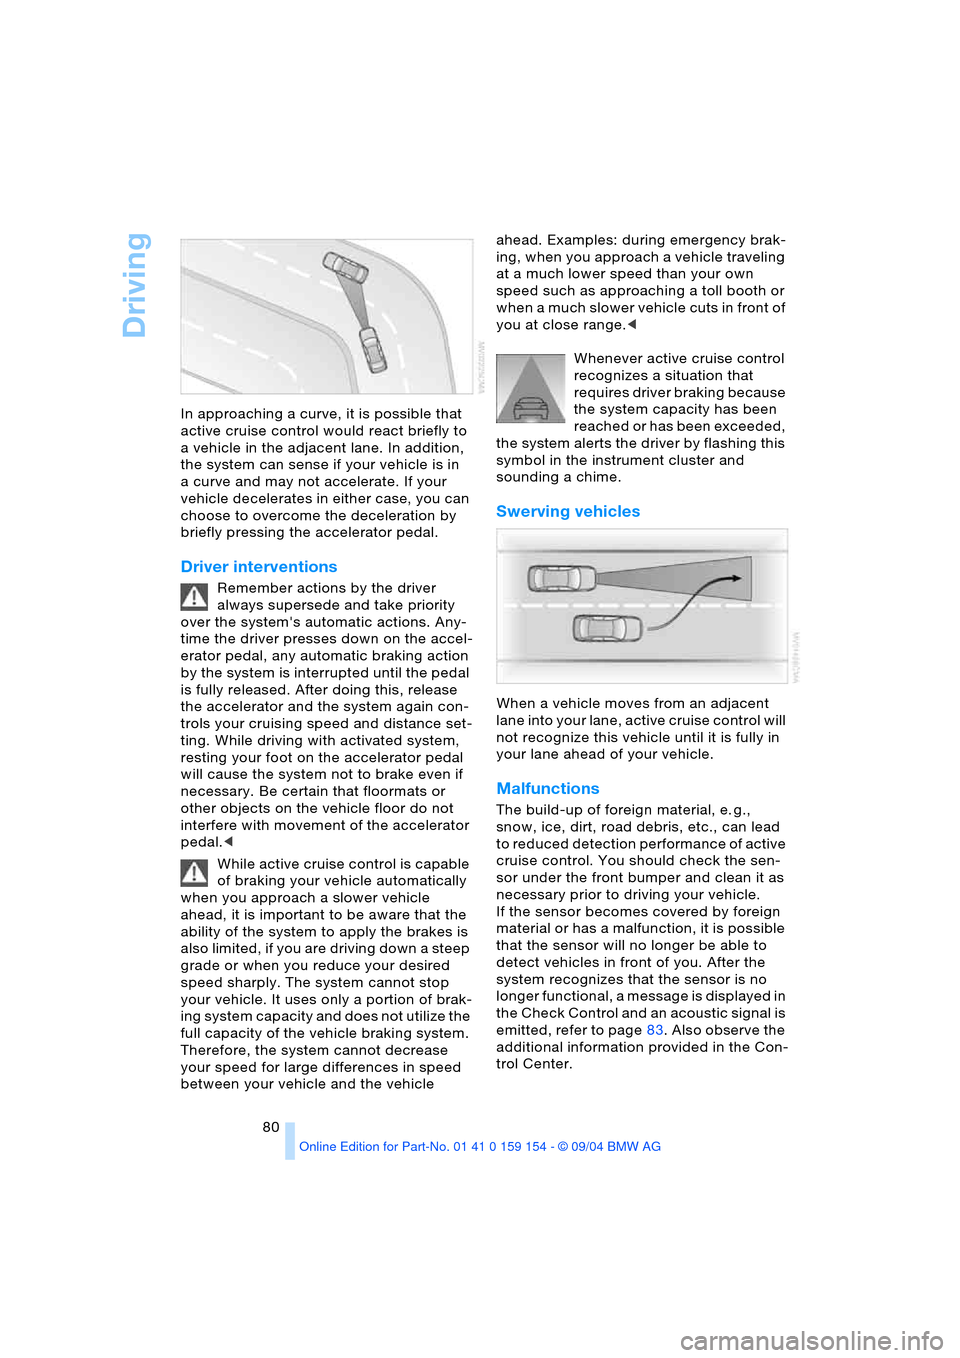
Swerving vehicles
When a vehicle moves from an adjacent
lane into your lane, active cruise control will
not recognize this vehicle until it is fully in
your lane ahead of your vehicle.
Malfunctions
The build-up of foreign material, e. g.,
snow, ice, dirt, road debris, etc., can lead
to reduced detection performance of active
cruise control. You should check the sen-
sor under the front bumper and clean it as
necessary prior to driving your vehicle.
If the sensor becomes covered by foreign
material or has a malfunction, it is possible
that the sensor will no longer be able to
detect vehicles in front of you. After the
system recognizes that the sensor is no
longer functional, a message is displayed in
the Check Control and an acoustic signal is
emitted, refer to page83. Also observe the
additional information provided in the Con-
trol Center.
Page 94 of 239
Technology for comfort, convenience and safety
92
PDC with visual warning
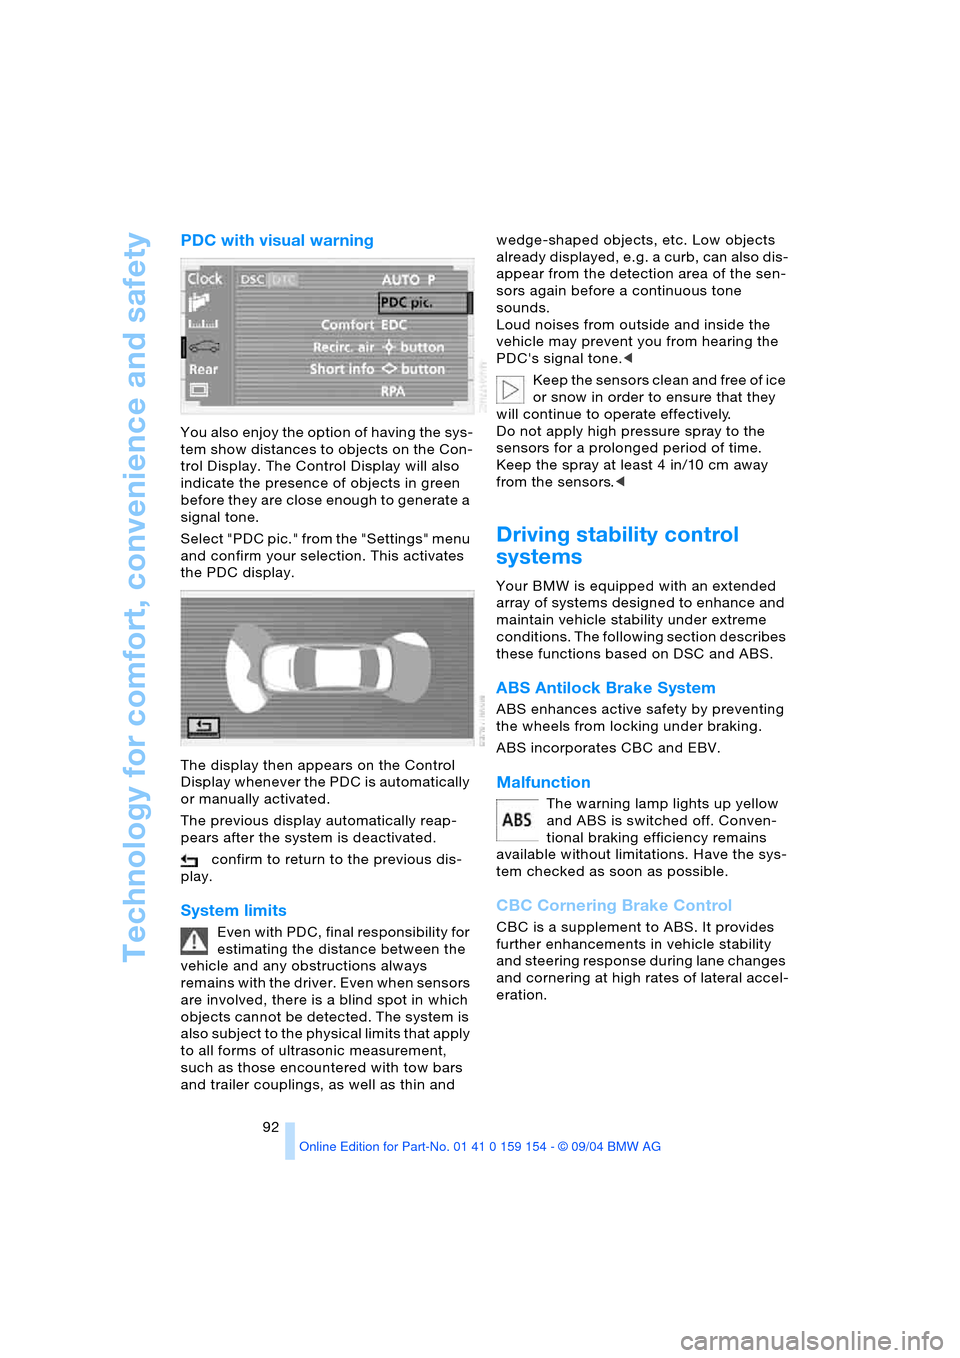
You also enjoy the option of having the sys-
tem show distances to objects on the Con-
trol Display. The Control Display will also
indicate the presence of objects in green
before they are close enough to generate a
signal tone.
Select "PDC pic." from the "Settings" menu
and confirm your selection. This activates
the PDC display.
The display then appears on the Control
Display whenever the PDC is automatically
or manually activated.
The previous display automatically reap-
pears after the system is deactivated.
confirm to return to the previous dis-
play.
System limits
Even with PDC, final responsibility for
estimating the distance between the
vehicle and any obstructions always
remains with the driver. Even when sensors
are involved, there is a blind spot in which
objects cannot be detected. The system is
also subject to the physical limits that apply
to all forms of ultrasonic measurement,
such as those encountered with tow bars
and trailer couplings, as well as thin and wedge-shaped objects, etc. Low objects
already displayed, e.g. a curb, can also dis-
appear from the detection area of the sen-
sors again before a continuous tone
sounds.
Loud noises from outside and inside the
vehicle may prevent you from hearing the
PDC's signal tone.<
Keep the sensors clean and free of ice
or snow in order to ensure that they
will continue to operate effectively.
Do not apply high pressure spray to the
sensors for a prolonged period of time.
Keep the spray at least 4 in/10 cm away
from the sensors.<
Driving stability control
systems
Your BMW is equipped with an extended
array of systems designed to enhance and
maintain vehicle stability under extreme
conditions. The following section describes
these functions based on DSC and ABS.
ABS Antilock Brake System
ABS enhances active safety by preventing
the wheels from locking under braking.
ABS incorporates CBC and EBV.
Malfunction
The warning lamp lights up yellow
and ABS is switched off. Conven-
tional braking efficiency remains
available without limitations. Have the sys-
tem checked as soon as possible.
CBC Cornering Brake Control
CBC is a supplement to ABS. It provides
further enhancements in vehicle stability
and steering response during lane changes
and cornering at high rates of lateral accel-
eration.
Page 98 of 239
Technology for comfort, convenience and safety
96 The check of the tire inflation pressure is
based on monitoring the relative speeds of
the wheels. A flat tire is detected and
reported on the basis of a deviation in cer-
tain speed ratios.
Functional requirements
So that the Flat Tire Monitor can learn the
correct inflation pressure, please perform
the following:
1.Check the inflation pressures in all tires
2.Compare with the inflation pressure
table on page189 and correct if neces-
sary
3.Initialize the system.
System limits
The Flat Tire Monitor cannot indicate
sudden severe tire damage caused by
outside factors and does not detect a natu-
ral, even pressure drop in all four tires.<
In the following situations, on the other
hand, there can be delays in detecting tire
pressure losses, and even system failure:
>When you are driving on snow-covered
or slippery road surfaces
>In the case of performance-oriented
driving: slip on the drive wheels, high
lateral acceleration
>False alarms and undetected loss of
pressure may occur when you are driv-
ing with snow chains fitted.
Initializing system
Perform the initialization immediately
after correcting the inflation pressure,
changing a tire or changing a wheel or all
wheels. A drive is necessary for this pur-
pose.<
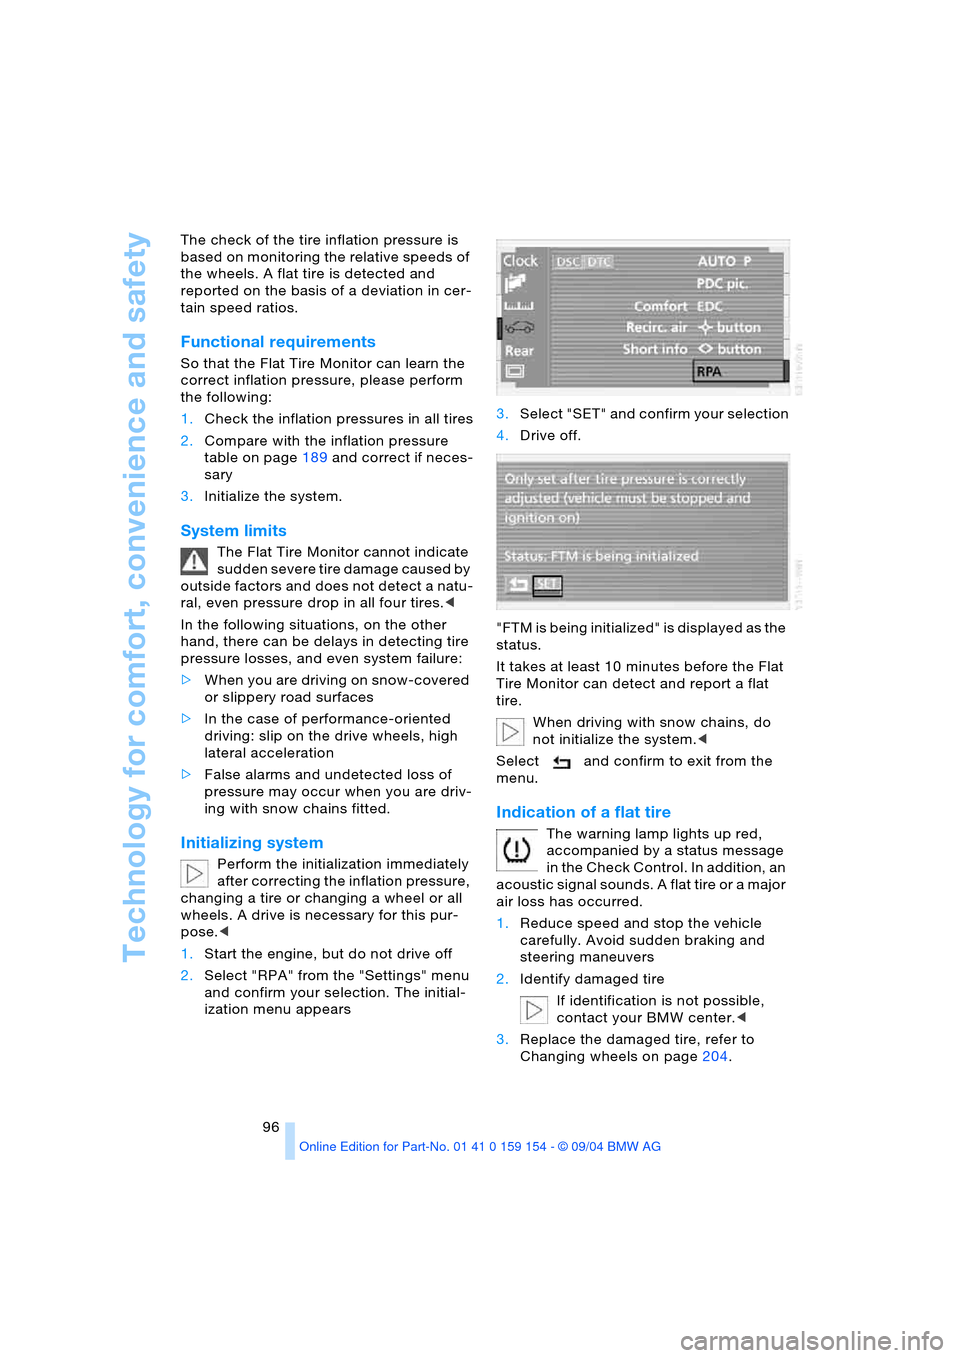
1.Start the engine, but do not drive off
2.Select "RPA" from the "Settings" menu
and confirm your selection. The initial-
ization menu appears 3.Select "SET" and confirm your selection
4.Drive off.
"FTM is being initialized" is displayed as the
status.
It takes at least 10 minutes before the Flat
Tire Monitor can detect and report a flat
tire.
When driving with snow chains, do
not initialize the system.<
Select and confirm to exit from the
menu.
Indication of a flat tire
The warning lamp lights up red,
accompanied by a status message
in the Check Control. In addition, an
acoustic signal sounds. A flat tire or a major
air loss has occurred.
1.Reduce speed and stop the vehicle
carefully. Avoid sudden braking and
steering maneuvers
2.Identify damaged tire
If identification is not possible,
contact your BMW center.<
3.Replace the damaged tire, refer to
Changing wheels on page204.
Page 102 of 239
Lamps
100
Lamps
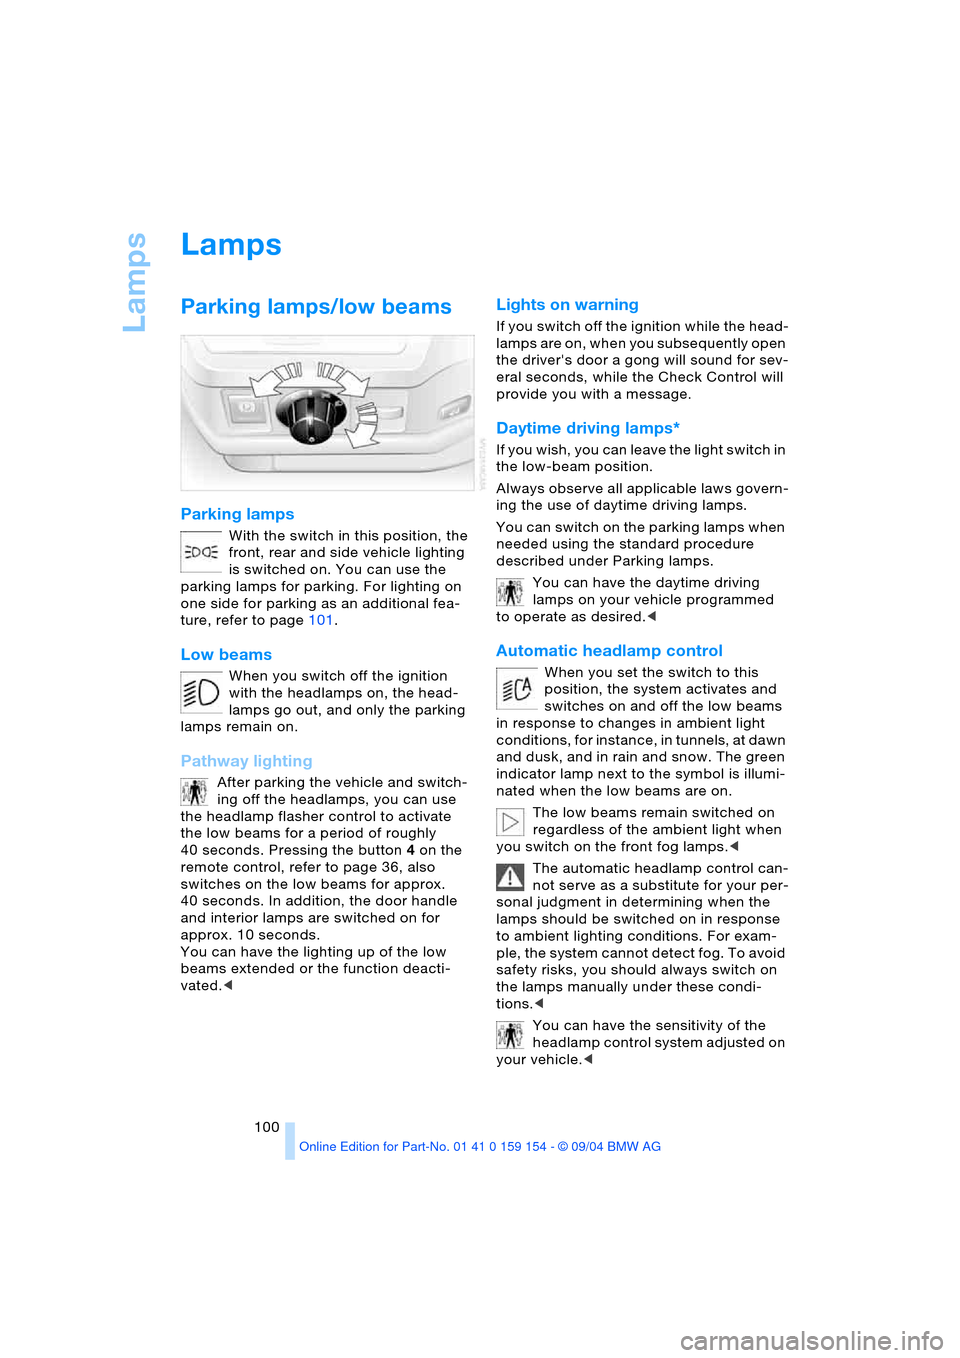
Parking lamps/low beams
Parking lamps
With the switch in this position, the
front, rear and side vehicle lighting
is switched on. You can use the
parking lamps for parking. For lighting on
one side for parking as an additional fea-
ture, refer to page101.
Low beams
When you switch off the ignition
with the headlamps on, the head-
lamps go out, and only the parking
lamps remain on.
Pathway lighting
After parking the vehicle and switch-
ing off the headlamps, you can use
the headlamp flasher control to activate
the low beams for a period of roughly
40 seconds. Pressing the button 4 on the
remote control, refer to page 36, also
switches on the low beams for approx.
40 seconds. In addition, the door handle
and interior lamps are switched on for
approx. 10 seconds.
You can have the lighting up of the low
beams extended or the function deacti-
vated.<
Lights on warning
If you switch off the ignition while the head-
lamps are on, when you subsequently open
the driver's door a gong will sound for sev-
eral seconds, while the Check Control will
provide you with a message
.
Daytime driving lamps*
If you wish, you can leave the light switch in
the low-beam position.
Always observe all applicable laws govern-
ing the use of daytime driving lamps.
You can switch on the parking lamps when
needed using the standard procedure
described under Parking lamps.
You can have the daytime driving
lamps on your vehicle programmed
to operate as desired.<
Automatic headlamp control
When you set the switch to this
position, the system activates and
switches on and off the low beams
in response to changes in ambient light
conditions, for instance, in tunnels, at dawn
and dusk, and in rain and snow. The green
indicator lamp next to the symbol is illumi-
nated when the low beams are on.
The low beams remain switched on
regardless of the ambient light when
you switch on the front fog lamps.<
The automatic headlamp control can-
not serve as a substitute for your per-
sonal judgment in determining when the
lamps should be switched on in response
to ambient lighting conditions. For exam-
ple, the system cannot detect fog. To avoid
safety risks, you should always switch on
the lamps manually under these condi-
tions.<
You can have the sensitivity of the
headlamp control system adjusted on
your vehicle.<
Page 125 of 239
Driving tips
123Reference
At a glance
Controls
Communications
Navigation
Entertainment
Mobility
Hydroplaning
When driving on wet or slushy roads,
reduce road speed. If you do not, a
wedge of water can form between tires and
road surface. This phenomenon is referred
to as hydroplaning, and is characterized by
a partial or complete loss of contact
between tires and road surface, ultimately
undermining your ability to steer and brake
the vehicle.<
Driving through water
Only drive through water with a maxi-
mum depth of 1 ft/30 cm, and then
only at walking speed at the most. Other-
wise, the vehicle's engine, the electrical
systems and the transmission may be dam-
aged.<
Safe braking
Your BMW is equipped with ABS as stan-
dard equipment. The best way to brake is
to apply maximum pressure to the brake
pedal during emergency: full brake applica-
tion. Since the vehicle maintains steering
responsiveness, you can nevertheless
avoid possible obstacles with a minimum
of steering effort.
Pulsation at the brake pedal combines with
sounds from the hydraulic circuits to indi-
cate to the driver that ABS is in its active
mode.
Driving in wet conditions
While driving in wet conditions and in heavy
rain, it is a good idea to apply light pressure
to the brake pedal every few miles. Monitor
traffic conditions to ensure that this maneu-
ver does not endanger other road users.
The heat generated in this process helps
dry the pads and rotors to ensure that full
braking efficiency will then be available
when you need it.
Hills
To prevent overheating and reduced
efficiency of the brake system, drive
long or steep downhill gradients in the gear
in which the least braking is required. Otherwise, even light but consistent pedal
pressure can lead to high temperatures,
brake wear and possibly even brake fail-
ure.<
You can further enhance the engine's brak-
ing effect by selecting a lower gear in the
automatic transmission's manual mode,
downshifting as far as first gear on
extremely steep stretches, refer to
page70. This strategy helps you avoid
placing excessive loads on the brake sys-
tem.
Never allow the vehicle to coast with
the transmission in Neutral – or with
the engine switched off – as there is no
engine braking when the transmission is in
Neutral, and no power-assist for brakes
and steering when the engine is not run-
ning.
Never allow floor mats, carpets or any other
objects to protrude into the area around the
accelerator and brake pedals and obstruct
their movement.<
Corrosion on brake rotors
When the vehicle is driven only occasion-
ally, during extended periods when the
vehicle is not used at all, and in operating
conditions where brake applications are
less frequent, there is an increased ten-
dency for corrosion to form on rotors, while
contaminants accumulate on the brake
pads. This occurs because the minimal
pressure which must be exerted by the
pads during brake applications to clean the
rotors is not reached.
Should corrosion form on the brake rotors,
the brakes will tend to respond with a pul-
sating effect that even extended applica-
tion will fail to cure.
Mobile communications devices in
vehicle
BMW does not recommend using
mobile communications devices, e.g.
portable phones, in the interior of the vehi-
cle without a direct connection to an out-
side antenna. Otherwise the vehicle elec-
tronics and mobile communications device
can affect each other. In addition, it is not