ECU BMW 745Li 2005 E66 User Guide
[x] Cancel search | Manufacturer: BMW, Model Year: 2005, Model line: 745Li, Model: BMW 745Li 2005 E66Pages: 239, PDF Size: 8.03 MB
Page 72 of 239
Driving
70
Sport program and manual operation
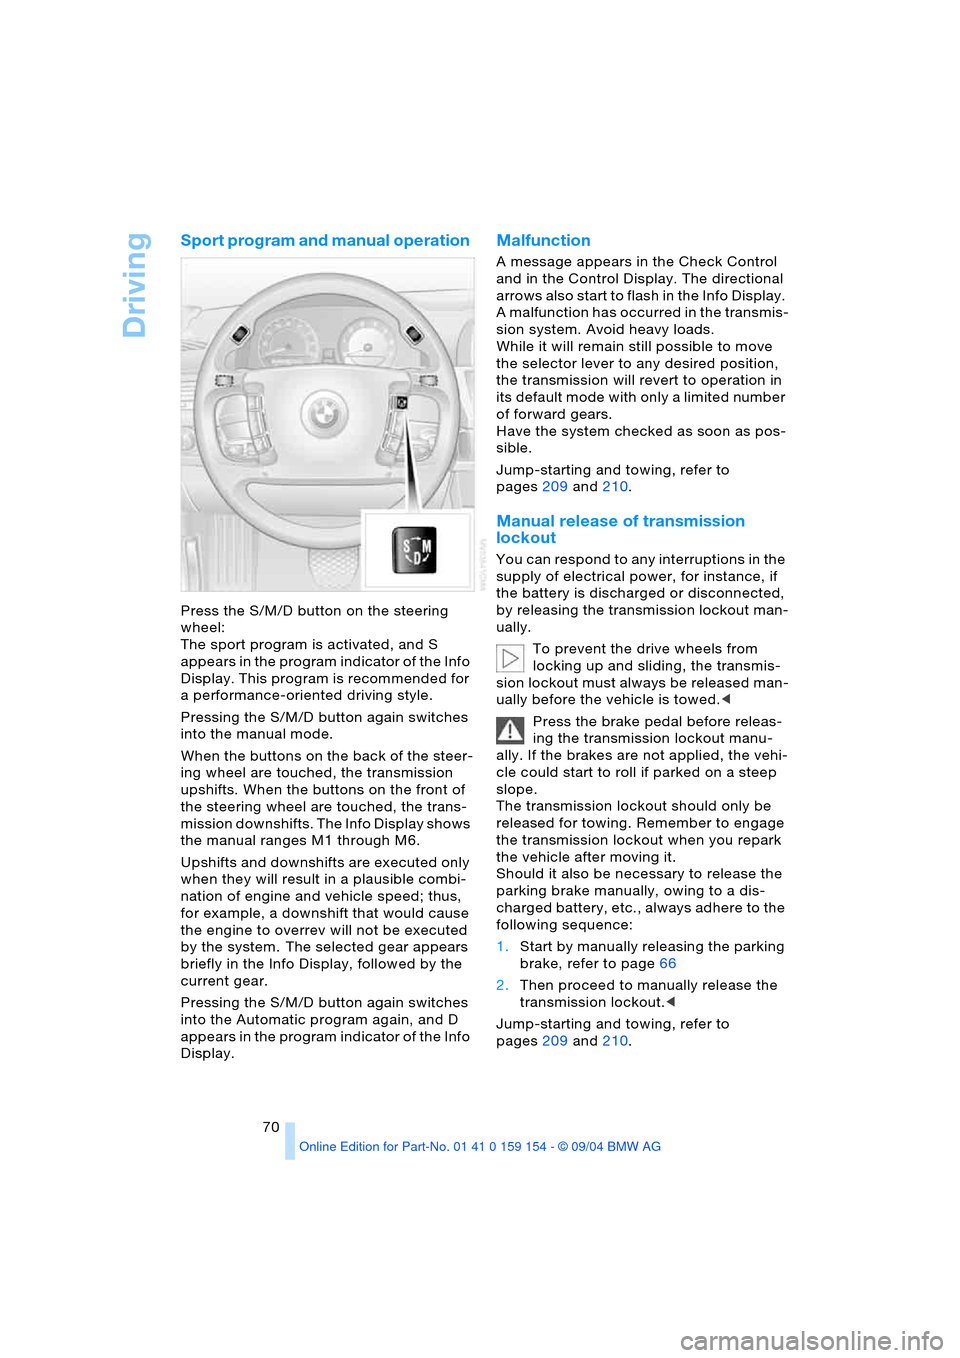
Press the S/M/D button on the steering
wheel:
The sport program is activated, and S
appears in the program indicator of the Info
Display. This program is recommended for
a performance-oriented driving style.
Pressing the S/M/D button again switches
into the manual mode.
When the buttons on the back of the steer-
ing wheel are touched, the transmission
upshifts. When the buttons on the front of
the steering wheel are touched, the trans-
mission downshifts. The Info Display shows
the manual ranges M1 through M6.
Upshifts and downshifts are executed only
when they will result in a plausible combi-
nation of engine and vehicle speed; thus,
for example, a downshift that would cause
the engine to overrev will not be executed
by the system. The selected gear appears
briefly in the Info Display, followed by the
current gear.
Pressing the S/M/D button again switches
into the Automatic program again, and D
appears in the program indicator of the Info
Display.
Malfunction
A message appears in the Check Control
and in the Control Display. The directional
arrows also start to flash in the Info Display.
A malfunction has occurred in the transmis-
sion system. Avoid heavy loads.
While it will remain still possible to move
the selector lever to any desired position,
the transmission will revert to operation in
its default mode with only a limited number
of forward gears.
Have the system checked as soon as pos-
sible.
Jump-starting and towing, refer to
pages209 and210.
Manual release of transmission
lockout
You can respond to any interruptions in the
supply of electrical power, for instance, if
the battery is discharged or disconnected,
by releasing the transmission lockout man-
ually.
To prevent the drive wheels from
locking up and sliding, the transmis-
sion lockout must always be released man-
ually before the vehicle is towed.<
Press the brake pedal before releas-
ing the transmission lockout manu-
ally. If the brakes are not applied, the vehi-
cle could start to roll if parked on a steep
slope.
The transmission lockout should only be
released for towing. Remember to engage
the transmission lockout when you repark
the vehicle after moving it.
Should it also be necessary to release the
parking brake manually, owing to a dis-
charged battery, etc., always adhere to the
following sequence:
1.Start by manually releasing the parking
brake, refer to page66
2.Then proceed to manually release the
transmission lockout.<
Jump-starting and towing, refer to
pages209 and210.
Page 85 of 239
Controls
83Reference
At a glance
Driving tips
Communications
Navigation
Entertainment
Mobility
or the battery switch OFF.
Please remember that brake fluid should be
changed every two years at the latest, even
if the display does not yet indicate that ser-
vice is required, refer to page197.
This same precaution applies to all of the
other service and maintenance operations
scheduled according to periodic inter-
vals.<
Displaying and entering dates for
legally-mandated emission and
vehicle inspections
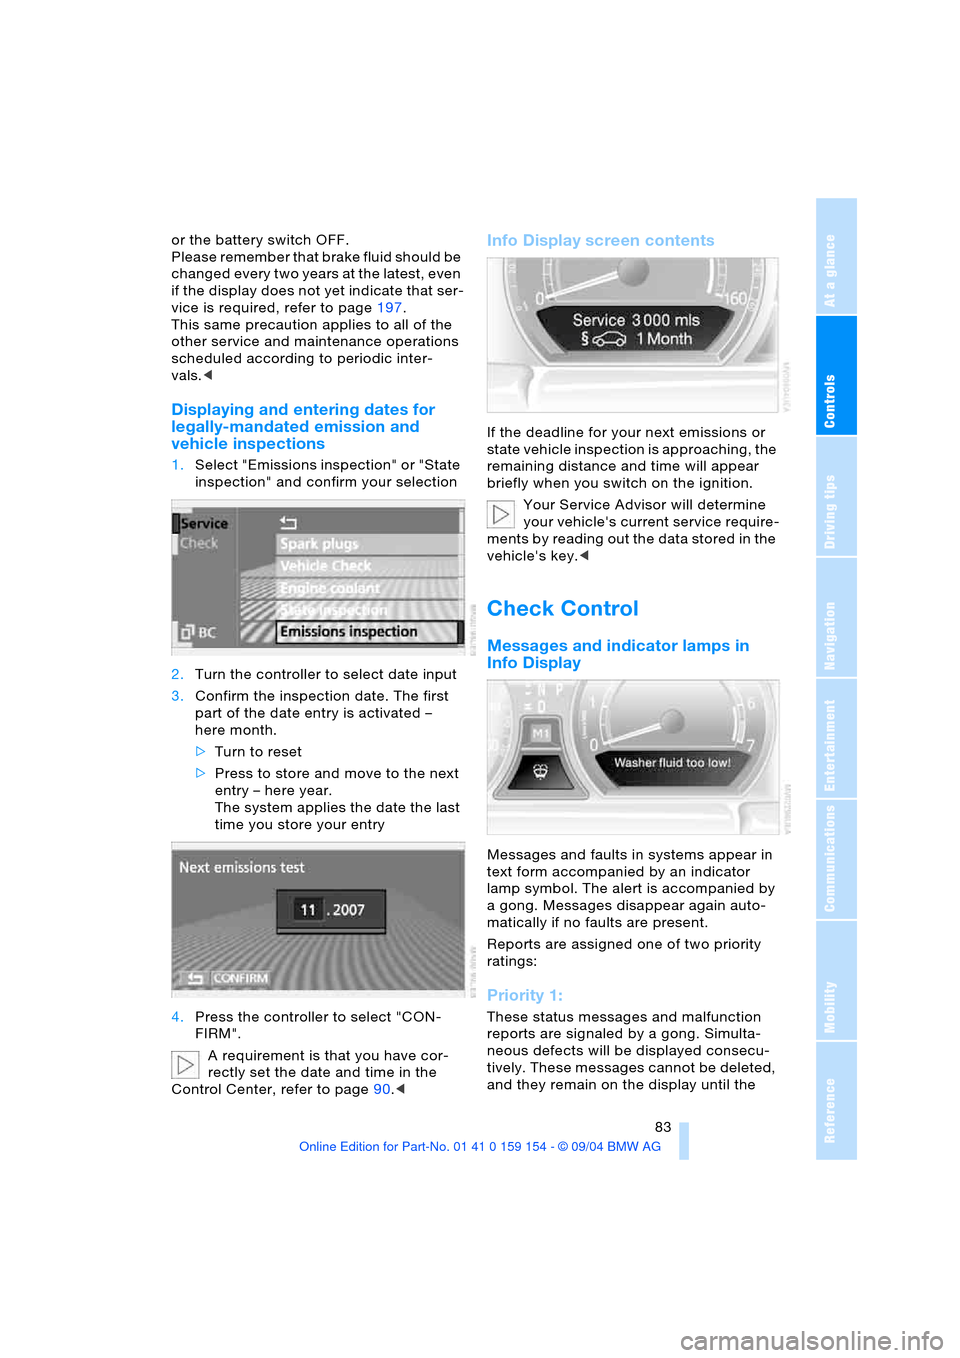
1.Select "Emissions inspection" or "State
inspection" and confirm your selection
2.Turn the controller to select date input
3.Confirm the inspection date. The first
part of the date entry is activated –
here month.
>Turn to reset
>Press to store and move to the next
entry – here year.
The system applies the date the last
time you store your entry
4.Press the controller to select "CON-
FIRM".
A requirement is that you have cor-
rectly set the date and time in the
Control Center, refer to page90.<
Info Display screen contents
If the deadline for your next emissions or
state vehicle inspection is approaching, the
remaining distance and time will appear
briefly when you switch on the ignition.
Your Service Advisor will determine
your vehicle's current service require-
ments by reading out the data stored in the
vehicle's key.<
Check Control
Messages and indicator lamps in
Info Display
Messages and faults in systems appear in
text form accompanied by an indicator
lamp symbol. The alert is accompanied by
a gong. Messages disappear again auto-
matically if no faults are present.
Reports are assigned one of two priority
ratings:
Priority 1:
These status messages and malfunction
reports are signaled by a gong. Simulta-
neous defects will be displayed consecu-
tively. These messages cannot be deleted,
and they remain on the display until the
Page 87 of 239
Controls
85Reference
At a glance
Driving tips
Communications
Navigation
Entertainment
Mobility
Confirm to hide the display.
Displays after completion of trip
Selected fault reports generated during the
trip are shown consecutively when you
switch off the ignition.
If indicated, the following message may
also appear:
"Parking lamps on!"
This message appears when you open the
driver's door after parking. A supplemen-
tary gong is also heard.
Even with the ignition and Info Display off,
you can reactivate the screen and display
the messages.
Press the CHECK button for approx.
8 seconds, refer to page84. The stored
status reports appear again in the display. If
several messages are present, you can
continue to briefly press the CHECK button
to view them in succession.
The Check Control function
>cancels itself automatically after a brief
period
>can be canceled by again pressing the
CHECK button for approximately
8seconds.
You can select the language in which
Check Control status reports and
messages from the computer will appear,
refer to page89.<
Computer
Requesting functions
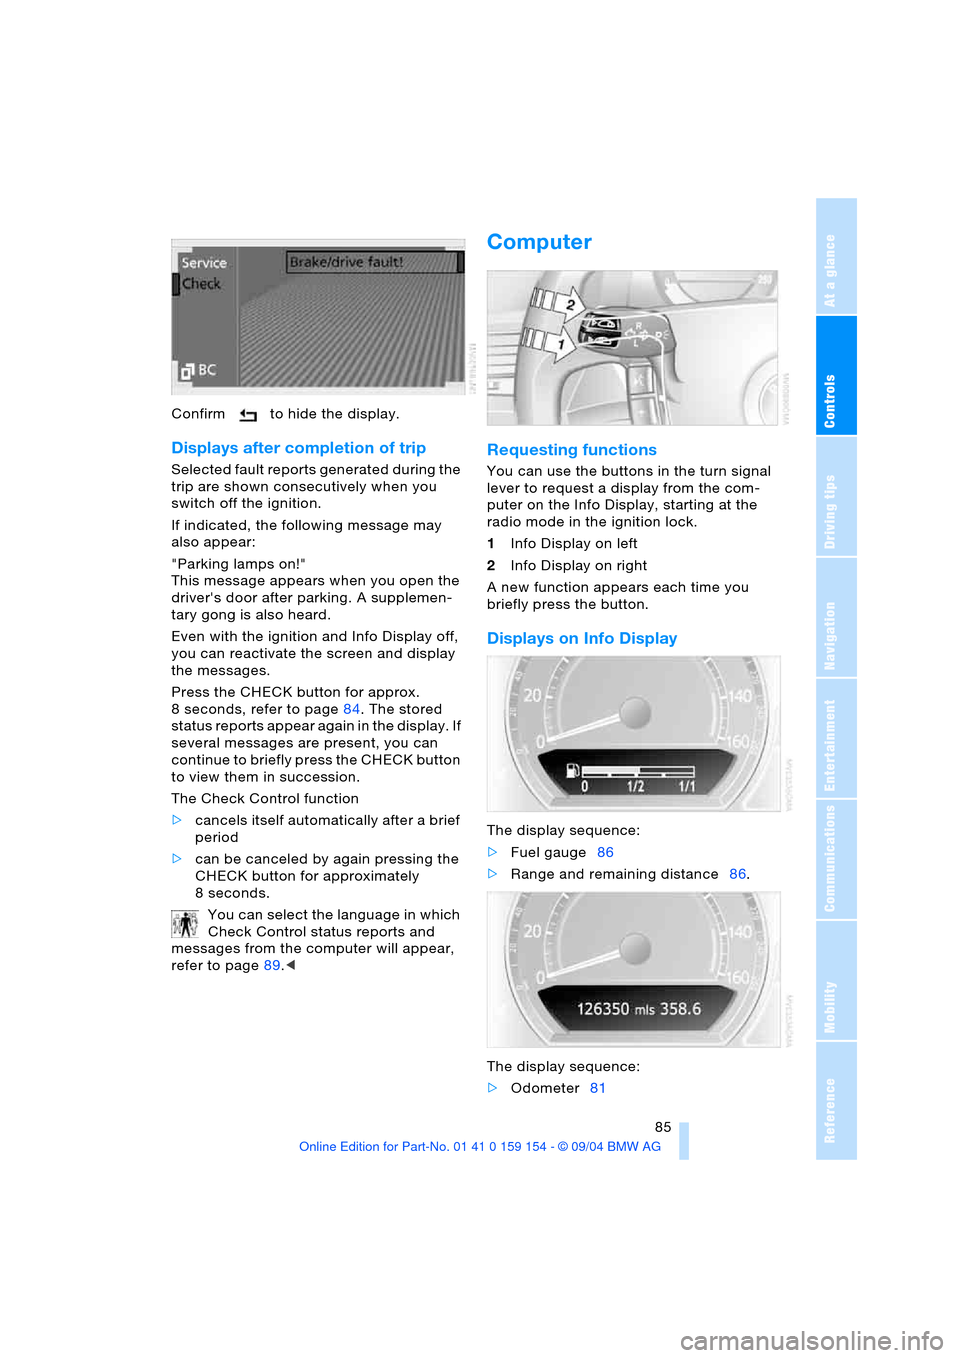
You can use the buttons in the turn signal
lever to request a display from the com-
puter on the Info Display, starting at the
radio mode in the ignition lock.
1Info Display on left
2Info Display on right
A new function appears each time you
briefly press the button.
Displays on Info Display
The display sequence:
>Fuel gauge86
>Range and remaining distance86.
The display sequence:
>Odometer81
Page 107 of 239
Controls
105Reference
At a glance
Driving tips
Communications
Navigation
Entertainment
Mobility
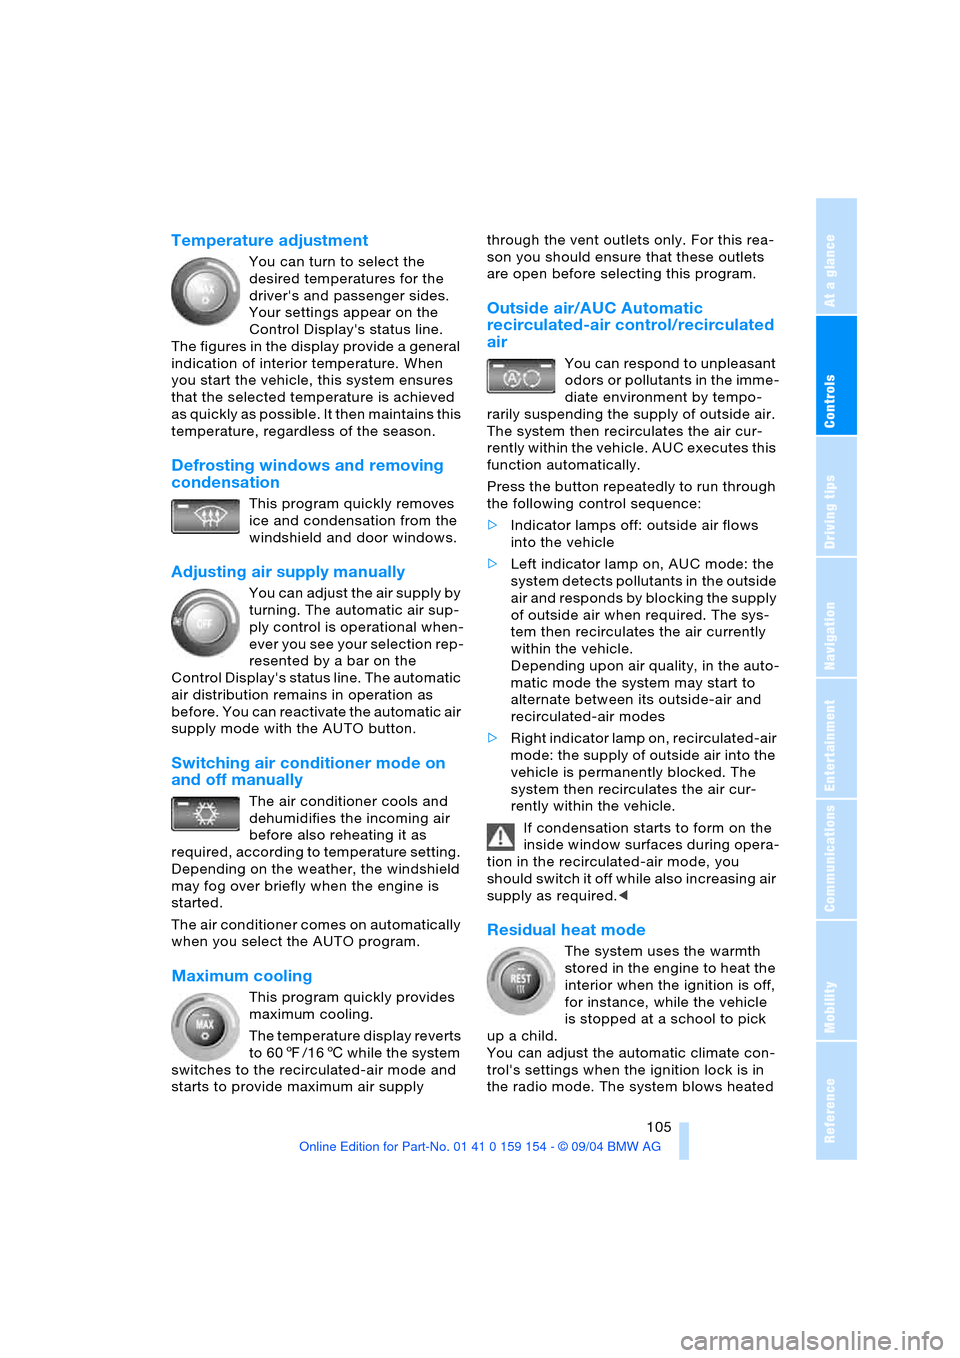
Temperature adjustment
You can turn to select the
desired temperatures for the
driver's and passenger sides.
Your settings appear on the
Control Display's status line.
The figures in the display provide a general
indication of interior temperature. When
you start the vehicle, this system ensures
that the selected temperature is achieved
as quickly as possible. It then maintains this
temperature, regardless of the season.
Defrosting windows and removing
condensation
This program quickly removes
ice and condensation from the
windshield and door windows.
Adjusting air supply manually
You can adjust the air supply by
turning. The automatic air sup-
ply control is operational when-
ever you see your selection rep-
resented by a bar on the
Control Display's status line. The automatic
air distribution remains in operation as
before. You can reactivate the automatic air
supply mode with the AUTO button.
Switching air conditioner mode on
and off manually
The air conditioner cools and
dehumidifies the incoming air
before also reheating it as
required, according to temperature setting.
Depending on the weather, the windshield
may fog over briefly when the engine is
started.
The air conditioner comes on automatically
when you select the AUTO program.
Maximum cooling
This program quickly provides
maximum cooling.
The temperature display reverts
to 607/166 while the system
switches to the recirculated-air mode and
starts to provide maximum air supply through the vent outlets only. For this rea-
son you should ensure that these outlets
are open before selecting this program.
Outside air/AUC Automatic
recirculated-air control/recirculated
air
You can respond to unpleasant
odors or pollutants in the imme-
diate environment by tempo-
rarily suspending the supply of outside air.
The system then recirculates the air cur-
rently within the vehicle. AUC executes this
function automatically.
Press the button repeatedly to run through
the following control sequence:
>Indicator lamps off: outside air flows
into the vehicle
>Left indicator lamp on, AUC mode: the
system detects pollutants in the outside
air and responds by blocking the supply
of outside air when required. The sys-
tem then recirculates the air currently
within the vehicle.
Depending upon air quality, in the auto-
matic mode the system may start to
alternate between its outside-air and
recirculated-air modes
>Right indicator lamp on, recirculated-air
mode: the supply of outside air into the
vehicle is permanently blocked. The
system then recirculates the air cur-
rently within the vehicle.
If condensation starts to form on the
inside window surfaces during opera-
tion in the recirculated-air mode, you
should switch it off while also increasing air
supply as required.<
Residual heat mode
The system uses the warmth
stored in the engine to heat the
interior when the ignition is off,
for instance, while the vehicle
is stopped at a school to pick
up a child.
You can adjust the automatic climate con-
trol's settings when the ignition lock is in
the radio mode. The system blows heated
Page 121 of 239
Controls
119Reference
At a glance
Driving tips
Communications
Navigation
Entertainment
Mobility
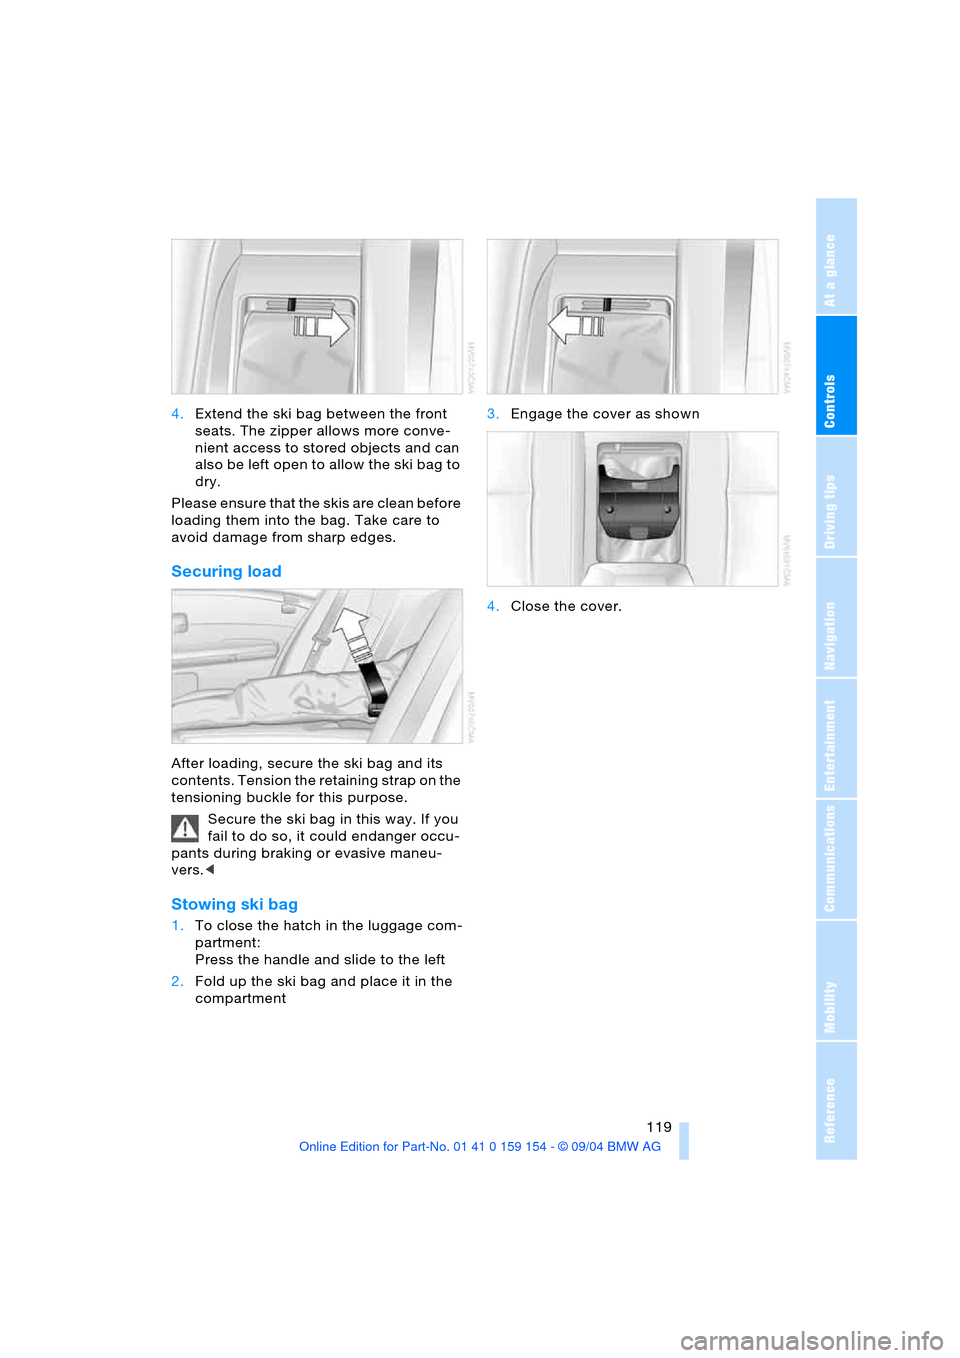
4.Extend the ski bag between the front
seats. The zipper allows more conve-
nient access to stored objects and can
also be left open to allow the ski bag to
dry.
Please ensure that the skis are clean before
loading them into the bag. Take care to
avoid damage from sharp edges.
Securing load
After loading, secure the ski bag and its
contents. Tension the retaining strap on the
tensioning buckle for this purpose.
Secure the ski bag in this way. If you
fail to do so, it could endanger occu-
pants during braking or evasive maneu-
vers.<
Stowing ski bag
1.To close the hatch in the luggage com-
partment:
Press the handle and slide to the left
2.Fold up the ski bag and place it in the
compartment 3.Engage the cover as shown
4.Close the cover.
Page 126 of 239
Things to remember when driving
124 ensured that the radiation which results
during transmission will be discharged
from the vehicle interior.<
Cargo loading
To avoid loading the tires beyond
their approved carrying capacity,
never overload the vehicle. Overloading
can lead to overheating and increases the
rate at which damage develops inside the
tires. The ultimate result can assume the
form of a sudden air loss.<
Determine loading limit
1.Locate the following statement on your
vehicle's door pillar
*:
The combined weight of occu-
pants and cargo should never
exceed XXX lbs. or YYY kg, as other-
wise the vehicle may be damaged and
unstable driving conditions may
result.<
2.Determine the combined weight of the
driver and passenger that will be riding
in your vehicle
3.Subtract the combined weight of the
driver and passenger from XXX lbs. or
YYY kg
4.The resulting figure equals the available
amount of cargo and luggage load
capacity.
For example, if the XXX amount equals
1,400 lbs. and there will be five 150-lbs.
passengers in your vehicle, the amount
of available cargo and luggage load
capacity is 650 lbs.:
1,400 Ibs. minus 750 Ibs. = 650 Ibs.5.Determine the combined weight of lug-
gage and cargo being loaded on the
vehicle. That weight should not exceed
the available cargo and luggage load
capacity calculated in step 4
6.If your vehicle will be towing a trailer,
part of the load from your trailer will be
transferred to your vehicle. Consult the
manual for transporting a trailer to
determine how this may reduce the
available cargo and luggage load
capacity of your vehicle.
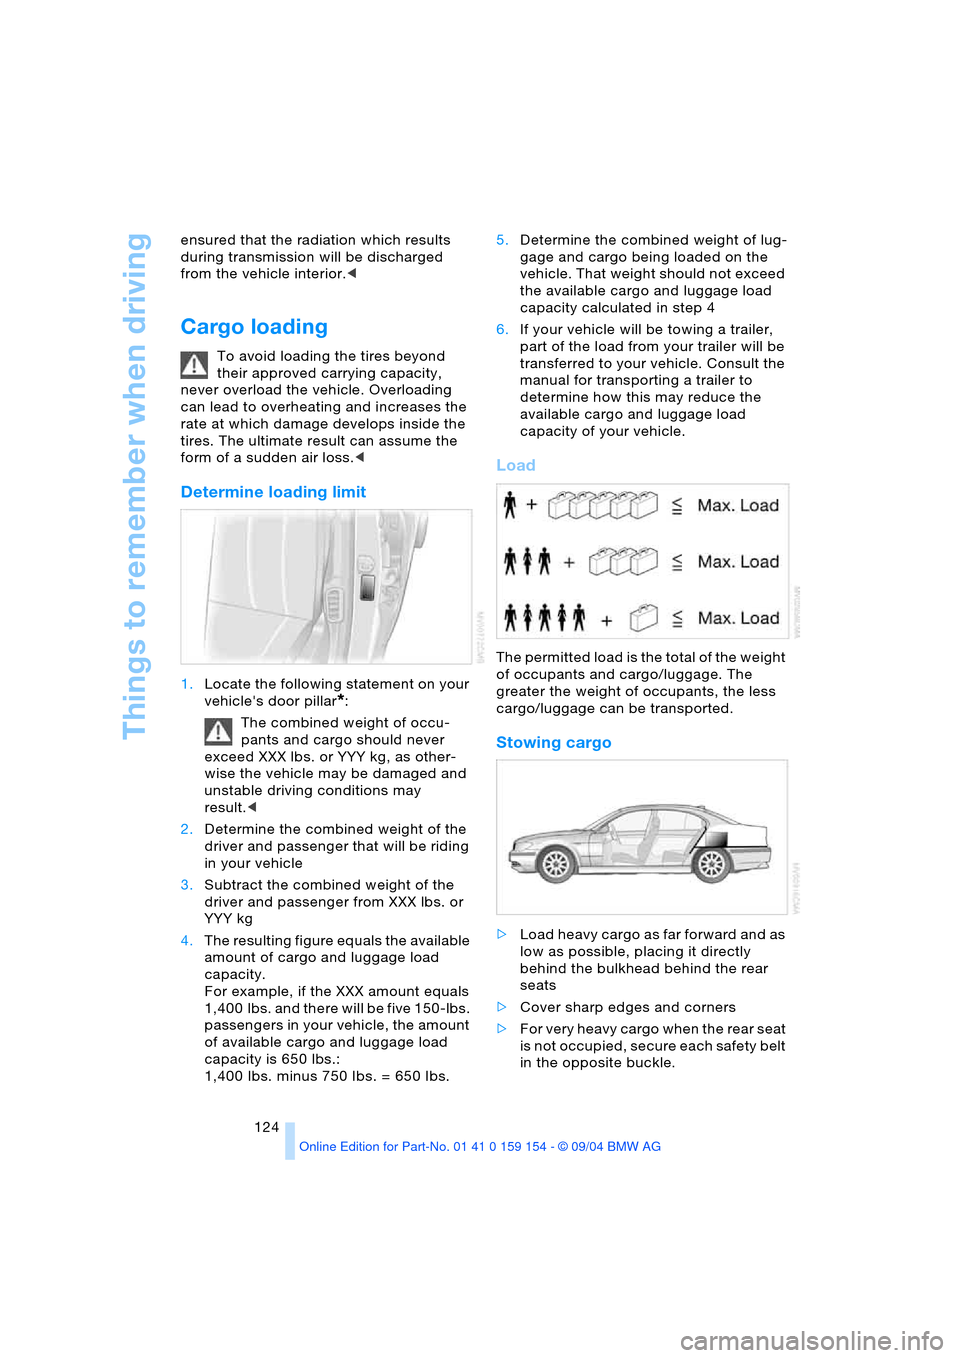
Load
The permitted load is the total of the weight
of occupants and cargo/luggage. The
greater the weight of occupants, the less
cargo/luggage can be transported.
Stowing cargo
>Load heavy cargo as far forward and as
low as possible, placing it directly
behind the bulkhead behind the rear
seats
>Cover sharp edges and corners
>For very heavy cargo when the rear seat
is not occupied, secure each safety belt
in the opposite buckle.
Page 127 of 239
Driving tips
125Reference
At a glance
Controls
Communications
Navigation
Entertainment
Mobility
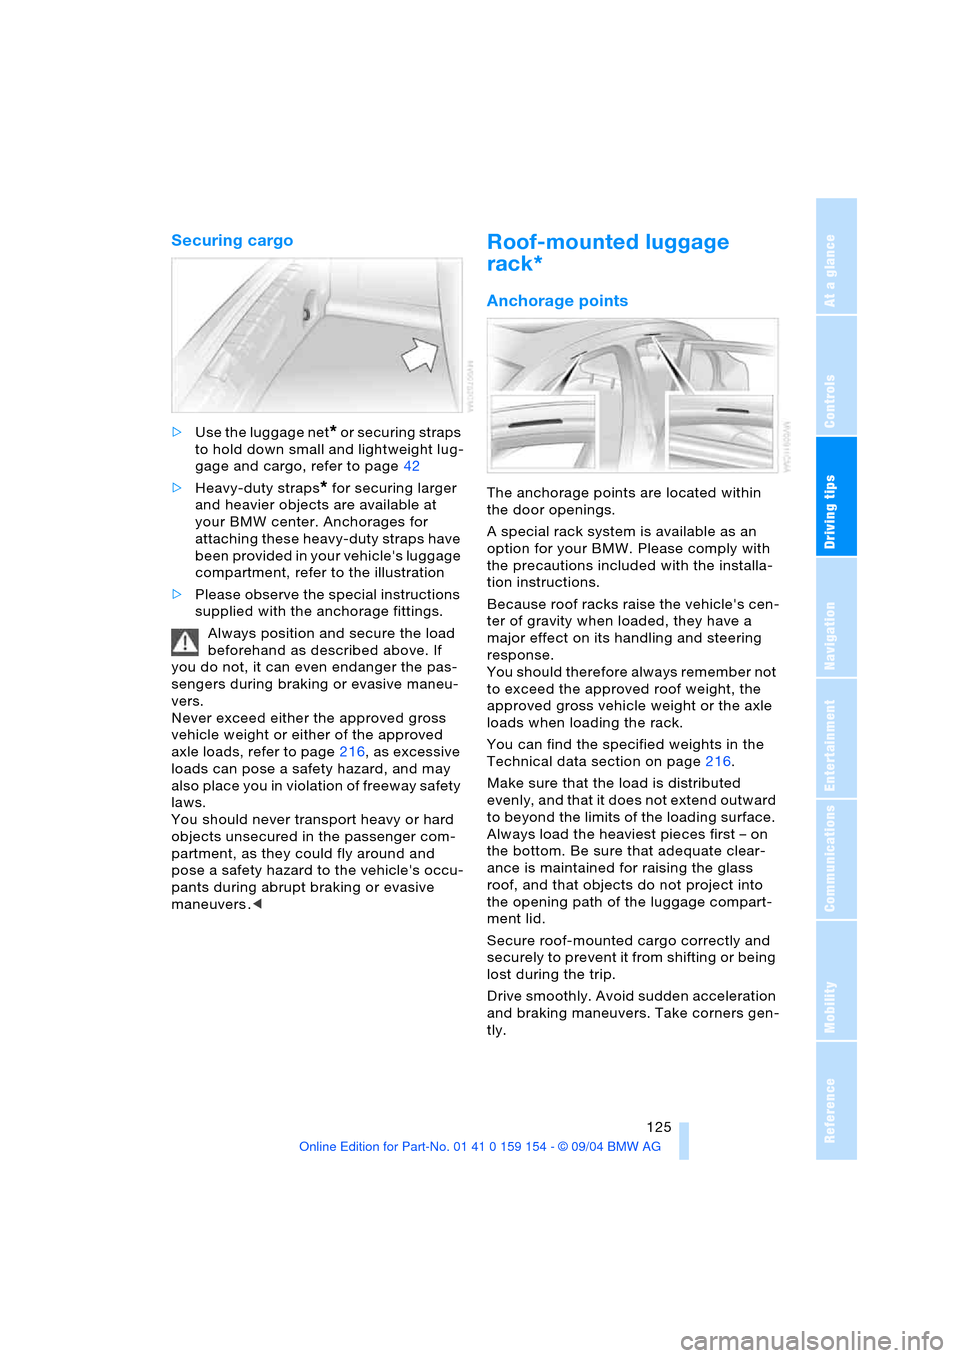
Securing cargo
>Use the luggage net* or securing straps
to hold down small and lightweight lug-
gage and cargo, refer to page42
>Heavy-duty straps
* for securing larger
and heavier objects are available at
your BMW center. Anchorages for
attaching these heavy-duty straps have
been provided in your vehicle's luggage
compartment, refer to the illustration
>Please observe the special instructions
supplied with the anchorage fittings.
Always position and secure the load
beforehand as described above. If
you do not, it can even endanger the pas-
sengers during braking or evasive maneu-
vers.
Never exceed either the approved gross
vehicle weight or either of the approved
axle loads, refer to page216, as excessive
loads can pose a safety hazard, and may
also place you in violation of freeway safety
laws.
You should never transport heavy or hard
objects unsecured in the passenger com-
partment, as they could fly around and
pose a safety hazard to the vehicle's occu-
pants during abrupt braking or evasive
maneuvers .<
Roof-mounted luggage
rack*
Anchorage points
The anchorage points are located within
the door openings.
A special rack system is available as an
option for your BMW. Please comply with
the precautions included with the installa-
tion instructions.
Because roof racks raise the vehicle's cen-
ter of gravity when loaded, they have a
major effect on its handling and steering
response.
You should therefore always remember not
to exceed the approved roof weight, the
approved gross vehicle weight or the axle
loads when loading the rack.
You can find the specified weights in the
Technical data section on page216.
Make sure that the load is distributed
evenly, and that it does not extend outward
to beyond the limits of the loading surface.
Always load the heaviest pieces first – on
the bottom. Be sure that adequate clear-
ance is maintained for raising the glass
roof, and that objects do not project into
the opening path of the luggage compart-
ment lid.
Secure roof-mounted cargo correctly and
securely to prevent it from shifting or being
lost during the trip.
Drive smoothly. Avoid sudden acceleration
and braking maneuvers. Take corners gen-
tly.
Page 196 of 239
Under the hood
194
Under the hood
Never attempt to perform any service
or repair operations on your vehicle
without the required, professional technical
training. If you are not familiar with the reg-
u l a t i o n s t o b e o b s e r v e d , o n l y h a v e w o r k o n
your vehicle carried out by a BMW center
or a workshop that uses personnel trained
in accordance with BMW requirements. If
this work is not carried out properly, there
is a danger of subsequent damage and
related safety hazards.<
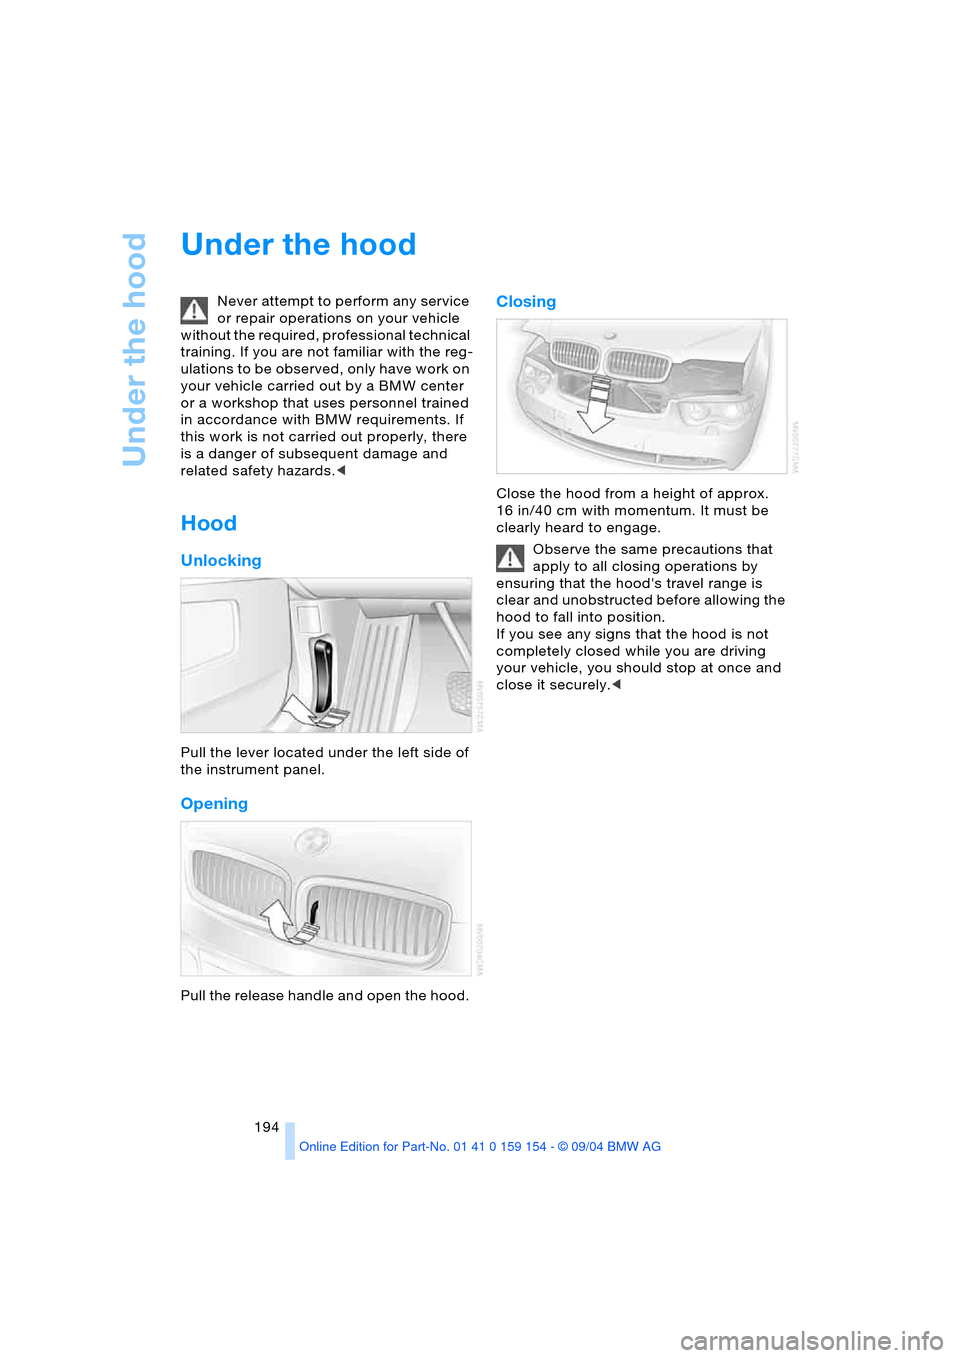
Hood
Unlocking
Pull the lever located under the left side of
the instrument panel.
Opening
Pull the release handle and open the hood.
Closing
Close the hood from a height of approx.
16 in/40 cm with momentum. It must be
clearly heard to engage.
Observe the same precautions that
apply to all closing operations by
ensuring that the hood's travel range is
clear and unobstructed before allowing the
hood to fall into position.
If you see any signs that the hood is not
completely closed while you are driving
your vehicle, you should stop at once and
close it securely.<
Page 207 of 239
Mobility
205Reference
At a glance
Controls
Driving tips
Communications
Navigation
Entertainment
Grasp the handle in the upper panel and
fold it down.
Undo the wingnut and remove the jack.
After use, screw the jack all the way
back down and snap the handle back
into place.
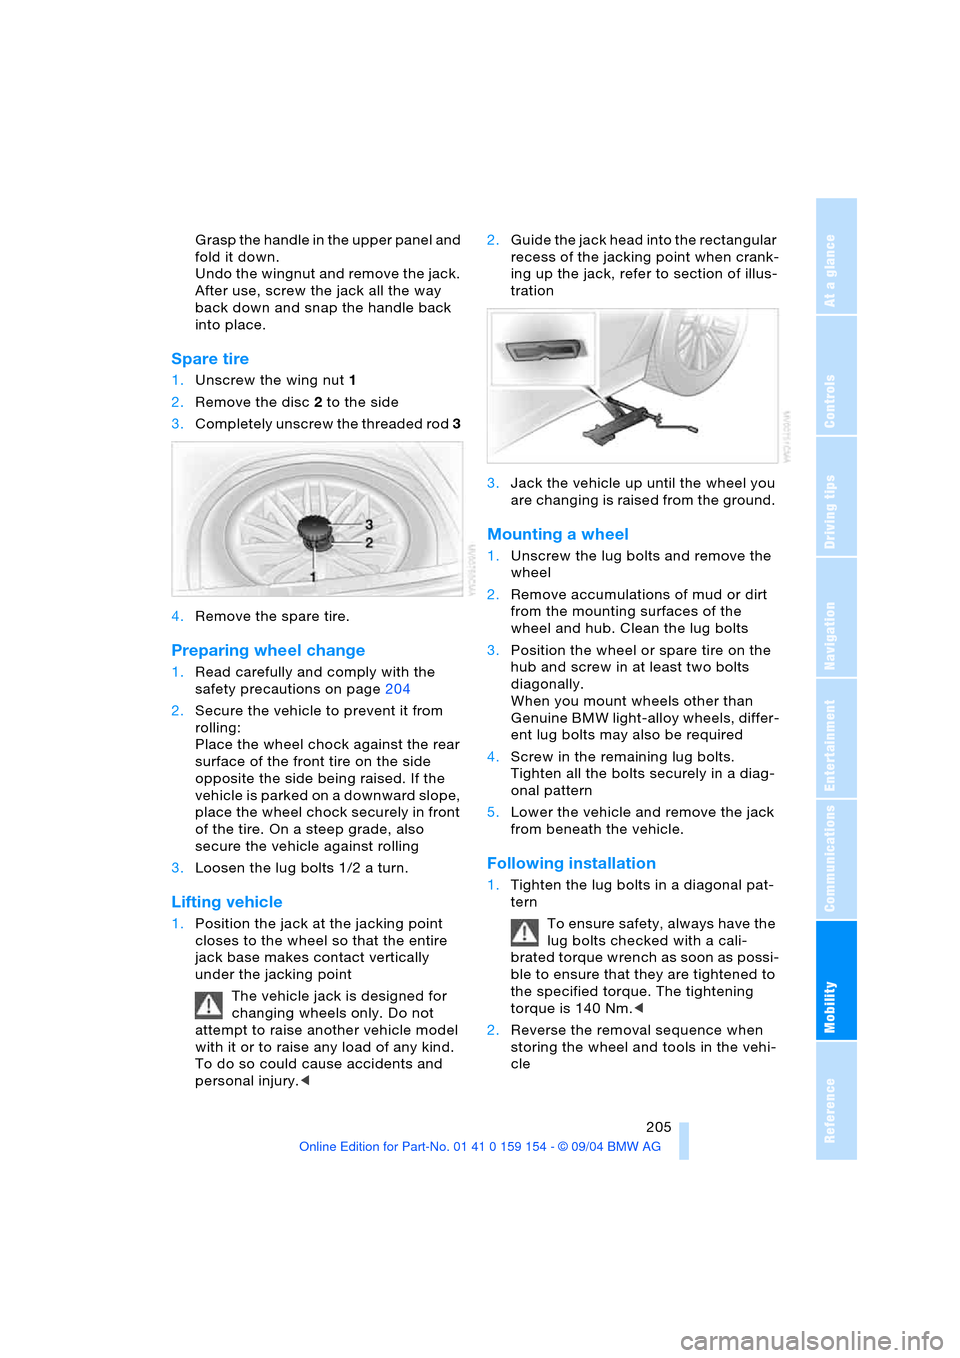
Spare tire
1.Unscrew the wing nut 1
2.Remove the disc 2 to the side
3.Completely unscrew the threaded rod 3
4.Remove the spare tire.
Preparing wheel change
1.Read carefully and comply with the
safety precautions on page204
2.Secure the vehicle to prevent it from
rolling:
Place the wheel chock against the rear
surface of the front tire on the side
opposite the side being raised. If the
vehicle is parked on a downward slope,
place the wheel chock securely in front
of the tire. On a steep grade, also
secure the vehicle against rolling
3.Loosen the lug bolts 1/2 a turn.
Lifting vehicle
1.Position the jack at the jacking point
closes to the wheel so that the entire
jack base makes contact vertically
under the jacking point
The vehicle jack is designed for
changing wheels only. Do not
attempt to raise another vehicle model
with it or to raise any load of any kind.
To do so could cause accidents and
personal injury.<2.Guide the jack head into the rectangular
recess of the jacking point when crank-
ing up the jack, refer to section of illus-
tration
3.Jack the vehicle up until the wheel you
are changing is raised from the ground.
Mounting a wheel
1.Unscrew the lug bolts and remove the
wheel
2.Remove accumulations of mud or dirt
from the mounting surfaces of the
wheel and hub. Clean the lug bolts
3.Position the wheel or spare tire on the
hub and screw in at least two bolts
diagonally.
When you mount wheels other than
Genuine BMW light-alloy wheels, differ-
ent lug bolts may also be required
4.Screw in the remaining lug bolts.
Tighten all the bolts securely in a diag-
onal pattern
5.Lower the vehicle and remove the jack
from beneath the vehicle.
Following installation
1.Tighten the lug bolts in a diagonal pat-
tern
To ensure safety, always have the
lug bolts checked with a cali-
brated torque wrench as soon as possi-
ble to ensure that they are tightened to
the specified torque. The tightening
torque is 140 Nm.<
2.Reverse the removal sequence when
storing the wheel and tools in the vehi-
cle
Page 209 of 239
Mobility
207Reference
At a glance
Controls
Driving tips
Communications
Navigation
Entertainment
Battery
Battery care
The battery is 100 % maintenance-free, i.e.,
the electrolyte will last for the life of the bat-
tery when the vehicle is operated in a tem-
perate climate. Your BMW center will be
happy to advise you on all questions con-
cerning the battery.
Charging battery
Only charge the battery in the vehicle via
the terminals in the engine compartment
with the engine off. Connections, refer to
Jump-starting on page210.
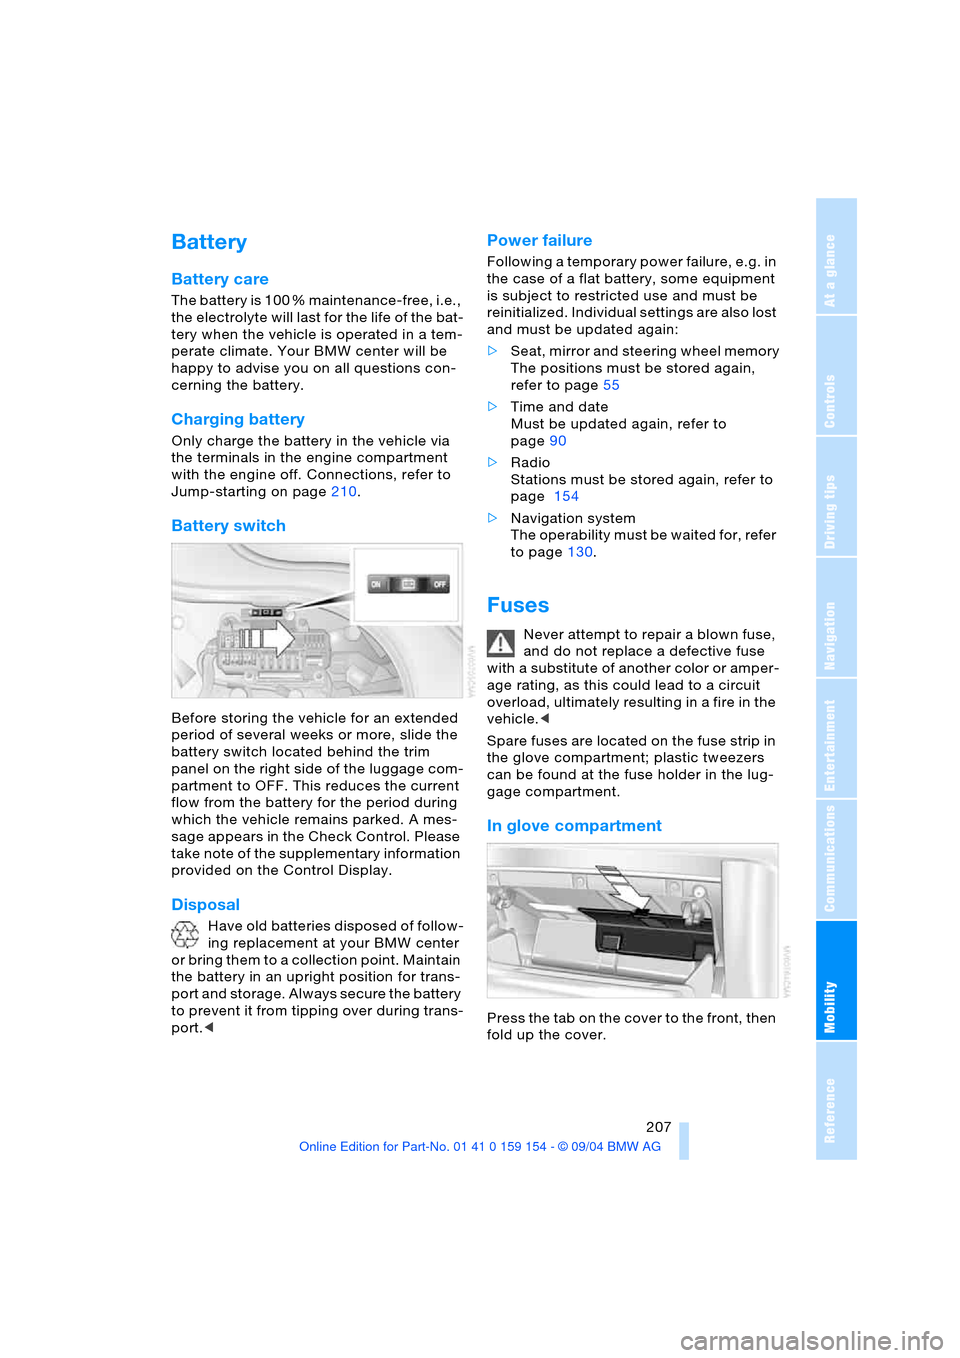
Battery switch
Before storing the vehicle for an extended
period of several weeks or more, slide the
battery switch located behind the trim
panel on the right side of the luggage com-
partment to OFF. This reduces the current
flow from the battery for the period during
which the vehicle remains parked. A mes-
sage appears in the Check Control. Please
take note of the supplementary information
provided on the Control Display.
Disposal
Have old batteries disposed of follow-
ing replacement at your BMW center
or bring them to a collection point. Maintain
the battery in an upright position for trans-
port and storage. Always secure the battery
to prevent it from tipping over during trans-
port.<
Power failure
Following a temporary power failure, e.g. in
the case of a flat battery, some equipment
is subject to restricted use and must be
reinitialized. Individual settings are also lost
and must be updated again:
>Seat, mirror and steering wheel memory
The positions must be stored again,
refer to page55
>Time and date
Must be updated again, refer to
page90
>Radio
Stations must be stored again, refer to
page 154
>Navigation system
The operability must be waited for, refer
to page130.
Fuses
Never attempt to repair a blown fuse,
and do not replace a defective fuse
with a substitute of another color or amper-
age rating, as this could lead to a circuit
overload, ultimately resulting in a fire in the
vehicle.<
Spare fuses are located on the fuse strip in
the glove compartment; plastic tweezers
can be found at the fuse holder in the lug-
gage compartment.
In glove compartment
Press the tab on the cover to the front, then
fold up the cover.