engine BMW 745Li 2005 E66 User Guide
[x] Cancel search | Manufacturer: BMW, Model Year: 2005, Model line: 745Li, Model: BMW 745Li 2005 E66Pages: 239, PDF Size: 8.03 MB
Page 76 of 239
Driving
74
One lever for all functions
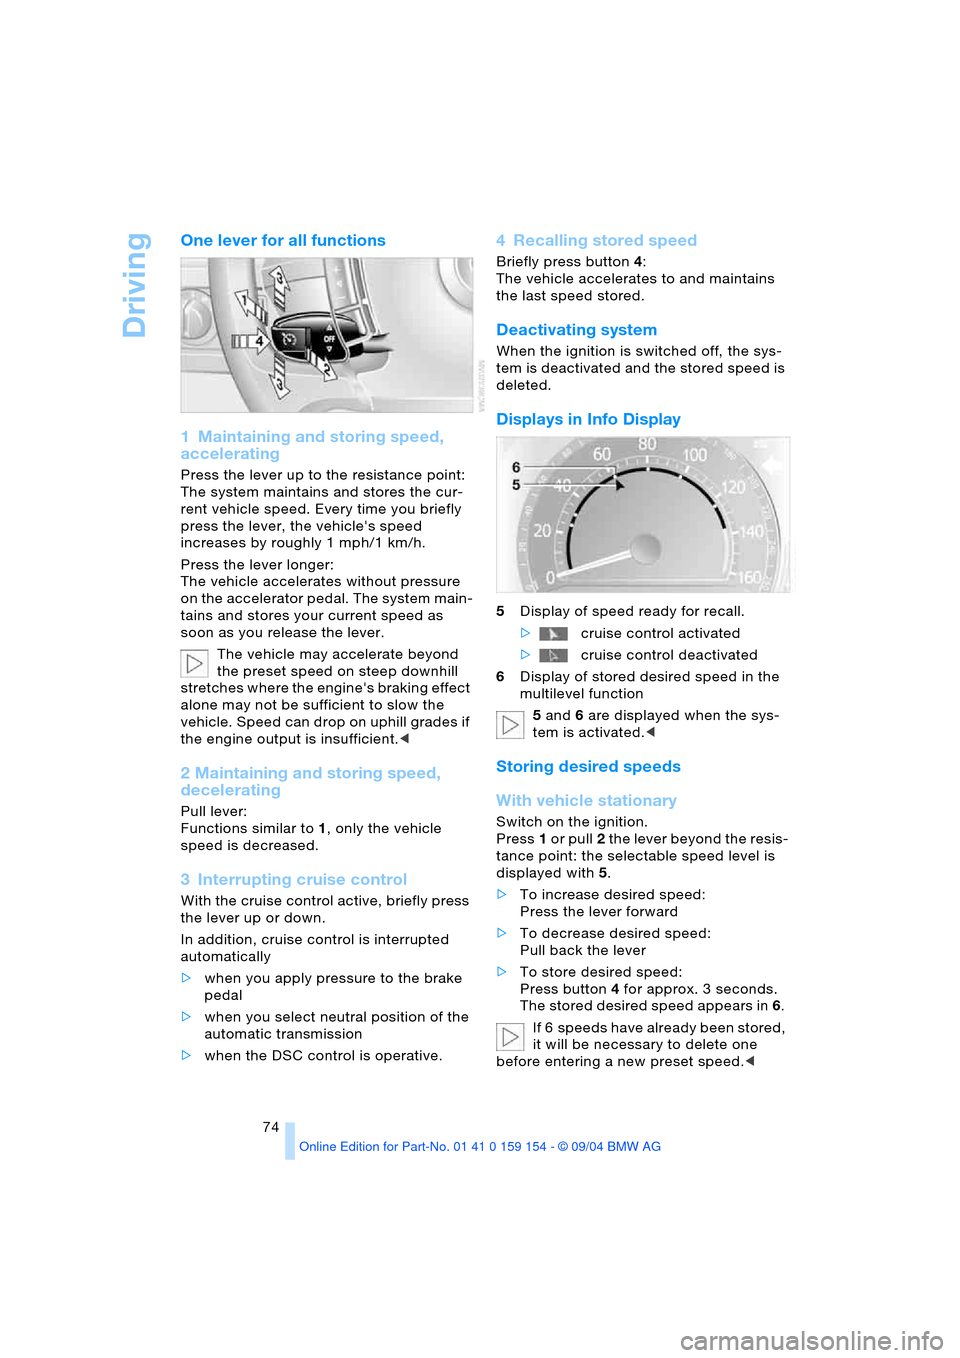
1 Maintaining and storing speed,
accelerating
Press the lever up to the resistance point:
The system maintains and stores the cur-
rent vehicle speed. Every time you briefly
press the lever, the vehicle's speed
increases by roughly 1 mph/1 km/h.
Press the lever longer:
The vehicle accelerates without pressure
on the accelerator pedal. The system main-
tains and stores your current speed as
soon as you release the lever.
The vehicle may accelerate beyond
the preset speed on steep downhill
stretches where the engine's braking effect
alone may not be sufficient to slow the
vehicle. Speed can drop on uphill grades if
the engine output is insufficient.<
2 Maintaining and storing speed,
decelerating
Pull lever:
Functions similar to1, only the vehicle
speed is decreased.
3 Interrupting cruise control
With the cruise control active, briefly press
the lever up or down.
In addition, cruise control is interrupted
automatically
>when you apply pressure to the brake
pedal
>when you select neutral position of the
automatic transmission
>when the DSC control is operative.
4 Recalling stored speed
Briefly press button4:
The vehicle accelerates to and maintains
the last speed stored.
Deactivating system
When the ignition is switched off, the sys-
tem is deactivated and the stored speed is
deleted.
Displays in Info Display
5Display of speed ready for recall.
>cruise control activated
>cruise control deactivated
6Display of stored desired speed in the
multilevel function
5 and 6 are displayed when the sys-
tem is activated.<
Storing desired speeds
With vehicle stationary
Switch on the ignition.
Press1 or pull2 the lever beyond the resis-
tance point: the selectable speed level is
displayed with5.
>To increase desired speed:
Press the lever forward
>To decrease desired speed:
Pull back the lever
>To store desired speed:
Press button4 for approx. 3 seconds.
The stored desired speed appears in 6.
If 6 speeds have already been stored,
it will be necessary to delete one
before entering a new preset speed.<
Page 80 of 239
Driving
78 Press the lever up or down for approx.
1second.
4 Resume to stored desired speed
and distance setting
Press button4:
The displays appear in the speedometer.
The system is reactivated and uses the last
stored desired speed and distance setting.
4 Fine adjustment of desired speed
In the activated state, the desired speed
increases by 1 mph/1 km/h each time
button4 is pressed briefly.
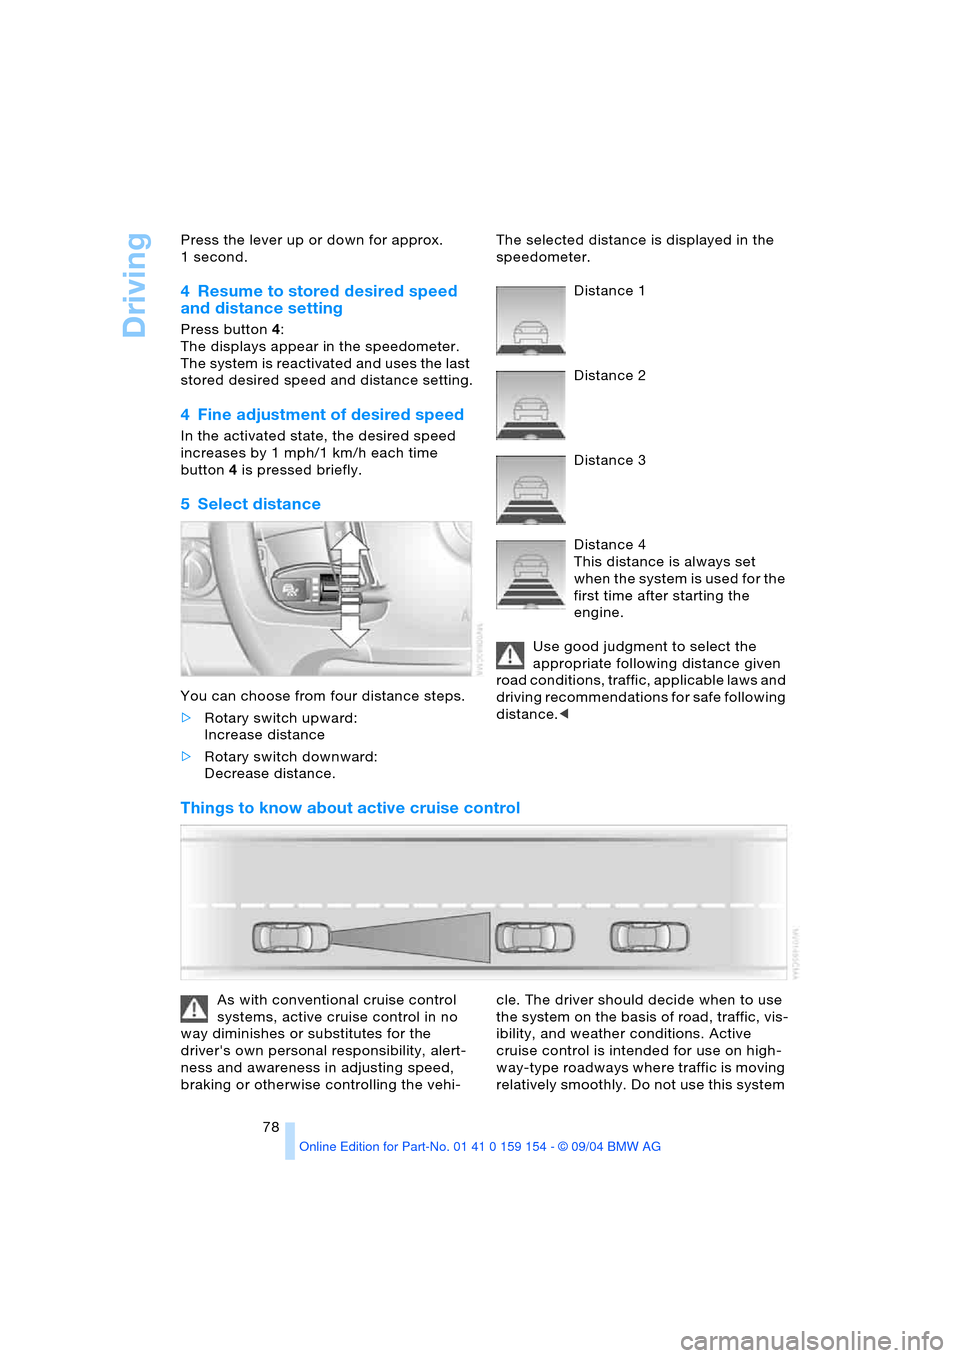
5Select distance
You can choose from four distance steps.
>Rotary switch upward:
Increase distance
>Rotary switch downward:
Decrease distance. The selected distance is displayed in the
speedometer.
Distance 1
Distance 2
Distance 3
Distance 4
This distance is always set
when the system is used for the
first time after starting the
engine.
Use good judgment to select the
appropriate following distance given
road conditions, traffic, applicable laws and
driving recommendations for safe following
distance.<
Things to know about active cruise control
As with conventional cruise control
systems, active cruise control in no
way diminishes or substitutes for the
driver's own personal responsibility, alert-
ness and awareness in adjusting speed,
braking or otherwise controlling the vehi-cle. The driver should decide when to use
the system on the basis of road, traffic, vis-
ibility, and weather conditions. Active
cruise control is intended for use on high-
way-type roadways where traffic is moving
relatively smoothly. Do not use this system
Page 81 of 239
Controls
79Reference
At a glance
Driving tips
Communications
Navigation
Entertainment
Mobility
in city driving; heavy traffic such as during
rush hour; on curvy, winding roads, slip-
pery roads or roads with sharp curves such
as highway off-ramps; during inclement
weather such as snow, strong rain or fog;
or when entering interchanges, service/
parking areas or toll booths. It is also
important to regulate your vehicle's speed
and distance setting within applicable legal
limits. Always be ready to take action or
apply the brakes if necessary, especially
when the system is actively following a
vehicle in front of you.<
Always remember that the range and
ability of the system does have physi-
cal limitations. It will not apply the brakes or
decelerate your vehicle when there is a
slow-moving vehicle, stopped vehicle or
stationary object ahead of you, as for
example, at a traffic light or a parked vehi-
cle. Also, the system does not react to
oncoming traffic, pedestrians or other type
of potential traffic such as a rider on horse-
back. It is also possible that the system
may not detect smaller moving objects
such as motorcycles or bicycles. Be espe-
cially alert when encountering any of these
situations as the system will neither auto-
matically brake, nor provide a warning to
you. Also, be aware that every decrease in
the distance setting allows your vehicle to
come closer to a vehicle in front of you and
requires a heightened amount of alert-
ness.<
If while your vehicle is actively following a
vehicle in front of you and the vehicle
ahead speeds up or the lane ahead
becomes clear, then your vehicle will
accelerate to the speed you have selected.
Be aware that changing to a clear, unob-
st r uc ted lan e w il l als o r esu lt in y ou r v eh icle
accelerating.
Be certain to deactivate the system
when you pull into an exit lane for a
highway off-ramp.<
Also, vehicles traveling in a staggered man-
ner on a highway may cause a delay in the
system's reaction to a vehicle in front of you
or may cause the system to react to a vehi-
cle actually in the lane next to you. Always be ready to take action or apply the brakes
if necessary.
Active cruise control can only decelerate
the vehicle to approx. 20 mph/30 km/h. If
the system reduces vehicle speed below
20 mph/30 km/h or if DSC/ABS is engaged
while driving, the system will automatically
deactivate.
Remember, the system cannot stop
your vehicle. In addition, the system is
deactivated whenever the driver applies
the vehicle brakes, shifts the transmission
from drive/D to neutral/N, or deactivates
DSC. After any deactivation, the system will
no longer automatically activate the vehicle
brakes, which means the driver must inter-
vene and resume manual braking. You
should then reactivate the system only
when you are fully aware of the prior speed
and distance settings.<
Active cruise control may brake when you
reduce the stored desired speed; however,
the driver must constantly monitor traffic
and intervene if necessary.
When you switch off the engine or ignition,
active cruise control is fully switched off,
too, and any settings you have selected are
canceled.
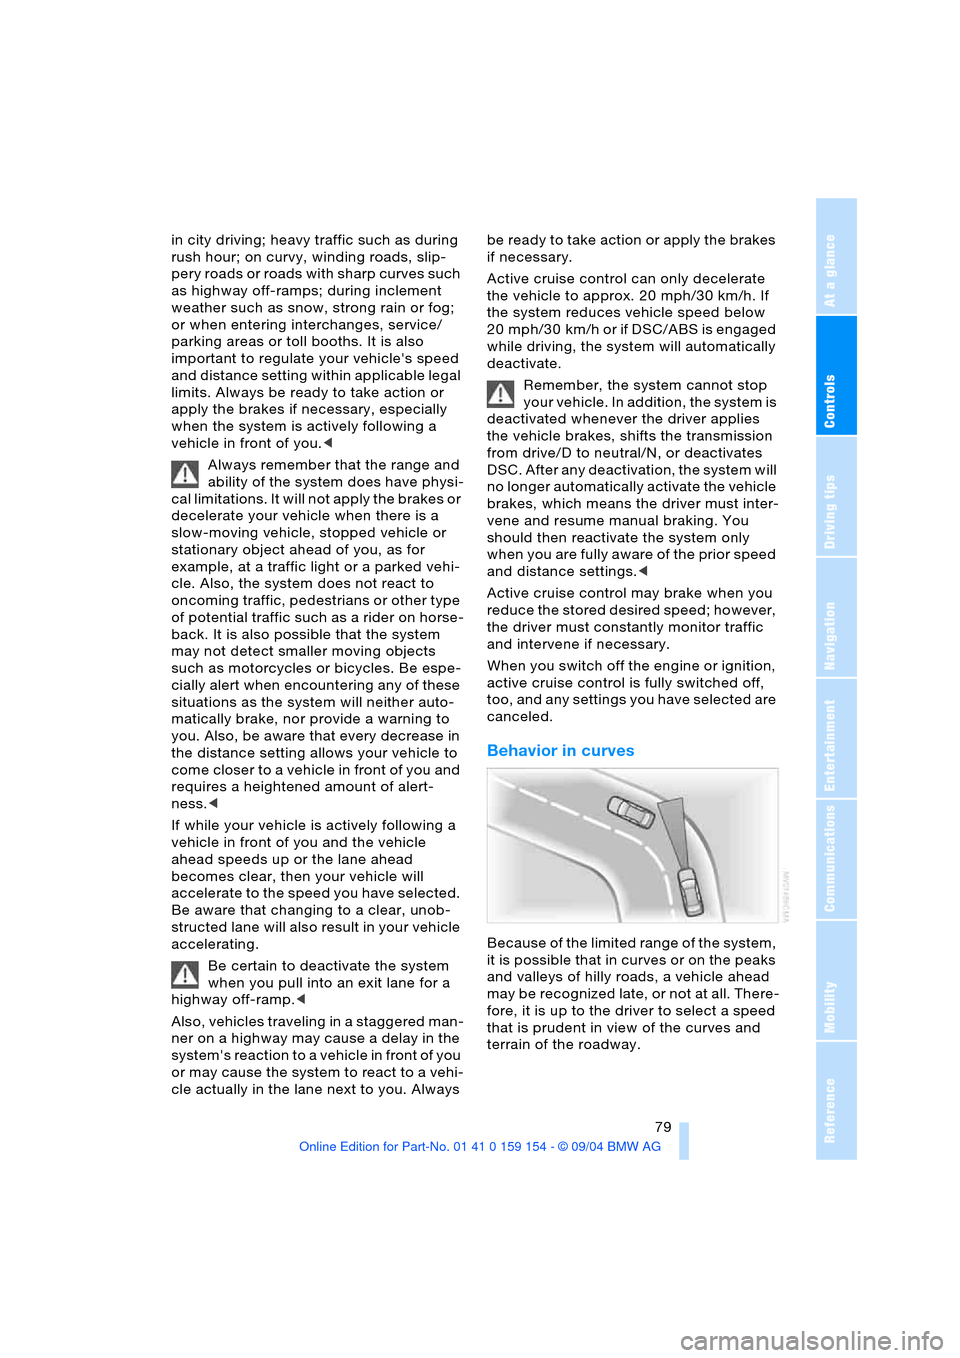
Behavior in curves
Because of the limited range of the system,
it is possible that in curves or on the peaks
and valleys of hilly roads, a vehicle ahead
may be recognized late, or not at all. There-
fore, it is up to the driver to select a speed
that is prudent in view of the curves and
terrain of the roadway.
Page 83 of 239
Controls
81Reference
At a glance
Driving tips
Communications
Navigation
Entertainment
Mobility
Everything under control
Odometer, outside temperature display, clock
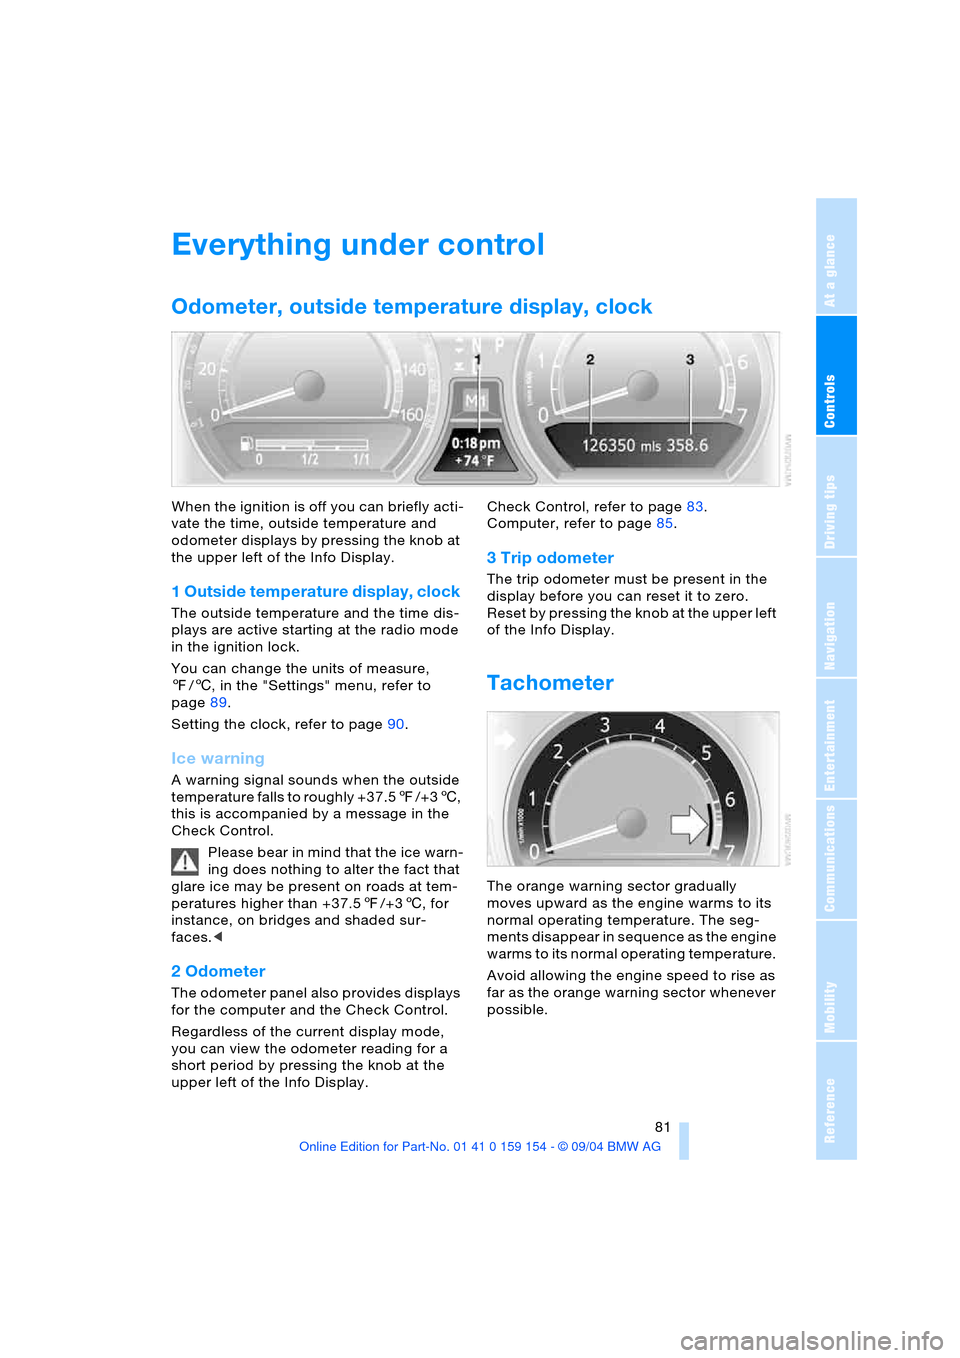
When the ignition is off you can briefly acti-
vate the time, outside temperature and
odometer displays by pressing the knob at
the upper left of the Info Display.
1 Outside temperature display, clock
The outside temperature and the time dis-
plays are active starting at the radio mode
in the ignition lock.
You can change the units of measure,
7/6, in the "Settings" menu, refer to
page89.
Setting the clock, refer to page90.
Ice warning
A warning signal sounds when the outside
temperature falls to roughly +37.57/+36,
this is accompanied by a message in the
Check Control.
Please bear in mind that the ice warn-
ing does nothing to alter the fact that
glare ice may be present on roads at tem-
peratures higher than +37.57/+36, for
instance, on bridges and shaded sur-
faces.<
2 Odometer
The odometer panel also provides displays
for the computer and the Check Control.
Regardless of the current display mode,
you can view the odometer reading for a
short period by pressing the knob at the
upper left of the Info Display. Check Control, refer to page83.
Computer, refer to page85.
3 Trip odometer
The trip odometer must be present in the
display before you can reset it to zero.
Reset by pressing the knob at the upper left
of the Info Display.
Tachometer
The orange warning sector gradually
moves upward as the engine warms to its
normal operating temperature. The seg-
ments disappear in sequence as the engine
warms to its normal operating temperature.
Avoid allowing the engine speed to rise as
far as the orange warning sector whenever
possible.
Page 88 of 239
Everything under control
86 >Energy Control/
current fuel consumption86
>Average fuel consumption86
>Average speed86
>Time of arrival87.
Maintain pressure on button1 to can-
cel the display from the computer.
Briefly press the button again to return to
the last display.
It will not be possible to cancel the display
if the fuel level has fallen into the reserve
range or if a Check Control status report is
currently on the screen.
Briefly press the button again to view the
last display.<
Fuel gauge
The fuel gauge mode appears automati-
cally once the fuel level falls into the
reserve range. At the same time, the words
"Fuel reserve" appear. The tank still con-
tains approx. 2.6 gallons/10 liters of fuel.
If the tilt of the vehicle varies, when you are
driving in mountainous areas, for example,
the indicator may fluctuate slightly.
It will not be possible to cancel the
computer display once the fuel level
drops into the reserve range. However, you
can still request a display of the travel
range. Computer, refer to page85.<
Fuel tank capacity: approx. 23.2 gallons/
88 liters. You can find information on refu-
eling on page186.
Refuel well before the tank is empty,
as otherwise engine functions will not
be ensured and damage can occur if you
drive down to the last drop.<
Cruising range
Displays the estimated cruising range avail-
able with the remaining fuel. The fuel level
is measured and the range is calculated
taking the driving style over the last
20 miles/30 km into account.
Always refuel as soon as possible
once your range falls to below
30 miles/50 km, as otherwise engine func-tions are not ensured and damage can
occur.<
Refueling is only registered by the com-
puter for fuel amounts above approx.
1.3 gallons/5 liters.
Remaining distance
When you enter a destination in the naviga-
tion system or manually enter a distance in
the computer prior to departure, the system
can also display the distance remaining to
your destination, refer to page132 or87.
The system automatically applies the dis-
tance to your destination using the route
recommended by the navigation system.
When you enter a destination in the
navigation system, any manual entries
will be overwritten no later than once
1,640 ft/500 meters of the calculated dis-
tance have elapsed.<
Energy Control/
current fuel consumption
Shows the current fuel consumption. This
allows you to see whether your current
driving style is conducive to fuel economy
with minimum exhaust emissions.
Average fuel consumption
The average fuel consumption is calculated
for the time during which the engine is run-
ning.
You can use the Control Display to view
your fuel consumption rate over two differ-
ent distances, refer to Computer or Trip
computer.
Average speed
Periods with the vehicle parked and the
engine off are not included in the calcula-
tions of average speed.
Reset average speed: Press button2 in the
turn indicator lever for approx. 2 seconds.
Page 95 of 239
Controls
93Reference
At a glance
Driving tips
Communications
Navigation
Entertainment
Mobility
EBV Electronic brake-force
distribution
EBV controls the brake system's applica-
tion pressure at the rear wheels to ensure
stable deceleration.
DSC Dynamic Stability Control
The system optimizes vehicle stability dur-
ing acceleration and when starting from a
full stop, as well as optimizing traction.
The system recognizes any tendency for
the vehicle to assume an unstable attitude
such as oversteer or understeer; it then
counteracts this tendency with a combina-
tion of graduated reductions in engine
torque and selective braking intervention at
individual wheels. DSC provides optimized
stability within the limits defined by the
laws of physics.
The DSC is operational every time you start
the engine. DSC contains the functions
DTC Dynamic Traction Control and DBC
Dynamic Brake Control.
Indicator lamp
The indicator lamp goes out shortly
after the engine starts.
The indicator lamp flashes:
DSC controls the drive and braking forces.
The indicator lamp stays lit:
DSC has been switched off using the Con-
trol Center.
Activating DTC Dynamic Traction
Control
In particular driving situations, in deep
snow, for example, DTC ensures the maxi-
mum forward momentum. The gain in for-
ward momentum in these situations
involves a reduction in vehicle stability.
DTC is active up to 45 mph/70 km/h.You may find it useful to briefly activate
DTC under the following special circum-
stances:
>When rocking the vehicle and starting
off in deep snow or on loose road sur-
faces
>When ascending snow-covered hills,
and when driving in deep or on hard-
packed snow
>When driving with snow chains.
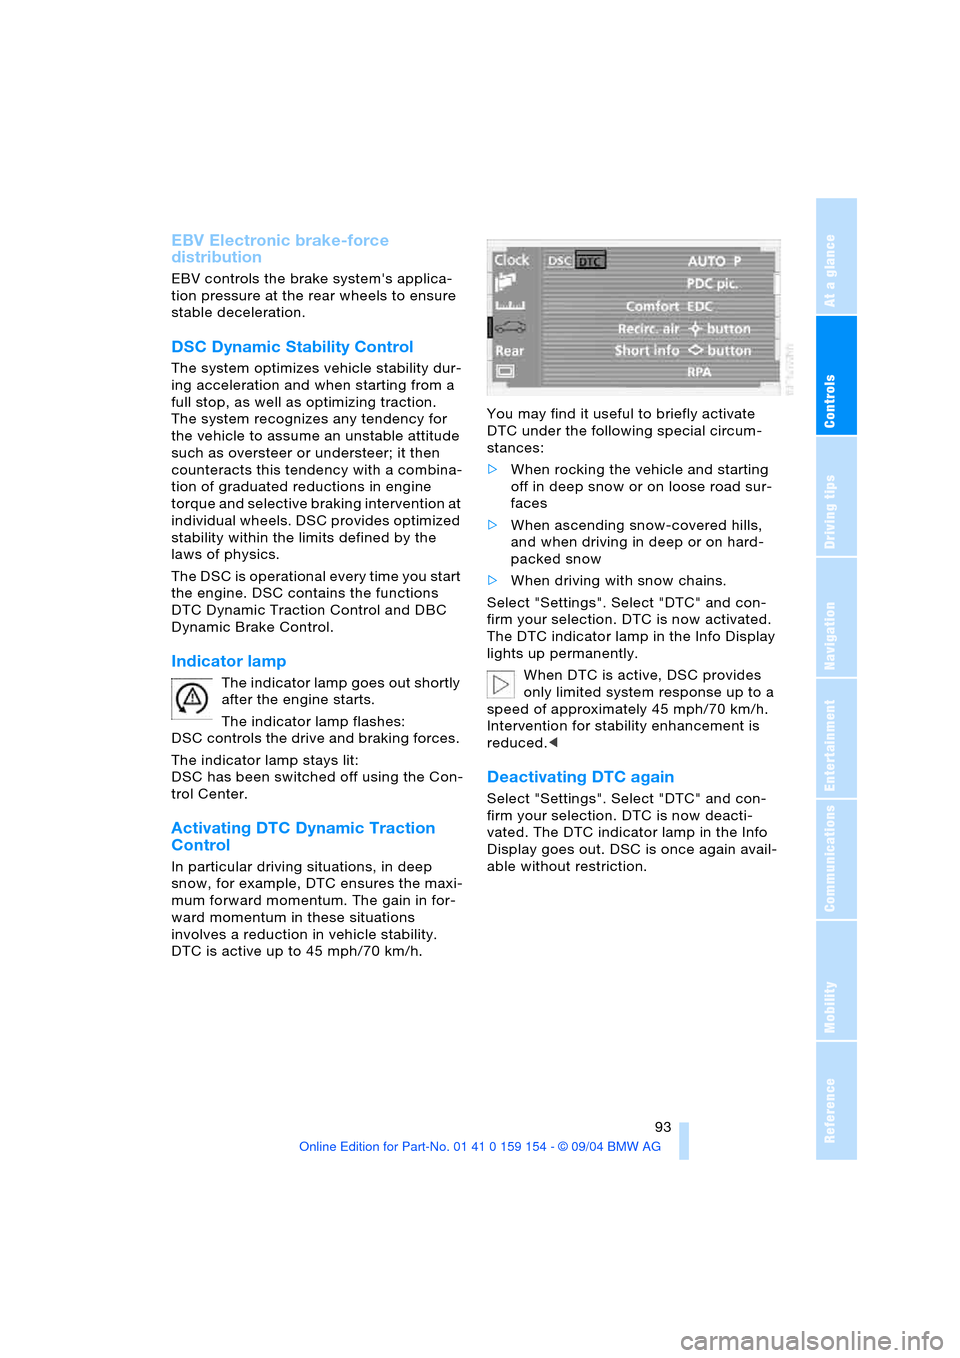
Select "Settings". Select "DTC" and con-
firm your selection. DTC is now activated.
The DTC indicator lamp in the Info Display
lights up permanently.
When DTC is active, DSC provides
only limited system response up to a
speed of approximately 45 mph/70 km/h.
Intervention for stability enhancement is
reduced.<
Deactivating DTC again
Select "Settings". Select "DTC" and con-
firm your selection. DTC is now deacti-
vated. The DTC indicator lamp in the Info
Display goes out. DSC is once again avail-
able without restriction.
Page 97 of 239
Controls
95Reference
At a glance
Driving tips
Communications
Navigation
Entertainment
Mobility
Have the system checked as soon as pos-
sible.
Display of the previously described
malfunction on Canadian models.
Dynamic Drive
The concept
Dynamic Drive minimizes body roll and
optimizes vehicle stability during cornering
and evasive maneuvers.
Active stabilizers at the front and rear axles
form the basis for Dynamic Drive. Suspen-
sion compliance adapts to suit driving con-
ditions, varying from performance-oriented
during cornering to smooth and comfort-
oriented when the vehicle is proceeding in
a straight line.
The system assumes operational status
each time you start the engine.
Driving with Dynamic Drive
During vehicle operation, the system con-
tinuously runs through closed-loop control
cycles lasting only fractions of a second.
Malfunction
The warning lamp lights up, accom-
panied by a status message in the
Check Control. Please take note of
the additional information on the Control
Display. A malfunction has occurred in the
system. Have the system checked as soon
as possible.
If the Dynamic Drive system switches
off in response to malfunction, please
remember to adapt your speed accord-
ingly, especially in curves.
The suspension will be noticeably softer
and the vehicle will display a greater ten-
dency to tilt during cornering and in cross-
winds.
If a Check Control message stating that you
should stop appears in addition to the red
symbol, stop immediately and switch off
the engine. In this case the oil level in the
reservoir may have dropped below the min-imum, possibly owing to a leak in the
hydraulic system.
Please observe the additional instructions
provided on the Control Display.<
EDC Electronic Damping
Control*
The suspension responds to changes in
factors such as road surface, or operating
conditions such as steering and braking, by
adapting to the new conditions within frac-
tions of a second.
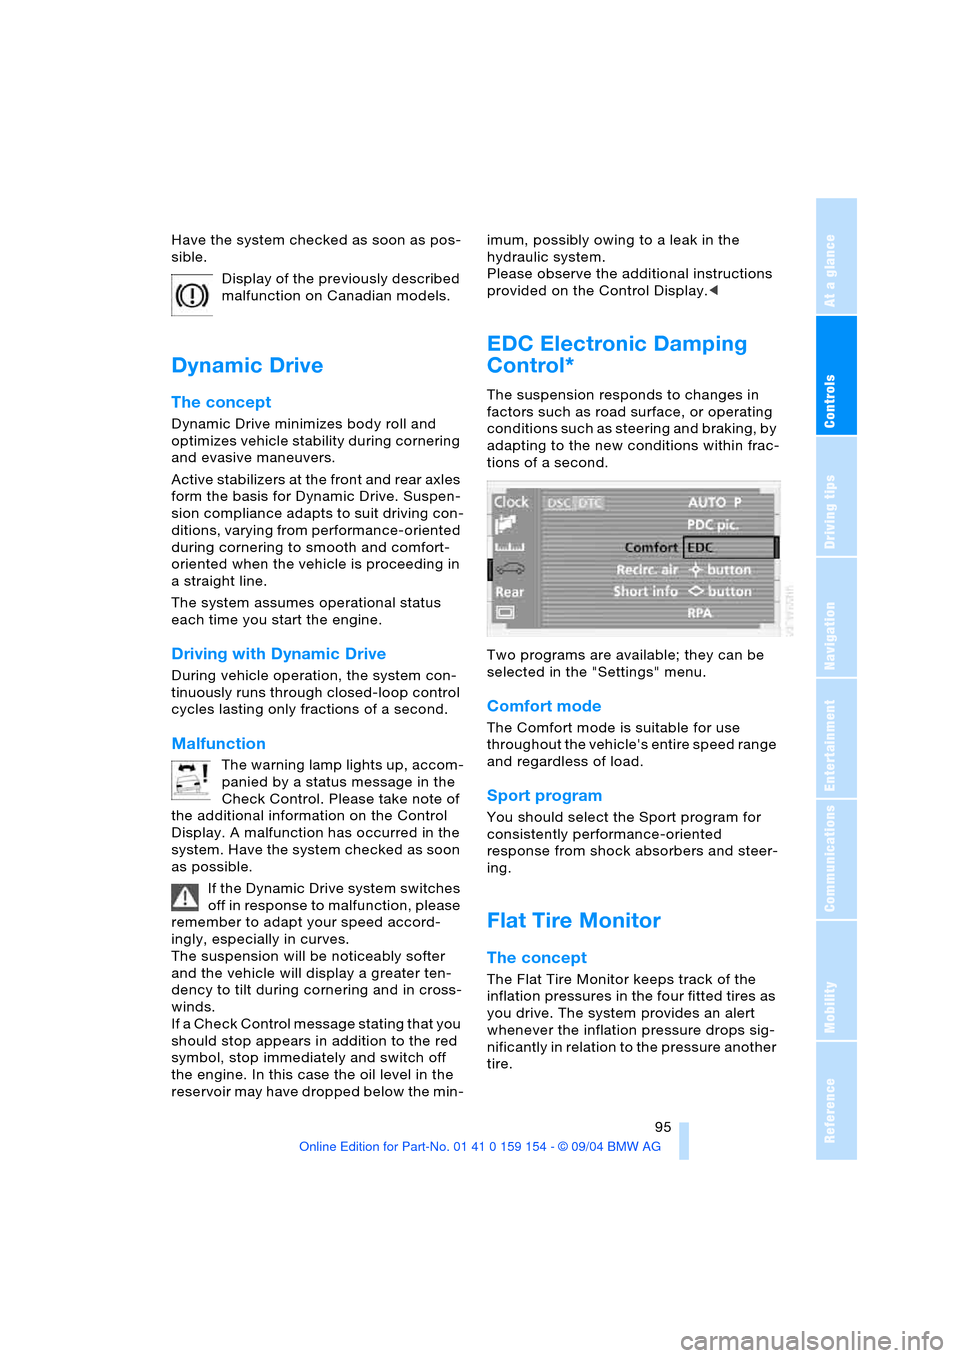
Two programs are available; they can be
selected in the "Settings" menu.
Comfort mode
The Comfort mode is suitable for use
throughout the vehicle's entire speed range
and regardless of load.
Sport program
You should select the Sport program for
consistently performance-oriented
response from shock absorbers and steer-
ing.
Flat Tire Monitor
The concept
The Flat Tire Monitor keeps track of the
inflation pressures in the four fitted tires as
you drive. The system provides an alert
whenever the inflation pressure drops sig-
nificantly in relation to the pressure another
tire.
Page 98 of 239
Technology for comfort, convenience and safety
96 The check of the tire inflation pressure is
based on monitoring the relative speeds of
the wheels. A flat tire is detected and
reported on the basis of a deviation in cer-
tain speed ratios.
Functional requirements
So that the Flat Tire Monitor can learn the
correct inflation pressure, please perform
the following:
1.Check the inflation pressures in all tires
2.Compare with the inflation pressure
table on page189 and correct if neces-
sary
3.Initialize the system.
System limits
The Flat Tire Monitor cannot indicate
sudden severe tire damage caused by
outside factors and does not detect a natu-
ral, even pressure drop in all four tires.<
In the following situations, on the other
hand, there can be delays in detecting tire
pressure losses, and even system failure:
>When you are driving on snow-covered
or slippery road surfaces
>In the case of performance-oriented
driving: slip on the drive wheels, high
lateral acceleration
>False alarms and undetected loss of
pressure may occur when you are driv-
ing with snow chains fitted.
Initializing system
Perform the initialization immediately
after correcting the inflation pressure,
changing a tire or changing a wheel or all
wheels. A drive is necessary for this pur-
pose.<
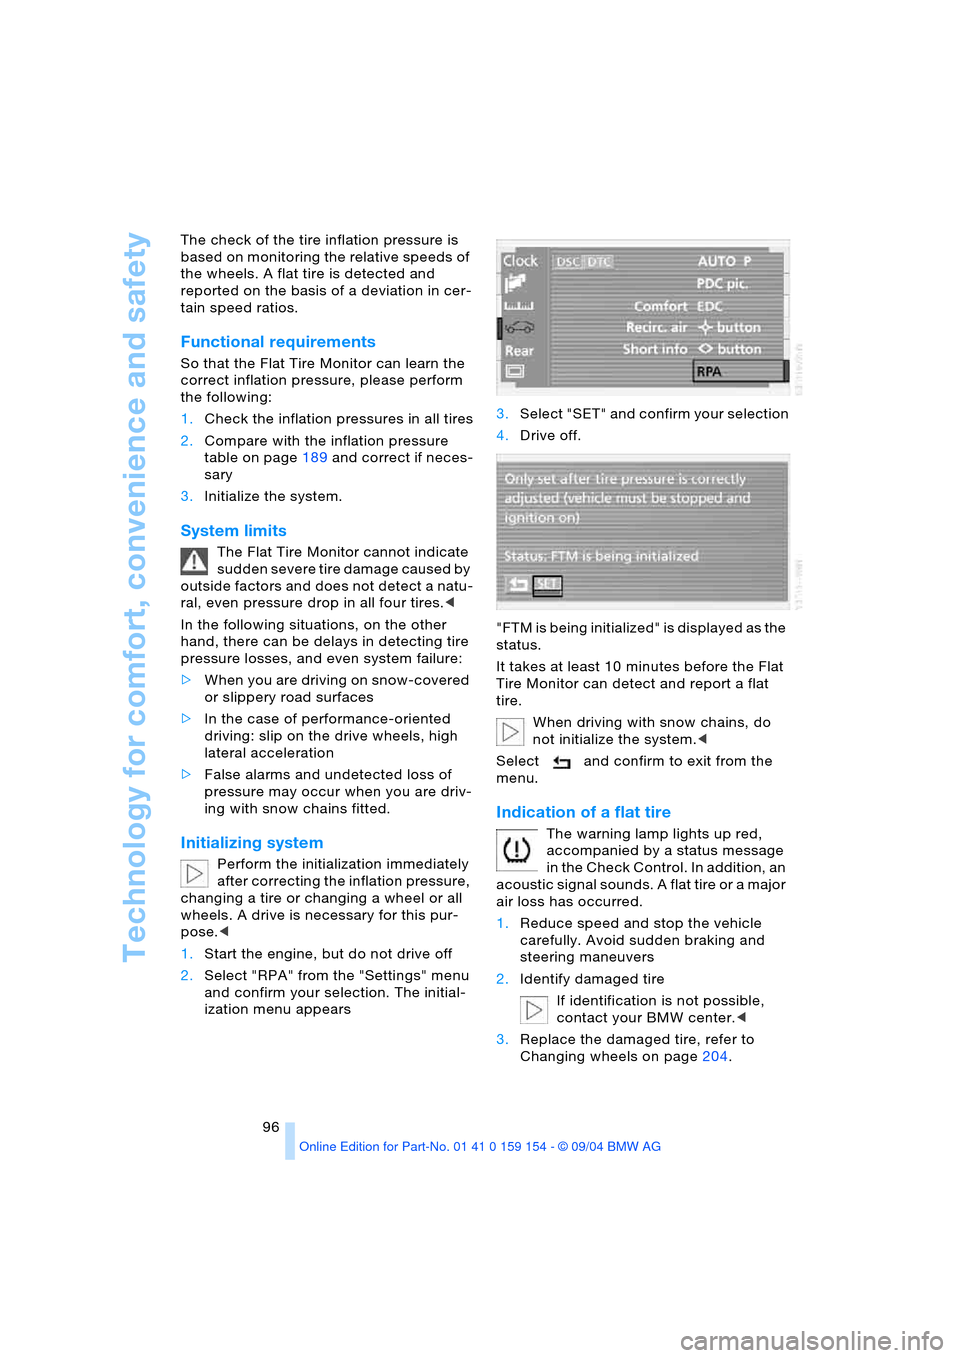
1.Start the engine, but do not drive off
2.Select "RPA" from the "Settings" menu
and confirm your selection. The initial-
ization menu appears 3.Select "SET" and confirm your selection
4.Drive off.
"FTM is being initialized" is displayed as the
status.
It takes at least 10 minutes before the Flat
Tire Monitor can detect and report a flat
tire.
When driving with snow chains, do
not initialize the system.<
Select and confirm to exit from the
menu.
Indication of a flat tire
The warning lamp lights up red,
accompanied by a status message
in the Check Control. In addition, an
acoustic signal sounds. A flat tire or a major
air loss has occurred.
1.Reduce speed and stop the vehicle
carefully. Avoid sudden braking and
steering maneuvers
2.Identify damaged tire
If identification is not possible,
contact your BMW center.<
3.Replace the damaged tire, refer to
Changing wheels on page204.
Page 106 of 239
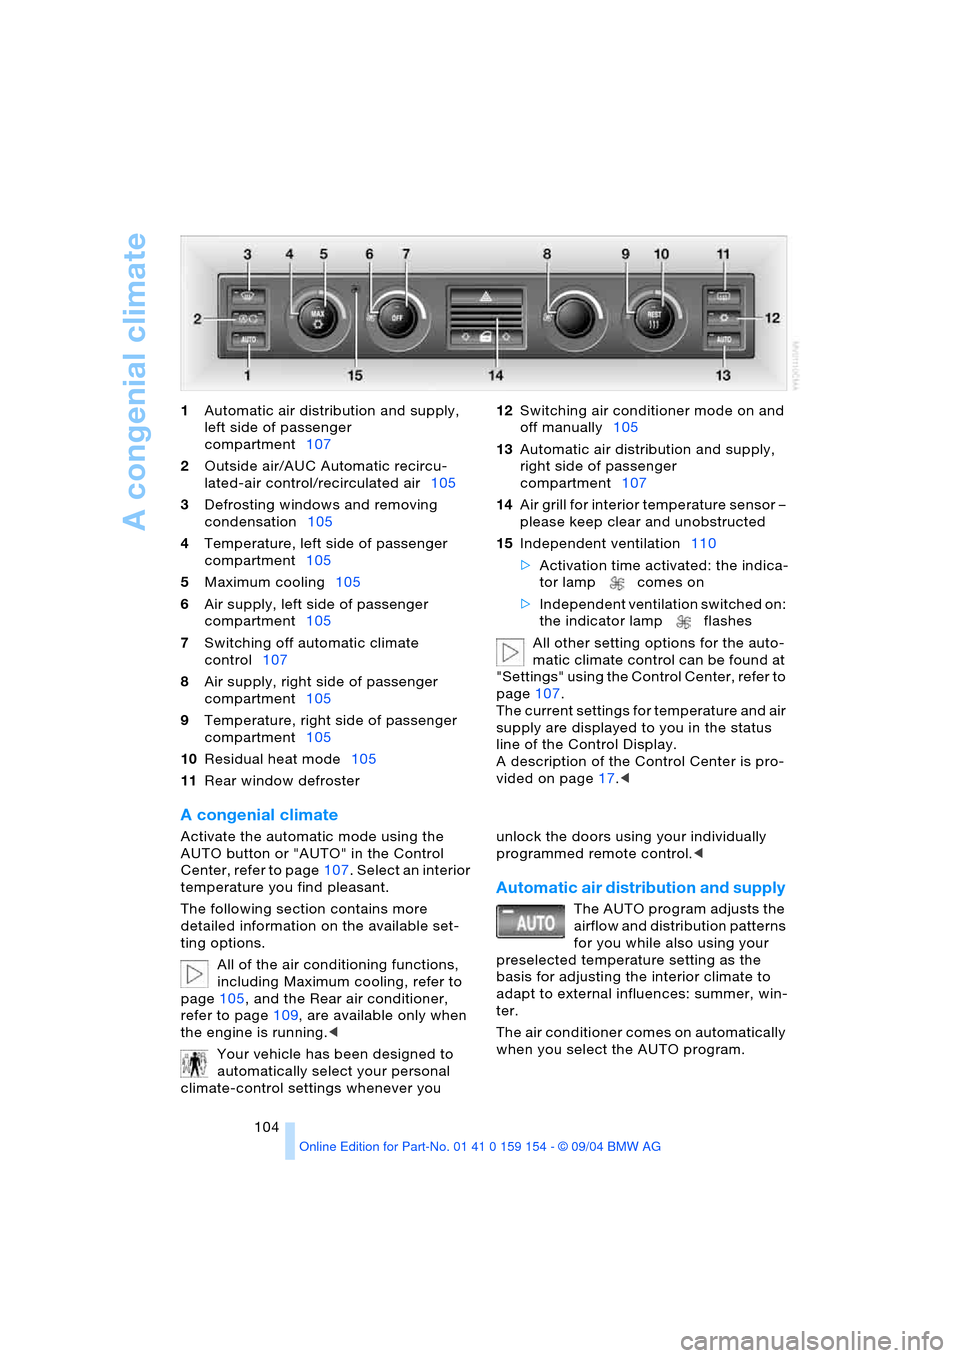
A congenial climate
104 1Automatic air distribution and supply,
left side of passenger
compartment107
2Outside air/AUC Automatic recircu-
lated-air control/recirculated air105
3Defrosting windows and removing
condensation105
4Temperature, left side of passenger
compartment105
5Maximum cooling105
6Air supply, left side of passenger
compartment105
7Switching off automatic climate
control107
8Air supply, right side of passenger
compartment105
9Temperature, right side of passenger
compartment105
10Residual heat mode105
11Rear window defroster 12Switching air conditioner mode on and
off manually105
13Automatic air distribution and supply,
right side of passenger
compartment107
14Air grill for interior temperature sensor –
please keep clear and unobstructed
15Independent ventilation110
>Activation time activated: the indica-
tor lamp comes on
>Independent ventilation switched on:
the indicator lamp flashes
All other setting options for the auto-
matic climate control can be found at
"Settings" using the Control Center, refer to
page107.
The current settings for temperature and air
supply are displayed to you in the status
line of the Control Display.
A description of the Control Center is pro-
vided on page17.<
A congenial climate
Activate the automatic mode using the
AUTO button or "AUTO" in the Control
Center, refer to page107. Select an interior
temperature you find pleasant.
The following section contains more
detailed information on the available set-
ting options.
All of the air conditioning functions,
including Maximum cooling, refer to
page105, and the Rear air conditioner,
refer to page109, are available only when
the engine is running.<
Your vehicle has been designed to
automatically select your personal
climate-control settings whenever you unlock the doors using your individually
programmed remote control.<
Automatic air distribution and supply
The AUTO program adjusts the
airflow and distribution patterns
for you while also using your
preselected temperature setting as the
basis for adjusting the interior climate to
adapt to external influences: summer, win-
ter.
The air conditioner comes on automatically
when you select the AUTO program.
Page 107 of 239
Controls
105Reference
At a glance
Driving tips
Communications
Navigation
Entertainment
Mobility
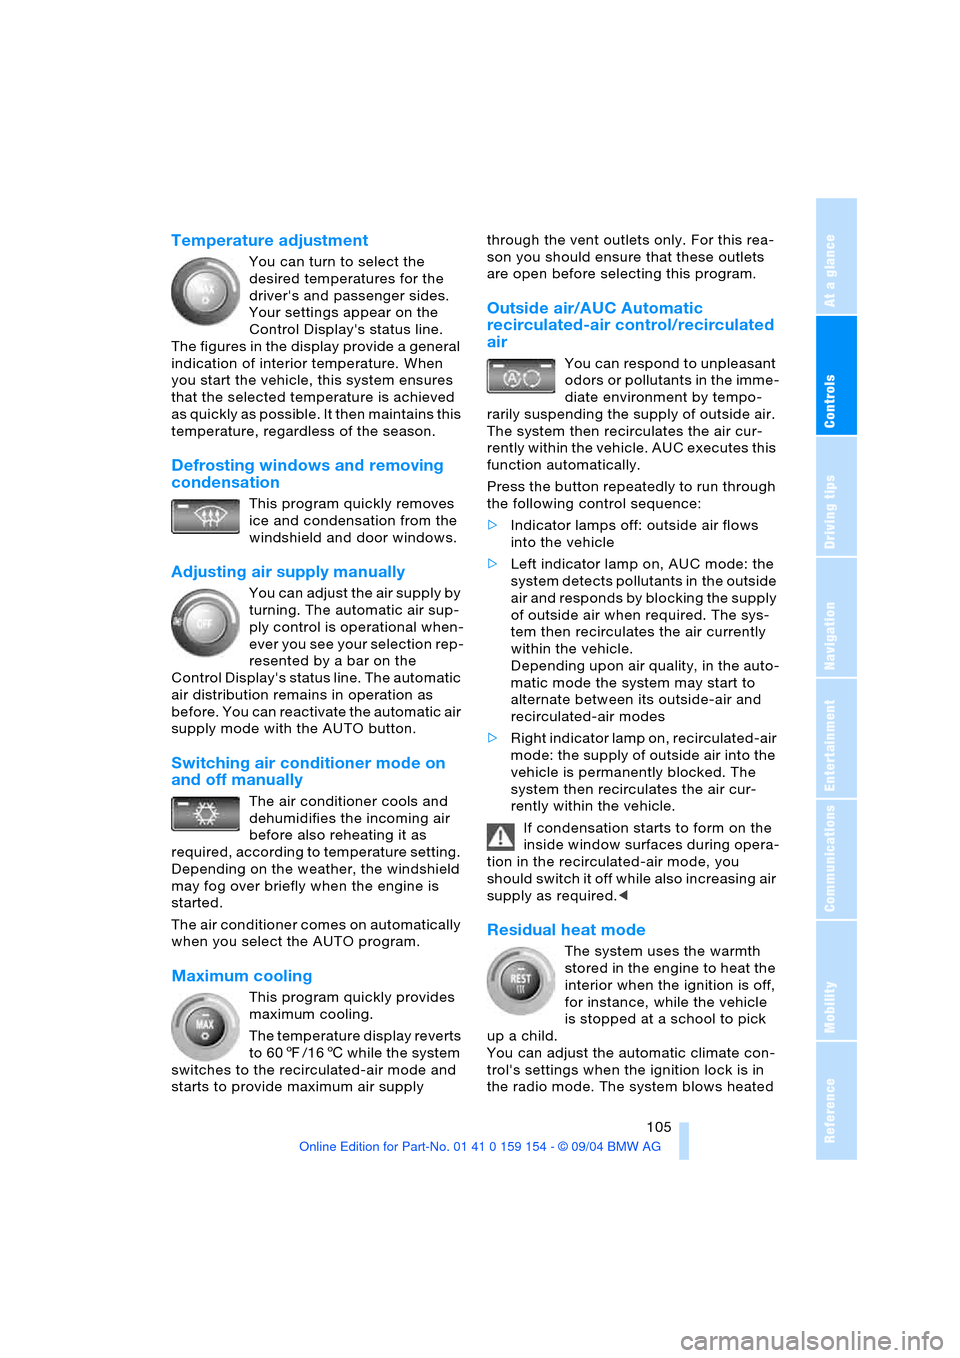
Temperature adjustment
You can turn to select the
desired temperatures for the
driver's and passenger sides.
Your settings appear on the
Control Display's status line.
The figures in the display provide a general
indication of interior temperature. When
you start the vehicle, this system ensures
that the selected temperature is achieved
as quickly as possible. It then maintains this
temperature, regardless of the season.
Defrosting windows and removing
condensation
This program quickly removes
ice and condensation from the
windshield and door windows.
Adjusting air supply manually
You can adjust the air supply by
turning. The automatic air sup-
ply control is operational when-
ever you see your selection rep-
resented by a bar on the
Control Display's status line. The automatic
air distribution remains in operation as
before. You can reactivate the automatic air
supply mode with the AUTO button.
Switching air conditioner mode on
and off manually
The air conditioner cools and
dehumidifies the incoming air
before also reheating it as
required, according to temperature setting.
Depending on the weather, the windshield
may fog over briefly when the engine is
started.
The air conditioner comes on automatically
when you select the AUTO program.
Maximum cooling
This program quickly provides
maximum cooling.
The temperature display reverts
to 607/166 while the system
switches to the recirculated-air mode and
starts to provide maximum air supply through the vent outlets only. For this rea-
son you should ensure that these outlets
are open before selecting this program.
Outside air/AUC Automatic
recirculated-air control/recirculated
air
You can respond to unpleasant
odors or pollutants in the imme-
diate environment by tempo-
rarily suspending the supply of outside air.
The system then recirculates the air cur-
rently within the vehicle. AUC executes this
function automatically.
Press the button repeatedly to run through
the following control sequence:
>Indicator lamps off: outside air flows
into the vehicle
>Left indicator lamp on, AUC mode: the
system detects pollutants in the outside
air and responds by blocking the supply
of outside air when required. The sys-
tem then recirculates the air currently
within the vehicle.
Depending upon air quality, in the auto-
matic mode the system may start to
alternate between its outside-air and
recirculated-air modes
>Right indicator lamp on, recirculated-air
mode: the supply of outside air into the
vehicle is permanently blocked. The
system then recirculates the air cur-
rently within the vehicle.
If condensation starts to form on the
inside window surfaces during opera-
tion in the recirculated-air mode, you
should switch it off while also increasing air
supply as required.<
Residual heat mode
The system uses the warmth
stored in the engine to heat the
interior when the ignition is off,
for instance, while the vehicle
is stopped at a school to pick
up a child.
You can adjust the automatic climate con-
trol's settings when the ignition lock is in
the radio mode. The system blows heated