belt BMW 750I 2011 F01 User Guide
[x] Cancel search | Manufacturer: BMW, Model Year: 2011, Model line: 750I, Model: BMW 750I 2011 F01Pages: 299, PDF Size: 8.49 MB
Page 73 of 299
When the ignition is switched off, refer to
page
65, position P is engaged automatically.
P Park
Select only when the vehicle is stationary. The
drive wheels are blocked.
P is engaged automatically:
▷ After the engine is switched off, if the car is
in
radio ready state, refer to page 65, or if the
ignition is switched off, refer to page 65, and
if position R or D is engaged.
▷ If the ignition is switched off and position N
is engaged.
▷ If the safety belt is unbuckled, the driver's
door is opened, and the brake pedal is not
pressed while the vehicle is stationary and
transmission position R or D is engaged.
Kickdown
Kickdown is used to achieve maximum driving
performance. Press on the accelerator beyond
the resistance point at the full throttle position.
Engaging the transmission position
▷ Transmission position P can only be disen‐
gaged
if the engine is running and the brake
pedal is pressed.
▷ With the vehicle stationary, press on the
brake pedal before shifting out of P or N;
otherwise, the shift command will not be
executed: shift lock.
Depress
the brake until you start driv‐
ing
To prevent the vehicle from creeping after
you select a driving position, maintain pres‐
sure on the brake pedal until you are ready
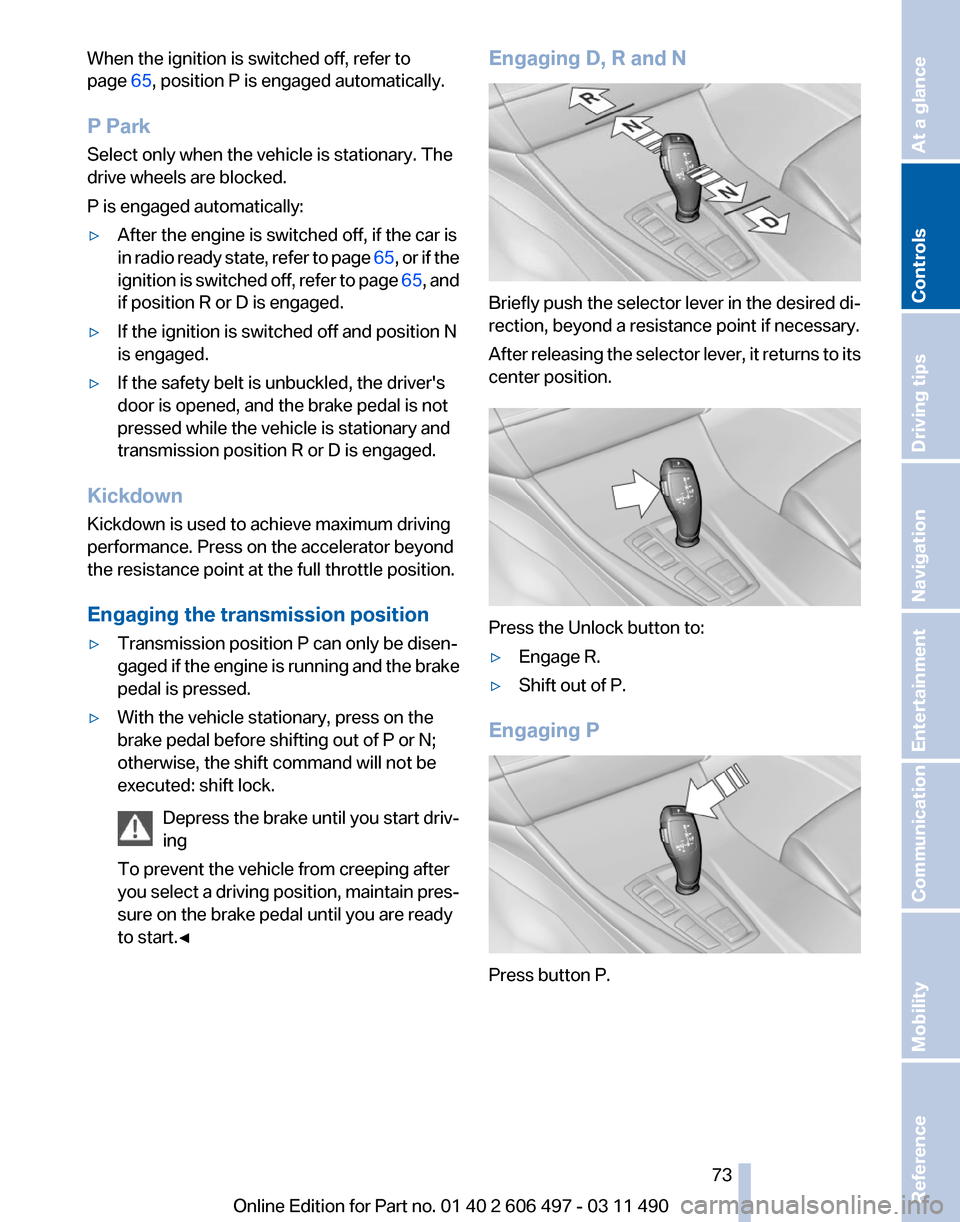
to start.◀ Engaging D, R and N
Briefly push the selector lever in the desired di‐
rection, beyond a resistance point if necessary.
After
releasing the selector lever, it returns to its
center position. Press the Unlock button to:
▷
Engage R.
▷ Shift out of P.
Engaging P Press button P.
Seite 73
73Online Edition for Part no. 01 40 2 606 497 - 03 11 490
Reference Mobility Communication Entertainment Navigation Driving tips
Controls At a glance
Page 88 of 299
Safety
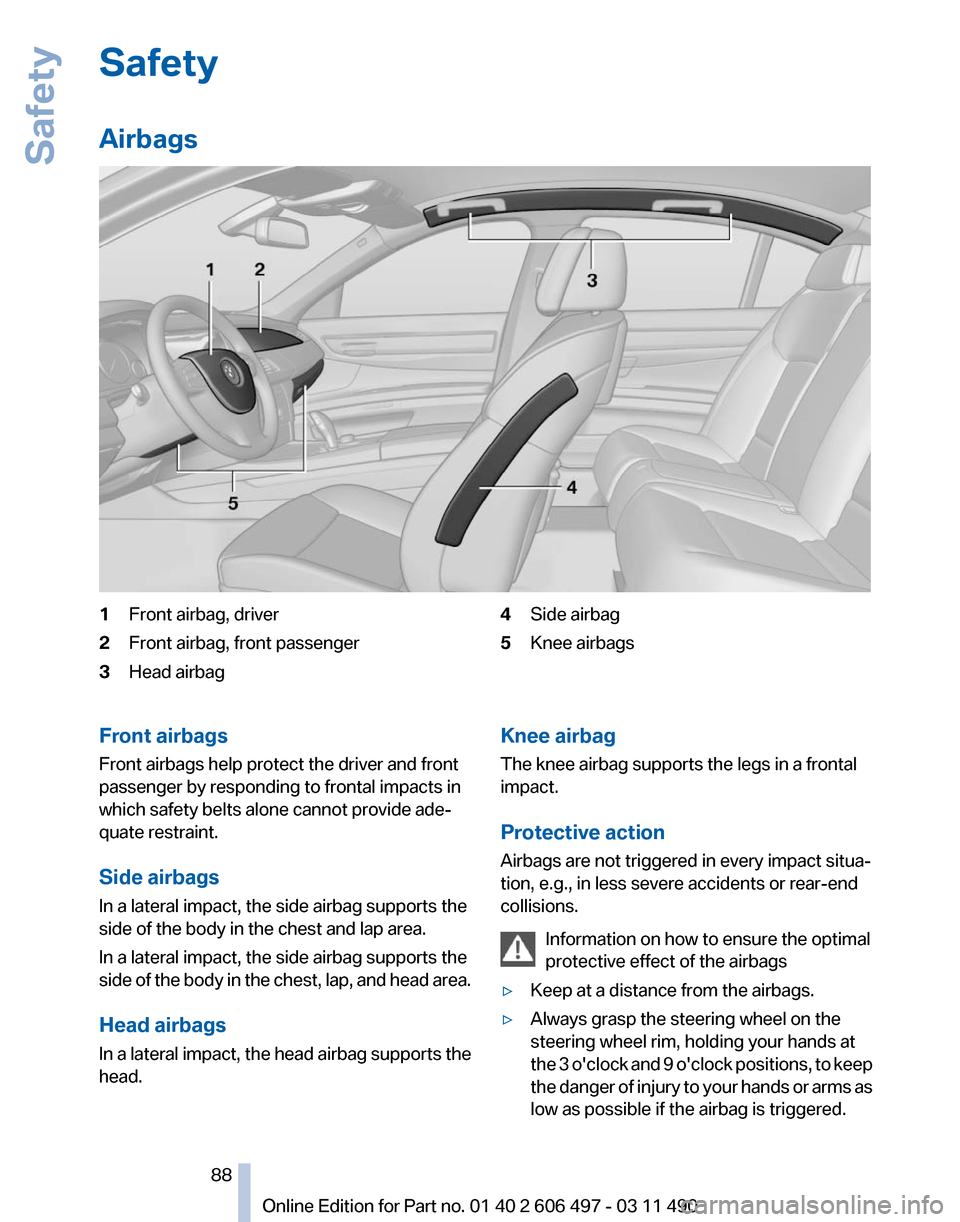
Airbags
1
Front airbag, driver
2 Front airbag, front passenger
3 Head airbag 4
Side airbag
5 Knee airbags
Front airbags
Front airbags help protect the driver and front
passenger by responding to frontal impacts in
which safety belts alone cannot provide ade‐
quate restraint.
Side airbags
In a lateral impact, the side airbag supports the
side of the body in the chest and lap area.
In a lateral impact, the side airbag supports the
side
of the body in the chest, lap, and head area.
Head airbags
In a lateral impact, the head airbag supports the
head. Knee airbag
The knee airbag supports the legs in a frontal
impact.
Protective action
Airbags are not triggered in every impact situa‐
tion, e.g., in less severe accidents or rear-end
collisions.
Information on how to ensure the optimal
protective effect of the airbags
▷ Keep at a distance from the airbags.
▷ Always grasp the steering wheel on the
steering wheel rim, holding your hands at
the
3 o'clock and 9 o'clock positions, to keep
the danger of injury to your hands or arms as
low as possible if the airbag is triggered. Seite 88
88 Online Edition for Part no. 01 40 2 606 497 - 03 11 490
Safety
Page 89 of 299
▷
There should be no people, animals, or ob‐
jects between an airbag and a person.
▷ Do not use the cover of the front airbag on
the front passenger side as a storage area.
▷ Keep the dashboard and window on the
front
passenger side clear, i.e., do not cover
with adhesive labels or coverings, and do not
attach holders such as for navigation instru‐
ments and mobile phones.
▷ Make sure that the front passenger is sitting
correctly, i.e., keeps his or her feet and legs
in the footwell; otherwise, leg injuries can
occur if the front airbag is triggered.
▷ Do not place slip covers, seat cushions or
other objects on the front passenger seat
that are not approved specifically for seats
with integrated side airbags.
▷ Do not hang pieces of clothing, such as jack‐
ets, over the backrests.
▷ Make sure that occupants keep their heads
away from the side airbag and do not rest
against the head airbag; otherwise, injuries
can occur if the airbags are triggered.
▷ Do not remove the airbag restraint system.
▷ Do not remove the steering wheel.
▷ Do not apply adhesive materials to the air‐
bag cover panels, cover them or modify
them in any way.
▷ Never modify either the individual compo‐
nents
or the wiring in the airbag system. This
also applies to steering wheel covers, the
dashboard, the seats, the roof pillars and the
sides of the headliner.◀
Even when all instructions are followed closely,
injury from contact with the airbags cannot be
ruled out in certain situations.
The ignition and inflation noise may lead to
short-term
and, in most cases, temporary hear‐
ing impairment in sensitive individuals.
In the case of a malfunction, deactivation
and after triggering of the airbags
Do not touch the individual components imme‐
diately after the system has been triggered; oth‐
erwise, there is the danger of burns. Only have the airbags checked, repaired or dis‐
mantled and the airbag generator scrapped by
your service center or a workshop that has the
necessary
authorization for handling explosives.
Non-professional attempts to service the sys‐
tem could lead to failure in an emergency or un‐
desired triggering of the airbag, either of which
could result in injury.◀
Warnings and information on the airbags are
also found on the sun visors.
Functional readiness of the airbag
system When the ignition is switch on, the warn‐
ing lamp in the instrument cluster lights
up briefly and thereby indicates the op‐
erational readiness of the entire airbag system
and the belt tensioner.
Airbag system malfunctioning
▷ In radio ready state, the warning lamp does
not come on.
▷ The warning lamp lights up continuously.
When there is a malfunction, have the air‐
bag system checked immediately
When there is a malfunction, have the airbag
system checked immediately; otherwise, there
is
a risk that the system does not function as ex‐
pected in the event of an accident despite cor‐
responding severity of the accident.◀
Automatic deactivation of the front
passenger airbags
The system determines whether the front pas‐
senger seat is occupied by measuring the re‐
sistance of the human body.
The front, knee, and side airbag on the front
passenger side are activated or deactivated ac‐
cordingly.
Leave feet in the footwell
Make sure that the front passenger keeps
his or her feet in the footwell; otherwise, the front
passenger airbags may not function properly.◀ Seite 89
89Online Edition for Part no. 01 40 2 606 497 - 03 11 490
Reference Mobility Communication Entertainment Navigation Driving tips
Controls At a glance
Page 106 of 299
The displays go out. The stored desired speed
and distance are deleted.
Interrupting
When active, press the button.
If
interrupting the system while stationary, press
on the brake pedal at the same time.
The system is automatically interrupted if:
▷ The brakes are applied.
▷ The clutch pedal is depressed.
▷ Transmission position D is disengaged.
▷ DTC Dynamic Traction Control is activated
or DSC is deactivated.
▷ DSC is actively controlling stability.
▷ The safety belt and the driver's door are
opened when the vehicle is standing.
▷ The system has not detected objects for an
extended
period, e.g., on a road with very lit‐
tle traffic without road edge line markings.
▷ Radar sensor is soiled.
Maintaining/storing the speed Press the button*.
When the system is switched on, the current
speed is maintained and stored as the desired
speed.
It is displayed in the speedometer and briefly
displayed in the instrument cluster, Displays in
the instrument cluster, refer to page 107.
When cruise control is maintained or stored,
DSC
Dynamic Stability Control is switched on, if
necessary.
Changing, maintaining, and storing the
speed
The rocker switch can be pressed while the sys‐
tem is interrupted to maintain and store the cur‐
rent speed. DSC Dynamic Stability Control is
switched on, if necessary. Adapting the desired speed
Adapt the desired speed to the road con‐
ditions
and be ready to brake at all times; other‐
wise, there is the danger of an accident occur‐
ring.◀
Speed differences
Great speed differences with vehicles
driving ahead of you, e.g., when rapidly ap‐
proaching a truck or when another vehicle
swerves into your own lane, cannot be compen‐
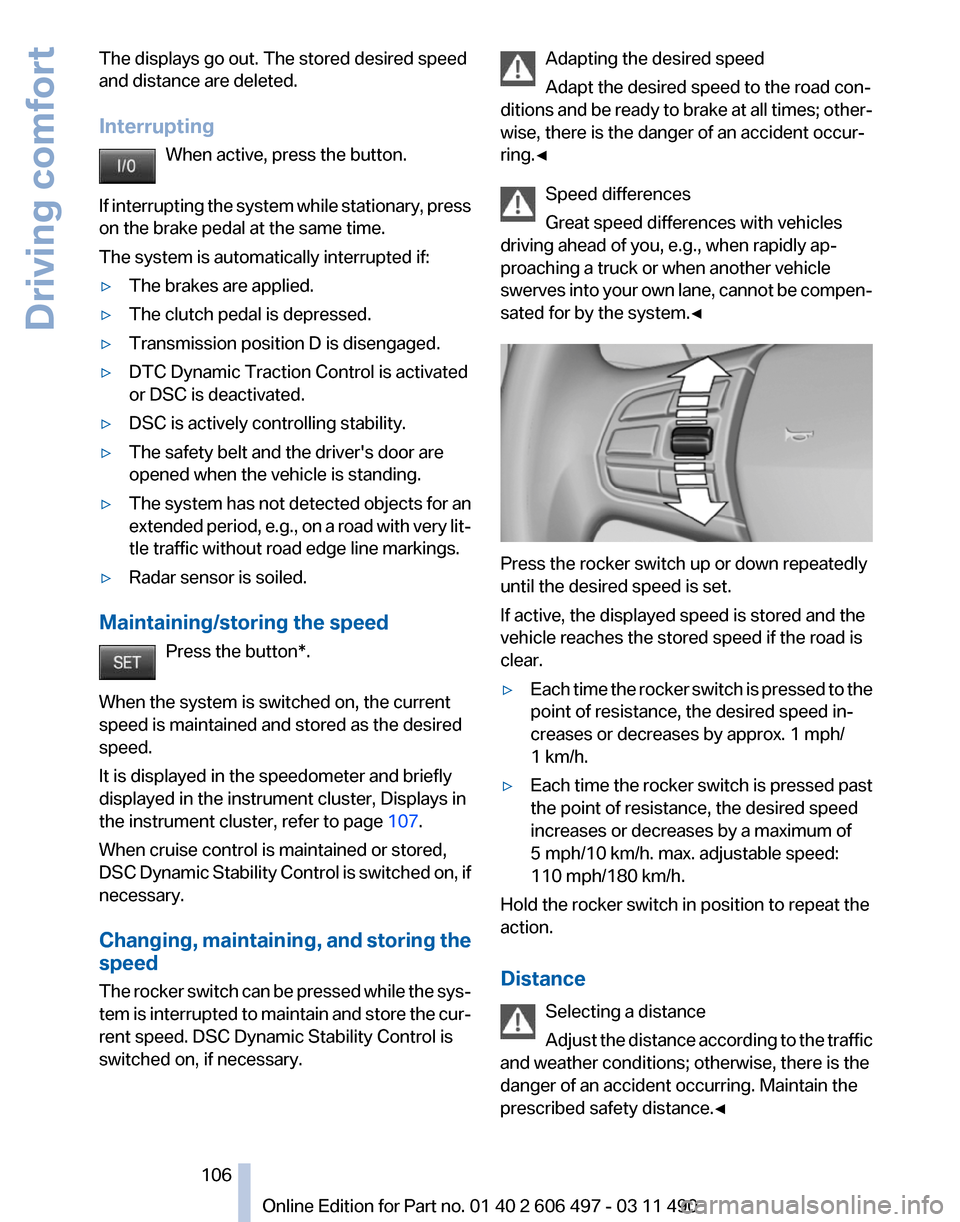
sated for by the system.◀ Press the rocker switch up or down repeatedly
until the desired speed is set.
If active, the displayed speed is stored and the
vehicle reaches the stored speed if the road is
clear.
▷
Each time the rocker switch is pressed to the
point of resistance, the desired speed in‐
creases or decreases by approx. 1 mph/
1 km/h.
▷ Each time the rocker switch is pressed past
the point of resistance, the desired speed
increases or decreases by a maximum of
5 mph/10 km/h. max. adjustable speed:
110 mph/180 km/h.
Hold the rocker switch in position to repeat the
action.
Distance
Selecting a distance
Adjust
the distance according to the traffic
and weather conditions; otherwise, there is the
danger of an accident occurring. Maintain the
prescribed safety distance.◀ Seite 106
106 Online Edition for Part no. 01 40 2 606 497 - 03 11 490
Driving comfort
Page 137 of 299
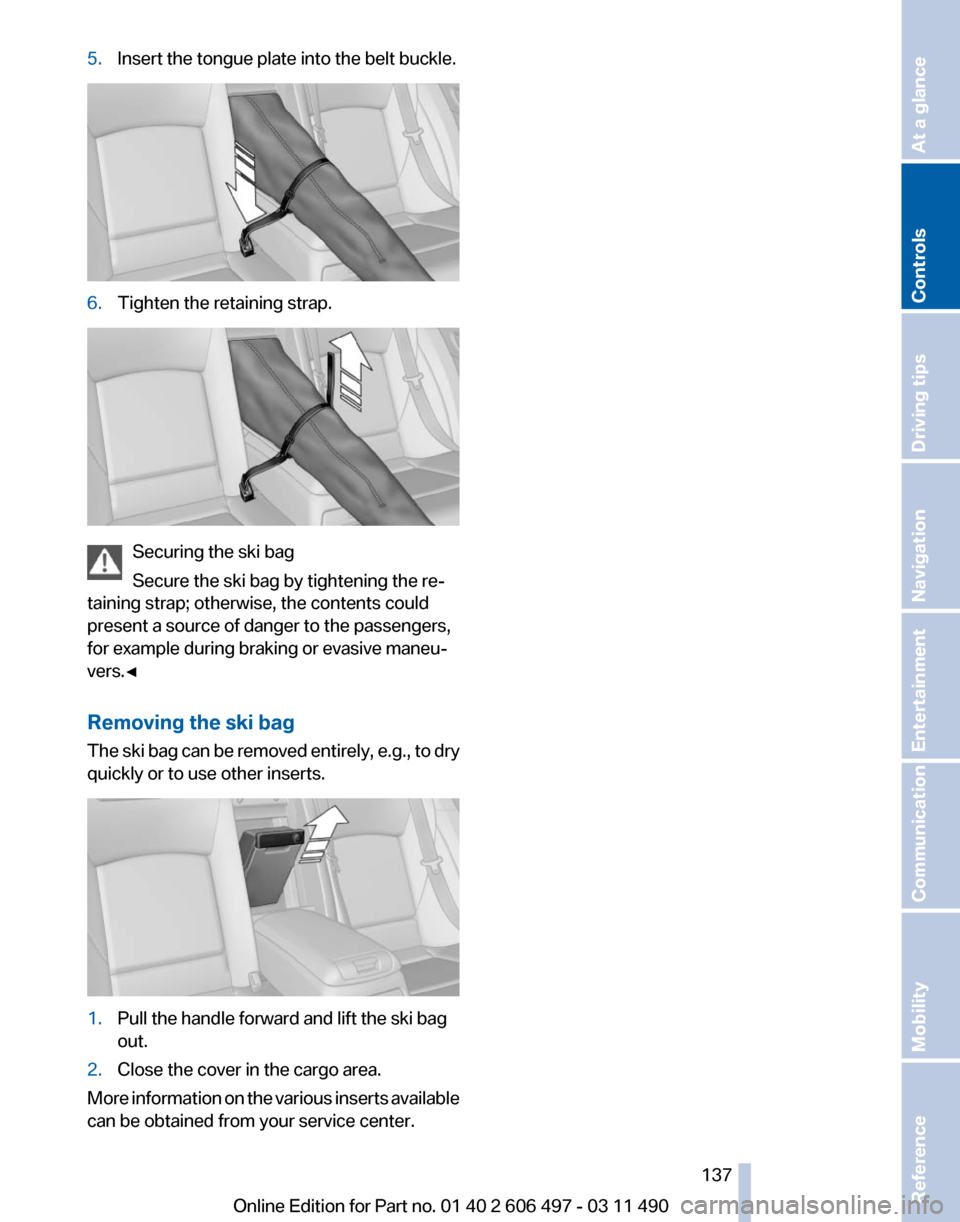
5.
Insert the tongue plate into the belt buckle. 6.
Tighten the retaining strap. Securing the ski bag
Secure the ski bag by tightening the re‐
taining strap; otherwise, the contents could
present a source of danger to the passengers,
for example during braking or evasive maneu‐
vers.◀
Removing the ski bag
The
ski bag can be removed entirely, e.g., to dry
quickly or to use other inserts. 1.
Pull the handle forward and lift the ski bag
out.
2. Close the cover in the cargo area.
More information on the various inserts available
can be obtained from your service center. Seite 137
137Online Edition for Part no. 01 40 2 606 497 - 03 11 490
Reference Mobility Communication Entertainment Navigation Driving tips
Controls At a glance
Page 147 of 299
4.
The resulting figure equals the available
amount
of cargo and luggage load capacity.
For example, if the YYY amount equals
1,000 lbs and there will be four 150 lbs pas‐
sengers in your vehicle, the amount of avail‐
able cargo and luggage load capacity is
400 lbs: 1,000 lbs minus 600 lbs = 400 lbs.
5. Determine the combined weight of luggage
and
cargo being loaded on the vehicle. That
weight may not safely exceed the available
cargo and luggage load capacity calculated
in Step 4.
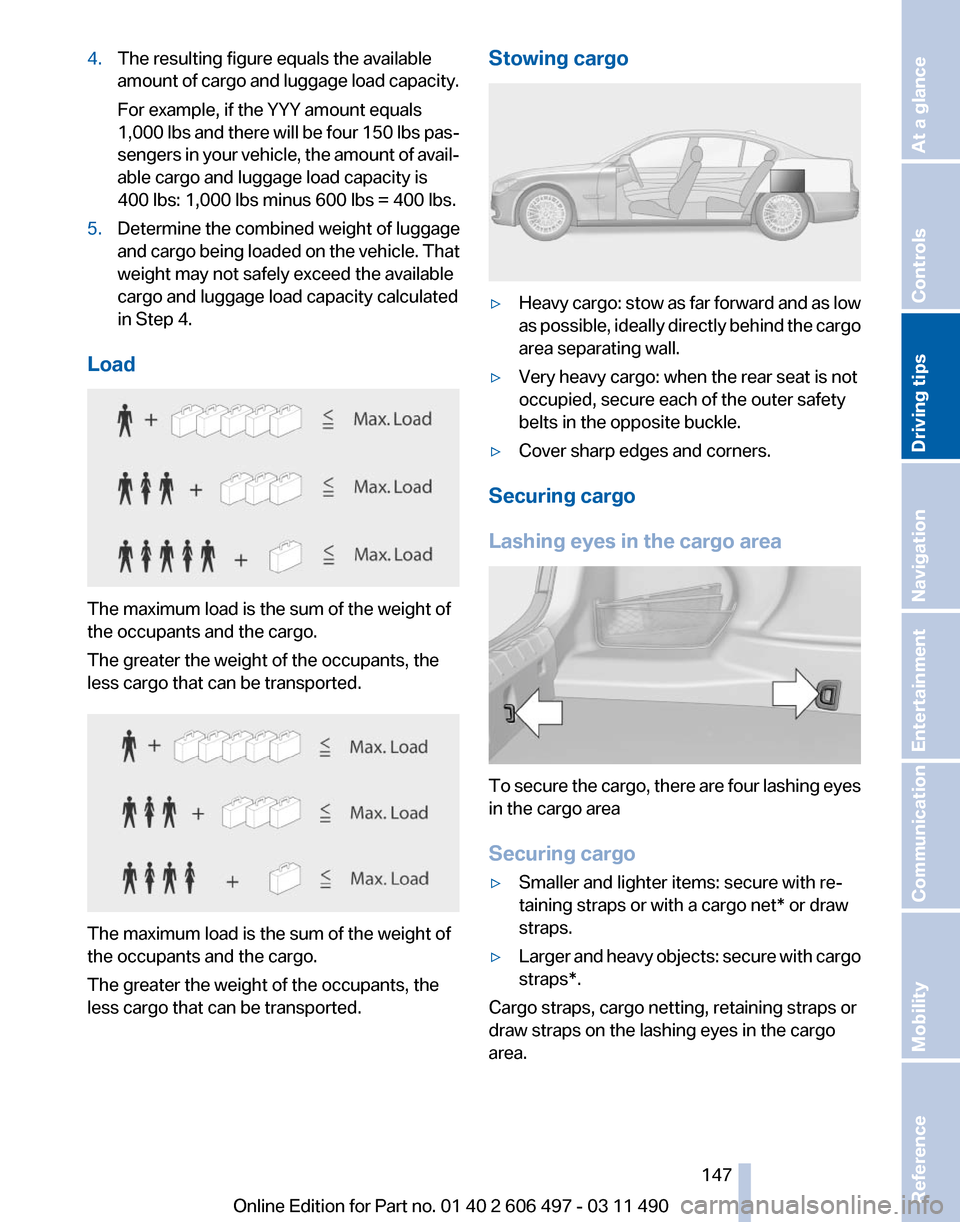
Load The maximum load is the sum of the weight of
the occupants and the cargo.
The greater the weight of the occupants, the
less cargo that can be transported.
The maximum load is the sum of the weight of
the occupants and the cargo.
The greater the weight of the occupants, the
less cargo that can be transported. Stowing cargo
▷
Heavy cargo: stow as far forward and as low
as
possible, ideally directly behind the cargo
area separating wall.
▷ Very heavy cargo: when the rear seat is not
occupied, secure each of the outer safety
belts in the opposite buckle.
▷ Cover sharp edges and corners.
Securing cargo
Lashing eyes in the cargo area To secure the cargo, there are four lashing eyes
in the cargo area
Securing cargo
▷
Smaller and lighter items: secure with re‐
taining straps or with a
cargo net* or draw
straps.
▷ Larger and heavy objects: secure with cargo
straps*.
Cargo straps, cargo netting, retaining straps or
draw straps on the lashing eyes in the cargo
area.
Seite 147
147Online Edition for Part no. 01 40 2 606 497 - 03 11 490
Reference Mobility Communication Entertainment Navigation
Driving tips Controls At a glance
Page 171 of 299
When surround is activated, multi-channel play‐
back is simulated when a stereo audio track is
played.
Volume
▷
"Speed volume": speed-dependent volume
control.
▷ "PDC": volume of the PDC signal* com‐
pared to the entertainment sound output.
▷ "Gong": volume of the signal, such as the
safety belt reminder, compared to the en‐
tertainment sound output.
▷ "Microphone": volume of the microphone*
during a phone call.
▷ "Loudspeak.":
volume of the loudspeakers*
during a phone call.
The following volumes are only stored for the
respective paired telephone:
"Microphone",
"Loudspeak.".
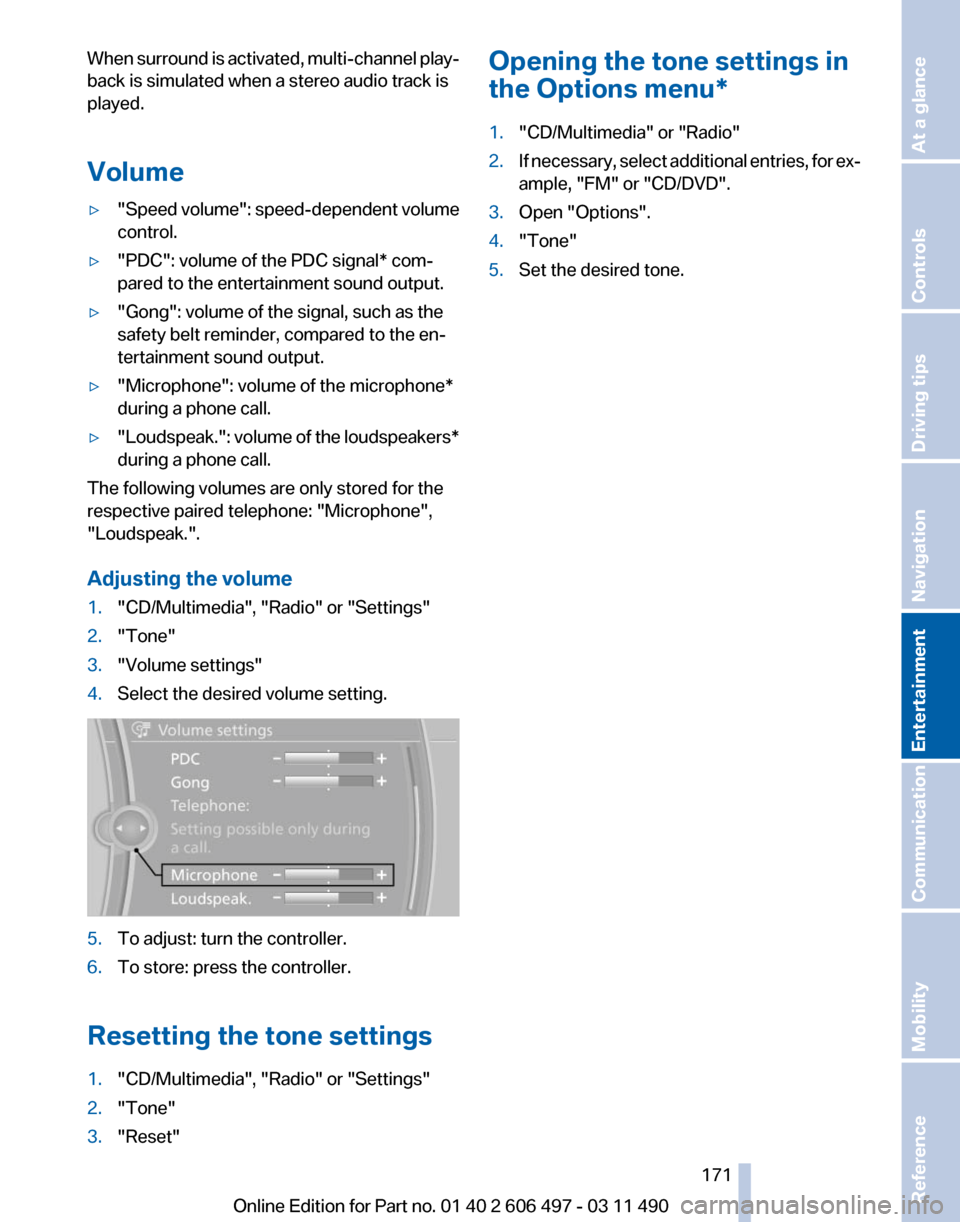
Adjusting the volume
1. "CD/Multimedia", "Radio" or "Settings"
2. "Tone"
3. "Volume settings"
4. Select the desired volume setting. 5.
To adjust: turn the controller.
6. To store: press the controller.
Resetting the tone settings
1. "CD/Multimedia", "Radio" or "Settings"
2. "Tone"
3. "Reset" Opening the tone settings in
the Options menu
*
1. "CD/Multimedia" or "Radio"
2. If necessary, select additional entries, for ex‐
ample, "FM" or
"CD/DVD".
3. Open "Options".
4. "Tone"
5. Set the desired tone.
Seite 171
171Online Edition for Part no. 01 40 2 606 497 - 03 11 490
Reference Mobility Communication
Entertainment Navigation Driving tips Controls At a glance
Page 273 of 299
When cleaning rubber seals, do not use any sil‐
icon-containing car care products in order to
avoid damage or reduced noise damping.
Fine wood parts*
Clean fine wood facing and fine wood compo‐
nents
only with a moist rag. Then dry with a soft
cloth.
Plastic components
These include:
▷ Imitation leather surfaces.
▷ Headliner.
▷ Lamp lenses.
▷ Instrument cluster cover.
▷ Matte black spray-coated components.
Clean with a microfiber cloth.
Moisten the cloth lightly and use plastic
cleanser, if necessary.
Do not soak the headliner.
Do not use cleansers that contain alcohol
or solvents
Do
not use cleansers that contain alcohol or sol‐
vents, such as lacquer thinners, heavy-duty
grease removers, fuel, or such; this could lead to
surface damage.◀
Safety belts
Dirty belt straps impede the reeling action and
thus have a negative impact on safety.
Chemical cleaning
Do not clean chemically; this can destroy
the webbing.◀
Use only a mild soapy solution, with the safety
belts clipped into their buckles.
Do not allow the reels to retract the safety belts
until they are dry. Floor carpets and floor mats*
No objects in the area around the pedals
Keep floor mats, carpets, and any other
objects out of the area of motion of the pedals;
otherwise, the function of the pedals could be
impeded while driving
Do not place additional floor mats over existing
mats or other objects.
Only
use floor mats that have been approved for
the vehicle and can be properly fixed in place.
Ensure that the floor mats are securely fastened
again after they were removed for cleaning, for
example.◀
Floor mats can be removed from the passenger
compartment for cleaning.
If the floor carpets are very dirty, clean with a
microfiber cloth and water or a textile cleaner. To
prevent matting of the carpet, rub back and forth
in the direction of travel only.
Sensors/cameras
To clean sensors and cameras, use a cloth mois‐
tened with a small amount of glass cleaner.
Displays/screens
Clean the displays with a microfiber cloth.
Cleaning displays
Do not use chemical or household cleans‐
ers.
Keep all fluids and moisture away from the unit.
Otherwise, they could affect or damage surfa‐
ces or electrical components.
Avoid pressing too hard when cleaning and do
not use abrasive materials; otherwise, damage
can result.◀
Long-term vehicle storage
Your service center can advise you on what to
consider when storing the vehicle for longer
than three months. Seite 273
273Online Edition for Part no. 01 40 2 606 497 - 03 11 490
Reference
Mobility Communication Entertainment Navigation Driving tips Controls At a glance
Page 289 of 299
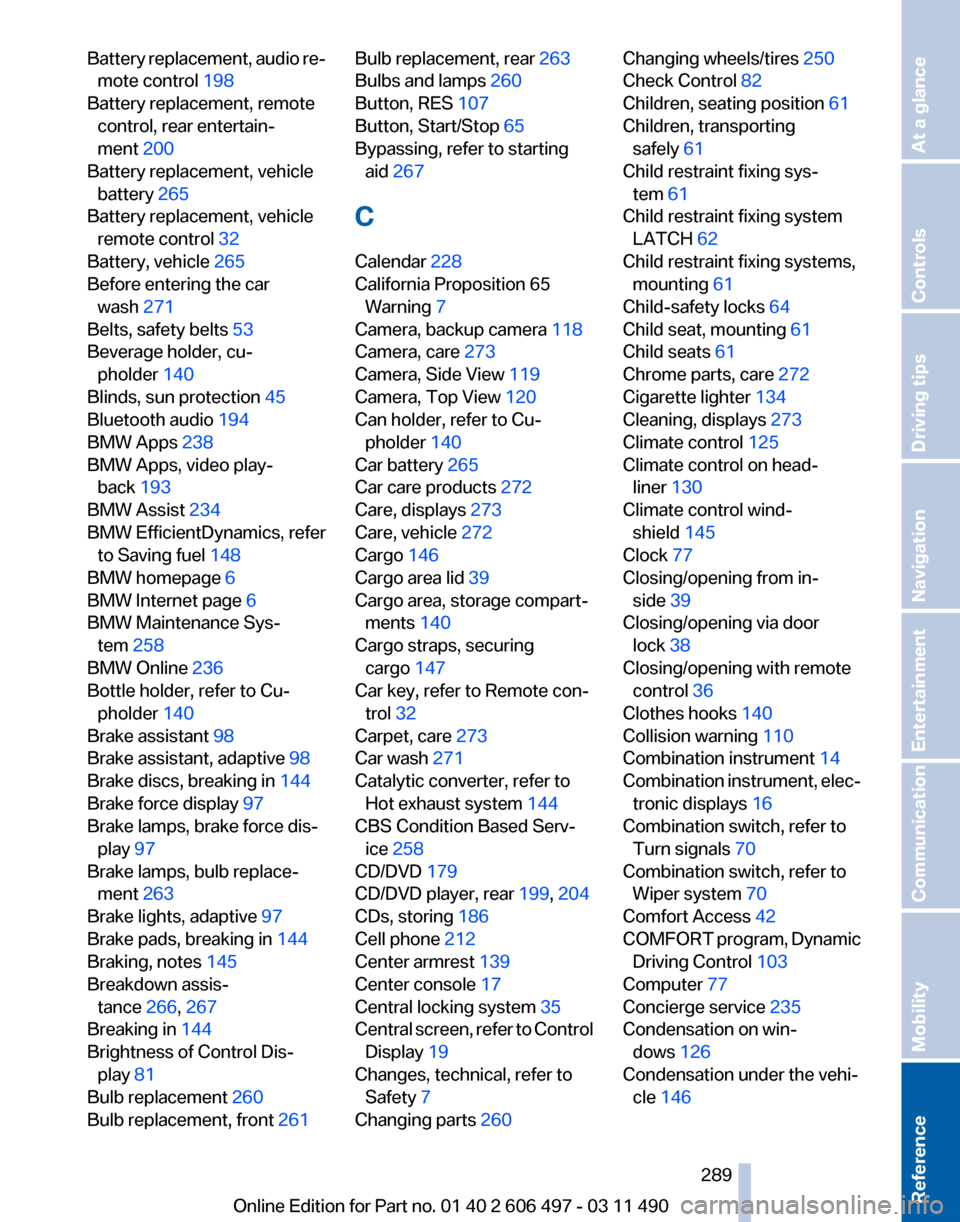
Battery replacement, audio re‐
mote control 198
Battery replacement, remote control, rear entertain‐
ment 200
Battery replacement, vehicle battery 265
Battery replacement, vehicle remote control 32
Battery, vehicle 265
Before entering the car wash 271
Belts, safety belts 53
Beverage holder, cu‐ pholder 140
Blinds, sun protection 45
Bluetooth audio 194
BMW Apps 238
BMW Apps, video play‐ back 193
BMW Assist 234
BMW EfficientDynamics, refer to Saving fuel 148
BMW homepage 6
BMW Internet page 6
BMW Maintenance Sys‐ tem 258
BMW Online 236
Bottle holder, refer to Cu‐ pholder 140
Brake assistant 98
Brake assistant, adaptive 98
Brake discs, breaking in 144
Brake force display 97
Brake lamps, brake force dis‐ play 97
Brake lamps, bulb replace‐ ment 263
Brake lights, adaptive 97
Brake pads, breaking in 144
Braking, notes 145
Breakdown assis‐ tance 266, 267
Breaking in 144
Brightness of Control Dis‐ play 81
Bulb replacement 260
Bulb replacement, front 261 Bulb replacement, rear
263
Bulbs and lamps 260
Button, RES 107
Button, Start/Stop 65
Bypassing, refer to starting aid 267
C
Calendar 228
California Proposition 65 Warning 7
Camera, backup camera 118
Camera, care 273
Camera, Side View 119
Camera, Top View 120
Can holder, refer to Cu‐ pholder 140
Car battery 265
Car care products 272
Care, displays 273
Care, vehicle 272
Cargo 146
Cargo area lid 39
Cargo area, storage compart‐ ments 140
Cargo straps, securing cargo 147
Car key, refer to Remote con‐ trol 32
Carpet, care 273
Car wash 271
Catalytic converter, refer to Hot exhaust system 144
CBS Condition Based Serv‐ ice 258
CD/DVD 179
CD/DVD player, rear 199, 204
CDs, storing 186
Cell phone 212
Center armrest 139
Center console 17
Central locking system 35
Central
screen, refer to Control
Display 19
Changes, technical, refer to Safety 7
Changing parts 260 Changing wheels/tires 250
Check Control 82
Children, seating position 61
Children, transporting safely 61
Child restraint fixing sys‐ tem 61
Child restraint fixing system LATCH 62
Child restraint fixing systems, mounting 61
Child-safety locks 64
Child seat, mounting 61
Child seats 61
Chrome parts, care 272
Cigarette lighter 134
Cleaning, displays 273
Climate control 125
Climate control on head‐ liner 130
Climate control wind‐ shield 145
Clock 77
Closing/opening from in‐ side 39
Closing/opening via door lock 38
Closing/opening with remote control 36
Clothes hooks 140
Collision warning 110
Combination instrument 14
Combination
instrument, elec‐
tronic displays 16
Combination switch, refer to Turn signals 70
Combination switch, refer to Wiper system 70
Comfort Access 42
COMFORT program, Dynamic Driving Control 103
Computer 77
Concierge service 235
Condensation on win‐ dows 126
Condensation under the vehi‐ cle 146
Seite 289
289Online Edition for Part no. 01 40 2 606 497 - 03 11 490
Reference Mobility Communication Entertainment Navigation Driving tips Controls At a glance
Page 294 of 299
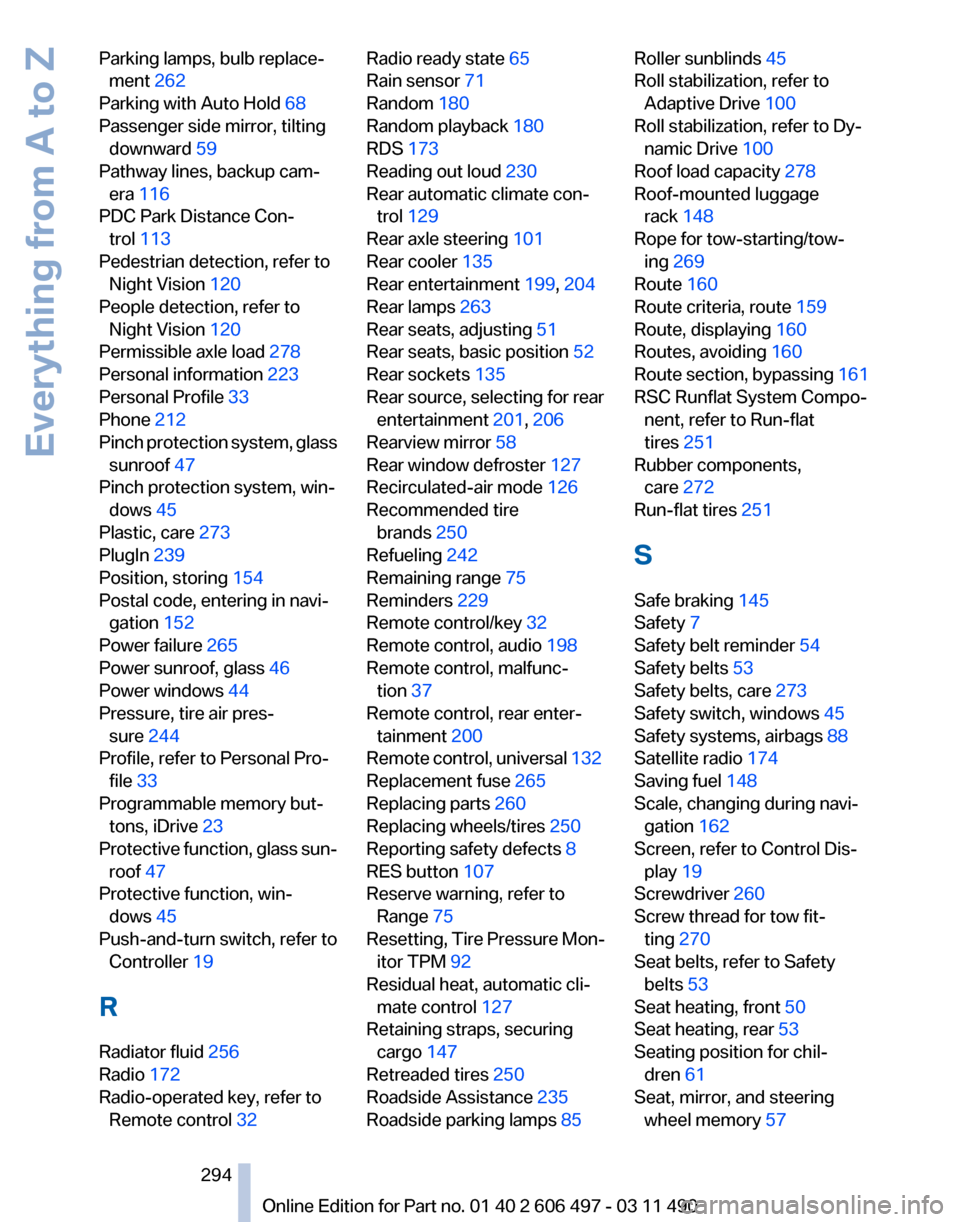
Parking lamps, bulb replace‐
ment 262
Parking with Auto Hold 68
Passenger side mirror, tilting downward 59
Pathway lines, backup cam‐ era 116
PDC Park Distance Con‐ trol 113
Pedestrian detection, refer to Night Vision 120
People detection, refer to Night Vision 120
Permissible axle load 278
Personal information 223
Personal Profile 33
Phone 212
Pinch
protection system, glass
sunroof 47
Pinch protection system, win‐ dows 45
Plastic, care 273
PlugIn 239
Position, storing 154
Postal code, entering in navi‐ gation 152
Power failure 265
Power sunroof, glass 46
Power windows 44
Pressure, tire air pres‐ sure 244
Profile, refer to Personal Pro‐ file 33
Programmable memory but‐ tons, iDrive 23
Protective function, glass sun‐ roof 47
Protective function, win‐ dows 45
Push-and-turn switch, refer to Controller 19
R
Radiator fluid 256
Radio 172
Radio-operated key, refer to Remote control 32 Radio ready state
65
Rain sensor 71
Random 180
Random playback 180
RDS 173
Reading out loud 230
Rear automatic climate con‐ trol 129
Rear axle steering 101
Rear cooler 135
Rear entertainment 199, 204
Rear lamps 263
Rear seats, adjusting 51
Rear seats, basic position 52
Rear sockets 135
Rear source, selecting for rear entertainment 201, 206
Rearview mirror 58
Rear window defroster 127
Recirculated-air mode 126
Recommended tire brands 250
Refueling 242
Remaining range 75
Reminders 229
Remote control/key 32
Remote control, audio 198
Remote control, malfunc‐ tion 37
Remote control, rear enter‐ tainment 200
Remote
control, universal 132
Replacement fuse 265
Replacing parts 260
Replacing wheels/tires 250
Reporting safety defects 8
RES button 107
Reserve warning, refer to Range 75
Resetting, Tire Pressure Mon‐ itor TPM 92
Residual heat, automatic cli‐ mate control 127
Retaining straps, securing cargo 147
Retreaded tires 250
Roadside Assistance 235
Roadside parking lamps 85 Roller sunblinds 45
Roll stabilization, refer to
Adaptive Drive 100
Roll stabilization, refer to Dy‐ namic Drive 100
Roof load capacity 278
Roof-mounted luggage rack 148
Rope for tow-starting/tow‐ ing 269
Route 160
Route criteria, route 159
Route, displaying 160
Routes, avoiding 160
Route
section, bypassing 161
RSC Runflat System Compo‐ nent, refer to Run-flat
tires 251
Rubber components, care 272
Run-flat tires 251
S
Safe braking 145
Safety 7
Safety belt reminder 54
Safety belts 53
Safety belts, care 273
Safety switch, windows 45
Safety systems, airbags 88
Satellite radio 174
Saving fuel 148
Scale, changing during navi‐ gation 162
Screen, refer to Control Dis‐ play 19
Screwdriver 260
Screw thread for tow fit‐ ting 270
Seat belts, refer to Safety belts 53
Seat heating, front 50
Seat heating, rear 53
Seating position for chil‐ dren 61
Seat, mirror, and steering wheel memory 57
Seite 294
294 Online Edition for Part no. 01 40 2 606 497 - 03 11 490
Everything from A to Z