seats BMW 750IL SEDAN 1998 Owners Manual
[x] Cancel search | Manufacturer: BMW, Model Year: 1998, Model line: 750IL SEDAN, Model: BMW 750IL SEDAN 1998Pages: 211, PDF Size: 1.68 MB
Page 11 of 211

Contents
Overview
Controls and features
Cockpit16
Instrument cluster18
Indicator and warning lamps20
Multifunction steering wheel
(MFL)23
Hazard warning flashers24
Warning triangle24
First-aid kit24
Refueling25
Fuel specifications25
Tire inflation pressure26
Locks and security systems:
Keys30
Electronic vehicle
immobilizer31
Central locking system32
Door locks – outside32
Radio remote control33
Door locks – inside36
Luggage compartment lid37
Luggage compartment39
Alarm system40
Electric power windows42
Security glass43
Sliding/Tilt sunroof44
Adjustments:
Seats46
Steering wheel49
Mirrors50
Seat, mirror and steering wheel
memory51
Car Memory, Key Memory53
Passenger safety systems:
Safety belts54
Airbags55
Child restraints57
Child restraint installation58
Child-safety locks58
Driving:
Steering/Ignition lock59
Starting engine59
Switching off engine60Parking brake61
Automatic transmission62
Automatic transmission with
Steptronic65
Turn signal/Headlamp flasher68
Washer/Wiper system/Rain
sensor68
Rear window defroster70
Cruise control70
Everything under control:
Odometer, outside temperature
display72
Tachometer72
Energy control73
Fuel gauge73
Temperature gauge74
Service Interval Display74
Check Control 75
Multi-Information Display
(MID)78
Digital clock79
Onboard computer84
Technology for safety and
convenience:
Park Distance Control PDC90
Automatic Stability Control plus
Traction (ASC+T)/Dynamic Sta-
bility Control (DSC)92
Electronic Damper Control
(EDC)93
Tire Pressure Control (RDC)94
Page 25 of 211
24n
Hazard warning flashers Warning triangle
*
First-aid kit
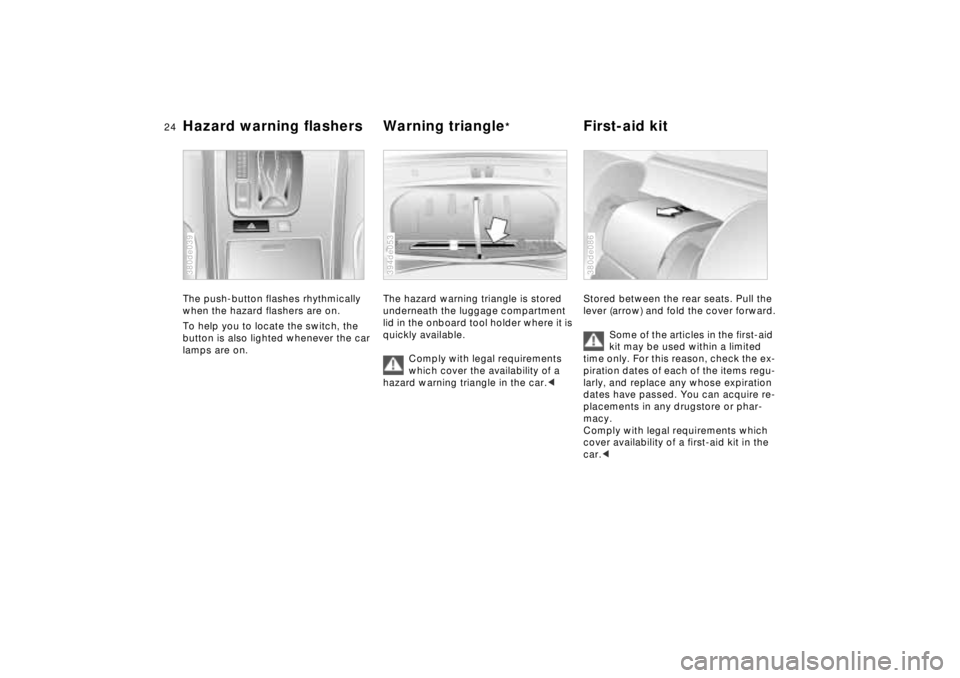
The push-button flashes rhythmically
when the hazard flashers are on.
To help you to locate the switch, the
button is also lighted whenever the car
lamps are on.380de039
The hazard warning triangle is stored
underneath the luggage compartment
lid in the onboard tool holder where it is
quickly available.
Comply with legal requirements
which cover the availability of a
hazard warning triangle in the car.< 394de053
Stored between the rear seats. Pull the
lever (arrow) and fold the cover forward.
Some of the articles in the first-aid
kit may be used within a limited
time only. For this reason, check the ex-
piration dates of each of the items regu-
larly, and replace any whose expiration
dates have passed. You can acquire re-
placements in any drugstore or phar-
macy.
Comply with legal requirements which
cover availability of a first-aid kit in the
car.< 380de086
Page 29 of 211
28n
Locks and security systems:
Keys30
Electronic vehicle
immobilizer31
Central locking system32
Door locks – outside32
Radio remote control33
Door locks – inside36
Luggage compartment lid37
Luggage compartment39
Alarm system40
Electric power windows42
Security glass43
Sliding/Tilt sunroof44
Adjustments:
Seats46
Steering wheel49
Mirrors50
Seat, mirror and steering wheel
memory51
Car Memory, Key Memory53
Passenger safety systems:
Safety belts54
Airbags55
Child restraints57
Child restraint installation58
Child-safety locks58
Driving:
Steering/Ignition lock59
Starting engine59
Switching off engine60
Page 44 of 211
43n
RepairsIndexOverview Controls Car care Technology Data
Electric power windows Security glass
*
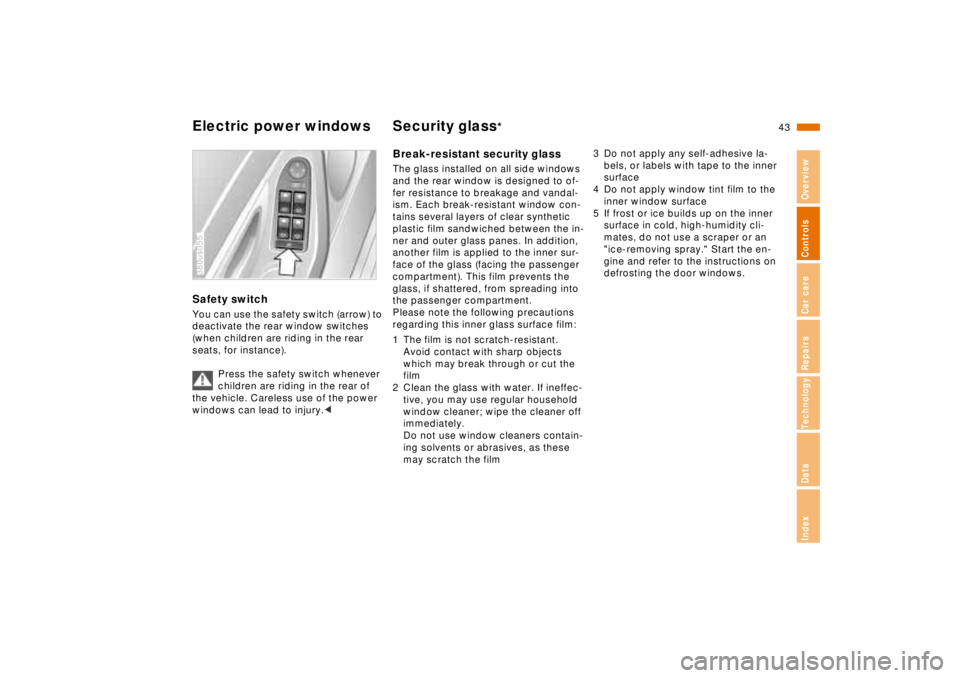
Safety switchYou can use the safety switch (arrow) to
deactivate the rear window switches
(when children are riding in the rear
seats, for instance).
Press the safety switch whenever
children are riding in the rear of
the vehicle. Careless use of the power
windows can lead to injury.< 380us055
Break-resistant security glassThe glass installed on all side windows
and the rear window is designed to of-
fer resistance to breakage and vandal-
ism. Each break-resistant window con-
tains several layers of clear synthetic
plastic film sandwiched between the in-
ner and outer glass panes. In addition,
another film is applied to the inner sur-
face of the glass (facing the passenger
compartment). This film prevents the
glass, if shattered, from spreading into
the passenger compartment.
Please note the following precautions
regarding this inner glass surface film:
1 The film is not scratch-resistant.
Avoid contact with sharp objects
which may break through or cut the
film
2 Clean the glass with water. If ineffec-
tive, you may use regular household
window cleaner; wipe the cleaner off
immediately.
Do not use window cleaners contain-
ing solvents or abrasives, as these
may scratch the film3 Do not apply any self-adhesive la-
bels, or labels with tape to the inner
surface
4 Do not apply window tint film to the
inner window surface
5 If frost or ice builds up on the inner
surface in cold, high-humidity cli-
mates, do not use a scraper or an
"ice-removing spray." Start the en-
gine and refer to the instructions on
defrosting the door windows.
Page 47 of 211
46n
Seat adjustment Electric power seatsFor maximum safety when adjusting the
seat position, please observe the fol-
lowing:
Never try to adjust your seat while
operating the vehicle. The seat
could respond with unexpected move-
ment, and the ensuing loss of vehicle
control could lead to an accident.
Wear the safety belt firmly against your
body at all times. In the event of a fron-
tal impact, a loose lap belt could slide
over your hips, leading to abdominal in-
jury. In addition, the safety belt's re-
straint effectiveness is reduced if the
belt is worn loosely.
Never ride with the backrest reclined to
an extreme horizontal angle (especially
important for front passengers to re-
member). Keep the backrest relatively
upright to minimize the risk of "sliding
under" the safety belt and sustaining in-
jury in an accident.
Do not slide the seats to the rear when
the vehicle is at an extreme angle (on
garage ramps or steep slopes, for in-
stance), to prevent the shoulder strap's
automatic height adjustment mecha-
nism from disengaging.<
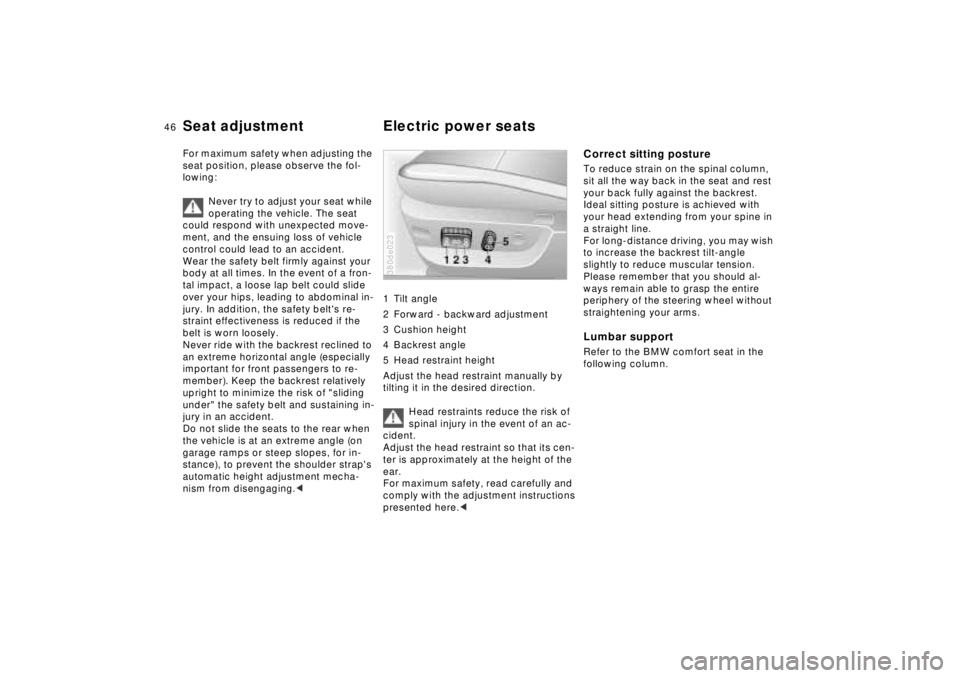
1 Tilt angle
2 Forward - backward adjustment
3 Cushion height
4 Backrest angle
5 Head restraint height
Adjust the head restraint manually by
tilting it in the desired direction.
Head restraints reduce the risk of
spinal injury in the event of an ac-
cident.
Adjust the head restraint so that its cen-
ter is approximately at the height of the
ear.
For maximum safety, read carefully and
comply with the adjustment instructions
presented here.< 380de023
Correct sitting postureTo reduce strain on the spinal column,
sit all the way back in the seat and rest
your back fully against the backrest.
Ideal sitting posture is achieved with
your head extending from your spine in
a straight line.
For long-distance driving, you may wish
to increase the backrest tilt-angle
slightly to reduce muscular tension.
Please remember that you should al-
ways remain able to grasp the entire
periphery of the steering wheel without
straightening your arms.Lumbar supportRefer to the BMW comfort seat in the
following column.
Page 57 of 211
56n
Airbags
For your safety, comply with the
following instructions for the air-
bags. If you do not, the airbags may not
be able to provide their maximum pro-
tection. All passengers in the vehicle
should be aware of and comply with
this information:
The airbags are supplemental restraint
devices designed to provide extra pro-
tection; they are not a substitute for
safety belts. Wear your safety belt at all
times. The airbags will not be triggered
in the event of a minor accident, a vehi-
cle roll-over, or collisions from the rear.
In these situations, the safety belts pro-
vide optimal protection.
Adjust your seat to a position that pro-
vides maximum distance between you
and the steering wheel, the instrument
panel and the door while still allowing
comfortable and safe access to all vehi-
cle controls.
Hold the steering wheel at the rim
(hands at the "9 o'clock and 3 o'clock"
positions) in order to avoid injuries to
the hands or arms if the airbag is trig-
gered.
Never allow any objects to obstruct the
area between the airbag and the driver/
passenger.
Do not use the cover panel above the
passenger-side airbag as a storage
area.
Do not apply tape or stickers or other
material over the padded steering
wheel hub, the instrument panel, the
side trim panels of the front or rear
doors and the roof pillars or the sides of
the headliner, or modify them in any
other way.
Do not install a rear-facing child-re-
straint device on the front passenger
seat.
If your vehicle is equipped with side air-
bags in the rear, be sure that child seats
are installed correctly and with the
greatest possible distance from the
door. Do not allow children to lean out
of the child's seat in the direction of the
door. Otherwise, serious injuries could
occur if the airbag is triggered.<
Even when all these guidelines are fol-
lowed, there is still a small residual risk
of injuries to the face, hands and arms
occurring in isolated instances. The ig-
nition and inflation noise may provoke a
mild temporary hearing loss in extremely
sensitive individuals.
Airbag warning information is also pro-
vided on the sun visors.
For additional information concerning the
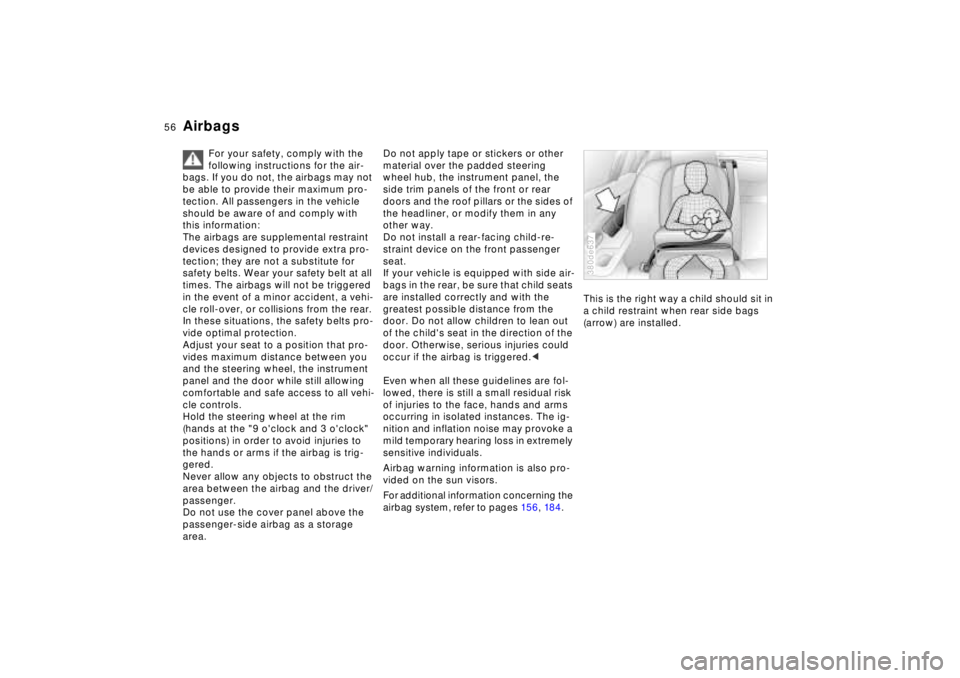
airbag system, refer to pages 15 6, 18 4.This is the right way a child should sit in
a child restraint when rear side bags
(arrow) are installed.
380de637
Page 58 of 211
57n
RepairsIndexOverview Controls Car care Technology Data
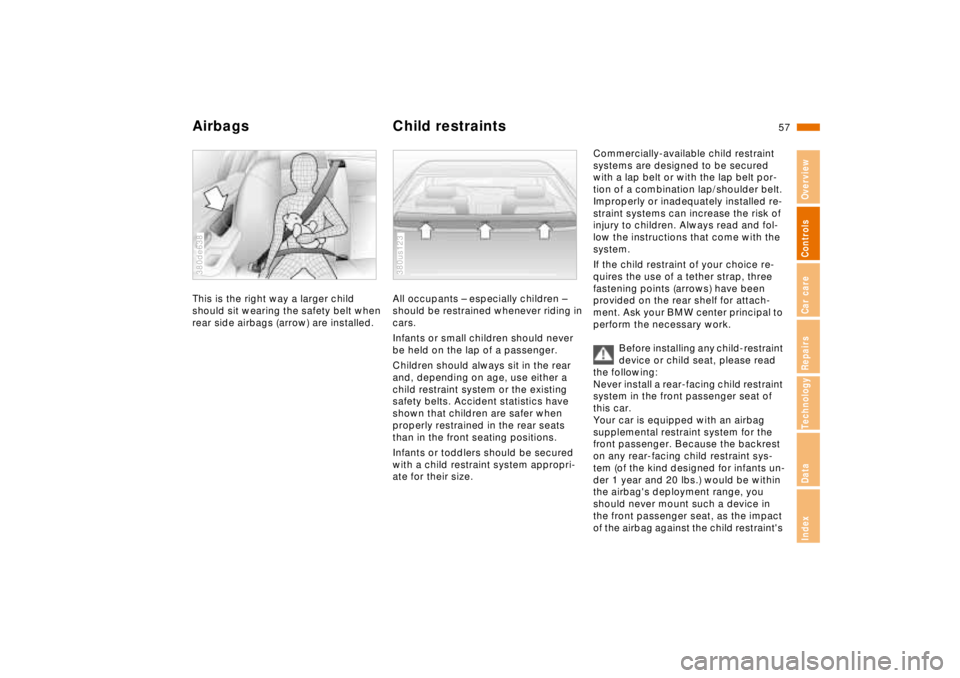
Airbags Child restraintsThis is the right way a larger child
should sit wearing the safety belt when
rear side airbags (arrow) are installed.380de638
All occupants – especially children –
should be restrained whenever riding in
cars.
Infants or small children should never
be held on the lap of a passenger.
Children should always sit in the rear
and, depending on age, use either a
child restraint system or the existing
safety belts. Accident statistics have
shown that children are safer when
properly restrained in the rear seats
than in the front seating positions.
Infants or toddlers should be secured
with a child restraint system appropri-
ate for their size.380us123
Commercially-available child restraint
systems are designed to be secured
with a lap belt or with the lap belt por-
tion of a combination lap/shoulder belt.
Improperly or inadequately installed re-
straint systems can increase the risk of
injury to children. Always read and fol-
low the instructions that come with the
system.
If the child restraint of your choice re-
quires the use of a tether strap, three
fastening points (arrows) have been
provided on the rear shelf for attach-
ment. Ask your BMW center principal to
perform the necessary work.
Before installing any child-restraint
device or child seat, please read
the following:
Never install a rear-facing child restraint
system in the front passenger seat of
this car.
Your car is equipped with an airbag
supplemental restraint system for the
front passenger. Because the backrest
on any rear-facing child restraint sys-
tem (of the kind designed for infants un-
der 1 year and 20 lbs.) would be within
the airbag's deployment range, you
should never mount such a device in
the front passenger seat, as the impact
of the airbag against the child restraint's
Page 114 of 211
113n
RepairsIndexOverview Controls Car care Technology Data
Additional storage areas Cup holder Cellular phones
*
Front storage compartment on slanted
surface of center console:
To open, press the recess at the top,
press to close.
This storage area can be ordered with
an optional CD or cassette holder.
Storage compartment on center con-
sole between the front seats:
To open, reach into the recess at the
front and pull upward.
When a cellular phone is installed, a
small storage compartment is provided
on each side of the phone. Press side
button to open.
A rotating coin holder
is located on the
right under the radio cover.
You will find additional storage com-
partments in all of the doors as well as
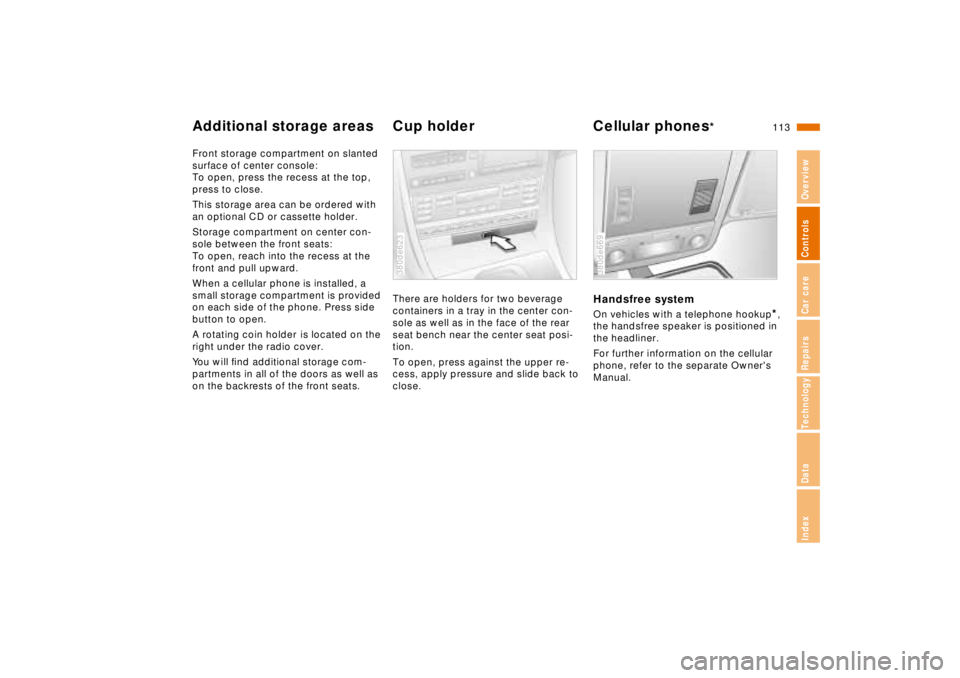
on the backrests of the front seats.There are holders for two beverage
containers in a tray in the center con-
sole as well as in the face of the rear
seat bench near the center seat posi-
tion.
To open, press against the upper re-
cess, apply pressure and slide back to
close.
380de623
Handsfree systemOn vehicles with a telephone hookup
*,
the handsfree speaker is positioned in
the headliner.
For further information on the cellular
phone, refer to the separate Owner's
Manual.
380de669
Page 117 of 211
116n
Ski bag
*
Designed for safe, convenient trans-
port of 3 to 4 pairs of skis.
The supplementary length provided by
the ski sacks in combination with the
space in the luggage compartment
makes it possible to transport skis of up
to 6.8 ft (2.10 m) in length. Because of
the tapered shape of the ski bag, it can
only accommodate two pairs of skis
with a length of 6.8 feet (2.10 m).
LoadingFold the center armrest completely out.
Detach the Velcro
â strip holding the
center cover in position and place it on
the armrest.
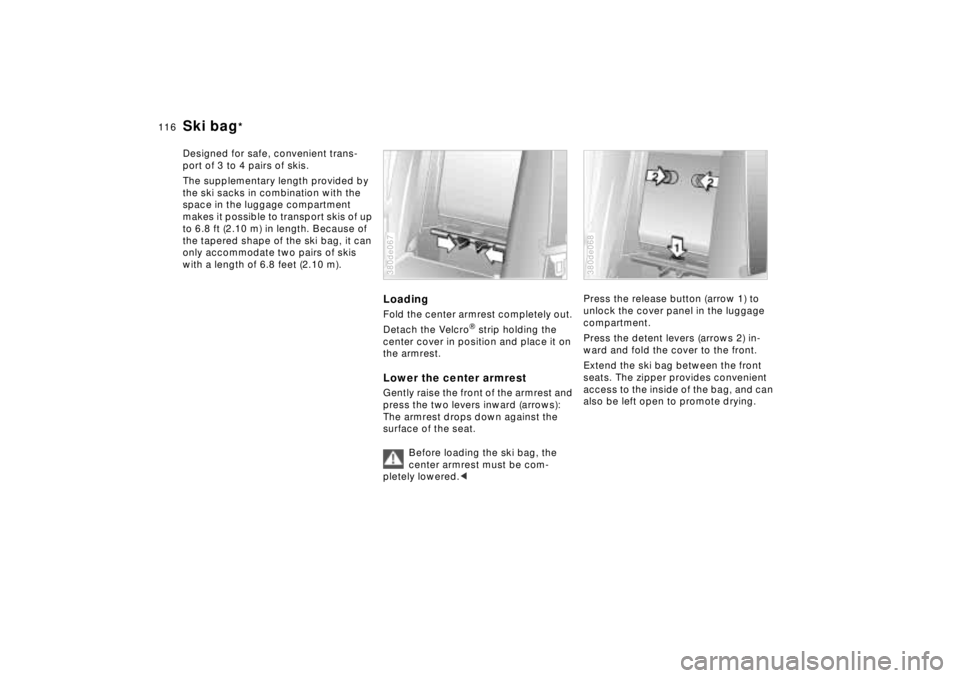
Lower the center armrestGently raise the front of the armrest and
press the two levers inward (arrows):
The armrest drops down against the
surface of the seat.
Before loading the ski bag, the
center armrest must be com-
pletely lowered.< 380de067
Press the release button (arrow 1) to
unlock the cover panel in the luggage
compartment.
Press the detent levers (arrows 2) in-
ward and fold the cover to the front.
Extend the ski bag between the front
seats. The zipper provides convenient
access to the inside of the bag, and can
also be left open to promote drying.380de068
Page 155 of 211

154n
Caring for your carCaring for other vehicle
components and materialsLight-alloy wheels should be treated
with alloy wheel cleaner, especially dur-
ing the winter months. However, do not
use aggressive products containing ac-
ids, strong alkalis or abrasives. Do not
use steam cleaners operating at tem-
peratures above 1407 (606). Follow
the manufacturer's instructions.
If your vehicle has chromed parts
* such
as window moldings, door handles or
other parts, clean these parts especially
carefully with ample clean water, espe-
cially if they have an accumulation of
road salt. You may wish to add a car
shampoo supplement to the water. Use
a chrome polish for an additional treat-
ment.
Plastic components, vinyl upholstery,
headliners, lamp lenses, the clear cover
of the instrument panel and compo-
nents with a sprayed dull black surface
can be cleaned with water (add plastic
cleaner as required). Do not allow mois-
ture to soak through the seats or head-
liner. Never use solvents such as lac-
quer thinner, heavy-duty grease
remover, fuels, etc.
Rubber components should be cleaned
with water only; a rubber treatment or
silicone spray may also be applied.Clean the wiper blades with soapy wa-
ter. The wiper blades should be re-
placed twice a year, before and after
the cold season.
Use only wiper blades approved
by BMW.<
The safety belts should be cleaned with
a mild soap and water solution without
being removed from the car. Never at-
tempt chemical or dry cleaning, as
damage to the belt fabric could result.
After cleaning, never allow the inertia
reel to retract the belts until they are
completely dry. Dirty safety belts pre-
vent the inertia reel mechanism from re-
tracting the strap properly, and thus
constitute a safety hazard.
Heavily soiled floor carpets and mats
*
can be cleaned with an interior cleaner.
The floor mats can be removed from the
vehicle for cleaning.
Please use only a damp cloth to clean
wooden fascia panels and components.
Follow up by drying with a soft cloth.
A full range of car-care products is
available from your BMW center.<
Leather careThe leather upholstery used by BMW is
a natural product of the highest quality,
processed using state-of-the-art meth-
ods to ensure that it will maintain its
high quality for years to come, provided
that it is properly cared for.
Because this product is manufactured
using natural materials, you must make
allowance for its special characteristics
as well as for the peculiarities of its use
and care.
Regular periodic cleaning and care are
essential, as dust and road dirt act as
abrasives in the pores and creases of
the material. This leads to wear spots
and premature brittleness on the sur-
face of the leather. We therefore sug-
gest that you clean the leather with a
vacuum cleaner or dust cloth at fre-
quent intervals.
For cleaning, use BMW leather cleaning
foam.