turn signal BMW 750LI 2014 Owners Manual
[x] Cancel search | Manufacturer: BMW, Model Year: 2014, Model line: 750LI, Model: BMW 750LI 2014Pages: 251, PDF Size: 5.75 MB
Page 13 of 251
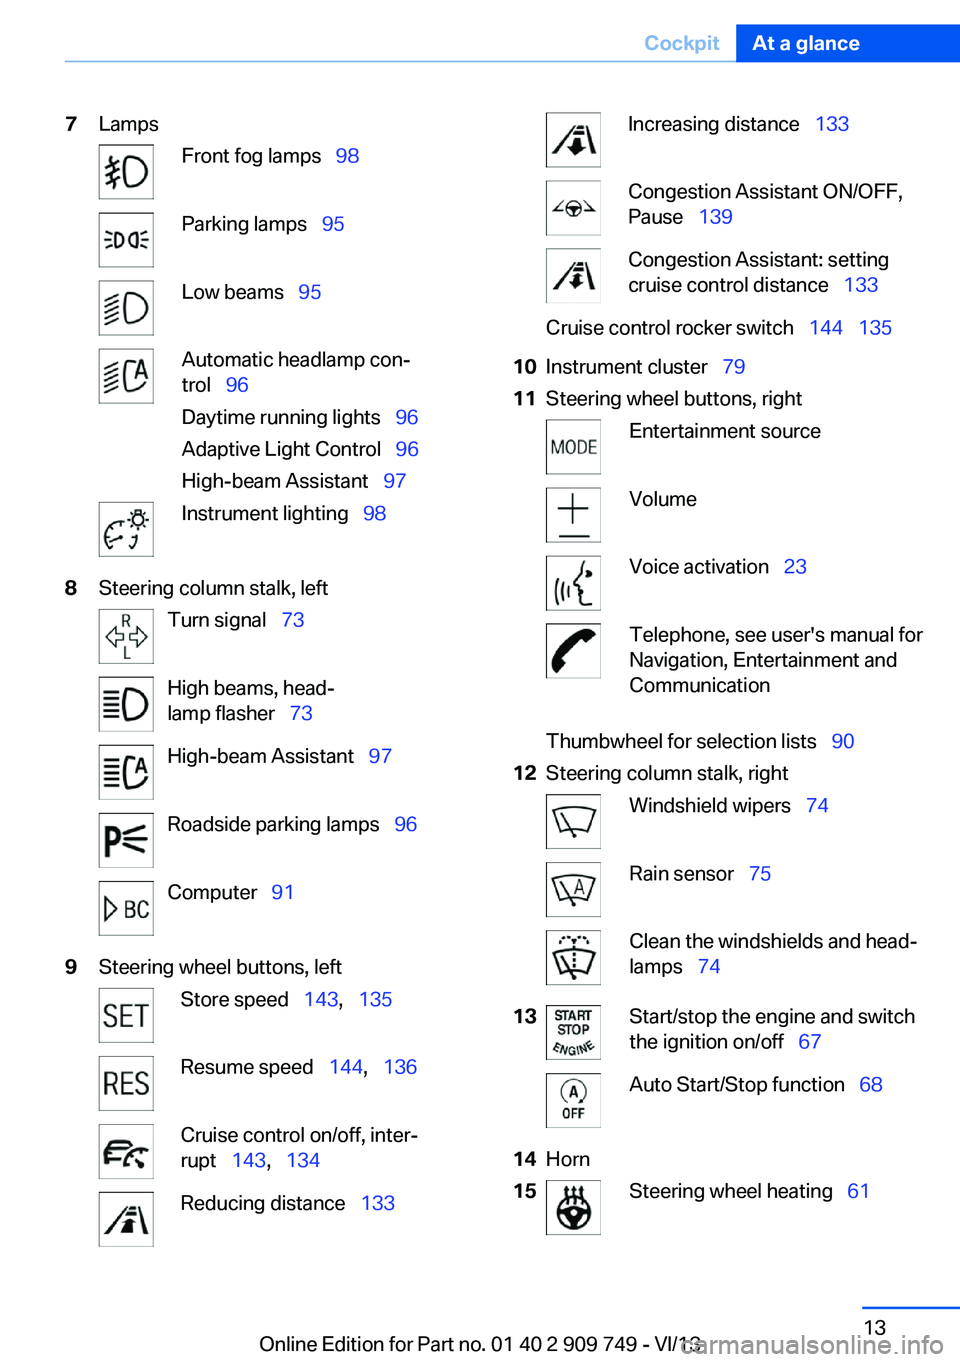
7LampsFront fog lamps 98Parking lamps 95Low beams 95Automatic headlamp con‐
trol 96
Daytime running lights 96
Adaptive Light Control 96
High-beam Assistant 97Instrument lighting 988Steering column stalk, leftTurn signal 73High beams, head‐
lamp flasher 73High-beam Assistant 97Roadside parking lamps 96Computer 919Steering wheel buttons, leftStore speed 143, 135Resume speed 144, 136Cruise control on/off, inter‐
rupt 143, 134Reducing distance 133Increasing distance 133Congestion Assistant ON/OFF,
Pause 139Congestion Assistant: setting
cruise control distance 133Cruise control rocker switch 144 13510Instrument cluster 7911Steering wheel buttons, rightEntertainment sourceVolumeVoice activation 23Telephone, see user's manual for
Navigation, Entertainment and
Communication
Thumbwheel for selection lists 90
12Steering column stalk, rightWindshield wipers 74Rain sensor 75Clean the windshields and head‐
lamps 7413Start/stop the engine and switch
the ignition on/off 67Auto Start/Stop function 6814Horn15Steering wheel heating 61Seite 13CockpitAt a glance13
Online Edition for Part no. 01 40 2 909 749 - VI/13
Page 33 of 251
▷Exterior mirror position.▷CD/Multimedia: audio source listened to
last.▷Unlocking/locking of the vehicle: settings.▷Driving Dynamics Control: sport program.▷Driver's seat position: automatic retrieval
after unlocking.▷Programmable memory buttons: assign‐
ment.▷Head-up Display: selection, brightness,
position and rotation of the display.▷Headlamp courtesy delay feature: time set‐
ting.▷Tone: tone settings.▷Automatic climate control: settings.▷Steering wheel position.▷Navigation: map views, route criteria, voice
output on/off.▷Night Vision with pedestrian detection.▷Intelligent Safety: individual settings.▷Park Distance Control PDC: adjusting the
signal tone volume.▷Radio: stored stations, station listened to
last, special settings.▷Rearview camera: selection of functions
and type of display.▷Side View: selection of the display type.▷Language on the Control Display.▷Lane departure warning: last setting, on/
off.▷Active Blind Spot Detection: last setting,
on/off.▷Daytime running lights: current setting.▷Triple turn signal activation.▷Locking the vehicle: after a brief period or
after starting to drive.Central locking system
The concept The central locking system becomes active
when the driver's door is closed.
The system simultaneously engages and re‐
leases the locks on the following:▷Doors.▷Trunk lid.▷Fuel filler flap.
Operating from the outside
▷Via the remote control.▷Via the driver's door lock.▷Via the door handles.▷Via the button in the trunk lid.
The following takes place simultaneously
when locking/unlocking the vehicle via the re‐
mote control:
▷Depending on how the vehicle is equipped,
the theft protection is activated/deacti‐
vated. Theft protection prevents the doors
from being unlocked using the lock but‐
tons or the door opener.▷The welcome lamps, interior lamps and
courtesy lamps are switched on and off.▷The alarm system, refer to page 42, is
armed or disarmed.
Operating from the inside
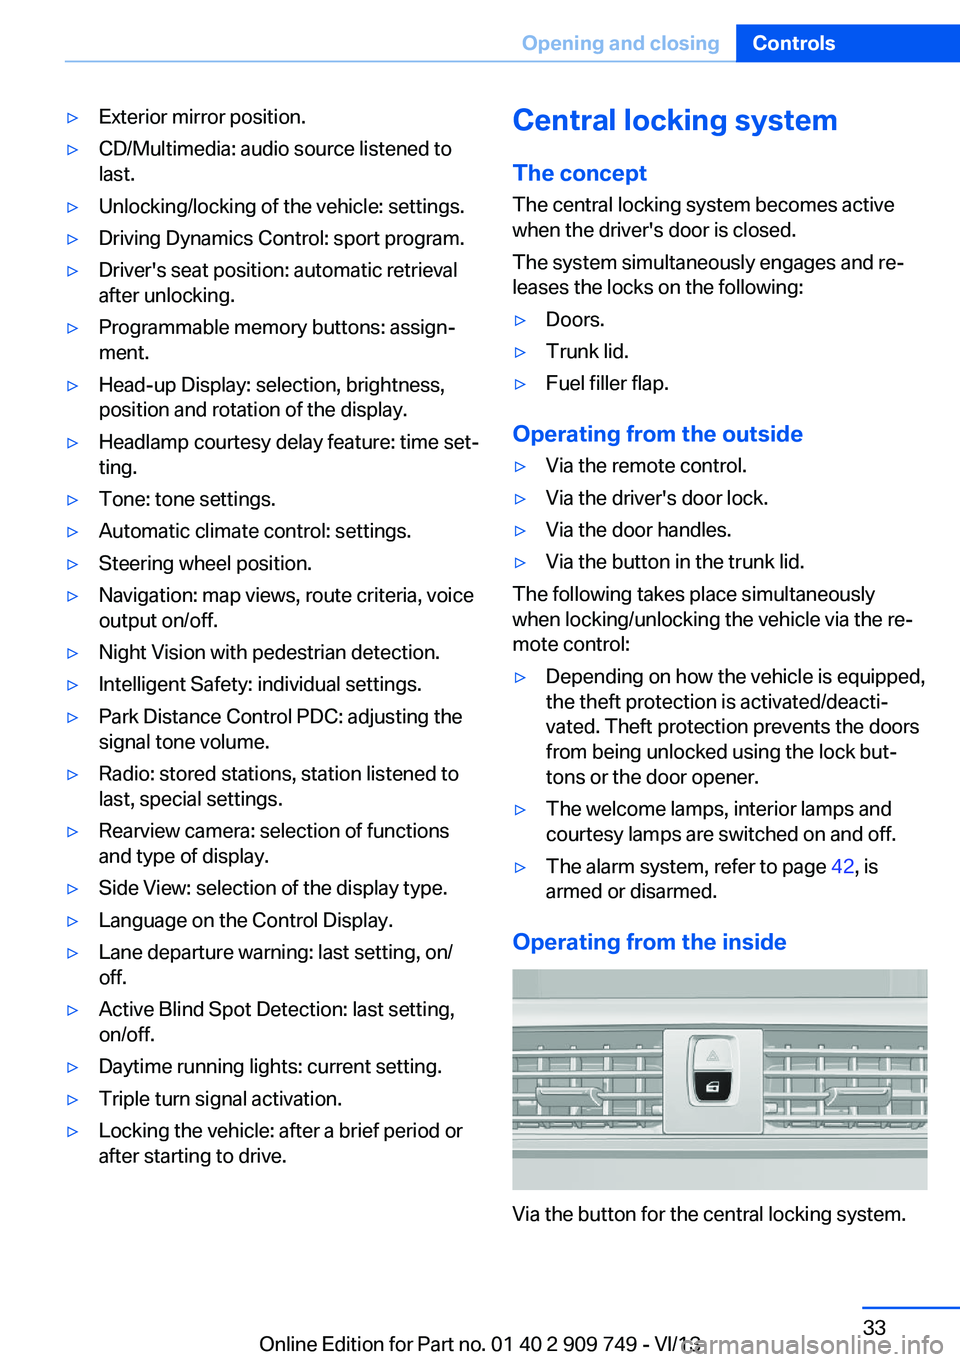
Via the button for the central locking system.
Seite 33Opening and closingControls33
Online Edition for Part no. 01 40 2 909 749 - VI/13
Page 73 of 251
DeactivatingPress the button again.
The LED and the letters AUTO H go
out.
Automatic Hold is deactivated.
If the vehicle is being held by Automatic Hold,
press on the brake pedal to deactivate it.
When the parking brake is set manually, Auto‐
matic Hold is deactivated automatically.
Driving Automatic Hold is activated: the vehicle is au‐
tomatically secured against rolling after brak‐
ing to a standstill.
The indicator lamp lights up green.
Step on the accelerator pedal to drive
off.
The brake is released automatically.
The indicator lamp goes out.
Lower lamp: indicator lamp in Canadian mod‐
els
Before driving into a car wash
Before driving into the car wash, deacti‐
vate Automatic Hold; otherwise, the parking
brake will be set when the vehicle is stationary
and the vehicle will no longer be able to roll.◀
Parking The parking brake is automatically set if the
engine is switched off while the vehicle is be‐
ing held by Automatic Hold.
The indicator lamp changes from green
to red.
The parking brake is not set if the en‐
gine is switched off while the vehicle is
coasting to a halt. Automatic Hold is
deactivated.
Lower lamp: indicator lamp in Canadian mod‐
elsAutomatic Hold remains activated during the
engine stop brought about by the Auto Start/
Stop function.
Take the remote control with you
Take the remote control with you when
leaving the vehicle so that children, for exam‐
ple, cannot release the parking brake.◀
Malfunction
In the event of a failure or malfunction of the
parking brake, secure the vehicle against roll‐
ing using a wheel chock, for example, when
leaving it.
Turn signal, high beams,
headlamp flasher
Turn signal Do not fold in the exterior mirrors
Do not fold in the exterior mirror while
driving and when the turn signals/warning
flashers are working, or else the additional
flasher lights in the exterior mirror will no lon‐
ger be in the prescribed position and will be
difficult to see.◀
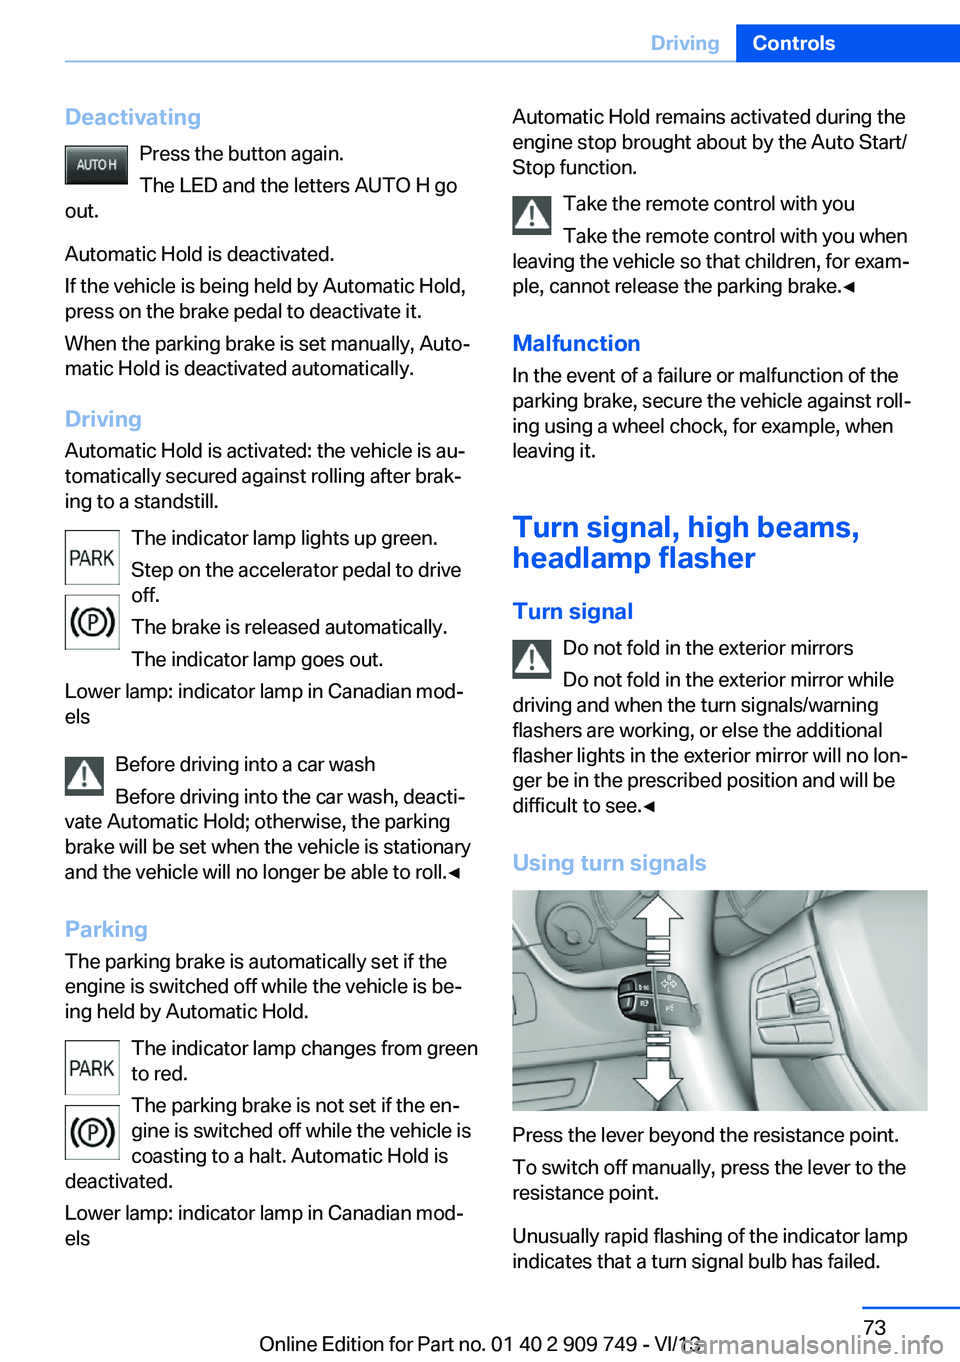
Using turn signals
Press the lever beyond the resistance point.
To switch off manually, press the lever to the
resistance point.
Unusually rapid flashing of the indicator lamp
indicates that a turn signal bulb has failed.
Seite 73DrivingControls73
Online Edition for Part no. 01 40 2 909 749 - VI/13
Page 74 of 251
Triple turn signal activationPress the lever to the resistance point.
The turn signal flashes three times.
The function can be activated or deactivated:1."Settings"2."Lighting"3."Triple turn signal"
Signaling briefly
Press the lever to the resistance point and hold
it there for as long as you want the turn signal
to flash.
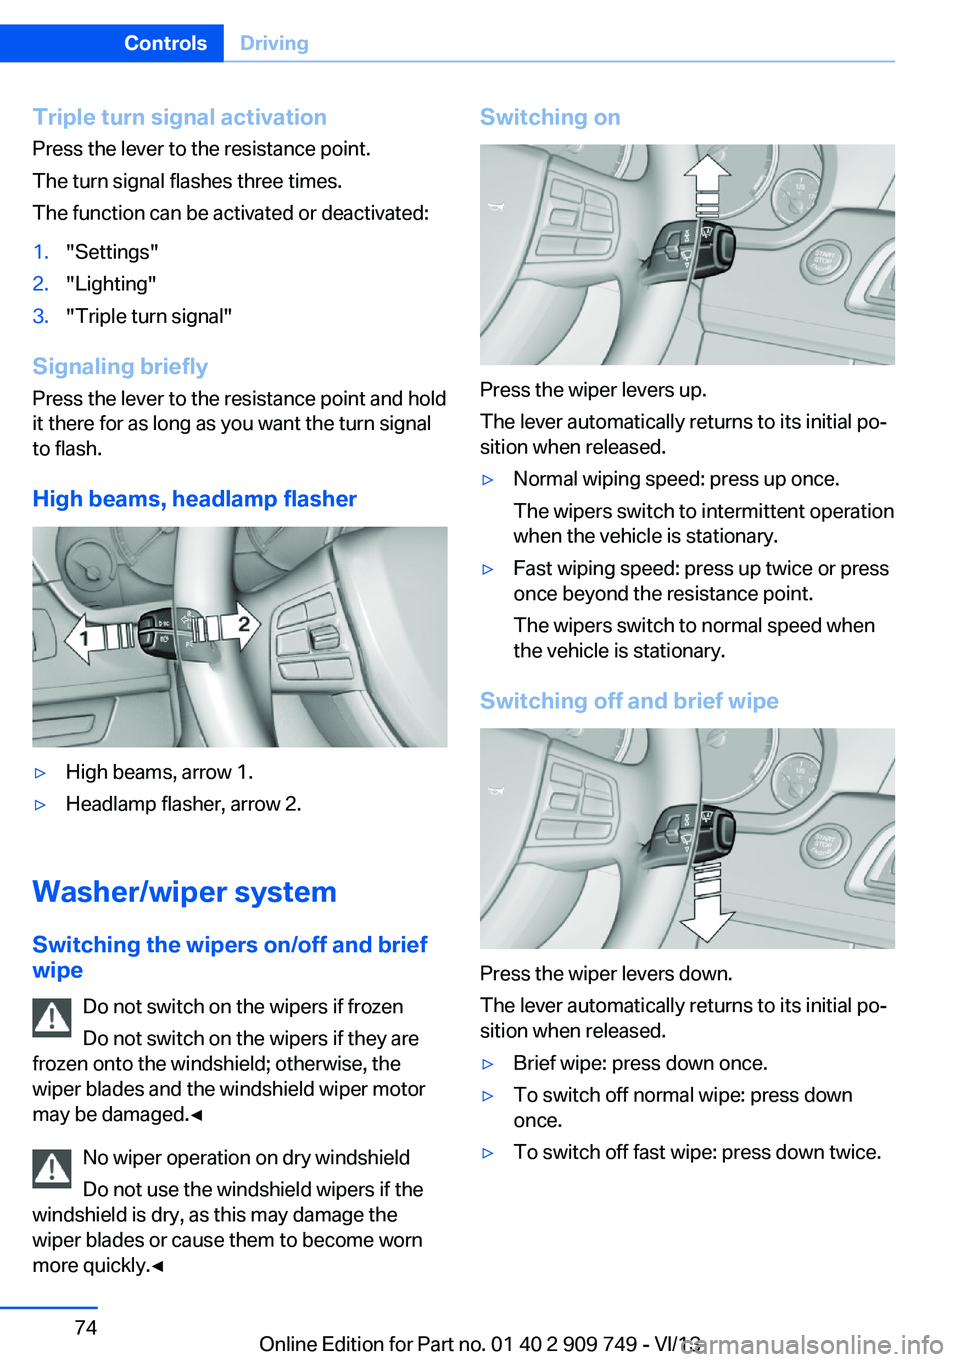
High beams, headlamp flasher
▷High beams, arrow 1.▷Headlamp flasher, arrow 2.
Washer/wiper system Switching the wipers on/off and brief
wipe
Do not switch on the wipers if frozen
Do not switch on the wipers if they are
frozen onto the windshield; otherwise, the wiper blades and the windshield wiper motor
may be damaged.◀
No wiper operation on dry windshield
Do not use the windshield wipers if the
windshield is dry, as this may damage the
wiper blades or cause them to become worn
more quickly.◀
Switching on
Press the wiper levers up.
The lever automatically returns to its initial po‐
sition when released.
▷Normal wiping speed: press up once.
The wipers switch to intermittent operation
when the vehicle is stationary.▷Fast wiping speed: press up twice or press
once beyond the resistance point.
The wipers switch to normal speed when
the vehicle is stationary.
Switching off and brief wipe
Press the wiper levers down.
The lever automatically returns to its initial po‐
sition when released.
▷Brief wipe: press down once.▷To switch off normal wipe: press down
once.▷To switch off fast wipe: press down twice.Seite 74ControlsDriving74
Online Edition for Part no. 01 40 2 909 749 - VI/13
Page 84 of 251
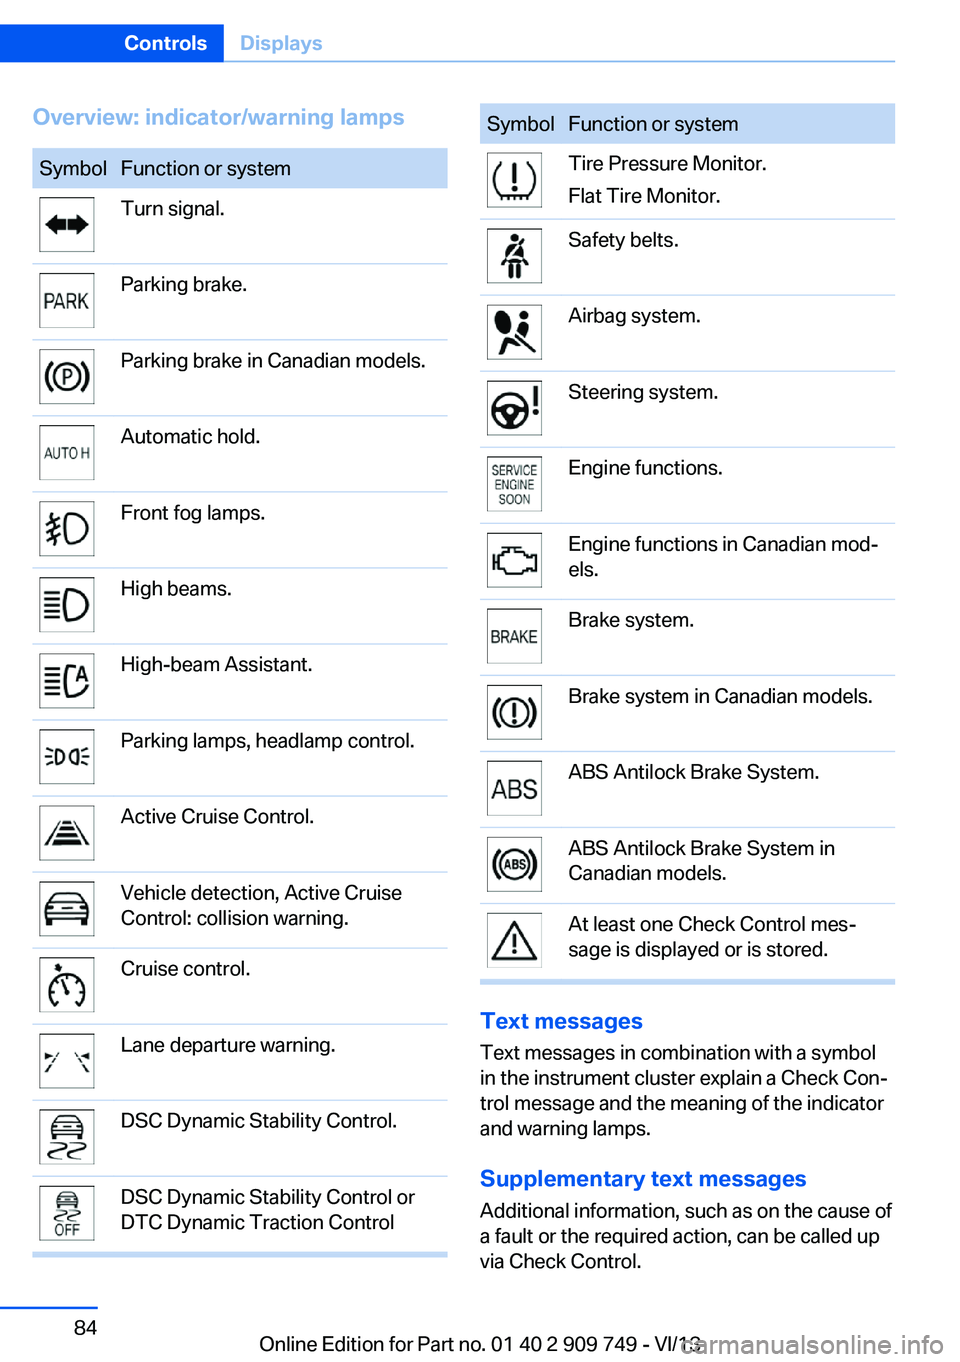
Overview: indicator/warning lampsSymbolFunction or systemTurn signal.Parking brake.Parking brake in Canadian models.Automatic hold.Front fog lamps.High beams.High-beam Assistant.Parking lamps, headlamp control.Active Cruise Control.Vehicle detection, Active Cruise
Control: collision warning.Cruise control.Lane departure warning.DSC Dynamic Stability Control.DSC Dynamic Stability Control or
DTC Dynamic Traction ControlSymbolFunction or systemTire Pressure Monitor.
Flat Tire Monitor.Safety belts.Airbag system.Steering system.Engine functions.Engine functions in Canadian mod‐
els.Brake system.Brake system in Canadian models.ABS Antilock Brake System.ABS Antilock Brake System in
Canadian models.At least one Check Control mes‐
sage is displayed or is stored.
Text messages
Text messages in combination with a symbol
in the instrument cluster explain a Check Con‐ trol message and the meaning of the indicator
and warning lamps.
Supplementary text messages
Additional information, such as on the cause of
a fault or the required action, can be called up
via Check Control.
Seite 84ControlsDisplays84
Online Edition for Part no. 01 40 2 909 749 - VI/13
Page 85 of 251
The supplementary text of urgent messages is
automatically displayed on the Control Display.
Symbols
Depending on the Check Control message, the
following functions can be selected.▷ "Owner's Manual"
Display additional information about the
Check Control message in the Integrated
Owner's Manual.▷ "Service request"
Contact the service partner.▷ "Roadside Assistance"
Contact Roadside Assistance.
Hiding Check Control messages
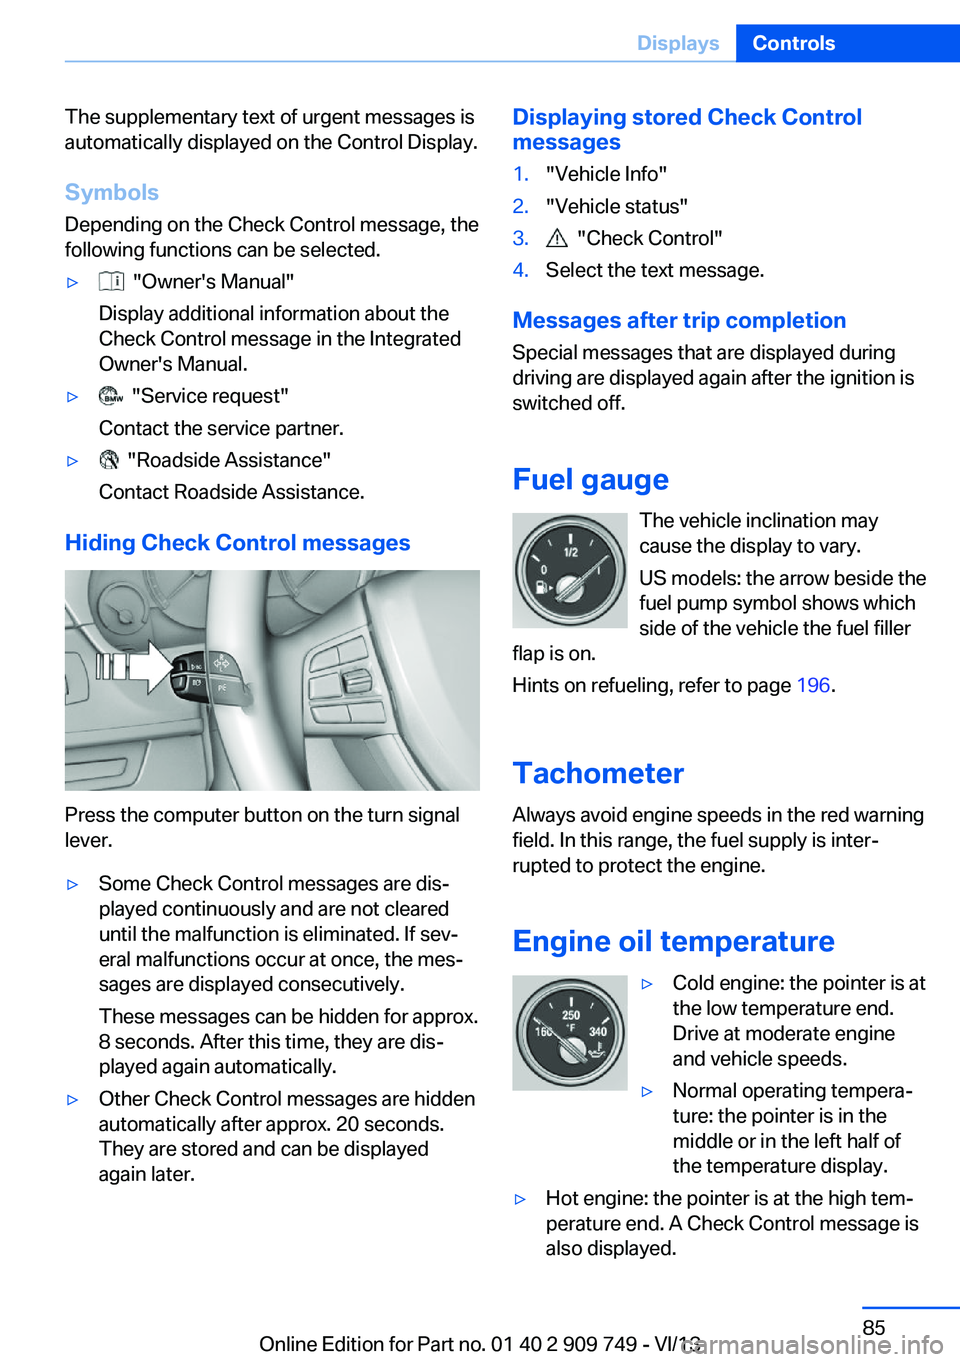
Press the computer button on the turn signal
lever.
▷Some Check Control messages are dis‐
played continuously and are not cleared
until the malfunction is eliminated. If sev‐
eral malfunctions occur at once, the mes‐
sages are displayed consecutively.
These messages can be hidden for approx.
8 seconds. After this time, they are dis‐
played again automatically.▷Other Check Control messages are hidden
automatically after approx. 20 seconds.
They are stored and can be displayed
again later.Displaying stored Check Control
messages1."Vehicle Info"2."Vehicle status"3. "Check Control"4.Select the text message.
Messages after trip completion
Special messages that are displayed during
driving are displayed again after the ignition is
switched off.
Fuel gauge The vehicle inclination may
cause the display to vary.
US models: the arrow beside the
fuel pump symbol shows which
side of the vehicle the fuel filler
flap is on.
Hints on refueling, refer to page 196.
Tachometer
Always avoid engine speeds in the red warning
field. In this range, the fuel supply is inter‐
rupted to protect the engine.
Engine oil temperature
▷Cold engine: the pointer is at
the low temperature end.
Drive at moderate engine
and vehicle speeds.▷Normal operating tempera‐
ture: the pointer is in the
middle or in the left half of
the temperature display.▷Hot engine: the pointer is at the high tem‐
perature end. A Check Control message is
also displayed.Seite 85DisplaysControls85
Online Edition for Part no. 01 40 2 909 749 - VI/13
Page 91 of 251
ComputerIndication in the info display The information from the on‐
board computer is shown in the
info display in the instrument
cluster.
Calling up information on the info
display
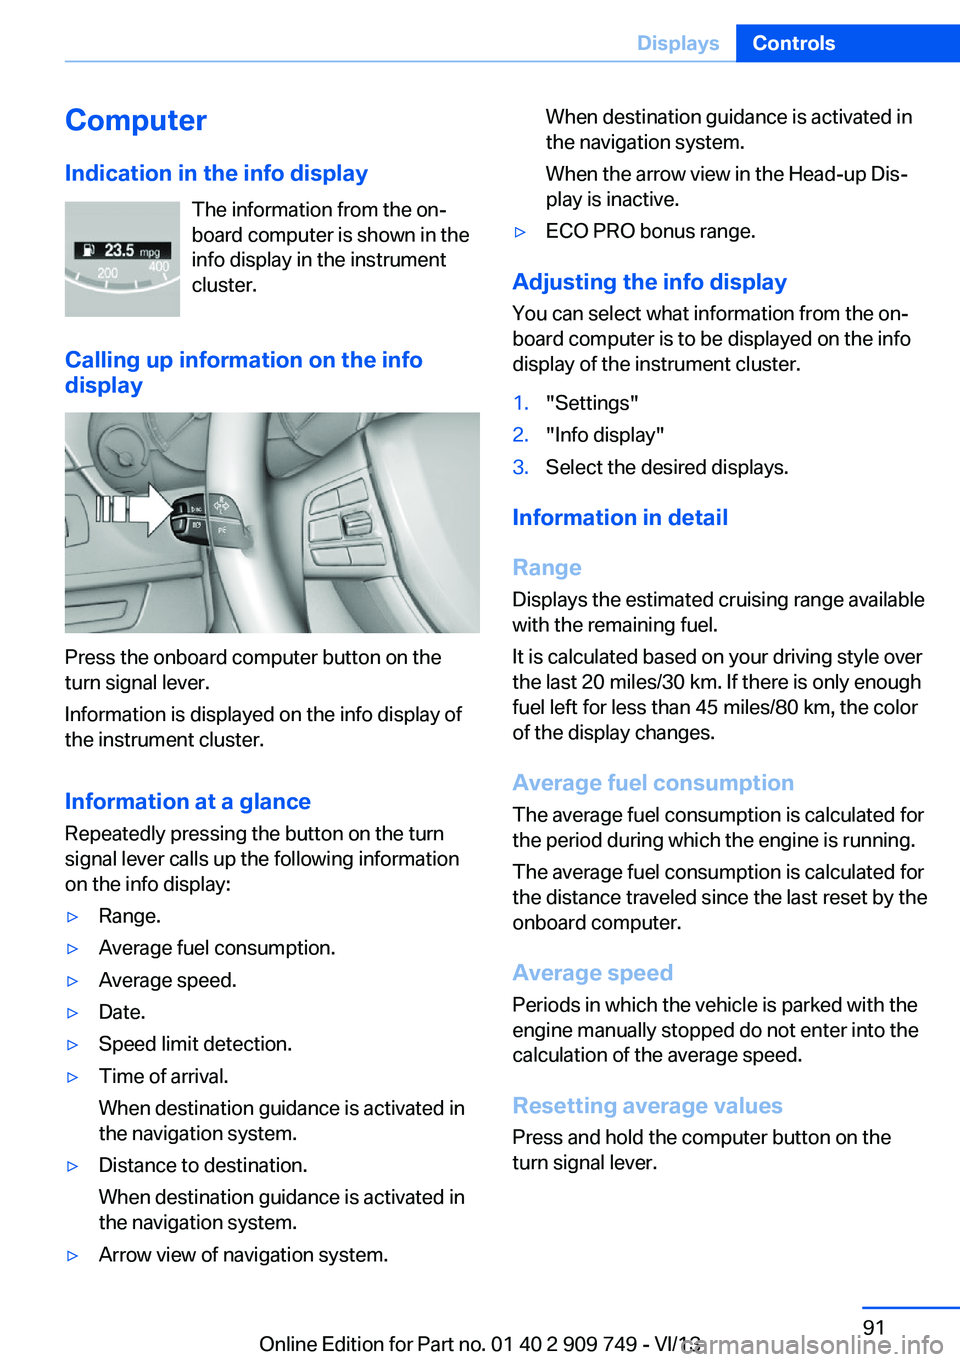
Press the onboard computer button on the
turn signal lever.
Information is displayed on the info display of
the instrument cluster.
Information at a glance
Repeatedly pressing the button on the turn
signal lever calls up the following information
on the info display:
▷Range.▷Average fuel consumption.▷Average speed.▷Date.▷Speed limit detection.▷Time of arrival.
When destination guidance is activated in
the navigation system.▷Distance to destination.
When destination guidance is activated in
the navigation system.▷Arrow view of navigation system.When destination guidance is activated in
the navigation system.
When the arrow view in the Head-up Dis‐
play is inactive.▷ECO PRO bonus range.
Adjusting the info display
You can select what information from the on‐
board computer is to be displayed on the info
display of the instrument cluster.
1."Settings"2."Info display"3.Select the desired displays.
Information in detail
Range
Displays the estimated cruising range available
with the remaining fuel.
It is calculated based on your driving style over
the last 20 miles/30 km. If there is only enough
fuel left for less than 45 miles/80 km, the color
of the display changes.
Average fuel consumption
The average fuel consumption is calculated for
the period during which the engine is running.
The average fuel consumption is calculated for
the distance traveled since the last reset by the
onboard computer.
Average speed
Periods in which the vehicle is parked with the
engine manually stopped do not enter into the
calculation of the average speed.
Resetting average values
Press and hold the computer button on the
turn signal lever.
Seite 91DisplaysControls91
Online Edition for Part no. 01 40 2 909 749 - VI/13
Page 97 of 251
The turning lamps are automatically switched
on depending on the steering angle or the use
of turn signals.
To avoid blinding oncoming traffic, the Adap‐
tive Light Control does not swivel to the driv‐
er's side when the vehicle is at a standstill.
When driving in reverse, only the turning lamp
is active.
Self-leveling headlamps The self-leveling headlamps compensate for
acceleration and braking operations in order
not to blind the oncoming traffic and to achieve
optimum illumination of the roadway.
Malfunction
A Check Control message is displayed.
Adaptive light control is malfunctioning or has
failed. Have the system checked as soon as
possible.
High-beam Assistant
The concept When the low beams are switched on, this sys‐
tem automatically switches the high beams on
and off or suppresses the light in the areas that
blind oncoming traffic. The procedure is con‐
trolled by a sensor on the front of the interior
rearview mirror. The assistant ensures that the
high beams are switched on whenever the traf‐
fic situation allows. The driver can intervene at
any time and switch the high beams on and off
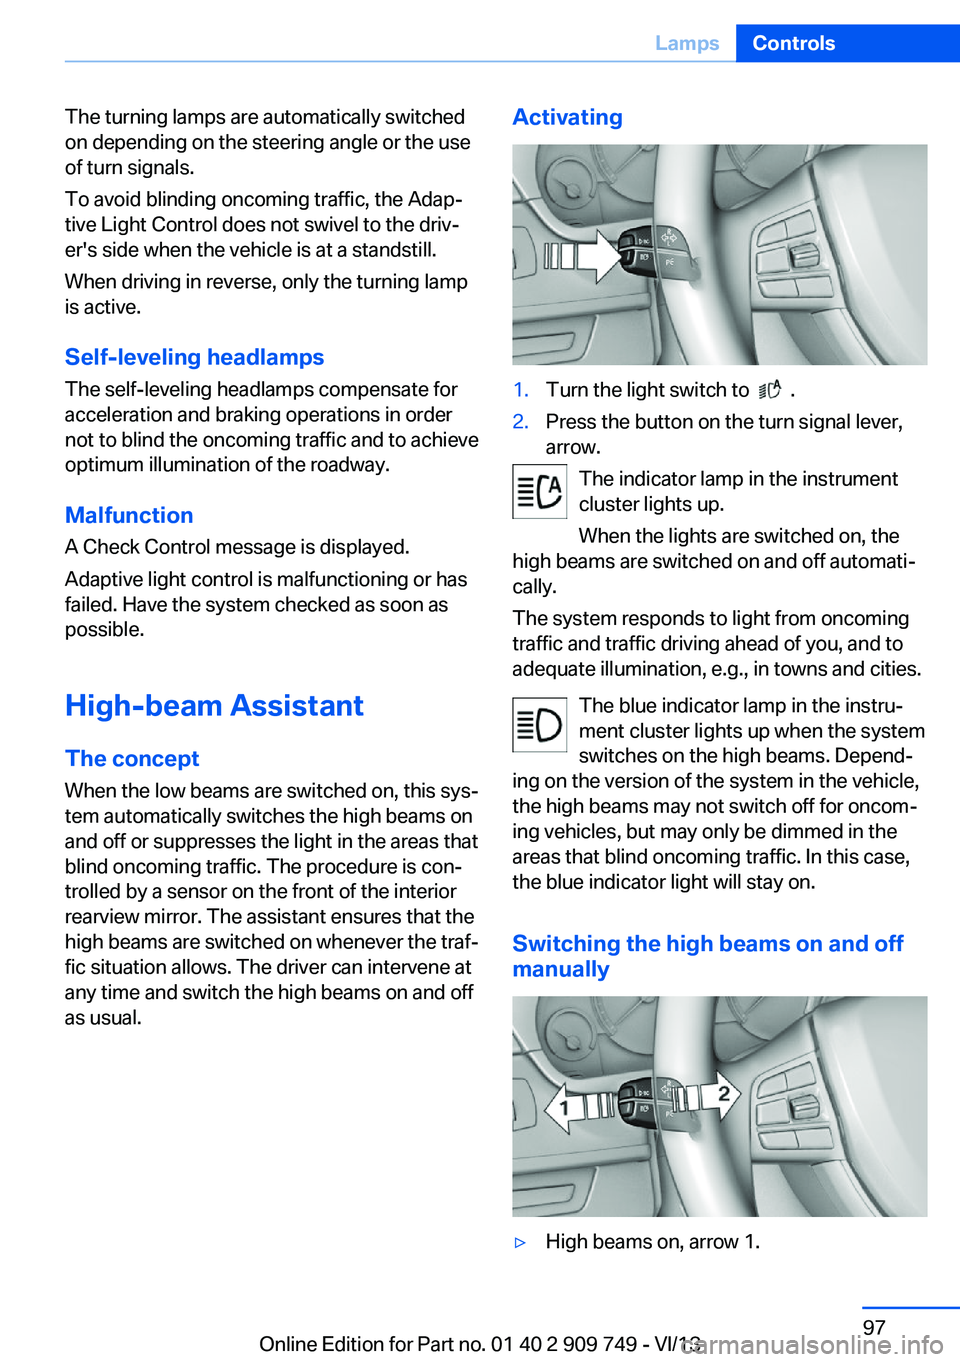
as usual.Activating1.Turn the light switch to .2.Press the button on the turn signal lever,
arrow.
The indicator lamp in the instrument
cluster lights up.
When the lights are switched on, the
high beams are switched on and off automati‐
cally.
The system responds to light from oncoming
traffic and traffic driving ahead of you, and to
adequate illumination, e.g., in towns and cities.
The blue indicator lamp in the instru‐
ment cluster lights up when the system
switches on the high beams. Depend‐
ing on the version of the system in the vehicle, the high beams may not switch off for oncom‐
ing vehicles, but may only be dimmed in the
areas that blind oncoming traffic. In this case,
the blue indicator light will stay on.
Switching the high beams on and off
manually
▷High beams on, arrow 1.Seite 97LampsControls97
Online Edition for Part no. 01 40 2 909 749 - VI/13
Page 98 of 251
▷High beams off/headlamp flasher, arrow 2.
The High-beam Assistant can be switched off
when manually adjusting the light. To reacti‐
vate the High-beam Assistant, press the but‐
ton on the turn signal lever.
System limits Personal responsibility
The high-beam assistant cannot serve as
a substitute for the driver's personal judgment
of when to use the high beams. Therefore,
manually switch off the high beams in situa‐
tions where this is required to avoid a safety
risk.◀
The system is not fully functional in situations
such as the following, and driver intervention
may be necessary:
▷In very unfavorable weather conditions,
such as fog or heavy precipitation.▷In detecting poorly-lit road users, such as
pedestrians, cyclists, horseback riders and
wagons; when driving close to train or ship
traffic; and at animal crossings.▷In tight curves, on hilltops or in depres‐
sions, in cross traffic or half-obscured on‐
coming traffic on freeways.▷In poorly-lit towns and cities and in the
presence of highly reflective signs.▷At low speeds.▷When the windshield in front of the interior
rearview mirror is fogged over, dirty or cov‐
ered with stickers, etc.Camera
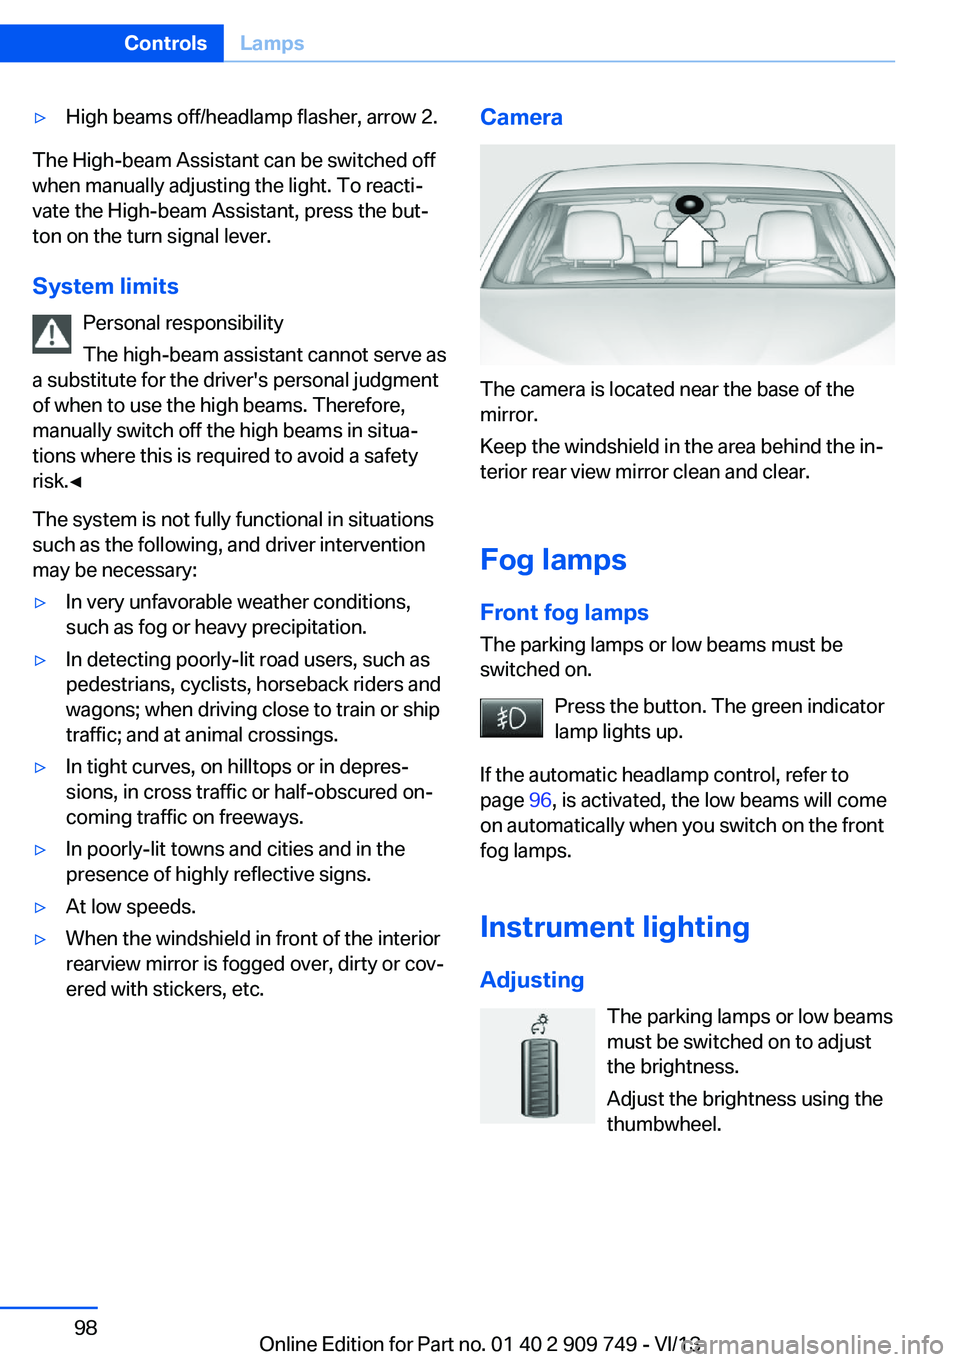
The camera is located near the base of the
mirror.
Keep the windshield in the area behind the in‐
terior rear view mirror clean and clear.
Fog lamps
Front fog lamps The parking lamps or low beams must be
switched on.
Press the button. The green indicator
lamp lights up.
If the automatic headlamp control, refer to
page 96, is activated, the low beams will come
on automatically when you switch on the front
fog lamps.
Instrument lighting Adjusting The parking lamps or low beams
must be switched on to adjust
the brightness.
Adjust the brightness using the
thumbwheel.
Seite 98ControlsLamps98
Online Edition for Part no. 01 40 2 909 749 - VI/13
Page 119 of 251
Acute warningThe red symbol is displayed and a sig‐
nal sounds.
Intervene immediately by braking or
making an evasive maneuver.
With animals no acute warning occurs.
Display in the Head-up Display The warning is displayed simultane‐
ously in the Head-up Display and on
the instrument cluster. The displayed
symbol can vary with the people detected.
When animals are detected, an animal symbol
is displayed.
System limits
Basic limits
System operation is limited in situations such
as the following:▷On steep hills, in steep depressions or in
tight curves.▷When the camera is dirty or the protective
glass is damaged.▷In heavy fog, rain or snowfall.▷At very high external temperatures.
Limits of pedestrian and animal
detection
In some situations, it may occur that pedes‐
trians are detected as animals or animals as
pedestrians.
Small animals are not detected by the object
detection function, even if they are clearly visi‐
ble in the image.
Limited detection:
▷People or animals who are fully or partially
covered, especially when their heads are
covered.▷People who are not in an upright position,
e.g., lying down.▷Cyclists on unconventional bicycles (e.g.,
recumbent bicycles).▷After physical damage to the system, e.g.,
after an accident.
No display on the rear screen
The image from Night Vision with people de‐
tection cannot be displayed on the rear screen.
Lane departure warningThe concept Starting at a specific speed, this system alerts
you when the vehicle on streets with lane
markings is about to leave the lane. Depending
on the country-specific version of the vehicle,
the speed is between 35 mph/55 km/h and
45 mph/70 km/h. If the system is switched on
below this speed, a message appears in the in‐
strument cluster.
The steering wheel begins vibrating gently in
the event of warnings. The time of the warning
may vary depending on the current driving sit‐
uation.
The system does not provide a warning if the
turn signal is set before leaving the lane.
Notes Personal responsibility
The system cannot serve as a substitute
for the driver's personal judgment of the
course of the road and the traffic situation.
In the event of a warning, do not jerk the steer‐
ing wheel, as you may lose control of the vehi‐
cle.◀
Seite 119SafetyControls119
Online Edition for Part no. 01 40 2 909 749 - VI/13