radio BMW 750LI SEDAN 2008 Owner's Guide
[x] Cancel search | Manufacturer: BMW, Model Year: 2008, Model line: 750LI SEDAN, Model: BMW 750LI SEDAN 2008Pages: 254, PDF Size: 7.98 MB
Page 155 of 254
Navigation
Entertainment
Driving tips
153Reference
At a glance
Controls
Communications
Mobility
wheel, refer to page11, and via the voice com-
mand system
*, refer to page23.
Switching on/off
In order to switch the Entertainment sound out-
put on/off: press the knob.
The system selects the most recently used
audio or video source, radio, CD, external audio
device, or DVD.
Using the voice command system:
Using with ignition off
The audio and video functions remain available
for use for a period of approx. 30 minutes after
you switch off the ignition.
Switch the sound output back on to enjoy this
function.
Adjusting volume
Turn the knob to the desired volume level.
The sound system automatically reverts
to its mute mode whenever you initiate or
accept a phone call.
Tone control
You can change various tone settings, e.g. tre-
ble and bass or the speed-dependent volume
control. The tone settings are set globally for all
of the audio sources.
Speakers, headsets in the rear, and external
audio devices can be adjusted separately. The
sound settings of the headphones are made on
the rear seat screen with the headphones con-
nected. Only treble, bass and balance can be
adjusted.
The setting is stored for the remote control cur-
rently in use.
Tone adjustment
iDrive, for principle details, refer to page16.
1.Press the button to open the start
menu.
2.Move the controller toward "Entertain-
ment".
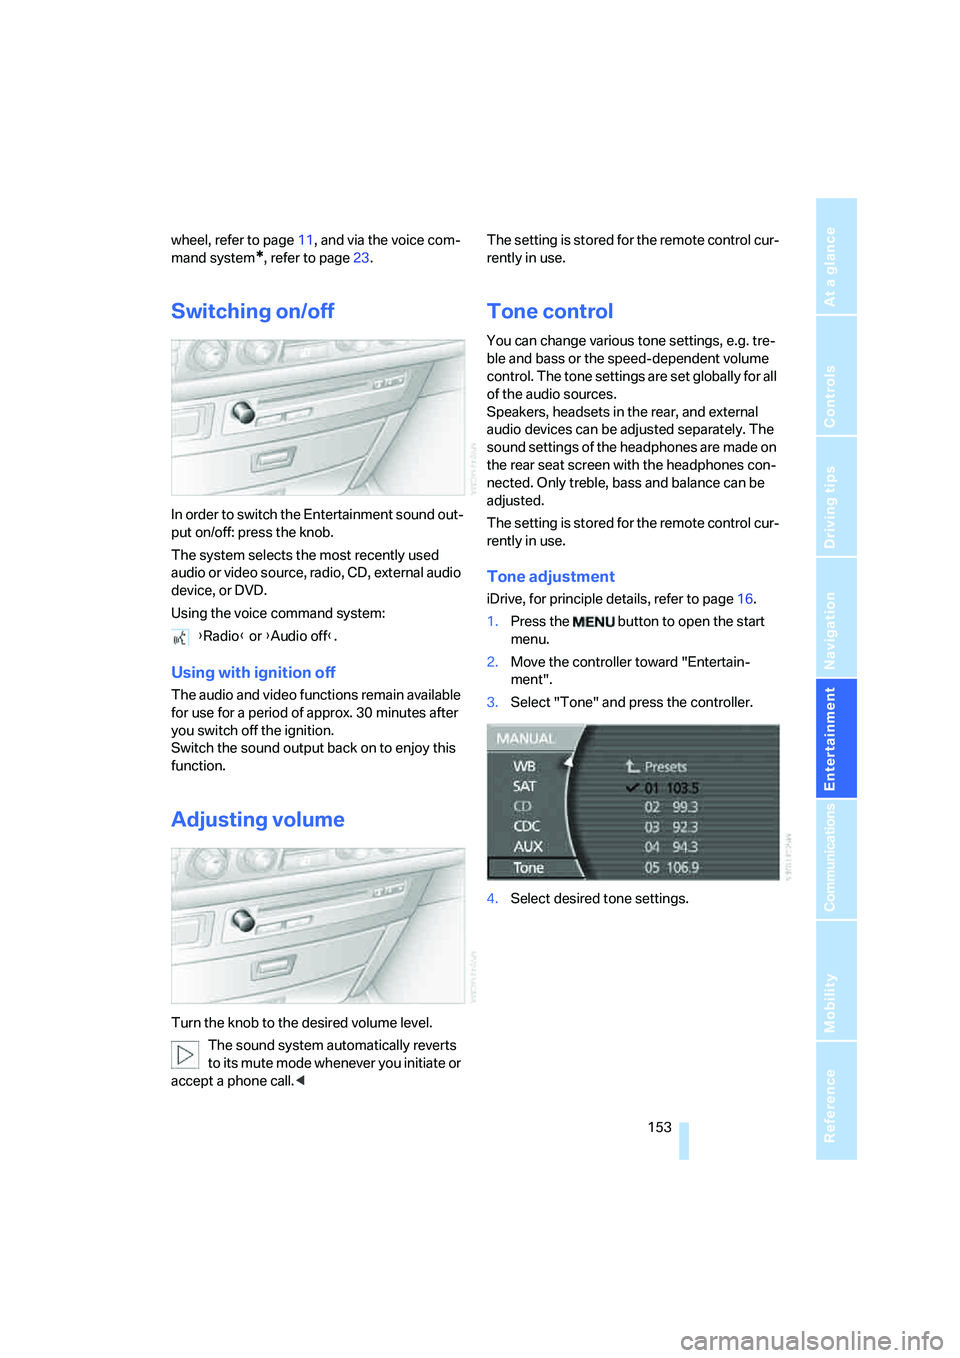
3.Select "Tone" and press the controller.
4.Select desired tone settings. {Radio} or {Audio off}.
Page 156 of 254
On/off and settings
154
Treble and bass
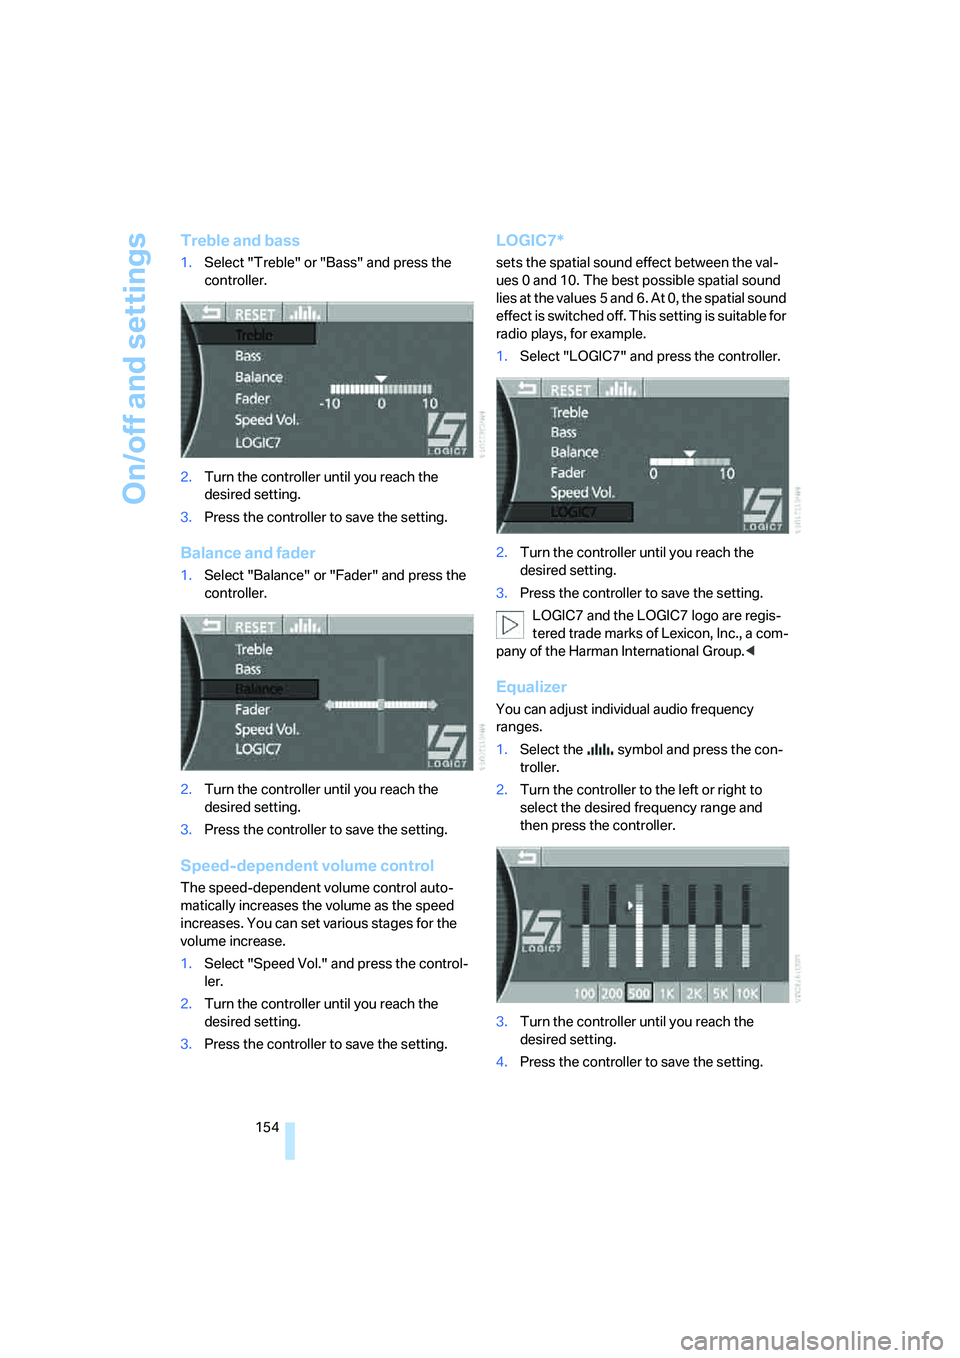
1.Select "Treble" or "Bass" and press the
controller.
2.Turn the controller until you reach the
desired setting.
3.Press the controller to save the setting.
Balance and fader
1.Select "Balance" or "Fader" and press the
controller.
2.Turn the controller until you reach the
desired setting.
3.Press the controller to save the setting.
Speed-dependent volume control
The speed-dependent volume control auto-
matically increases the volume as the speed
increases. You can set various stages for the
volume increase.
1.Select "Speed Vol." and press the control-
ler.
2.Turn the controller until you reach the
desired setting.
3.Press the controller to save the setting.
LOGIC7*
sets the spatial sound effect between the val-
ues 0 and 10. The best possible spatial sound
lies at the values 5 and 6. At 0, the spatial sound
effect is switched off. This setting is suitable for
radio plays, for example.
1.Select "LOGIC7" and press the controller.
2.Turn the controller until you reach the
desired setting.
3.Press the controller to save the setting.
LOGIC7 and the LOGIC7 logo are regis-
tered trade marks of Lexicon, Inc., a com-
pany of the Harman International Group.<
Equalizer
You can adjust individual audio frequency
ranges.
1.Select the symbol and press the con-
troller.
2.Turn the controller to the left or right to
select the desired frequency range and
then press the controller.
3.Turn the controller until you reach the
desired setting.
4.Press the controller to save the setting.
Page 158 of 254
Radio
156
Radio
Your radio is equipped to receive the FM and
AM wavebands.
Listening to radio
Switch on audio or video sources, refer to
page153.
iDrive, for principle details, refer to page16.
1.Press the button to open the start
menu.
2.Move the controller toward "Entertain-
ment".
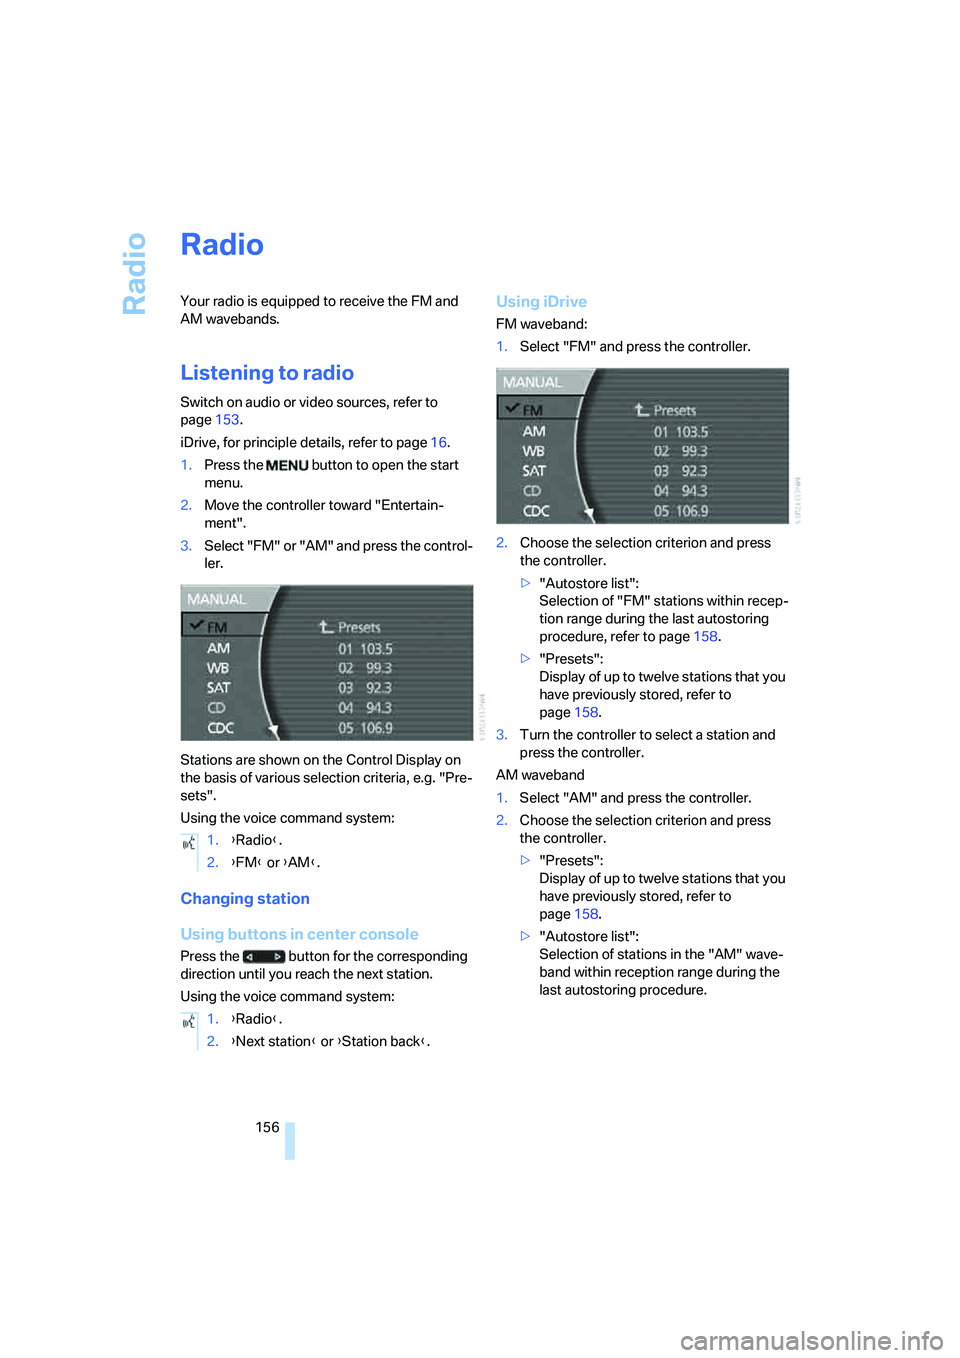
3.Select "FM" or "AM" and press the control-
ler.
Stations are shown on the Control Display on
the basis of various selection criteria, e.g. "Pre-
sets".
Using the voice command system:
Changing station
Using buttons in center console
Press the button for the corresponding
direction until you reach the next station.
Using the voice command system:
Using iDrive
FM waveband:
1.Select "FM" and press the controller.
2.Choose the selection criterion and press
the controller.
>"Autostore list":
Selection of "FM" stations within recep-
tion range during the last autostoring
procedure, refer to page158.
>"Presets":
Display of up to twelve stations that you
have previously stored, refer to
page158.
3.Turn the controller to select a station and
press the controller.
AM waveband
1.Select "AM" and press the controller.
2.Choose the selection criterion and press
the controller.
>"Presets":
Display of up to twelve stations that you
have previously stored, refer to
page158.
>"Autostore list":
Selection of stations in the "AM" wave-
band within reception range during the
last autostoring procedure. 1.{Radio}.
2.{FM} or {AM}.
1.{Radio}.
2.{Next station} or {Station back}.
Page 160 of 254
Radio
158 Using the voice command system:
Updating selection of stations in
receiving range
In the course of longer trips, when you travel
outside the transmission range of the originally
selected stations, you can update the selection
of stations in receiving range.
1.Select "AM" and press the controller.
2.Select "MANUAL" and press the controller.
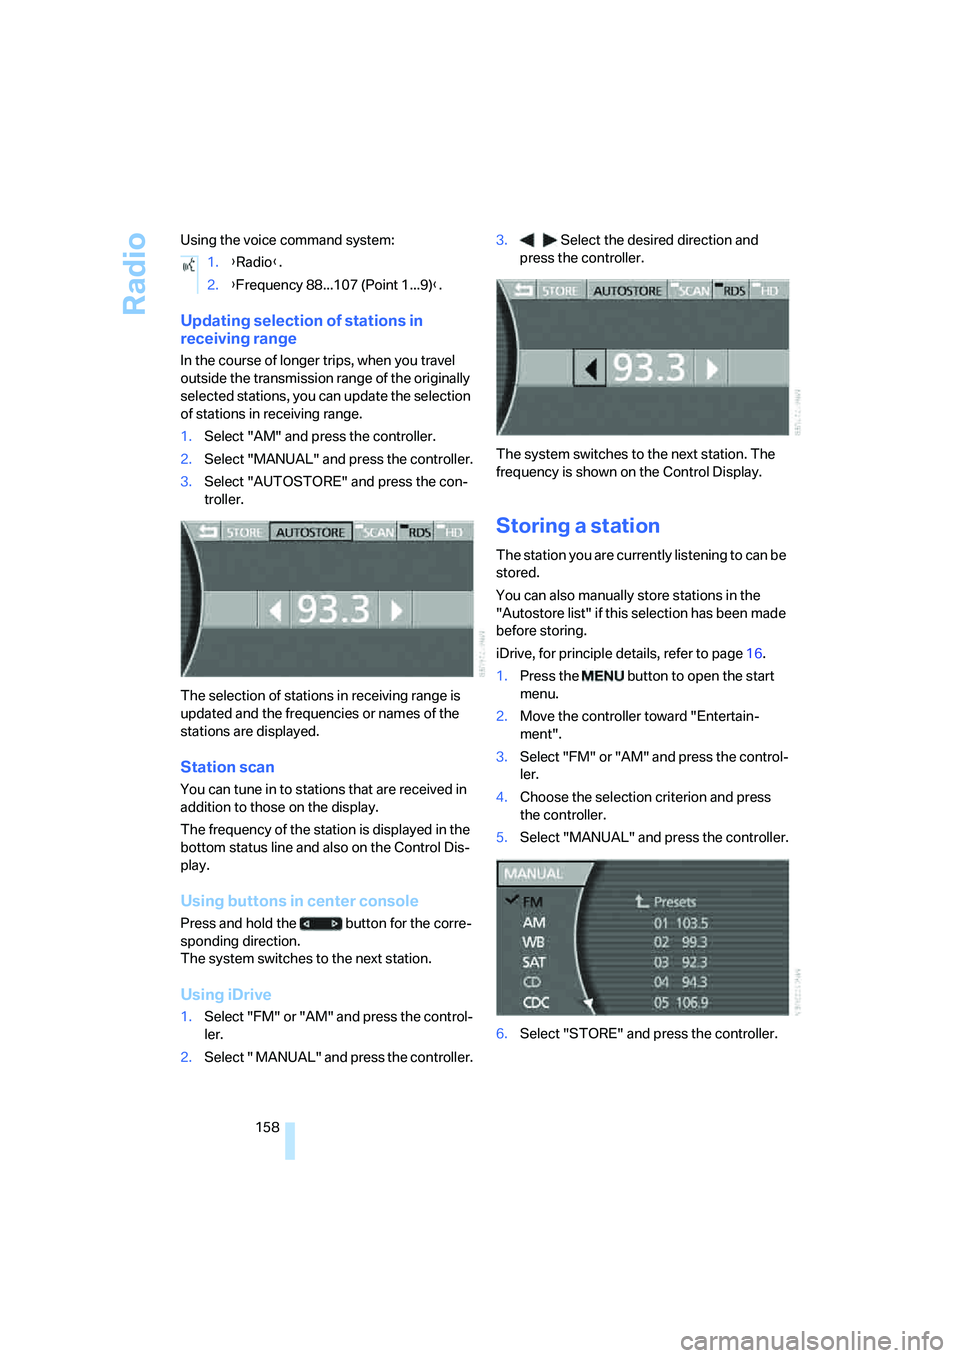
3.Select "AUTOSTORE" and press the con-
troller.
The selection of stations in receiving range is
updated and the frequencies or names of the
stations are displayed.
Station scan
You can tune in to stations that are received in
addition to those on the display.
The frequency of the station is displayed in the
bottom status line and also on the Control Dis-
play.
Using buttons in center console
Press and hold the button for the corre-
sponding direction.
The system switches to the next station.
Using iDrive
1.Select "FM" or "AM" and press the control-
ler.
2.Select " MANUAL" and press the controller.3. Select the desired direction and
press the controller.
The system switches to the next station. The
frequency is shown on the Control Display.
Storing a station
The station you are currently listening to can be
stored.
You can also manually store stations in the
"Autostore list" if this selection has been made
before storing.
iDrive, for principle details, refer to page16.
1.Press the button to open the start
menu.
2.Move the controller toward "Entertain-
ment".
3.Select "FM" or "AM" and press the control-
ler.
4.Choose the selection criterion and press
the controller.
5.Select "MANUAL" and press the controller.
6.Select "STORE" and press the controller. 1.{Radio}.
2.{Frequency 88...107 (Point 1...9)}.
Page 161 of 254
Navigation
Entertainment
Driving tips
159Reference
At a glance
Controls
Communications
Mobility
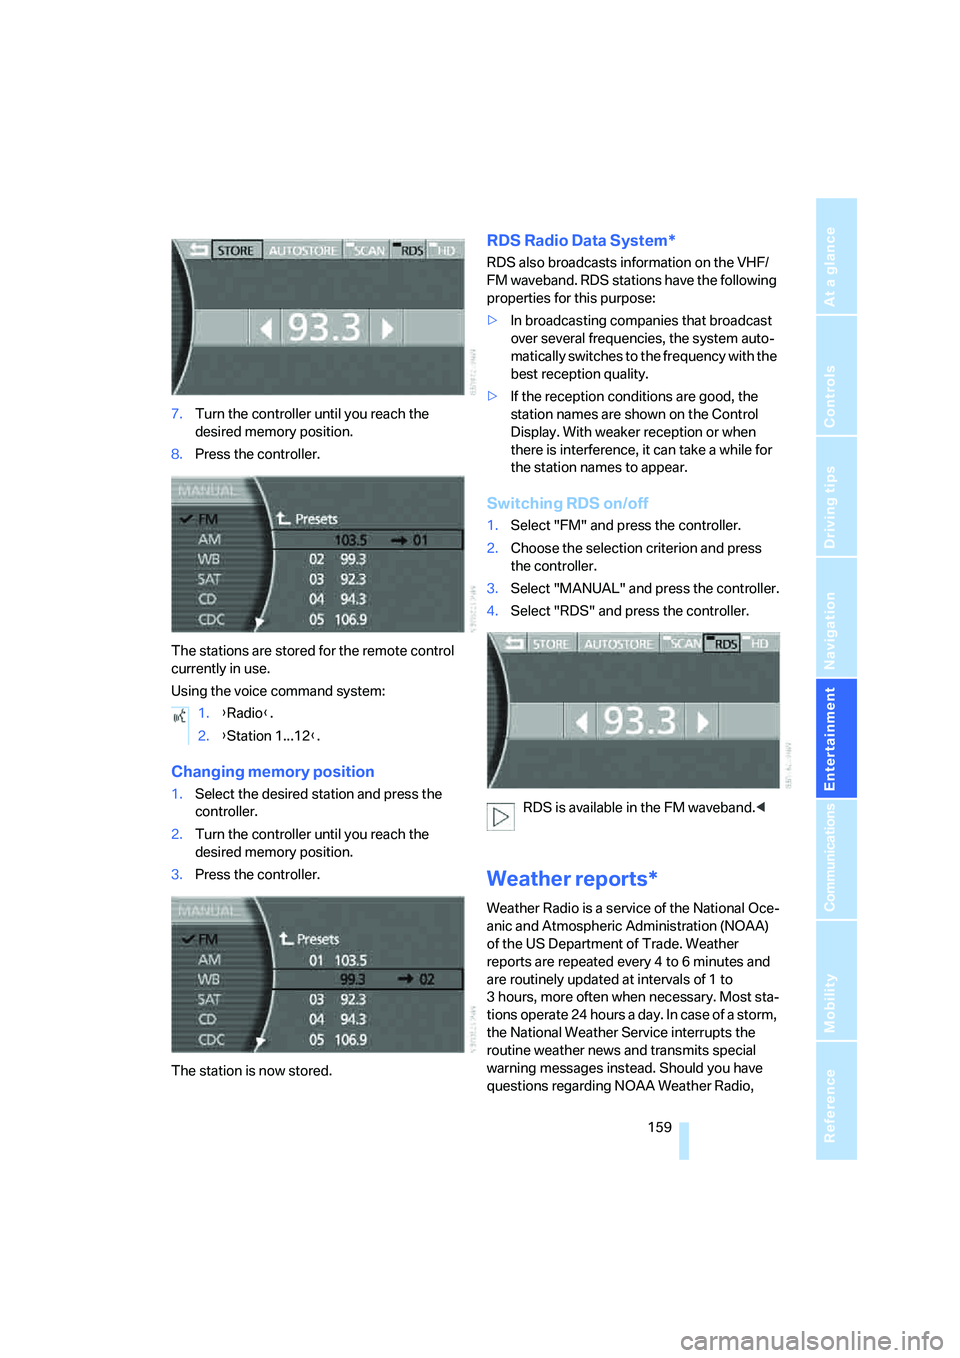
7.Turn the controller until you reach the
desired memory position.
8.Press the controller.
The stations are stored for the remote control
currently in use.
Using the voice command system:
Changing memory position
1.Select the desired station and press the
controller.
2.Turn the controller until you reach the
desired memory position.
3.Press the controller.
The station is now stored.
RDS Radio Data System*
RDS also broadcasts information on the VHF/
FM waveband. RDS stations have the following
properties for this purpose:
>In broadcasting companies that broadcast
over several frequencies, the system auto-
matically switches to the frequency with the
best reception quality.
>If the reception conditions are good, the
station names are shown on the Control
Display. With weaker reception or when
there is interference, it can take a while for
the station names to appear.
Switching RDS on/off
1.Select "FM" and press the controller.
2.Choose the selection criterion and press
the controller.
3.Select "MANUAL" and press the controller.
4.Select "RDS" and press the controller.
RDS is available in the FM waveband.<
Weather reports*
Weather Radio is a service of the National Oce-
anic and Atmospheric Administration (NOAA)
of the US Department of Trade. Weather
reports are repeated every 4 to 6 minutes and
are routinely updated at intervals of 1 to
3 hours, more often when necessary. Most sta-
tions operate 24 hours a day. In case of a storm,
the National Weather Service interrupts the
routine weather news and transmits special
warning messages instead. Should you have
questions regarding NOAA Weather Radio, 1.{Radio}.
2.{Station 1...12}.
Page 162 of 254
Radio
160 please contact the nearest office of the National
Weather Service or write to the National
Weather Service at: W/OM1, National Oceanic
and Atmospheric Administration, 1325 East-
West Highway, Silver Spring, MD 20910.
Calling up weather reports
iDrive, for principle details, refer to page16.
1.Press the button to open the start
menu.
2.Move the controller toward "Entertain-
ment".
3.Select "WB" and press the controller.
A list of the available channels is displayed.
4.Turn the controller until the desired channel
is selected and press the controller.
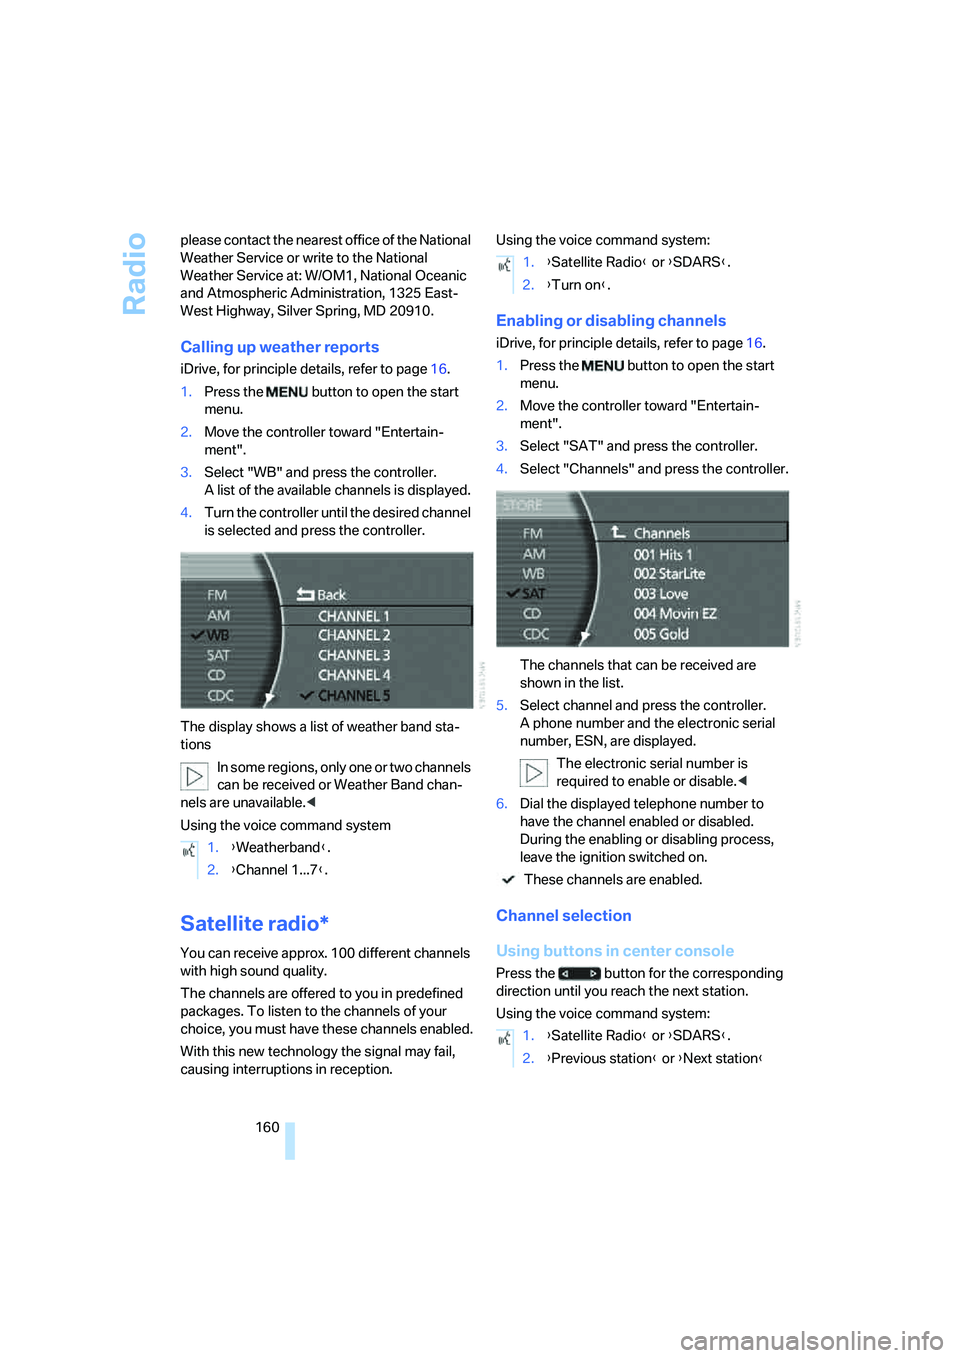
The display shows a list of weather band sta-
tions
In some regions, only one or two channels
can be received or Weather Band chan-
nels are unavailable.<
Using the voice command system
Satellite radio*
You can receive approx. 100 different channels
with high sound quality.
The channels are offered to you in predefined
packages. To listen to the channels of your
choice, you must have these channels enabled.
With this new technology the signal may fail,
causing interruptions in reception.Using the voice command system:
Enabling or disabling channels
iDrive, for principle details, refer to page16.
1.Press the button to open the start
menu.
2.Move the controller toward "Entertain-
ment".
3.Select "SAT" and press the controller.
4.Select "Channels" and press the controller.
The channels that can be received are
shown in the list.
5.Select channel and press the controller.
A phone number and the electronic serial
number, ESN, are displayed.
The electronic serial number is
required to enable or disable.<
6.Dial the displayed telephone number to
have the channel enabled or disabled.
During the enabling or disabling process,
leave the ignition switched on.
These channels are enabled.
Channel selection
Using buttons in center console
Press the button for the corresponding
direction until you reach the next station.
Using the voice command system: 1.{Weatherband}.
2.{Channel 1...7}.
1.{Satellite Radio} or {SDARS}.
2.{Turn on}.
1.{Satellite Radio} or {SDARS}.
2.{Previous station} or {Next station}
Page 163 of 254
Navigation
Entertainment
Driving tips
161Reference
At a glance
Controls
Communications
Mobility
Using iDrive
1.Select "SAT" and press the controller.
2.Choose the selection criterion and press
the controller.
>"Channels":
All channels are displayed.
>"Categories":
All channels are displayed, sorted
according to categories.
>"Presets":
Up to twelve channels that you have pre-
viously stored are displayed.
3.Select channel and press the controller.
Using the voice command system:
Select a stored channel:
Displaying additional information
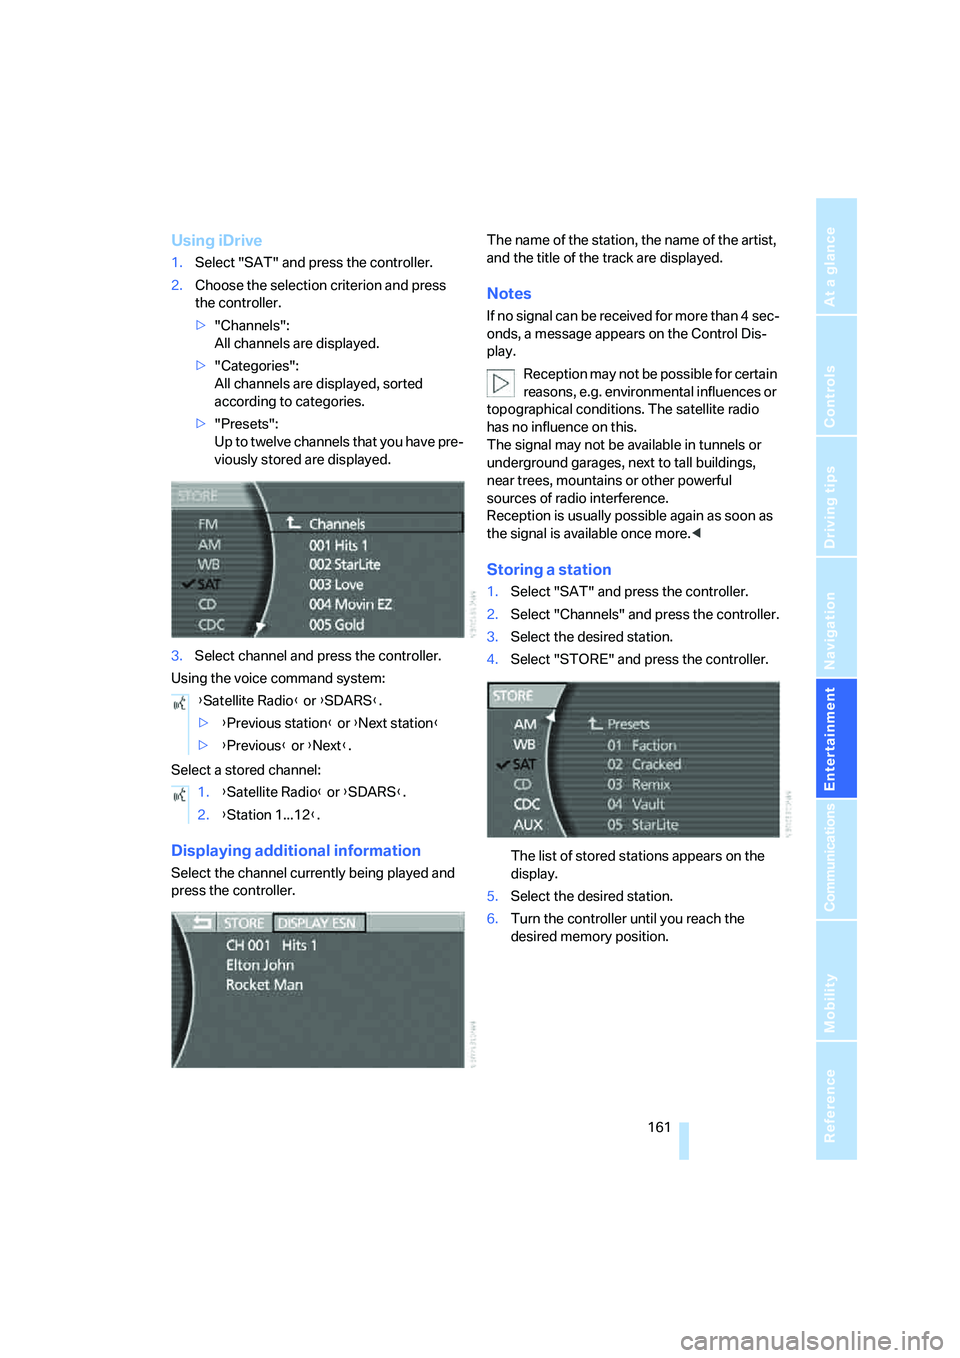
Select the channel currently being played and
press the controller.The name of the station, the name of the artist,
and the title of the track are displayed.
Notes
If no signal can be received for more than 4 sec-
onds, a message appears on the Control Dis-
play.
Reception may not be possible for certain
reasons, e.g. environmental influences or
topographical conditions. The satellite radio
has no influence on this.
The signal may not be available in tunnels or
underground garages, next to tall buildings,
near trees, mountains or other powerful
sources of radio interference.
Reception is usually possible again as soon as
the signal is available once more.<
Storing a station
1.Select "SAT" and press the controller.
2.Select "Channels" and press the controller.
3.Select the desired station.
4.Select "STORE" and press the controller.
The list of stored stations appears on the
display.
5.Select the desired station.
6.Turn the controller until you reach the
desired memory position. {Satellite Radio} or {SDARS}.
>{Previous station} or {Next station}
>{Previous} or {Next}.
1.{Satellite Radio} or {SDARS}.
2.{Station 1...12}.
Page 164 of 254
Radio
162 7.Press and hold the controller.
High Definition Radio*
Many stations transmit both analog and digital
signals. You can receive these stations digitally
and with improved sound quality.
Activating and deactivating digital
radio reception
iDrive, for principle details, refer to page16.
1.Press the button to open the start
menu.
2.Move the controller toward "Entertain-
ment".
3.Select "FM" or "AM" and press the control-
ler.
4.Select "MANUAL" and press the controller.
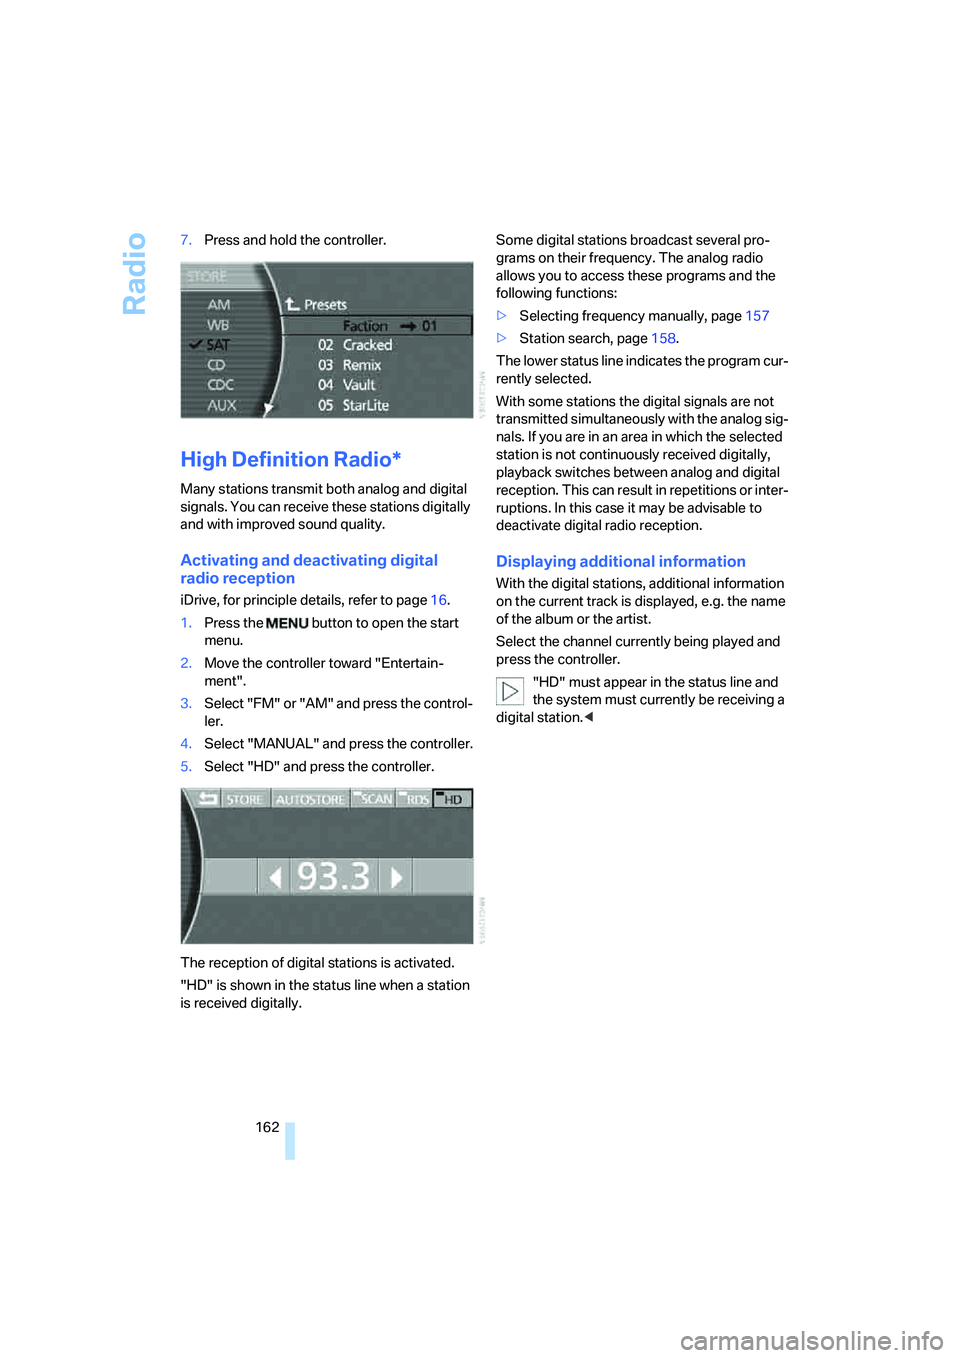
5.Select "HD" and press the controller.
The reception of digital stations is activated.
"HD" is shown in the status line when a station
is received digitally.Some digital stations broadcast several pro-
grams on their frequency. The analog radio
allows you to access these programs and the
following functions:
>Selecting frequency manually, page157
>Station search, page158.
The lower status line indicates the program cur-
rently selected.
With some stations the digital signals are not
transmitted simultaneously with the analog sig-
nals. If you are in an area in which the selected
station is not continuously received digitally,
playback switches between analog and digital
reception. This can result in repetitions or inter-
ruptions. In this case it may be advisable to
deactivate digital radio reception.
Displaying additional information
With the digital stations, additional information
on the current track is displayed, e.g. the name
of the album or the artist.
Select the channel currently being played and
press the controller.
"HD" must appear in the status line and
the system must currently be receiving a
digital station.<
Page 180 of 254
Telephone overview
178
Telephone overview
The concept
Your BMW is equipped with a mobile phone
preparation package. After a suitable mobile
phone has been paired with the vehicle once,
you can operate the mobile phone via iDrive, via
the button on the steering wheel, via the phone
keypad and by voice
*.
A mobile phone that has been paired with the
vehicle once is automatically detected again
with the engine running or the ignition switched
on as soon as it is brought inside the vehicle.
The logon data of up to four mobile phones can
be stored simultaneously. If several mobile
phones are detected simultaneously, then the
vehicle can be used to operate the mobile
phone that was most recently paired with it.
Using a phone in your vehicle
Using snap-in adapter*
The so-called snap-in adapter, a cradle for your
mobile phone, is inserted into the center arm-
rest. If the mobile phone is inserted into the
snap-in adapter, the battery is charged and the
mobile phone is connected to the external
antenna of the vehicle whenever the ignition
key is in the radio ready state or higher. This
assures better network reception and uniform
sound quality. Ask your BMW center which
mobile phones snap-in adapters are offered for.
To use the snap-in adapter, refer to page181.
BMW discourages the use of mobile
phones or other mobile communications
devices inside the vehicle without a direct con-
nection to an outside antenna. Otherwise, the
vehicle electronics and mobile communications
device can interfere with each other. In addition,
there is no assurance that the radiation gener-
ated during transmission will be discharged
from the vehicle interior.
phone; otherwise, malfunctions can occur.
The mobile phone can be operated by means
of:
>the button on the steering wheel, refer to
page11
>the retracting telephone keypad, refer to
page179
>iDrive, refer to Initiating communication,
page184
>the voice command system
*, refer to
page23
For information on operating your mobile
phone, please consult the separate operating
instructions.
For your safety
Only make entries when the traffic situa-
tion allows you to do so. Do not hold the
mobile phone in your hand while you are driving;
use the hands-free system instead. If you do
not comply with this precaution, your being dis-
tracted can endanger vehicle occupants and
other road users.<
Suitable mobile phones
Ask your BMW center which mobile phones
with a Bluetooth interface are supported by the
mobile phone preparation package or which
mobile phones snap-in adapters are available
for. These mobile phones support the functions
described in this Owner's Manual with a certain
software version. Malfunctions can occur with
other mobile phones.
*
Page 183 of 254
181
Entertainment
Reference
At a glance
Controls
Driving tips Communications
Navigation
Mobility
Getting started
Snap-in adapter*
The so-called snap-in adapter, a cradle for your
mobile phone, is inserted into the center arm-
rest. If the mobile phone is inserted into the
snap-in adapter, the battery is charged and the
mobile phone is connected to the external
antenna of the vehicle whenever the ignition
key is in the radio ready state or higher. This
assures better network reception and uniform
sound quality. Ask your BMW center which
mobile phones snap-in adapters are offered for.
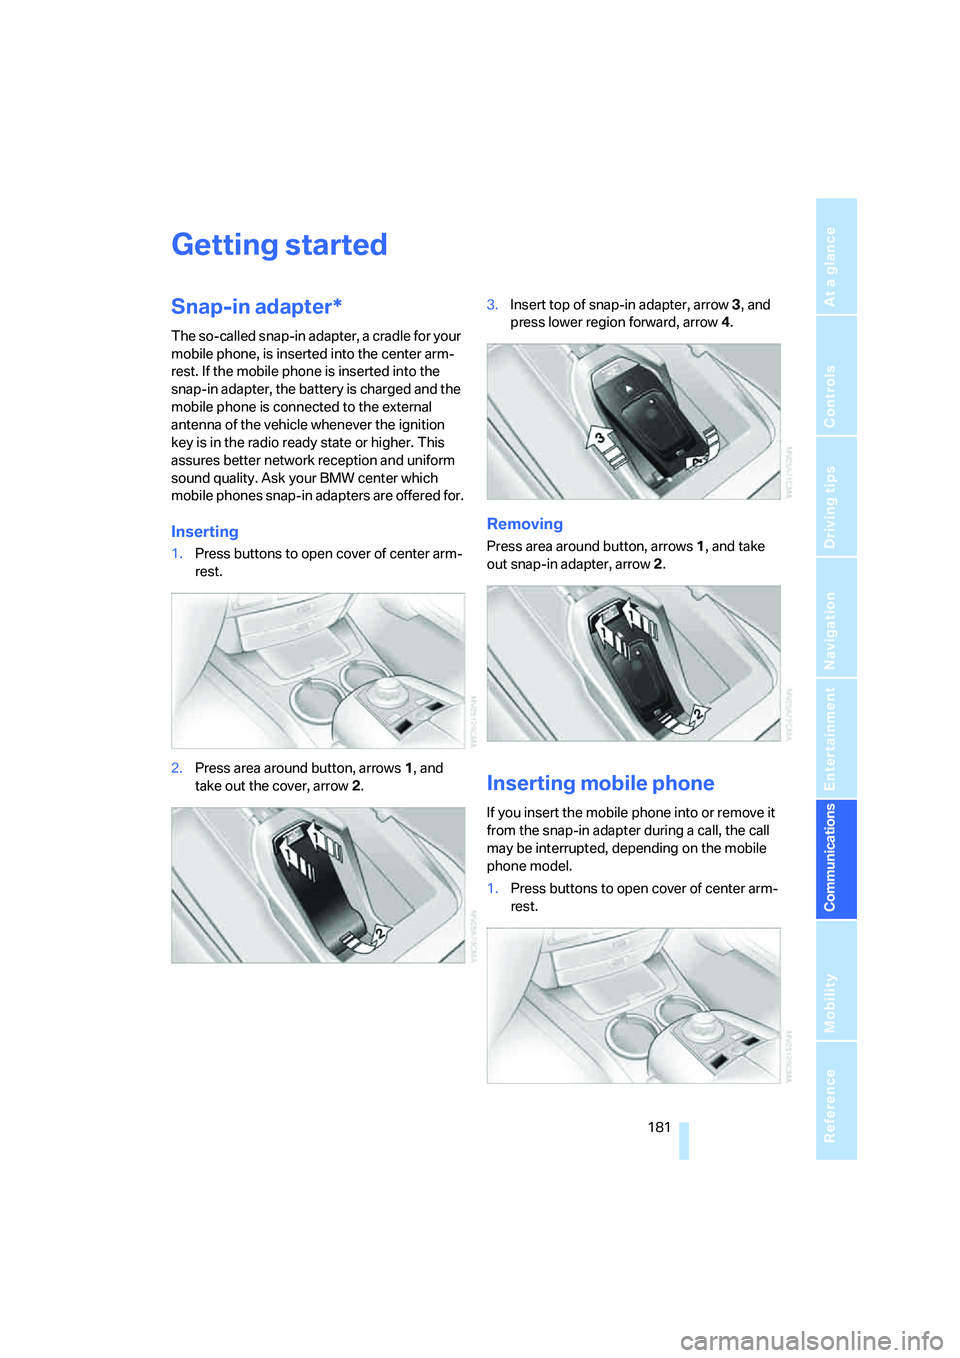
Inserting
1.Press buttons to open cover of center arm-
rest.
2.Press area around button, arrows1, and
take out the cover, arrow2.3.Insert top of snap-in adapter, arrow3, and
press lower region forward, arrow4.
Removing
Press area around button, arrows1, and take
out snap-in adapter, arrow2.
Inserting mobile phone
If you insert the mobile phone into or remove it
from the snap-in adapter during a call, the call
may be interrupted, depending on the mobile
phone model.
1.Press buttons to open cover of center arm-
rest.