lights BMW 750LI SEDAN 2015 Manual PDF
[x] Cancel search | Manufacturer: BMW, Model Year: 2015, Model line: 750LI SEDAN, Model: BMW 750LI SEDAN 2015Pages: 314, PDF Size: 7.9 MB
Page 241 of 314
Avoid high engine speeds
As a rule: driving at low engine speeds lowers
fuel consumption and reduces wear.
If necessary, observe the gear shift indicator,
refer to page 120, of the vehicle.
Use coasting conditions When approaching a red light, take your foot
off the accelerator and let the vehicle coast to
a halt.
For going downhill take your foot off the accel‐
erator and let the vehicle roll.
The flow of fuel is interrupted while coasting.
Switch off the engine during longer stops
Switch off the engine during longer stops, e.g.,
at traffic lights, railroad crossings or in traffic
congestion.
Auto Start/Stop function The Auto Start/Stop function of your vehicle
automatically switches off the engine during a
stop.
If the engine is switched off and then restarted
rather than leaving the engine running con‐
stantly, fuel consumption and emissions are
reduced. Savings can begin within a few sec‐
onds of switching off the engine.
In addition, fuel consumption is also deter‐
mined by other factors, such as driving style,
road conditions, maintenance or environmental
factors.
Switch off any functions that
are not currently needed
Functions such as seat heating and the rear
window defroster require a lot of energy andreduce the range, especially in city and stop-
and-go traffic.
Switch off these functions if they are not
needed.
The ECO PRO driving program supports the
energy conserving use of comfort features.
These functions are automatically deactivated
partially or completely.
Have maintenance carried
out
Have vehicles maintained regularly to achieve
optimal vehicle efficiency and service life.
BMW recommends that maintenance work be
performed by a BMW dealer’s service center.
For information on the BMW Maintenance
System, refer to page 279.
ECO PRO
The concept
ECO PRO supports a driving style that saves
on fuel consumption. For this purpose, the en‐
gine control and comfort features, e. g. the cli‐
mate control output, are adjusted.
Under certain conditions the engine is auto‐
matically decoupled from the transmission in
the D selector lever position. The vehicle con‐
tinues traveling with the engine idling to re‐
duce fuel consumption. Selector lever position
D remains engaged.
In addition, context-sensitive instructions are
displayed to assist with an optimized fuel con‐
sumption driving style.
The achieved extended range is displayed in
the instrument cluster as bonus range.
Overview
The system includes the following
EfficientDynamics functions and displays:▷ECO PRO bonus range, refer to page 243.Seite 241Saving fuelDriving tips241
Online Edition for Part no. 0140 2 964 330 - VI/15
Page 266 of 314
▷The system has detected a wheel change,
but no reset was done.▷No reset was performed for the system.
The system therefore issues a warning
based on the tire inflation pressures before
the last reset.▷Inflation was not carried out according to
specifications.▷The tire inflation pressure has fallen below
the level of the last reset.
In these cases:
1.Check the tire pressure and correct as
needed.2.Reset the system.
Message in case of low tire pressure
The yellow warning lamp lights up.
A Check Control message is displayed.
▷There is a tire inflation pressure loss.▷No reset was performed for the system.
The system therefore issues a warning
based on the tire inflation pressures before
the last reset.
In these cases:
1.Reduce your speed and drive moderately.
Do not exceed a speed of
80 mph/130 km/h.2.At the next opportunity, e.g. gas station,
check and if necessary correct the tire in‐
flation pressure in all four tires.3.Reset the system.
Message in case of sharp tire inflation pressure loss
The yellow warning lamp lights up.
A symbol with the affected tires will be dis‐
played in the Check Control message.▷There is a flat tire or a major loss in tire in‐
flation pressure.▷No reset was performed for the system.
The system therefore issues a warning
based on the tire inflation pressures before
the last reset.
In these cases:
1.Reduce your speed and stop cautiously.
Avoid sudden braking and steering maneu‐
vers.2.Check whether the vehicle is fitted with
normal tires or run-flat tires.
Run-flat tires, refer to page 260, are la‐
beled with a circular symbol containing the
letters RSC marked on the tire's sidewall.
WARNING
A damaged regular tire with low or miss‐
ing tire inflation pressure impacts handling,
such as steering and braking response. Run-
flat tires can maintain limited stability. There is
risk of an accident. Do not continue driving if
the vehicle is not equipped with run-flat tires.
Observe the information on run-flat tires and
continued driving with these tires.◀
A low tire inflation pressure might turn on DSC
Dynamic Stability Control.
Actions in the event of a flat tire
Normal tires
1.Identify the damaged tire.
Do this by checking the air pressure in all
four tires.
The tire pressure gauge of the Mobility
System, refer to page 260, can be used for
this purpose.
If the tire inflation pressure in all four tires
is shown to be correct, it is possible that
the Tire Pressure Monitor did not perform
a reset. Then perform the reset.Seite 266MobilityWheels and tires266
Online Edition for Part no. 0140 2 964 330 - VI/15
Page 267 of 314
If identification of flat tire damage is not
possible, please contact a dealer’s service
center or another qualified service center
or repair shop.2.Fixing a flat tire, where applicable with the
Mobility System.3.Replacing a damaged tire, where applica‐
ble with the emergency wheel.
Use of sealant, e.g., the Mobility System, may
damage the TPM wheel electronics. In this
case, have the electronics checked at the next
opportunity and have them replaced if needed.
Run-flat tires Maximum speed
You may continue driving with a damaged tire
at speeds up to 50 mph/80 km/h.
Continued driving with a flat tire
If continuing to drive with a damaged tire:
1.Avoid sudden braking and steering maneu‐
vers.2.Do not exceed a speed of 50 mph/80 km/h.3.Check the air pressure in all four tires at
the next opportunity.
If the tire inflation pressure in all four tires
is shown to be correct, it is possible that
the Tire Pressure Monitor did not perform
a reset. In that case, carry out a reset.
Possible driving distance with complete loss of
tire inflation pressure:
The possible driving distance after a loss of tire
inflation pressure depends on cargo load, driv‐
ing style and road conditions.
A vehicle with an average load has a possible
driving range of approx. 50 miles/80 km.
A vehicle with a damaged tire reacts differ‐
ently, e.g., it has reduced lane stability during
braking, a longer braking distance and different
self-steering properties. Adjust your driving
style accordingly. Avoid abrupt steering ma‐
neuvers or driving over obstacles, e.g., curbs,
potholes, etc.
Because the possible driving distance de‐
pends on how the vehicle is used during the
trip, the actual distance may be shorter or lon‐
ger depending on the driving speed, road con‐
ditions, external temperature, cargo load, etc.
WARNING
Your vehicle handles differently when a
run-flat tire is damaged and has low or missing
tire inflation pressure, e.g., your lane stability is
reduced when braking, braking distances are
longer and the self-steering properties will
change. There is risk of an accident.
Drive moderately and do not exceed a speed of
50 mph/80 km/h.◀
System limits
The system does not function properly if a re‐
set has not been carried out, e.g., a flat tire is
reported though tire inflation pressures are
correct.
The tire inflation pressure depends on the
tire's temperature. Driving or exposure to the
sun will increase the tire's temperature, thus
increasing the tire inflation pressure. The tire
inflation pressure is reduced when the tire
temperature falls again. These circumstances
may cause a warning when temperatures fall
very sharply.
The system cannot indicate sudden serious
tire damage caused by external circumstances.
Malfunction The yellow warning lamp flashes andthen lights up continuously. A Check
Control message is displayed. No flat
tire or loss of tire inflation pressure can be de‐
tected.
Examples and recommendations in the follow‐
ing situations:▷A wheel without TPM electronics is
mounted, e.g. emergency wheel: Have itSeite 267Wheels and tiresMobility267
Online Edition for Part no. 0140 2 964 330 - VI/15
Page 269 of 314
Status displayThe current status of the flat tire monitor can
be displayed, e.g., whether the RPA is active.
About iDrive:1."My Vehicle"2."Vehicle status"3. "Flat Tire Monitor"
The status is displayed.
Initialization
When initializing the once set inflation tire
pressures serve as reference values in order to
detect a flat tire. Initialization is started by con‐
firming the tire inflation pressures.
Do not initialize the system when driving with
snow chains.
About iDrive:
1."My Vehicle"2."Vehicle status"3.Flat Tire Monitor reset4.Start the engine - do not drive off.5.Start the initialization: "Perform reset"6.Drive away.
The initialization is completed while driving,
which can be interrupted at any time.
The initialization automatically continues when
driving resumes.
Indication of a flat tire The yellow warning lamp lights up. A
Check Control message is displayed.
There is a flat tire or a major loss in tire
inflation pressure.
1.Reduce your speed and stop cautiously.
Avoid sudden braking and steering maneu‐
vers.2.Check whether the vehicle is fitted with
normal tires or run-flat tires.Run-flat tires, refer to page 260, are la‐
beled with a circular symbol containing the
letters RSC marked on the tire's sidewall.
WARNING
A damaged regular tire with low or miss‐
ing tire inflation pressure impacts handling,
such as steering and braking response. Run-
flat tires can maintain limited stability. There is
risk of an accident. Do not continue driving if
the vehicle is not equipped with run-flat tires.
Observe the information on run-flat tires and
continued driving with these tires.◀
When a flat tire is indicated, DSC Dynamic Sta‐
bility Control is switched on if needed.
System limits
A natural, even tire inflation pressure loss in all four tires will not be recognized. Therefore,
check the tire inflation pressure regularly.
Sudden serious tire damage caused by exter‐
nal circumstances cannot be recognized in ad‐
vance.
The system could be delayed or malfunction in
the following situations:
▷When the system has not been initialized.▷When driving on a snowy or slippery road
surface.▷Sporty driving style: spinning traction
wheels, high lateral acceleration (drifting).▷When driving with snow chains.
Actions in the event of a flat tire
Normal tires
1.Identify the damaged tire.
Do this by checking the air pressure in all
four tires.
The tire pressure gauge of the Mobility
System, refer to page 260, can be used for
this purpose.
If the tire inflation pressure in all four tires
is correct, the Flat Tire Monitor may notSeite 269Wheels and tiresMobility269
Online Edition for Part no. 0140 2 964 330 - VI/15
Page 280 of 314
Socket for OBD Onboard
Diagnosis
Information CAUTION
Improper use of the socket for Onboard
Diagnosis can lead to vehicle malfunctions.
There is risk of property damage. The manu‐
facturer of your vehicle strongly recommends
access to the socket for Onboard Diagnosis be
limited to a dealer's service center, another
qualified service center or repair shop or other
authorized persons.◀
Position
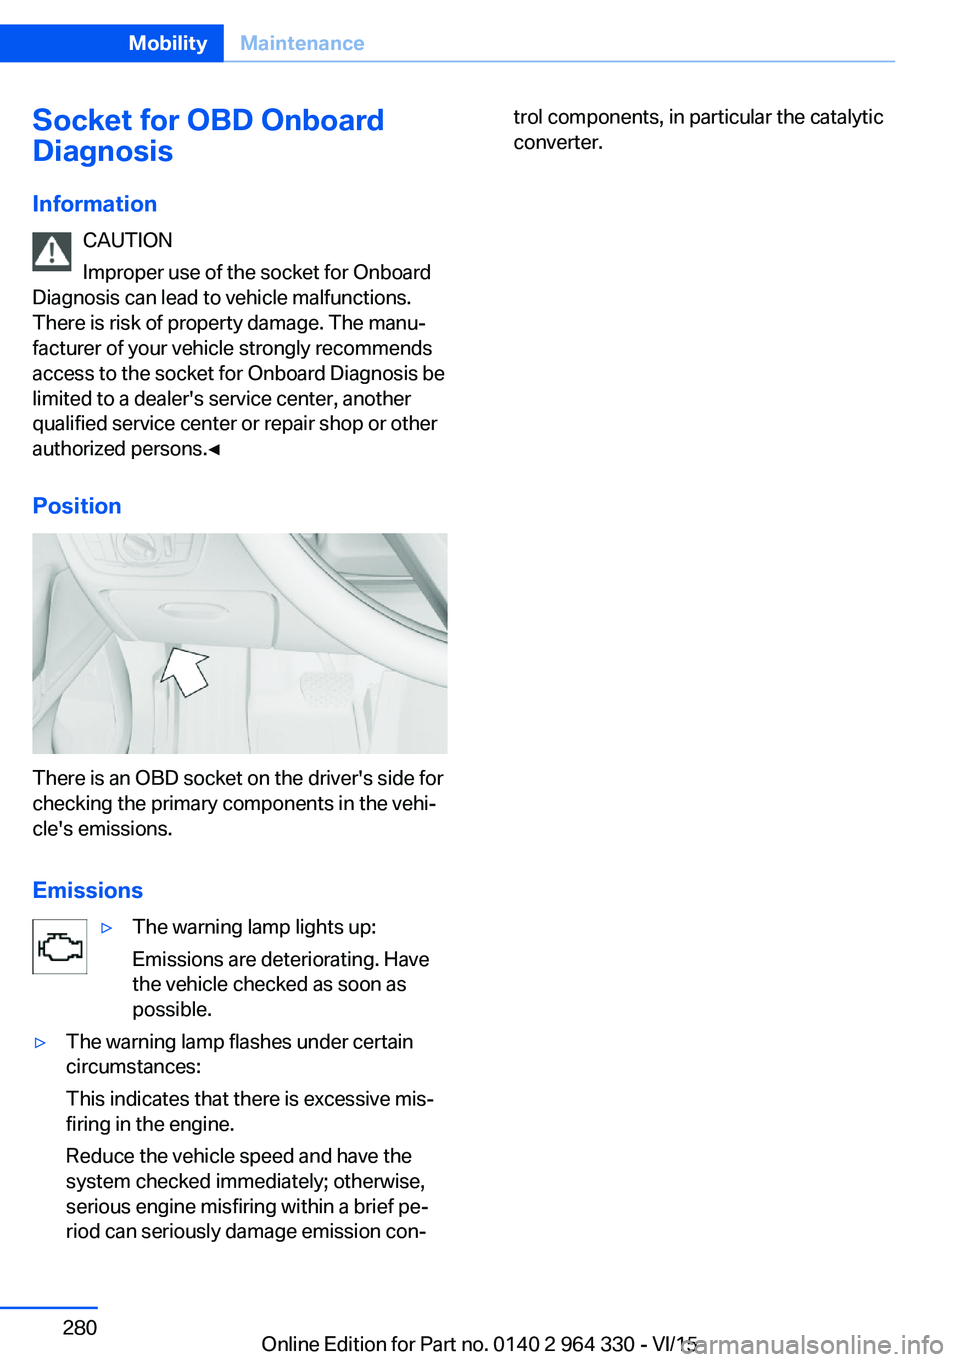
There is an OBD socket on the driver's side for
checking the primary components in the vehi‐
cle's emissions.
Emissions
▷The warning lamp lights up:
Emissions are deteriorating. Have
the vehicle checked as soon as
possible.▷The warning lamp flashes under certain
circumstances:
This indicates that there is excessive mis‐
firing in the engine.
Reduce the vehicle speed and have the
system checked immediately; otherwise,
serious engine misfiring within a brief pe‐
riod can seriously damage emission con‐trol components, in particular the catalytic
converter.Seite 280MobilityMaintenance280
Online Edition for Part no. 0140 2 964 330 - VI/15
Page 282 of 314
Lights and bulbs
General information
Lights and bulbs make an essential contribu‐
tion to vehicle safety.
All headlights and lights are made using LED
or laser technology.
The vehicle manufacturer recommends that
you let a dealer’s service center or another
qualified service center or repair shop perform
the work in case of a malfunction.
Information
Lights and bulbs DANGER
There can be high voltage in the lighting
system. There is danger to life. The manufac‐
turer of your vehicle recommends that the
work on the lighting system including bulb re‐
placement be performed by a dealer’s service
center or another qualified service center or re‐
pair shop.◀
Light-emitting diodes (LEDs)
Some items of equipment use light-emitting
diodes installed behind a cover as a light
source.
These light-emitting diodes, which are related
to conventional lasers, are officially designated
as Class 1 light-emitting diodes.
WARNING
Too intensive brightness can irritate or
damage the retina of the eye. There is risk of
injuries. Do not look directly into the headlights
or other light sources for an extended period of
time. Do not remove the LED covers.◀
Headlight glass
Condensation can form on the inside of the ex‐
ternal lights in cool or humid weather. When
driving with the lights switched on, the con‐densation evaporates after a short time. The
headlight glass does not need to be changed.
If despite driving with the lights switched on,
increasing humidity forms, e. g. water droplets
in the lamp, the manufacturer of your vehicle
recommends having it checked by a dealer’s
service center or another qualified service cen‐
ter or repair shop.
Changing wheels
Information When using run-flat tires or sealants, a tire
does not need to be changed immediately in
the event of pressure loss due to a flat tire.
The tools for changing wheels are available as
accessories from your dealer’s service center
or another qualified service center or repair
shop.
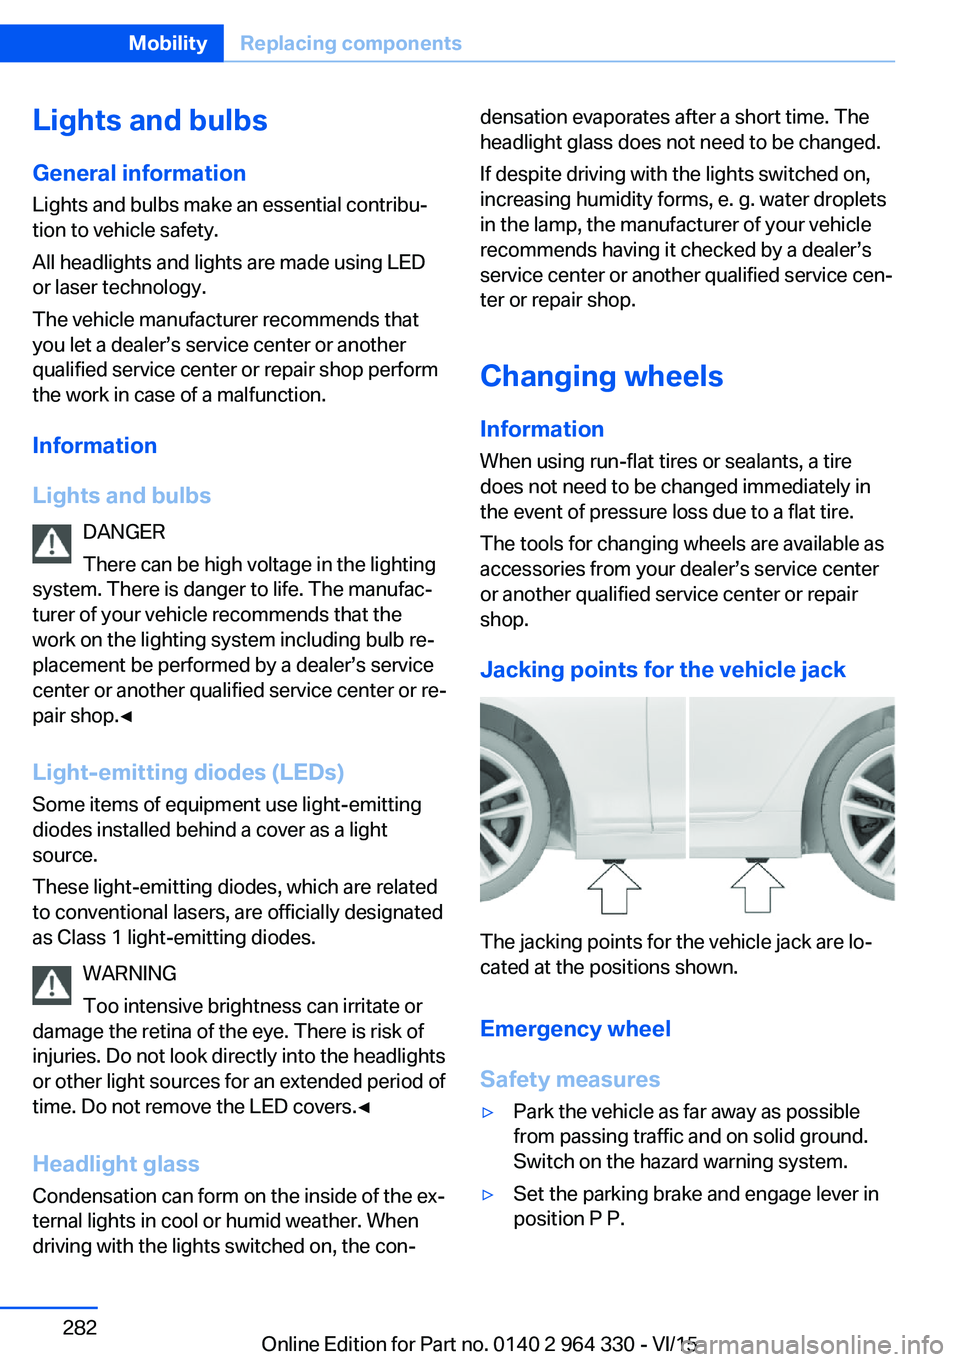
Jacking points for the vehicle jack
The jacking points for the vehicle jack are lo‐
cated at the positions shown.
Emergency wheel
Safety measures
▷Park the vehicle as far away as possible
from passing traffic and on solid ground.
Switch on the hazard warning system.▷Set the parking brake and engage lever in
position P P.Seite 282MobilityReplacing components282
Online Edition for Part no. 0140 2 964 330 - VI/15
Page 286 of 314
Breakdown assistanceVehicle features and options
This chapter describes all standard, country-
specific and optional features offered with the
series. It also describes features that are not
necessarily available in your car, e. g., due to
the selected options or country versions. This
also applies to safety-related functions and
systems. The respectively applicable country
provisions must be observed when using the
respective features and systems.
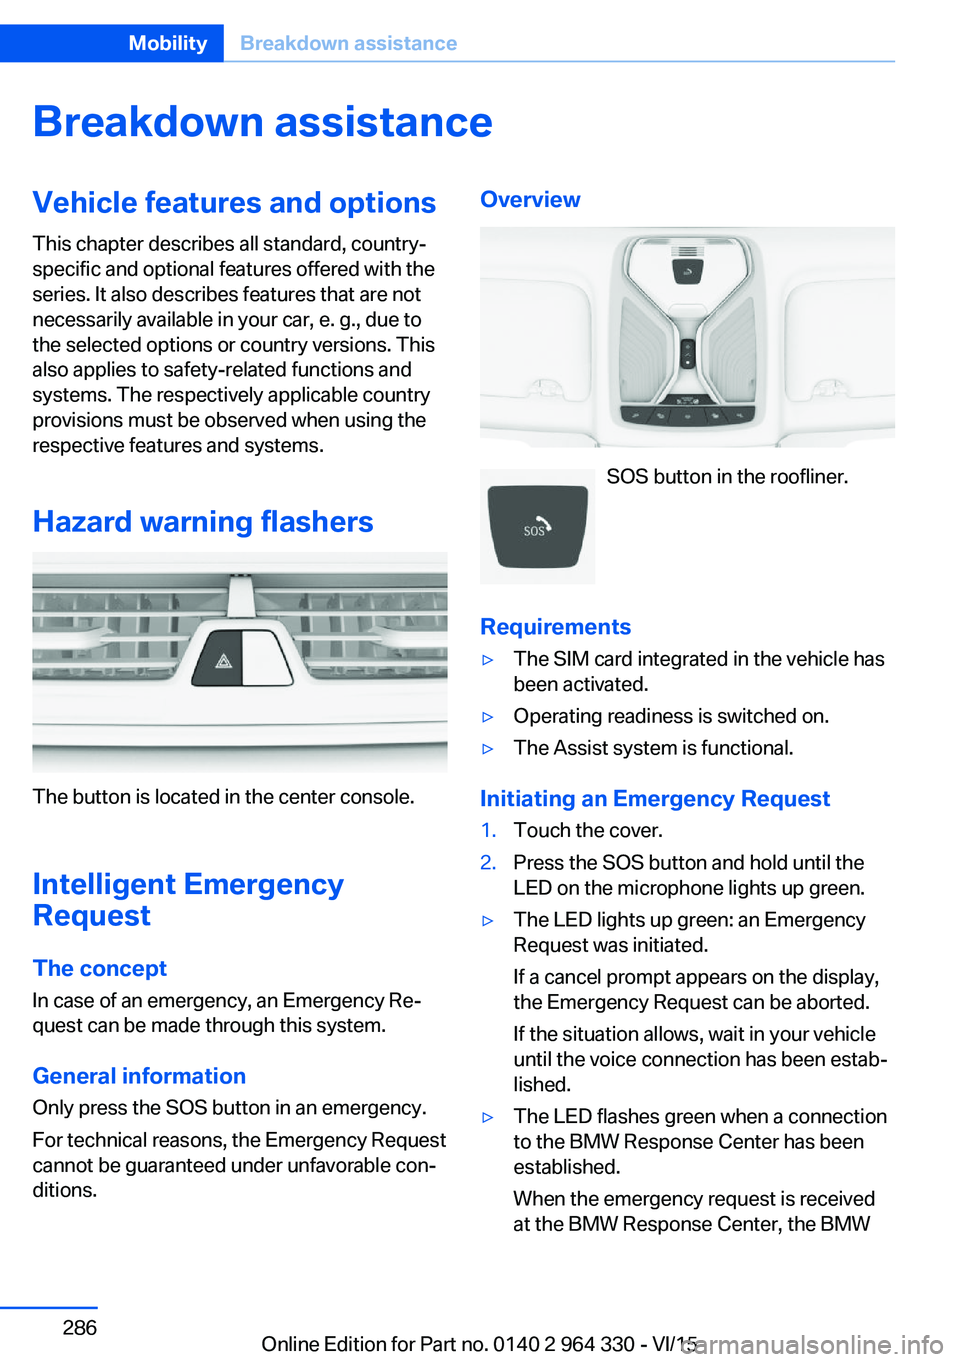
Hazard warning flashers
The button is located in the center console.
Intelligent Emergency
Request
The concept In case of an emergency, an Emergency Re‐
quest can be made through this system.
General information
Only press the SOS button in an emergency.
For technical reasons, the Emergency Request
cannot be guaranteed under unfavorable con‐
ditions.
Overview
SOS button in the roofliner.
Requirements
▷The SIM card integrated in the vehicle has
been activated.▷Operating readiness is switched on.▷The Assist system is functional.
Initiating an Emergency Request
1.Touch the cover.2.Press the SOS button and hold until the
LED on the microphone lights up green.▷The LED lights up green: an Emergency
Request was initiated.
If a cancel prompt appears on the display,
the Emergency Request can be aborted.
If the situation allows, wait in your vehicle
until the voice connection has been estab‐
lished.▷The LED flashes green when a connection
to the BMW Response Center has been
established.
When the emergency request is received
at the BMW Response Center, the BMWSeite 286MobilityBreakdown assistance286
Online Edition for Part no. 0140 2 964 330 - VI/15
Page 292 of 314
In this way, operating readiness remains
switched on, and a Check-Control mes‐
sage is displayed.
The vehicle cannot be locked from the outside
when in selector lever position N. A signal
sounds when an attempt is made to lock the
vehicle.
For activation of drive readiness:
1.Depress the brake pedal.2.Press the Start/Stop button.
When the Start/Stop button is pressed without
stepping on the brake, a Check Control mes‐
sage is displayed.
Selector lever positionSelector lever position P is automatically en‐
gaged after approx. 25 minutes.
Headlights
▷Do not rub dry and do not use abrasive or
acidic cleansers.▷Soak areas that have been dirtied e. g.,
from insects, with shampoo and wash off
with water.▷Thaw ice with de-icing spray; do not use an
ice scraper.
After washing the vehicle
After washing the vehicle, apply the brakes
briefly to dry them; otherwise, braking action
can be reduced and corrosion of the brake
discs can occur.
Completely remove all residues on the win‐
dows, to minimize loss of visibility due to
smearing and to reduce wiper noises and
wiper blade wear.
Vehicle care
Car care productsThe manufacturer of your vehicle recommends
using car care and cleaning products from
BMW.
WARNING
Cleansers can contain substances that
are dangerous and harmful to your health.
There is risk of injuries. When cleaning the in‐
terior, open the doors or windows. Only use
products intended for cleaning vehicles. Fol‐
low the instructions on the container.◀
Vehicle paint Regular care contributes to driving safety and
value retention. Environmental influences in
areas with elevated air pollution or natural con‐
taminants, such as tree resin or pollen can af‐
fect the vehicle's paintwork. Tailor the fre‐
quency and extent of your car care to these
influences.
Aggressive substances such as spilled fuel, oil,
grease or bird droppings, must be removed im‐
mediately to prevent the finish from being al‐
tered or discolored.
Matte finish Only use cleaning and care products suitable
for vehicles with matte finish. These are availa‐
ble from a dealer’s service center or another
qualified service center or repair shop.
Leather care
Remove dust from the leather often, using a
cloth or vacuum cleaner.
Otherwise, particles of dust and road grime
chafe in pores and folds, and lead to increased
wear and premature degradation of the leather
surface.
To guard against discoloration, such as from
clothing, provide leather care roughly every
two months.Seite 292MobilityCare292
Online Edition for Part no. 0140 2 964 330 - VI/15
Page 302 of 314
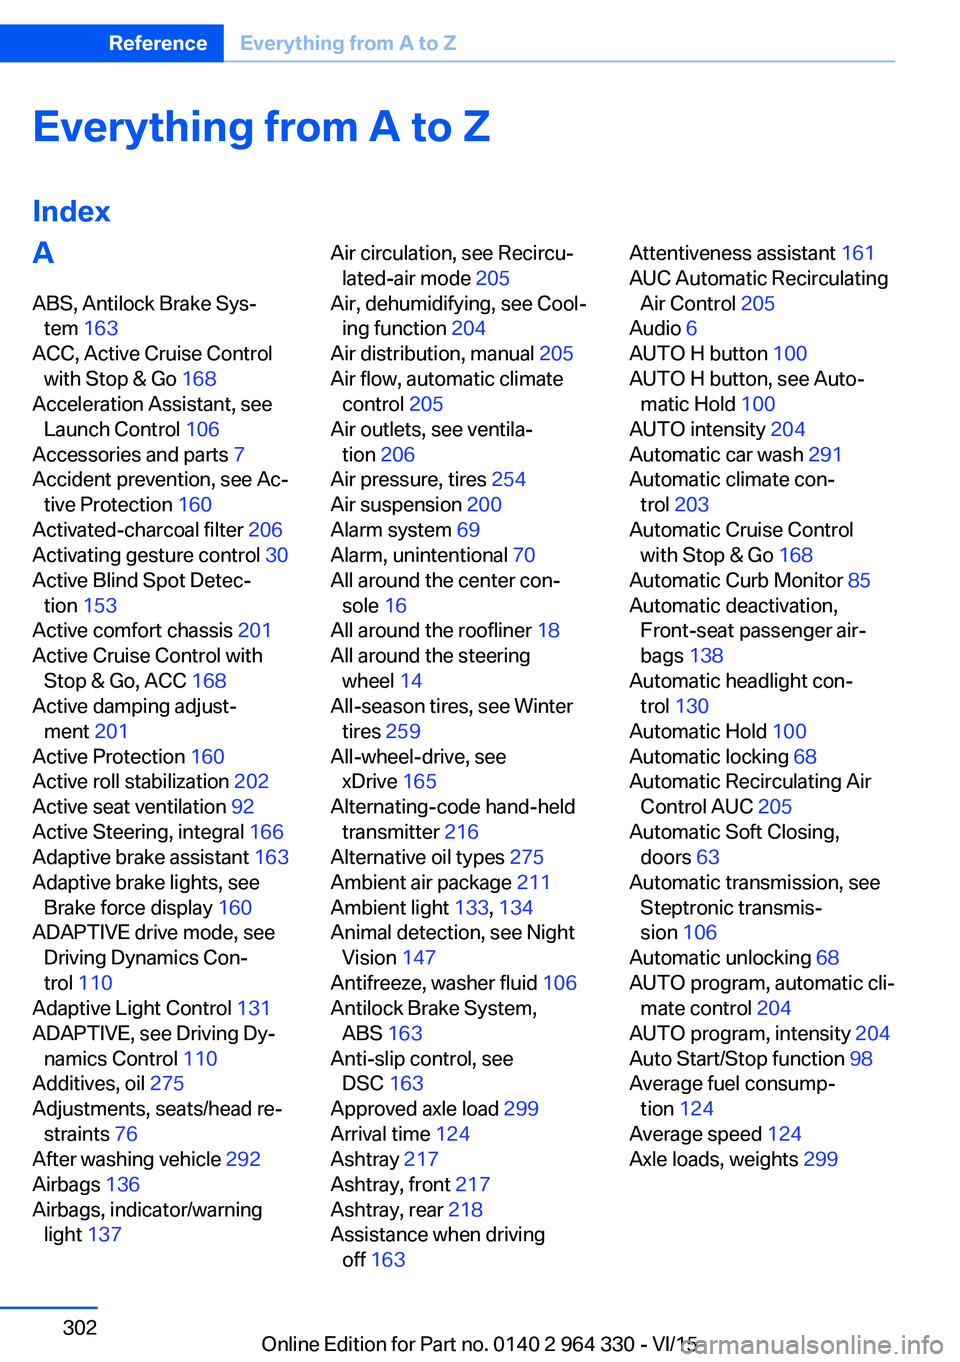
Everything from A to Z
IndexA ABS, Antilock Brake Sys‐ tem 163
ACC, Active Cruise Control with Stop & Go 168
Acceleration Assistant, see Launch Control 106
Accessories and parts 7
Accident prevention, see Ac‐ tive Protection 160
Activated-charcoal filter 206
Activating gesture control 30
Active Blind Spot Detec‐ tion 153
Active comfort chassis 201
Active Cruise Control with Stop & Go, ACC 168
Active damping adjust‐ ment 201
Active Protection 160
Active roll stabilization 202
Active seat ventilation 92
Active Steering, integral 166
Adaptive brake assistant 163
Adaptive brake lights, see Brake force display 160
ADAPTIVE drive mode, see Driving Dynamics Con‐
trol 110
Adaptive Light Control 131
ADAPTIVE, see Driving Dy‐ namics Control 110
Additives, oil 275
Adjustments, seats/head re‐ straints 76
After washing vehicle 292
Airbags 136
Airbags, indicator/warning light 137 Air circulation, see Recircu‐
lated-air mode 205
Air, dehumidifying, see Cool‐ ing function 204
Air distribution, manual 205
Air flow, automatic climate control 205
Air outlets, see ventila‐ tion 206
Air pressure, tires 254
Air suspension 200
Alarm system 69
Alarm, unintentional 70
All around the center con‐ sole 16
All around the roofliner 18
All around the steering wheel 14
All-season tires, see Winter tires 259
All-wheel-drive, see xDrive 165
Alternating-code hand-held transmitter 216
Alternative oil types 275
Ambient air package 211
Ambient light 133, 134
Animal detection, see Night Vision 147
Antifreeze, washer fluid 106
Antilock Brake System, ABS 163
Anti-slip control, see DSC 163
Approved axle load 299
Arrival time 124
Ashtray 217
Ashtray, front 217
Ashtray, rear 218
Assistance when driving off 163 Attentiveness assistant 161
AUC Automatic Recirculating Air Control 205
Audio 6
AUTO H button 100
AUTO H button, see Auto‐ matic Hold 100
AUTO intensity 204
Automatic car wash 291
Automatic climate con‐ trol 203
Automatic Cruise Control with Stop & Go 168
Automatic Curb Monitor 85
Automatic deactivation, Front-seat passenger air‐
bags 138
Automatic headlight con‐ trol 130
Automatic Hold 100
Automatic locking 68
Automatic Recirculating Air Control AUC 205
Automatic Soft Closing, doors 63
Automatic transmission, see Steptronic transmis‐
sion 106
Automatic unlocking 68
AUTO program, automatic cli‐ mate control 204
AUTO program, intensity 204
Auto Start/Stop function 98
Average fuel consump‐ tion 124
Average speed 124
Axle loads, weights 299 Seite 302ReferenceEverything from A to Z302
Online Edition for Part no. 0140 2 964 330 - VI/15
Page 303 of 314
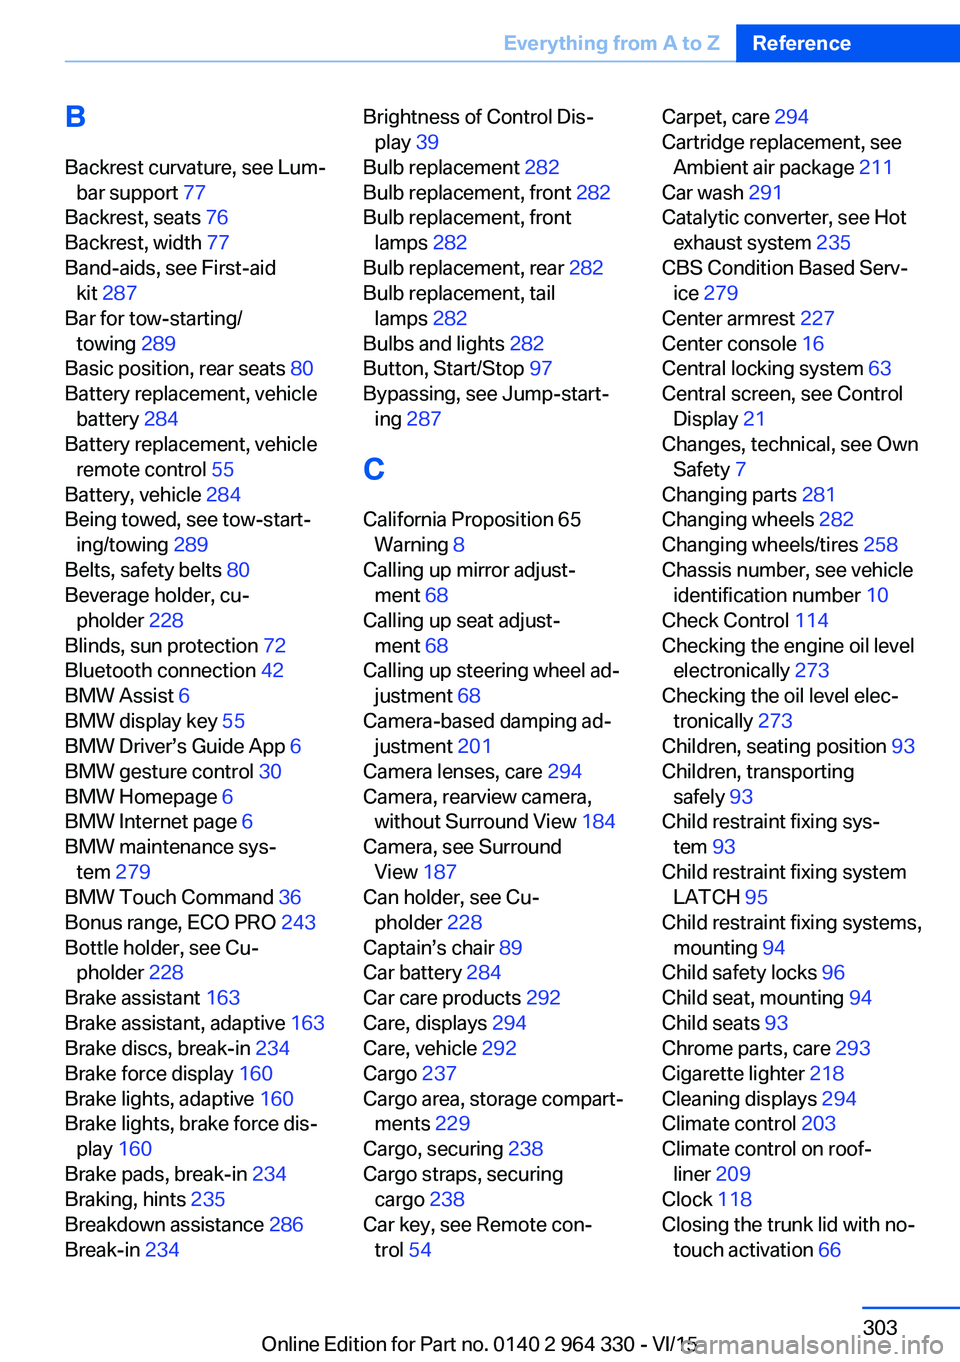
BBackrest curvature, see Lum‐ bar support 77
Backrest, seats 76
Backrest, width 77
Band-aids, see First-aid kit 287
Bar for tow-starting/ towing 289
Basic position, rear seats 80
Battery replacement, vehicle battery 284
Battery replacement, vehicle remote control 55
Battery, vehicle 284
Being towed, see tow-start‐ ing/towing 289
Belts, safety belts 80
Beverage holder, cu‐ pholder 228
Blinds, sun protection 72
Bluetooth connection 42
BMW Assist 6
BMW display key 55
BMW Driver’s Guide App 6
BMW gesture control 30
BMW Homepage 6
BMW Internet page 6
BMW maintenance sys‐ tem 279
BMW Touch Command 36
Bonus range, ECO PRO 243
Bottle holder, see Cu‐ pholder 228
Brake assistant 163
Brake assistant, adaptive 163
Brake discs, break-in 234
Brake force display 160
Brake lights, adaptive 160
Brake lights, brake force dis‐ play 160
Brake pads, break-in 234
Braking, hints 235
Breakdown assistance 286
Break-in 234 Brightness of Control Dis‐
play 39
Bulb replacement 282
Bulb replacement, front 282
Bulb replacement, front lamps 282
Bulb replacement, rear 282
Bulb replacement, tail lamps 282
Bulbs and lights 282
Button, Start/Stop 97
Bypassing, see Jump-start‐ ing 287
C
California Proposition 65 Warning 8
Calling up mirror adjust‐ ment 68
Calling up seat adjust‐ ment 68
Calling up steering wheel ad‐ justment 68
Camera-based damping ad‐ justment 201
Camera lenses, care 294
Camera, rearview camera, without Surround View 184
Camera, see Surround View 187
Can holder, see Cu‐ pholder 228
Captain’s chair 89
Car battery 284
Car care products 292
Care, displays 294
Care, vehicle 292
Cargo 237
Cargo area, storage compart‐ ments 229
Cargo, securing 238
Cargo straps, securing cargo 238
Car key, see Remote con‐ trol 54 Carpet, care 294
Cartridge replacement, see Ambient air package 211
Car wash 291
Catalytic converter, see Hot exhaust system 235
CBS Condition Based Serv‐ ice 279
Center armrest 227
Center console 16
Central locking system 63
Central screen, see Control Display 21
Changes, technical, see Own Safety 7
Changing parts 281
Changing wheels 282
Changing wheels/tires 258
Chassis number, see vehicle identification number 10
Check Control 114
Checking the engine oil level electronically 273
Checking the oil level elec‐ tronically 273
Children, seating position 93
Children, transporting safely 93
Child restraint fixing sys‐ tem 93
Child restraint fixing system LATCH 95
Child restraint fixing systems, mounting 94
Child safety locks 96
Child seat, mounting 94
Child seats 93
Chrome parts, care 293
Cigarette lighter 218
Cleaning displays 294
Climate control 203
Climate control on roof‐ liner 209
Clock 118
Closing the trunk lid with no- touch activation 66 Seite 303Everything from A to ZReference303
Online Edition for Part no. 0140 2 964 330 - VI/15