mirror BMW 760i 2004 E65 Owner's Manual
[x] Cancel search | Manufacturer: BMW, Model Year: 2004, Model line: 760i, Model: BMW 760i 2004 E65Pages: 232, PDF Size: 5.27 MB
Page 12 of 232
Cockpit
10
Cockpit
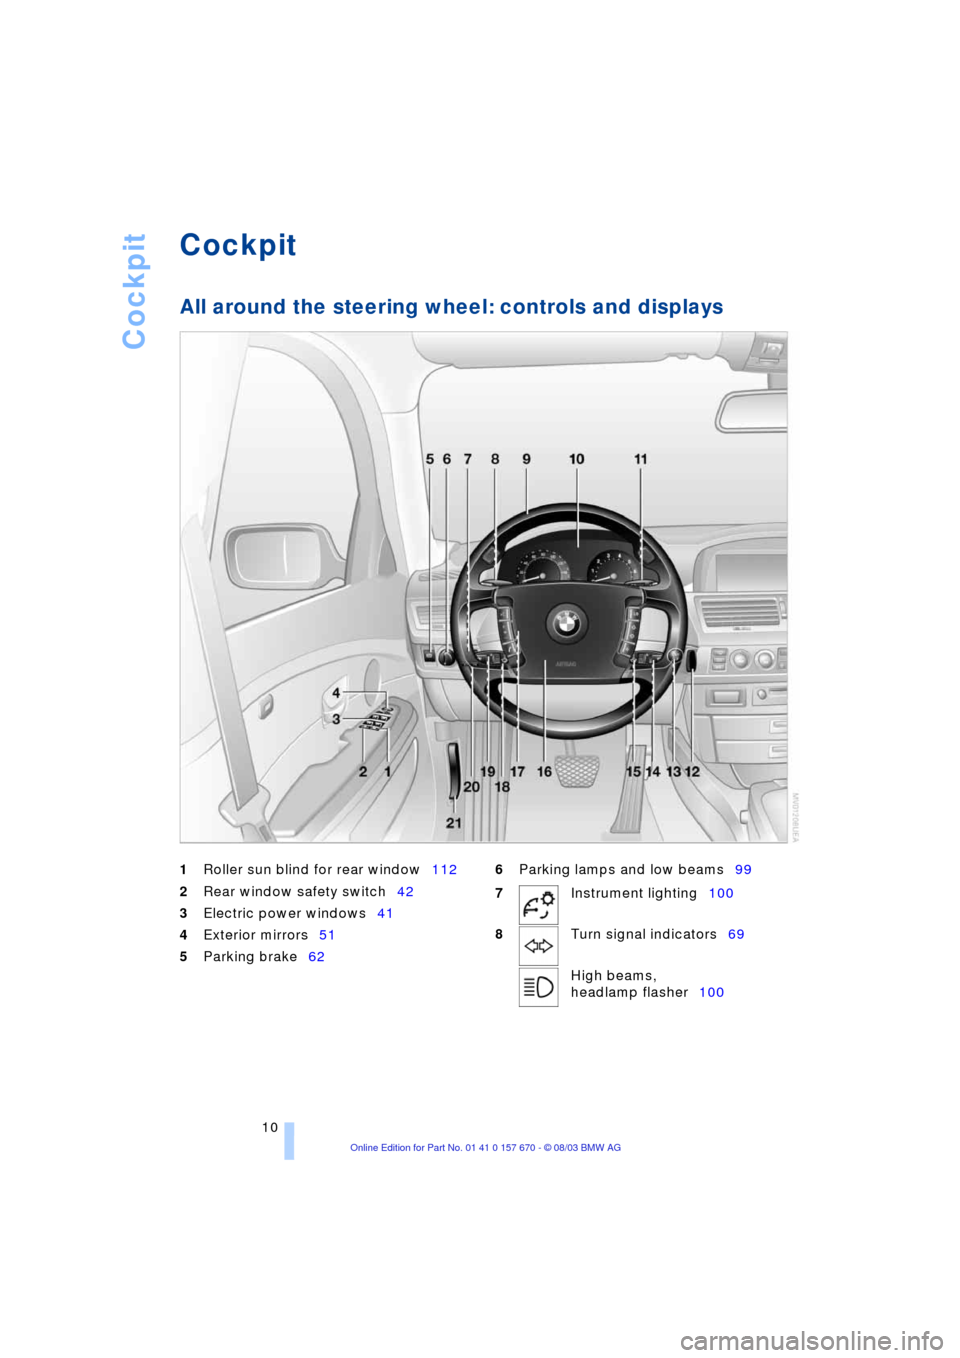
All around the steering wheel: controls and displays
1
Roller sun blind for rear window112
2
Rear window safety switch42
3
Electric power windows41
4
Exterior mirrors51
5
Parking brake62
6
Parking lamps and low beams99
7
Instrument lighting100
8
Turn signal indicators69
High beams,
headlamp flasher100
Page 17 of 232
At a glance
15Reference
Controls
Driving tips
Communications
Navigation
Entertainment
Mobility
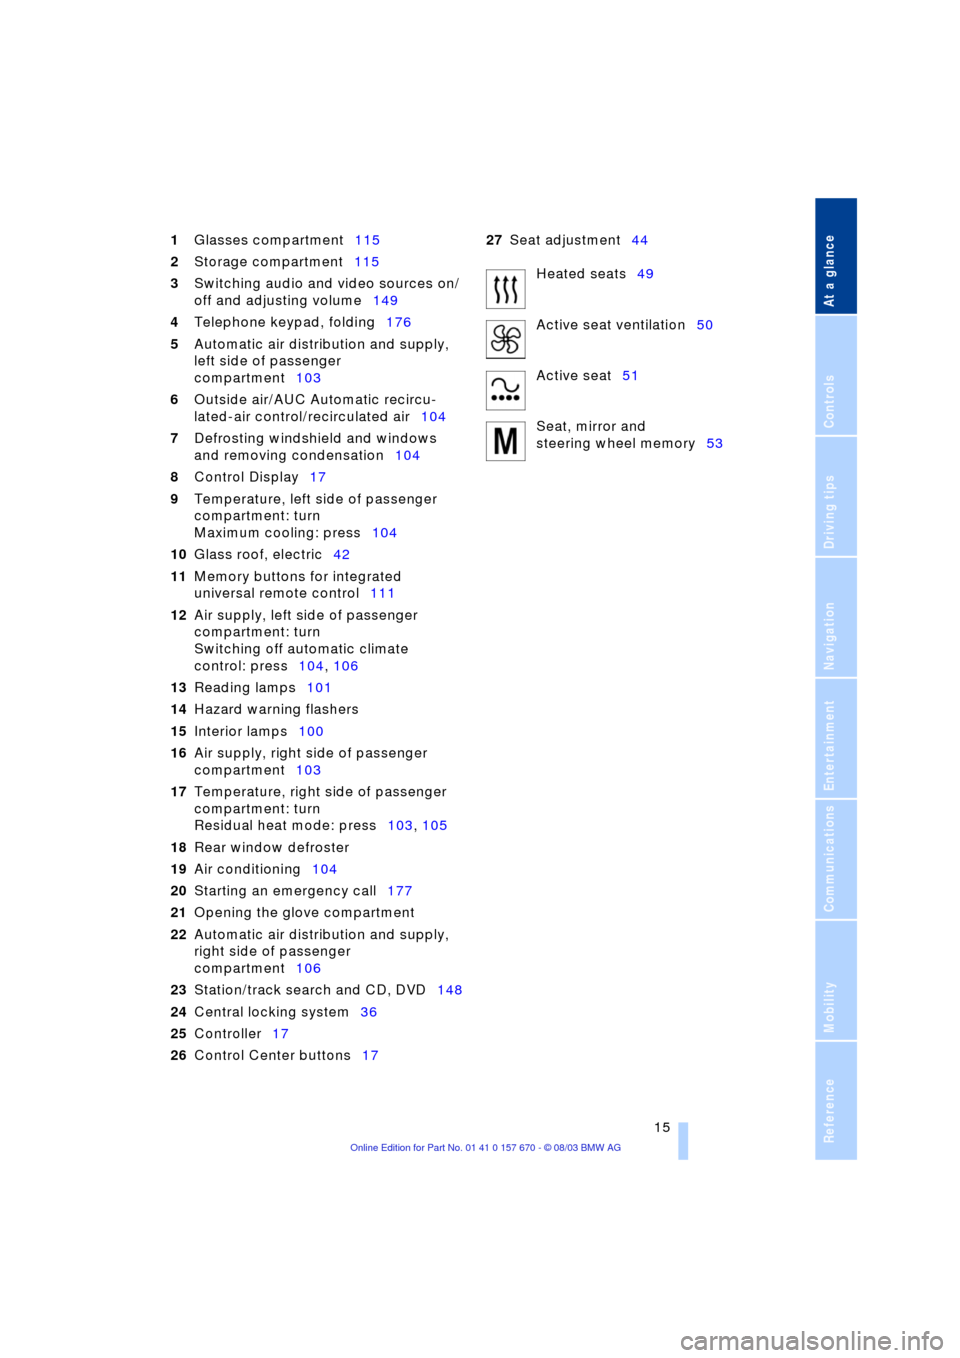
1Glasses compartment115
2Storage compartment115
3Switching audio and video sources on/
off and adjusting volume149
4Telephone keypad, folding176
5Automatic air distribution and supply,
left side of passenger
compartment103
6Outside air/AUC Automatic recircu-
lated-air control/recirculated air104
7Defrosting windshield and windows
and removing condensation104
8Control Display17
9Temperature, left side of passenger
compartment: turn
Maximum cooling: press104
10Glass roof, electric42
11Memory buttons for integrated
universal remote control111
12Air supply, left side of passenger
compartment: turn
Switching off automatic climate
control: press104, 106
13Reading lamps101
14Hazard warning flashers
15Interior lamps100
16Air supply, right side of passenger
compartment103
17Temperature, right side of passenger
compartment: turn
Residual heat mode: press103, 105
18Rear window defroster
19Air conditioning104
20Starting an emergency call177
21Opening the glove compartment
22Automatic air distribution and supply,
right side of passenger
compartment106
23Station/track search and CD, DVD148
24Central locking system36
25Controller17
26Control Center buttons1727Seat adjustment44
Heated seats49
Active seat ventilation50
Active seat51
Seat, mirror and
steering wheel memory53
Page 29 of 232
At a glance
27Reference
Controls
Driving tips
Communications
Navigation
Entertainment
Mobility
Notes
Do not use the voice command sys-
tem to make emergency calls. Your
voice and habitual tone could be affected
by stressful situations, as a result of which
the process of establishing the telephone
connection could be unnecessarily
delayed. Instead, use the emergency call
button near the interior rearview mirror,
refer to page 177.<
Environmental conditions
The voice command system uses a special
hands-free microphone located in the front
of your vehicle's headliner. Although the
system is designed to filter out ambient
noise, you can help ensure that your com-
mands will be understood by observing the
following instructions:
>Speak smoothly and clearly, at a normal
volume. Do not place any unusual
stress on individual syllables, and avoid
pauses
>Do not speak while the voice command
system is talking
>Keep the doors, windows and glass
roof closed to prevent interference from
ambient noise
>Avoid other sources of noise in the
vehicle while speaking, and ask other
vehicle occupants to refrain from talk-
ing while you are using the system
>The hands-free microphone is aimed
toward the driver. This means that the
system might be unable to register the
voices of other vehicle occupants prop-
erly.
The notebook
Recording a note
You can store approx. ten minutes of
spoken text Ð either as a single entry or
as multiple entries of any desired length.
To terminate recording:
Press the button for a long period.
When recording notes, the voice
command system does not respond
to the {Cancel} command. The text check-
ing function for command words is deacti-
vated in this case so that you can speak
any desired text for your notes. This feature
saves you from having to concentrate on
avoiding any command words.<
Listening to a notebook entry
To listen to recorded notebook entries:
Deleting notes
Clearing the notebook
To delete all contents from the notebook:
{Record note}.
1.{Read out}
Approximately the first 3 seconds
of the first note are read aloud
2.Following the inquiry {{Note and
next?}} select the desired function
>To listen to the entire note:
{Read out}
>To listen to the next notebook
entry:
{Next}
>To listen to the entry again:
{Back} or
{Repeat}.
1.{Edit}
2.{Delete}.
1.{Notepad}
2.{Delete}.
Page 42 of 232
Opening and closing
40 >To a change in the vehicle's tilt if some-
one attempts to steal the wheels or tow
the vehicle
>To interruption of battery voltage.
The system responds to unauthorized vehi-
cle entry and attempted theft by simulta-
neously activating:
>An acoustic alarm, which lasts for a
period of approx. 30 seconds
>The hazard warning flashers for approx.
five minutes
>The high beams, which flash on and off
in the same rhythm.
Arming and disarming the alarm
system
When you lock or unlock the vehicle, either
with the remote control unit or at the door
lock, the alarm system is armed or dis-
armed at the same time.
The system indicates that it has been cor-
rectly armed by switching on the hazard
warning flashers for a single cycle and by
emitting an acoustic signal.
You can have different acknowledg-
ment signals set to confirm arming
and disarming.<
You can also open the luggage compart-
ment lid with the system armed using
button 3 on the remote control, refer to
page 34. When you close the lid, the sys-
tem is rearmed.
Pressing the Panic mode button for a
longer period triggers the alarm, refer
to page 34.<
To deactivate the alarm
>unlock the vehicle using the remote
control, refer to page 34
>insert the remote control all the way into
the ignition lock, engaging the detent.
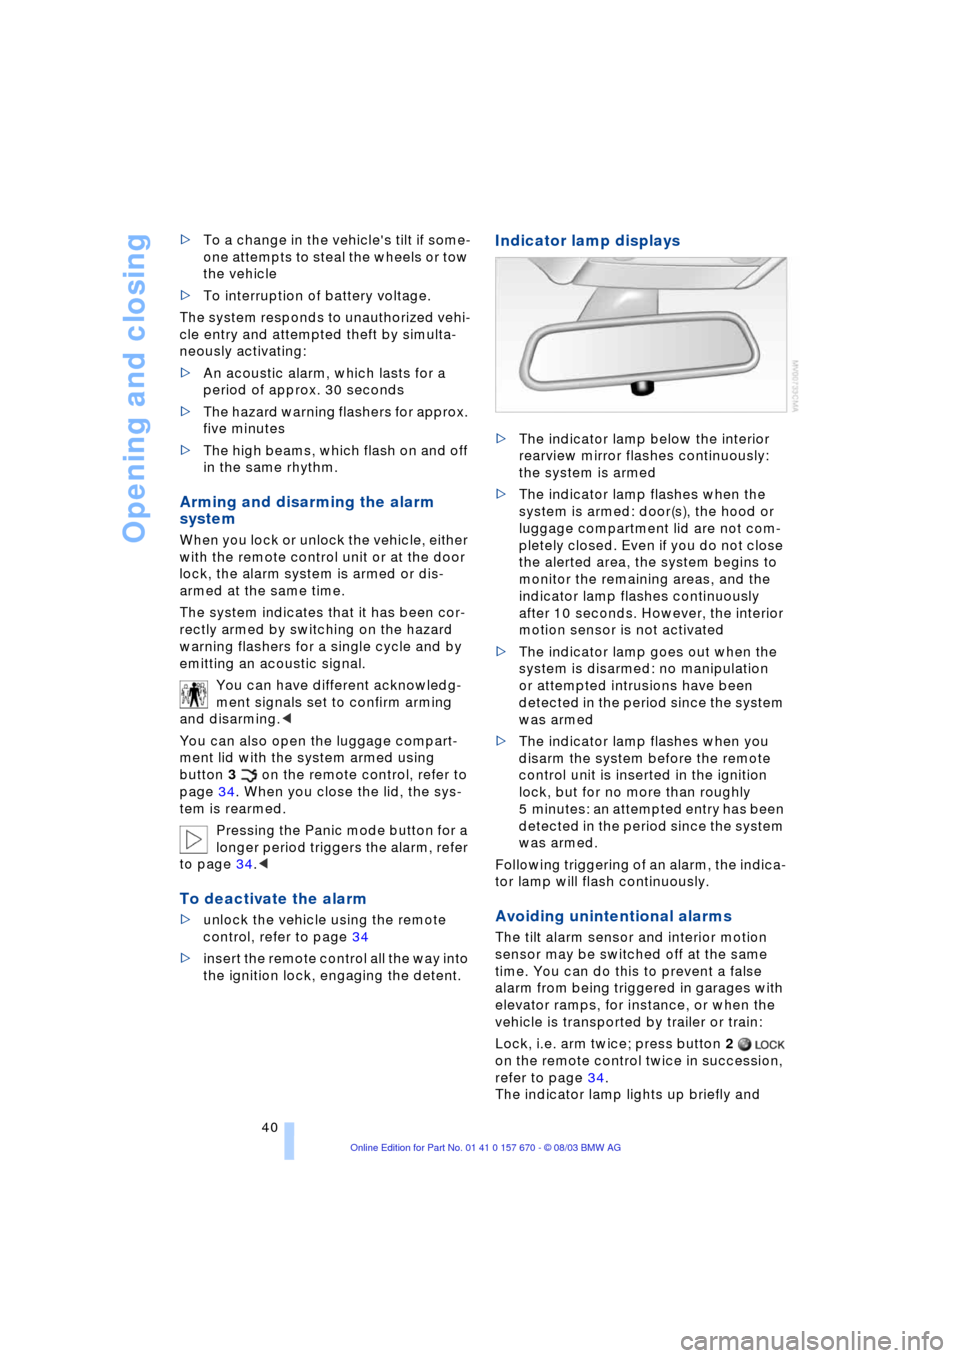
Indicator lamp displays
>The indicator lamp below the interior
rearview mirror flashes continuously:
the system is armed
>The indicator lamp flashes when the
system is armed: door(s), the hood or
luggage compartment lid are not com-
pletely closed. Even if you do not close
the alerted area, the system begins to
monitor the remaining areas, and the
indicator lamp flashes continuously
after 10 seconds. However, the interior
motion sensor is not activated
>The indicator lamp goes out when the
system is disarmed: no manipulation
or attempted intrusions have been
detected in the period since the system
was armed
>The indicator lamp flashes when you
disarm the system before the remote
control unit is inserted in the ignition
lock, but for no more than roughly
5 minutes: an attempted entry has been
detected in the period since the system
was armed.
Following triggering of an alarm, the indica-
tor lamp will flash continuously.
Avoiding unintentional alarms
The tilt alarm sensor and interior motion
sensor may be switched off at the same
time. You can do this to prevent a false
alarm from being triggered in garages with
elevator ramps, for instance, or when the
vehicle is transported by trailer or train:
Lock, i.e. arm twice; press button 2
on the remote control twice in succession,
refer to page 34.
The indicator lamp lights up briefly and
Page 53 of 232
Controls
51Reference
At a glance
Driving tips
Communications
Navigation
Entertainment
Mobility
Active seat*
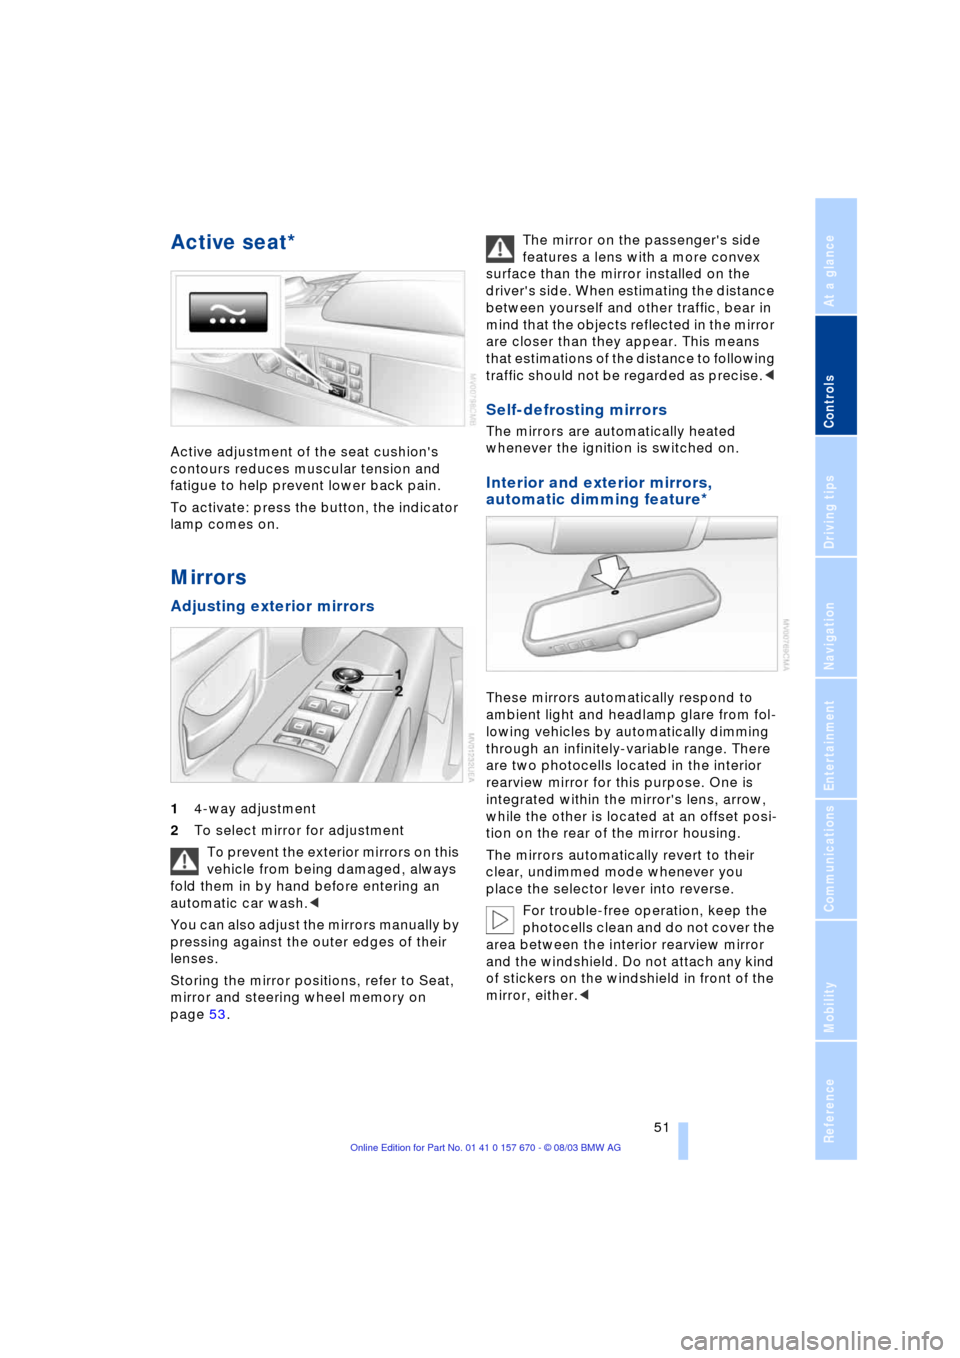
Active adjustment of the seat cushion's
contours reduces muscular tension and
fatigue to help prevent lower back pain.
To activate: press the button, the indicator
lamp comes on.
Mirrors
Adjusting exterior mirrors
14-way adjustment
2To select mirror for adjustment
To prevent the exterior mirrors on this
vehicle from being damaged, always
fold them in by hand before entering an
automatic car wash.<
You can also adjust the mirrors manually by
pressing against the outer edges of their
lenses.
Storing the mirror positions, refer to Seat,
mirror and steering wheel memory on
page 53. The mirror on the passenger's side
features a lens with a more convex
surface than the mirror installed on the
driver's side. When estimating the distance
between yourself and other traffic, bear in
mind that the objects reflected in the mirror
are closer than they appear. This means
that estimations of the distance to following
traffic should not be regarded as precise.<
Self-defrosting mirrors
The mirrors are automatically heated
whenever the ignition is switched on.
Interior and exterior mirrors,
automatic dimming feature*
These mirrors automatically respond to
ambient light and headlamp glare from fol-
lowing vehicles by automatically dimming
through an infinitely-variable range. There
are two photocells located in the interior
rearview mirror for this purpose. One is
integrated within the mirror's lens, arrow,
while the other is located at an offset posi-
tion on the rear of the mirror housing.
The mirrors automatically revert to their
clear, undimmed mode whenever you
place the selector lever into reverse.
For trouble-free operation, keep the
photocells clean and do not cover the
area between the interior rearview mirror
and the windshield. Do not attach any kind
of stickers on the windshield in front of the
mirror, either.<
Page 54 of 232
Adjustments
52
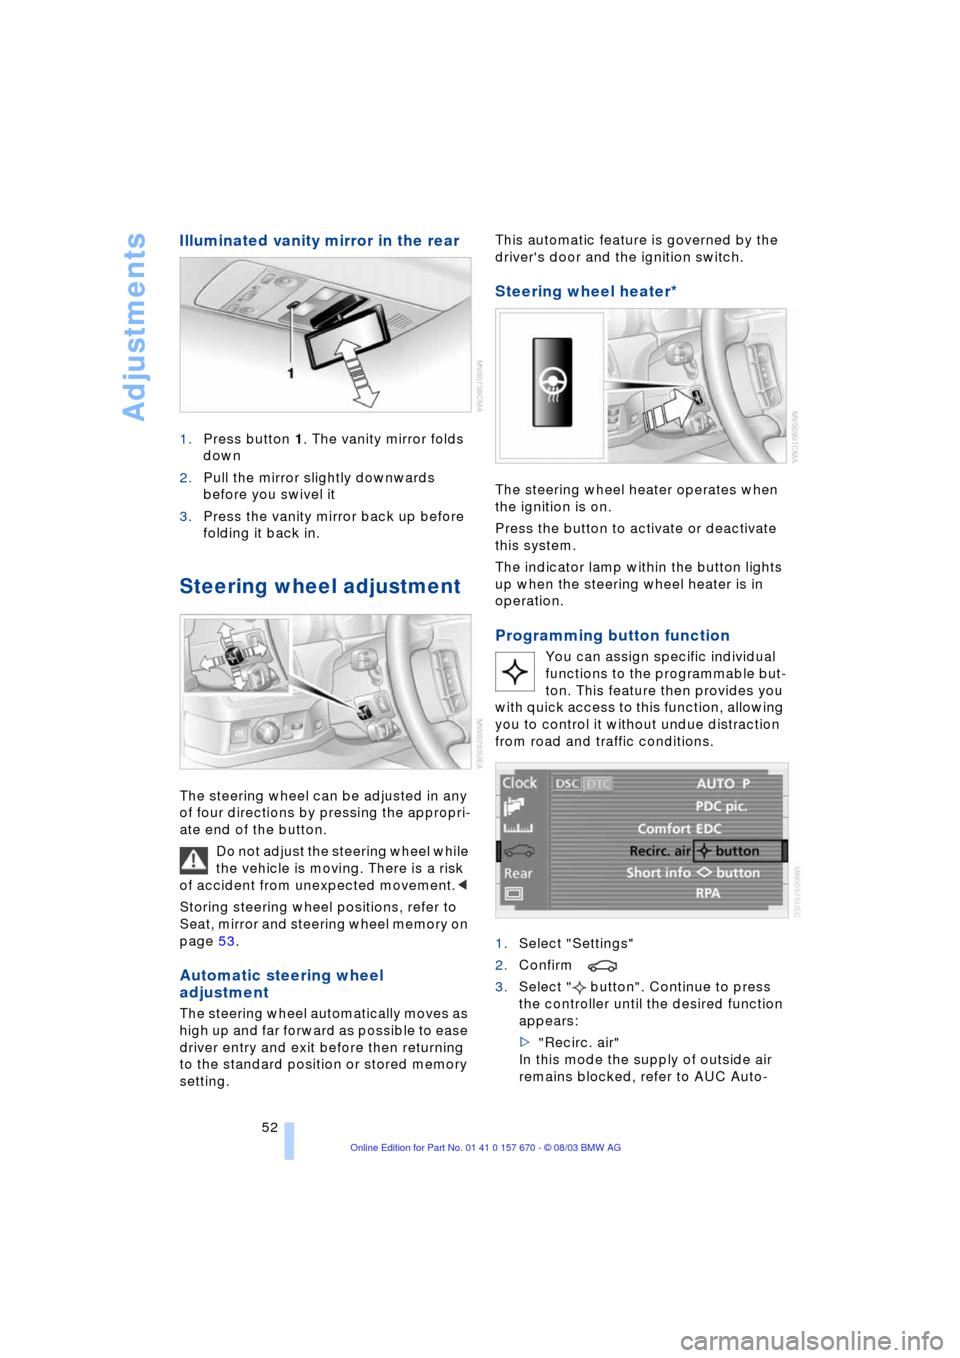
Illuminated vanity mirror in the rear
1.Press button 1. The vanity mirror folds
down
2.Pull the mirror slightly downwards
before you swivel it
3.Press the vanity mirror back up before
folding it back in.
Steering wheel adjustment
The steering wheel can be adjusted in any
of four directions by pressing the appropri-
ate end of the button.
Do not adjust the steering wheel while
the vehicle is moving. There is a risk
of accident from unexpected movement.<
Storing steering wheel positions, refer to
Seat, mirror and steering wheel memory on
page 53.
Automatic steering wheel
adjustment
The steering wheel automatically moves as
high up and far forward as possible to ease
driver entry and exit before then returning
to the standard position or stored memory
setting. This automatic feature is governed by the
driver's door and the ignition switch.
Steering wheel heater*
The steering wheel heater operates when
the ignition is on.
Press the button to activate or deactivate
this system.
The indicator lamp within the button lights
up when the steering wheel heater is in
operation.
Programming button function
You can assign specific individual
functions to the programmable but-
ton. This feature then provides you
with quick access to this function, allowing
you to control it without undue distraction
from road and traffic conditions.
1.Select "Settings"
2.Confirm
3.Select " button". Continue to press
the controller until the desired function
appears:
>"Recirc. air"
In this mode the supply of outside air
remains blocked, refer to AUC Auto-
Page 55 of 232
Controls
53Reference
At a glance
Driving tips
Communications
Navigation
Entertainment
Mobility
matic recirculated-air control on
page 104
>"Navi info"
To repeat the most recent message
from the navigation system, refer to
page 141
>"AUTO P"
To activate/deactivate Automatic Hold
refer to Automatic Hold on page 63.
You can select the displayed function using
the button on the steering wheel.
If you have activated Automatic Hold,
refer to page 63, you can use the but-
ton on the steering wheel to deactivate the
system for parking maneuvers etc.<
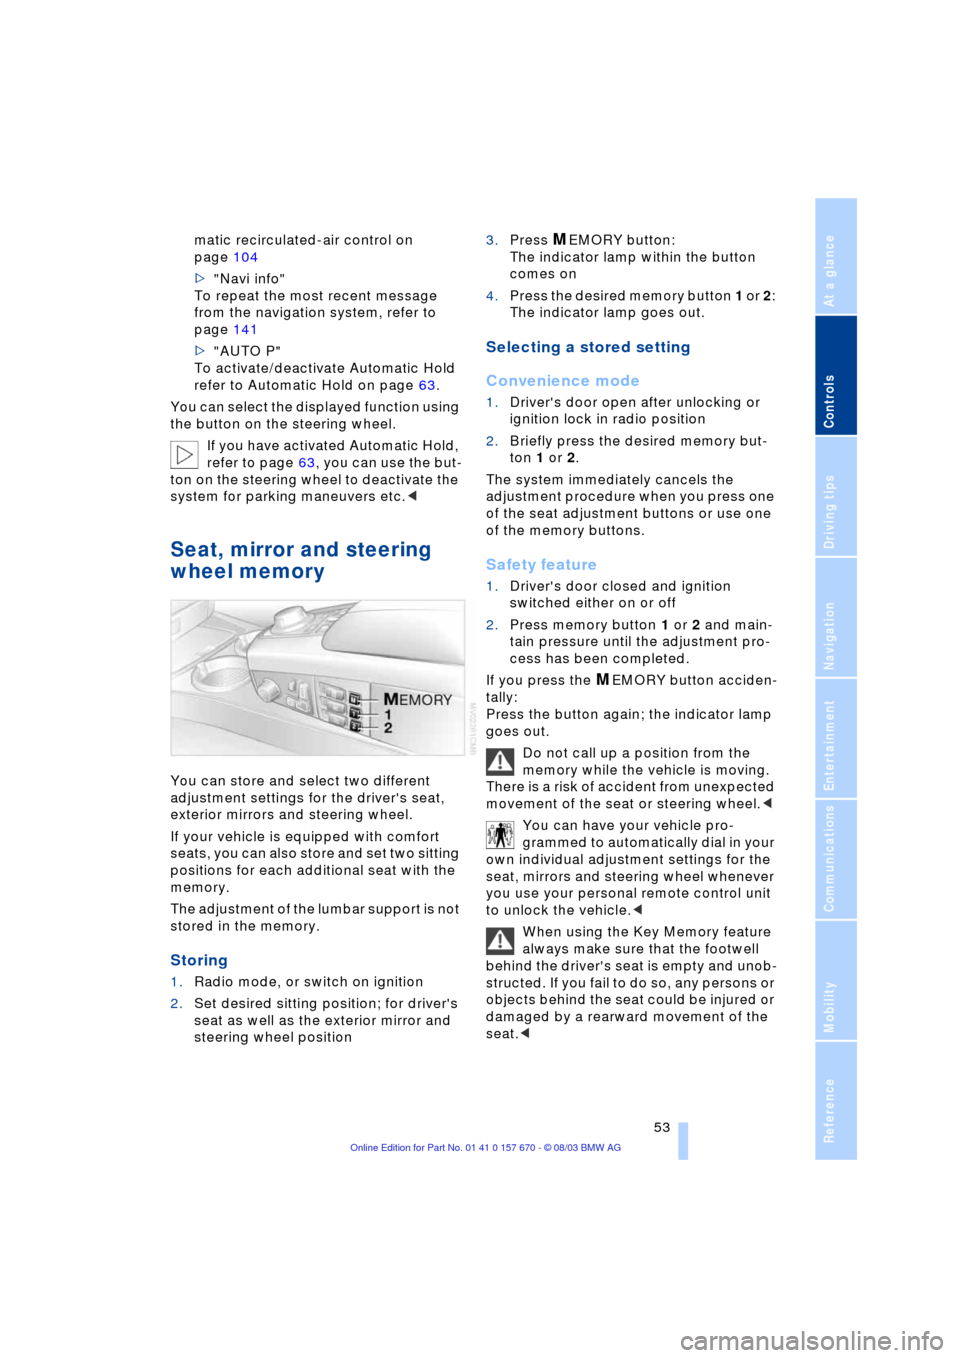
Seat, mirror and steering
wheel memory
You can store and select two different
adjustment settings for the driver's seat,
exterior mirrors and steering wheel.
If your vehicle is equipped with comfort
seats, you can also store and set two sitting
positions for each additional seat with the
memory.
The adjustment of the lumbar support is not
stored in the memory.
Storing
1.Radio mode, or switch on ignition
2.Set desired sitting position; for driver's
seat as well as the exterior mirror and
steering wheel position 3.Press
MEMORY button:
The indicator lamp within the button
comes on
4.Press the desired memory button 1 or 2:
The indicator lamp goes out.
Selecting a stored setting
Convenience mode
1.Driver's door open after unlocking or
ignition lock in radio position
2.Briefly press the desired memory but-
ton 1 or 2.
The system immediately cancels the
adjustment procedure when you press one
of the seat adjustment buttons or use one
of the memory buttons.
Safety feature
1.Driver's door closed and ignition
switched either on or off
2.Press memory button 1 or 2 and main-
tain pressure until the adjustment pro-
cess has been completed.
If you press the
MEMORY button acciden-
tally:
Press the button again; the indicator lamp
goes out.
Do not call up a position from the
memory while the vehicle is moving.
There is a risk of accident from unexpected
movement of the seat or steering wheel.<
You can have your vehicle pro-
grammed to automatically dial in your
own individual adjustment settings for the
seat, mirrors and steering wheel whenever
you use your personal remote control unit
to unlock the vehicle.<
When using the Key Memory feature
always make sure that the footwell
behind the driver's seat is empty and unob-
structed. If you fail to do so, any persons or
objects behind the seat could be injured or
damaged by a rearward movement of the
seat.<
Page 56 of 232
Adjustments
54
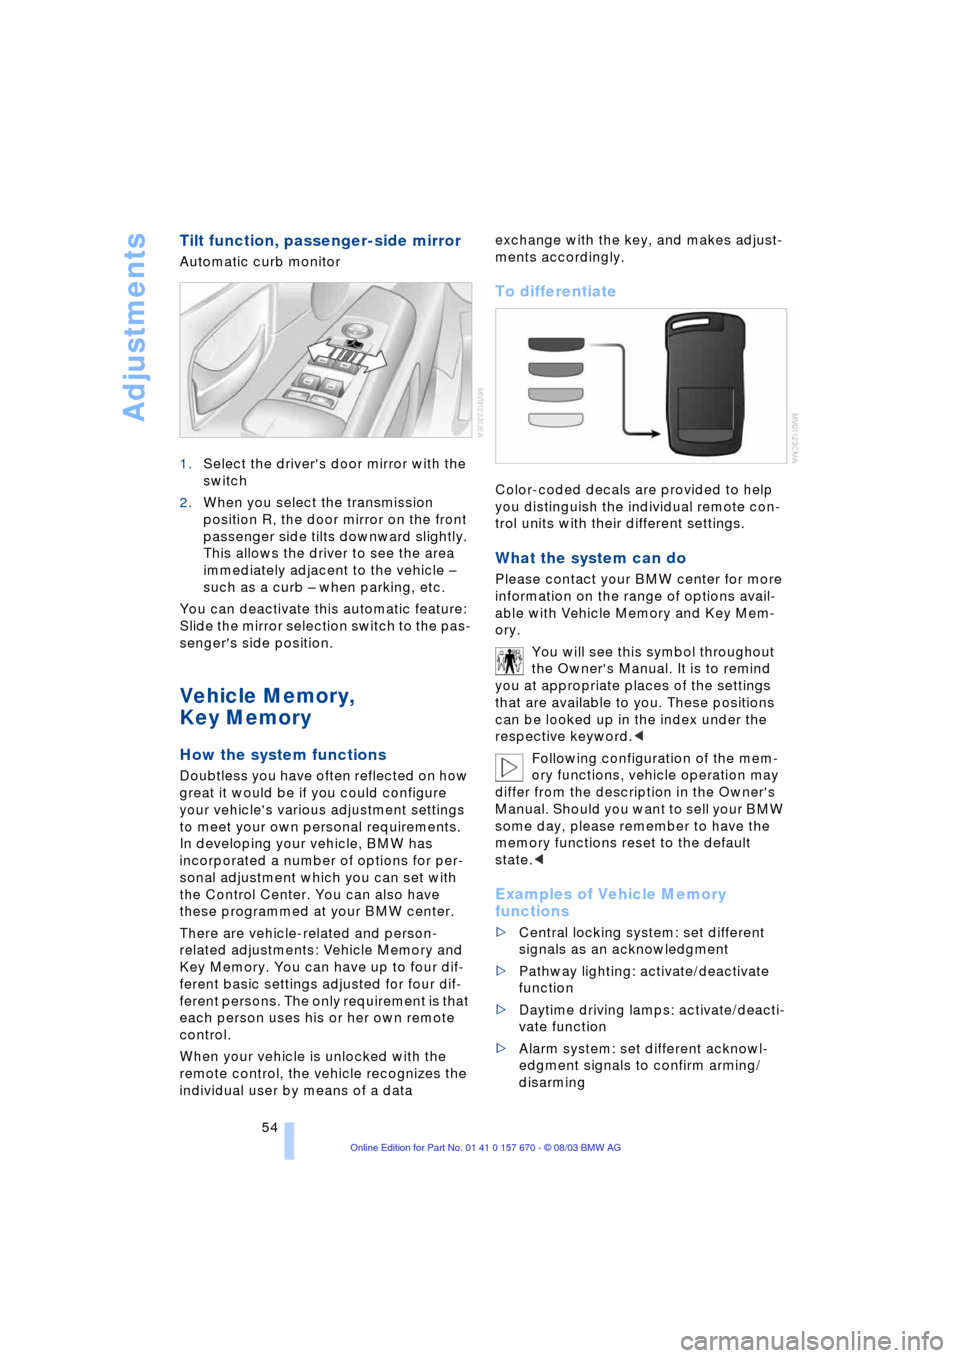
Tilt function, passenger-side mirror
Automatic curb monitor
1.Select the driver's door mirror with the
switch
2.When you select the transmission
position R, the door mirror on the front
passenger side tilts downward slightly.
This allows the driver to see the area
immediately adjacent to the vehicle Ð
such as a curb Ð when parking, etc.
You can deactivate this automatic feature:
Slide the mirror selection switch to the pas-
senger's side position.
Vehicle Memory,
Key Memory
How the system functions
Doubtless you have often reflected on how
great it would be if you could configure
your vehicle's various adjustment settings
to meet your own personal requirements.
In developing your vehicle, BMW has
incorporated a number of options for per-
sonal adjustment which you can set with
the Control Center. You can also have
these programmed at your BMW center.
There are vehicle-related and person-
related adjustments: Vehicle Memory and
Key Memory. You can have up to four dif-
ferent basic settings adjusted for four dif-
ferent persons. The only requirement is that
each person uses his or her own remote
control.
When your vehicle is unlocked with the
remote control, the vehicle recognizes the
individual user by means of a data exchange with the key, and makes adjust-
ments accordingly.
To differentiate
Color-coded decals are provided to help
you distinguish the individual remote con-
trol units with their different settings.
What the system can do
Please contact your BMW center for more
information on the range of options avail-
able with Vehicle Memory and Key Mem-
ory.
You will see this symbol throughout
the Owner's Manual. It is to remind
you at appropriate places of the settings
that are available to you. These positions
can be looked up in the index under the
respective keyword.<
Following configuration of the mem-
ory functions, vehicle operation may
differ from the description in the Owner's
Manual. Should you want to sell your BMW
some day, please remember to have the
memory functions reset to the default
state.<
Examples of Vehicle Memory
functions
>Central locking system: set different
signals as an acknowledgment
>Pathway lighting: activate/deactivate
function
>Daytime driving lamps: activate/deacti-
vate function
>Alarm system: set different acknowl-
edgment signals to confirm arming/
disarming
Page 72 of 232
Driving
70
Signaling briefly
Press the lever up to but not beyond the
resistance point. It then returns to the cen-
ter position when released.
If the flashing of the indicator lamp and the
ticking from the relay are both faster than
normal, this indicates that one of the bulbs
is defective; if a trailer is attached, this
could also indicate that one of its turn sig-
nal indicator bulbs is defective.
Wiper system
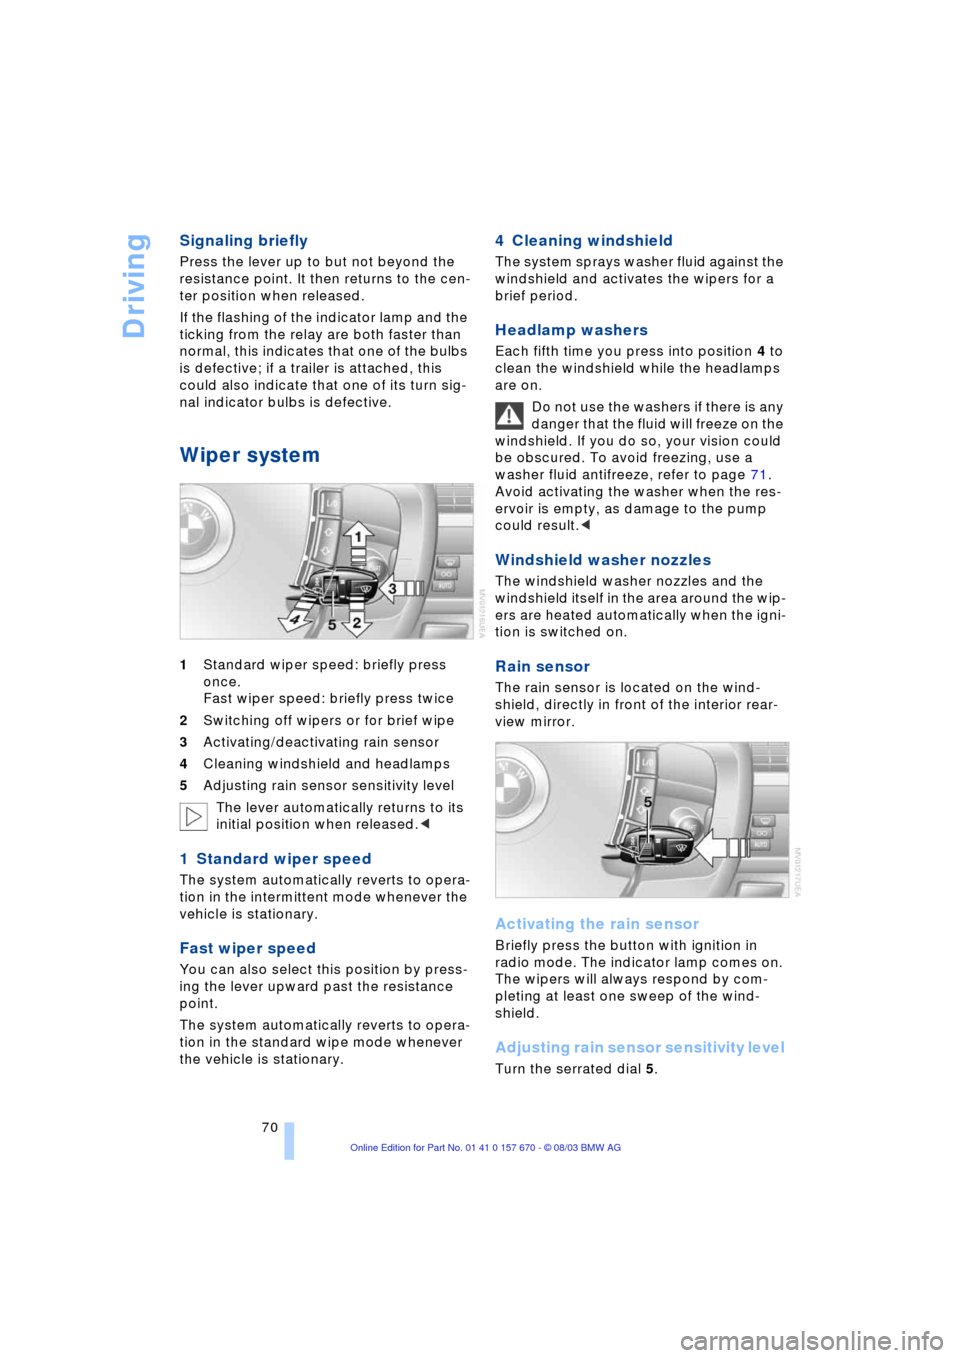
1Standard wiper speed: briefly press
once.
Fast wiper speed: briefly press twice
2Switching off wipers or for brief wipe
3Activating/deactivating rain sensor
4Cleaning windshield and headlamps
5Adjusting rain sensor sensitivity level
The lever automatically returns to its
initial position when released.<
1 Standard wiper speed
The system automatically reverts to opera-
tion in the intermittent mode whenever the
vehicle is stationary.
Fast wiper speed
You can also select this position by press-
ing the lever upward past the resistance
point.
The system automatically reverts to opera-
tion in the standard wipe mode whenever
the vehicle is stationary.
4 Cleaning windshield
The system sprays washer fluid against the
windshield and activates the wipers for a
brief period.
Headlamp washers
Each fifth time you press into position 4 to
clean the windshield while the headlamps
are on.
Do not use the washers if there is any
danger that the fluid will freeze on the
windshield. If you do so, your vision could
be obscured. To avoid freezing, use a
washer fluid antifreeze, refer to page 71.
Avoid activating the washer when the res-
ervoir is empty, as damage to the pump
could result.<
Windshield washer nozzles
The windshield washer nozzles and the
windshield itself in the area around the wip-
ers are heated automatically when the igni-
tion is switched on.
Rain sensor
The rain sensor is located on the wind-
shield, directly in front of the interior rear-
view mirror.
Activating the rain sensor
Briefly press the button with ignition in
radio mode. The indicator lamp comes on.
The wipers will always respond by com-
pleting at least one sweep of the wind-
shield.
Adjusting rain sensor sensitivity level
Turn the serrated dial 5.
Page 124 of 232
Things to remember when driving
122
Things to remember when driving
Break-in procedures
To ensure that your vehicle continues to
furnish optimized economy of operation
throughout an extended service life, we
request that you devote careful attention
to the following section.
Engine and differential
Up to 1,200 miles/2,000 km:
During this initial period you should attempt
to avoid constant, steady-state operation
and vary both vehicle and engine speeds
as often as possible. Until the break-in
period has been completed you should
also refrain from exceeding the following:
>4,500 rpm or 105 mph/170 km/h.
Always obey all official speed limits.
Avoid full-throttle operation and use of the
transmission's kickdown mode during
these initial miles.
Once you have driven 1,200 miles/
2,000 km, the engine or vehicle speeds
can be gradually increased.
You should also comply with these break-in
procedures should the engine or differen-
tial need to be replaced at a later point.
Tires
Due to technical factors associated with
their manufacture, tires do not achieve their
full traction potential until after an initial
break-in period.Therefore, drive reservedly
during the first 200 miles/300 km.
Brake system
Brakes require an initial break-in period of
approx. 300 miles/500 km to achieve opti-
mized contact and wear patterns between
brake pads and rotors.
General driving notes
High temperatures
Extreme temperatures occur at the
catalytic converter on this and every
catalyst-equipped vehicle. Do not remove
the heat shields installed adjacent to vari-
ous sections of the exhaust system, and
never apply undercoating to them.
When driving, standing at idle and while
parking take care to avoid possible contact
between the hot exhaust system and any
highly flammable materials such as hay,
leaves, grass, etc. Such contact could lead
to a fire, accompanied by the risk of serious
property damage as well as personal
injury.<
Parking the vehicle
Condensation forms in the air conditioner
system during operation, and then exits
under the vehicle. Traces of condensed
water under the vehicle are thus normal.
Before driving into the car wash
1.Fold in the exterior mirrors, refer to
page 51, as otherwise they could be
damaged due to the width of the vehicle
2.Leave the remote control in the ignition
lock, as otherwise the position P of the
automatic transmission will automati-
cally be selected when the remote con-
trol is removed, refer to pages 61
and 67.
With Comfort Access, be sure to
observe the instructions on page 61
3.Release the parking brake, especially
when you have activated Automatic
Hold, refer to pages 62 and 63.
Hydroplaning
When driving on wet or slushy roads,
reduce road speed. If you do not, a
wedge of water can form between tires and
road surface. This phenomenon is referred