change wheel BMW 760I 2008 E65 User Guide
[x] Cancel search | Manufacturer: BMW, Model Year: 2008, Model line: 760I, Model: BMW 760I 2008 E65Pages: 254, PDF Size: 7.98 MB
Page 93 of 254
Controls
91Reference
At a glance
Driving tips
Communications
Navigation
Entertainment
Mobility
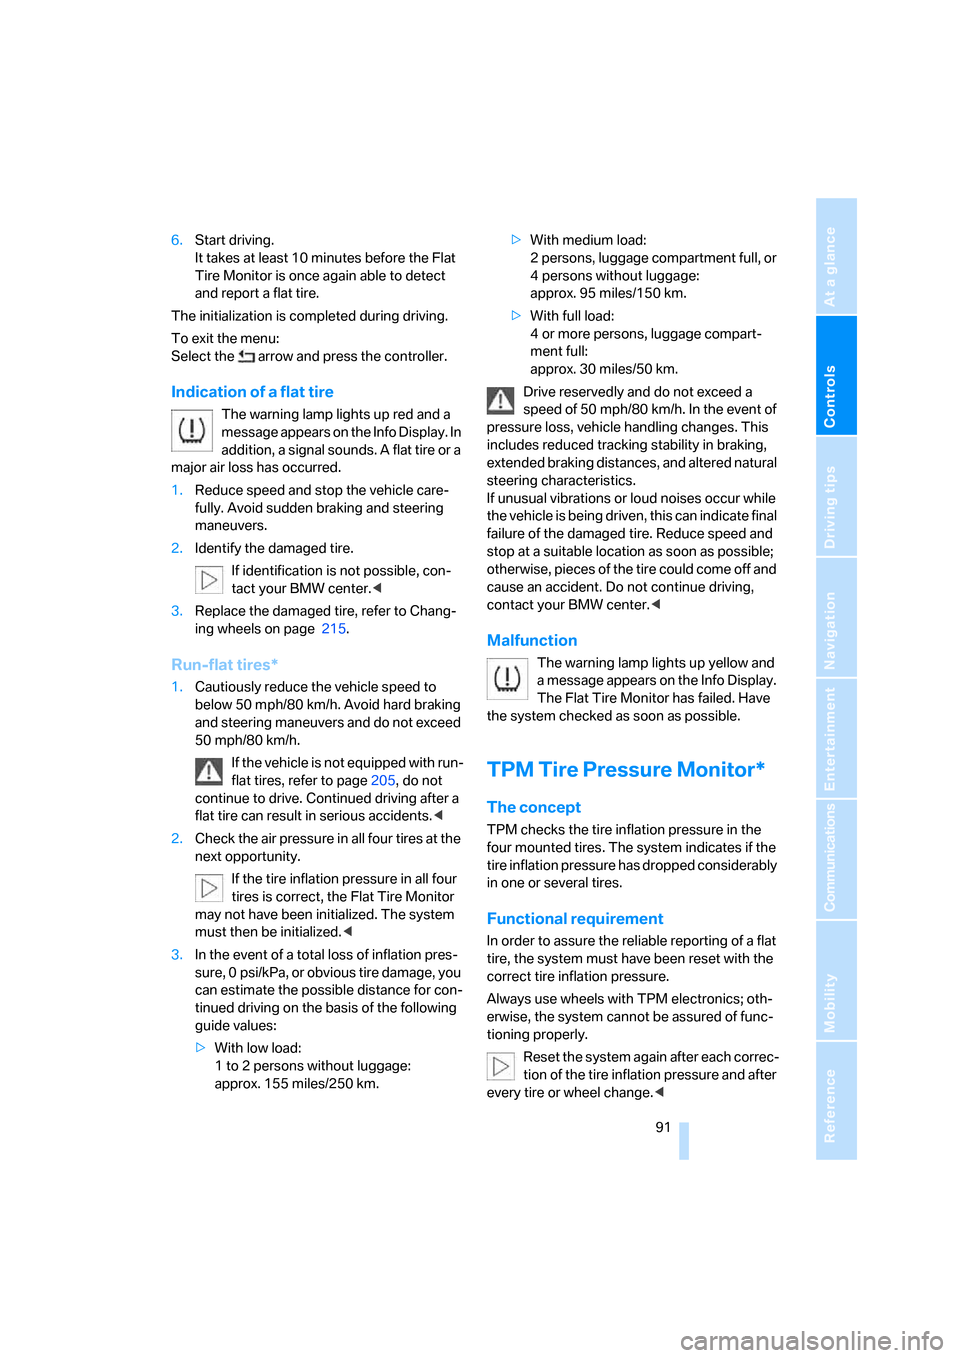
6.Start driving.
It takes at least 10 minutes before the Flat
Tire Monitor is once again able to detect
and report a flat tire.
The initialization is completed during driving.
To exit the menu:
Select the arrow and press the controller.
Indication of a flat tire
The warning lamp lights up red and a
message appears on the Info Display. In
addition, a signal sounds. A flat tire or a
major air loss has occurred.
1.Reduce speed and stop the vehicle care-
fully. Avoid sudden braking and steering
maneuvers.
2.Identify the damaged tire.
If identification is not possible, con-
tact your BMW center.<
3.Replace the damaged tire, refer to Chang-
ing wheels on page215.
Run-flat tires*
1.Cautiously reduce the vehicle speed to
below 50 mph/80 km/h. Avoid hard braking
and steering maneuvers and do not exceed
50 mph/80 km/h.
If the vehicle is not equipped with run-
flat tires, refer to page205, do not
continue to drive. Continued driving after a
flat tire can result in serious accidents.<
2.Check the air pressure in all four tires at the
next opportunity.
If the tire inflation pressure in all four
tires is correct, the Flat Tire Monitor
may not have been initialized. The system
must then be initialized.<
3.In the event of a total loss of inflation pres-
sure, 0 psi/kPa, or obvious tire damage, you
can estimate the possible distance for con-
tinued driving on the basis of the following
guide values:
>With low load:
1 to 2 persons without luggage:
approx. 155 miles/250 km.>With medium load:
2 persons, luggage compartment full, or
4 persons without luggage:
approx. 95 miles/150 km.
>With full load:
4 or more persons, luggage compart-
ment full:
approx. 30 miles/50 km.
Drive reservedly and do not exceed a
speed of 50 mph/80 km/h. In the event of
pressure loss, vehicle handling changes. This
includes reduced tracking stability in braking,
extended braking distances, and altered natural
steering characteristics.
If unusual vibrations or loud noises occur while
the vehicle is being driven, this can indicate final
failure of the damaged tire. Reduce speed and
stop at a suitable location as soon as possible;
otherwise, pieces of the tire could come off and
cause an accident. Do not continue driving,
contact your BMW center.<
Malfunction
The warning lamp lights up yellow and
a message appears on the Info Display.
The Flat Tire Monitor has failed. Have
the system checked as soon as possible.
TPM Tire Pressure Monitor*
The concept
TPM checks the tire inflation pressure in the
four mounted tires. The system indicates if the
tire inflation pressure has dropped considerably
in one or several tires.
Functional requirement
In order to assure the reliable reporting of a flat
tire, the system must have been reset with the
correct tire inflation pressure.
Always use wheels with TPM electronics; oth-
erwise, the system cannot be assured of func-
tioning properly.
Reset the system again after each correc-
tion of the tire inflation pressure and after
every tire or wheel change.<
Page 94 of 254
Technology for comfort, convenience and safety
92
System limits
TPM cannot warn you of sudden serious
tire damage caused by external influ-
ences.<
The system does not work correctly if it has not
been reset; for example, a flat tire may be indi-
cated even though the tire inflation pressures
are correct.
If a wheel without TPM electronics has been
mounted or if the TPM experiences temporary
interference from other systems or devices that
use the same radio frequency, then the system
is inactive and unable to report a flat tire.
Status display on Control Display
The tire and system status is indicated by the
color of the tires.
TPM takes into account the fact that the tire
pressure changes during driving. A correction is
only required if the color of the TPM display
indicates that it is necessary.
Green
The tire pressure matches the learned set state.
"Status: TPM active" appears on the Control
Display.
One wheel is yellow
There is a flat tire or a major drop in inflation
pressure in the indicated tire. A message
appears on the Control Display.
All wheels are yellow
There is a flat tire or a major drop in inflation
pressure in several tires. A message appears on
the Control Display.
Gray
The system cannot detect a flat tire.
Reasons for this can include:
>TPM is in the process of being reset
>Temporary interference due to systems or
devices that use the same radio frequency
>Malfunction
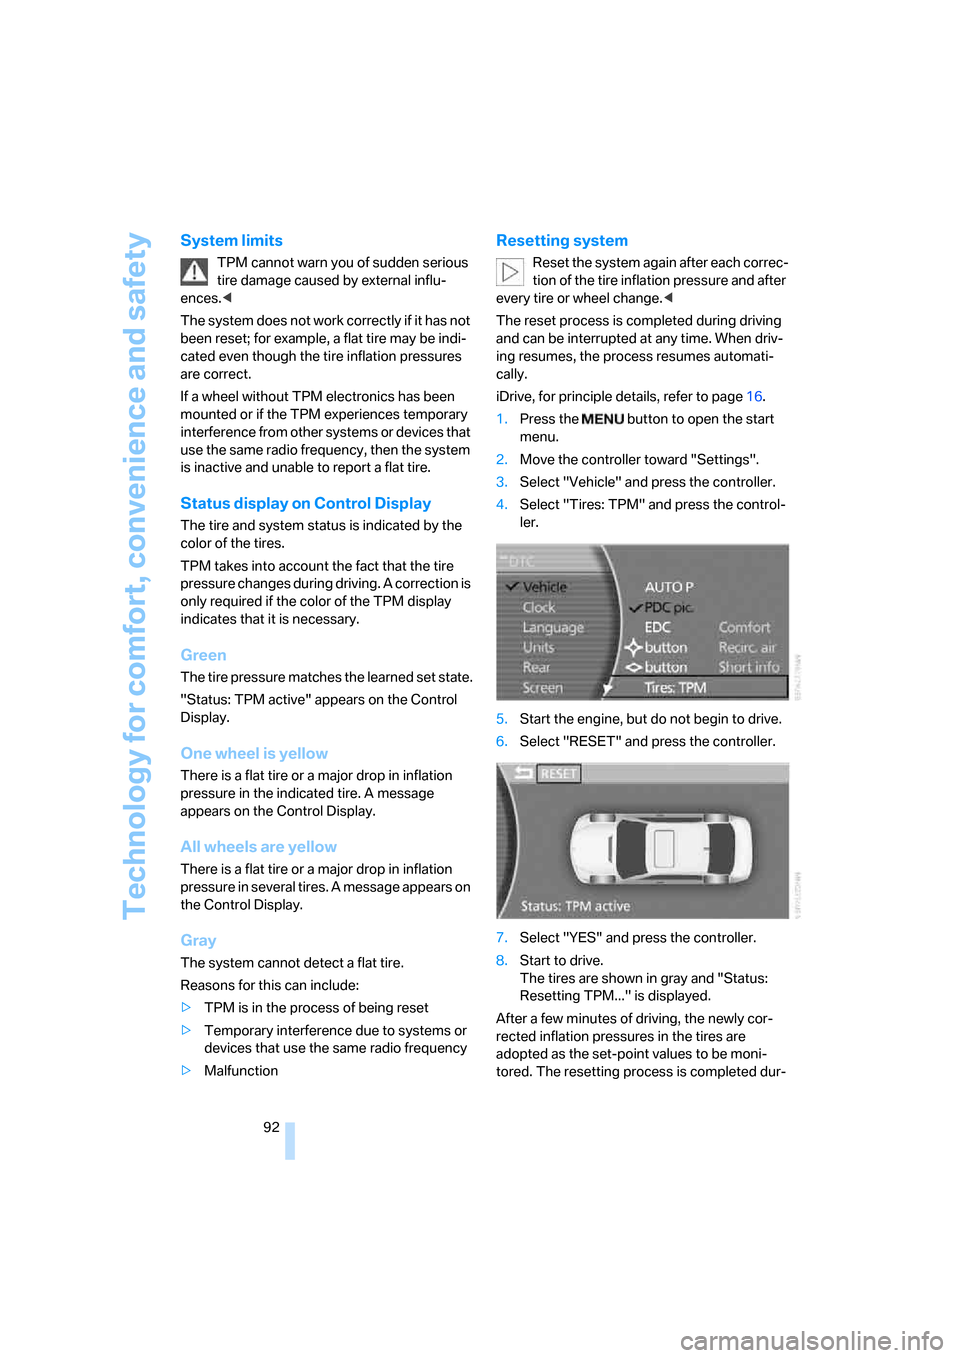
Resetting system
Reset the system again after each correc-
tion of the tire inflation pressure and after
every tire or wheel change.<
The reset process is completed during driving
and can be interrupted at any time. When driv-
ing resumes, the process resumes automati-
cally.
iDrive, for principle details, refer to page16.
1.Press the button to open the start
menu.
2.Move the controller toward "Settings".
3.Select "Vehicle" and press the controller.
4.Select "Tires: TPM" and press the control-
ler.
5.Start the engine, but do not begin to drive.
6.Select "RESET" and press the controller.
7.Select "YES" and press the controller.
8.Start to drive.
The tires are shown in gray and "Status:
Resetting TPM..." is displayed.
After a few minutes of driving, the newly cor-
rected inflation pressures in the tires are
adopted as the set-point values to be moni-
tored. The resetting process is completed dur-
Page 95 of 254
Controls
93Reference
At a glance
Driving tips
Communications
Navigation
Entertainment
Mobility
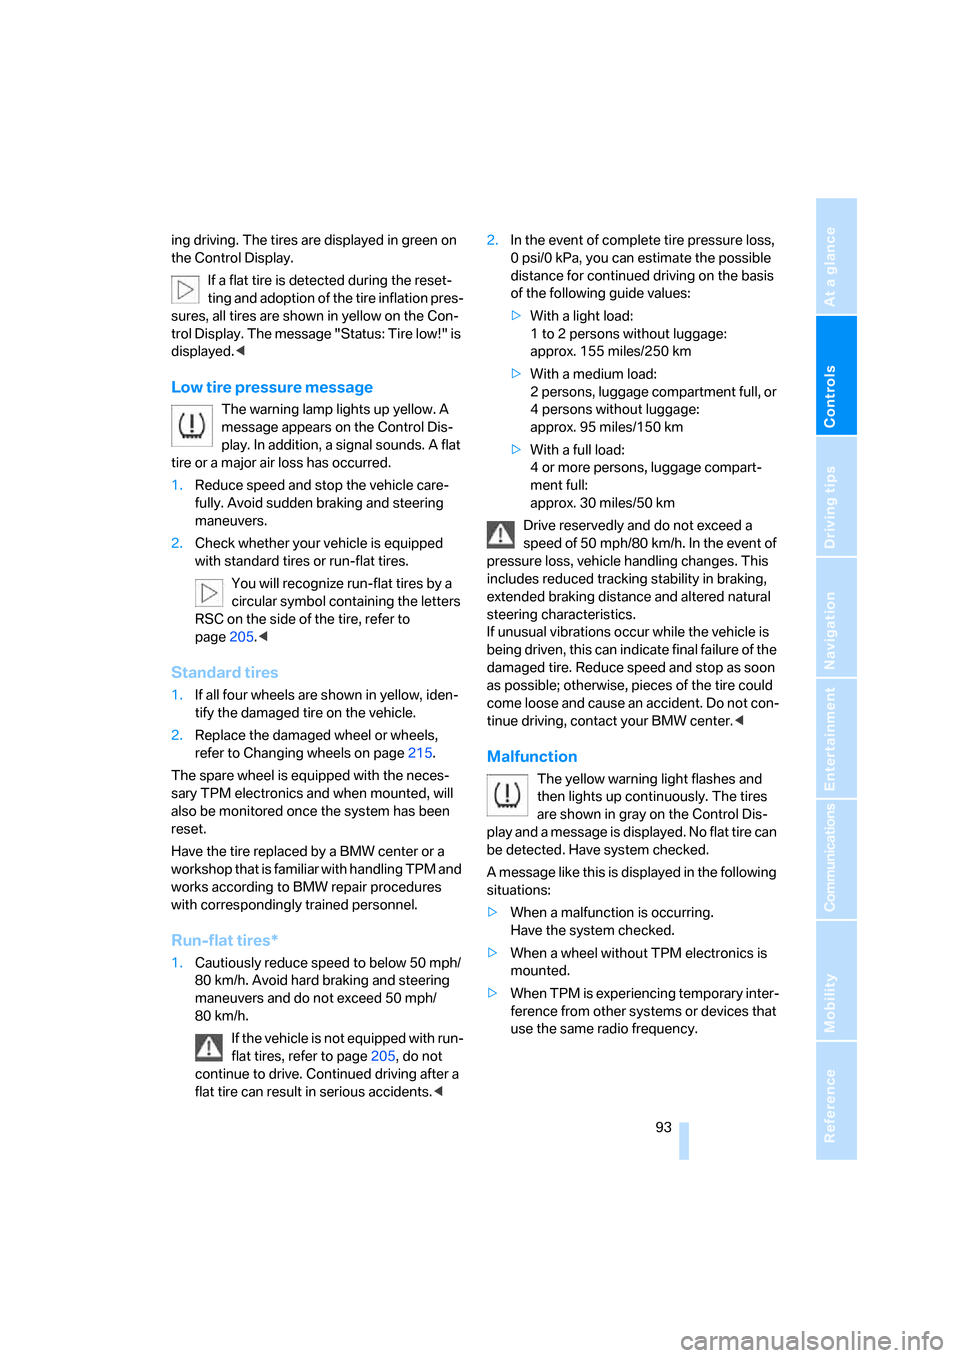
ing driving. The tires are displayed in green on
the Control Display.
If a flat tire is detected during the reset-
ting and adoption of the tire inflation pres-
sures, all tires are shown in yellow on the Con-
trol Display. The message "Status: Tire low!" is
displayed.<
Low tire pressure message
The warning lamp lights up yellow. A
message appears on the Control Dis-
play. In addition, a signal sounds. A flat
tire or a major air loss has occurred.
1.Reduce speed and stop the vehicle care-
fully. Avoid sudden braking and steering
maneuvers.
2.Check whether your vehicle is equipped
with standard tires or run-flat tires.
You will recognize run-flat tires by a
circular symbol containing the letters
RSC on the side of the tire, refer to
page205.<
Standard tires
1.If all four wheels are shown in yellow, iden-
tify the damaged tire on the vehicle.
2.Replace the damaged wheel or wheels,
refer to Changing wheels on page215.
The spare wheel is equipped with the neces-
sary TPM electronics and when mounted, will
also be monitored once the system has been
reset.
Have the tire replaced by a BMW center or a
workshop that is familiar with handling TPM and
works according to BMW repair procedures
with correspondingly trained personnel.
Run-flat tires*
1.Cautiously reduce speed to below 50 mph/
80 km/h. Avoid hard braking and steering
maneuvers and do not exceed 50 mph/
80 km/h.
If the vehicle is not equipped with run-
flat tires, refer to page205, do not
continue to drive. Continued driving after a
flat tire can result in serious accidents.<2.In the event of complete tire pressure loss,
0 psi/0 kPa, you can estimate the possible
distance for continued driving on the basis
of the following guide values:
>With a light load:
1 to 2 persons without luggage:
approx. 155 miles/250 km
>With a medium load:
2 persons, luggage compartment full, or
4 persons without luggage:
approx. 95 miles/150 km
>With a full load:
4 or more persons, luggage compart-
ment full:
approx. 30 miles/50 km
Drive reservedly and do not exceed a
speed of 50 mph/80 km/h. In the event of
pressure loss, vehicle handling changes. This
includes reduced tracking stability in braking,
extended braking distance and altered natural
steering characteristics.
If unusual vibrations occur while the vehicle is
being driven, this can indicate final failure of the
damaged tire. Reduce speed and stop as soon
as possible; otherwise, pieces of the tire could
come loose and cause an accident. Do not con-
tinue driving, contact your BMW center.<
Malfunction
The yellow warning light flashes and
then lights up continuously. The tires
are shown in gray on the Control Dis-
play and a message is displayed. No flat tire can
be detected. Have system checked.
A message like this is displayed in the following
situations:
>When a malfunction is occurring.
Have the system checked.
>When a wheel without TPM electronics is
mounted.
>When TPM is experiencing temporary inter-
ference from other systems or devices that
use the same radio frequency.
Page 100 of 254
Technology for comfort, convenience and safety
98 BMW Night Vision is not a substitute or replace-
ment for driver responsibility or for adapting to
the visibility conditions and the traffic situation.
The forward view illuminated by the headlamps
must always be the basis for making safe driv-
ing decisions; otherwise, a safety risk will
result.<
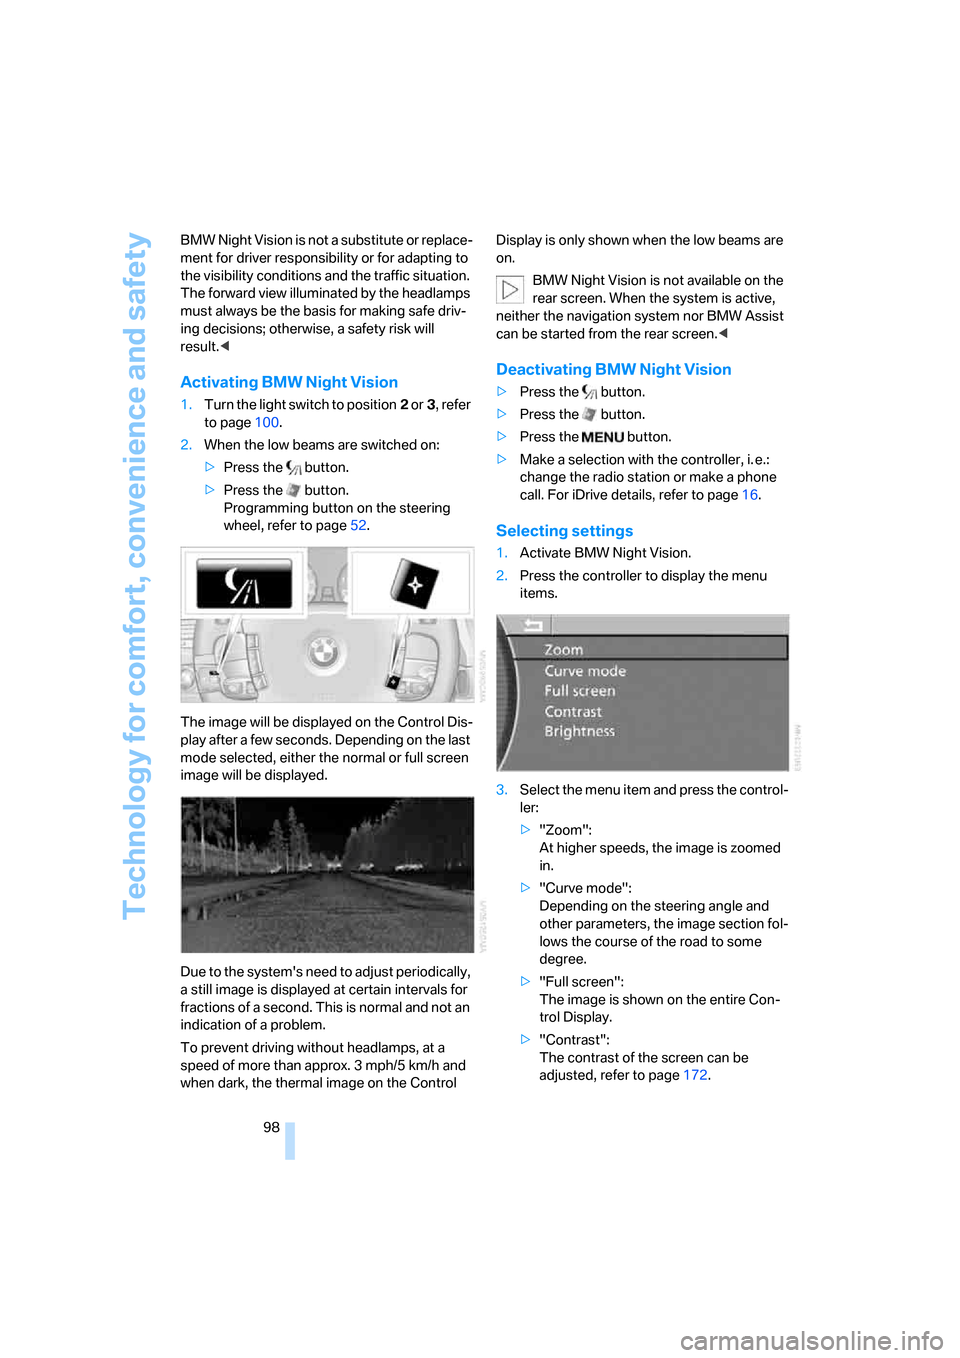
Activating BMW Night Vision
1.Turn the light switch to position2 or3, refer
to page100.
2.When the low beams are switched on:
>Press the button.
>Press the button.
Programming button on the steering
wheel, refer to page52.
The image will be displayed on the Control Dis-
play after a few seconds. Depending on the last
mode selected, either the normal or full screen
image will be displayed.
Due to the system's need to adjust periodically,
a still image is displayed at certain intervals for
fractions of a second. This is normal and not an
indication of a problem.
To prevent driving without headlamps, at a
speed of more than approx. 3 mph/5 km/h and
when dark, the thermal image on the Control Display is only shown when the low beams are
on.
BMW Night Vision is not available on the
rear screen. When the system is active,
neither the navigation system nor BMW Assist
can be started from the rear screen.<
Deactivating BMW Night Vision
>Press the button.
>Press the button.
>Press the button.
>Make a selection with the controller, i. e.:
change the radio station or make a phone
call. For iDrive details, refer to page16.
Selecting settings
1.Activate BMW Night Vision.
2.Press the controller to display the menu
items.
3.Select the menu item and press the control-
ler:
>"Zoom":
At higher speeds, the image is zoomed
in.
>"Curve mode":
Depending on the steering angle and
other parameters, the image section fol-
lows the course of the road to some
degree.
>"Full screen":
The image is shown on the entire Con-
trol Display.
>"Contrast":
The contrast of the screen can be
adjusted, refer to page172.
Page 154 of 254
On/off and settings
152
On/off and settings
The following audio and video sources share
the same controls and adjustment options.
>Radio
>CD player
*
>CD changer*
>DVD changer*
The CD changer can play CDs with com-
pressed audio files, such as MP3s.<
Controls
The audio and video sources can be operated
using:
>Buttons on the CD player
>iDrive
>Buttons on steering wheel, refer to page11
Buttons on the CD player
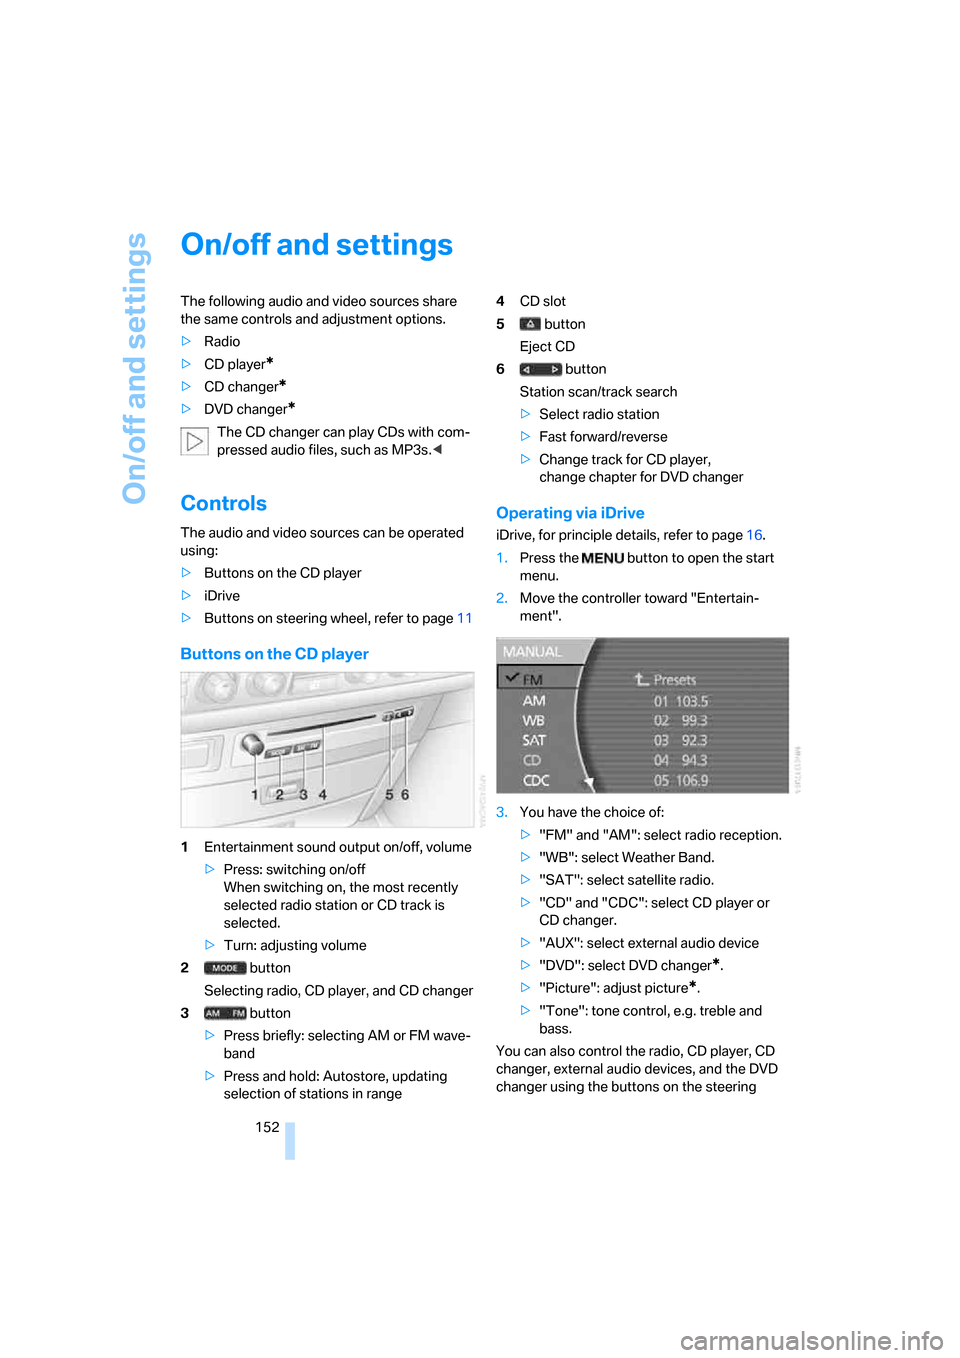
1Entertainment sound output on/off, volume
>Press: switching on/off
When switching on, the most recently
selected radio station or CD track is
selected.
>Turn: adjusting volume
2 button
Selecting radio, CD player, and CD changer
3 button
>Press briefly: selecting AM or FM wave-
band
>Press and hold: Autostore, updating
selection of stations in range4CD slot
5 button
Eject CD
6 button
Station scan/track search
>Select radio station
>Fast forward/reverse
>Change track for CD player,
change chapter for DVD changer
Operating via iDrive
iDrive, for principle details, refer to page16.
1.Press the button to open the start
menu.
2.Move the controller toward "Entertain-
ment".
3.You have the choice of:
>"FM" and "AM": select radio reception.
>"WB": select Weather Band.
>"SAT": select satellite radio.
>"CD" and "CDC": select CD player or
CD changer.
>"AUX": select external audio device
>"DVD": select DVD changer
*.
>"Picture": adjust picture
*.
>"Tone": tone control, e.g. treble and
bass.
You can also control the radio, CD player, CD
changer, external audio devices, and the DVD
changer using the buttons on the steering
Page 155 of 254
Navigation
Entertainment
Driving tips
153Reference
At a glance
Controls
Communications
Mobility
wheel, refer to page11, and via the voice com-
mand system
*, refer to page23.
Switching on/off
In order to switch the Entertainment sound out-
put on/off: press the knob.
The system selects the most recently used
audio or video source, radio, CD, external audio
device, or DVD.
Using the voice command system:
Using with ignition off
The audio and video functions remain available
for use for a period of approx. 30 minutes after
you switch off the ignition.
Switch the sound output back on to enjoy this
function.
Adjusting volume
Turn the knob to the desired volume level.
The sound system automatically reverts
to its mute mode whenever you initiate or
accept a phone call.
Tone control
You can change various tone settings, e.g. tre-
ble and bass or the speed-dependent volume
control. The tone settings are set globally for all
of the audio sources.
Speakers, headsets in the rear, and external
audio devices can be adjusted separately. The
sound settings of the headphones are made on
the rear seat screen with the headphones con-
nected. Only treble, bass and balance can be
adjusted.
The setting is stored for the remote control cur-
rently in use.
Tone adjustment
iDrive, for principle details, refer to page16.
1.Press the button to open the start
menu.
2.Move the controller toward "Entertain-
ment".
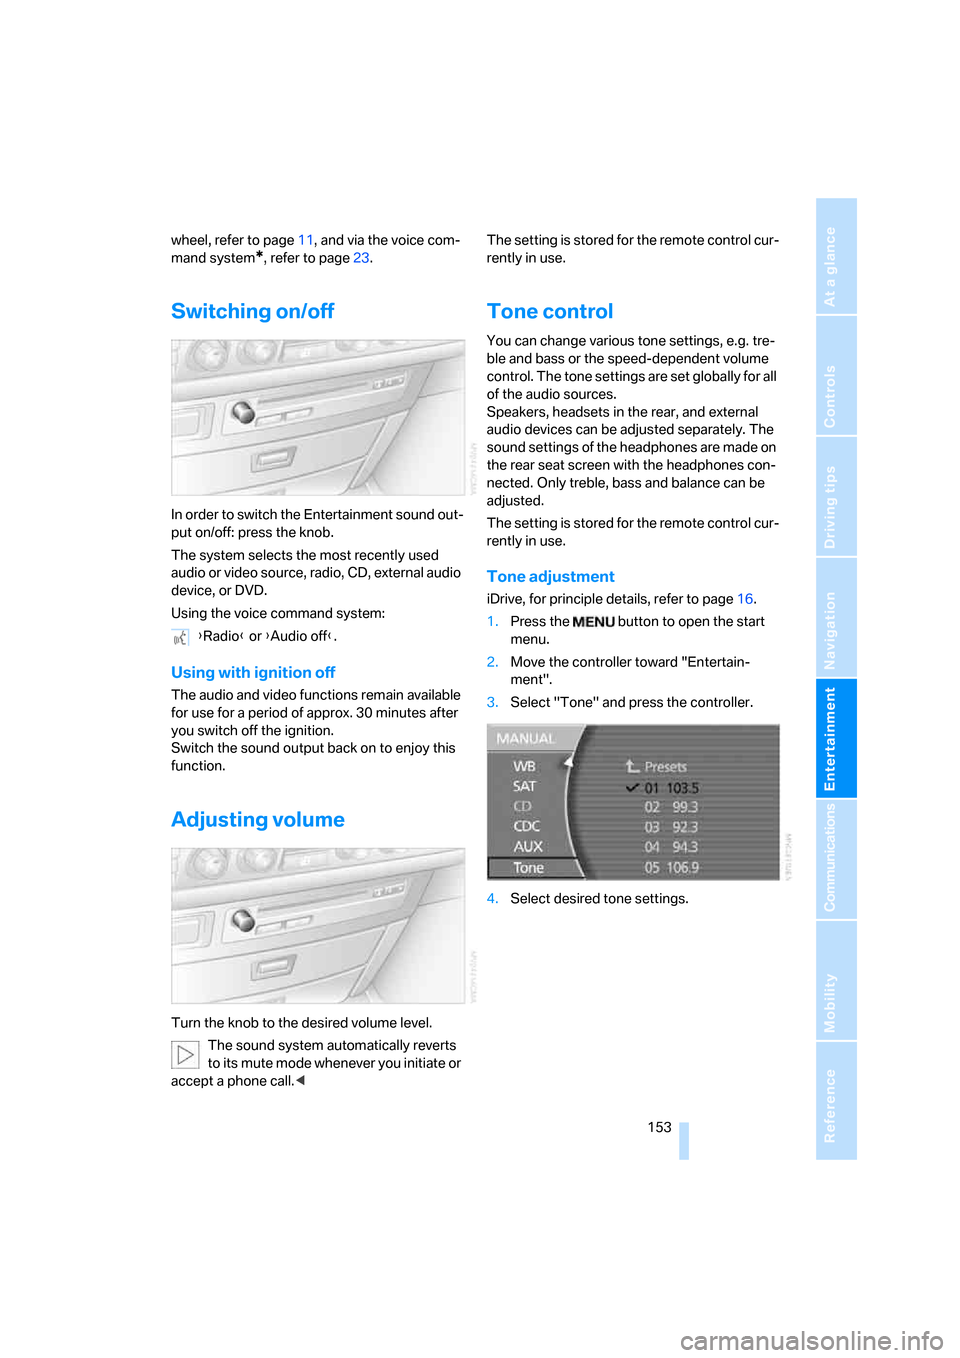
3.Select "Tone" and press the controller.
4.Select desired tone settings. {Radio} or {Audio off}.
Page 206 of 254
Wheels and tires
204
Temperature
The temperature grades are A, B, and C, A
being highest, and represent the tire's resis-
tance to the generation of heat and its ability to
dissipate heat when tested under controlled
conditions on a specified indoor laboratory test
wheel.
Sustained high temperature can cause the
material of the tire to degenerate and reduce
tire life, and excessive temperature can lead to
sudden tire failure. The grade C corresponds to
a level of performance which all passenger car
tires must meet under the Federal Motor Vehi-
cle Safety Standard No. 109. Grades B and A
represent higher levels of performance on the
laboratory test wheel than the minimum
required by law.
The temperature grade for this tire is
established for a tire that is properly
inflated and not overloaded. Excessive speed,
underinflation, or excessive loading, either sep-
arately or in combination, can cause heat
buildup and possible tire failure.<
RSC Run-flat tires
You will recognize run-flat tires by a circular
symbol containing the letters RSC on the side
of the tire, refer to page205.
M+S
Winter and all-season tires.
These have better winter properties than sum-
mer tires.
XL
Indicates specially reinforced tires.
Tire condition
Inspect your tires frequently for tread depth,
signs of damage and for foreign objects lodged
in the tread. Check the tread depth.
Minimum tread depth
The tread depth should not fall below 0.12 in/
3 mm, although, for example, European legisla-
tion only specifies a minimum tread depth of
0.063 in/1.6 mm.
At tread depths below 0.12 in/3 mm, there is an
increased risk of high-speed hydroplaning,
even when only small amounts of water are
present on the road surface.
Winter tires display a noticeable loss in their
ability to cope with cold-weather driving condi-
tions once the tread wears to below 0.16 in/
4 mm. To ensure continued safety, you should
always have such tires replaced.
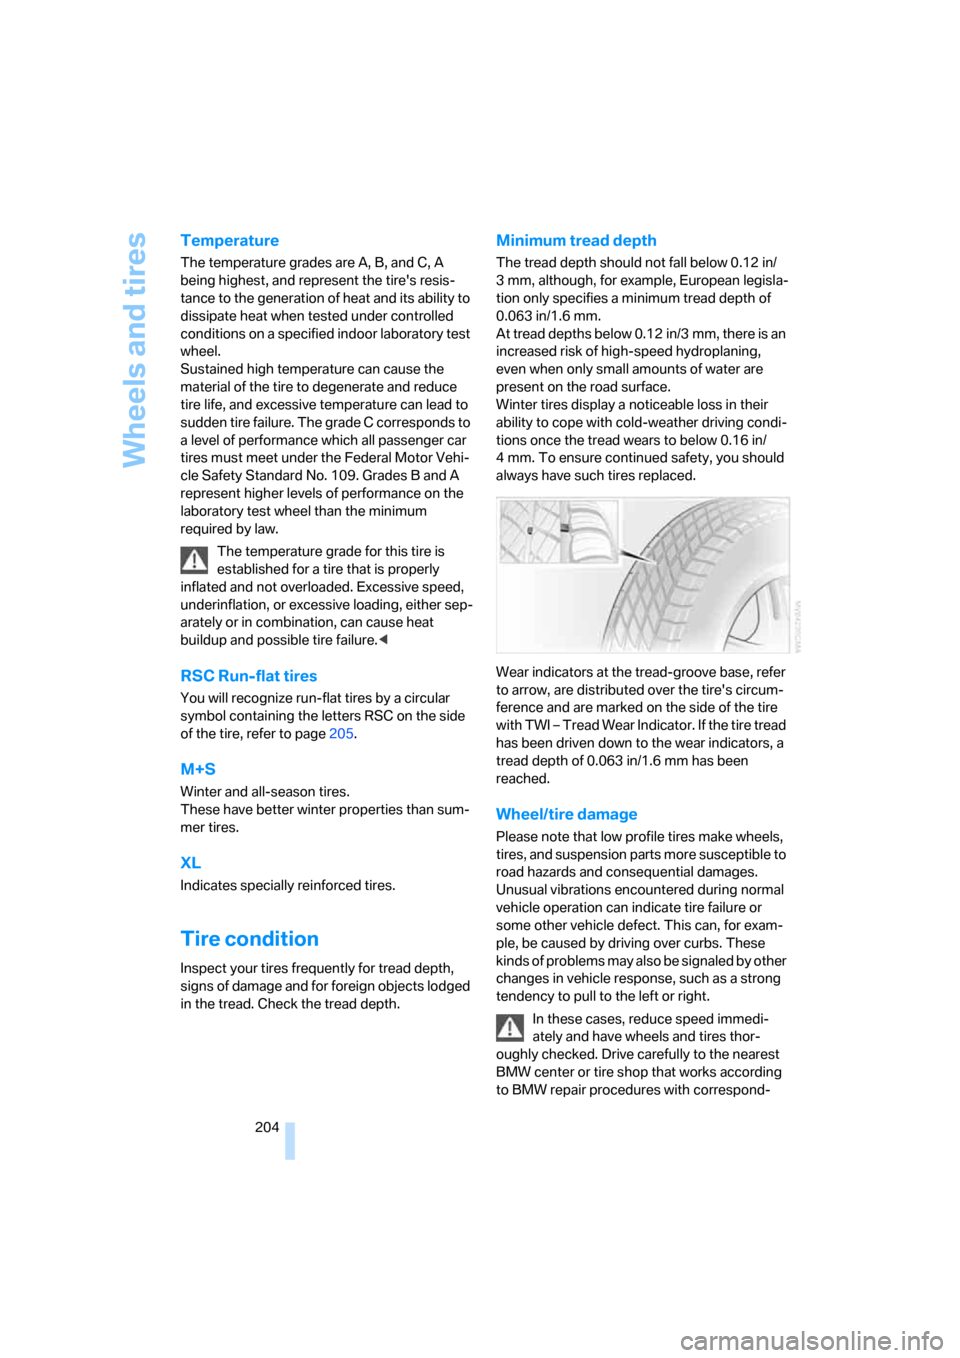
Wear indicators at the tread-groove base, refer
to arrow, are distributed over the tire's circum-
ference and are marked on the side of the tire
with TWI – Tread Wear Indicator. If the tire tread
has been driven down to the wear indicators, a
tread depth of 0.063 in/1.6 mm has been
reached.
Wheel/tire damage
Please note that low profile tires make wheels,
tires, and suspension parts more susceptible to
road hazards and consequential damages.
Unusual vibrations encountered during normal
vehicle operation can indicate tire failure or
some other vehicle defect. This can, for exam-
ple, be caused by driving over curbs. These
kinds of problems may also be signaled by other
changes in vehicle response, such as a strong
tendency to pull to the left or right.
In these cases, reduce speed immedi-
ately and have wheels and tires thor-
oughly checked. Drive carefully to the nearest
BMW center or tire shop that works according
to BMW repair procedures with correspond-
Page 217 of 254
Mobility
215Reference
At a glance
Controls
Driving tips
Communications
Navigation
Entertainment
3.Apply gentle pressure to the bulb while
turning it to the left for removal and replace-
ment.
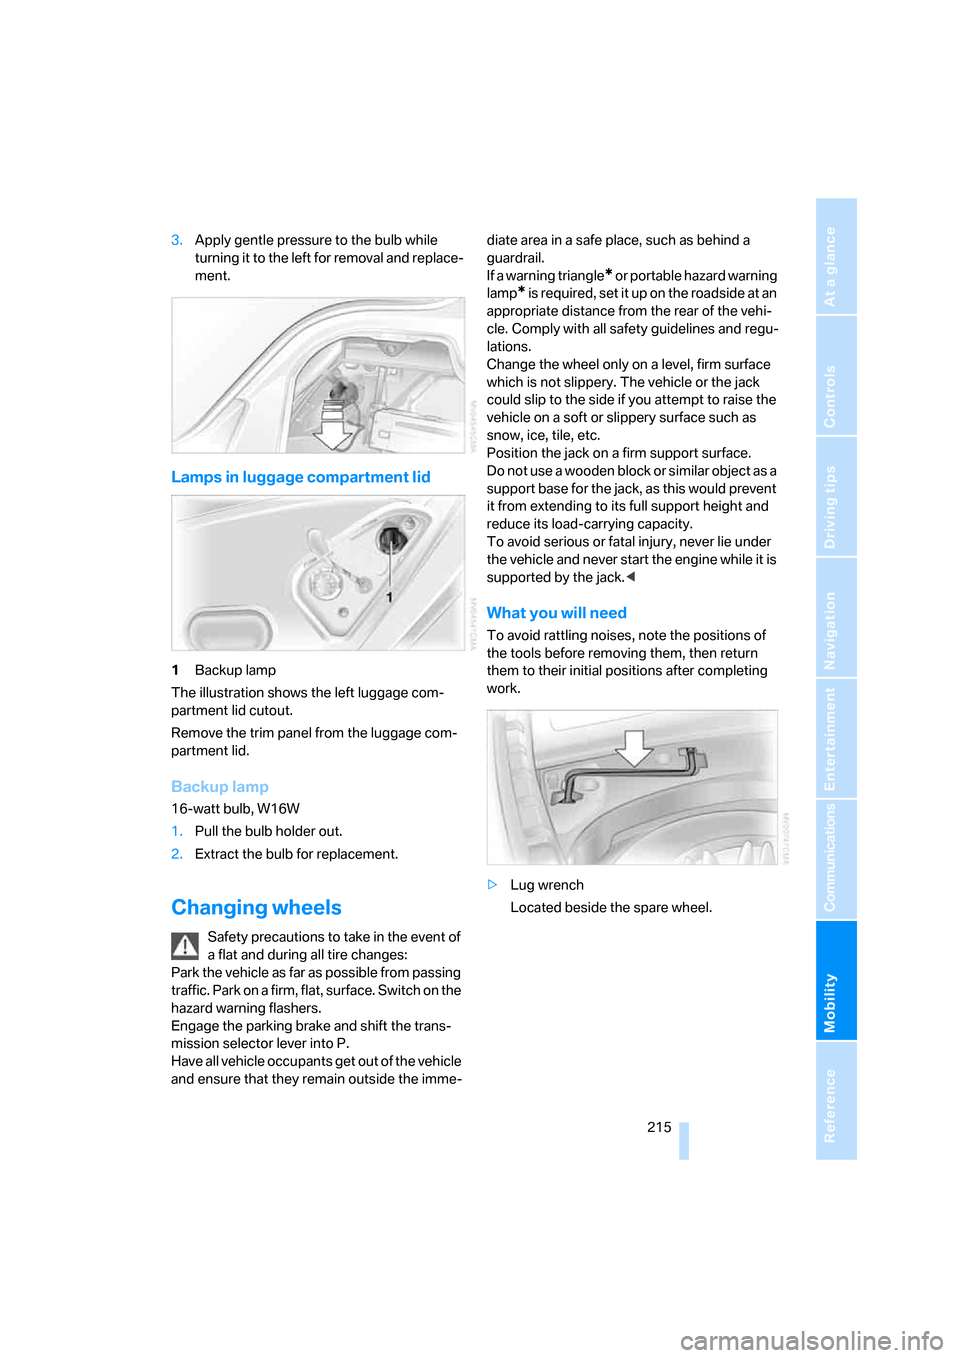
Lamps in luggage compartment lid
1Backup lamp
The illustration shows the left luggage com-
partment lid cutout.
Remove the trim panel from the luggage com-
partment lid.
Backup lamp
16-watt bulb, W16W
1.Pull the bulb holder out.
2.Extract the bulb for replacement.
Changing wheels
Safety precautions to take in the event of
a flat and during all tire changes:
Park the vehicle as far as possible from passing
traffic. Park on a firm, flat, surface. Switch on the
hazard warning flashers.
Engage the parking brake and shift the trans-
mission selector lever into P.
Have all vehicle occupants get out of the vehicle
and ensure that they remain outside the imme-diate area in a safe place, such as behind a
guardrail.
If a warning triangle
* or portable hazard warning
lamp
* is r e q u ir e d , s et i t up o n t h e ro a d s id e a t a n
appropriate distance from the rear of the vehi-
cle. Comply with all safety guidelines and regu-
lations.
Change the wheel only on a level, firm surface
which is not slippery. The vehicle or the jack
could slip to the side if you attempt to raise the
vehicle on a soft or slippery surface such as
snow, ice, tile, etc.
Position the jack on a firm support surface.
Do not use a wooden block or similar object as a
support base for the jack, as this would prevent
it from extending to its full support height and
reduce its load-carrying capacity.
To avoid serious or fatal injury, never lie under
the vehicle and never start the engine while it is
supported by the jack.<
What you will need
To avoid rattling noises, note the positions of
the tools before removing them, then return
them to their initial positions after completing
work.
>Lug wrench
Located beside the spare wheel.
Page 218 of 254
Replacing components
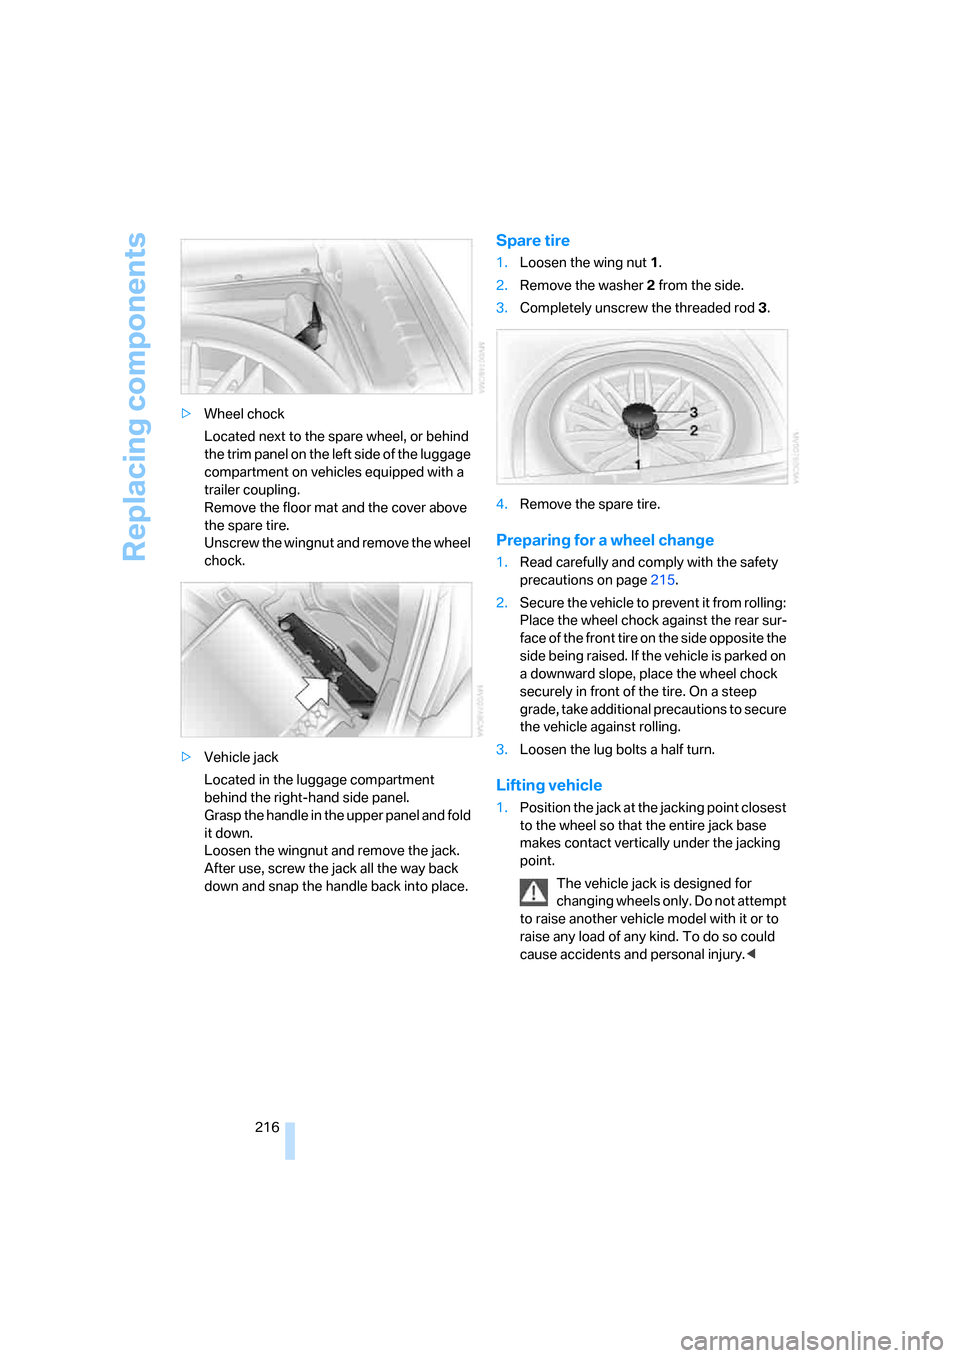
216 >Wheel chock
Located next to the spare wheel, or behind
the trim panel on the left side of the luggage
compartment on vehicles equipped with a
trailer coupling.
Remove the floor mat and the cover above
the spare tire.
Unscrew the wingnut and remove the wheel
chock.
>Vehicle jack
Located in the luggage compartment
behind the right-hand side panel.
Grasp the handle in the upper panel and fold
it down.
Loosen the wingnut and remove the jack.
After use, screw the jack all the way back
down and snap the handle back into place.
Spare tire
1.Loosen the wing nut 1.
2.Remove the washer 2 from the side.
3.Completely unscrew the threaded rod 3.
4.Remove the spare tire.
Preparing for a wheel change
1.Read carefully and comply with the safety
precautions on page215.
2.Secure the vehicle to prevent it from rolling:
Place the wheel chock against the rear sur-
face of the front tire on the side opposite the
side being raised. If the vehicle is parked on
a downward slope, place the wheel chock
securely in front of the tire. On a steep
grade, take additional precautions to secure
the vehicle against rolling.
3.Loosen the lug bolts a half turn.
Lifting vehicle
1.Position the jack at the jacking point closest
to the wheel so that the entire jack base
makes contact vertically under the jacking
point.
The vehicle jack is designed for
changing wheels only. Do not attempt
to raise another vehicle model with it or to
raise any load of any kind. To do so could
cause accidents and personal injury.<
Page 234 of 254
Everything from A to Z
232
Everything from A to Z
Index
A
"ABC...", navigation131
ABS Antilock Brake
System87
ACC, refer to Active cruise
control69
"ACCEPT",
navigation140,148
Accessories, refer to Your
individual vehicle5
Accident, refer to
– Initiating an emergency
call219
– Roadside
Assistance190,219
Activated-charcoal filter107
Activating
– BMW Assist193
– High Definition Radio162
Active cruise control69
– indicator lamp71
– malfunction72
– radar sensor72
– sensor, refer to
Malfunction72
Active head restraints,
front47
Active seat50
Active seat ventilation50
Adapter for spare key31
Adaptive brake lamp, refer to
Brake force display94
Adaptive Drive
– refer to Dynamic Drive89
– refer to EDC Electronic
Damper Control89
Adaptive Head Light100
Address
– deleting140
– displaying141
– storing139
– storing current position147"Address book",
navigation139
Adjusting cooling action of
rear climate control108
Adjusting interior
temperature105
Adjusting tone in audio mode,
refer to Tone control153
Adjusting volume153
– ring tone of telephone179
– voice command system25
– voice instructions146
Airbags95
– safe sitting position43
Air conditioning103
– in rear108
– in the rear108
– while parked109
Air distribution
– automatic104
– manual106
Airing, refer to Ventilation107
Air jets, refer to
Ventilation107
Air pressure, refer to Tire
inflation pressure200
Air recirculation, refer to
Recirculated-air mode105
Air vents, refer to
Ventilation107
Air volume
– automatic climate
control106
– rear climate control108
AKI, refer to Fuel
specifications199
Alarm system37
– avoiding unintentional
alarms38
All around the steering
wheel10
All-season tires, refer to
Winter tires206Altering route, refer to
Changing route146
Alternate route, refer to
Changing route146
"AM", radio156
AM, refer to Radio156
"ANGLE", DVD changer173
Antifreeze
– coolant210
– washer fluid66
Antilock Brake System
ABS87
Anti-theft system
– refer to Alarm system37
– refer to Central locking
system32
Approved engine oils209
Armrest, refer to Center
armrest
– front113
– rear114
"Arrow display",
navigation145
"AS ADDRESS",
navigation139,147
Ashtray
– front115
– rear116
Assist, refer to
BMW Assist189
Assistance getting in and
out52
– backrest width44
Assistance systems, refer to
Driving stability control
systems87
Assistance window20
AUC Automatic recirculated-
air control
105