lock BMW 760Li 2004 E66 Owner's Guide
[x] Cancel search | Manufacturer: BMW, Model Year: 2004, Model line: 760Li, Model: BMW 760Li 2004 E66Pages: 232, PDF Size: 5.27 MB
Page 46 of 232
Adjustments
44
Adjustments
Sitting safely
The ideal sitting position can make a vital
contribution to relaxed driving that is as
fatigue-free as possible. The sitting posi-
tion plays an important role together with
the safety belts and airbags in an accident.
To ensure that the safety systems operate
with optimized efficiency, we strongly urge
you to observe the instructions contained
in the following section.
For additional information on transporting
children safely, refer to page 56.
Sitting safely with airbags
Always maintain an adequate dis-
tance between yourself and the air-
bags. Always hold the steering wheel by
its rim with hands at the 9 o'clock and
3 o'clock positions, to minimize the risk of
injuries to your hands and arms in the event
of airbag deployment.
No one and nothing is to come between the
airbags and the seat occupant.
Do not use the cover of the front airbag on
the front passenger side as a storage area.
Make sure that the front passenger is cor-
rectly seated and does not rest feet or legs
on the instrument panel, otherwise leg inju-
ries can occur if the knee and front airbag
are triggered.
Never let an occupantÔs head rest near or
on a side airbag because the inflating air-
bag could cause a serious or fatal injury.<
Even if you adhere to all the instructions,
injuries resulting from contact with airbags
cannot be fully excluded, depending on the
circumstances. The ignition and inflation
noise may provoke a mild Ð usually tempo-
rary Ð hearing loss in extremely sensitive
individuals.
For airbag locations and additional infor-
mation on airbags, refer to page 97.
Sitting safely with safety belts
Fasten your safety belt before starting any
trip. Although airbags enhance safety by
providing added protection, they are not a
substitute for safety belts.
Your vehicle has five seats that are all
equipped with a safety belt.
At all times, occupants should sit
upright and be properly restrained Ð
infants and small children in appropriate
child-restraint systems; larger children and
adults using the safety belts.
Expectant mothers should always wear
their safety belts, taking care to position
the lap belt against the lower hips, where it
will not exert pressure against the abdomi-
nal area.
Never allow more than one person to wear
a single safety belt. Never allow infants or
small children to ride in a passenger's lap.
Do not route the belt across your neck, or
run it across sharp edges. Be sure that the
belt does not become caught or jammed.
Avoid twisting the belt while routing it firmly
across the hips and shoulder. Do not allow
the belt to rest against hard or fragile
objects. Otherwise, in the event of a frontal
impact, a loose lap belt could slide over
your hips, leading to abdominal injury.
Avoid wearing clothing that prevents the
belt from fitting properly and pull the lap
belt periodically to readjust the tension
across your shoulder in order to avoid a
reduction in the retention effect of the
safety belt.<
For instructions on operating safety belts,
refer to page 49.
Seats
Note before adjusting
Never attempt to adjust your seat
while operating the vehicle. The seat
could respond with unexpected move-
Page 52 of 232
Adjustments
50 The temperature setting progresses one
step through its control sequence each
time you press the button.
To switch off:
Maintain pressure on the button for several
seconds.
Rear
The operating concept is the same as for
the front heated seats.
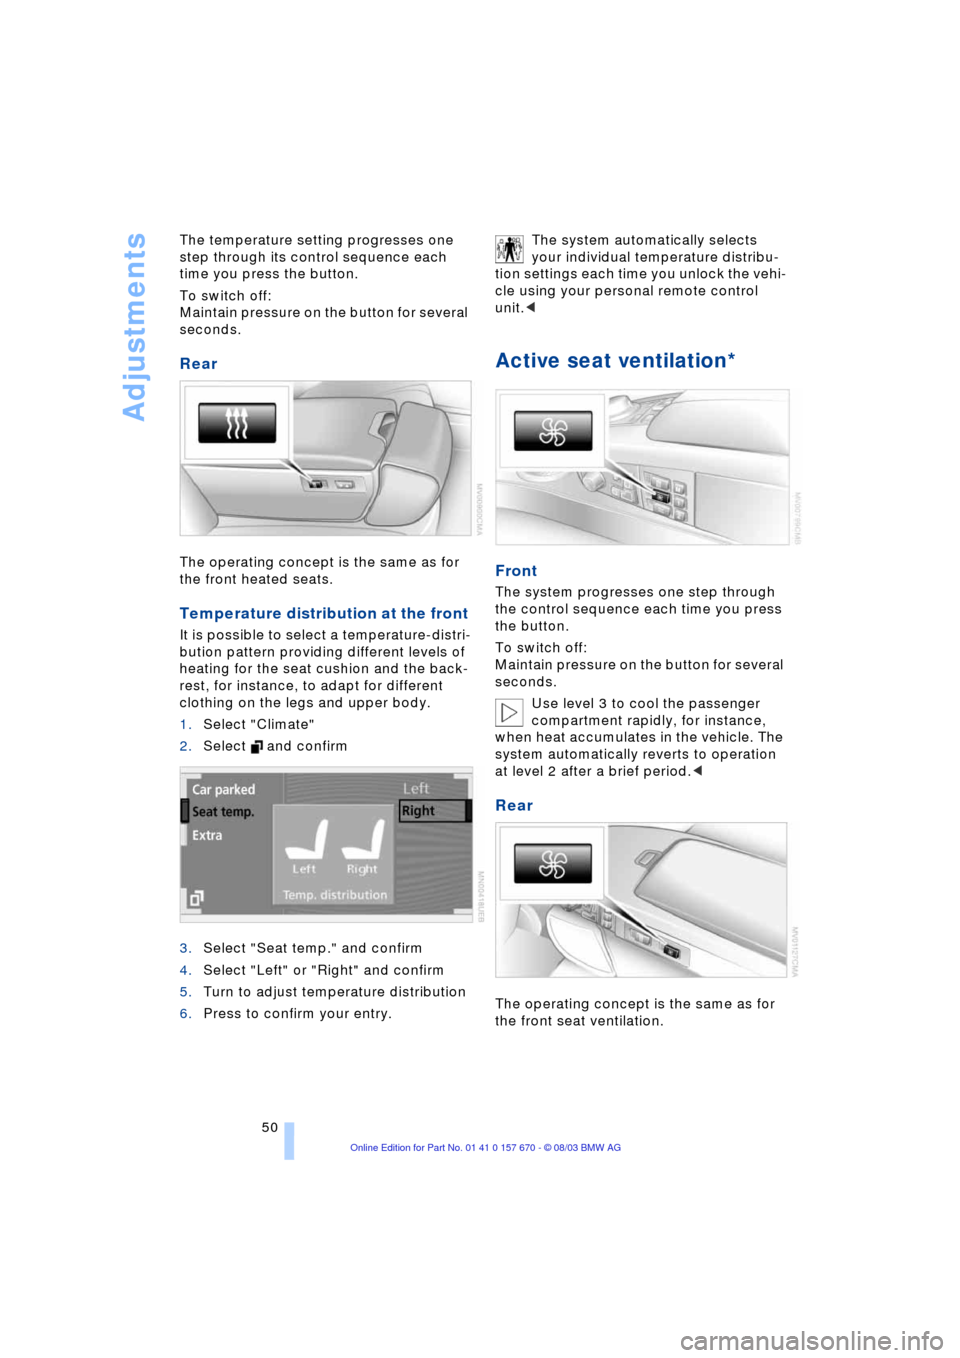
Temperature distribution at the front
It is possible to select a temperature-distri-
bution pattern providing different levels of
heating for the seat cushion and the back-
rest, for instance, to adapt for different
clothing on the legs and upper body.
1.Select "Climate"
2.Select and confirm
3.Select "Seat temp." and confirm
4.Select "Left" or "Right" and confirm
5.Turn to adjust temperature distribution
6.Press to confirm your entry. The system automatically selects
your individual temperature distribu-
tion settings each time you unlock the vehi-
cle using your personal remote control
unit.<
Active seat ventilation*
Front
The system progresses one step through
the control sequence each time you press
the button.
To switch off:
Maintain pressure on the button for several
seconds.
Use level 3 to cool the passenger
compartment rapidly, for instance,
when heat accumulates in the vehicle. The
system automatically reverts to operation
at level 2 after a brief period.<
Rear
The operating concept is the same as for
the front seat ventilation.
Page 54 of 232
Adjustments
52
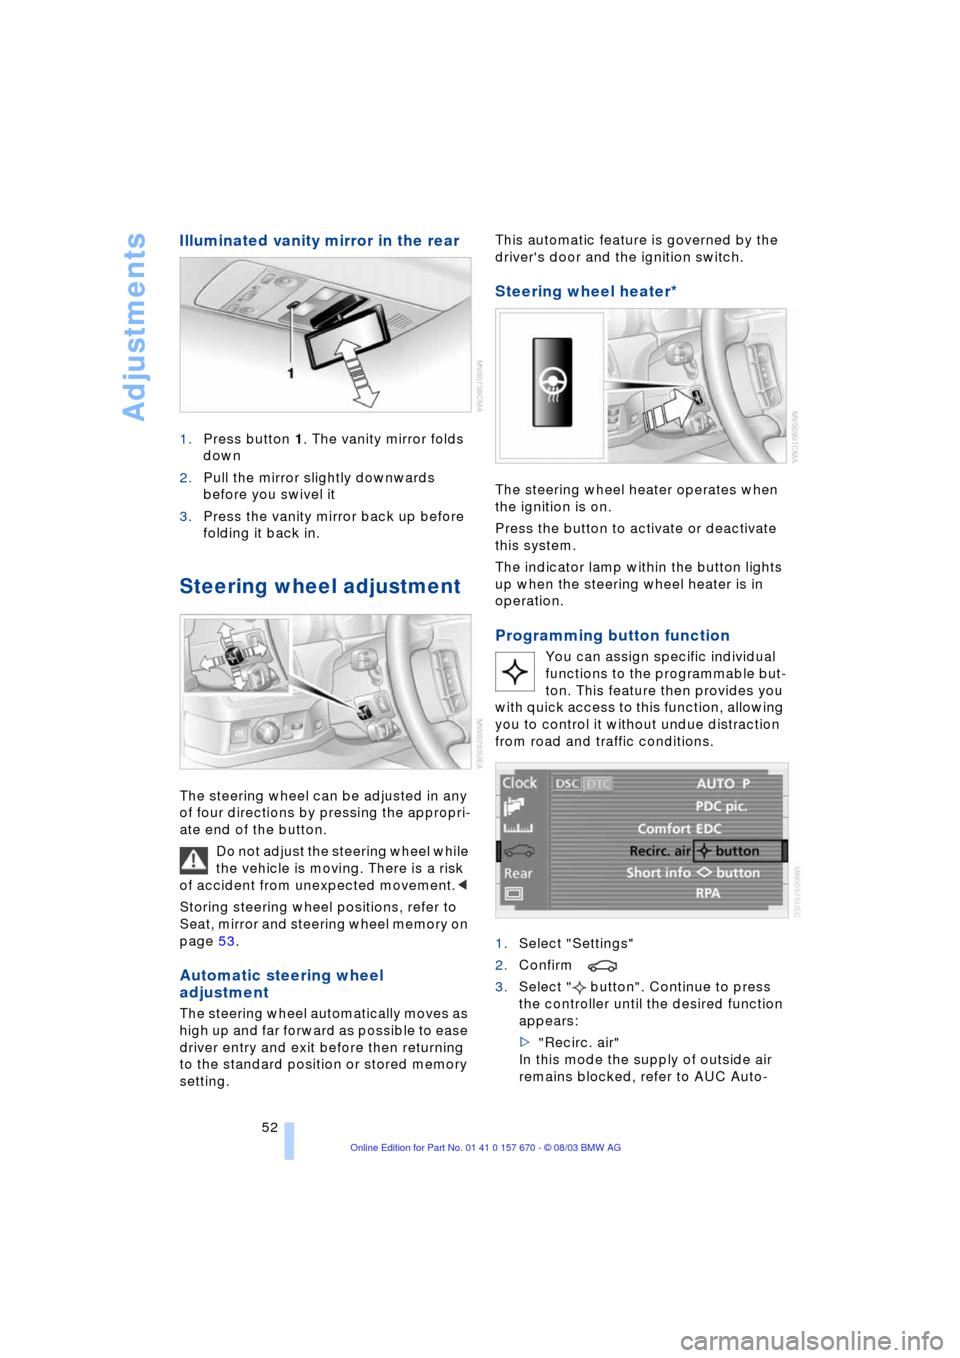
Illuminated vanity mirror in the rear
1.Press button 1. The vanity mirror folds
down
2.Pull the mirror slightly downwards
before you swivel it
3.Press the vanity mirror back up before
folding it back in.
Steering wheel adjustment
The steering wheel can be adjusted in any
of four directions by pressing the appropri-
ate end of the button.
Do not adjust the steering wheel while
the vehicle is moving. There is a risk
of accident from unexpected movement.<
Storing steering wheel positions, refer to
Seat, mirror and steering wheel memory on
page 53.
Automatic steering wheel
adjustment
The steering wheel automatically moves as
high up and far forward as possible to ease
driver entry and exit before then returning
to the standard position or stored memory
setting. This automatic feature is governed by the
driver's door and the ignition switch.
Steering wheel heater*
The steering wheel heater operates when
the ignition is on.
Press the button to activate or deactivate
this system.
The indicator lamp within the button lights
up when the steering wheel heater is in
operation.
Programming button function
You can assign specific individual
functions to the programmable but-
ton. This feature then provides you
with quick access to this function, allowing
you to control it without undue distraction
from road and traffic conditions.
1.Select "Settings"
2.Confirm
3.Select " button". Continue to press
the controller until the desired function
appears:
>"Recirc. air"
In this mode the supply of outside air
remains blocked, refer to AUC Auto-
Page 55 of 232
Controls
53Reference
At a glance
Driving tips
Communications
Navigation
Entertainment
Mobility
matic recirculated-air control on
page 104
>"Navi info"
To repeat the most recent message
from the navigation system, refer to
page 141
>"AUTO P"
To activate/deactivate Automatic Hold
refer to Automatic Hold on page 63.
You can select the displayed function using
the button on the steering wheel.
If you have activated Automatic Hold,
refer to page 63, you can use the but-
ton on the steering wheel to deactivate the
system for parking maneuvers etc.<
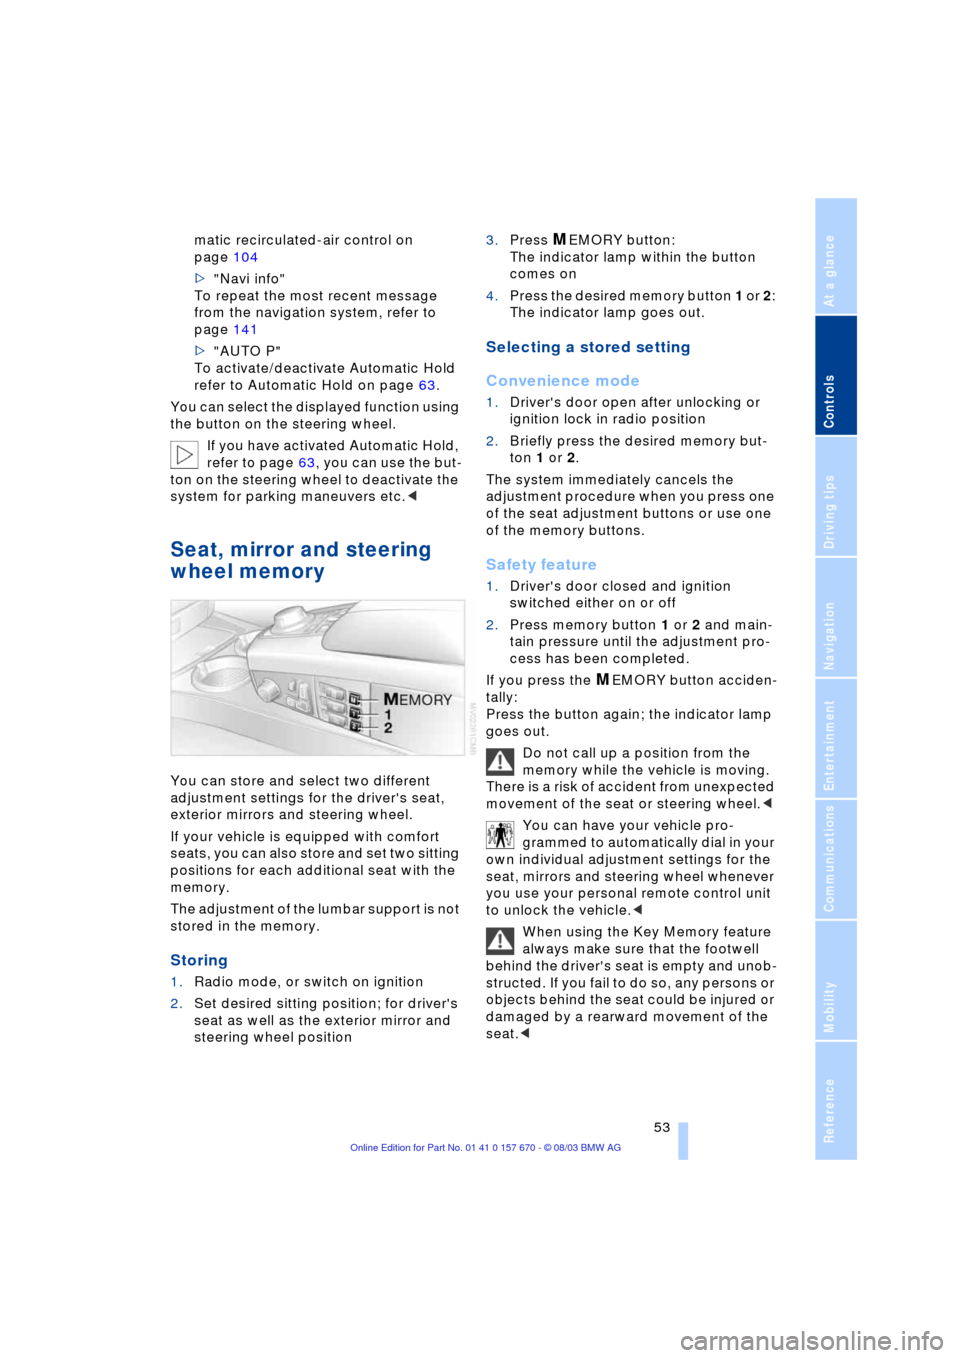
Seat, mirror and steering
wheel memory
You can store and select two different
adjustment settings for the driver's seat,
exterior mirrors and steering wheel.
If your vehicle is equipped with comfort
seats, you can also store and set two sitting
positions for each additional seat with the
memory.
The adjustment of the lumbar support is not
stored in the memory.
Storing
1.Radio mode, or switch on ignition
2.Set desired sitting position; for driver's
seat as well as the exterior mirror and
steering wheel position 3.Press
MEMORY button:
The indicator lamp within the button
comes on
4.Press the desired memory button 1 or 2:
The indicator lamp goes out.
Selecting a stored setting
Convenience mode
1.Driver's door open after unlocking or
ignition lock in radio position
2.Briefly press the desired memory but-
ton 1 or 2.
The system immediately cancels the
adjustment procedure when you press one
of the seat adjustment buttons or use one
of the memory buttons.
Safety feature
1.Driver's door closed and ignition
switched either on or off
2.Press memory button 1 or 2 and main-
tain pressure until the adjustment pro-
cess has been completed.
If you press the
MEMORY button acciden-
tally:
Press the button again; the indicator lamp
goes out.
Do not call up a position from the
memory while the vehicle is moving.
There is a risk of accident from unexpected
movement of the seat or steering wheel.<
You can have your vehicle pro-
grammed to automatically dial in your
own individual adjustment settings for the
seat, mirrors and steering wheel whenever
you use your personal remote control unit
to unlock the vehicle.<
When using the Key Memory feature
always make sure that the footwell
behind the driver's seat is empty and unob-
structed. If you fail to do so, any persons or
objects behind the seat could be injured or
damaged by a rearward movement of the
seat.<
Page 56 of 232
Adjustments
54
Tilt function, passenger-side mirror
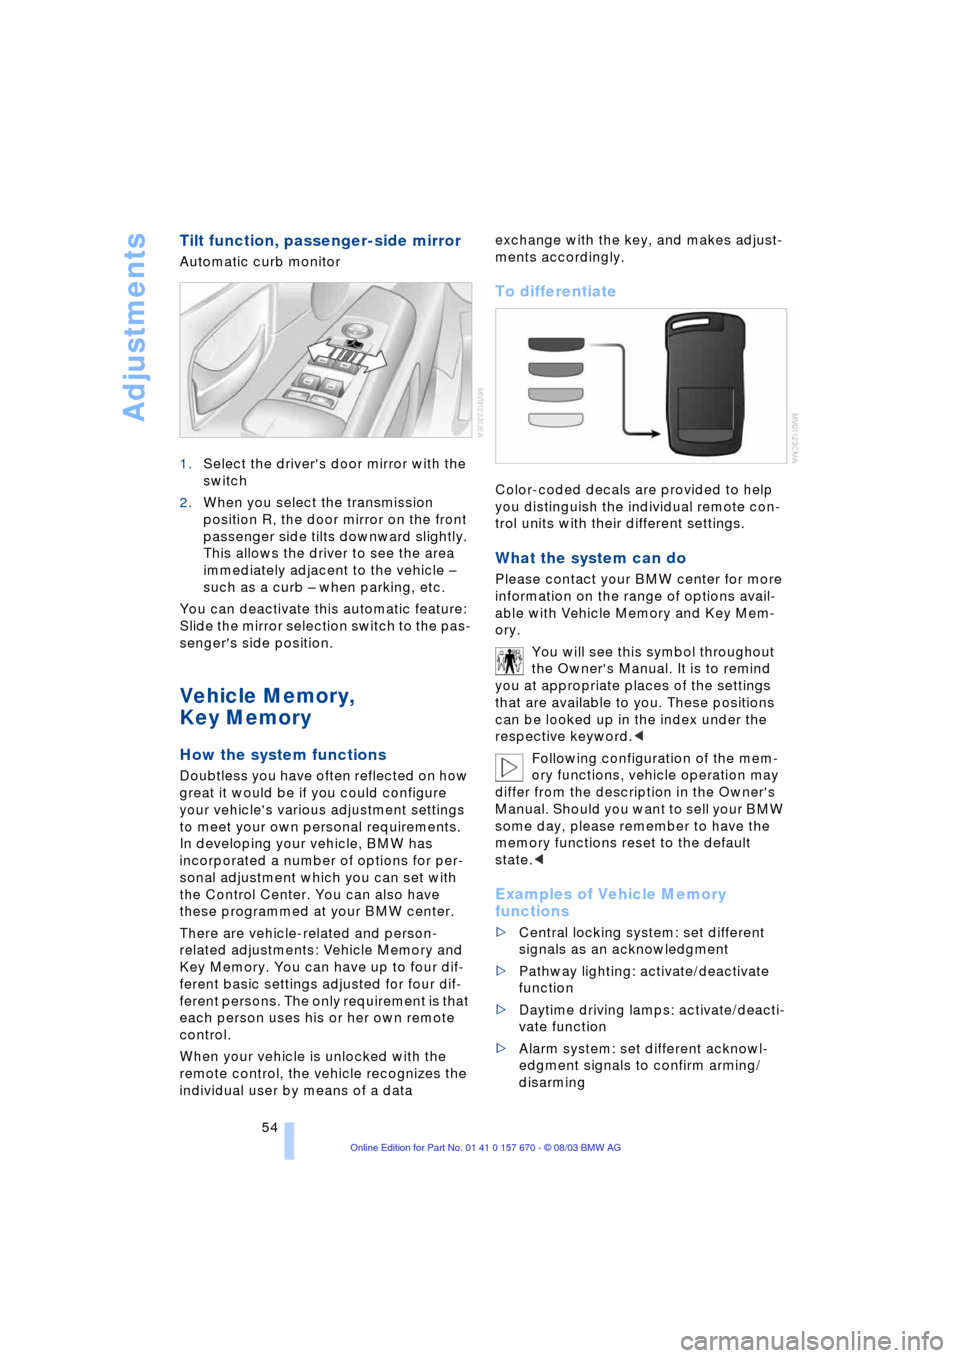
Automatic curb monitor
1.Select the driver's door mirror with the
switch
2.When you select the transmission
position R, the door mirror on the front
passenger side tilts downward slightly.
This allows the driver to see the area
immediately adjacent to the vehicle Ð
such as a curb Ð when parking, etc.
You can deactivate this automatic feature:
Slide the mirror selection switch to the pas-
senger's side position.
Vehicle Memory,
Key Memory
How the system functions
Doubtless you have often reflected on how
great it would be if you could configure
your vehicle's various adjustment settings
to meet your own personal requirements.
In developing your vehicle, BMW has
incorporated a number of options for per-
sonal adjustment which you can set with
the Control Center. You can also have
these programmed at your BMW center.
There are vehicle-related and person-
related adjustments: Vehicle Memory and
Key Memory. You can have up to four dif-
ferent basic settings adjusted for four dif-
ferent persons. The only requirement is that
each person uses his or her own remote
control.
When your vehicle is unlocked with the
remote control, the vehicle recognizes the
individual user by means of a data exchange with the key, and makes adjust-
ments accordingly.
To differentiate
Color-coded decals are provided to help
you distinguish the individual remote con-
trol units with their different settings.
What the system can do
Please contact your BMW center for more
information on the range of options avail-
able with Vehicle Memory and Key Mem-
ory.
You will see this symbol throughout
the Owner's Manual. It is to remind
you at appropriate places of the settings
that are available to you. These positions
can be looked up in the index under the
respective keyword.<
Following configuration of the mem-
ory functions, vehicle operation may
differ from the description in the Owner's
Manual. Should you want to sell your BMW
some day, please remember to have the
memory functions reset to the default
state.<
Examples of Vehicle Memory
functions
>Central locking system: set different
signals as an acknowledgment
>Pathway lighting: activate/deactivate
function
>Daytime driving lamps: activate/deacti-
vate function
>Alarm system: set different acknowl-
edgment signals to confirm arming/
disarming
Page 57 of 232

Controls
55Reference
At a glance
Driving tips
Communications
Navigation
Entertainment
Mobility
>Alarm system: activate/deactivate inte-
rior motion sensor and tilt alarm sensor
>Automatic headlamp control: adjust
sensitivity.
Examples of Key Memory functions
>Seat memory: activate/deactivate func-
tion
>Central locking system: vehicle is
locked as soon as you drive off or if
you have not opened a door or the lug-
gage compartment lid after unlocking.
Activate/deactivate functions
>Automatic climate control: key-specific
storage of the temperature, blower and
air conditioner setting. Activate/deacti-
vate function
>Check Control: set languages and units
>Seat heating: recall personal tempera-
ture distribution.
Page 59 of 232
Controls
57Reference
At a glance
Driving tips
Communications
Navigation
Entertainment
Mobility
Always read and follow the instructions that
come with the system.
Child seat security
All of the rear belt retractors and the front
passenger's safety belt can be locked for
mounting and securing child-restraint sys-
tems.
Information regarding this is located near
the buckle latch of each safety belt.
To lock the safety belt
Pull the entire length of the belt from the
belt retractor. Allow the reel to retract the
belt somewhat and engage the buckle,
then tighten the belt against the child-
restraint system. The retraction mechanism
is now locked.
To unlock the safety belt
Release the buckle, remove the child-
restraint system and allow the belt retractor
to reel the belt completely in.
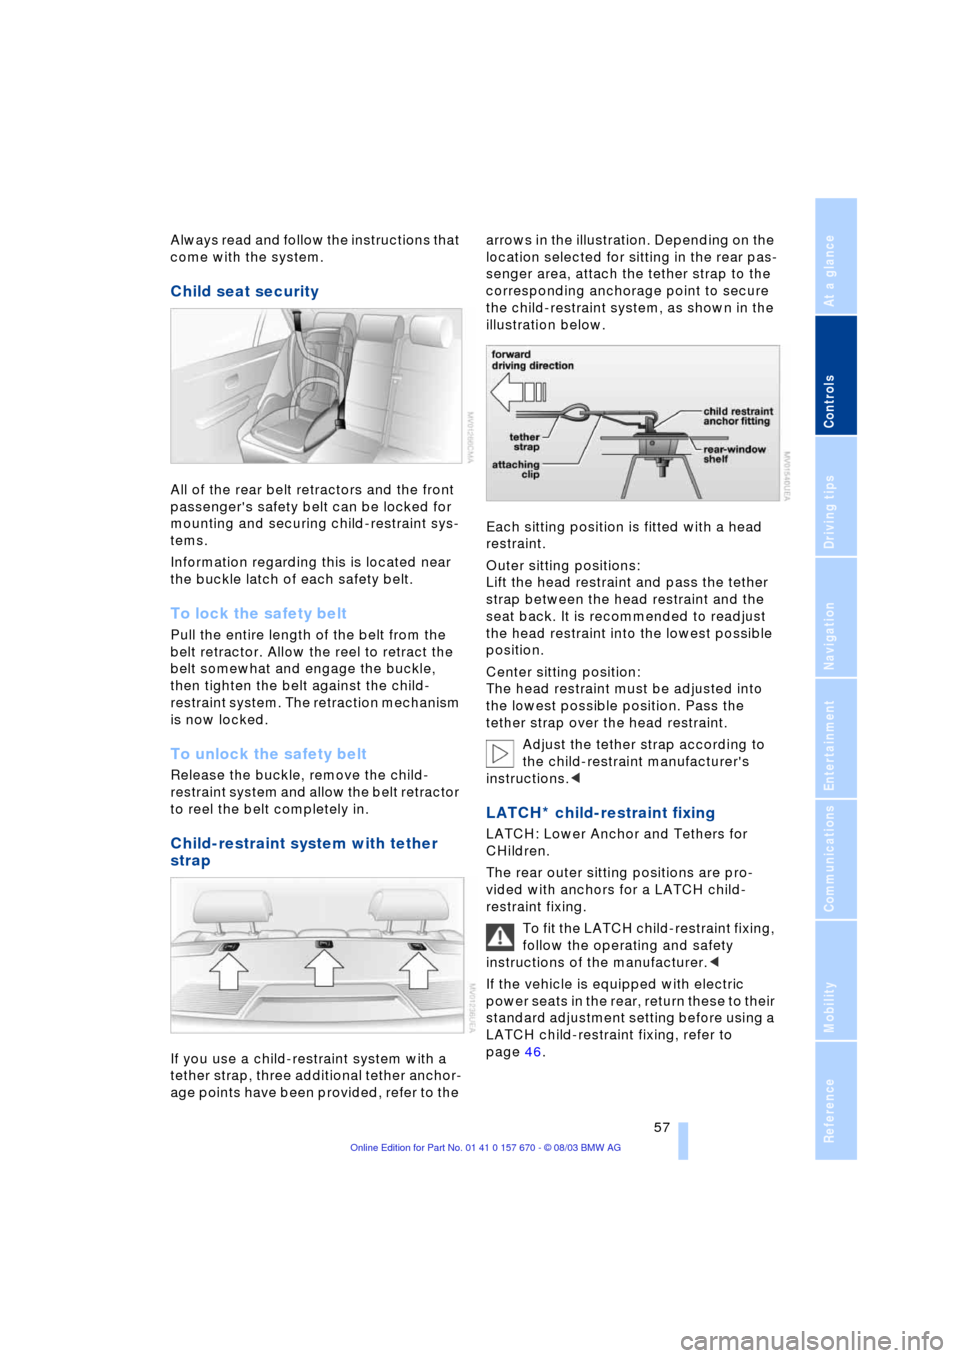
Child-restraint system with tether
strap
If you use a child-restraint system with a
tether strap, three additional tether anchor-
age points have been provided, refer to the arrows in the illustration. Depending on the
location selected for sitting in the rear pas-
senger area, attach the tether strap to the
corresponding anchorage point to secure
the child-restraint system, as shown in the
illustration below.
Each sitting position is fitted with a head
restraint.
Outer sitting positions:
Lift the head restraint and pass the tether
strap between the head restraint and the
seat back. It is recommended to readjust
the head restraint into the lowest possible
position.
Center sitting position:
The head restraint must be adjusted into
the lowest possible position. Pass the
tether strap over the head restraint.
Adjust the tether strap according to
the child-restraint manufacturer's
instructions.<
LATCH* child-restraint fixing
LATCH: Lower Anchor and Tethers for
CHildren.
The rear outer sitting positions are pro-
vided with anchors for a LATCH child-
restraint fixing.
To fit the LATCH child-restraint fixing,
follow the operating and safety
instructions of the manufacturer.<
If the vehicle is equipped with electric
power seats in the rear, return these to their
standard adjustment setting before using a
LATCH child-restraint fixing, refer to
page 46.
Page 60 of 232
Transporting children safely
58
Access to anchorage points
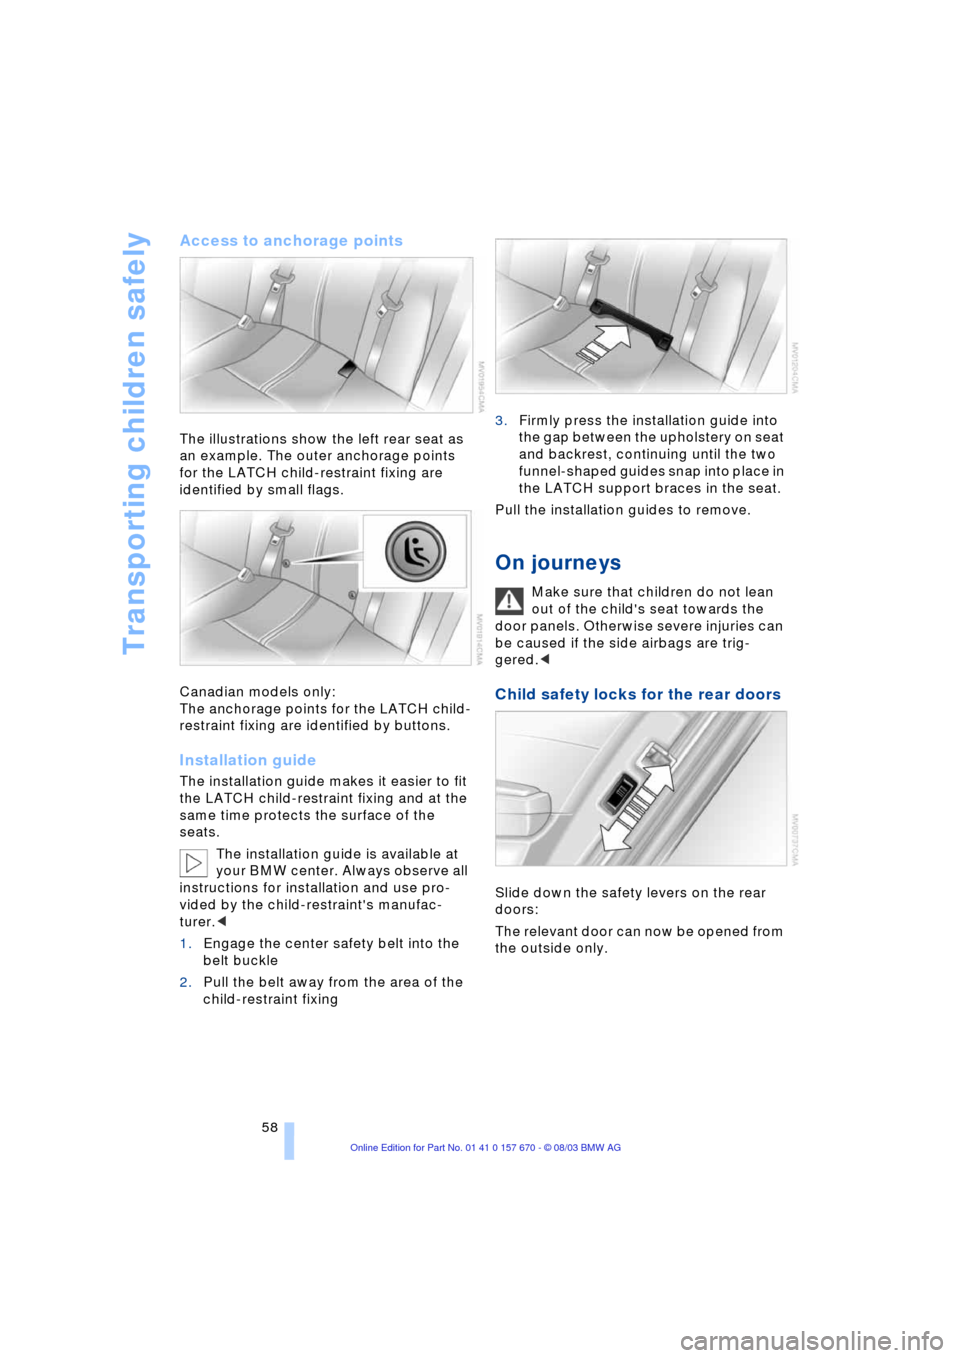
The illustrations show the left rear seat as
an example. The outer anchorage points
for the LATCH child-restraint fixing are
identified by small flags.
Canadian models only:
The anchorage points for the LATCH child-
restraint fixing are identified by buttons.
Installation guide
The installation guide makes it easier to fit
the LATCH child-restraint fixing and at the
same time protects the surface of the
seats.
The installation guide is available at
your BMW center. Always observe all
instructions for installation and use pro-
vided by the child-restraint's manufac-
turer.<
1.Engage the center safety belt into the
belt buckle
2.Pull the belt away from the area of the
child-restraint fixing3.Firmly press the installation guide into
the gap between the upholstery on seat
and backrest, continuing until the two
funnel-shaped guides snap into place in
the LATCH support braces in the seat.
Pull the installation guides to remove.
On journeys
Make sure that children do not lean
out of the child's seat towards the
door panels. Otherwise severe injuries can
be caused if the side airbags are trig-
gered.<
Child safety locks for the rear doors
Slide down the safety levers on the rear
doors:
The relevant door can now be opened from
the outside only.
Page 62 of 232
Driving
60
Driving
Ignition lock
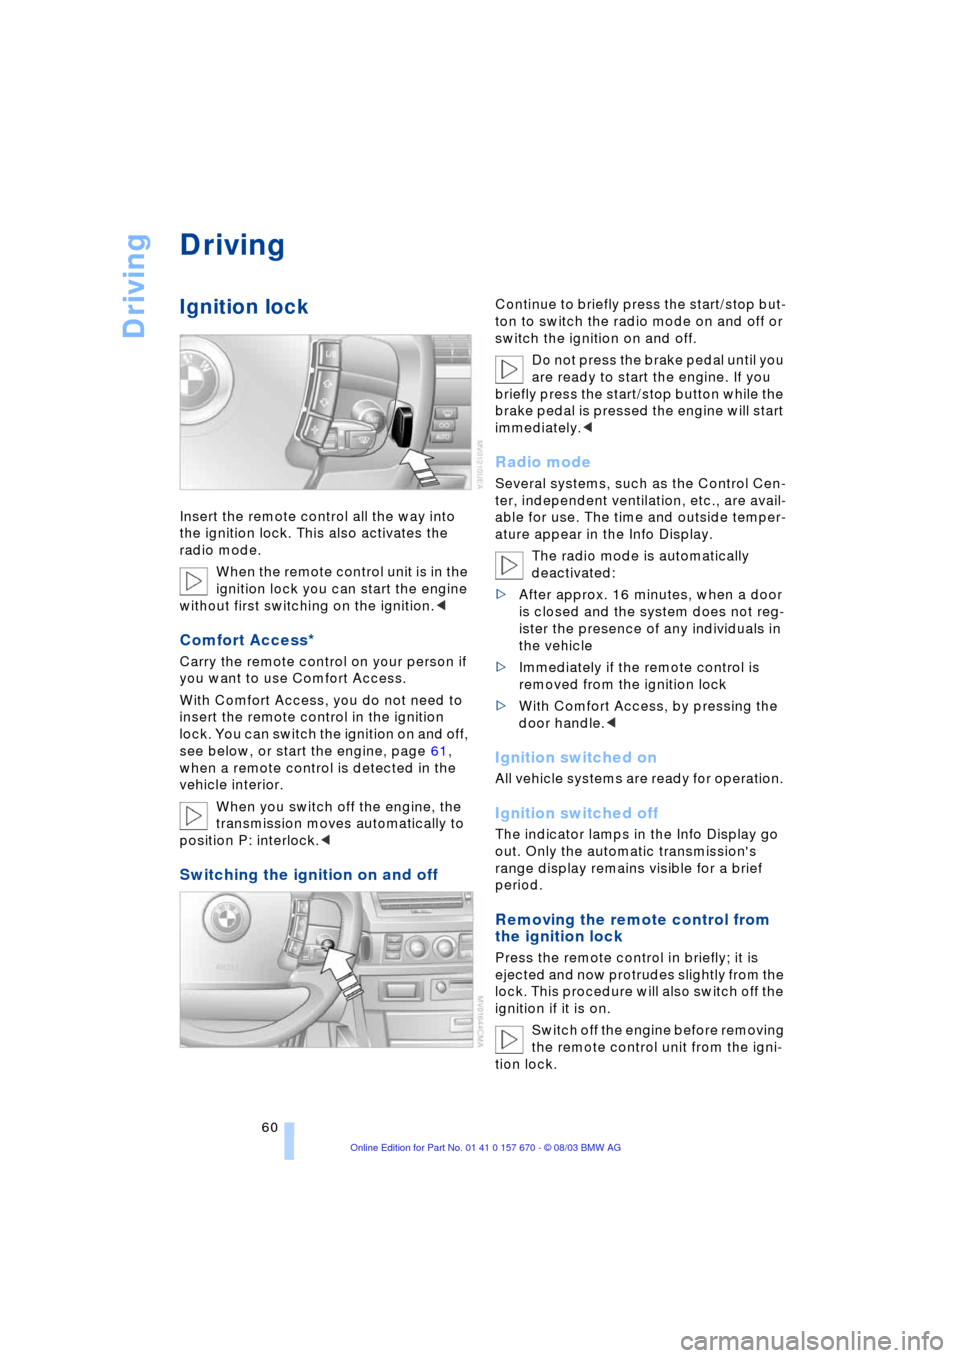
Insert the remote control all the way into
the ignition lock. This also activates the
radio mode.
When the remote control unit is in the
ignition lock you can start the engine
without first switching on the ignition.<
Comfort Access*
Carry the remote control on your person if
you want to use Comfort Access.
With Comfort Access, you do not need to
insert the remote control in the ignition
lock. You can switch the ignition on and off,
see below, or start the engine, page 61,
when a remote control is detected in the
vehicle interior.
When you switch off the engine, the
transmission moves automatically to
position P: interlock.<
Switching the ignition on and off
Continue to briefly press the start/stop but-
ton to switch the radio mode on and off or
switch the ignition on and off.
Do not press the brake pedal until you
are ready to start the engine. If you
briefly press the start/stop button while the
brake pedal is pressed the engine will start
immediately.<
Radio mode
Several systems, such as the Control Cen-
ter, independent ventilation, etc., are avail-
able for use. The time and outside temper-
ature appear in the Info Display.
The radio mode is automatically
deactivated:
>After approx. 16 minutes, when a door
is closed and the system does not reg-
ister the presence of any individuals in
the vehicle
>Immediately if the remote control is
removed from the ignition lock
>With Comfort Access, by pressing the
door handle.<
Ignition switched on
All vehicle systems are ready for operation.
Ignition switched off
The indicator lamps in the Info Display go
out. Only the automatic transmission's
range display remains visible for a brief
period.
Removing the remote control from
the ignition lock
Press the remote control in briefly; it is
ejected and now protrudes slightly from the
lock. This procedure will also switch off the
ignition if it is on.
Switch off the engine before removing
the remote control unit from the igni-
tion lock.
Page 63 of 232
Controls
61Reference
At a glance
Driving tips
Communications
Navigation
Entertainment
Mobility
The transmission automatically shifts to
position P: interlock.<
If the remote control is still in the ignition
lock when the driver's door is opened, a
gong will sound and a message will appear
in the Info Display.
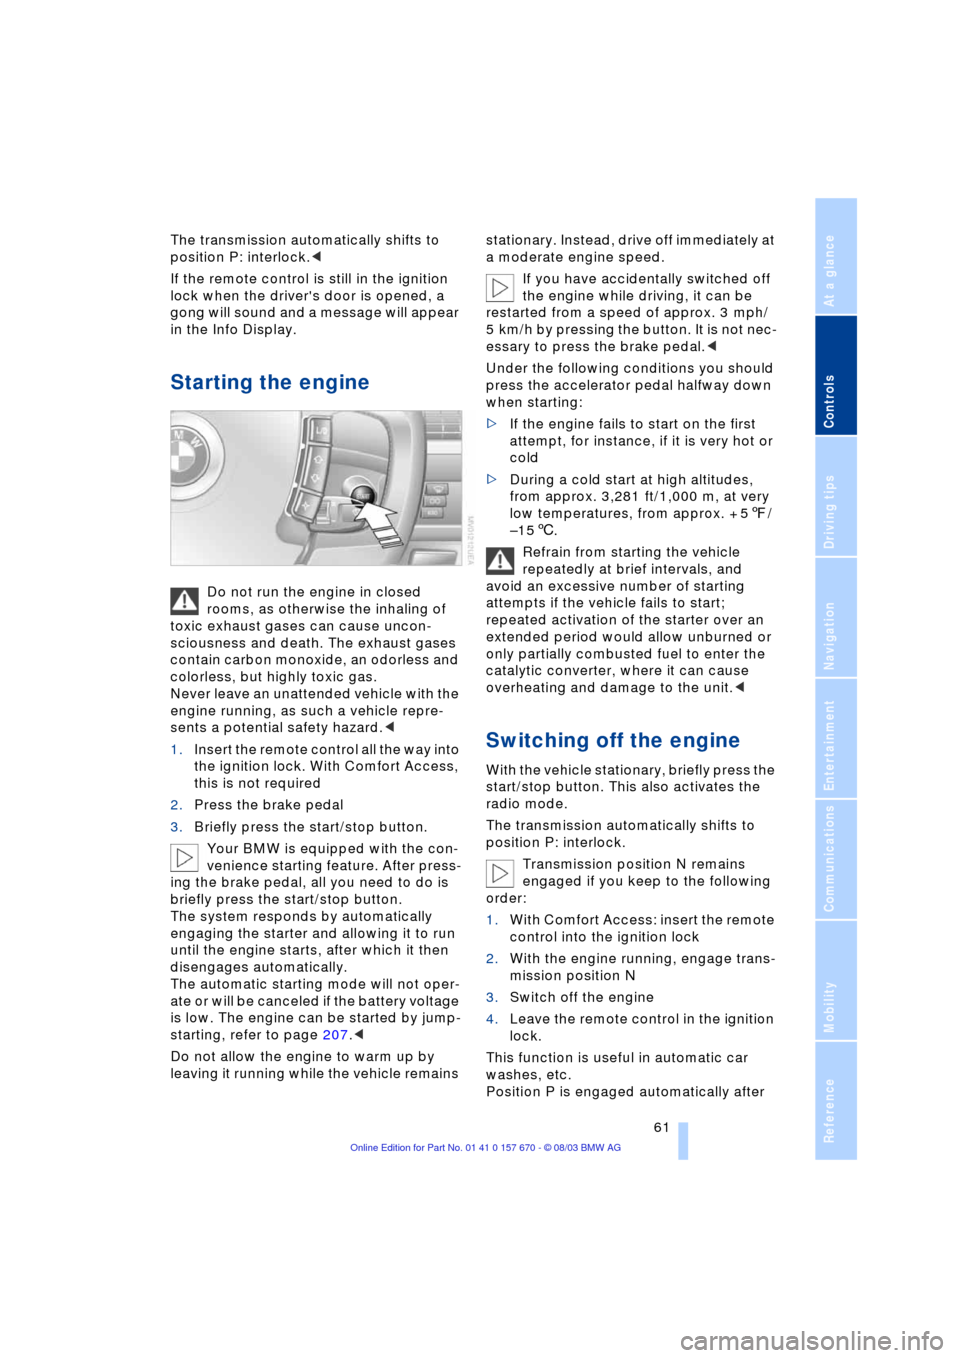
Starting the engine
Do not run the engine in closed
rooms, as otherwise the inhaling of
toxic exhaust gases can cause uncon-
sciousness and death. The exhaust gases
contain carbon monoxide, an odorless and
colorless, but highly toxic gas.
Never leave an unattended vehicle with the
engine running, as such a vehicle repre-
sents a potential safety hazard.<
1.Insert the remote control all the way into
the ignition lock. With Comfort Access,
this is not required
2.Press the brake pedal
3.Briefly press the start/stop button.
Your BMW is equipped with the con-
venience starting feature. After press-
ing the brake pedal, all you need to do is
briefly press the start/stop button.
The system responds by automatically
engaging the starter and allowing it to run
until the engine starts, after which it then
disengages automatically.
The automatic starting mode will not oper-
ate or will be canceled if the battery voltage
is low. The engine can be started by jump-
starting, refer to page 207.<
Do not allow the engine to warm up by
leaving it running while the vehicle remains stationary. Instead, drive off immediately at
a moderate engine speed.
If you have accidentally switched off
the engine while driving, it can be
restarted from a speed of approx. 3 mph/
5 km/h by pressing the button. It is not nec-
essary to press the brake pedal.<
Under the following conditions you should
press the accelerator pedal halfway down
when starting:
>If the engine fails to start on the first
attempt, for instance, if it is very hot or
cold
>During a cold start at high altitudes,
from approx. 3,281 ft/1,000 m, at very
low temperatures, from approx. + 57/
Ð156.
Refrain from starting the vehicle
repeatedly at brief intervals, and
avoid an excessive number of starting
attempts if the vehicle fails to start;
repeated activation of the starter over an
extended period would allow unburned or
only partially combusted fuel to enter the
catalytic converter, where it can cause
overheating and damage to the unit.<
Switching off the engine
With the vehicle stationary, briefly press the
start/stop button. This also activates the
radio mode.
The transmission automatically shifts to
position P: interlock.
Transmission position N remains
engaged if you keep to the following
order:
1.With Comfort Access: insert the remote
control into the ignition lock
2.With the engine running, engage trans-
mission position N
3.Switch off the engine
4.Leave the remote control in the ignition
lock.
This function is useful in automatic car
washes, etc.
Position P is engaged automatically after