BMW 760Li 2004 E66 Service Manual
Manufacturer: BMW, Model Year: 2004, Model line: 760Li, Model: BMW 760Li 2004 E66Pages: 232, PDF Size: 5.27 MB
Page 41 of 232
Controls
39Reference
At a glance
Driving tips
Communications
Navigation
Entertainment
Mobility
rear. Ensure that adequate clearance is
available before opening.<
Closing
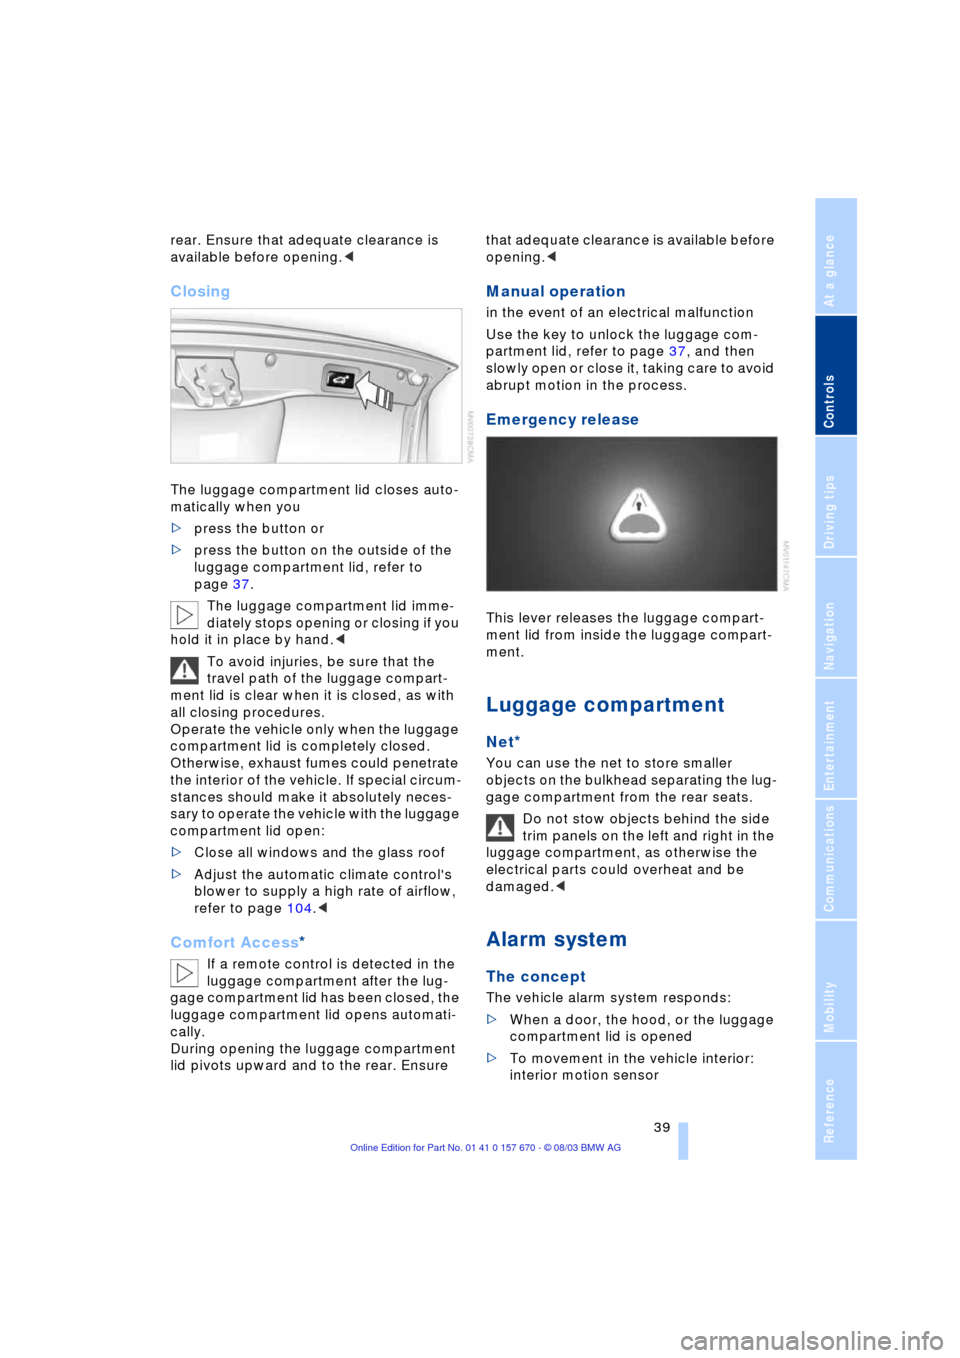
The luggage compartment lid closes auto-
matically when you
>press the button or
>press the button on the outside of the
luggage compartment lid, refer to
page 37.
The luggage compartment lid imme-
diately stops opening or closing if you
hold it in place by hand.<
To avoid injuries, be sure that the
travel path of the luggage compart-
ment lid is clear when it is closed, as with
all closing procedures.
Operate the vehicle only when the luggage
compartment lid is completely closed.
Otherwise, exhaust fumes could penetrate
the interior of the vehicle. If special circum-
stances should make it absolutely neces-
sary to operate the vehicle with the luggage
compartment lid open:
>Close all windows and the glass roof
>Adjust the automatic climate control's
blower to supply a high rate of airflow,
refer to page 104.<
Comfort Access*
If a remote control is detected in the
luggage compartment after the lug-
gage compartment lid has been closed, the
luggage compartment lid opens automati-
cally.
During opening the luggage compartment
lid pivots upward and to the rear. Ensure that adequate clearance is available before
opening.<
Manual operation
in the event of an electrical malfunction
Use the key to unlock the luggage com-
partment lid, refer to page 37, and then
slowly open or close it, taking care to avoid
abrupt motion in the process.
Emergency release
This lever releases the luggage compart-
ment lid from inside the luggage compart-
ment.
Luggage compartment
Net*
You can use the net to store smaller
objects on the bulkhead separating the lug-
gage compartment from the rear seats.
Do not stow objects behind the side
trim panels on the left and right in the
luggage compartment, as otherwise the
electrical parts could overheat and be
damaged.<
Alarm system
The concept
The vehicle alarm system responds:
>When a door, the hood, or the luggage
compartment lid is opened
>To movement in the vehicle interior:
interior motion sensor
Page 42 of 232
Opening and closing
40 >To a change in the vehicle's tilt if some-
one attempts to steal the wheels or tow
the vehicle
>To interruption of battery voltage.
The system responds to unauthorized vehi-
cle entry and attempted theft by simulta-
neously activating:
>An acoustic alarm, which lasts for a
period of approx. 30 seconds
>The hazard warning flashers for approx.
five minutes
>The high beams, which flash on and off
in the same rhythm.
Arming and disarming the alarm
system
When you lock or unlock the vehicle, either
with the remote control unit or at the door
lock, the alarm system is armed or dis-
armed at the same time.
The system indicates that it has been cor-
rectly armed by switching on the hazard
warning flashers for a single cycle and by
emitting an acoustic signal.
You can have different acknowledg-
ment signals set to confirm arming
and disarming.<
You can also open the luggage compart-
ment lid with the system armed using
button 3 on the remote control, refer to
page 34. When you close the lid, the sys-
tem is rearmed.
Pressing the Panic mode button for a
longer period triggers the alarm, refer
to page 34.<
To deactivate the alarm
>unlock the vehicle using the remote
control, refer to page 34
>insert the remote control all the way into
the ignition lock, engaging the detent.
Indicator lamp displays
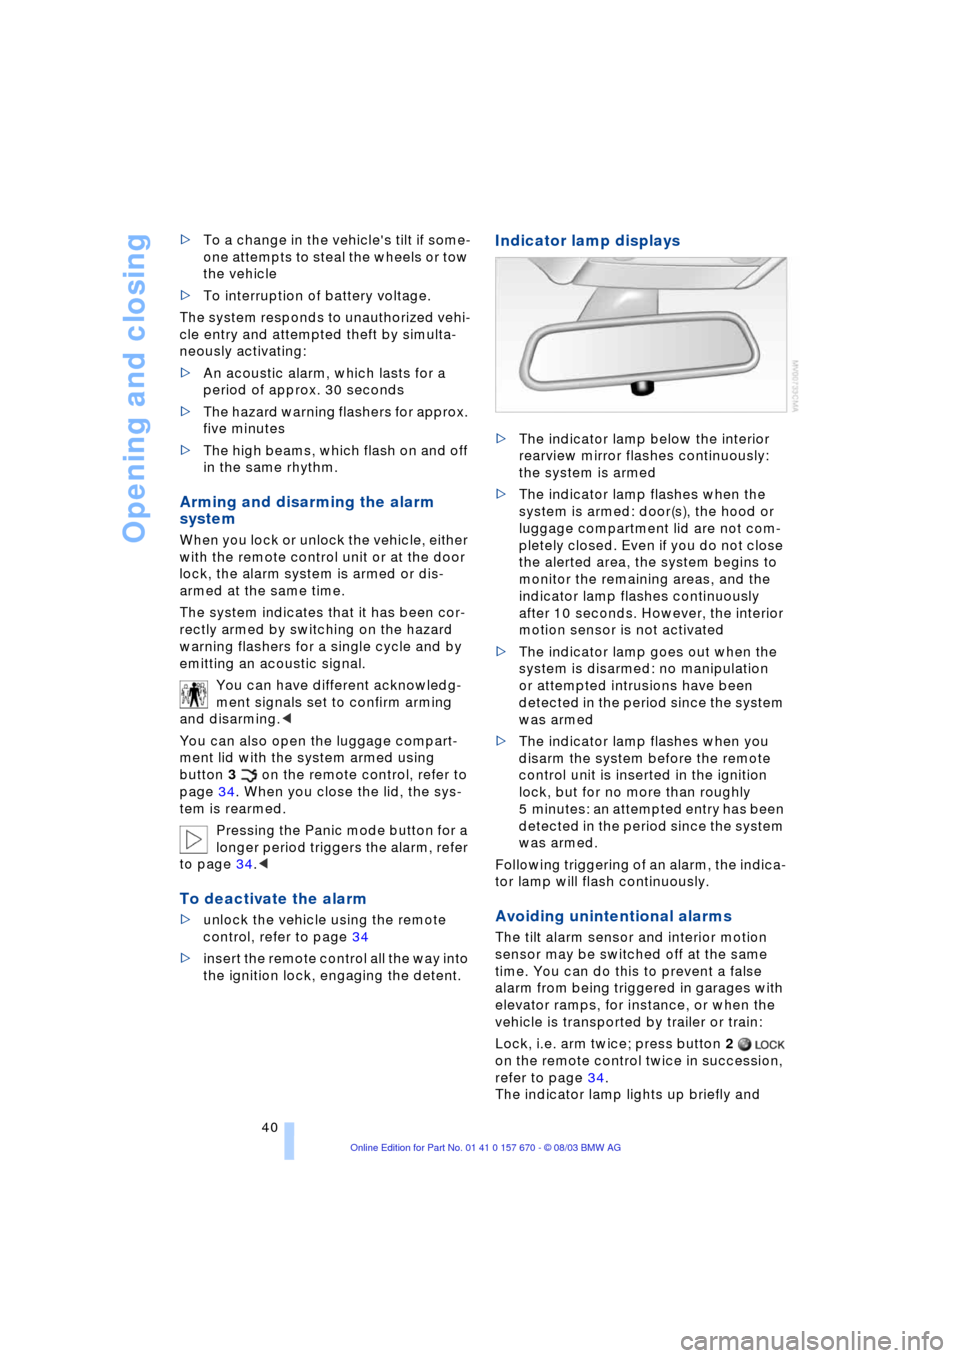
>The indicator lamp below the interior
rearview mirror flashes continuously:
the system is armed
>The indicator lamp flashes when the
system is armed: door(s), the hood or
luggage compartment lid are not com-
pletely closed. Even if you do not close
the alerted area, the system begins to
monitor the remaining areas, and the
indicator lamp flashes continuously
after 10 seconds. However, the interior
motion sensor is not activated
>The indicator lamp goes out when the
system is disarmed: no manipulation
or attempted intrusions have been
detected in the period since the system
was armed
>The indicator lamp flashes when you
disarm the system before the remote
control unit is inserted in the ignition
lock, but for no more than roughly
5 minutes: an attempted entry has been
detected in the period since the system
was armed.
Following triggering of an alarm, the indica-
tor lamp will flash continuously.
Avoiding unintentional alarms
The tilt alarm sensor and interior motion
sensor may be switched off at the same
time. You can do this to prevent a false
alarm from being triggered in garages with
elevator ramps, for instance, or when the
vehicle is transported by trailer or train:
Lock, i.e. arm twice; press button 2
on the remote control twice in succession,
refer to page 34.
The indicator lamp lights up briefly and
Page 43 of 232
Controls
41Reference
At a glance
Driving tips
Communications
Navigation
Entertainment
Mobility
then flashes continuously. The tilt alarm
sensor and the interior motion sensor are
switched off as long as the system is
armed.
If you desire, the
>tilt alarm sensor
>interior motion sensor
can be switched off permanently. Please
contact your BMW center for assistance.<
Interior motion sensor
In order for the interior motion sensor to
function properly, the windows and glass
roof must be completely closed.
Be sure to deactivate the interior motion
sensor, refer to section on Avoiding unin-
tentional alarms, when you wish to leave
the windows or glass roof open.
Windows
Opening and closing windows
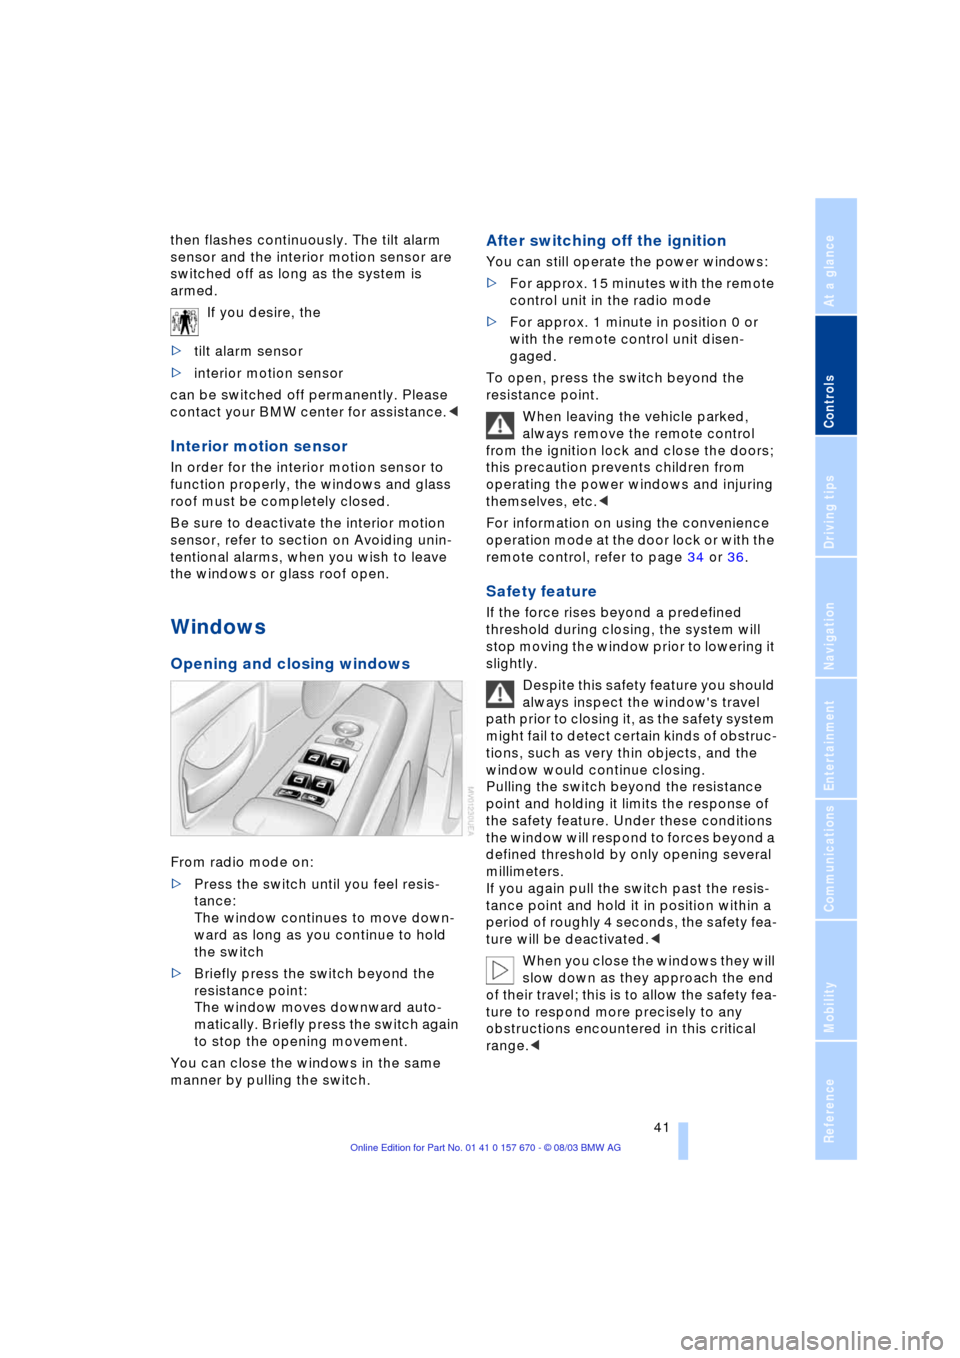
From radio mode on:
>Press the switch until you feel resis-
tance:
The window continues to move down-
ward as long as you continue to hold
the switch
>Briefly press the switch beyond the
resistance point:
The window moves downward auto-
matically. Briefly press the switch again
to stop the opening movement.
You can close the windows in the same
manner by pulling the switch.
After switching off the ignition
You can still operate the power windows:
>For approx. 15 minutes with the remote
control unit in the radio mode
>For approx. 1 minute in position 0 or
with the remote control unit disen-
gaged.
To open, press the switch beyond the
resistance point.
When leaving the vehicle parked,
always remove the remote control
from the ignition lock and close the doors;
this precaution prevents children from
operating the power windows and injuring
themselves, etc.<
For information on using the convenience
operation mode at the door lock or with the
remote control, refer to page 34 or 36.
Safety feature
If the force rises beyond a predefined
threshold during closing, the system will
stop moving the window prior to lowering it
slightly.
Despite this safety feature you should
always inspect the window's travel
path prior to closing it, as the safety system
might fail to detect certain kinds of obstruc-
tions, such as very thin objects, and the
window would continue closing.
Pulling the switch beyond the resistance
point and holding it limits the response of
the safety feature. Under these conditions
the window will respond to forces beyond a
defined threshold by only opening several
millimeters.
If you again pull the switch past the resis-
tance point and hold it in position within a
period of roughly 4 seconds, the safety fea-
ture will be deactivated.<
When you close the windows they will
slow down as they approach the end
of their travel; this is to allow the safety fea-
ture to respond more precisely to any
obstructions encountered in this critical
range.<
Page 44 of 232
Opening and closing
42
Safety switch
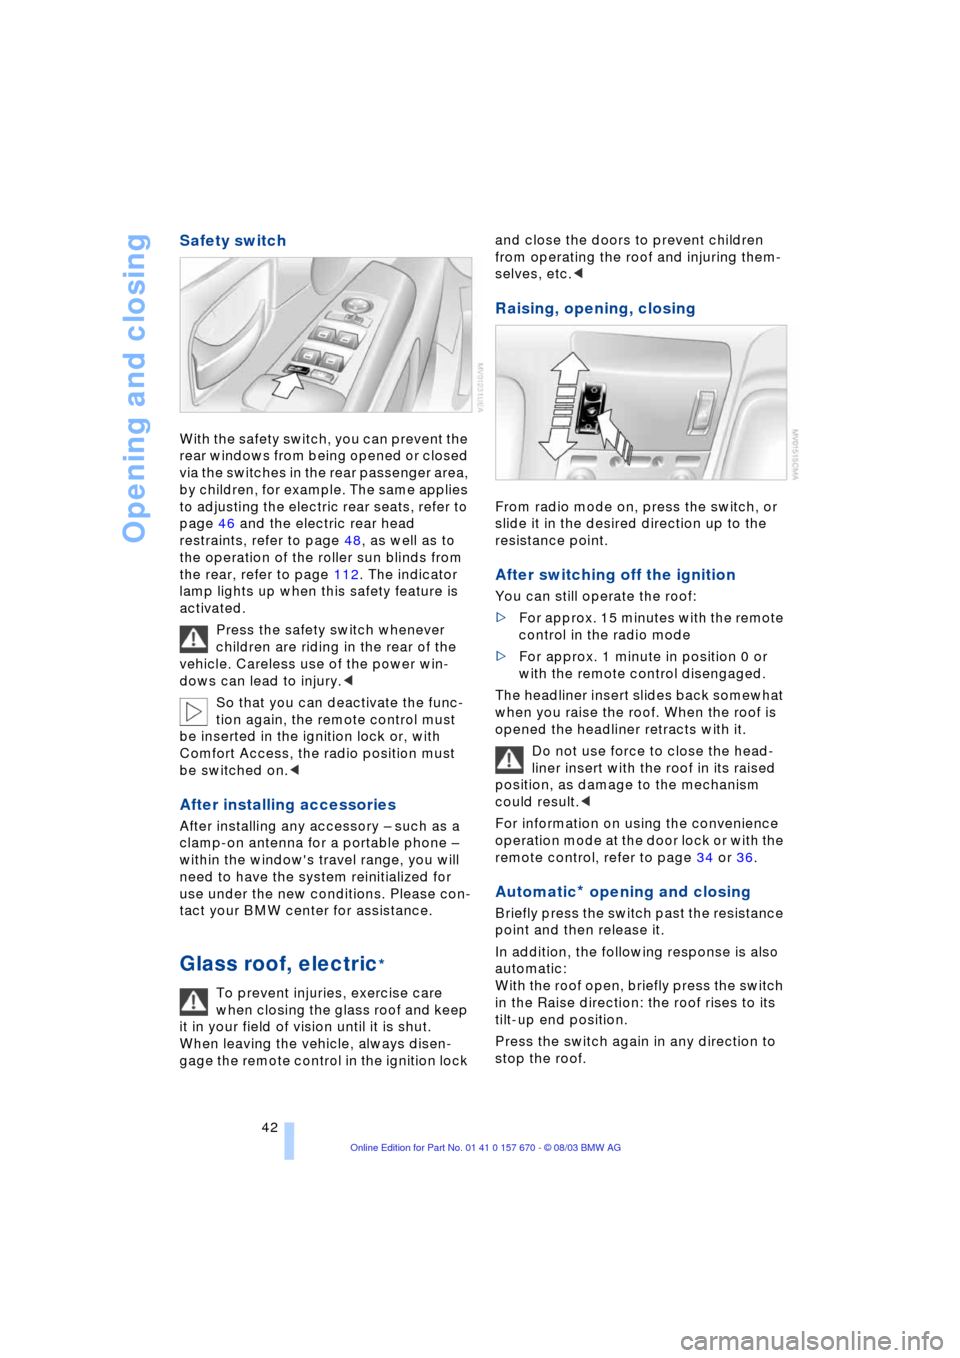
With the safety switch, you can prevent the
rear windows from being opened or closed
via the switches in the rear passenger area,
by children, for example. The same applies
to adjusting the electric rear seats, refer to
page 46 and the electric rear head
restraints, refer to page 48, as well as to
the operation of the roller sun blinds from
the rear, refer to page 112. The indicator
lamp lights up when this safety feature is
activated.
Press the safety switch whenever
children are riding in the rear of the
vehicle. Careless use of the power win-
dows can lead to injury.<
So that you can deactivate the func-
tion again, the remote control must
be inserted in the ignition lock or, with
Comfort Access, the radio position must
be switched on.<
After installing accessories
After installing any accessory Ð such as a
clamp-on antenna for a portable phone Ð
within the window's travel range, you will
need to have the system reinitialized for
use under the new conditions. Please con-
tact your BMW center for assistance.
Glass roof, electric*
To prevent injuries, exercise care
when closing the glass roof and keep
it in your field of vision until it is shut.
When leaving the vehicle, always disen-
gage the remote control in the ignition lock and close the doors to prevent children
from operating the roof and injuring them-
selves, etc.<
Raising, opening, closing
From radio mode on, press the switch, or
slide it in the desired direction up to the
resistance point.
After switching off the ignition
You can still operate the roof:
>For approx. 15 minutes with the remote
control in the radio mode
>For approx. 1 minute in position 0 or
with the remote control disengaged.
The headliner insert slides back somewhat
when you raise the roof. When the roof is
opened the headliner retracts with it.
Do not use force to close the head-
liner insert with the roof in its raised
position, as damage to the mechanism
could result.<
For information on using the convenience
operation mode at the door lock or with the
remote control, refer to page 34 or 36.
Automatic* opening and closing
Briefly press the switch past the resistance
point and then release it.
In addition, the following response is also
automatic:
With the roof open, briefly press the switch
in the Raise direction: the roof rises to its
tilt-up end position.
Press the switch again in any direction to
stop the roof.
Page 45 of 232
Controls
43Reference
At a glance
Driving tips
Communications
Navigation
Entertainment
Mobility
The automatic opening feature in the
Raise direction can be deactivated.
Please contact your BMW center for assis-
tance.<
Safety feature
If the glass roof encounters resistance
>when it is closing from the raised posi-
tion
>when it is closing from a point roughly
past the middle of its travel
the closing cycle is interrupted and the
glass roof will open again slightly.
Despite this safety feature you should
always inspect the roof's travel range
prior to closing it, as the safety feature
might fail to detect certain kinds of obstruc-
tions, such as very thin objects, and the
roof would continue closing.
Pressing the switch beyond the resistance
point and holding it limits the response of
the safety feature. The roof only opens a
short distance.
If you again press the switch past the resis-
tance point and hold it in position within
about 1.5 seconds, the safety feature will
be deactivated.<
When you close the glass roof, it will
slow down as it approaches the end
of its travel path; this is to allow the safety
feature to respond more precisely to any
obstructions encountered in this critical
range.<
Following interruptions in electrical
power supply
Following interruptions in electrical power,
for instance, when the battery is discon-
nected, it is possible that the glass roof will
extend to its tilt-up position, but fail to
respond to other commands. Should this
occur, please have the roof reinitialized at
your BMW center.
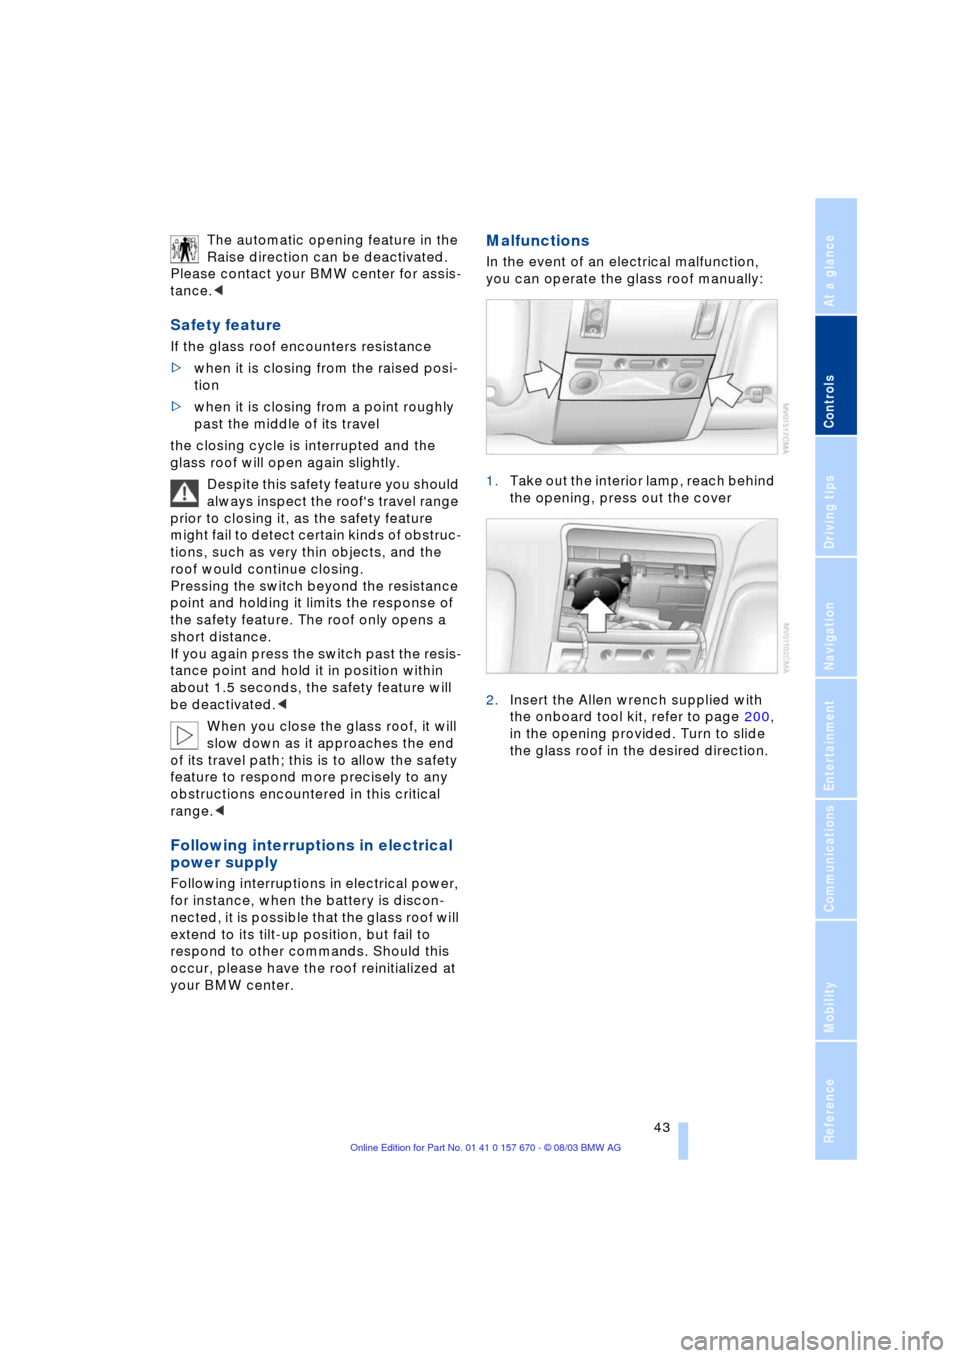
Malfunctions
In the event of an electrical malfunction,
you can operate the glass roof manually:
1.Take out the interior lamp, reach behind
the opening, press out the cover
2.Insert the Allen wrench supplied with
the onboard tool kit, refer to page 200,
in the opening provided. Turn to slide
the glass roof in the desired direction.
Page 46 of 232
Adjustments
44
Adjustments
Sitting safely
The ideal sitting position can make a vital
contribution to relaxed driving that is as
fatigue-free as possible. The sitting posi-
tion plays an important role together with
the safety belts and airbags in an accident.
To ensure that the safety systems operate
with optimized efficiency, we strongly urge
you to observe the instructions contained
in the following section.
For additional information on transporting
children safely, refer to page 56.
Sitting safely with airbags
Always maintain an adequate dis-
tance between yourself and the air-
bags. Always hold the steering wheel by
its rim with hands at the 9 o'clock and
3 o'clock positions, to minimize the risk of
injuries to your hands and arms in the event
of airbag deployment.
No one and nothing is to come between the
airbags and the seat occupant.
Do not use the cover of the front airbag on
the front passenger side as a storage area.
Make sure that the front passenger is cor-
rectly seated and does not rest feet or legs
on the instrument panel, otherwise leg inju-
ries can occur if the knee and front airbag
are triggered.
Never let an occupantÔs head rest near or
on a side airbag because the inflating air-
bag could cause a serious or fatal injury.<
Even if you adhere to all the instructions,
injuries resulting from contact with airbags
cannot be fully excluded, depending on the
circumstances. The ignition and inflation
noise may provoke a mild Ð usually tempo-
rary Ð hearing loss in extremely sensitive
individuals.
For airbag locations and additional infor-
mation on airbags, refer to page 97.
Sitting safely with safety belts
Fasten your safety belt before starting any
trip. Although airbags enhance safety by
providing added protection, they are not a
substitute for safety belts.
Your vehicle has five seats that are all
equipped with a safety belt.
At all times, occupants should sit
upright and be properly restrained Ð
infants and small children in appropriate
child-restraint systems; larger children and
adults using the safety belts.
Expectant mothers should always wear
their safety belts, taking care to position
the lap belt against the lower hips, where it
will not exert pressure against the abdomi-
nal area.
Never allow more than one person to wear
a single safety belt. Never allow infants or
small children to ride in a passenger's lap.
Do not route the belt across your neck, or
run it across sharp edges. Be sure that the
belt does not become caught or jammed.
Avoid twisting the belt while routing it firmly
across the hips and shoulder. Do not allow
the belt to rest against hard or fragile
objects. Otherwise, in the event of a frontal
impact, a loose lap belt could slide over
your hips, leading to abdominal injury.
Avoid wearing clothing that prevents the
belt from fitting properly and pull the lap
belt periodically to readjust the tension
across your shoulder in order to avoid a
reduction in the retention effect of the
safety belt.<
For instructions on operating safety belts,
refer to page 49.
Seats
Note before adjusting
Never attempt to adjust your seat
while operating the vehicle. The seat
could respond with unexpected move-
Page 47 of 232
Controls
45Reference
At a glance
Driving tips
Communications
Navigation
Entertainment
Mobility
ment, and the ensuing loss of vehicle con-
trol could lead to an accident.
Also on the passenger's side, do not incline
the backrest too far to the rear while the
vehicle is being driven, as otherwise there
is a danger in the event of an accident of
sliding under the safety belt, eliminating the
protection normally provided by the belt.<
Please observe the information on damage
to safety belts provided on page 49 and the
information on the active head restraints on
page 47.
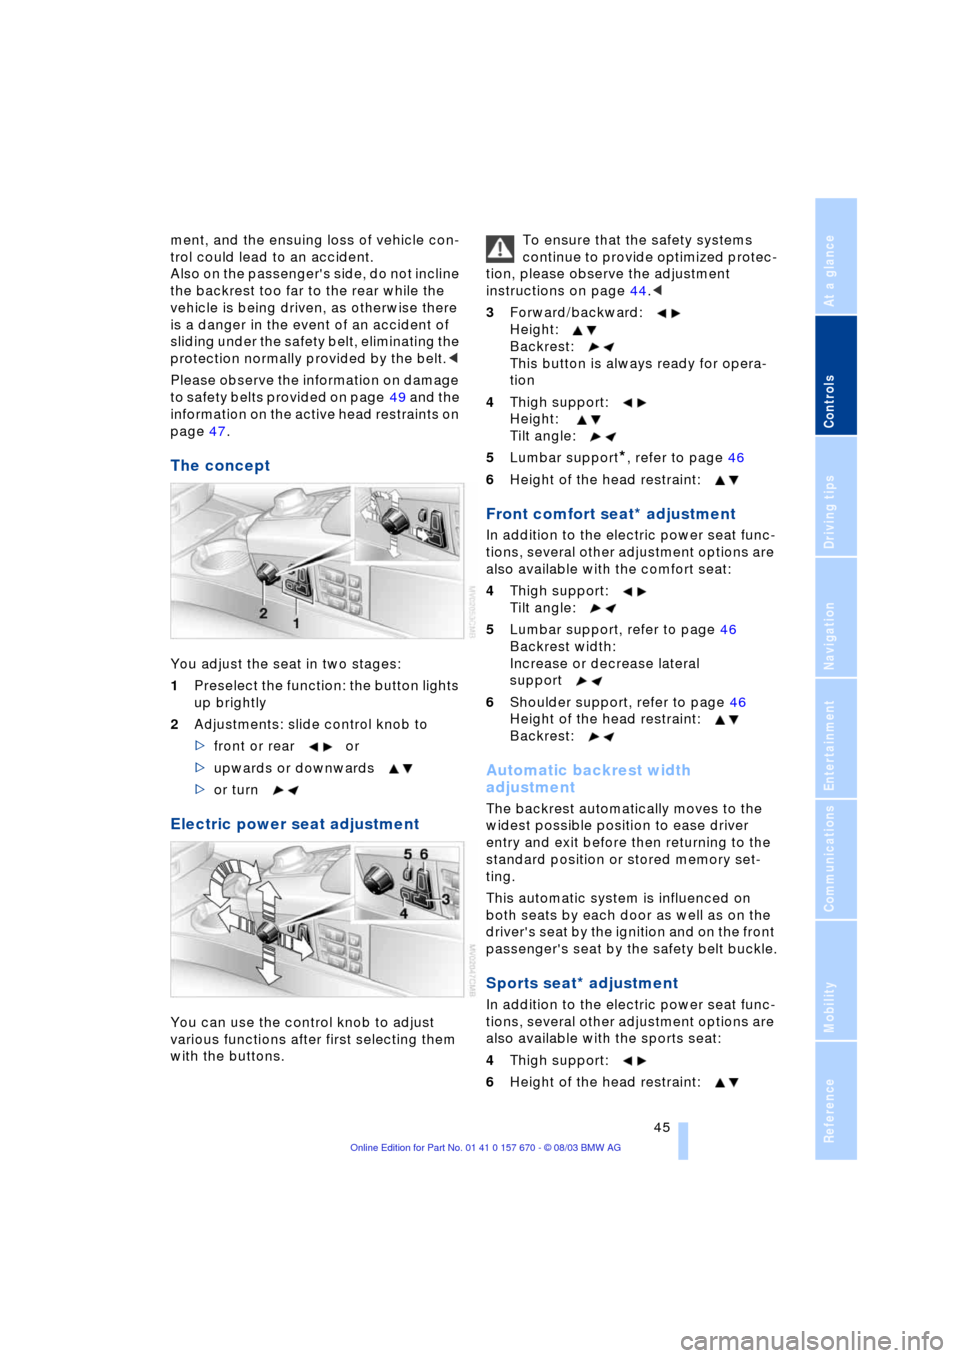
The concept
You adjust the seat in two stages:
1Preselect the function: the button lights
up brightly
2Adjustments: slide control knob to
>front or rear or
>upwards or downwards
>or turn
Electric power seat adjustment
You can use the control knob to adjust
various functions after first selecting them
with the buttons. To ensure that the safety systems
continue to provide optimized protec-
tion, please observe the adjustment
instructions on page 44.<
3Forward/backward:
Height:
Backrest:
This button is always ready for opera-
tion
4Thigh support:
Height:
Tilt angle:
5Lumbar support
*, refer to page 46
6Height of the head restraint:
Front comfort seat* adjustment
In addition to the electric power seat func-
tions, several other adjustment options are
also available with the comfort seat:
4Thigh support:
Tilt angle:
5Lumbar support, refer to page 46
Backrest width:
Increase or decrease lateral
support
6Shoulder support, refer to page 46
Height of the head restraint:
Backrest:
Automatic backrest width
adjustment
The backrest automatically moves to the
widest possible position to ease driver
entry and exit before then returning to the
standard position or stored memory set-
ting.
This automatic system is influenced on
both seats by each door as well as on the
driver's seat by the ignition and on the front
passenger's seat by the safety belt buckle.
Sports seat* adjustment
In addition to the electric power seat func-
tions, several other adjustment options are
also available with the sports seat:
4Thigh support:
6Height of the head restraint:
Page 48 of 232
Adjustments
46
Lumbar support adjustment
5Lumbar support
You can also adjust the contours of the
backrest to obtain additional support in the
lumbar region.
The upper hips and spinal column receive
supplementary support to help you main-
tain a relaxed, upright sitting position.
Increase or decrease curvature
Increase curvature at top or bottom.
Shoulder support adjustment
6Adjust the tilt angle of the shoulder
support:
You can use the adjustable upper backrest
for supplementary support in the shoulder
region. This provides a relaxed driving
position and helps relieve stress on the
shoulder muscles.
Make corrections in the forward/
backward adjustment of the seat to
ensure that the safety belt still fits firmly
against your body. If you do not do this, the
protection provided by the safety belt may
be reduced.<
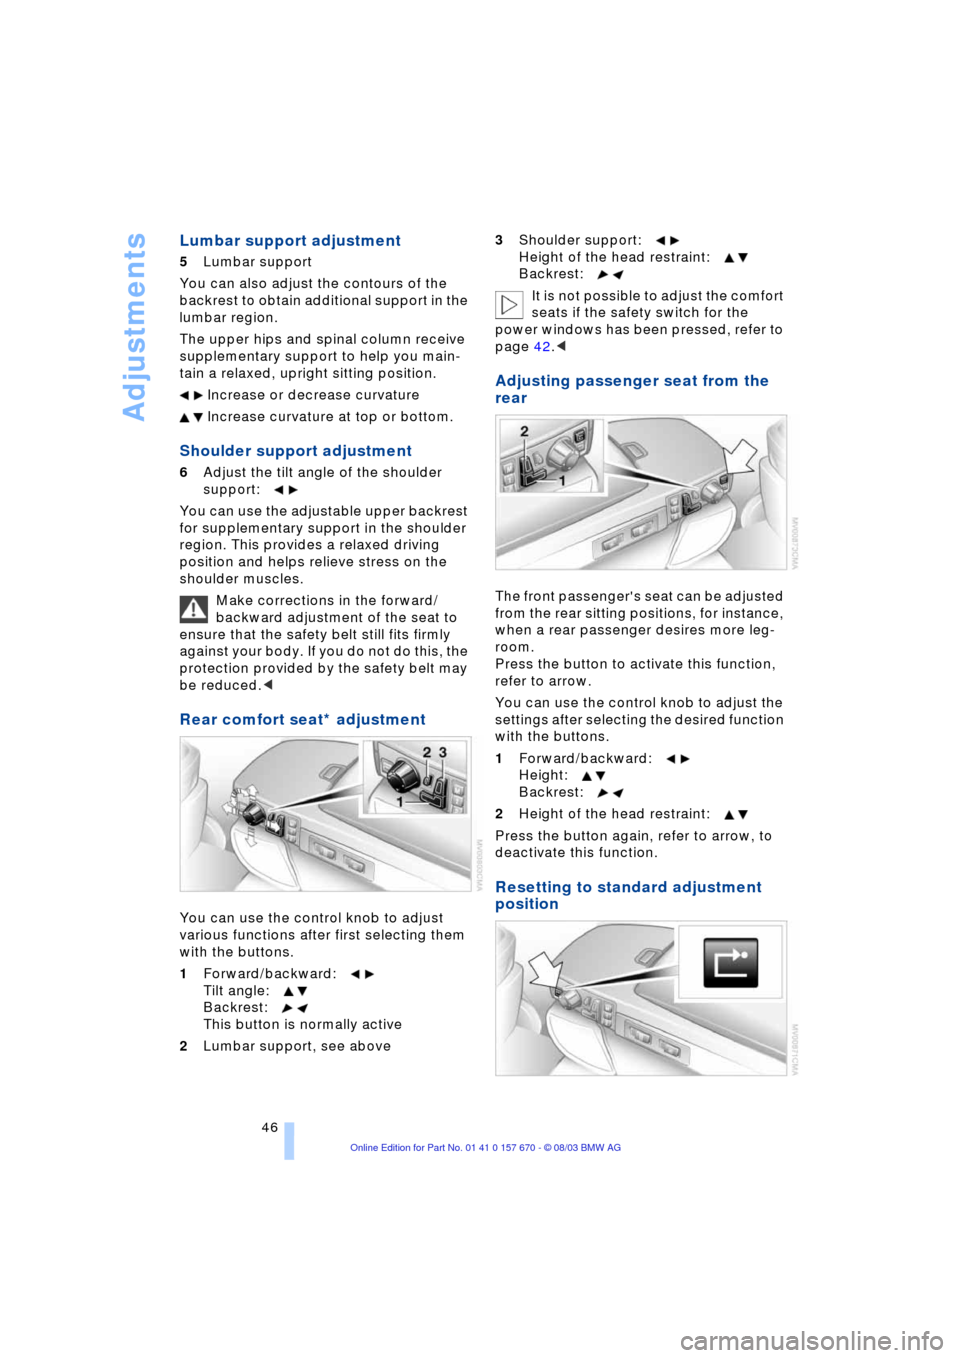
Rear comfort seat* adjustment
You can use the control knob to adjust
various functions after first selecting them
with the buttons.
1Forward/backward:
Tilt angle:
Backrest:
This button is normally active
2Lumbar support, see above3Shoulder support:
Height of the head restraint:
Backrest:
It is not possible to adjust the comfort
seats if the safety switch for the
power windows has been pressed, refer to
page 42.<
Adjusting passenger seat from the
rear
The front passenger's seat can be adjusted
from the rear sitting positions, for instance,
when a rear passenger desires more leg-
room.
Press the button to activate this function,
refer to arrow.
You can use the control knob to adjust the
settings after selecting the desired function
with the buttons.
1Forward/backward:
Height:
Backrest:
2Height of the head restraint:
Press the button again, refer to arrow, to
deactivate this function.
Resetting to standard adjustment
position
Page 49 of 232
Controls
47Reference
At a glance
Driving tips
Communications
Navigation
Entertainment
Mobility
You can use the button to return the rear
seats to their standard or default positions.
Maintain pressure on the button until the
system completes the adjustment.
It will be necessary to return the rear
seats to their standard position, for
instance, before using a child-restraint sys-
tem, refer to page 56.<
Head restraints
Adjustment information
Head restraints reduce the risk of spi-
nal injury in the event of an accident.
Adjust the head restraints so that they are
centered roughly at the level of your ears.<
Adjusting the height
Adjust the height of the head restraint.
Adjusting the tilt angle
Swivel the head restraint.
With the comfort seat, adjust the dis-
tance to the back of the head via the
shoulder support.<
Adjusting the side extensions
You can fold the side extensions on the
head restraint forward for increased lateral
support.
Front head restraints, active*
The front comfort seats are equipped with
an active head restraint.
When necessary, the system will respond
to a rear impact by automatically triggering
the active head restraints.
To ensure that the active head
restraints afford maximum protection,
and to avoid unnecessary risks to personal
safety, we request that you read and com-
ply with the following.
>Adjust the head restraints so that they
are centered at roughly ear height
>Do not install seat or head-restraint
covers
>Never use the head restraints as sup-
ports for suspending objects of any
kind, such as clothes hangers. Refrain
from mounting accessories on either
the seat or the head restraint.<
Rear seats
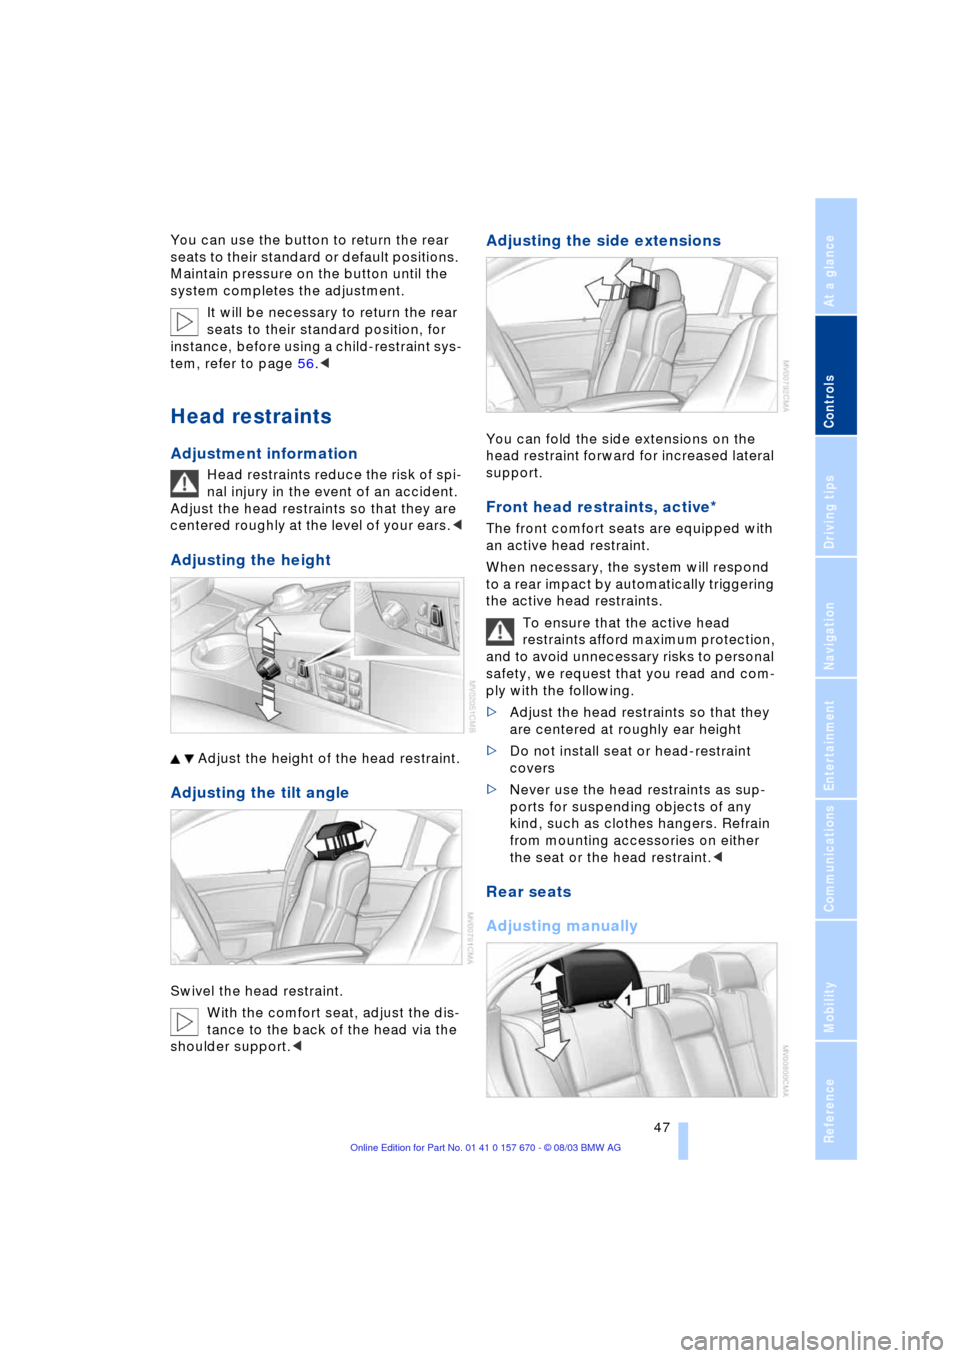
Adjusting manually
Page 50 of 232
Adjustments
48 >To raise: pull
>To lower: press the button, arrow 1, and
push down the head restraint.
To remove head restraints, refer to next
column.
Center head restraint adjustment
If the head restraint has been low-
ered, pull it back up, continuing until
the detent engages, before allowing a pas-
senger to ride in the rear center position.
Otherwise the level of occupant protection
can be reduced.<
Adjusting electrically*
If necessary, adjust the head restraint's
height to ensure that it is centered at
roughly the height of the passenger's ears.
With the safety switch pressed, refer
to page 42, the height adjustment of
the head restraints is deactivated.<
The head restraints at the outer sitting posi-
tions extend automatically whenever the
system detects a passenger on the seat.
You can also adjust the height of the head
restraint electrically.
To prevent possible personal injury
and property damage, always ensure
that the area above the head restraints is
clear and unobstructed before extending
them upward.<
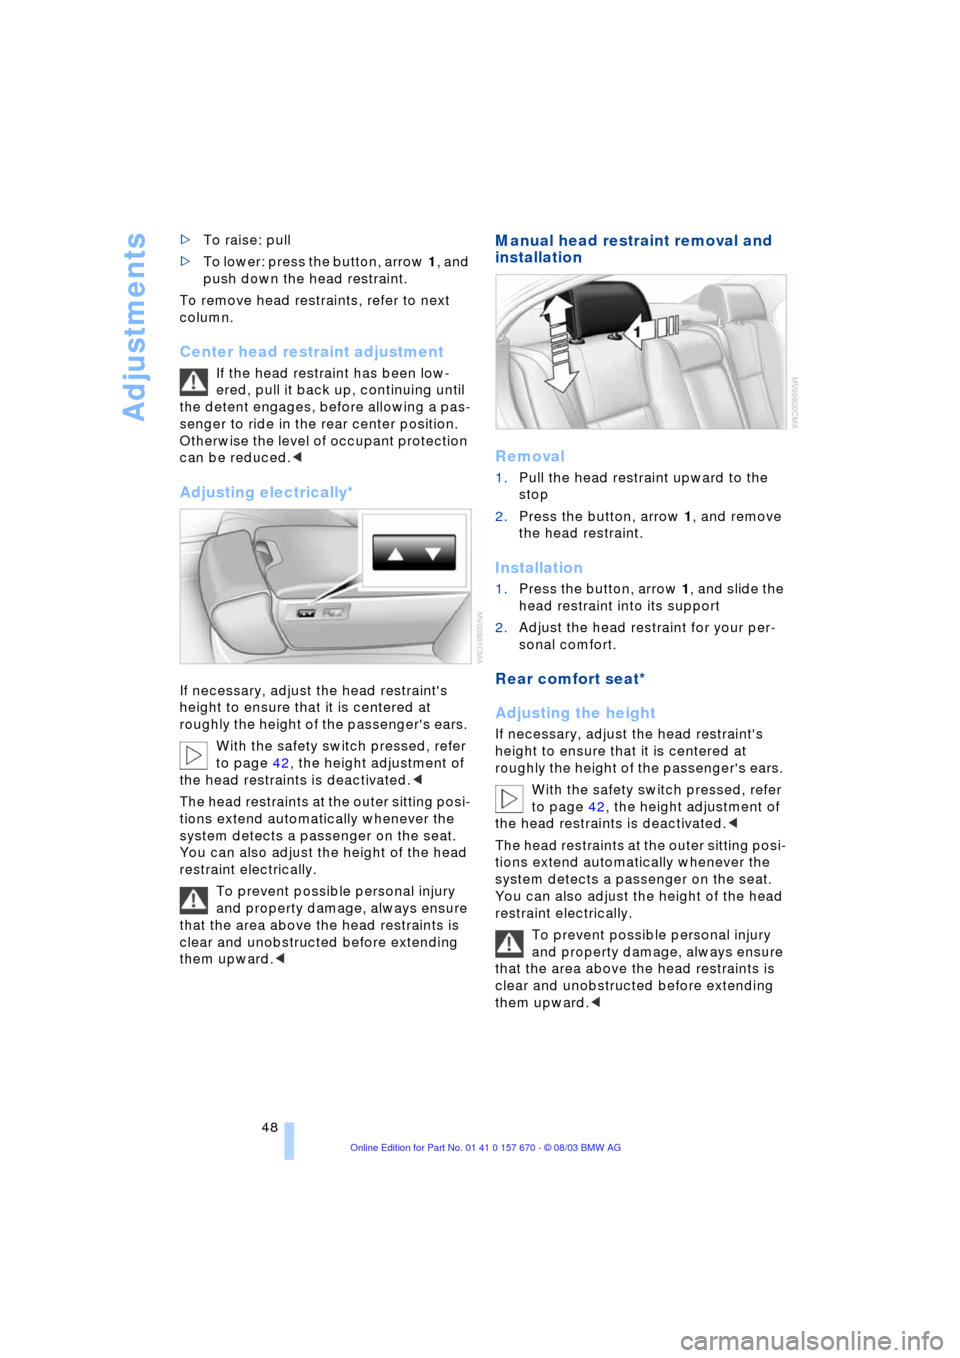
Manual head restraint removal and
installation
Removal
1.Pull the head restraint upward to the
stop
2.Press the button, arrow 1, and remove
the head restraint.
Installation
1.Press the button, arrow 1, and slide the
head restraint into its support
2.Adjust the head restraint for your per-
sonal comfort.
Rear comfort seat*
Adjusting the height
If necessary, adjust the head restraint's
height to ensure that it is centered at
roughly the height of the passenger's ears.
With the safety switch pressed, refer
to page 42, the height adjustment of
the head restraints is deactivated.<
The head restraints at the outer sitting posi-
tions extend automatically whenever the
system detects a passenger on the seat.
You can also adjust the height of the head
restraint electrically.
To prevent possible personal injury
and property damage, always ensure
that the area above the head restraints is
clear and unobstructed before extending
them upward.<