clock reset BMW 760Li 2004 E66 Owner's Manual
[x] Cancel search | Manufacturer: BMW, Model Year: 2004, Model line: 760Li, Model: BMW 760Li 2004 E66Pages: 232, PDF Size: 5.27 MB
Page 14 of 232

Cockpit
12
Info Display
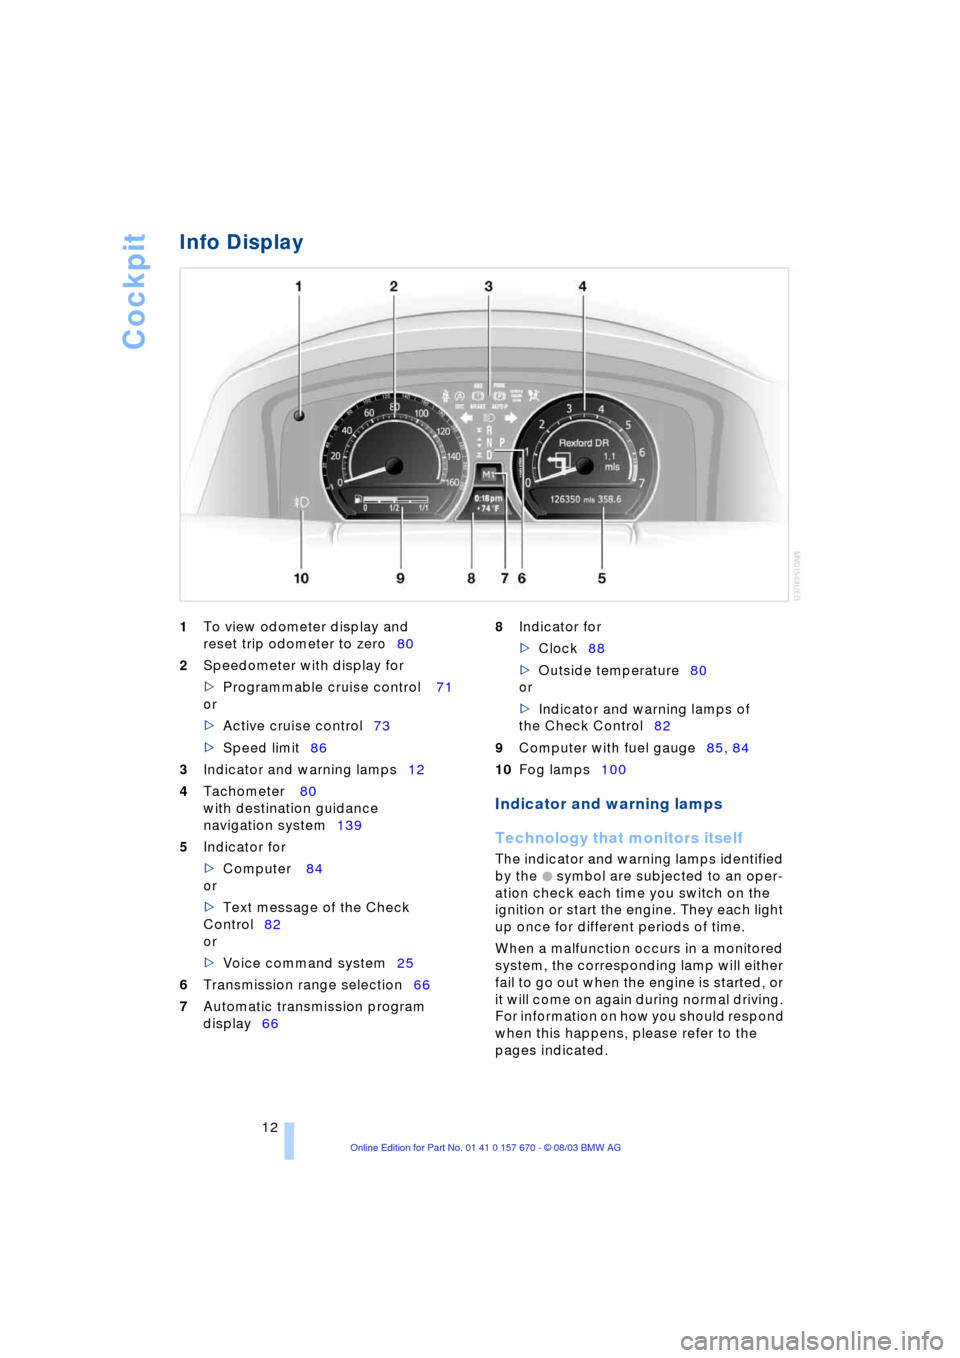
1
To view odometer display and
reset trip odometer to zero80
2
Speedometer with display for
>
Programmable cruise control 71
or
>
Active cruise control73
>
Speed limit86
3
Indicator and warning lamps12
4
Tachometer 80
with destination guidance
navigation system139
5
Indicator for
>
Computer 84
or
>Text message of the Check
Control82
or
>Voice command system25
6Transmission range selection66
7Automatic transmission program
display66 8Indicator for
>Clock88
>Outside temperature80
or
>Indicator and warning lamps of
the Check Control82
9Computer with fuel gauge85, 84
10Fog lamps100
Indicator and warning lamps
Technology that monitors itself
The indicator and warning lamps identified
by the
+ symbol are subjected to an oper-
ation check each time you switch on the
ignition or start the engine. They each light
up once for different periods of time.
When a malfunction occurs in a monitored
system, the corresponding lamp will either
fail to go out when the engine is started, or
it will come on again during normal driving.
For information on how you should respond
when this happens, please refer to the
pages indicated.
Page 82 of 232

Everything under control
80
Everything under control
Odometer, outside temperature display, clock
When the ignition is off you can briefly acti-
vate the time, outside temperature and
odometer displays by pressing the knob at
the upper left of the Info Display.
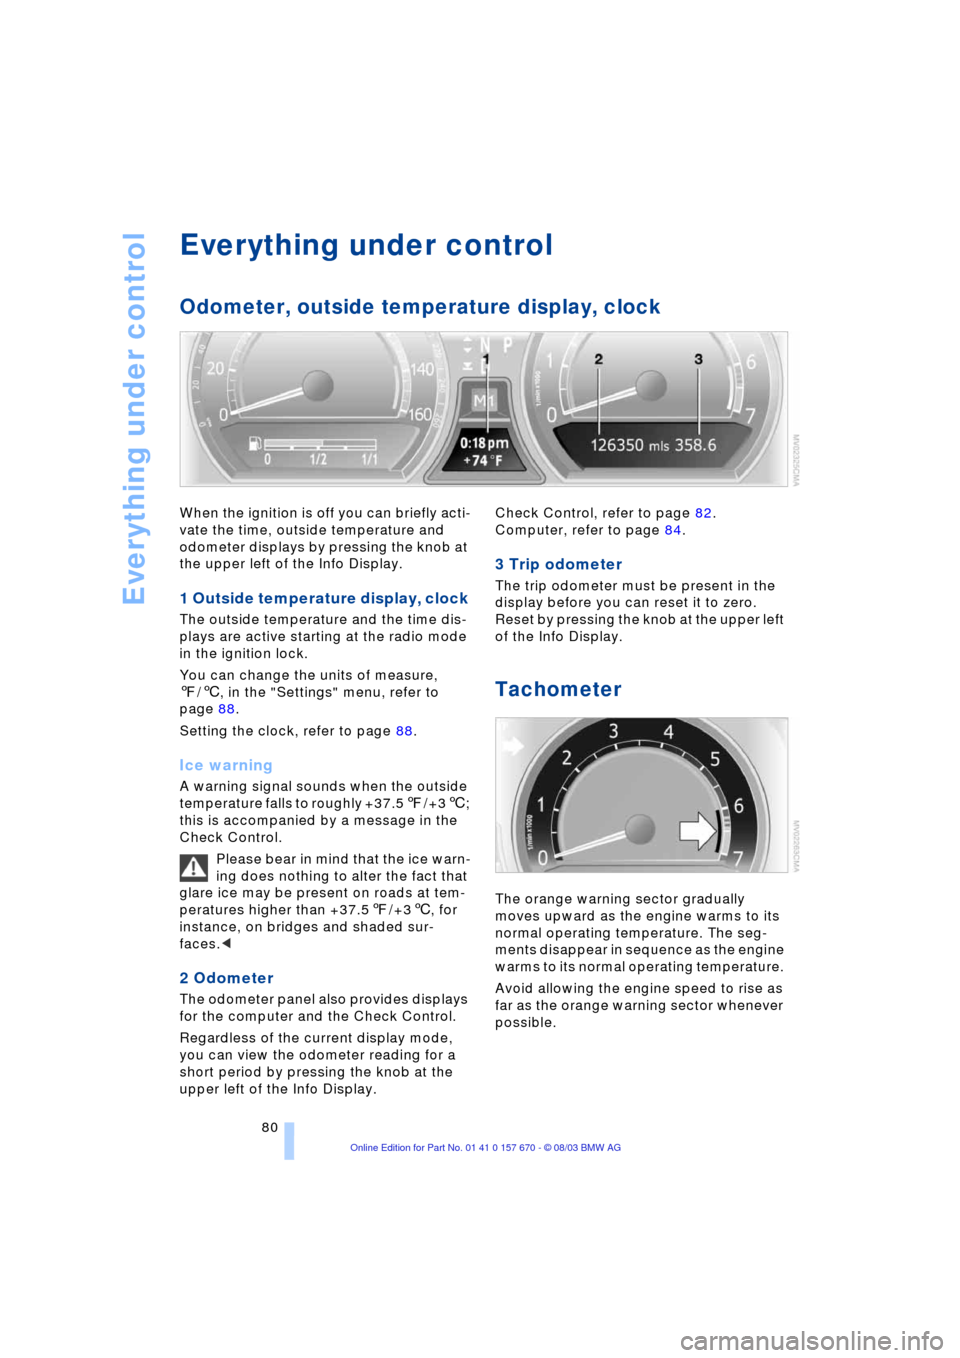
1 Outside temperature display, clock
The outside temperature and the time dis-
plays are active starting at the radio mode
in the ignition lock.
You can change the units of measure,
7/6, in the "Settings" menu, refer to
page 88.
Setting the clock, refer to page 88.
Ice warning
A warning signal sounds when the outside
temperature falls to roughly +37.57/+36;
this is accompanied by a message in the
Check Control.
Please bear in mind that the ice warn-
ing does nothing to alter the fact that
glare ice may be present on roads at tem-
peratures higher than +37.57/+36, for
instance, on bridges and shaded sur-
faces.<
2 Odometer
The odometer panel also provides displays
for the computer and the Check Control.
Regardless of the current display mode,
you can view the odometer reading for a
short period by pressing the knob at the
upper left of the Info Display. Check Control, refer to page 82.
Computer, refer to page 84.
3 Trip odometer
The trip odometer must be present in the
display before you can reset it to zero.
Reset by pressing the knob at the upper left
of the Info Display.
Tachometer
The orange warning sector gradually
moves upward as the engine warms to its
normal operating temperature. The seg-
ments disappear in sequence as the engine
warms to its normal operating temperature.
Avoid allowing the engine speed to rise as
far as the orange warning sector whenever
possible.
Page 90 of 232

Everything under control
88
Applying display
1.Select the desired function and confirm
Ð here computer "BC"
2.Select and confirm. The func-
tion appears in the assistance window.
The symbol is highlighted
if the function displayed in the
assistance window is selected on the
Control Display.<
You can also choose to view brief help
texts explaining selected menu items, refer
to page 22, or the travel route on vehicles
equipped with a GPS navigation system,
refer to page 131.
Changing settings
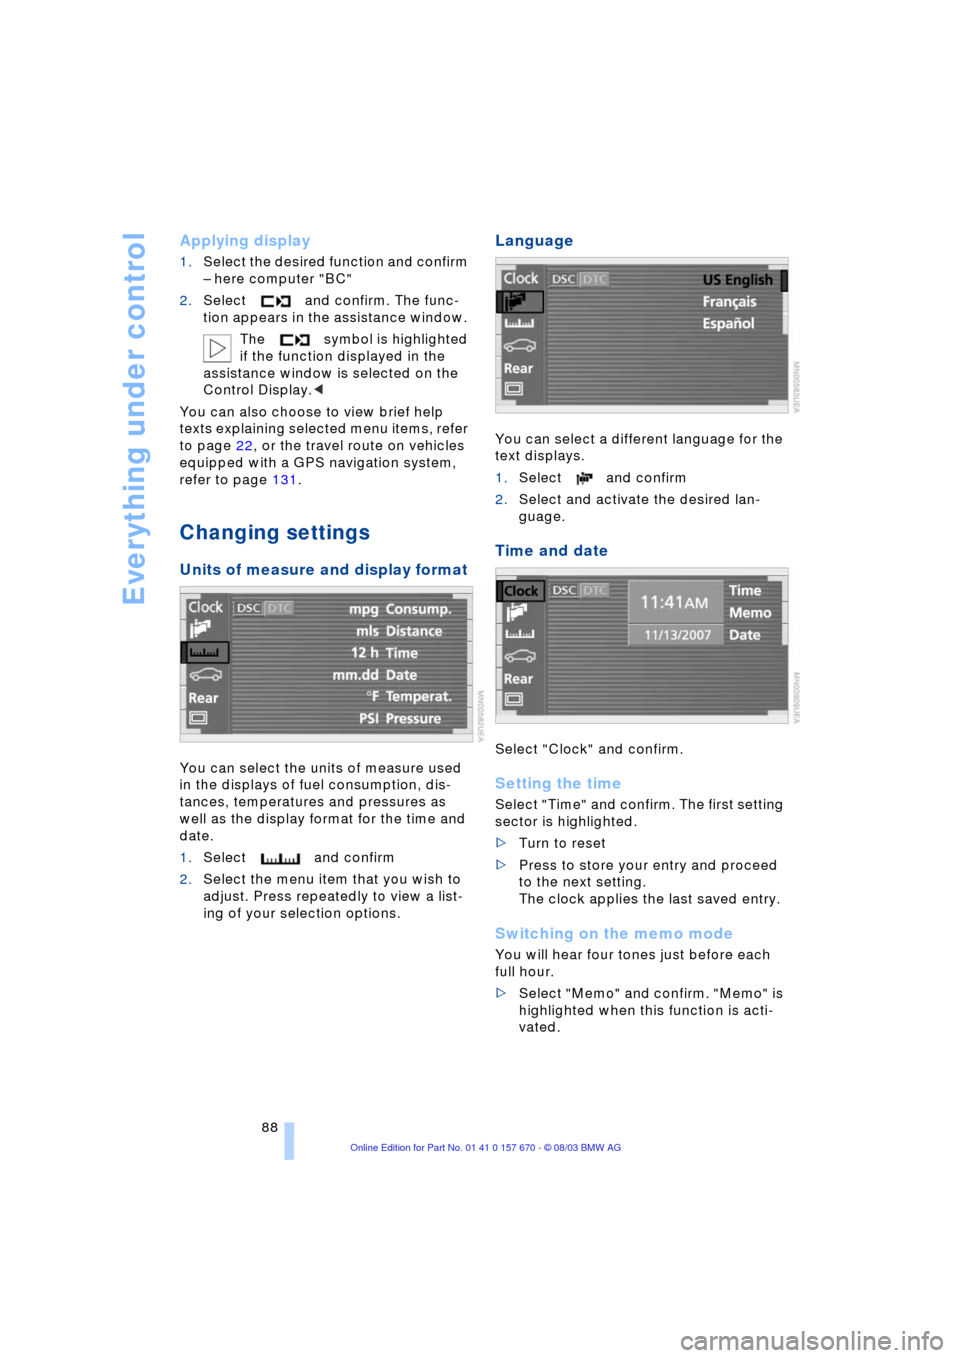
Units of measure and display format
You can select the units of measure used
in the displays of fuel consumption, dis-
tances, temperatures and pressures as
well as the display format for the time and
date.
1.Select and confirm
2.Select the menu item that you wish to
adjust. Press repeatedly to view a list-
ing of your selection options.
Language
You can select a different language for the
text displays.
1.Select and confirm
2.Select and activate the desired lan-
guage.
Time and date
Select "Clock" and confirm.
Setting the time
Select "Time" and confirm. The first setting
sector is highlighted.
>Turn to reset
>Press to store your entry and proceed
to the next setting.
The clock applies the last saved entry.
Switching on the memo mode
You will hear four tones just before each
full hour.
>Select "Memo" and confirm. "Memo" is
highlighted when this function is acti-
vated.