Service BMW 760LI 2011 F02 Owner's Guide
[x] Cancel search | Manufacturer: BMW, Model Year: 2011, Model line: 760LI, Model: BMW 760LI 2011 F02Pages: 299, PDF Size: 8.49 MB
Page 148 of 299
Securing cargo
Always position and secure the cargo as
described
above; otherwise, it can endanger the
car's occupants if sudden braking or swerving
becomes necessary.
Heavy or hard objects should not be carried
loose inside the car; otherwise, they could be
thrown around as a result of hard braking, sud‐
den swerves, etc., and endanger the occu‐
pants.◀
Roof-mounted luggage rack
Note
Installation only possible in roof drip molding
with flaps*. Your service center will be glad to
advise you.
Roof racks are available as special accessories.
Attachment
Follow the installation instructions of the roof
rack.
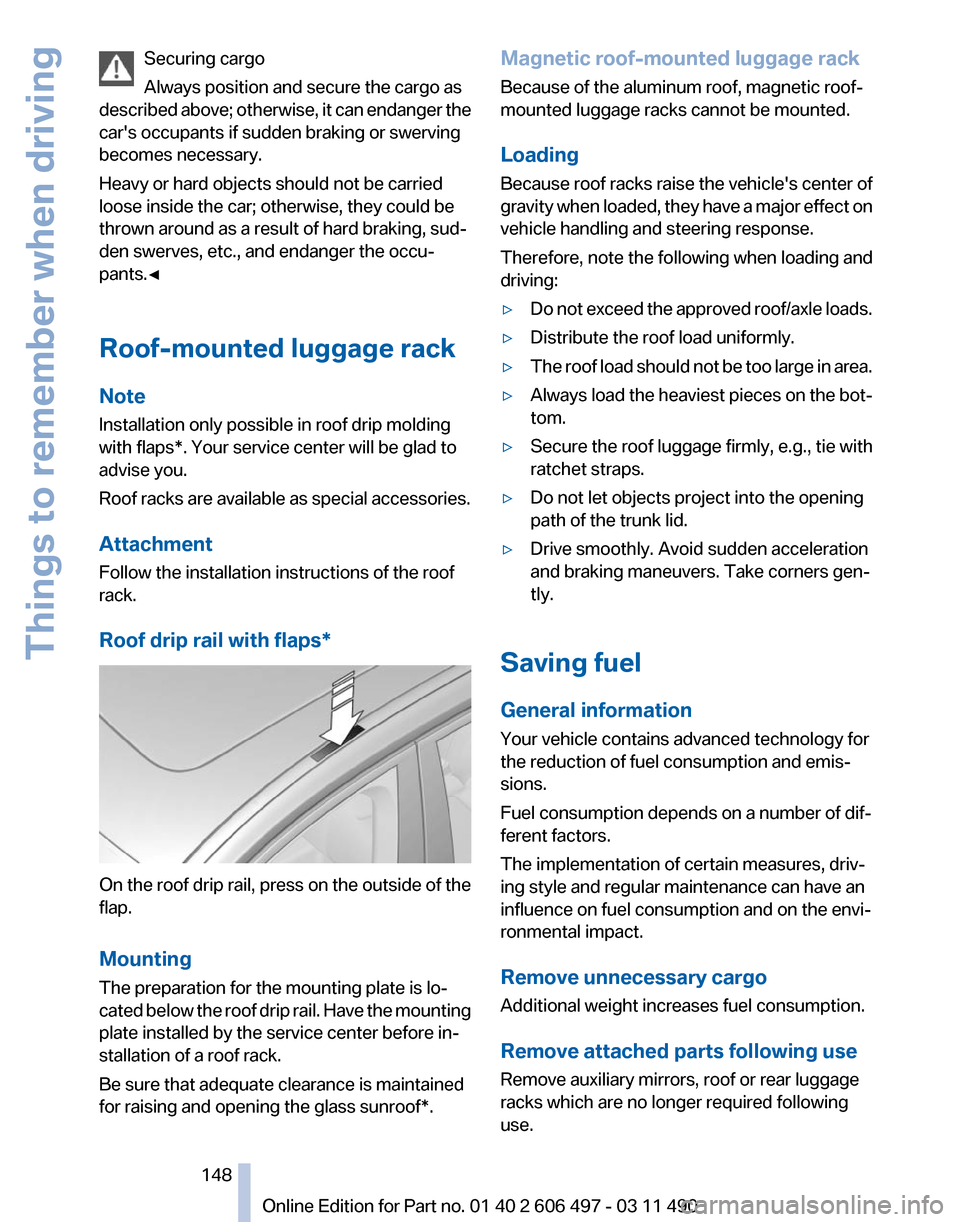
Roof drip rail with flaps* On the roof drip rail, press on the outside of the
flap.
Mounting
The preparation for the mounting plate is lo‐
cated
below the roof drip rail. Have the mounting
plate installed by the service center before in‐
stallation of a roof rack.
Be sure that adequate clearance is maintained
for raising and opening the glass sunroof*. Magnetic roof-mounted luggage rack
Because of the aluminum roof, magnetic roof-
mounted luggage racks cannot be mounted.
Loading
Because roof racks raise the vehicle's center of
gravity
when loaded, they have a major effect on
vehicle handling and steering response.
Therefore, note the following when loading and
driving:
▷ Do not exceed the approved roof/axle loads.
▷ Distribute the roof load uniformly.
▷ The roof load should not be too large in area.
▷ Always load the heaviest pieces on the bot‐
tom.
▷ Secure the roof luggage firmly, e.g., tie with
ratchet straps.
▷ Do not let objects project into the opening
path of the trunk lid.
▷ Drive smoothly. Avoid sudden acceleration
and braking maneuvers. Take corners gen‐
tly.
Saving fuel
General information
Your vehicle contains advanced technology for
the reduction of fuel consumption and emis‐
sions.
Fuel consumption depends on a number of dif‐
ferent factors.
The implementation of certain measures, driv‐
ing style and regular maintenance can have an
influence on fuel consumption and on the envi‐
ronmental impact.
Remove unnecessary cargo
Additional weight increases fuel consumption.
Remove attached parts following use
Remove auxiliary mirrors, roof or rear luggage
racks which are no longer required following
use.
Seite 148
148 Online Edition for Part no. 01 40 2 606 497 - 03 11 490
Things to remember when driving
Page 156 of 299
"Start search": if a search term is not entered,
the
search is repeated with the previous search
term.
Category search
1. "Category search"
2. "Town/City"
Select or enter the town/city.
3. "Category"
4. Select the category.
5. "Category details"
For
some special destinations, multiple cat‐
egory details can be selected. Move the
controller to the left to leave the category
details.
6. "Start search"
A
list of the special destinations is displayed.
7. Select a special destination.
Details are displayed.
If multiple details are stored, you can leaf
through the pages.
If
a phone number is available, a connection
can be established if necessary.
8. Select the symbol.
"Start guidance" or "Add as another
destination"
Add a destination as a further destination,
refer to page 158.
Display of special destinations
List
of special destinations: special destinations
are organized by distance and are displayed with
a directional arrow to the special destination.
on the split screen, special destinations of the
selected category are displayed in the map view
as symbols. The display depends on the scale
of the map and the category.
Destination entry via BMW Assist*
A connection is established to the Concierge
service, refer to page 235. 1.
"Navigation"
2. "Enter address"
3. Open "Options".
4. "BMW Assist dest. entry"
Displaying special destinations in the
map
To display symbols of the special destinations
in the map view:
1. "Navigation"
2. "Map"
3. Open "Options".
4. "Display Points of Interest"
5. Select the setting.
Destination entry by map
Selecting the destination
1. "Navigation"
2. "Map"
The current position of the vehicle is indi‐
cated on the map.
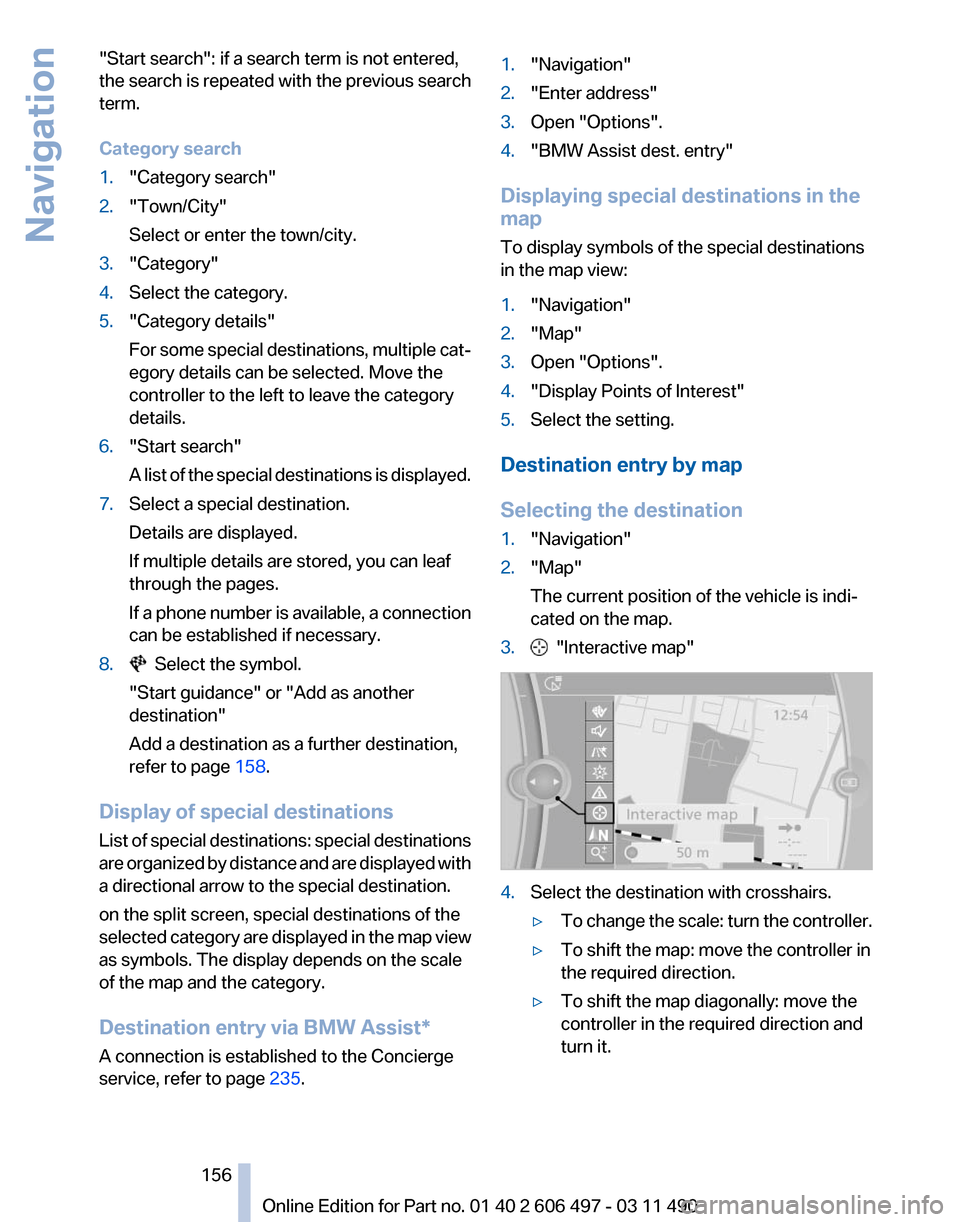
3. "Interactive map"
4.
Select the destination with crosshairs.
▷To change the scale: turn the controller.
▷ To shift the map: move the controller in
the required direction.
▷ To shift the map diagonally: move the
controller in the required direction and
turn it.
Seite 156
156 Online Edition for Part no. 01 40 2 606 497 - 03 11 490
Navigation
Page 163 of 299
Settings for the map view
The settings are stored for the remote control
currently in use.
1.
"Navigation"
2. "Map"
3. Open "Options".
4. "Settings"
Set the map view.
▷ "Day/night mode"
Select and create the necessary settings
depending on the light conditions.
"Traffic conditions/gray map" active: the
setting is disregarded.
▷ "Satellite images"
Depending on availability and resolution,
satellite images* are displayed in a scale of
approx. 1 mile to 600 miles/2 km to
1,000 km.
▷ "Perspective view in 3D"
Prominent areas that are contained in the
navigation data are displayed on the map in
3D.
▷ "Traffic conditions/gray map"
The map is optimized for displaying traffic
bulletins,
refer to page 163. Symbols for the
special destinations are no longer displayed.
Map view for split screen
The map view can be selected for the split
screen independently from the main screen.
1. Open "Options".
2. "Split screen"
3. Move the controller to the right repeatedly
until the split screen is selected.
4. Select "Split screen content" or the scale.
5. Select the map view.
▷"Arrow display"
▷ "Map facing north"
▷ "Map direction of travel"
▷ "Map view with perspective"
▷ "Position" ▷
"Exit ramp view": selected blind drive‐
ways
are displayed three dimensionally.
Setting in some cases will affect the dis‐
play in the Head-Up Display*.
▷ "Traffic conditions/gray map"
6. To change the scale: select the split screen
and turn the controller.
Traffic bulletins*
At a glance
▷ Display the traffic bulletins from radio sta‐
tions that broadcast the TI Traffic Informa‐
tion
of a traffic information service. Informa‐
tion on traffic obstructions and hazards is
updated continuously.
Certain BMW models equipped with navi‐
gation have the capability to display real-
time traffic information. If your system has
this capability the following additional terms
and conditions apply:
An End-User shall no longer have the right
to use the Traffic Data in the event that the
End-User is in material breach of the terms
and conditions contained herein.
A. Total Traffic Network, a division of Clear
Channel Broadcasting, Inc. (“Total Traffic
Network”) holds the rights to the traffic in‐
cident data and RDS-TMC network through
which it is delivered. You may not modify,
copy, scan or use any other method to re‐
produce, duplicate, republish, transmit or
distribute in any way any portion of traffic in‐
cident data. You agree to indemnify, defend
and hold harmless BMW of North America,
LLC. (“BMW NA”) and Total Traffic Net‐
work, Inrix, Inc (and their affiliates) against
any and all claims, damages, costs or other
expenses that arise directly or indirectly out
of (a) your unauthorized use of the traffic in‐
cident data or the RDS-TMC network, (b)
your violation of this directive and/or (c) any
unauthorized or unlawful activities by you in
connection herewith.
Seite 163
163Online Edition for Part no. 01 40 2 606 497 - 03 11 490
Reference Mobility Communication Entertainment
Navigation Driving tips Controls At a glance
Page 165 of 299
in the map using triangles or gray bars along the
calculated route.
▷
Red: congestion.
▷ Orange: stop-and-go traffic.
▷ Yellow: heavy traffic.
▷ Green: clear roads.
▷ Gray: general traffic bulletins, e.g., construc‐
tion site.
The displayed information depends on the par‐
ticular traffic information service.
Filtering traffic bulletins
You
can set which traffic bulletins appear on the
map.
1. "Navigation"
2. "Map"
3. Open "Options".
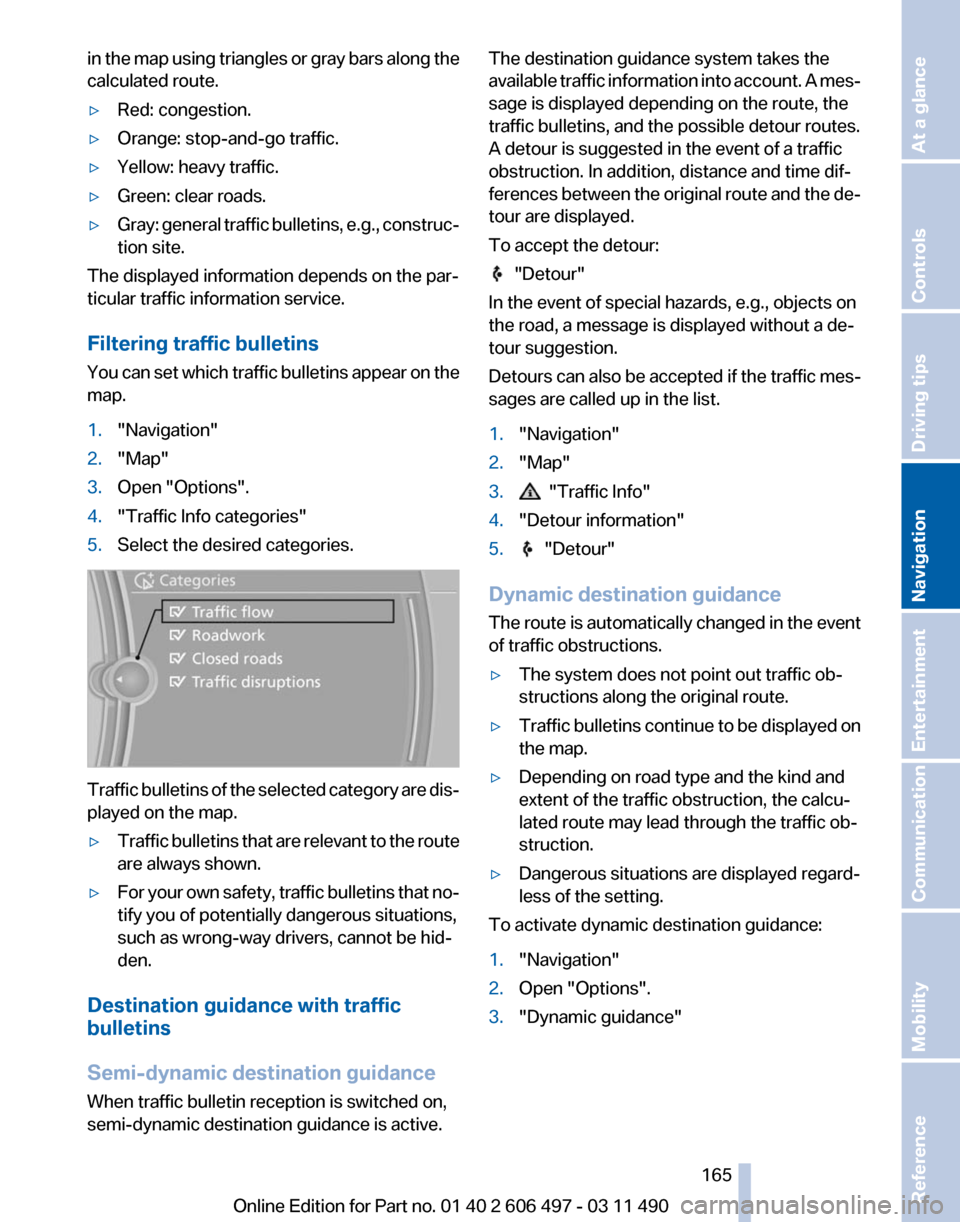
4. "Traffic Info categories"
5. Select the desired categories. Traffic bulletins of the selected category are dis‐
played on the map.
▷
Traffic bulletins that are relevant to the route
are always shown.
▷ For your own safety, traffic bulletins that no‐
tify you of potentially dangerous situations,
such as wrong-way drivers, cannot be hid‐
den.
Destination guidance with traffic
bulletins
Semi-dynamic destination guidance
When traffic bulletin reception is switched on,
semi-dynamic destination guidance is active. The destination guidance system takes the
available
traffic information into account. A mes‐
sage is displayed depending on the route, the
traffic bulletins, and the possible detour routes.
A detour is suggested in the event of a traffic
obstruction. In addition, distance and time dif‐
ferences between the original route and the de‐
tour are displayed.
To accept the detour: "Detour"
In the event of special hazards, e.g., objects on
the road, a message is displayed without a de‐
tour suggestion.
Detours
can also be accepted if the traffic mes‐
sages are called up in the list.
1. "Navigation"
2. "Map"
3. "Traffic Info"
4. "Detour information"
5. "Detour"
Dynamic destination guidance
The
route is automatically changed in the event
of traffic obstructions.
▷ The system does not point out traffic ob‐
structions along the original route.
▷ Traffic bulletins continue to be displayed on
the map.
▷ Depending on road type and the kind and
extent of the traffic obstruction, the calcu‐
lated route may lead through the traffic ob‐
struction.
▷ Dangerous situations are displayed regard‐
less of the setting.
To activate dynamic destination guidance:
1. "Navigation"
2. Open "Options".
3. "Dynamic guidance"
Seite 165
165Online Edition for Part no. 01 40 2 606 497 - 03 11 490
Reference Mobility Communication Entertainment
Navigation Driving tips Controls At a glance
Page 166 of 299
Navigation data
Information on the navigation data
1.
"Navigation"
2. Open "Options".
3. "Navigation system version": information on
the data version is displayed.
Updating the navigation data
General information
Navigation data and authorization codes are
available from your service center. Navigation
data are stored in the vehicle and can be up‐
dated.
▷ Depending on the data volume, a data up‐
date may take several hours.
▷ Update during the trip to preserve battery.
▷ During the update, only the basic functions
of the navigation system are available.
▷ The status of the update can be viewed.
▷ The system restarts after the update.
▷ The data carrier with the navigation data can
be removed after the update is complete.
Perform an update
1. Insert the navigation DVD into the DVD
player with the labeled side facing up.
2. Follow the instructions on the Control Dis‐
play.
3. Enter the authorization code of the naviga‐
tion DVD and change the DVD if needed.
After interrupting your trip, follow the instruc‐
tions on the Control Display.
Viewing the status
1. Press the button.
2. "Navigation update" What to do if...
▷
The current transmission position cannot be
displayed?
The vehicle is located in an unrecognized
region, is in a poor reception area, or the
system is currently determining the posi‐
tion. Reception is usually best when you
have an unobstructed view of the sky.
▷ The destination without street information is
not used for route guidance?
When
city has been input, no downtown can
be determined.
Input any street in the selected city and start
destination guidance.
▷ The destination is not used for route guid‐
ance?
The destination data is not contained in the
navigation data. Select a destination that is
as close as possible to the original.
▷ Letters for destination input cannot be se‐
lected?
The stored data do not contain the data of
the destination.
Select a goal that is as close as possible to
the original.
▷ Is the map displayed in shades of gray?
"Traffic conditions/gray map" Active: indi‐
cation on the control display is switched to
shades
of gray. This enables a better view of
the traffic bulletins.
▷ Spoken instructions are no longer output
during route guidance in front of intersec‐
tions?
The
area has not yet been fully recorded, or
you have left the recommended route and
the system requires a few seconds to cal‐
culate a new route suggestion.
Seite 166
166 Online Edition for Part no. 01 40 2 606 497 - 03 11 490
Navigation
Page 174 of 299
Weather Band*
General information
The availability of the Weather Band and the
number of available channels can vary depend‐
ing on the region.
Switching on the Weather Band
1.
"Radio"
2. "Weather band"
3. Select the desired channel.
Additional information
Weather Band is a service of the National Oce‐
anic and Atmospheric Administration (NOAA).
Additional information on the Internet:
www.nws.noaa.gov.
Satellite radio
*
General information
The channels are offered in predefined pack‐
ages. The packages must be enabled by tele‐
phone.
Navigation bar overview Symbol Function
Change the list view.
Select the category.
Direct channel entry
Timeshift
Open the My Favorites category/
open a favorite. Manage the favorites.
Traffic Jump
The functions of the navigation bar symbols can
also be stored on the programmable memory
buttons, refer to page
23. Managing a subscription
To be able to enable or unsubscribe from the
channels, you must have reception. It is usually
at
its best when you have an unobstructed view
of the sky. The channel name is displayed in the
status line.
Enabling channels
The Unsubscribed Channels category contains
all disabled channels.
1. "Radio"
2. "Satellite radio"
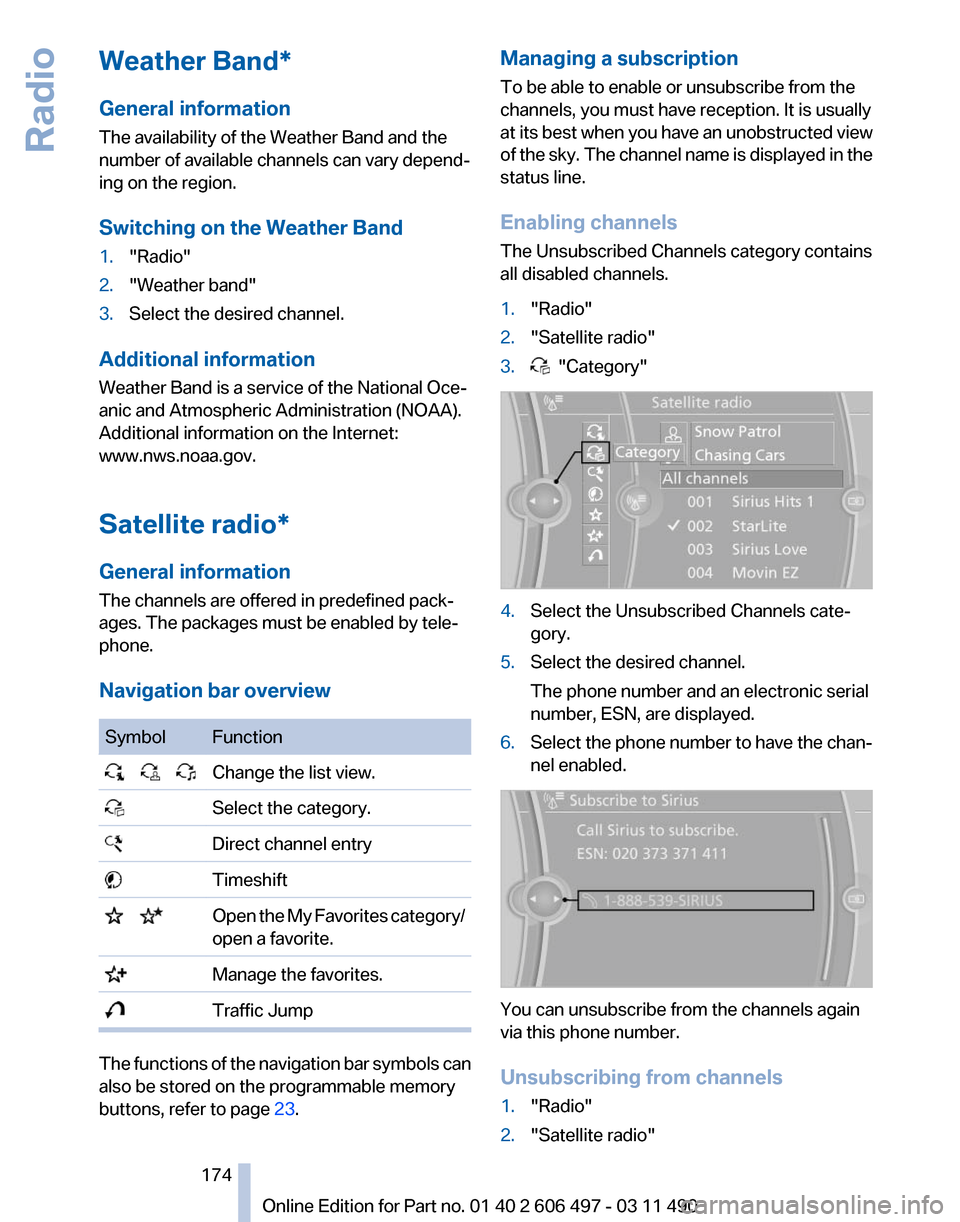
3. "Category"
4.
Select the Unsubscribed Channels cate‐
gory.
5. Select the desired channel.
The phone number and an electronic serial
number, ESN, are displayed.
6. Select the phone number to have the chan‐
nel enabled. You can unsubscribe from the channels again
via this phone number.
Unsubscribing from channels
1.
"Radio"
2. "Satellite radio"
Seite 174
174 Online Edition for Part no. 01 40 2 606 497 - 03 11 490
Radio
Page 186 of 299
DTS Digital Surround™
Manufactured under license under U.S.
Patent Numbers: 5,451,942;
5,956,674; 5,974,380; 5,978,762; 6,487,535 &
and other patents granted and registered in the
USA and worldwide. DTS and the logo are reg‐
istered trademarks & DTS Digital Surround and
the DTS logos are trademarks of DTS Inc. ©
DTS, Inc. All rights reserved.
Music collection*
Storing music
General information
Music tracks from CDs/DVDs and USB devices
can be stored in the music collection on a hard
disc in the vehicle and played from there.
▷ Audio CD: tracks are converted into a com‐
pressed audio format. If available, informa‐
tion on the album, such as the artist, is
stored as well.
▷ CD/DVD or USB device with compressed
audio
files: the entire content of the CD/DVD
or the USB device is stored in the vehicle as
an album. The WMA, MP3, M4A*, and
AAC* formats are stored. Individual tracks
and directories can be deleted later, Delet‐
ing a track and directory, refer to page 189.
Tracks with DRM copy protection can be
stored but cannot be played back.
Backing up music data
Regularly back up the music data; other‐
wise,
it could be lost if there is a fault on the hard
disk.◀
Music recognition technology and re‐
lated data are provided by Gracenote®.
Gracenote is the industry standard in music rec‐
ognition technology and related content deliv‐
ery. For more information, please visit
www.gracenote.com.
CD and music-related data from Gracenote, Inc.,
copyright © 2000-2009 Gracenote. Gracenote
Software, copyright © 2000-2009 Gracenote. This product and service may practice one or
more
of the following U.S. Patents: #5,987,525;
#6,061,680; #6,154,773, #6,161,132,
#6,230,192, #6,230,207, #6,240,459,
#6,330,593, and other patents issued or pend‐
ing. Some services supplied under license from
Open Globe, Inc. for U.S. Patent: #6,304,523.
Storing from a CD/DVD
1. Insert a CD or DVD into the CD/DVD player.
2. "CD/Multimedia"
3. "CD/DVD"
4. Select the symbol for the CD/DVD player.
5. "Store in vehicle" The music collection is displayed and the first
track of the CD/DVD is played back. During the
storage process, the tracks are played in se‐
quence.
Observe the following during the storage proc‐
ess:
Do not switch to the CD/DVD player and do not
remove
the CD/DVD from the CD/DVD player as
this will interrupt the storage process. You can
switch to the other audio sources without inter‐
rupting the storage process. Tracks from the
current CD/DVD that have already been stored
can be called up.
Interrupting storage
1. "CD/Multimedia"
2. "CD/DVD"
Seite 186
186 Online Edition for Part no. 01 40 2 606 497 - 03 11 490
CD/multimedia
Page 187 of 299
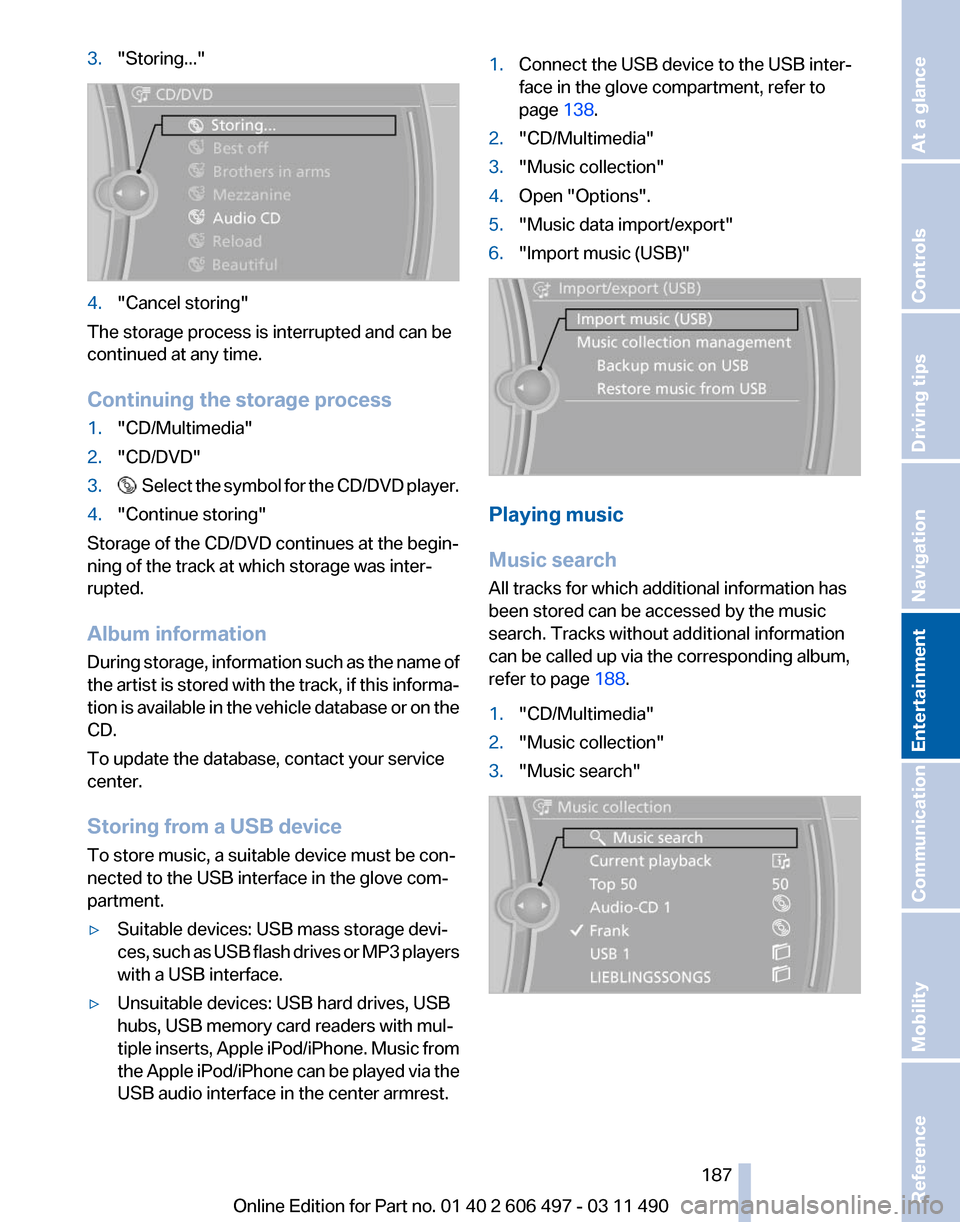
3.
"Storing..." 4.
"Cancel storing"
The storage process is interrupted and can be
continued at any time.
Continuing the storage process
1. "CD/Multimedia"
2. "CD/DVD"
3. Select the symbol for the CD/DVD player.
4. "Continue storing"
Storage of the CD/DVD continues at the begin‐
ning of the track at which storage was inter‐
rupted.
Album information
During
storage, information such as the name of
the artist is stored with the track, if this informa‐
tion is available in the vehicle database or on the
CD.
To update the database, contact your service
center.
Storing from a USB device
To store music, a suitable device must be con‐
nected to the USB interface in the glove com‐
partment.
▷ Suitable devices: USB mass storage devi‐
ces,
such as USB flash drives or MP3 players
with a USB interface.
▷ Unsuitable devices: USB hard drives, USB
hubs, USB memory card readers with mul‐
tiple
inserts, Apple iPod/iPhone. Music from
the Apple iPod/iPhone can be played via the
USB audio interface in the center armrest. 1.
Connect the USB device to the USB inter‐
face in the glove compartment, refer to
page 138.
2. "CD/Multimedia"
3. "Music collection"
4. Open "Options".
5. "Music data import/export"
6. "Import music (USB)" Playing music
Music search
All tracks for which additional information has
been stored can be accessed by the music
search. Tracks without additional information
can be called up via the corresponding album,
refer to page
188.
1. "CD/Multimedia"
2. "Music collection"
3. "Music search" Seite 187
187Online Edition for Part no. 01 40 2 606 497 - 03 11 490
Reference Mobility Communication
Entertainment Navigation Driving tips Controls At a glance
Page 191 of 299
Connecting
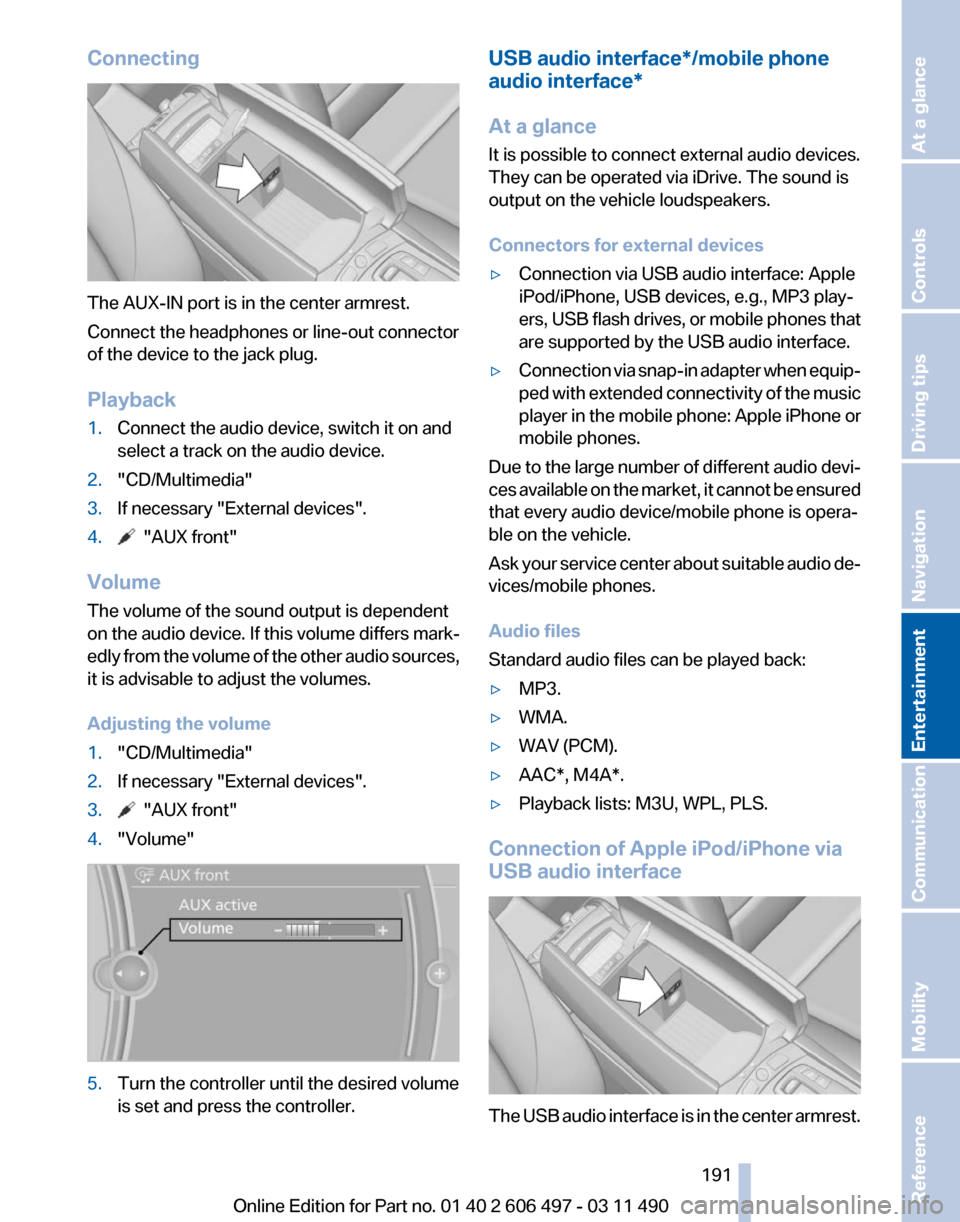
The AUX-IN port is in the center armrest.
Connect the headphones or line-out connector
of the device to the jack plug.
Playback
1.
Connect the audio device, switch it on and
select a track on the audio device.
2. "CD/Multimedia"
3. If necessary "External devices".
4. "AUX front"
Volume
The volume of the sound output is dependent
on the audio device. If this volume differs mark‐
edly
from the volume of the other audio sources,
it is advisable to adjust the volumes.
Adjusting the volume
1. "CD/Multimedia"
2. If necessary "External devices".
3. "AUX front"
4. "Volume" 5.
Turn the controller until the desired volume
is set and press the controller. USB audio interface*/mobile phone
audio interface
*
At a glance
It is possible to connect external audio devices.
They can be operated via iDrive. The sound is
output on the vehicle loudspeakers.
Connectors for external devices
▷ Connection via USB audio interface: Apple
iPod/iPhone, USB devices, e.g., MP3 play‐
ers,
USB flash drives, or mobile phones that
are supported by the USB audio interface.
▷ Connection via snap-in adapter when equip‐
ped
with extended connectivity of the music
player in the mobile phone: Apple iPhone or
mobile phones.
Due to the large number of different audio devi‐
ces
available on the market, it cannot be ensured
that every audio device/mobile phone is opera‐
ble on the vehicle.
Ask your service center about suitable audio de‐
vices/mobile phones.
Audio files
Standard audio files can be played back:
▷ MP3.
▷ WMA.
▷ WAV (PCM).
▷ AAC*, M4A*.
▷ Playback lists: M3U, WPL, PLS.
Connection of Apple iPod/iPhone via
USB audio interface The USB audio interface is in the center armrest.
Seite 191
191Online Edition for Part no. 01 40 2 606 497 - 03 11 490
Reference Mobility Communication
Entertainment Navigation Driving tips Controls At a glance
Page 197 of 299
▷
Adjust the volume settings on the device.
Playback is disturbed when buttons are pressed
or by other messages on the device.
▷ Switch off the button tones and other signal
tones on the device.
Playback is interrupted by a telephone call or
traffic bulletin and is not resumed automatically.
▷ Switch the radio off and on again.
Playback is not possible if the mobile phone is
connected
both via Bluetooth Audio and via the
extended connectivity of the music player in the
mobile phone*.
▷ Disconnect one of the two connections; for
example, disconnect the audio connection,
refer to page 196, and restart playback.
If all points in this list have been checked and the
required function is still not available, please
contact the hotline or service center.
Software Update*
The vehicle supports various external devices
depending
on the current software version. With
a software update, the vehicle can support new
cell phones* or new external devices*.
The updating of the software is done via:
▷ USB*.
Updates and related current information is
available at www.bmw.com/update.
▷ TeleService*.
Existing
software can be updated directly via
the vehicle.
Displaying the current version
The currently installed software is displayed.
1. "Settings"
2. "Software update"
3. "Show current version"
SelectDesired version* to displayAdditional in‐
formation*.
Updating software via USB
*
The software may only be updated when the ve‐
hicle is stationary. 1.
Store the file for the software-update in the
main director of a USB flash drive.
2. Insert the USB flash drive into the USB in‐
terface of the USB audio interface in the
center armrest. An update via the USB in‐
terface
in the glove compartment is not pos‐
sible.
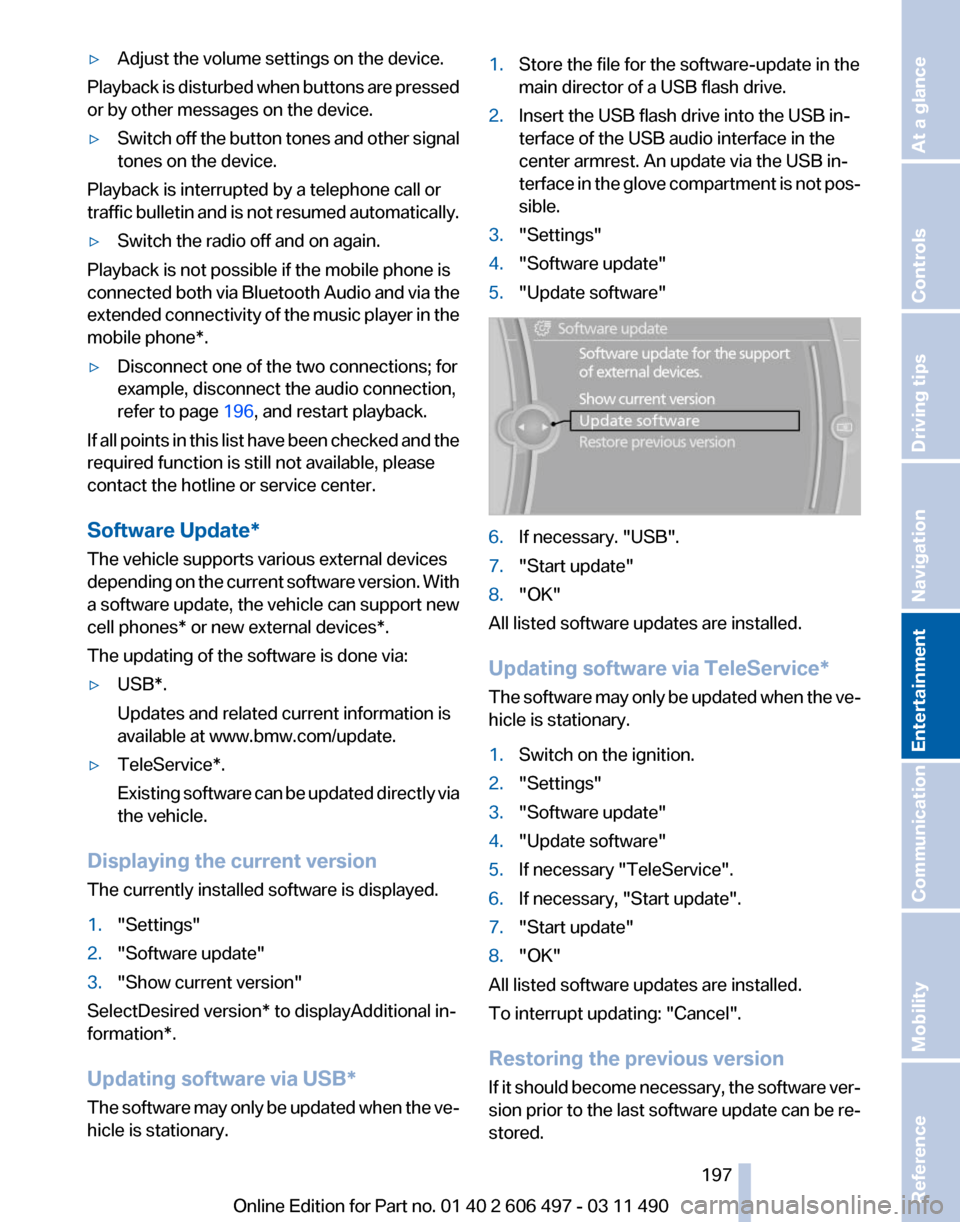
3. "Settings"
4. "Software update"
5. "Update software" 6.
If necessary. "USB".
7. "Start update"
8. "OK"
All listed software updates are installed.
Updating software via
TeleService*
The software may only be updated when the ve‐
hicle is stationary.
1. Switch on the ignition.
2. "Settings"
3. "Software update"
4. "Update software"
5. If necessary "TeleService".
6. If necessary, "Start update".
7. "Start update"
8. "OK"
All listed software updates are installed.
To interrupt updating:
"Cancel".
Restoring the previous version
If it should become necessary, the software ver‐
sion prior to the last software update can be re‐
stored.
Seite 197
197Online Edition for Part no. 01 40 2 606 497 - 03 11 490
Reference Mobility Communication
Entertainment Navigation Driving tips Controls At a glance