brake BMW 760LI SEDAN 2003 Owner's Manual
[x] Cancel search | Manufacturer: BMW, Model Year: 2003, Model line: 760LI SEDAN, Model: BMW 760LI SEDAN 2003Pages: 229, PDF Size: 4.35 MB
Page 86 of 229
Everything under control
84 Confirm to exit the display.
The Service Interval Display does not
continue counting down to the next
service during periods when the vehicle is
stored with the battery disconnected or the
battery switch OFF.
Please remember that brake fluid should
be changed every two years at the latest,
even if the display does not yet indicate
that service is required, refer to page 192.
This same precaution applies to all of the
other service and maintenance operations
scheduled according to periodic intervals,
as opposed to mileage.<
Displaying and entering dates for
legally prescribed emission and
vehicle inspections
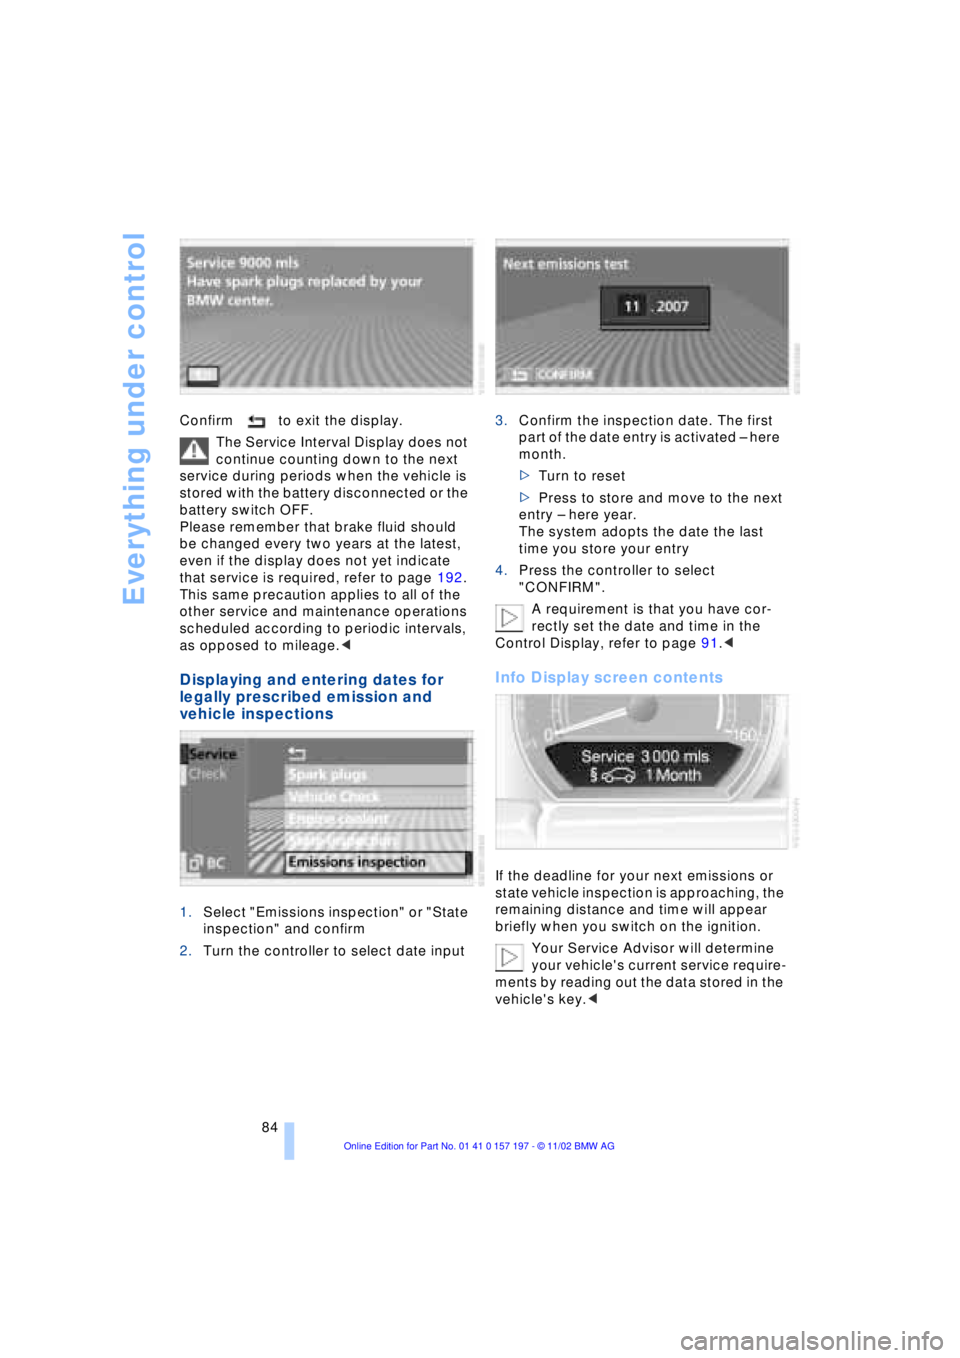
1.Select "Emissions inspection" or "State
inspection" and confirm
2.Turn the controller to select date input3.Confirm the inspection date. The first
part of the date entry is activated Ð here
month.
>Turn to reset
>Press to store and move to the next
entry Ð here year.
The system adopts the date the last
time you store your entry
4.Press the controller to select
"CONFIRM".
A requirement is that you have cor-
rectly set the date and time in the
Control Display, refer to page 91.<
Info Display screen contents
If the deadline for your next emissions or
state vehicle inspection is approaching, the
remaining distance and time will appear
briefly when you switch on the ignition.
Your Service Advisor will determine
your vehicle's current service require-
ments by reading out the data stored in the
vehicle's key.<
Page 96 of 229
Technology for comfort, convenience and safety
94
PDC with visual warning
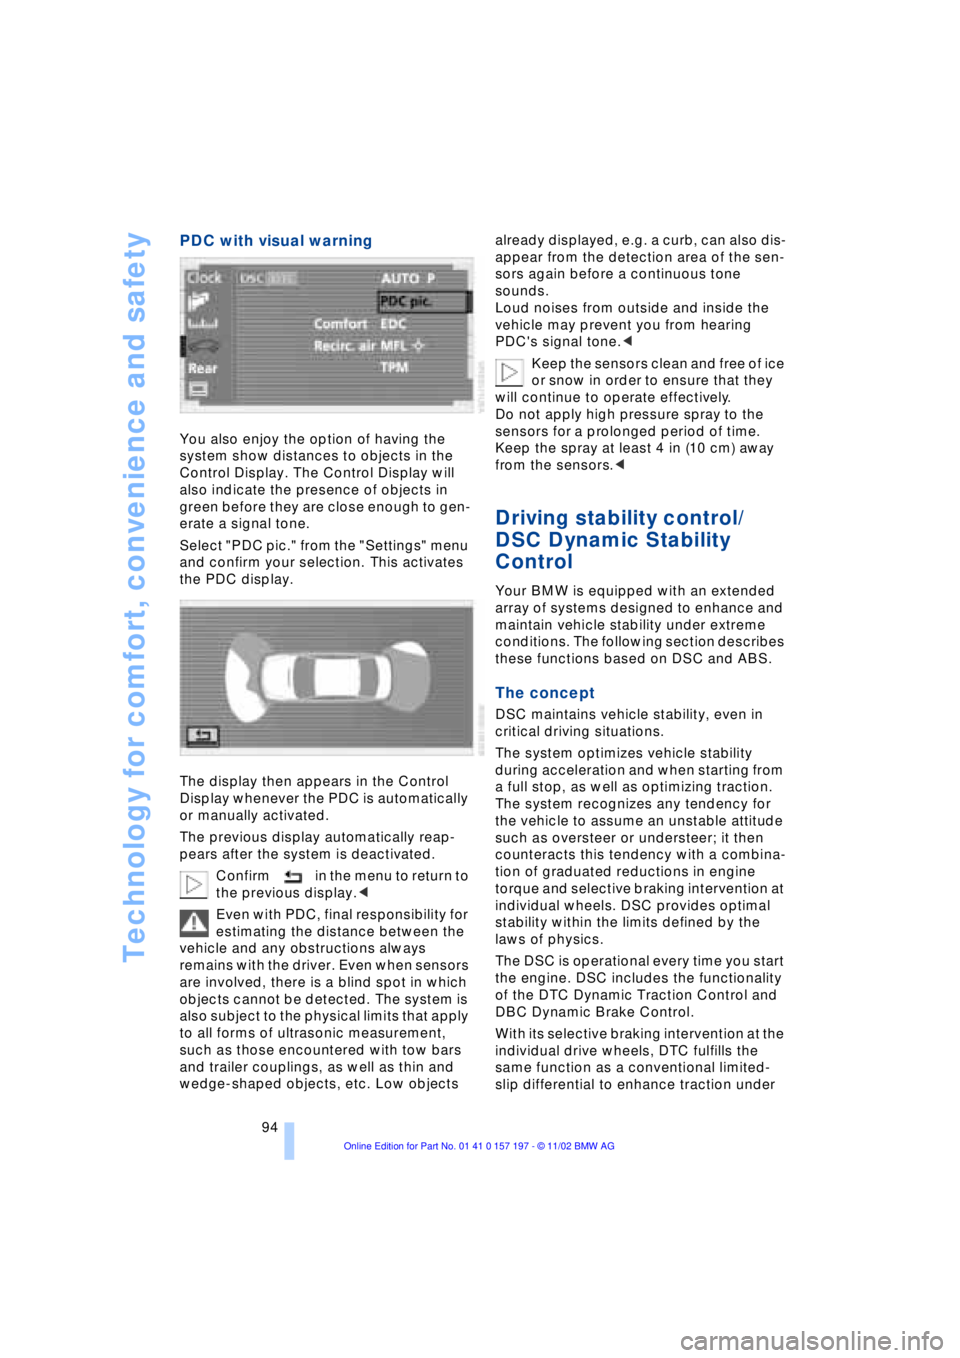
You also enjoy the option of having the
system show distances to objects in the
Control Display. The Control Display will
also indicate the presence of objects in
green before they are close enough to gen-
erate a signal tone.
Select "PDC pic." from the "Settings" menu
and confirm your selection. This activates
the PDC display.
The display then appears in the Control
Display whenever the PDC is automatically
or manually activated.
The previous display automatically reap-
pears after the system is deactivated.
Confirm in the menu to return to
the previous display.<
Even with PDC, final responsibility for
estimating the distance between the
vehicle and any obstructions always
remains with the driver. Even when sensors
are involved, there is a blind spot in which
objects cannot be detected. The system is
also subject to the physical limits that apply
to all forms of ultrasonic measurement,
such as those encountered with tow bars
and trailer couplings, as well as thin and
wedge-shaped objects, etc. Low objects already displayed, e.g. a curb, can also dis-
appear from the detection area of the sen-
sors again before a continuous tone
sounds.
Loud noises from outside and inside the
vehicle may prevent you from hearing
PDC's signal tone.<
Keep the sensors clean and free of ice
or snow in order to ensure that they
will continue to operate effectively.
Do not apply high pressure spray to the
sensors for a prolonged period of time.
Keep the spray at least 4 in (10 cm) away
from the sensors.<
Driving stability control/
DSC Dynamic Stability
Control
Your BMW is equipped with an extended
array of systems designed to enhance and
maintain vehicle stability under extreme
conditions. The following section describes
these functions based on DSC and ABS.
The concept
DSC maintains vehicle stability, even in
critical driving situations.
The system optimizes vehicle stability
during acceleration and when starting from
a full stop, as well as optimizing traction.
The system recognizes any tendency for
the vehicle to assume an unstable attitude
such as oversteer or understeer; it then
counteracts this tendency with a combina-
tion of graduated reductions in engine
torque and selective braking intervention at
individual wheels. DSC provides optimal
stability within the limits defined by the
laws of physics.
The DSC is operational every time you start
the engine. DSC includes the functionality
of the DTC Dynamic Traction Control and
DBC Dynamic Brake Control.
With its selective braking intervention at the
individual drive wheels, DTC fulfills the
same function as a conventional limited-
slip differential to enhance traction under
Page 97 of 229
At a glance
Controls
Driving tips
Communications
Navigation
Entertainment
Mobility
Reference
95
difficult driving conditions, such as on
snow, etc.
Indicator lamps
The indicator lamp in the Info Dis-
play goes out soon after you start
the engine.
If the indicator lamp flashes:
DSC controls the drive and braking forces.
The indicator lamp stays lit:
DSC has been switched off via the Control
Display.
The indicator lamp and the brake
warning lamp remain on continu-
ously:
DSC, DTC and DBC have been
deactivated or a system malfunc-
tion is present.
When the system is off, the stability main-
tenance functions described above are no
longer available. The vehicle will remain
completely operational, however, without
DSC.
Please respond to any malfunctions by
referring the problem to your BMW center.
Indicator and warning lamps on
Canadian models.
Activating DTC Dynamic Traction
Control
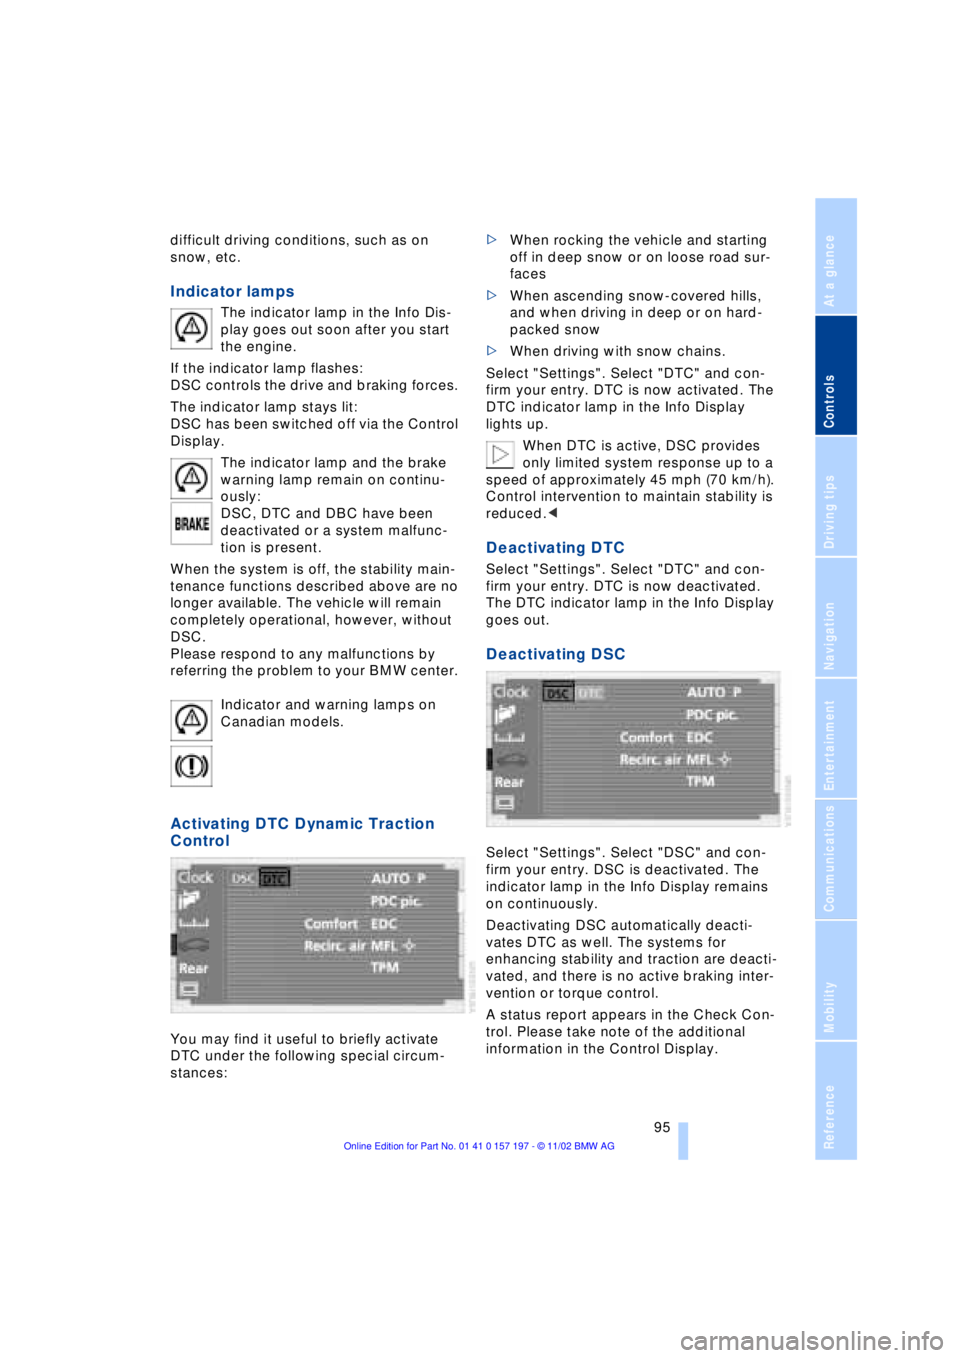
You may find it useful to briefly activate
DTC under the following special circum-
stances: >When rocking the vehicle and starting
off in deep snow or on loose road sur-
faces
>When ascending snow-covered hills,
and when driving in deep or on hard-
packed snow
>When driving with snow chains.
Select "Settings". Select "DTC" and con-
firm your entry. DTC is now activated. The
DTC indicator lamp in the Info Display
lights up.
When DTC is active, DSC provides
only limited system response up to a
speed of approximately 45 mph (70 km/h).
Control intervention to maintain stability is
reduced.<
Deactivating DTC
Select "Settings". Select "DTC" and con-
firm your entry. DTC is now deactivated.
The DTC indicator lamp in the Info Display
goes out.
Deactivating DSC
Select "Settings". Select "DSC" and con-
firm your entry. DSC is deactivated. The
indicator lamp in the Info Display remains
on continuously.
Deactivating DSC automatically deacti-
vates DTC as well. The systems for
enhancing stability and traction are deacti-
vated, and there is no active braking inter-
vention or torque control.
A status report appears in the Check Con-
trol. Please take note of the additional
information in the Control Display.
Page 98 of 229
Technology for comfort, convenience and safety
96 To maintain optimal stability, drive
with the system on whenever pos-
sible.<
Reactivating DSC
Select "Settings". Select "DSC" and con-
firm your entry. DSC is now activated. The
indicator lamp in the Info Display goes out.
The laws of physics cannot be
repealed, even with DSC. An approp-
riate driving style always remains the
responsibility of the driver. Avoid using the
additional safety margin provided by the
system as an excuse for taking unneces-
sary risks.
When DTC is active, DSC provides only
limited system response up to a speed of
approximately 45 mph (70 km/h). Interven-
tion for stability-enhancement is reduced.
Do not make any modifications to the DSC
system. Never allow anyone other than
authorized professional technicians to
carry out service or repairs on the DSC
system.<
DBC Dynamic Brake Control
When you apply the brakes rapidly, this
system automatically produces the max-
imum braking force boost and thus helps to
achieve the shortest possible braking dis-
tance during panic stops. This system
exploits all of the benefits provided by ABS.
Do not reduce the pressure on the brake
pedal for the duration of the brake applica-
tion. When the brake pedal is released, the
DBC is deactivated.
In the event of a malfunction, the
warning lamp comes on with a
yellow light. Have the system
checked and repaired at your BMW center
as soon as possible.
Check Control messages, refer to page 85.
Please note the supplementary information
provided in the Control Display.
Warning lamp on Canadian models.
Driving stability control/
ABS Antilock Braking
System
The concept
ABS enhances active safety by preventing
the wheels from locking under braking.
ABS incorporates CBC and EBV.
In case of malfunction
If the indicator lamp lights up in
yellow, this indicates that ABS has
been deactivated in response to a
system malfunction. Conventional braking
efficiency remains available without limita-
tions. Please have the system inspected at
your BMW center.
CBC Cornering Brake Control
CBC is a technical advance based on ABS.
It provides further enhancements in vehicle
stability and steering response during lane
changes and cornering at high rates of lat-
eral acceleration.
EBV Electronic brake-force
distribution
EBV controls the brake system's applica-
tion pressure at the rear wheels to ensure
stable deceleration.
In case of malfunction
If the brake system warning lamp
lights up in red, appearing together
with the yellow indicator lamps for
ABS and DSC: the stability control
is no longer operational.
If all three lamps light up in yellow:
malfunction in the stability control
systems.
While you may continue, you should
remember to proceed cautiously and drive
defensively while avoiding full brake appli-
cations.
Please have the system checked at the
nearest BMW center.
Page 103 of 229
At a glance
Controls
Driving tips
Communications
Navigation
Entertainment
Mobility
Reference
101
The symbol will appear in yellow in the
Check Control and a message will appear.
You will also see the same message
>in the event of a system fault
>if a wheel is mounted without the
appropriate TPM electronics
>if, in addition to the spare tire, addi-
tional wheels with TPM electronics are
on board.
Please refer to the additional information
supplied in the Control Display, and have
the system inspected at your BMW center.
Self-leveling suspension*
In the event of malfunction
A Check Control message
appearing together with this symbol
indicates a malfunction in the self-
leveling suspension. Please take note of
the additional information in the Control
Display.
Stop and inspect the vehicle. If the rear of
the vehicle is visibly lower than the front,
possibly accompanied by a tilt noticeable
when you compare the left rear with the
right rear, you should respond by immedi-
ately proceeding to the nearest BMW
center. Drive with appropriate caution in
the meantime. The vehicle has reduced
ground clearance and driving comfort may
be noticeably reduced. Even if the attitude
of the vehicle is normal, you should consult
the nearest BMW center if the warning
lamp indicates a system fault.
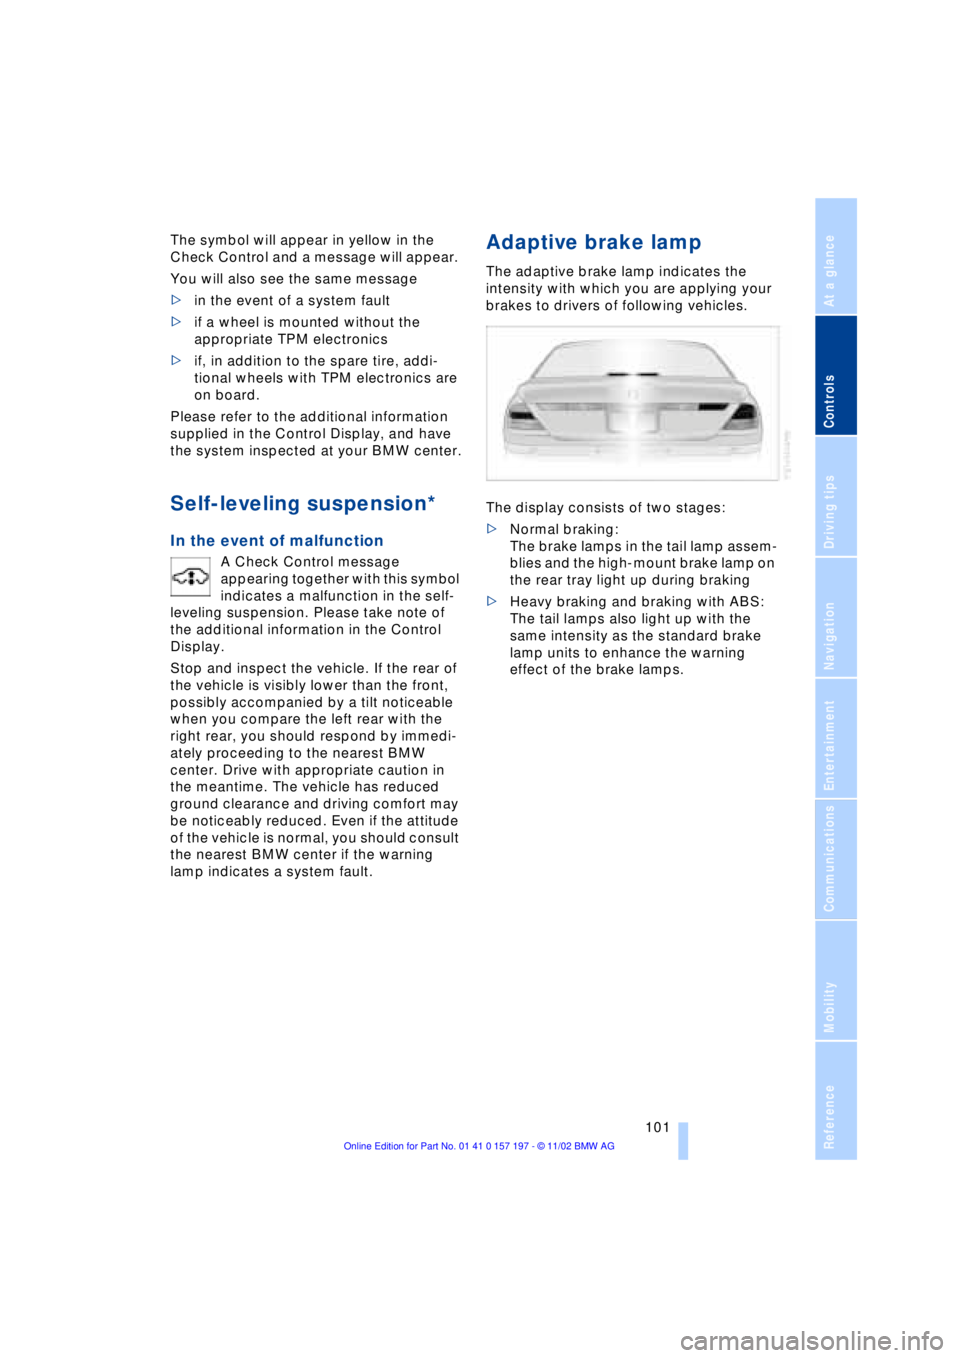
Adaptive brake lamp
The adaptive brake lamp indicates the
intensity with which you are applying your
brakes to drivers of following vehicles.
The display consists of two stages:
>Normal braking:
The brake lamps in the tail lamp assem-
blies and the high-mount brake lamp on
the rear tray light up during braking
>Heavy braking and braking with ABS:
The tail lamps also light up with the
same intensity as the standard brake
lamp units to enhance the warning
effect of the brake lamps.
Page 126 of 229
Things to remember when driving
124
Things to remember when driving
Break-in procedures
To ensure that your vehicle continues to
furnish optimal economy of operation
throughout an extended service life, we
request that you devote careful attention to
the following section.
Engine and differential
Up to 1,200 miles (2,000 km):
During this initial period you should attempt
to avoid constant, steady-state operation
and vary both vehicle and engine speeds
as often as possible. Until the break-in
period has been completed you should
also refrain from exceeding the following:
>4,500 rpm or 105 mph (170 km/h)
Always obey all official speed limits.
Avoid full-throttle operation and use of the
transmission's kickdown mode during
these initial miles.
Once you have driven 1,200 miles
(2,000 km), the engine and vehicle speeds
can be gradually increased.
You should also comply with these break-in
procedures should the engine or differen-
tial need to be replaced at a later point.
Tires
Due to technical factors associated with
their manufacture, tires do not achieve their
full traction potential until after an initial
break-in period. Therefore, drive reservedly
during the first 200 miles (300 km).
Brake system
Brakes require an initial break-in period of
approx. 300 miles (500 km) to achieve
optimal contact and wear patterns
between brake pads and rotors.
General driving notes
High temperatures
Extreme temperatures occur at the
catalytic converter on this and every
catalyst-equipped vehicle. Do not remove
the heat shields installed adjacent to
various sections of the exhaust system,
and never apply undercoating to them.
When driving, standing at idle and while
parking take care to avoid possible contact
between the hot exhaust system and any
highly flammable materials such as hay,
leaves, grass, etc. Such contact could lead
to a fire, and with it the risk of serious pro-
perty damage as well as personal injury.<
Parking the vehicle
Condensation forms in the air conditioner
system during operation, and then exits
under the vehicle. Traces of condensed
water under the vehicle are thus normal.
Before driving into the car wash
1.Fold in the door mirrors, refer to
page 52, as otherwise they could be
damaged due to the width of the vehicle
2.Leave the remote control in the ignition
lock, as otherwise the P position of the
automatic transmission will automati-
cally be selected when the remote con-
trol is removed. Also refer to page 68
3.Release the parking brake, especially
when you have activated Automatic
Hold. Refer to pages 63 and 64.
Hydroplaning
When driving on wet or slushy roads,
reduce road speed. If you do not, a
wedge of water can form between tires and
road surface. This phenomenon is referred
to as hydroplaning, and is characterized by
a partial or complete loss of contact bet-
ween tires and road surface, ultimately
Page 127 of 229
At a glance
Controls
Driving tips
Communications
Navigation
Entertainment
Mobility
Reference
125
undermining your ability to steer and brake
the vehicle.<
Driving through water
Do not drive through water on the
road if it is deeper than 1 ft (30 cm),
and then only at walking speed at the most.
Otherwise, the vehicle's engine, the elec-
trical systems and the transmission may be
damaged.<
Brake system
Braking with ABS
The best way to achieve optimal response
from the ABS is to apply maximum pres-
sure to the brake pedal during emergencyÐ
panic stops. Since the vehicle maintains
steering responsiveness, you can never-
theless avoid possible obstacles with a
minimum of steering effort.
Pulsation at the brake pedal combines with
sounds from the hydraulic circuits to indi-
cate to the driver that ABS is in its active
mode.
Do not drive with your foot resting on
the brake pedal. Even light but con-
sistent pedal pressure can lead to high
temperatures, brake wear and possibly
even brake failure.<
Disc brakes
Driving in wet conditions
While driving in wet conditions and in
heavy rain, it is a good idea to apply light
pressure to the brake pedal every few
miles. Monitor traffic conditions to ensure
that this maneuver does not endanger
other road users. The heat generated in this
process helps dry the pads and rotors to
ensure that full braking efficiency will then
be available when you need it.
Hills
You can retain full and unimpaired braking
efficiency by downshifting to a gear in
which only minimal brake applications are
needed when descending long or steep
downhill stretches.
You can further enhance the engine's bra-
king effect by selecting a lower gear in the
automatic transmission's manual mode,
downshifting as far as first gear on extre-
mely steep stretches, refer to page 68. This
strategy helps you avoid placing excessive
loads on the brake system.
Never allow the vehicle to coast with
the transmission in Neutral Ð or with
the engine switched off Ð there is no engine
braking when the transmission is in Neu-
tral, and no power-assist for brakes and
steering when the engine is not running.
Never allow floor mats, carpets or any other
objects to protrude into the area around the
accelerator and brake pedals and obstruct
their movement.<
Corrosion
When the vehicle is driven only occasio-
nally, during extended periods when the
vehicle is not used at all, and in operating
conditions where brake applications are
less frequent, there is an increased ten-
dency for corrosion to form on rotors, while
contaminants accumulate on the brake
pads. This occurs because the minimal
pressure which must be exerted by the
pads during brake applications to clean the
rotors is not reached.
Should corrosion form on the brake rotors,
the brakes will tend to respond with a pul-
sating effect that even extended applica-
tion will fail to cure.
Brake pads
If the brake pad wear warning lamp
appears in the Check Control,
accompanied by a text: please take
careful note of the additional information in
the Control Display.
Page 128 of 229
Things to remember when driving
126 Warning lamp for Canadian models.
The brake pads have reached their
minimum pad thickness. Have them
replaced at your BMW center as soon as
possible.
For your own safety: use only brake
pads that BMW has released for your
particular vehicle model. Because BMW
cannot assess the suitability of other brake
pads for use on your vehicle, we are unable
to assume continued responsibility for the
vehicle's operating safety if non-approved
pads are installed.<
Cargo loading
Stowing cargo
>Load heavy cargo as far forward and as
low as possible, placing it directly
behind the bulkhead behind the rear
seats
>Cover sharp edges and corners
>For very heavy cargo when the rear seat
is not occupied, secure each safety belt
in the opposite buckle.
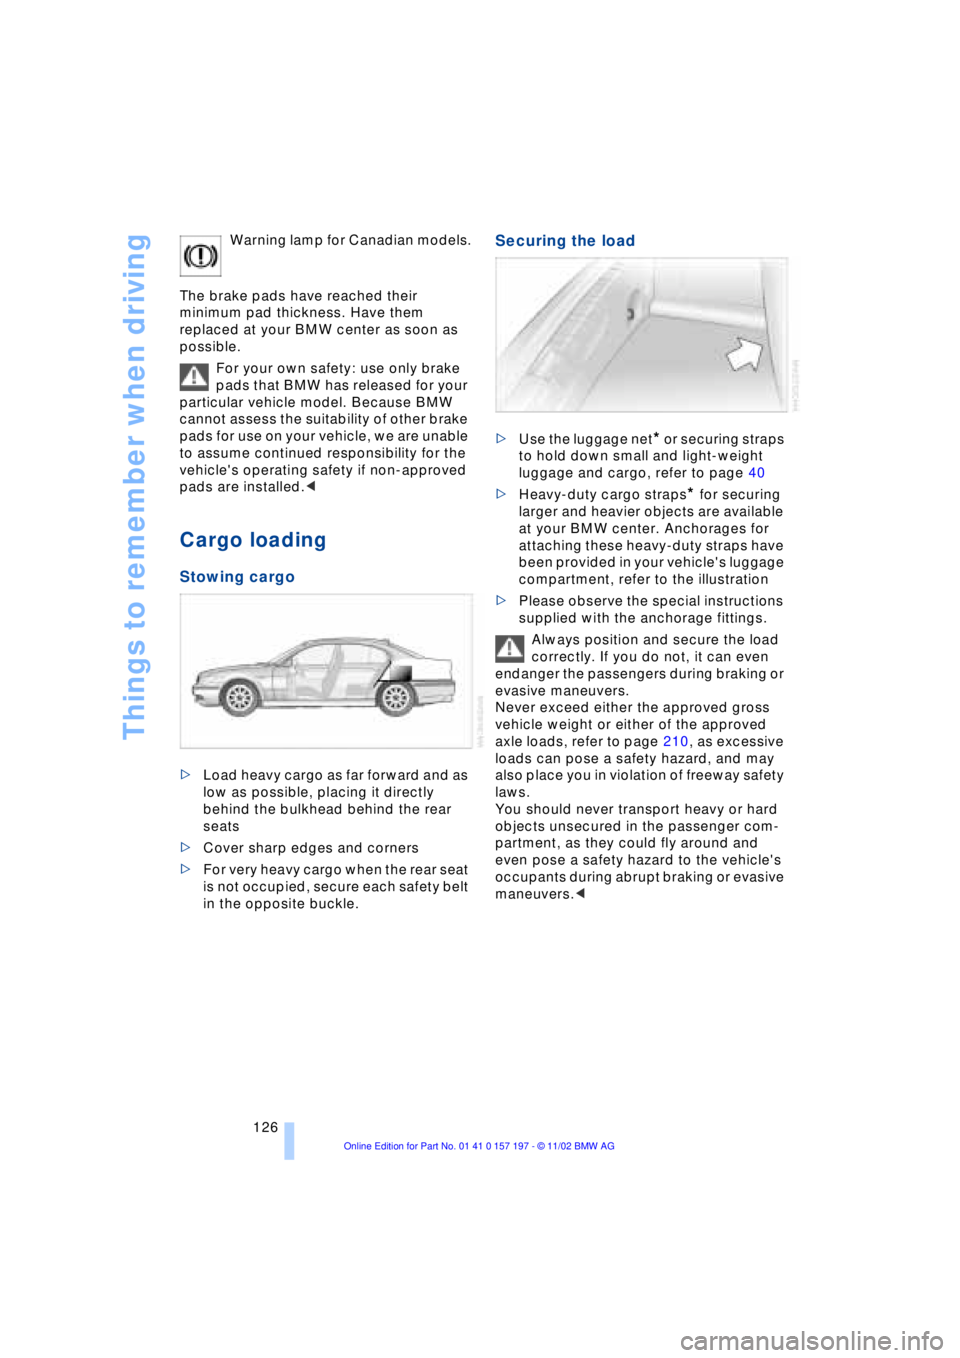
Securing the load
>Use the luggage net* or securing straps
to hold down small and light-weight
luggage and cargo, refer to page 40
>Heavy-duty cargo straps
* for securing
larger and heavier objects are available
at your BMW center. Anchorages for
attaching these heavy-duty straps have
been provided in your vehicle's luggage
compartment, refer to the illustration
>Please observe the special instructions
supplied with the anchorage fittings.
Always position and secure the load
correctly. If you do not, it can even
endanger the passengers during braking or
evasive maneuvers.
Never exceed either the approved gross
vehicle weight or either of the approved
axle loads, refer to page 210, as excessive
loads can pose a safety hazard, and may
also place you in violation of freeway safety
laws.
You should never transport heavy or hard
objects unsecured in the passenger com-
partment, as they could fly around and
even pose a safety hazard to the vehicle's
occupants during abrupt braking or evasive
maneuvers.<
Page 192 of 229
Under the hood
190
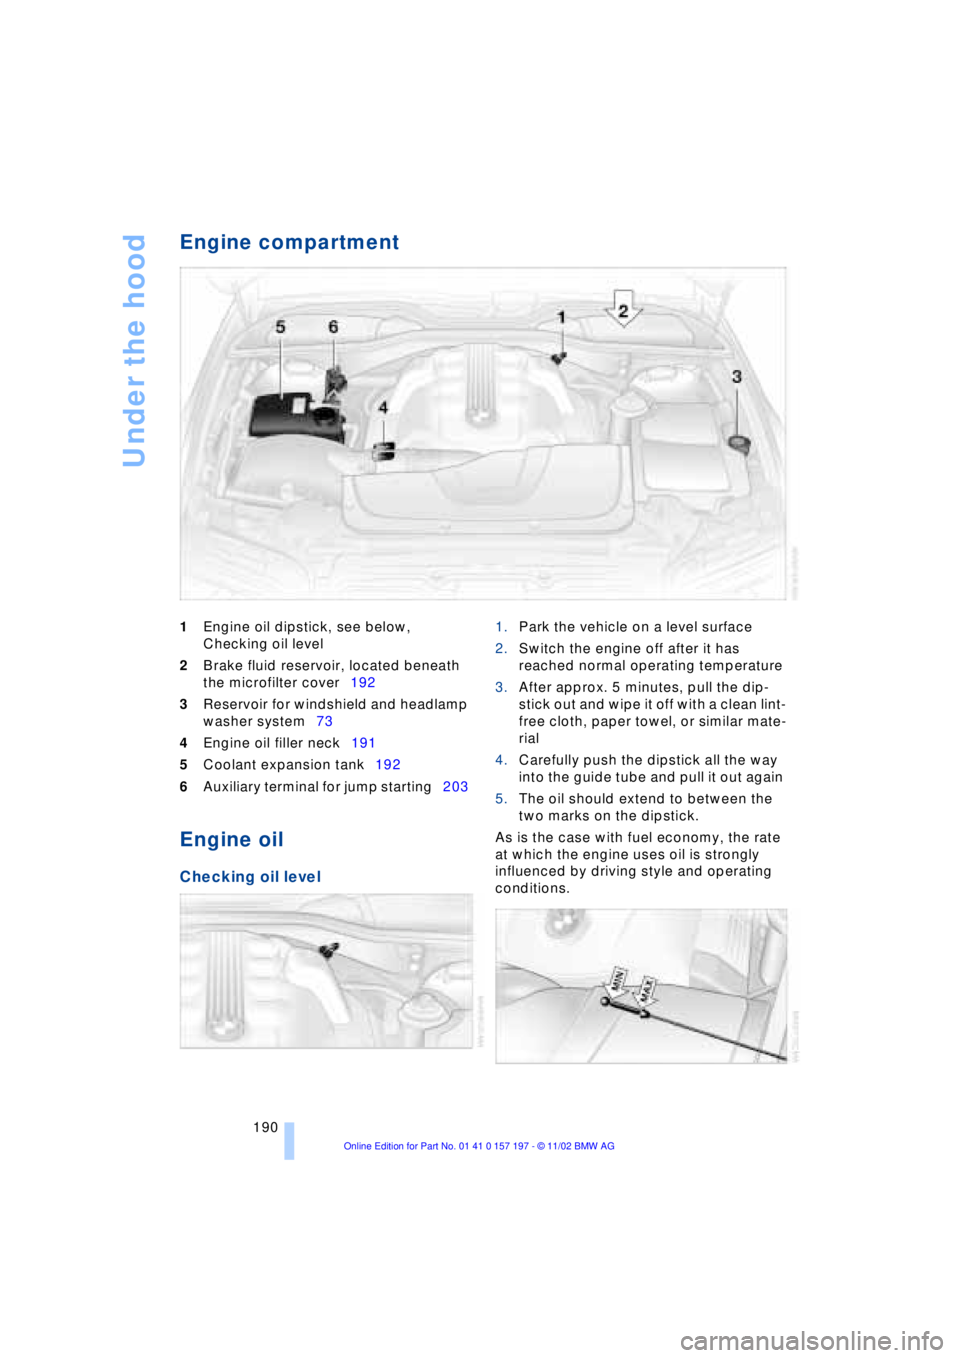
Engine compartment
1Engine oil dipstick, see below,
Checking oil level
2Brake fluid reservoir, located beneath
the microfilter cover192
3Reservoir for windshield and headlamp
washer system73
4Engine oil filler neck191
5Coolant expansion tank192
6Auxiliary terminal for jump starting203
Engine oil
Checking oil level
1.Park the vehicle on a level surface
2.Switch the engine off after it has
reached normal operating temperature
3.After approx. 5 minutes, pull the dip-
stick out and wipe it off with a clean lint-
free cloth, paper towel, or similar mate-
rial
4.Carefully push the dipstick all the way
into the guide tube and pull it out again
5.The oil should extend to between the
two marks on the dipstick.
As is the case with fuel economy, the rate
at which the engine uses oil is strongly
influenced by driving style and operating
conditions.
Page 194 of 229
Under the hood
192
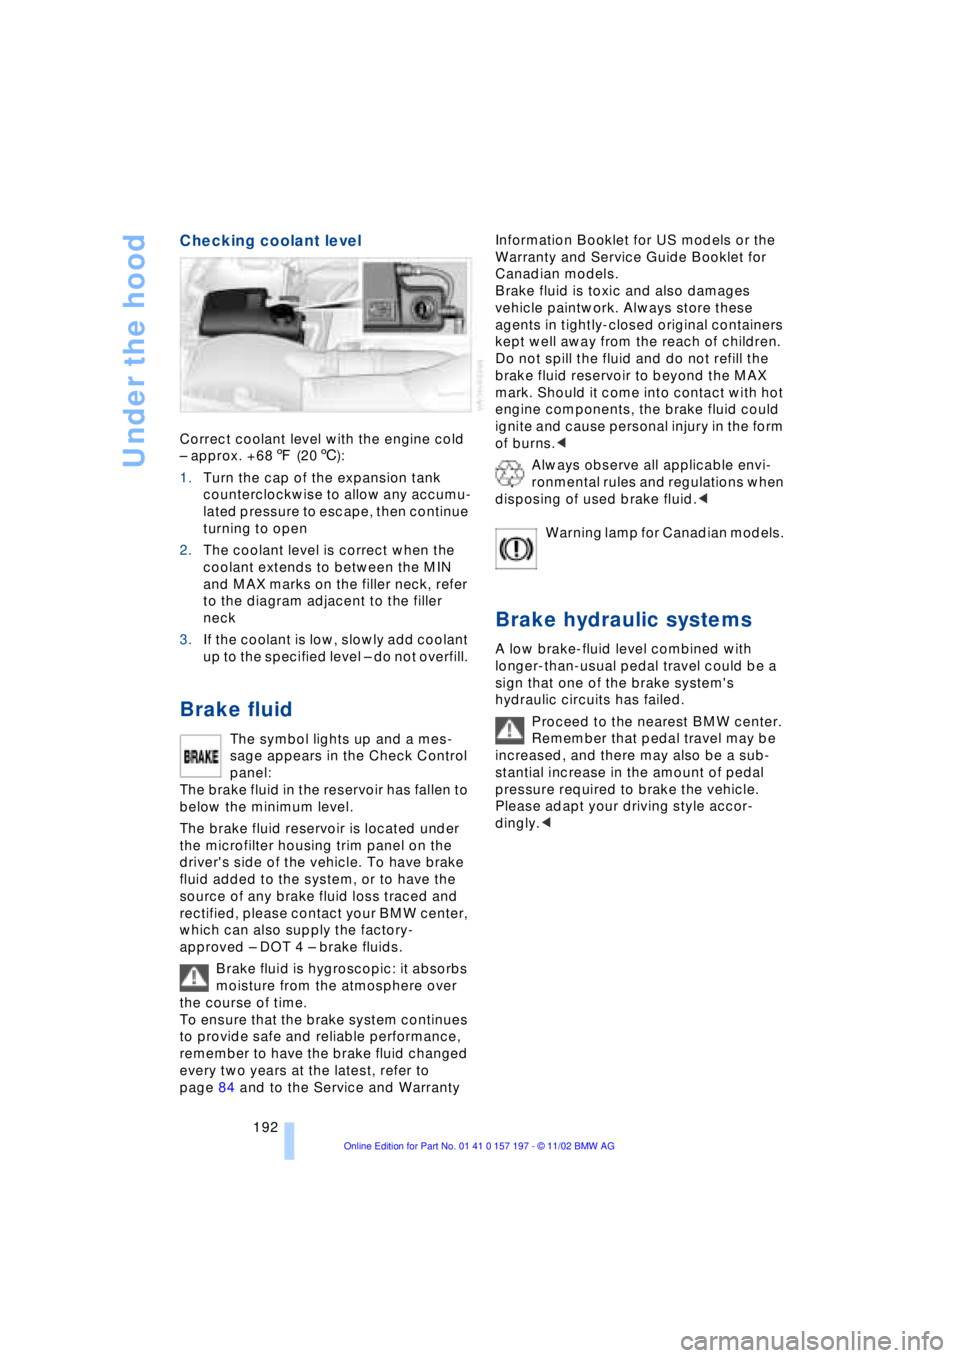
Checking coolant level
Correct coolant level with the engine cold
Ð approx. +687 (206):
1.Turn the cap of the expansion tank
counterclockwise to allow any accumu-
lated pressure to escape, then continue
turning to open
2.The coolant level is correct when the
coolant extends to between the MIN
and MAX marks on the filler neck, refer
to the diagram adjacent to the filler
neck
3.If the coolant is low, slowly add coolant
up to the specified level Ð do not overfill.
Brake fluid
The symbol lights up and a mes-
sage appears in the Check Control
panel:
The brake fluid in the reservoir has fallen to
below the minimum level.
The brake fluid reservoir is located under
the microfilter housing trim panel on the
driver's side of the vehicle. To have brake
fluid added to the system, or to have the
source of any brake fluid loss traced and
rectified, please contact your BMW center,
which can also supply the factory-
approved Ð DOT 4 Ð brake fluids.
Brake fluid is hygroscopic: it absorbs
moisture from the atmosphere over
the course of time.
To ensure that the brake system continues
to provide safe and reliable performance,
remember to have the brake fluid changed
every two years at the latest, refer to
page 84 and to the Service and Warranty Information Booklet for US models or the
Warranty and Service Guide Booklet for
Canadian models.
Brake fluid is toxic and also damages
vehicle paintwork. Always store these
agents in tightly-closed original containers
kept well away from the reach of children.
Do not spill the fluid and do not refill the
brake fluid reservoir to beyond the MAX
mark. Should it come into contact with hot
engine components, the brake fluid could
ignite and cause personal injury in the form
of burns.<
Always observe all applicable envi-
ronmental rules and regulations when
disposing of used brake fluid.<
Warning lamp for Canadian models.
Brake hydraulic systems
A low brake-fluid level combined with
longer-than-usual pedal travel could be a
sign that one of the brake system's
hydraulic circuits has failed.
Proceed to the nearest BMW center.
Remember that pedal travel may be
increased, and there may also be a sub-
stantial increase in the amount of pedal
pressure required to brake the vehicle.
Please adapt your driving style accor-
dingly.<