BMW 760LI SEDAN 2003 Repair Manual
Manufacturer: BMW, Model Year: 2003, Model line: 760LI SEDAN, Model: BMW 760LI SEDAN 2003Pages: 229, PDF Size: 4.35 MB
Page 61 of 229
At a glance
Controls
Driving tips
Communications
Navigation
Entertainment
Mobility
Reference
59
LATCH* child-restraint
system
LATCH: Lower Anchor and Tethers for
CHildren.
If the vehicle is equipped with electric
power seats, these must be returned
to their standard adjustment setting before
a LATCH child-restraint system can be
used, refer to page 47.<
Access to anchorage points
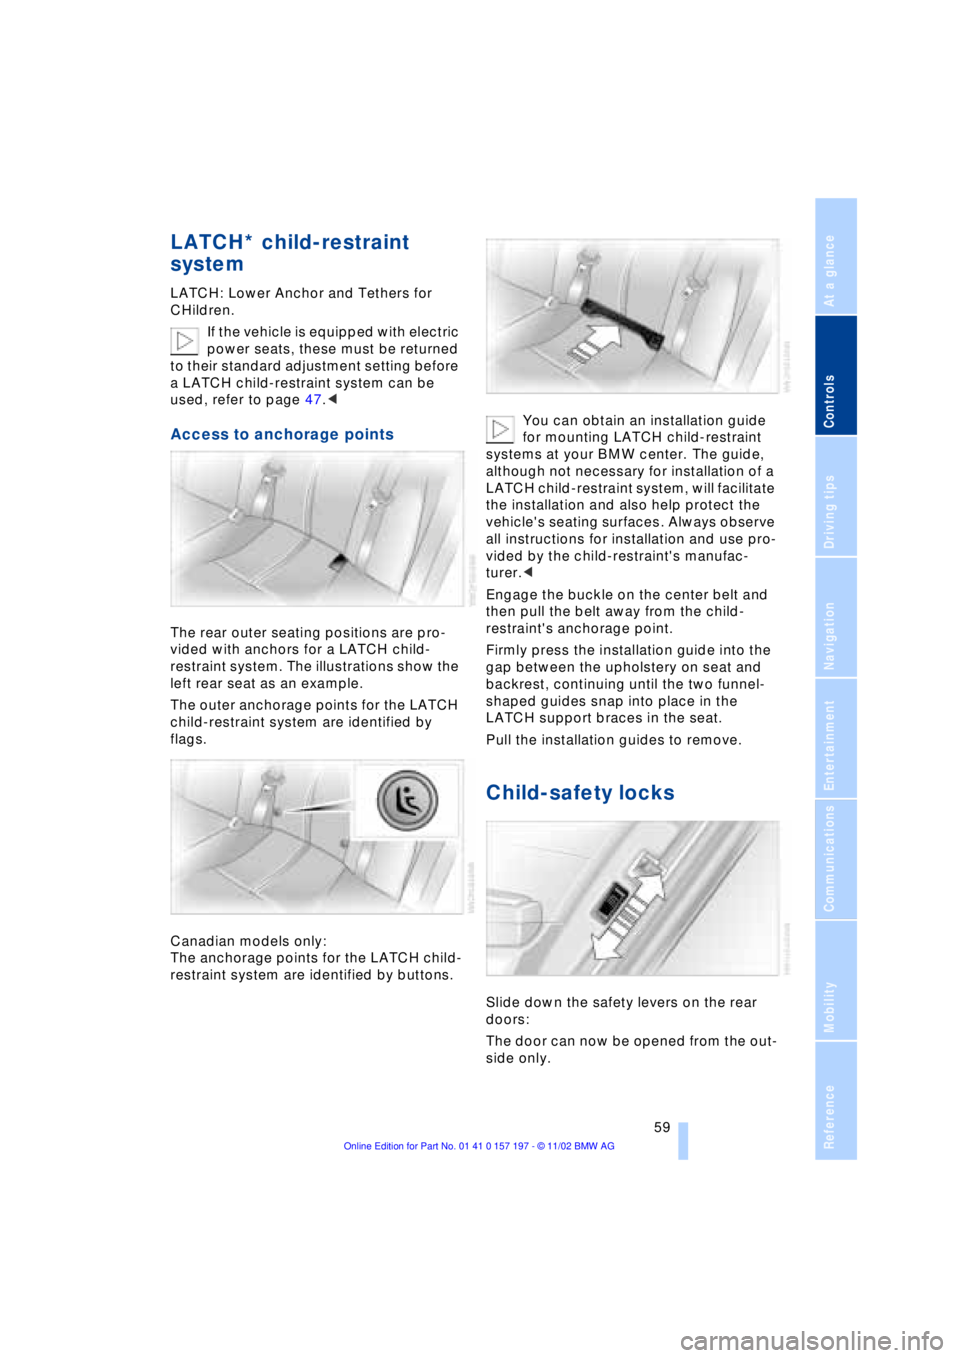
The rear outer seating positions are pro-
vided with anchors for a LATCH child-
restraint system. The illustrations show the
left rear seat as an example.
The outer anchorage points for the LATCH
child-restraint system are identified by
flags.
Canadian models only:
The anchorage points for the LATCH child-
restraint system are identified by buttons.You can obtain an installation guide
for mounting LATCH child-restraint
systems at your BMW center. The guide,
although not necessary for installation of a
LATCH child-restraint system, will facilitate
the installation and also help protect the
vehicle's seating surfaces. Always observe
all instructions for installation and use pro-
vided by the child-restraint's manufac-
turer.<
Engage the buckle on the center belt and
then pull the belt away from the child-
restraint's anchorage point.
Firmly press the installation guide into the
gap between the upholstery on seat and
backrest, continuing until the two funnel-
shaped guides snap into place in the
LATCH support braces in the seat.
Pull the installation guides to remove.
Child-safety locks
Slide down the safety levers on the rear
doors:
The door can now be opened from the out-
side only.
Page 62 of 229
Adjustments
60
Vehicle Memory, Key
Memory
How the system functions
Doubtless you have often reflected on how
great it would be if you could configure
your vehicle's various adjustment settings
to meet your own personal requirements. In
developing your vehicle, BMW has incor-
porated a number of options for personal
adjustment which you can set in the Con-
trol Center. You can have these pro-
grammed at your BMW center.
The available configuration settings fall into
two categories, according to whether their
primary orientation is the vehicle Ð Vehicle
Memory Ð or the individual Ð Key Memory.
You can have up to four different basic set-
tings adjusted for four different persons.
The only requirement is that each person
uses his or her own remote control.
When your vehicle is unlocked with the
remote control, the vehicle recognizes the
individual user by means of a data
exchange with the key, and makes adjust-
ments accordingly.
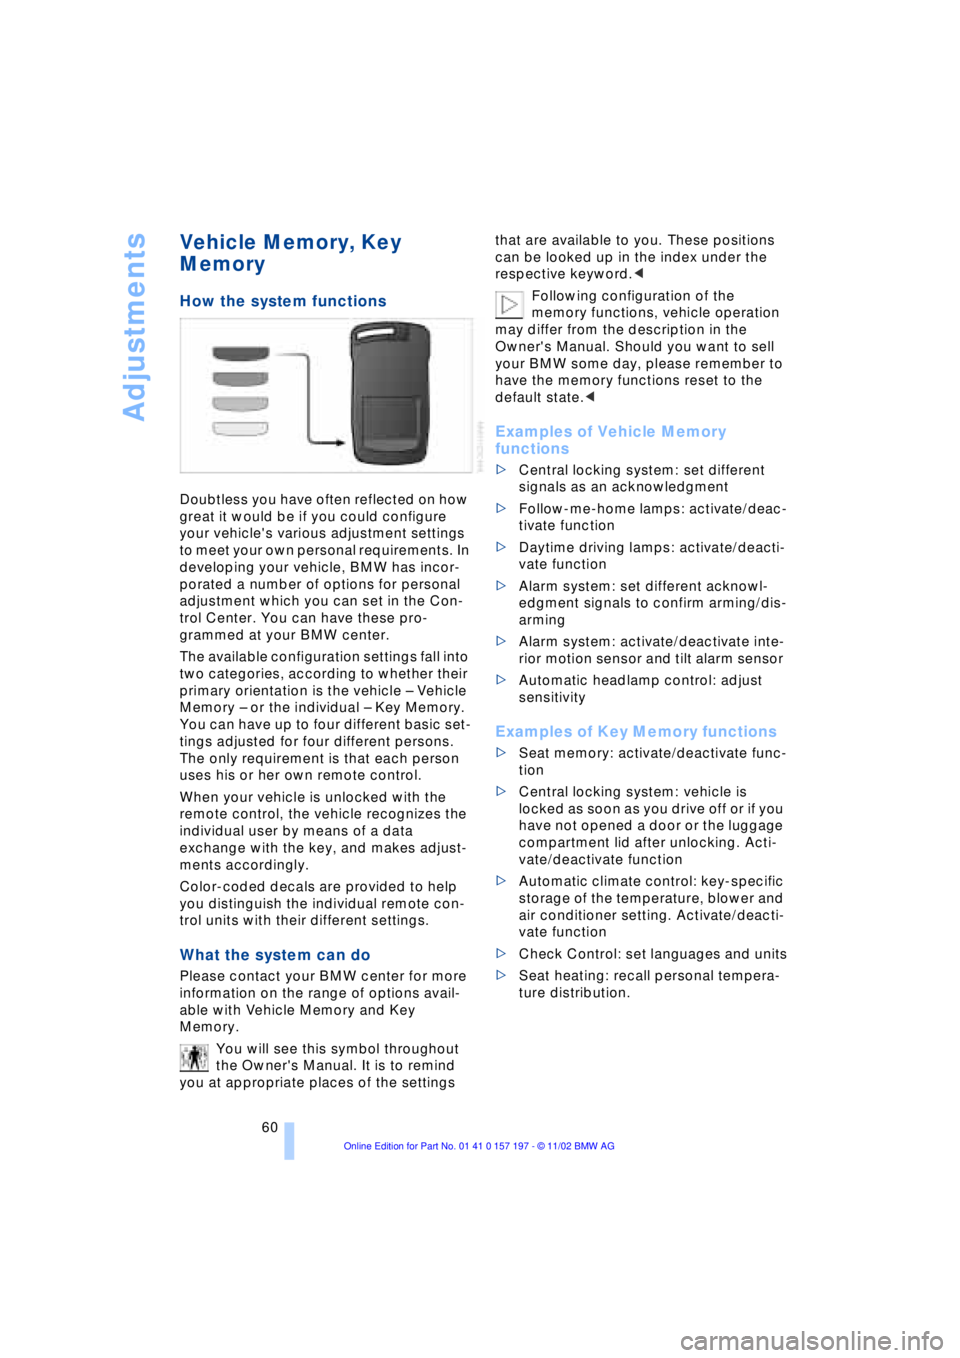
Color-coded decals are provided to help
you distinguish the individual remote con-
trol units with their different settings.
What the system can do
Please contact your BMW center for more
information on the range of options avail-
able with Vehicle Memory and Key
Memory.
You will see this symbol throughout
the Owner's Manual. It is to remind
you at appropriate places of the settings that are available to you. These positions
can be looked up in the index under the
respective keyword.<
Following configuration of the
memory functions, vehicle operation
may differ from the description in the
Owner's Manual. Should you want to sell
your BMW some day, please remember to
have the memory functions reset to the
default state.<
Examples of Vehicle Memory
functions
>Central locking system: set different
signals as an acknowledgment
>Follow-me-home lamps: activate/deac-
tivate function
>Daytime driving lamps: activate/deacti-
vate function
>Alarm system: set different acknowl-
edgment signals to confirm arming/dis-
arming
>Alarm system: activate/deactivate inte-
rior motion sensor and tilt alarm sensor
>Automatic headlamp control: adjust
sensitivity
Examples of Key Memory functions
>Seat memory: activate/deactivate func-
tion
>Central locking system: vehicle is
locked as soon as you drive off or if you
have not opened a door or the luggage
compartment lid after unlocking. Acti-
vate/deactivate function
>Automatic climate control: key-specific
storage of the temperature, blower and
air conditioner setting. Activate/deacti-
vate function
>Check Control: set languages and units
>Seat heating: recall personal tempera-
ture distribution.
Page 63 of 229
At a glance
Controls
Driving tips
Communications
Navigation
Entertainment
Mobility
Reference
61
Driving
Ignition lock
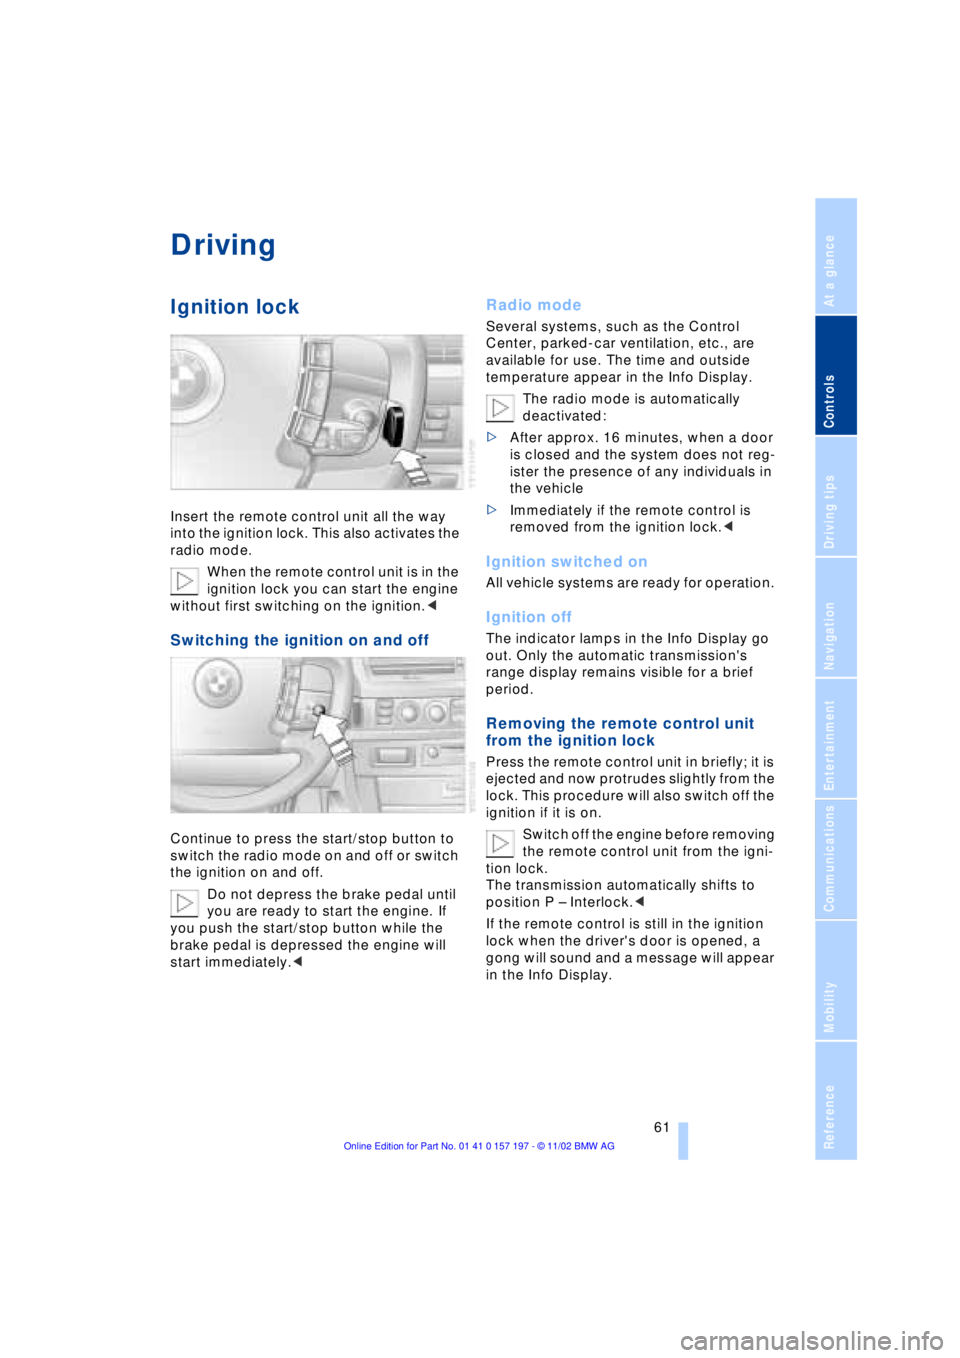
Insert the remote control unit all the way
into the ignition lock. This also activates the
radio mode.
When the remote control unit is in the
ignition lock you can start the engine
without first switching on the ignition.<
Switching the ignition on and off
Continue to press the start/stop button to
switch the radio mode on and off or switch
the ignition on and off.
Do not depress the brake pedal until
you are ready to start the engine. If
you push the start/stop button while the
brake pedal is depressed the engine will
start immediately.<
Radio mode
Several systems, such as the Control
Center, parked-car ventilation, etc., are
available for use. The time and outside
temperature appear in the Info Display.
The radio mode is automatically
deactivated:
>After approx. 16 minutes, when a door
is closed and the system does not reg-
ister the presence of any individuals in
the vehicle
>Immediately if the remote control is
removed from the ignition lock.<
Ignition switched on
All vehicle systems are ready for operation.
Ignition off
The indicator lamps in the Info Display go
out. Only the automatic transmission's
range display remains visible for a brief
period.
Removing the remote control unit
from the ignition lock
Press the remote control unit in briefly; it is
ejected and now protrudes slightly from the
lock. This procedure will also switch off the
ignition if it is on.
Switch off the engine before removing
the remote control unit from the igni-
tion lock.
The transmission automatically shifts to
position P Ð Interlock.<
If the remote control is still in the ignition
lock when the driver's door is opened, a
gong will sound and a message will appear
in the Info Display.
Page 64 of 229
Driving
62
Starting the engine
Do not run the engine in closed
rooms, as otherwise the inhaling of
toxic exhaust gases can cause uncon-
sciousness and death. The exhaust gases
contain carbon monoxide, an odorless and
colorless, but highly toxic gas.
Never leave an unattended vehicle with the
engine running, as such a vehicle repre-
sents a potential safety hazard.<
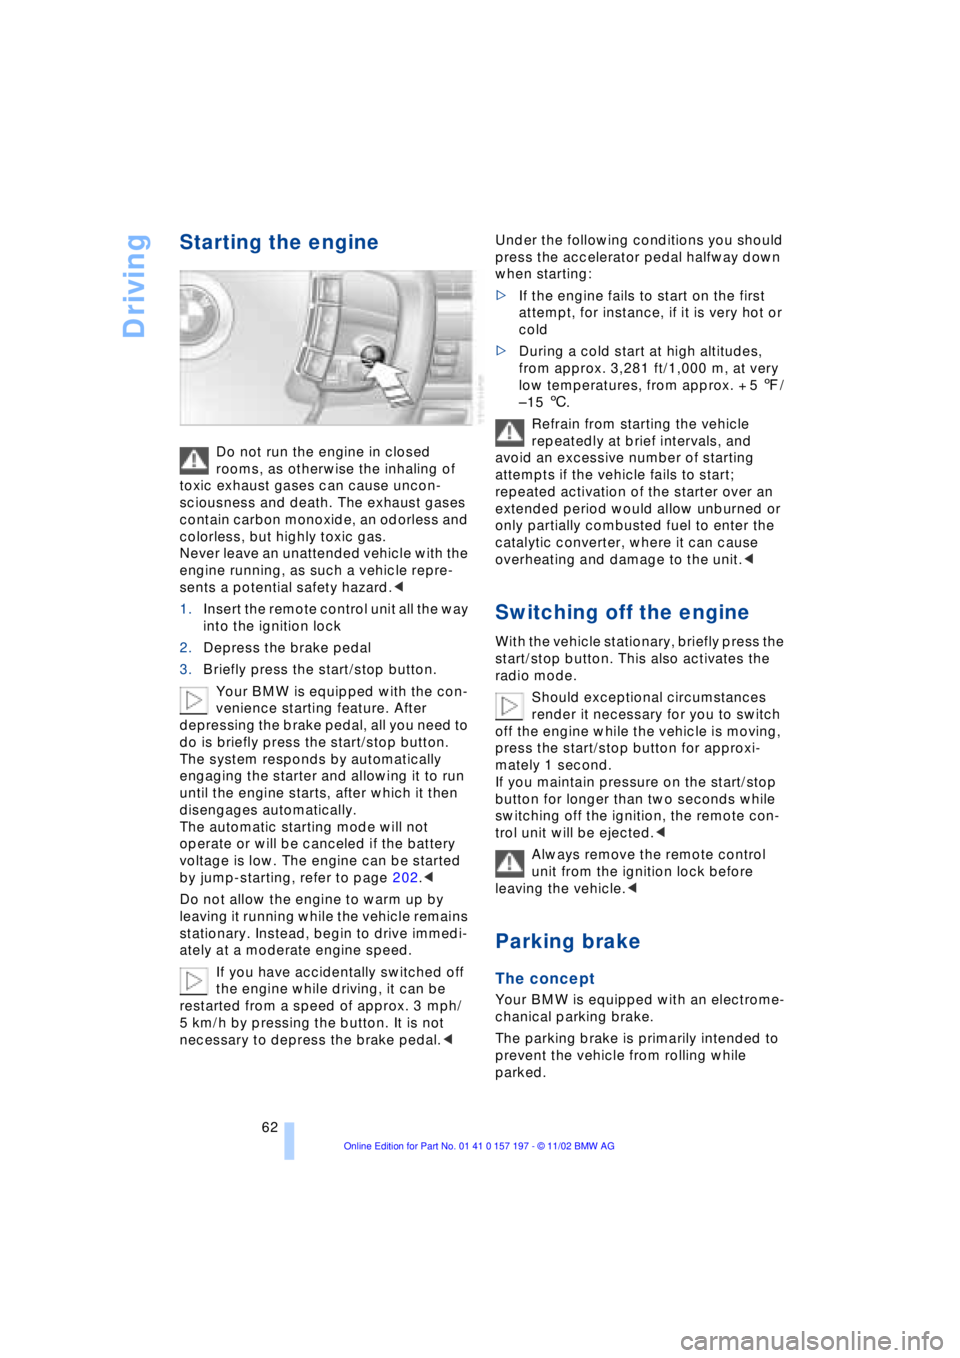
1.Insert the remote control unit all the way
into the ignition lock
2.Depress the brake pedal
3.Briefly press the start/stop button.
Your BMW is equipped with the con-
venience starting feature. After
depressing the brake pedal, all you need to
do is briefly press the start/stop button.
The system responds by automatically
engaging the starter and allowing it to run
until the engine starts, after which it then
disengages automatically.
The automatic starting mode will not
operate or will be canceled if the battery
voltage is low. The engine can be started
by jump-starting, refer to page 202.<
Do not allow the engine to warm up by
leaving it running while the vehicle remains
stationary. Instead, begin to drive immedi-
ately at a moderate engine speed.
If you have accidentally switched off
the engine while driving, it can be
restarted from a speed of approx. 3 mph/
5 km/h by pressing the button. It is not
necessary to depress the brake pedal.< Under the following conditions you should
press the accelerator pedal halfway down
when starting:
>If the engine fails to start on the first
attempt, for instance, if it is very hot or
cold
>During a cold start at high altitudes,
from approx. 3,281 ft/1,000 m, at very
low temperatures, from approx. + 5 7/
Ð 15 6.
Refrain from starting the vehicle
repeatedly at brief intervals, and
avoid an excessive number of starting
attempts if the vehicle fails to start;
repeated activation of the starter over an
extended period would allow unburned or
only partially combusted fuel to enter the
catalytic converter, where it can cause
overheating and damage to the unit.<
Switching off the engine
With the vehicle stationary, briefly press the
start/stop button. This also activates the
radio mode.
Should exceptional circumstances
render it necessary for you to switch
off the engine while the vehicle is moving,
press the start/stop button for approxi-
mately 1 second.
If you maintain pressure on the start/stop
button for longer than two seconds while
switching off the ignition, the remote con-
trol unit will be ejected.<
Always remove the remote control
unit from the ignition lock before
leaving the vehicle.<
Parking brake
The concept
Your BMW is equipped with an electrome-
chanical parking brake.
The parking brake is primarily intended to
prevent the vehicle from rolling while
parked.
Page 65 of 229
At a glance
Controls
Driving tips
Communications
Navigation
Entertainment
Mobility
Reference
63
You have two separate options for
engaging the parking brake:
>Manually, by briefly pressing the button
>Automatically, through activation of the
Automatic Hold mode, refer to page 64.
An electrohydraulic mechanism then
engages the parking brake to prevent the
rear wheels from turning whenever you
switch off the engine.
When the engine is running, parking brake
engagement is controlled by the brake
system's hydraulic circuits, which act on
the disc brakes at the front and rear
wheels.
Brake pedal feel
Because this function is activated using the
brake system's hydraulic circuits, the
response of the brake pedal may change
slightly. Engagement may also be accom-
panied by activation noise Ð this is normal.
Manual engagement
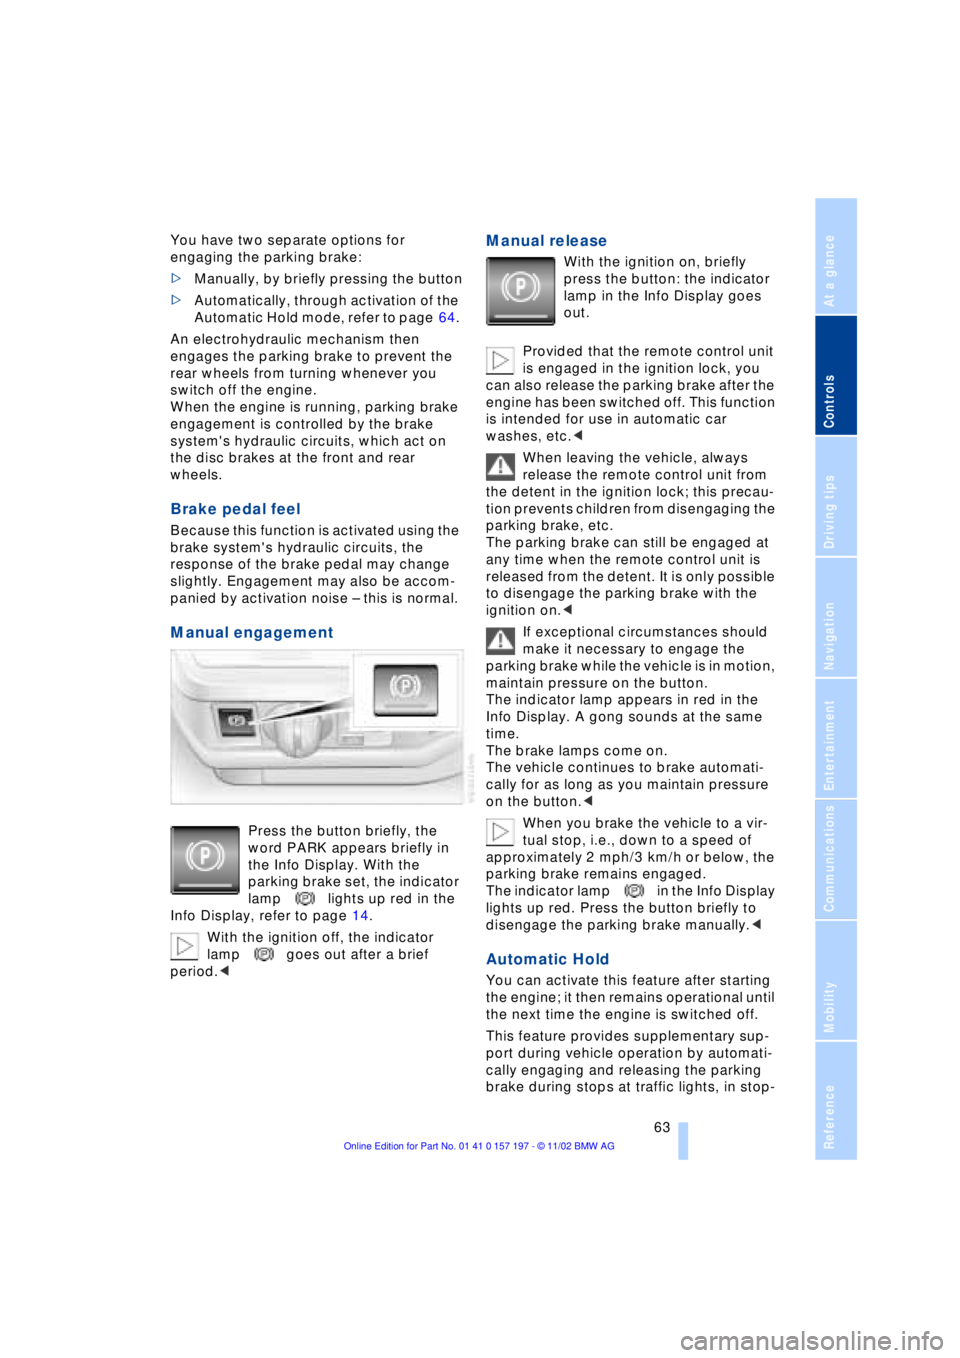
Press the button briefly, the
word PARK appears briefly in
the Info Display. With the
parking brake set, the indicator
lamp lights up red in the
Info Display, refer to page 14.
With the ignition off, the indicator
lamp goes out after a brief
period.<
Manual release
With the ignition on, briefly
press the button: the indicator
lamp in the Info Display goes
out.
Provided that the remote control unit
is engaged in the ignition lock, you
can also release the parking brake after the
engine has been switched off. This function
is intended for use in automatic car
washes, etc.<
When leaving the vehicle, always
release the remote control unit from
the detent in the ignition lock; this precau-
tion prevents children from disengaging the
parking brake, etc.
The parking brake can still be engaged at
any time when the remote control unit is
released from the detent. It is only possible
to disengage the parking brake with the
ignition on.<
If exceptional circumstances should
make it necessary to engage the
parking brake while the vehicle is in motion,
maintain pressure on the button.
The indicator lamp appears in red in the
Info Display. A gong sounds at the same
time.
The brake lamps come on.
The vehicle continues to brake automati-
cally for as long as you maintain pressure
on the button.<
When you brake the vehicle to a vir-
tual stop, i.e., down to a speed of
approximately 2 mph/3 km/h or below, the
parking brake remains engaged.
The indicator lamp in the Info Display
lights up red. Press the button briefly to
disengage the parking brake manually.<
Automatic Hold
You can activate this feature after starting
the engine; it then remains operational until
the next time the engine is switched off.
This feature provides supplementary sup-
port during vehicle operation by automati-
cally engaging and releasing the parking
brake during stops at traffic lights, in stop-
Page 66 of 229
Driving
64 and-go traffic, etc. As the vehicle then no
longer tends to creep when the transmis-
sion is engaged, it is no longer necessary
to hold the vehicle by depressing the brake
pedal.
It prevents the vehicle from rolling back-
ward during uphill starts.
The parking brake also engages automati-
cally when you switch off the engine after
stopping the vehicle.
You can activate and deactivate the Auto-
matic Hold feature by selecting the "Set-
tings" menu in the Control Center.
A description of the Control Center is pro-
vided on page 19.
Automatic Hold activation/
deactivation
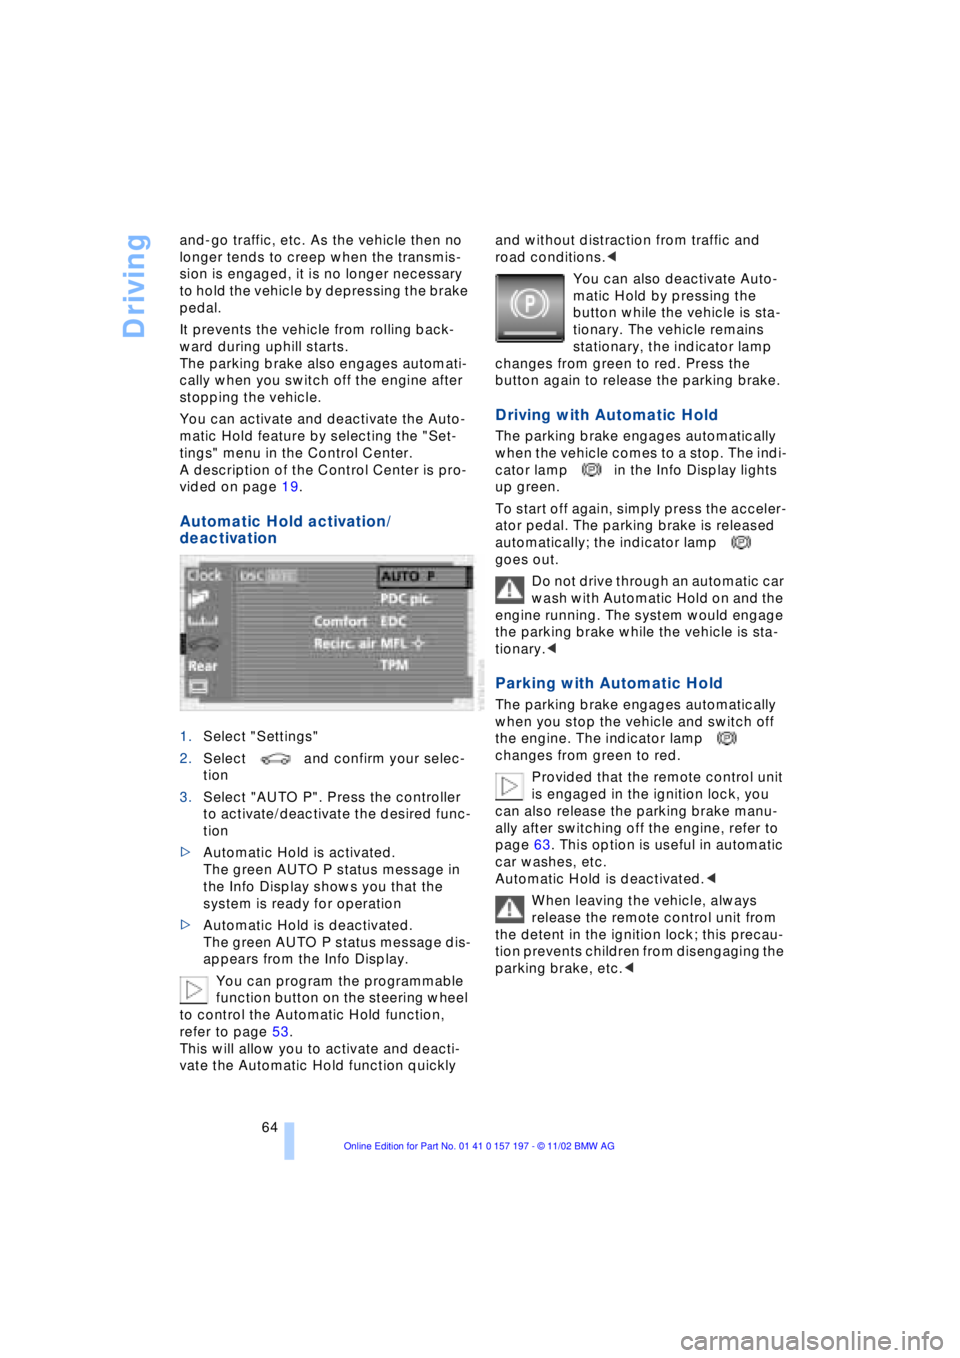
1.Select "Settings"
2.Select and confirm your selec-
tion
3.Select "AUTO P". Press the controller
to activate/deactivate the desired func-
tion
>Automatic Hold is activated.
The green AUTO P status message in
the Info Display shows you that the
system is ready for operation
>Automatic Hold is deactivated.
The green AUTO P status message dis-
appears from the Info Display.
You can program the programmable
function button on the steering wheel
to control the Automatic Hold function,
refer to page 53.
This will allow you to activate and deacti-
vate the Automatic Hold function quickly and without distraction from traffic and
road conditions.<
You can also deactivate Auto-
matic Hold by pressing the
button while the vehicle is sta-
tionary. The vehicle remains
stationary, the indicator lamp
changes from green to red. Press the
button again to release the parking brake.
Driving with Automatic Hold
The parking brake engages automatically
when the vehicle comes to a stop. The indi-
cator lamp in the Info Display lights
up green.
To start off again, simply press the acceler-
ator pedal. The parking brake is released
automatically; the indicator lamp
goes out.
Do not drive through an automatic car
wash with Automatic Hold on and the
engine running. The system would engage
the parking brake while the vehicle is sta-
tionary.<
Parking with Automatic Hold
The parking brake engages automatically
when you stop the vehicle and switch off
the engine. The indicator lamp
changes from green to red.
Provided that the remote control unit
is engaged in the ignition lock, you
can also release the parking brake manu-
ally after switching off the engine, refer to
page 63. This option is useful in automatic
car washes, etc.
Automatic Hold is deactivated.<
When leaving the vehicle, always
release the remote control unit from
the detent in the ignition lock; this precau-
tion prevents children from disengaging the
parking brake, etc.<
Page 67 of 229
At a glance
Controls
Driving tips
Communications
Navigation
Entertainment
Mobility
Reference
65
For your safety
Automatic Hold is automatically deacti-
vated when
>the engine is switched off
>the system detects that the driver's seat
is not occupied while the engine is run-
ning
>the hood is opened while the engine is
running
>the luggage compartment is opened
with the transmission in reverse while
the engine is running, and
>when the parking brake is used to bring
the vehicle to a stop.
The indicator lamp changes from
green to red, and the AUTO P letters in the
Info Display disappear.
Before starting off again, briefly press the
button to disengage the parking brake
manually, refer to page 63, or reactivate
Automatic Hold, refer to page 64.
Before leaving the vehicle with the
engine running, always move the
automatic transmission's selector lever to
position P and ensure that the parking
brake is engaged. The vehicle could start to
roll if you fail to observe these precautions.
Never leave an unattended vehicle with the
engine running, as such a vehicle repre-
sents a potential safety hazard.<
Automatic Hold is automatically
deactivated whenever the system
detects any tendency for the wheels to spin
in response to slippery road surfaces. Note
the status reports in the Check Control.
You can find more detailed information on
Check Control on page 85.<
Malfunctions
If a malfunction occurs, the indicator
lamp lights up yellow in the Info Dis-
play and a status report will appear in the
Check Control. Please note any supple-
mentary information that appears in the
Control Display.
Releasing the parking brake
manually
You can respond to any interruptions in the
supply of electrical power, for instance, if
the battery is discharged or disconnected,
by releasing the parking brake manually.
Before proceeding to release the
parking brake manually, and each
time you park the vehicle without engaging
the parking brake, always ensure that the
automatic transmission's selector lever is
in position P, refer to page 67. Note the
range indicated in the Info Display.
If it is not possible to avoid parking on an
extremely steep slope, use some supple-
mentary means, such as a wheel chock, to
make certain that the vehicle will not roll,
refer to page 198. Otherwise the danger
exists that the vehicle could roll when
parked on a very steep hill.<
Should it also be necessary to release the
automatic transmission's lockout manually,
for instance, if the battery is discharged,
always adhere to the following sequence:
1.If necessary, start by manually releasing
the parking brake
2.Then release the automatic transmis-
sion's lockout manually, refer to
page 70.
Jump-starting and towing, refer to
pages 202 and 203.
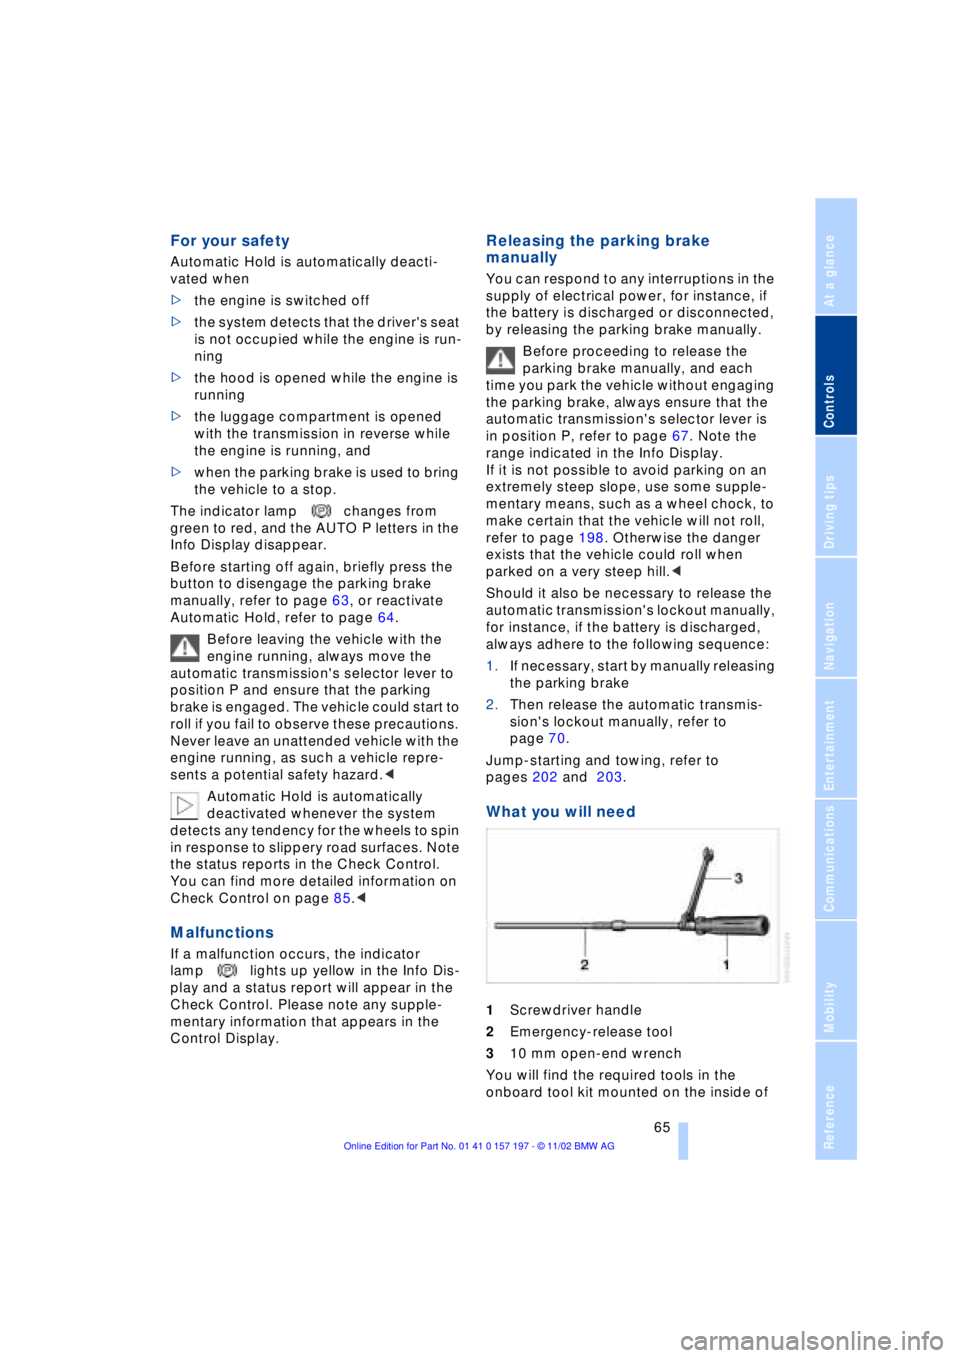
What you will need
1Screwdriver handle
2Emergency-release tool
310 mm open-end wrench
You will find the required tools in the
onboard tool kit mounted on the inside of
Page 68 of 229
Driving
66 the luggage compartment lid, refer to
page 195.
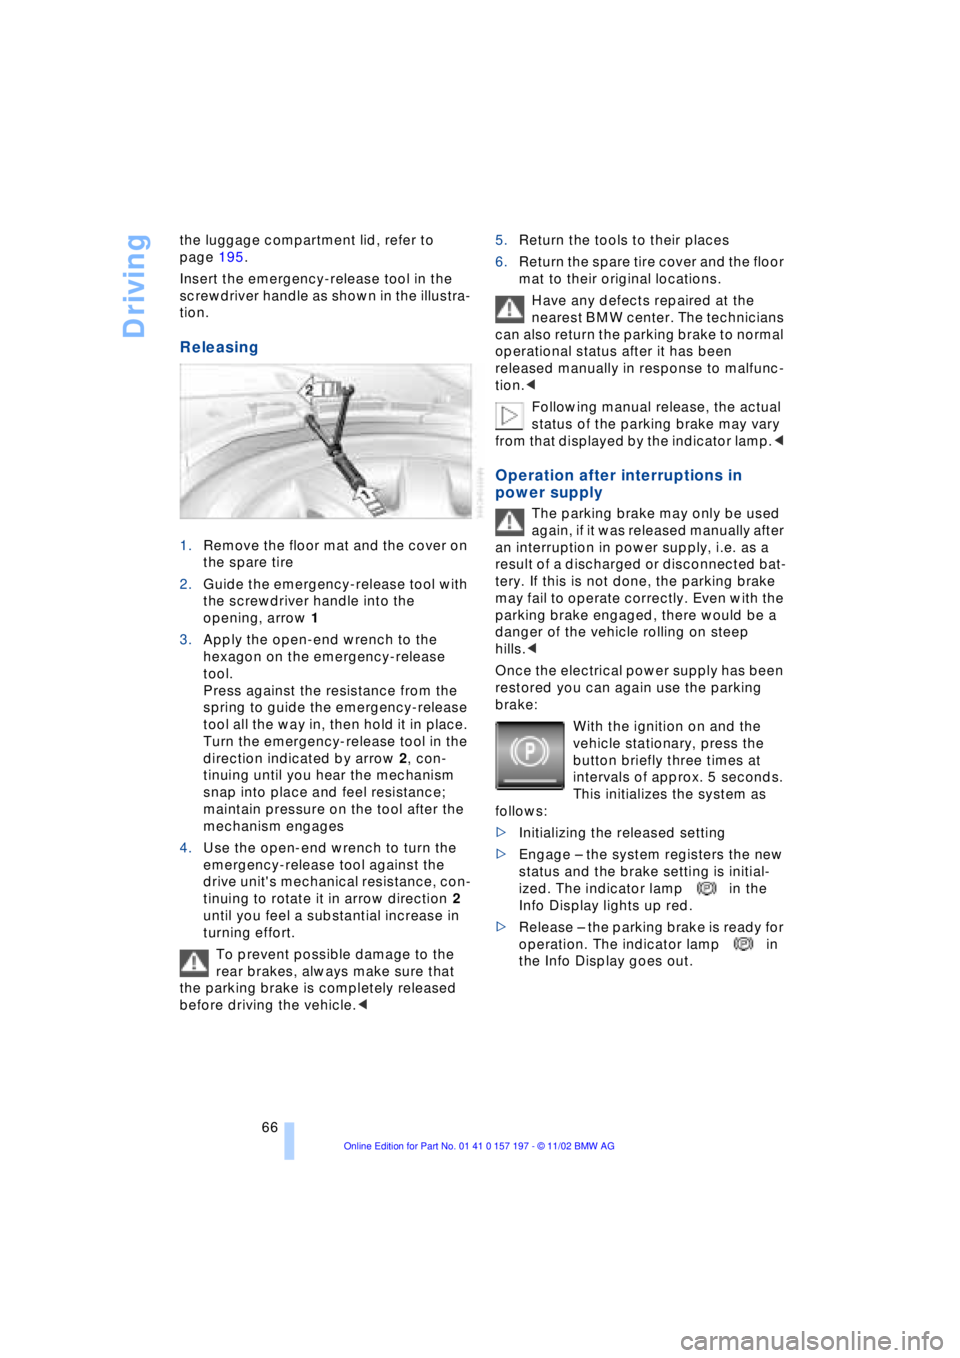
Insert the emergency-release tool in the
screwdriver handle as shown in the illustra-
tion.
Releasing
1.Remove the floor mat and the cover on
the spare tire
2.Guide the emergency-release tool with
the screwdriver handle into the
opening, arrow 1
3.Apply the open-end wrench to the
hexagon on the emergency-release
tool.
Press against the resistance from the
spring to guide the emergency-release
tool all the way in, then hold it in place.
Turn the emergency-release tool in the
direction indicated by arrow 2, con-
tinuing until you hear the mechanism
snap into place and feel resistance;
maintain pressure on the tool after the
mechanism engages
4.Use the open-end wrench to turn the
emergency-release tool against the
drive unit's mechanical resistance, con-
tinuing to rotate it in arrow direction 2
until you feel a substantial increase in
turning effort.
To prevent possible damage to the
rear brakes, always make sure that
the parking brake is completely released
before driving the vehicle.< 5.Return the tools to their places
6.Return the spare tire cover and the floor
mat to their original locations.
Have any defects repaired at the
nearest BMW center. The technicians
can also return the parking brake to normal
operational status after it has been
released manually in response to malfunc-
tion.<
Following manual release, the actual
status of the parking brake may vary
from that displayed by the indicator lamp.<
Operation after interruptions in
power supply
The parking brake may only be used
again, if it was released manually after
an interruption in power supply, i.e. as a
result of a discharged or disconnected bat-
tery. If this is not done, the parking brake
may fail to operate correctly. Even with the
parking brake engaged, there would be a
danger of the vehicle rolling on steep
hills.<
Once the electrical power supply has been
restored you can again use the parking
brake:
With the ignition on and the
vehicle stationary, press the
button briefly three times at
intervals of approx. 5 seconds.
This initializes the system as
follows:
>Initializing the released setting
>Engage Ð the system registers the new
status and the brake setting is initial-
ized. The indicator lamp in the
Info Display lights up red.
>Release Ð the parking brake is ready for
operation. The indicator lamp in
the Info Display goes out.
Page 69 of 229
At a glance
Controls
Driving tips
Communications
Navigation
Entertainment
Mobility
Reference
67
Automatic transmission
with L mode
While you can drive as with a conventional
automatic transmission, you also have the
option of retaining your current gear selec-
tion with the L/D button on the steering
wheel, refer to page 68.
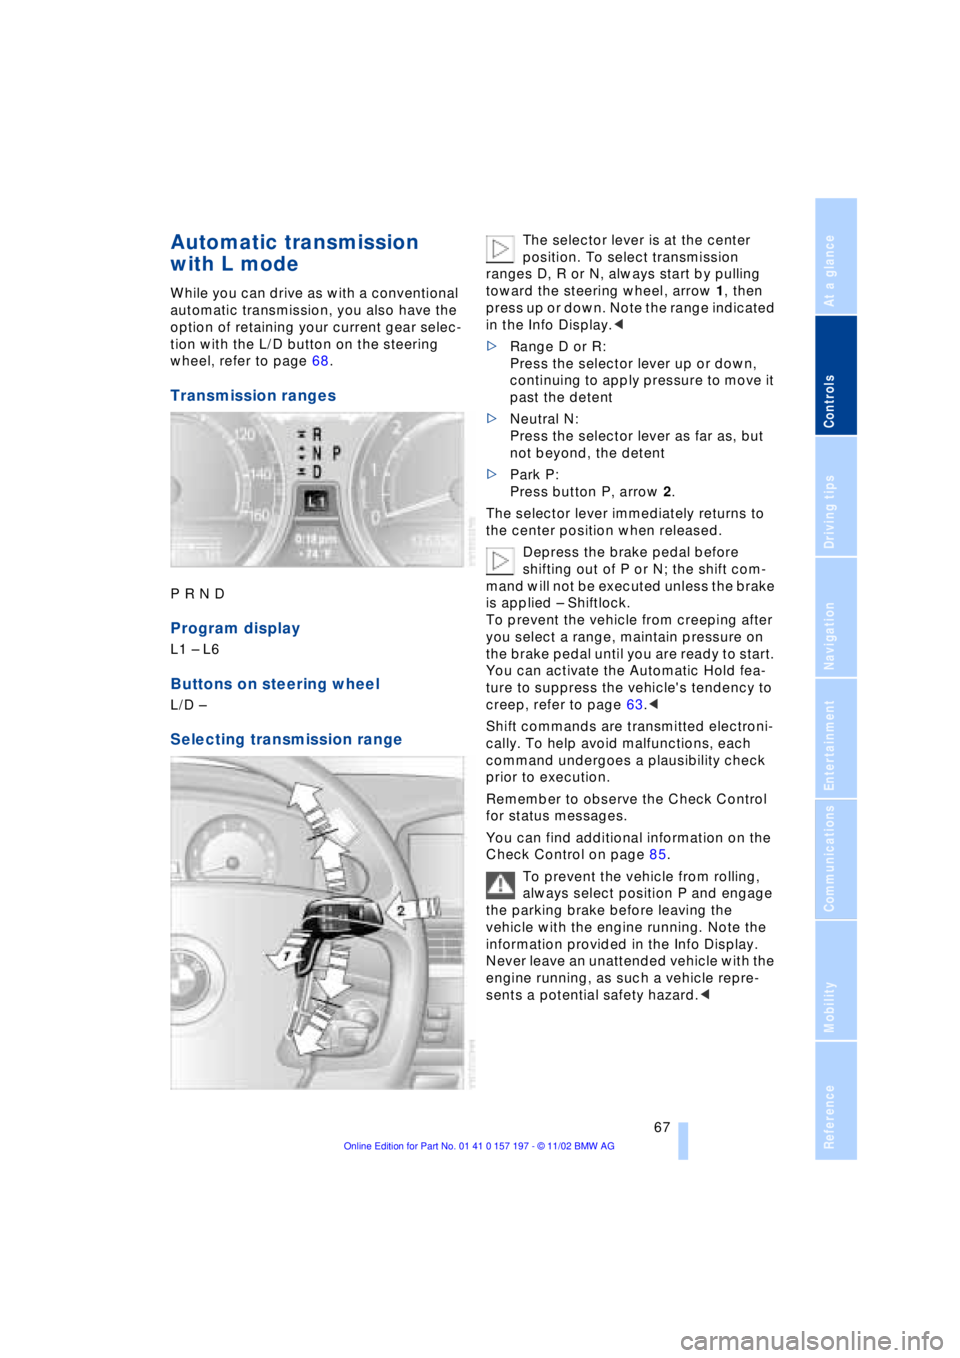
Transmission ranges
P R N D
Program display
L1 Ð L6
Buttons on steering wheel
L/D Ð
Selecting transmission range
The selector lever is at the center
position. To select transmission
ranges D, R or N, always start by pulling
toward the steering wheel, arrow 1, then
press up or down. Note the range indicated
in the Info Display.<
>Range D or R:
Press the selector lever up or down,
continuing to apply pressure to move it
past the detent
>Neutral N:
Press the selector lever as far as, but
not beyond, the detent
>Park P:
Press button P, arrow 2.
The selector lever immediately returns to
the center position when released.
Depress the brake pedal before
shifting out of P or N; the shift com-
mand will not be executed unless the brake
is applied Ð Shiftlock.
To prevent the vehicle from creeping after
you select a range, maintain pressure on
the brake pedal until you are ready to start.
You can activate the Automatic Hold fea-
ture to suppress the vehicle's tendency to
creep, refer to page 63.<
Shift commands are transmitted electroni-
cally. To help avoid malfunctions, each
command undergoes a plausibility check
prior to execution.
Remember to observe the Check Control
for status messages.
You can find additional information on the
Check Control on page 85.
To prevent the vehicle from rolling,
always select position P and engage
the parking brake before leaving the
vehicle with the engine running. Note the
information provided in the Info Display.
Never leave an unattended vehicle with the
engine running, as such a vehicle repre-
sents a potential safety hazard.<
Page 70 of 229
Driving
68
P Ñ Park
Press the button.
Select only when the vehicle is stationary.
The transmission lockout prevents the rear
wheels from turning. The lockout disen-
gages when you press the selector lever
toward D, N or R while the engine is run-
ning.
P is automatically engaged when you
remove the remote control unit from
the ignition lock after parking the vehicle.<
R Ñ Reverse
Press the selector lever upward, con-
tinuing to apply pressure to move it past
the detent. Select R only when the vehicle
is stationary.
N Ð Neutral
Press the selector lever as far as the
detent, but no further. Select N only if your
journey is interrupted for a long period.
>From D press the selector lever up
>From R press the selector lever down.
Note the arrows indicating direction in the
range display.
N is selected automatically whenever
the remote control unit remains
locked in the ignition lock after the ignition
is switched off. This function is useful in
automatic car washes, etc.
After approx. 30 minutes the system auto-
matically engages P. Remember to
observe the Check Control for status mes-
sages.<
D Drive Ð Automatic
Press the selector lever down, con-
tinuing beyond the detent. This is the range
recommended for normal vehicle opera-
tion. All forward gears are available.
Under normal operating conditions, fuel
consumption is lowest when driving in
position D.
Kickdown
The kickdown mode provides maximum
acceleration.
Press the accelerator pedal beyond full-
throttle detent point.
L mode
We recommend the L mode for times when
you wish to suppress certain shifts, for
instance, when ascending or descending
steep grades.
When the L mode is activated the transmis-
sion remains in your current gear, which
also appears in the Info Display, refer to
page 67. The transmission continues to
shift through the available ratios, but does
not proceed beyond the gear in the display.
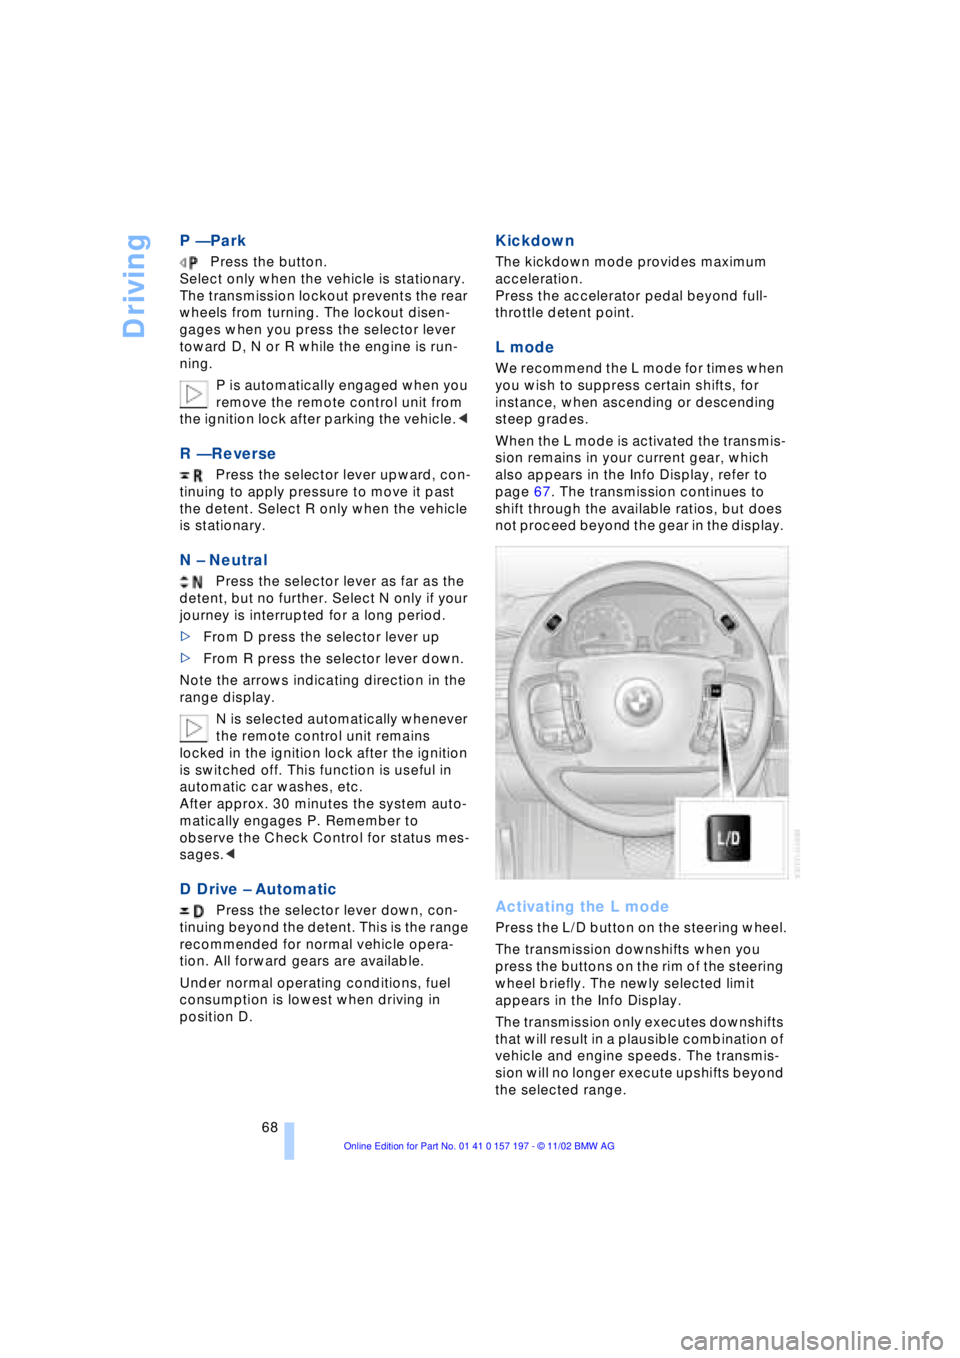
Activating the L mode
Press the L/D button on the steering wheel.
The transmission downshifts when you
press the buttons on the rim of the steering
wheel briefly. The newly selected limit
appears in the Info Display.
The transmission only executes downshifts
that will result in a plausible combination of
vehicle and engine speeds. The transmis-
sion will no longer execute upshifts beyond
the selected range.