length BMW 760LI SEDAN 2003 Owners Manual
[x] Cancel search | Manufacturer: BMW, Model Year: 2003, Model line: 760LI SEDAN, Model: BMW 760LI SEDAN 2003Pages: 229, PDF Size: 4.35 MB
Page 30 of 229

Voice command
28
Notices
Do not use the voice command
system to make emergency SOS
calls. Your voice and habitual tone could be
affected by stressful situations, as a result
of which the process of establishing the
telephone connection could be unneces-
sarily delayed. Instead, you should use the
emergency SOS button located adjacent to
the rearview mirror, refer to page 173.<
Environmental conditions
The voice command system uses a special
hands-free microphone located in the front
of your vehicle's headliner. Although the
system is designed to filter out ambient
noise, you can help ensure that your com-
mands will be understood by observing the
following instructions:
>Speak smoothly and clearly, at a normal
volume. Do not place any unusual
stress on individual syllables, and avoid
pauses
>Do not speak while the voice command
system is talking
>Keep the doors, windows and sunroof
closed to prevent interference from
ambient noise
>Avoid other sources of noise in the
vehicle while speaking, and ask other
vehicle occupants to refrain from
talking while you are using the system
>The hands-free microphone is aimed
toward the driver. This means that the
system might be unable to register the
voices of other vehicle occupants prop-
erly.
The notebook
To record a note
You can store approx. ten minutes of
spoken text Ð either as a single entry or as
multiple entries of any desired length.To terminate recording:
Press the button for a long period.
When recording notes, the voice
command system does not respond
to the {Cancel} command. The text
checking function for command words is
deactivated in this case so that you can
speak any desired text for your notes. This
feature saves you from having to concen-
trate on avoiding these words while
recording.<
Listening to a notebook entry
Listening to recorded notebook entries:
Delete notes
Clearing the notebook
To delete all contents from the notebook:
{Record note}.
1.{Read out}
Approximately the first 3 seconds of
the first note are read aloud
2.Following the inquiry {{Note and
next?}} select the next function
>To listen to the entire note:
{Read out}
>To hear the next notebook entry:
{Next}
>To hear the entry again:
{Back} or
{Repeat}.
1.{Edit}
2.{Delete}.
1.{Notepad}
2.{Delete}.
Page 60 of 229

Adjustments
58 Adjust the tether strap according to the
child-restraint manufacturer's instructions.
Before installing any child-restraint
system or child seat, please read the
following:
Never install a rearward-facing child-
restraint system in the front passenger seat
of this vehicle.
Your vehicle is equipped with an airbag
supplemental restraint system for the front
passenger. Because the backrest on any
rearward-facing child-restraint system Ð of
the kind designed for infants under 1 year
and 20 Ibs. (9 kg) Ð would be within the
airbag's deployment range, you should
never mount such a system in the front
passenger seat, since the impact of the
airbag against the child restraint's backrest
could lead to serious or fatal injuries.
If it is necessary for a child Ð not an infant Ð
to ride in the front seat, certain precautions
should be taken. First, move the passenger
seat as far away from the instrument panel
as possible. This important precaution is
intended to maximize the distance
between the airbag and the child. Older
children should be tightly secured with a
safety belt, after they have outgrown a
booster seat that is appropriate for their
age, height and weight. Younger children
should be secured in an appropriate for-
ward-facing child-restraint system that has
first been properly secured with a safety
belt. Never install a rearward-facing child-
restraint system in the front passenger
seat.
We strongly urge you to carefully read and
comply with the instructions for installation
and use provided by the child-restraint's
manufacturer whenever you use such a
system.
Be sure that all occupants Ð of all ages Ð
remain properly and securely restrained at
all times. If your vehicle is equipped with
electric power seats at the rear, these will
need to be returned to their standard
adjustment setting position before a child-
restraint system is used, refer to page 47.
Always press the safety switch for the
power windows before transporting chil-
dren in the rear seats, refer to page 43. This switch also disables the power rear seat
adjustment. Incorrect or unsupervised
adjustment of the electric power seats
could lead to injuries or damage to the
child-restraint system(s) installed in the
rear.<
All rear seating positions in your vehicle
meet the recommendations of SAE J1819,
an industry-recommended practice for
securing child-restraint systems in motor
vehicles.
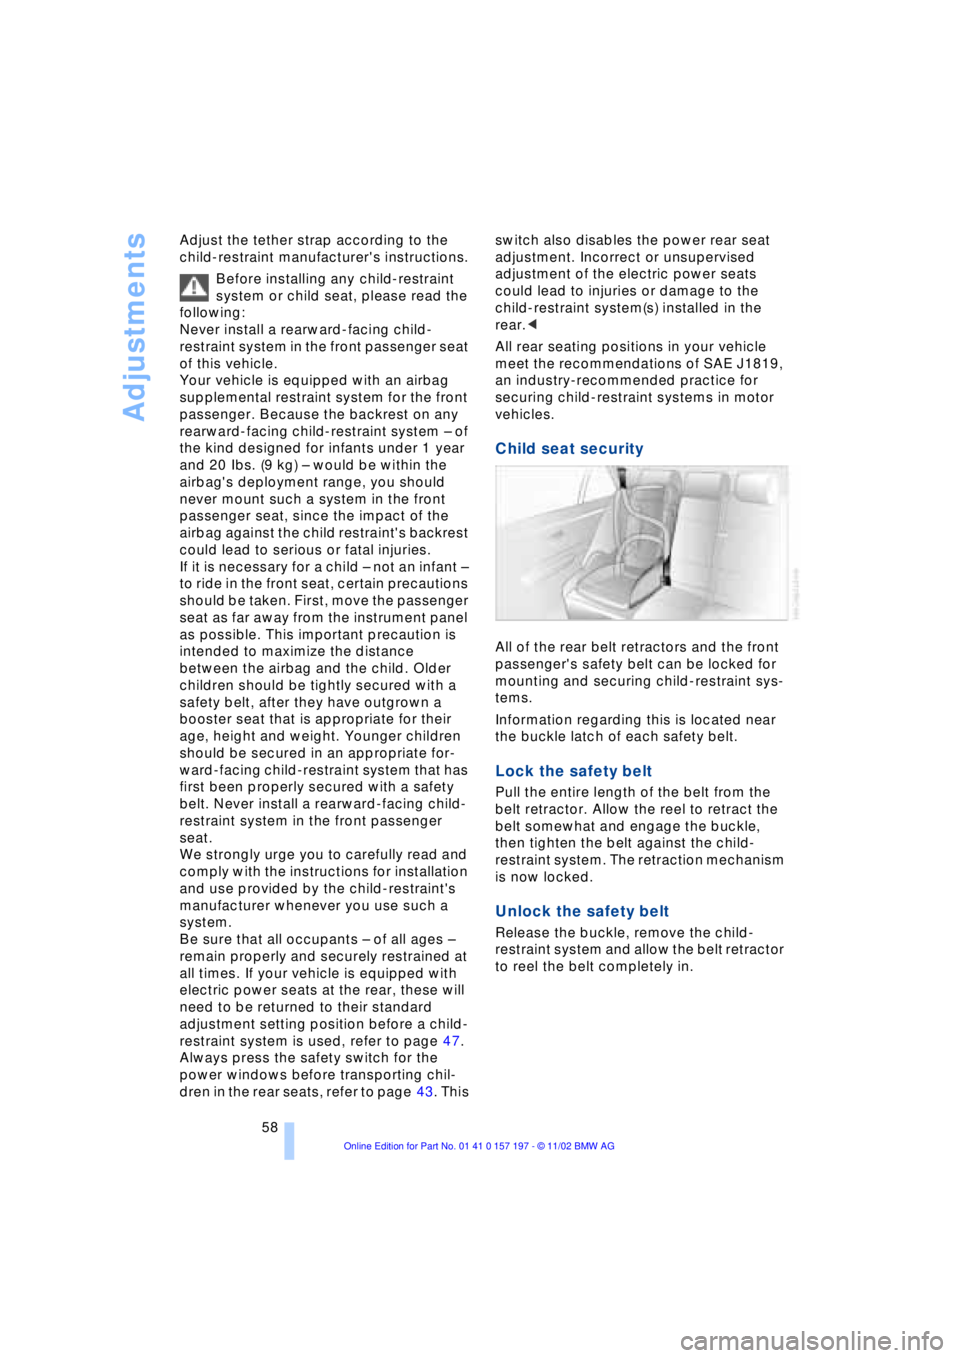
Child seat security
All of the rear belt retractors and the front
passenger's safety belt can be locked for
mounting and securing child-restraint sys-
tems.
Information regarding this is located near
the buckle latch of each safety belt.
Lock the safety belt
Pull the entire length of the belt from the
belt retractor. Allow the reel to retract the
belt somewhat and engage the buckle,
then tighten the belt against the child-
restraint system. The retraction mechanism
is now locked.
Unlock the safety belt
Release the buckle, remove the child-
restraint system and allow the belt retractor
to reel the belt completely in.
Page 122 of 229

Practical interior accessories
120
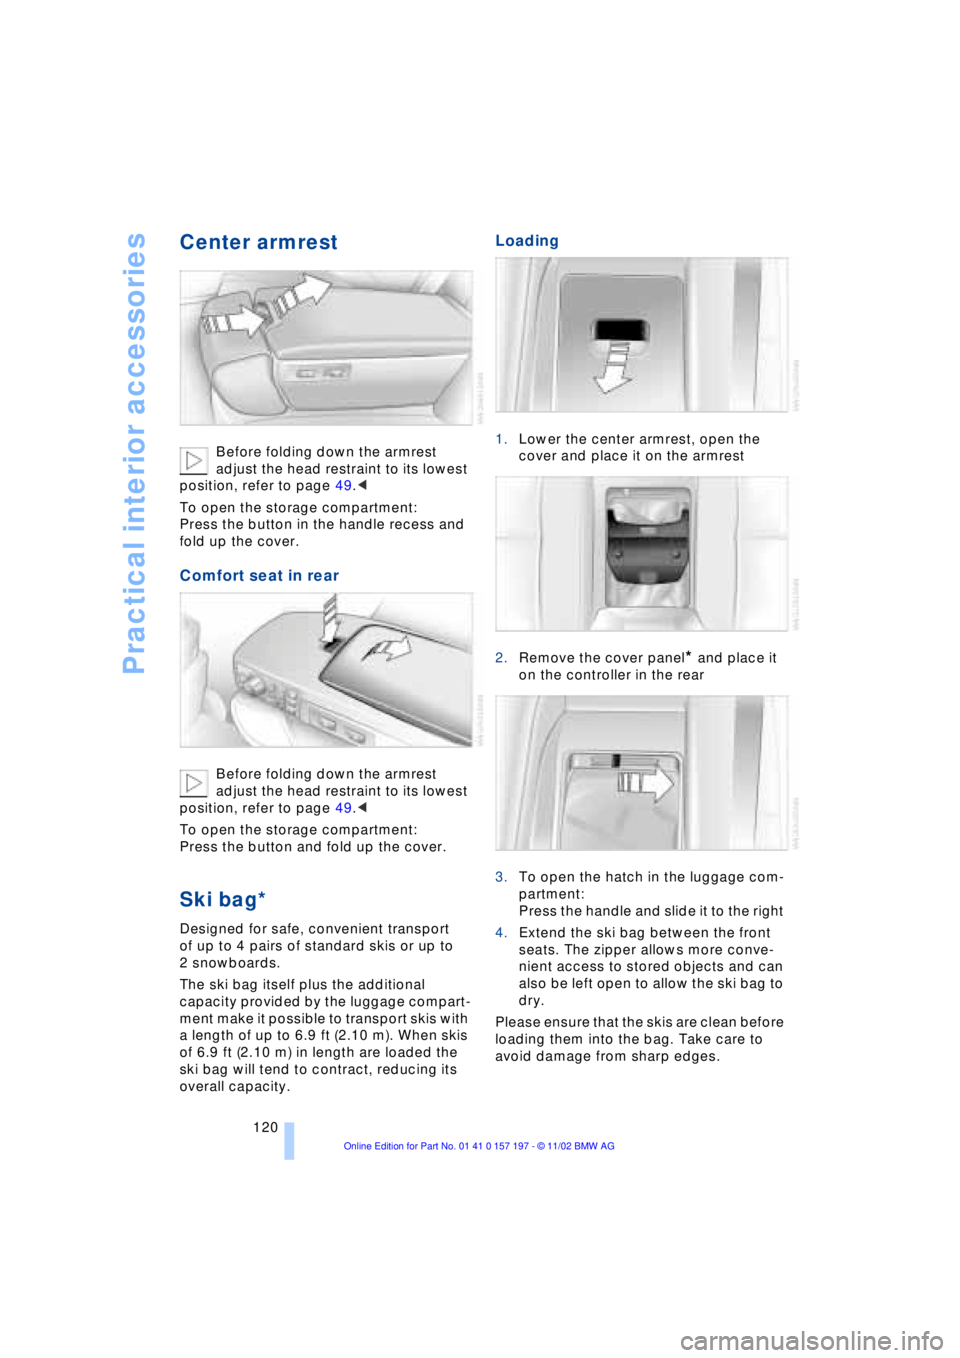
Center armrest
Before folding down the armrest
adjust the head restraint to its lowest
position, refer to page 49.<
To open the storage compartment:
Press the button in the handle recess and
fold up the cover.
Comfort seat in rear
Before folding down the armrest
adjust the head restraint to its lowest
position, refer to page 49.<
To open the storage compartment:
Press the button and fold up the cover.
Ski bag*
Designed for safe, convenient transport
of up to 4 pairs of standard skis or up to
2 snowboards.
The ski bag itself plus the additional
capacity provided by the luggage compart-
ment make it possible to transport skis with
a length of up to 6.9 ft (2.10 m). When skis
of 6.9 ft (2.10 m) in length are loaded the
ski bag will tend to contract, reducing its
overall capacity.
Loading
1.Lower the center armrest, open the
cover and place it on the armrest
2.Remove the cover panel
* and place it
on the controller in the rear
3.To open the hatch in the luggage com-
partment:
Press the handle and slide it to the right
4.Extend the ski bag between the front
seats. The zipper allows more conve-
nient access to stored objects and can
also be left open to allow the ski bag to
dry.
Please ensure that the skis are clean before
loading them into the bag. Take care to
avoid damage from sharp edges.
Page 219 of 229

217
At a glance
Controls
Driving tips
Communications
Navigation
Entertainment
Mobility
Reference
Fuel tank capacity 182
"FULL MENU" 165, 166
"Full Release" 25
Fuses 201
G
Garage door opener, refer
to Integrated universal
remote control 114
Gasoline 183
General driving
instructions 124
Glasses compartment 118
Glove compartment 117
GPS, refer to Navigation
system 130
GPS navigation system
Ð selecting destination in
"Information" 135
Ground lamps 104
Guidance system
Ð interrupting 140
Ð starting 137
Ð terminating 140
H
Handbrake, refer to Parking
brake 62
Hand lamp 117
Hands-free
microphone 173
Hands-free system 173
Hazard warning flashers 16
Headlamp cleaning
system 73
Headlamp control,
automatic 102
Headlamp flasher 71
Headlamps
Ð automatic control 102
Ð cleaning 73
Ð high beams 103
Ð low beams 102
Headlamp washers 72
Head restraints 47
Ð front head restraints,
active 48
Ð rear head restraints 48
Heated seats 51Heated steering wheel 53
Heating and ventilation 105
Heating while stopped 108
Height 209
Height adjustment
Ð seats 46
Ð steering wheel 53
"Help" 19, 22
Help texts in Control
Display 23
High beams 103
Ð bulb replacement 196
Home address 141
Hood release 189
Horn 13
Hydraulic brake assistant,
refer to DBC 96
Hydroplaning 124, 186
I
Ice warning 82
idrive, refer to Control
Center 19
Ignition key 34
Ignition lock 61
"Indep. heater" 112
"Indep. ventil." 109, 112
Indicator lamps 15
"Individual" 110
Individual button
assignments on steering
wheel 53
Inflation pressure 184
Info Display 14
"Information" for
navigation 135, 136
Information on the
navigation system, refer
to Voice guidance for
navigation 139
Infrared windshield, refer to
Entry/pass tags 127
Instrument cluster, refer to
Info Display 14
Instrument illumination 103
Instrument panel 12, 16
Integrated universal remote
control 114
Interior lamps 103
Ð remote control 36Interior mirrors 52
Ð automatic dimming 52
Interior motion sensor 42
Interior protection
Ð deactivation 36, 42
Interior rearview mirror 52
Ð automatic dimming 52
Intermittent wipe 72
J
Jack 198
Joystick, refer to Control
Center 19
Jump-starting 202
K
Key Memory 60
Keys 34
Ð adapter for spare key 34
Kickdown 68
L
Lamps 102
Ð fog lamps 103
Ð high beams/standing
lamps 103
Ð interior lamps 103
Ð parking lamps/low
beams 102
Language control 18, 26
"Last" 176
"Last dest." 136
"Last exit" 139
Latch, refer to
LATCH child-restraint
system 59
LATCH child-restraint
system 59
LEDs light-emitting
diodes 104
"Left"
Ð for automatic climate
control 109
Ð for heated seats 51
Length 209
Level control system 101
License plate lamp,
bulb replacement 197