tire size BMW 760LI SEDAN 2003 Owners Manual
[x] Cancel search | Manufacturer: BMW, Model Year: 2003, Model line: 760LI SEDAN, Model: BMW 760LI SEDAN 2003Pages: 229, PDF Size: 4.35 MB
Page 121 of 229
At a glance
Controls
Driving tips
Communications
Navigation
Entertainment
Mobility
Reference
119
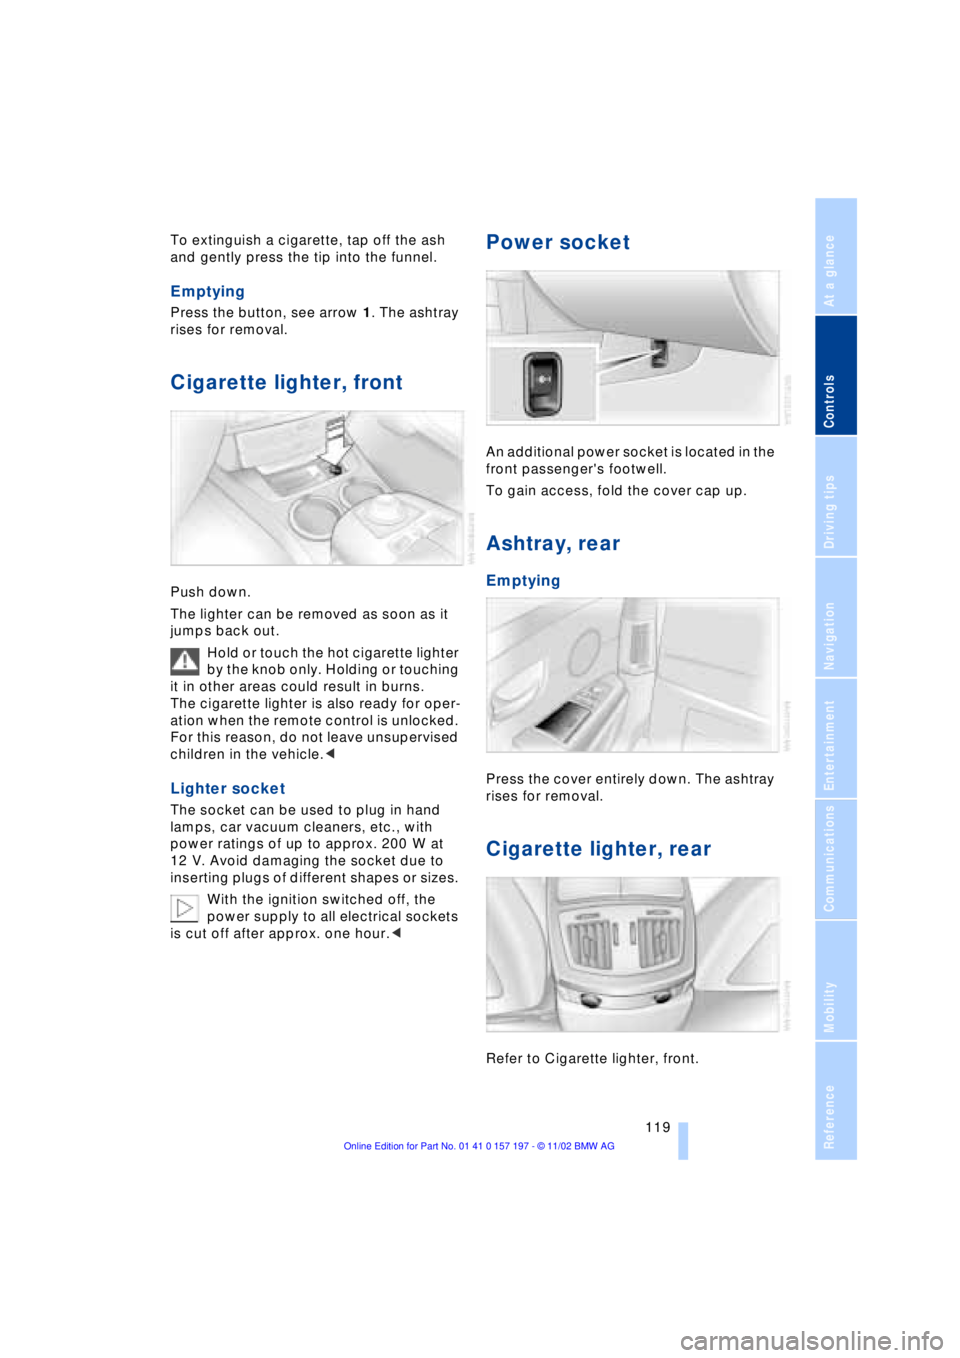
To extinguish a cigarette, tap off the ash
and gently press the tip into the funnel.
Emptying
Press the button, see arrow 1. The ashtray
rises for removal.
Cigarette lighter, front
Push down.
The lighter can be removed as soon as it
jumps back out.
Hold or touch the hot cigarette lighter
by the knob only. Holding or touching
it in other areas could result in burns.
The cigarette lighter is also ready for oper-
ation when the remote control is unlocked.
For this reason, do not leave unsupervised
children in the vehicle.<
Lighter socket
The socket can be used to plug in hand
lamps, car vacuum cleaners, etc., with
power ratings of up to approx. 200 W at
12 V. Avoid damaging the socket due to
inserting plugs of different shapes or sizes.
With the ignition switched off, the
power supply to all electrical sockets
is cut off after approx. one hour.<
Power socket
An additional power socket is located in the
front passenger's footwell.
To gain access, fold the cover cap up.
Ashtray, rear
Emptying
Press the cover entirely down. The ashtray
rises for removal.
Cigarette lighter, rear
Refer to Cigarette lighter, front.
Page 186 of 229
Wheels and tires
184
Wheels and tires
Tire inflation pressure
Information for your safety
The factory-mounted tires have been spe-
cially selected to provide optimal perfor-
mance when installed on your vehicle; if
properly cared for they will furnish a combi-
nation of tremendous safety and excellent
ride comfort.
It is not merely the tire's service life, but
also driving comfort and Ð above all else Ð
driving safety that depend on the condition
of the tires and the maintenance of the spe-
cified tire pressure.
Incorrect inflation pressure is a frequent
cause of tire damage. Tire inflation pres-
sures also have a substantial effect on your
BMW's handling response.
Check tire inflation pressures regu-
larly Ð at least every two weeks and
before beginning a longer trip. If you fail to
observe this precaution you may be driving
on tires with incorrect tire pressures, a con-
dition that can not only compromise your
vehicle's stability, but also lead to tire
damage and the risk of an accident.
Remember to check the inflation pressure
in your spare tire. Inflate the spare to the
highest pressure specified for any tire on
the vehicle.<
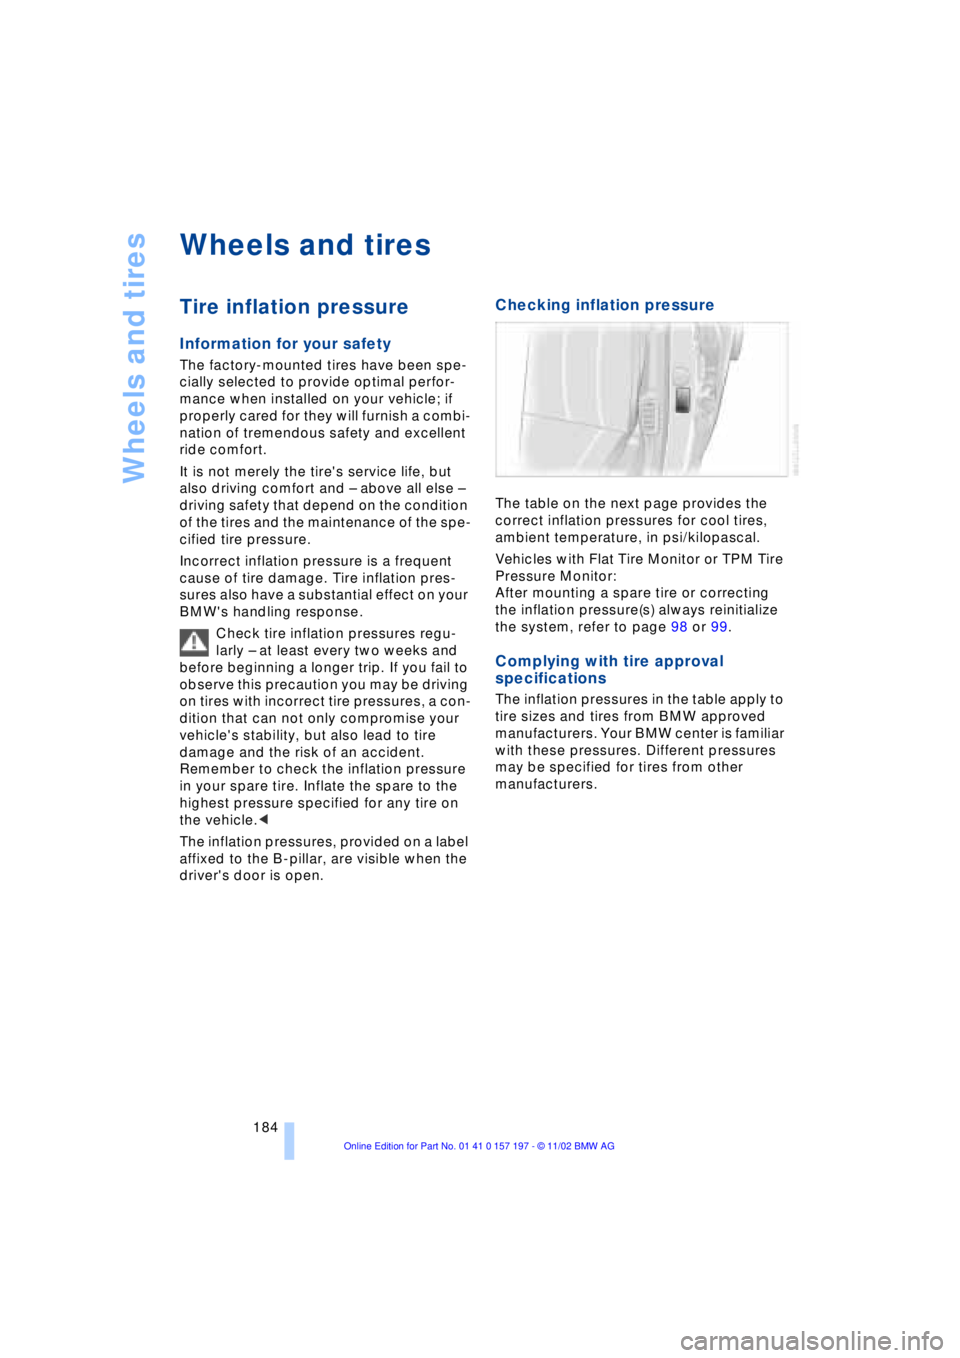
The inflation pressures, provided on a label
affixed to the B-pillar, are visible when the
driver's door is open.
Checking inflation pressure
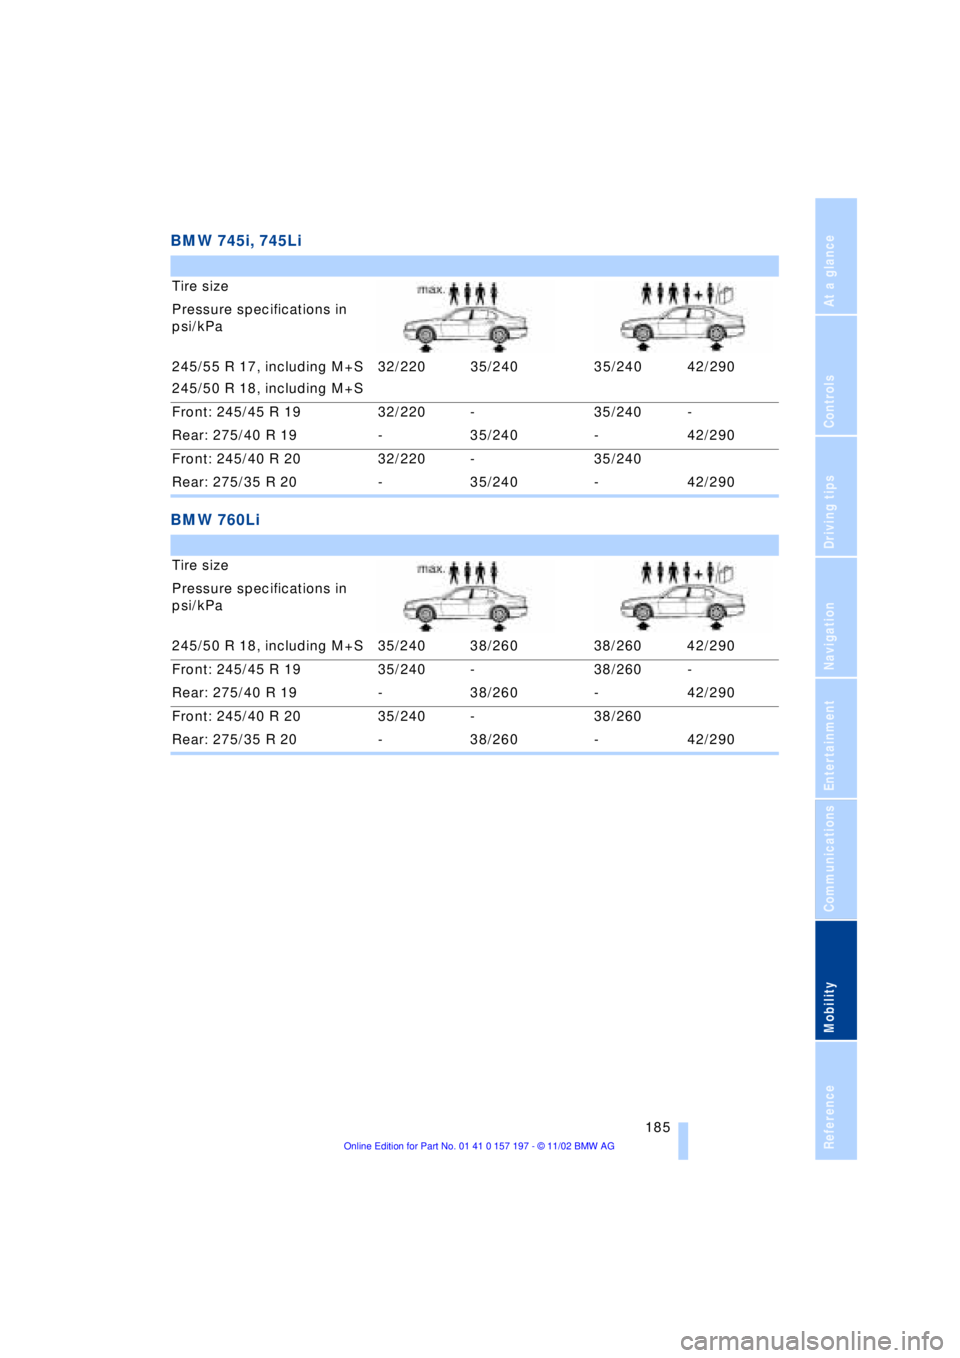
The table on the next page provides the
correct inflation pressures for cool tires,
ambient temperature, in psi/kilopascal.
Vehicles with Flat Tire Monitor or TPM Tire
Pressure Monitor:
After mounting a spare tire or correcting
the inflation pressure(s) always reinitialize
the system, refer to page 98 or 99.
Complying with tire approval
specifications
The inflation pressures in the table apply to
tire sizes and tires from BMW approved
manufacturers. Your BMW center is familiar
with these pressures. Different pressures
may be specified for tires from other
manufacturers.
Page 187 of 229
At a glance
Controls
Driving tips
Communications
Navigation
Entertainment
Mobility
Reference
185
BMW 745i, 745Li
BMW 760Li
Tire size
Pressure specifications in
psi/kPa
245/55 R 17, including M+S
245/50 R 18, including M+S 32/220 35/240 35/240 42/290
Front: 245/45 R 19 32/220 - 35/240 -
Rear: 275/40 R 19 - 35/240 - 42/290
Front: 245/40 R 20 32/220 - 35/240
Rear: 275/35 R 20 - 35/240 - 42/290
Tire size
Pressure specifications in
psi/kPa
245/50 R 18, including M+S 35/240 38/260 38/260 42/290
Front: 245/45 R 19 35/240 - 38/260 -
Rear: 275/40 R 19 - 38/260 - 42/290
Front: 245/40 R 20 35/240 - 38/260
Rear: 275/35 R 20 - 38/260 - 42/290
Page 189 of 229
At a glance
Controls
Driving tips
Communications
Navigation
Entertainment
Mobility
Reference
187
wear one and one-half Ð 1g Ð times as
well on the government course as a tire
graded 100. The relative performance of
tires depends upon the actual conditions of
their use, however, and may depart signifi-
cantly from the norm due to variations in
driving habits, service practices and differ-
ences in road characteristics and climate.
Traction
The traction grades, from highest to lowest,
are AA, A, B, and C.
Those grades represent the tire's ability to
stop on wet pavement as measured under
controlled conditions on specified govern-
ment test surfaces of asphalt and concrete.
A tire marked C may have poor traction
performance.
The traction grade assigned to this
tire is based on straight-ahead
braking traction tests, and does not include
acceleration, cornering, hydroplaning, or
peak traction characteristics.<
Temperature
The temperature grades are A Ð the
highest Ð, B, and C, representing the tire's
resistance to the generation of heat and its
ability to dissipate heat when tested under
controlled conditions on a specified indoor
laboratory test wheel.
Sustained high temperature can cause the
material of the tire to degenerate and
reduce tire life, and excessive temperature
can lead to sudden tire failure. The grade C
corresponds to a level of performance
which all passenger car tires must meet
under the Federal Motor Vehicle Safety
Standard No. 109. Grades B and A repre-
sent higher levels of performance on the
laboratory test wheel than the minimum
required by law.
The temperature grade for this tire is
established for a tire that is properly
inflated and not overloaded. Excessive
speed, underinflation, or excessive
loading, either separately or in combina-
tion, can cause heat buildup and possible
tire failure.<
Uniform Tire Quality Grading
Quality grades can be found where appli-
cable on the tire sidewall between tread
shoulder and maximum section width. For
example:
Treadwear 200 Traction AA
Temperature A
Do not use retreaded tires, since dri-
ving safety may be impaired. Possible
variations in the design and the age Ð which
could be substantial Ð of the carcasses can
lead to unusually rapid wear.<
Tire age
The tire's date of manufacture is indicated
on the sidewall:
DOT ... 3402 indicates that a tire was
manufactured in week 34 of the year 2002.
Regardless of mileage or wear, BMW
recommends that you replace all tires Ð
including the spare Ð after a maximum of
6 years, even though the tires may have a
theoretical service life of up to 10 years.
Wheel and tire
combinations
The right choice
Use only wheel and tire combinations
that BMW has approved for your par-
ticular vehicle. Variations in factors such as
manufacturing tolerances mean that even
wheels and tires with identical official size
ratings could actually have different dimen-
sions than the approved units Ð these diffe-
rences could lead to body contact, and
with it the risk of severe accidents. If non-
approved wheels and tires are used, BMW
cannot evaluate their suitability, and there-
fore cannot be held liable for driving
safety.<
BMW tests certain tire brands for each tire
size, classifies them as road-safe and
approves them. Consult your BMW center
for more information. Observe any country-
specific regulations, e.g. on making a cor-
responding entry in the vehicle documents.
Page 201 of 229
Overview
Controls
Driving tips
Communications
Navigation
Entertainment
Mobility
Reference
199
Procedure
1.Read carefully and comply with the
safety precautions on page 198
2.Secure the vehicle to prevent it from
rolling:
Place the wheel chock against the rear
surface of the front tire on the side
opposite the side being raised. If the
vehicle is parked on a downward slope,
place the wheel chock securely in front
of the tire. If the wheel must be changed
on a surface with a more severe slope,
take additional precautions to secure
the vehicle from rolling
3.Loosen the lug bolts 1/2 a turn
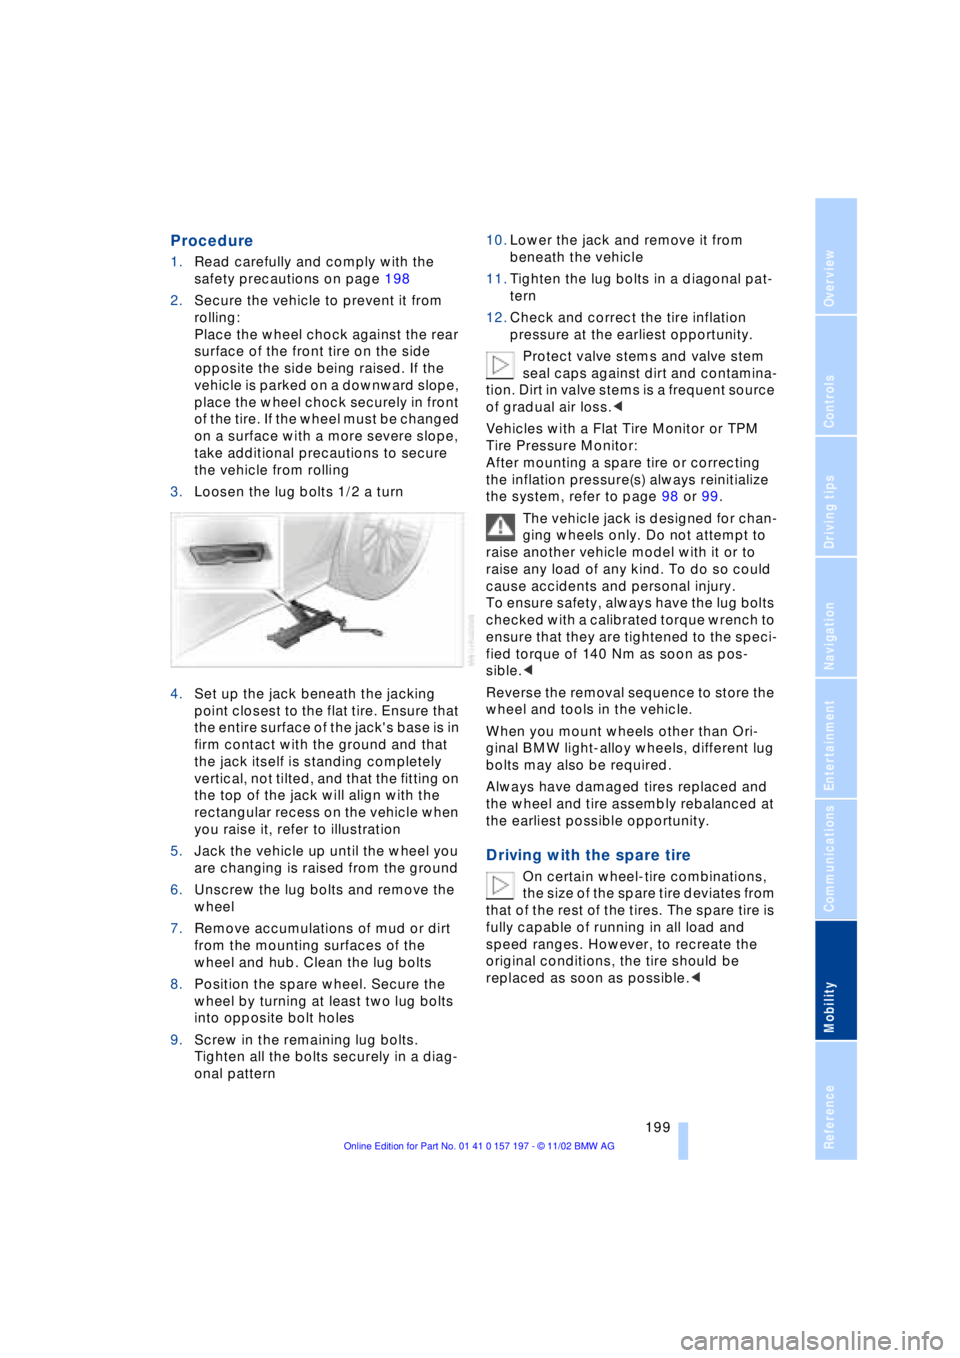
4.Set up the jack beneath the jacking
point closest to the flat tire. Ensure that
the entire surface of the jack's base is in
firm contact with the ground and that
the jack itself is standing completely
vertical, not tilted, and that the fitting on
the top of the jack will align with the
rectangular recess on the vehicle when
you raise it, refer to illustration
5.Jack the vehicle up until the wheel you
are changing is raised from the ground
6.Unscrew the lug bolts and remove the
wheel
7.Remove accumulations of mud or dirt
from the mounting surfaces of the
wheel and hub. Clean the lug bolts
8.Position the spare wheel. Secure the
wheel by turning at least two lug bolts
into opposite bolt holes
9.Screw in the remaining lug bolts.
Tighten all the bolts securely in a diag-
onal pattern 10.Lower the jack and remove it from
beneath the vehicle
11.Tighten the lug bolts in a diagonal pat-
tern
12.Check and correct the tire inflation
pressure at the earliest opportunity.
Protect valve stems and valve stem
seal caps against dirt and contamina-
tion. Dirt in valve stems is a frequent source
of gradual air loss.<
Vehicles with a Flat Tire Monitor or TPM
Tire Pressure Monitor:
After mounting a spare tire or correcting
the inflation pressure(s) always reinitialize
the system, refer to page 98 or 99.
The vehicle jack is designed for chan-
ging wheels only. Do not attempt to
raise another vehicle model with it or to
raise any load of any kind. To do so could
cause accidents and personal injury.
To ensure safety, always have the lug bolts
checked with a calibrated torque wrench to
ensure that they are tightened to the speci-
fied torque of 140 Nm as soon as pos-
sible.<
Reverse the removal sequence to store the
wheel and tools in the vehicle.
When you mount wheels other than Ori-
ginal BMW light-alloy wheels, different lug
bolts may also be required.
Always have damaged tires replaced and
the wheel and tire assembly rebalanced at
the earliest possible opportunity.
Driving with the spare tire
On certain wheel-tire combinations,
the size of the spare tire deviates from
that of the rest of the tires. The spare tire is
fully capable of running in all load and
speed ranges. However, to recreate the
original conditions, the tire should be
replaced as soon as possible.<
Page 224 of 229

Everything from A to Z
222 "Sport"
Ð "EDC" 97
Stability control,
refer to Driving stability
control 94
Standard during TV
operation 161
Standing lamps 103
Start/stop button 61
Starting 62
Starting and stopping
Ð cassette deck 158
Ð CD changer 156
Ð CD player 153
Ð DVD changer 164
Ð radio 149
Ð TV 160
Starting
problems 62, 203, 204
Starting the engine 62
"State inspection" 84
Station, refer to Radio 150
Status lines in Control
Center 24
Steering wheel 18
Ð adjustment 53
Ð individual button
assignment options 53
Steering wheel adjustment,
automatic 53
Steering wheel heater 53
Steering wheel memory 54
Steptronic 69
Stopwatch 90
Ð "INTERM. TIME" 90
Storage, refer to Care
manual
Storage compartments 117
Storing desired speeds,
refer to Programmable
cruise control 75
Storing destination per
voice 141
Storing seating position,
refer to Seat, mirror and
steering wheel
memory 54
Straps, refer to Cargo
loading 126
"Street" for navigation 134"SUBTITLE" in DVD
mode 167
Summer tires 187
Sun blinds 115
Switch for battery 201
Switching audio sources
on/off 147
Switching off the engine 62
Switching on and off
portable phone 174
"Switch. time1" 113
"Switch. time 2" 113
Symbols 6
Ð Control Center 20
System failure reports, refer
to Check Control 85
T
Tachometer 82
Tail lamps 197
Ð bulb replacement 197
"Tape" 146, 158, 159
Target cursor for
navigation 134, 135
Technical data 208
Technical modifications 8
Telephone 170
Ð operation with the
telephone keypad,
folding 172
Telephone directory 175
Ð creating voice command
telephone directory 175
Ð deleting all entries 176
Ð dialing numbers 175
Ð dialing numbers
using voice command
system 175
Ð entering numbers in voice
command directory 175
Ð entry deletion 176
Ð updating voice command
telephone directory 175
Ð viewing entries 176
Telephone keypad,
folding 172
Television, refer to TV 160
"Temp. distribution" 51
Temperature
adjustment 107Temperature display,
outside temperature 82
Tilt function, passenger-
side mirror 55
Time of arrival,
estimated 88
Timing 90
"Tint" during
TV operation 161
Tire change 197
Tire inflation pressures 184
Ð checking 184
Tire-pressure
monitoring 98, 99
Tire Pressure Monitor
TPM 99
Tire Quality Grading 187
Tires
Ð flat tire 197
Ð tire changes 197
Ð tire damage 186
Ð tire inflation
pressures 184
Ð tire pressure control 99
Ð tire replacement 186
Ð tire size, refer to Wheel
and tire
combinations 187
Ð tire tread 186
Ð treadwear indicators 186
"TITLE" 165
Title search
Ð cassette deck 159
"Tone" for audio
operation 146
Tone for audio operation
Ð adjusting 147
"Tone" in sound system
operation 148
Tools 195
"TOP 8" 176
"TOP" in DVD mode 167
Torque 208
Tow fittings 203
Towing 203, 204
Tow-starting 204
"TPM" 99
Ð "INITIALIZE" 99
TPM Tire Pressure
Monitor 99
Ð "INITIALIZE" 99