service BMW 760LI SEDAN 2015 User Guide
[x] Cancel search | Manufacturer: BMW, Model Year: 2015, Model line: 760LI SEDAN, Model: BMW 760LI SEDAN 2015Pages: 314, PDF Size: 7.9 MB
Page 54 of 314
Opening and closingVehicle features and options
This chapter describes all standard, country-
specific and optional features offered with the
series. It also describes features that are not
necessarily available in your car, e. g., due to
the selected options or country versions. This
also applies to safety-related functions and
systems. The respectively applicable country
provisions must be observed when using the
respective features and systems.
Remote control/key General information
The vehicle is supplied with two remote con‐
trols with integrated key.
Every remote control holds a replaceable bat‐
tery.
You may set the key functions depending on
the optional features and country-specific ver‐
sion. For Settings, refer to page 67.
The vehicle stores personal settings for every
remote control. Profile, refer to page 58.
The remote controls hold information on re‐
quired maintenance. Service data in the re‐
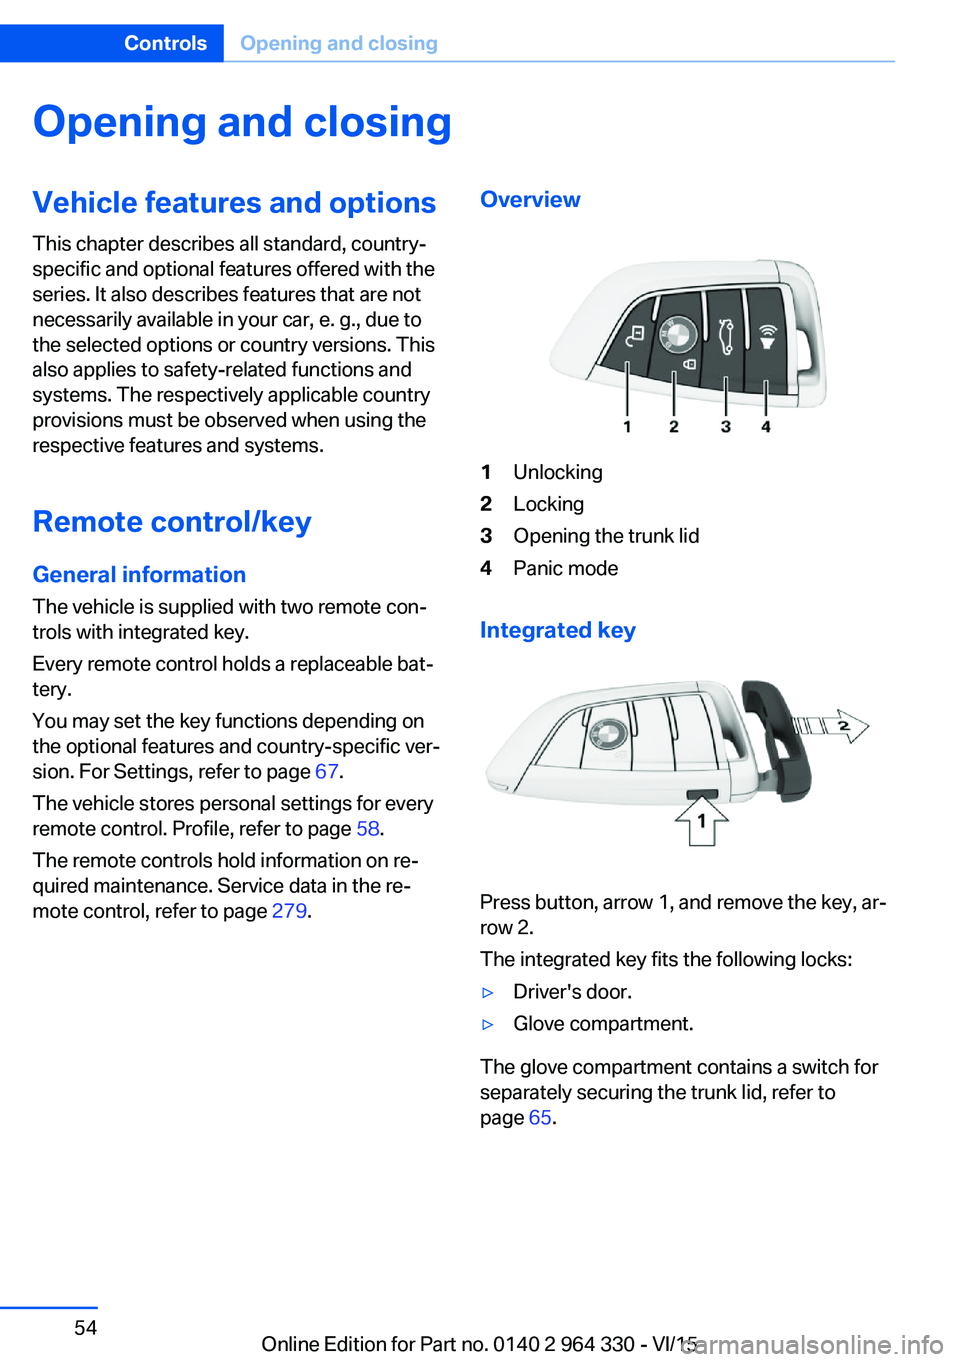
mote control, refer to page 279.Overview1Unlocking2Locking3Opening the trunk lid4Panic mode
Integrated key
Press button, arrow 1, and remove the key, ar‐
row 2.
The integrated key fits the following locks:
▷Driver's door.▷Glove compartment.
The glove compartment contains a switch for
separately securing the trunk lid, refer to
page 65.
Seite 54ControlsOpening and closing54
Online Edition for Part no. 0140 2 964 330 - VI/15
Page 55 of 314
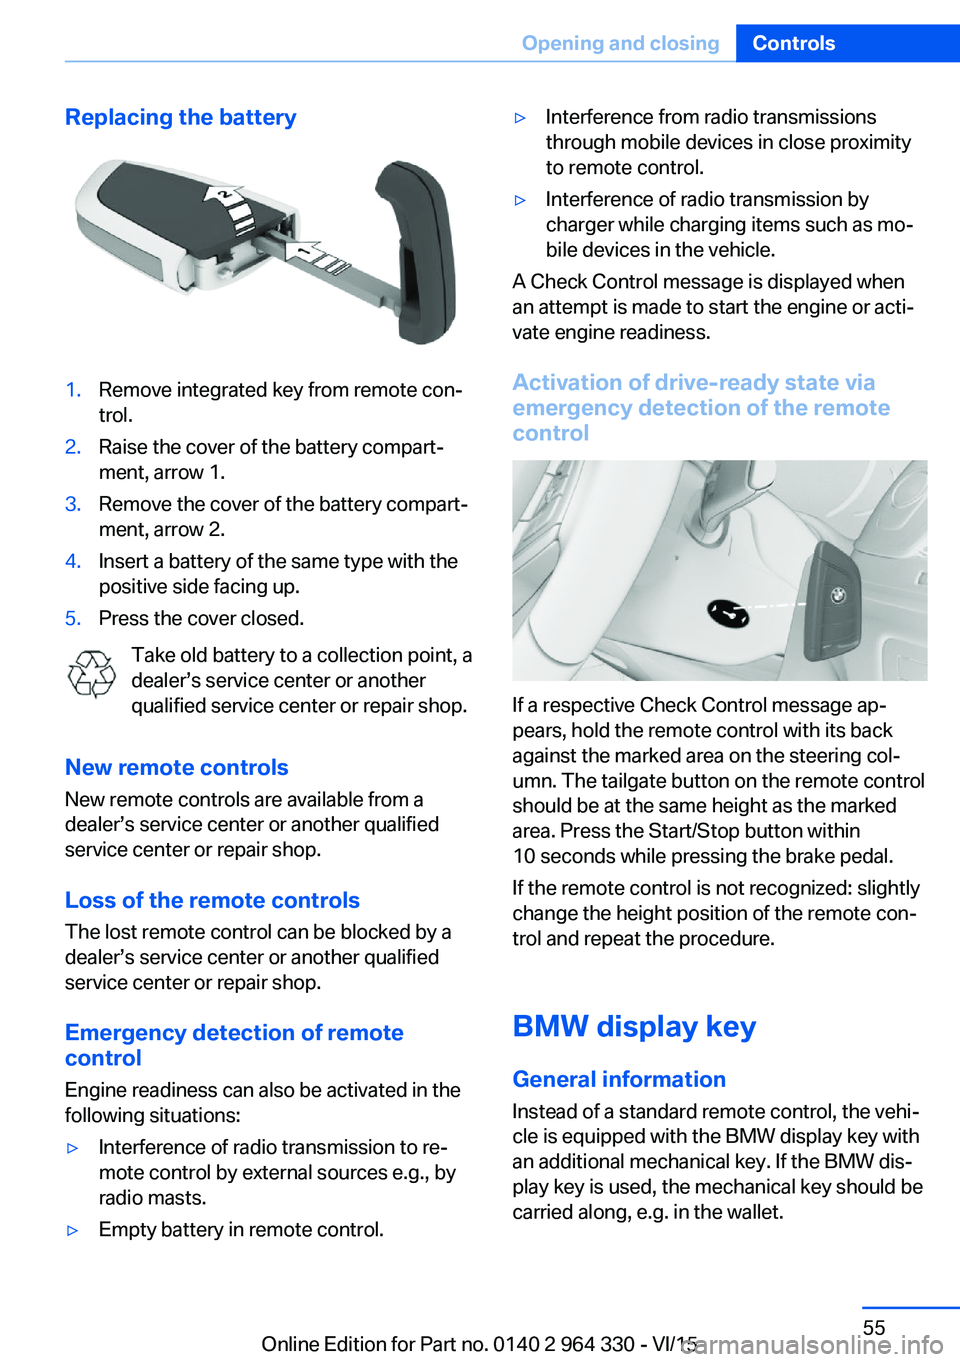
Replacing the battery1.Remove integrated key from remote con‐
trol.2.Raise the cover of the battery compart‐
ment, arrow 1.3.Remove the cover of the battery compart‐
ment, arrow 2.4.Insert a battery of the same type with the
positive side facing up.5.Press the cover closed.
Take old battery to a collection point, a
dealer’s service center or another
qualified service center or repair shop.
New remote controls New remote controls are available from a
dealer’s service center or another qualified
service center or repair shop.
Loss of the remote controls
The lost remote control can be blocked by a
dealer’s service center or another qualified
service center or repair shop.
Emergency detection of remote
control
Engine readiness can also be activated in the
following situations:
▷Interference of radio transmission to re‐
mote control by external sources e.g., by
radio masts.▷Empty battery in remote control.▷Interference from radio transmissions
through mobile devices in close proximity
to remote control.▷Interference of radio transmission by
charger while charging items such as mo‐
bile devices in the vehicle.
A Check Control message is displayed when
an attempt is made to start the engine or acti‐
vate engine readiness.
Activation of drive-ready state via
emergency detection of the remote
control
If a respective Check Control message ap‐
pears, hold the remote control with its back
against the marked area on the steering col‐
umn. The tailgate button on the remote control
should be at the same height as the marked
area. Press the Start/Stop button within
10 seconds while pressing the brake pedal.
If the remote control is not recognized: slightly
change the height position of the remote con‐
trol and repeat the procedure.
BMW display key
General information
Instead of a standard remote control, the vehi‐
cle is equipped with the BMW display key with
an additional mechanical key. If the BMW dis‐
play key is used, the mechanical key should be
carried along, e.g. in the wallet.
Seite 55Opening and closingControls55
Online Edition for Part no. 0140 2 964 330 - VI/15
Page 56 of 314
The BMW display key supports all functions of
the standard remote control. Beyond that, the
following functions are available.▷Display status of doors and windows.▷Display status of the alarm system.▷With parked-car heating: operate parked-
car heating.
Without parked-car heating: operate
parked-car ventilation.▷Call up range with available fuel.▷Display service information.
Emergency detection of the BMW
display key
The description for the emergency detection
of the remote control, refer to page 55, also
applies for the BMW display key. However, the
locking button should be at the height of the
marking.
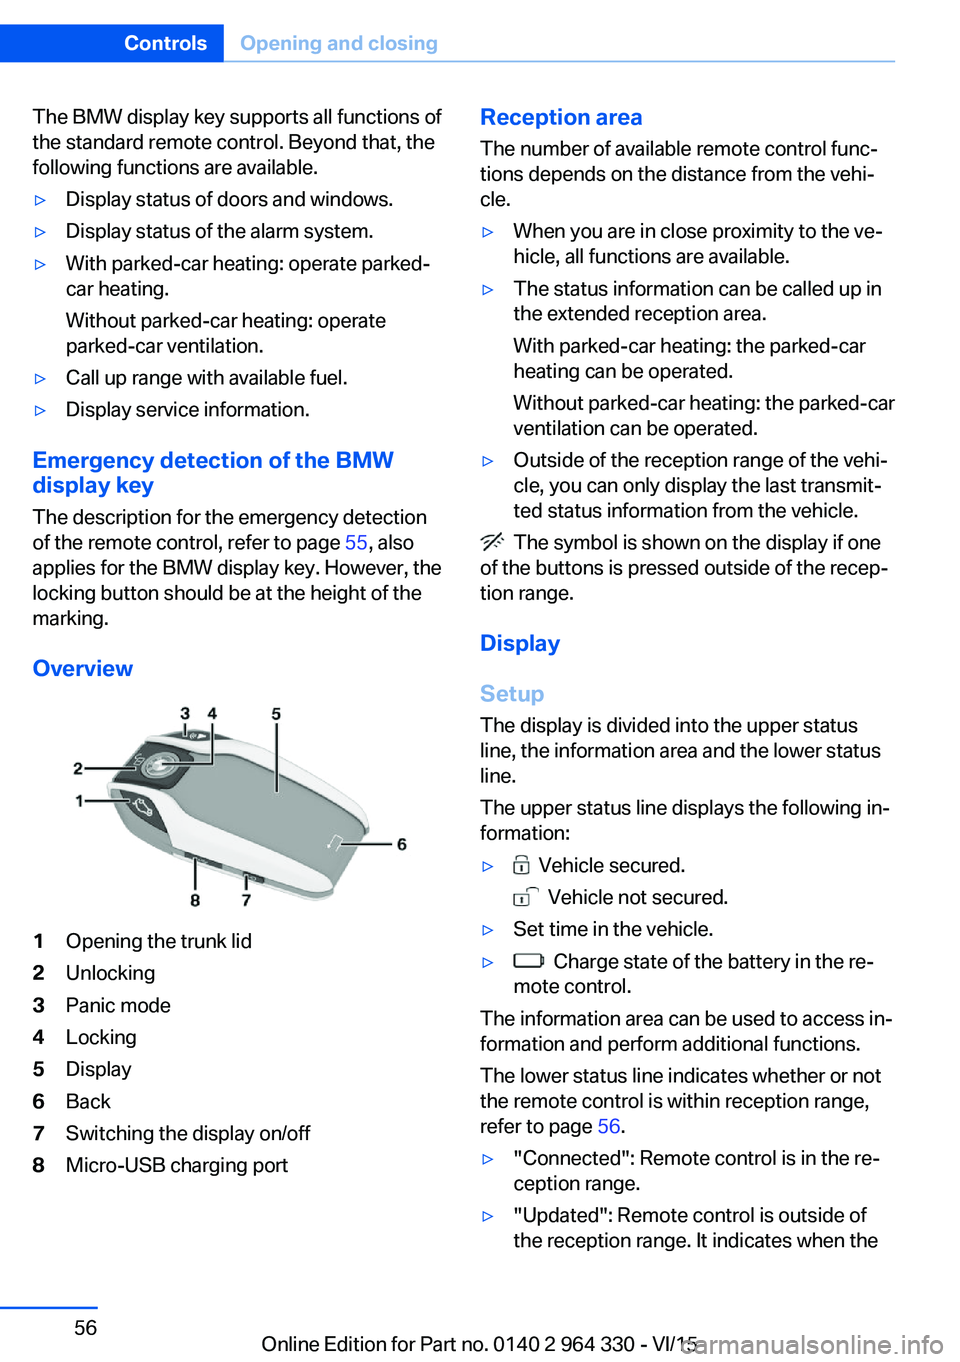
Overview
1Opening the trunk lid2Unlocking3Panic mode4Locking5Display6Back7Switching the display on/off8Micro-USB charging portReception area
The number of available remote control func‐
tions depends on the distance from the vehi‐
cle.▷When you are in close proximity to the ve‐
hicle, all functions are available.▷The status information can be called up in
the extended reception area.
With parked-car heating: the parked-car
heating can be operated.
Without parked-car heating: the parked-car
ventilation can be operated.▷Outside of the reception range of the vehi‐
cle, you can only display the last transmit‐
ted status information from the vehicle.
The symbol is shown on the display if one
of the buttons is pressed outside of the recep‐
tion range.
Display
Setup The display is divided into the upper status
line, the information area and the lower status
line.
The upper status line displays the following in‐
formation:
▷ Vehicle secured.
Vehicle not secured.
▷Set time in the vehicle.▷ Charge state of the battery in the re‐
mote control.
The information area can be used to access in‐
formation and perform additional functions.
The lower status line indicates whether or not
the remote control is within reception range,
refer to page 56.
▷"Connected": Remote control is in the re‐
ception range.▷"Updated": Remote control is outside of
the reception range. It indicates when theSeite 56ControlsOpening and closing56
Online Edition for Part no. 0140 2 964 330 - VI/15
Page 57 of 314
last data transfer from the vehicle took
place.
Controls
If the information area contains more than one
page, then page indicators are shown beneath
the information.
The indicator for the current page has
been filled in.
Swipe to the right or left with a finger to
change between the pages.
If additional information is available on a page,
tap the appropriate symbol.
Touch the arrow symbol beneath the dis‐
play to return to the original page.
Switching the display on/off
The display will go out automatically after a
brief period to conserve battery power.
To hide the display manually, press the button
on the left side of the remote control. Over‐
view, refer to page 56.
Show the display:
1.Press button on the left side of the remote
control.2.Then, swipe with your finger from bottom
to top to unlock the screen lock.
Completely switch off the display to increase
the usable battery life.
1.Press and hold the button on the left side
of the remote control for longer than 4 sec‐
onds.2."OK" tap.
Press button on the left side of the remote
control to switch on the switched-off display.
Operating concept
Depending on the equipment, there are up to
five main menus that provide access to the
sub-menus.
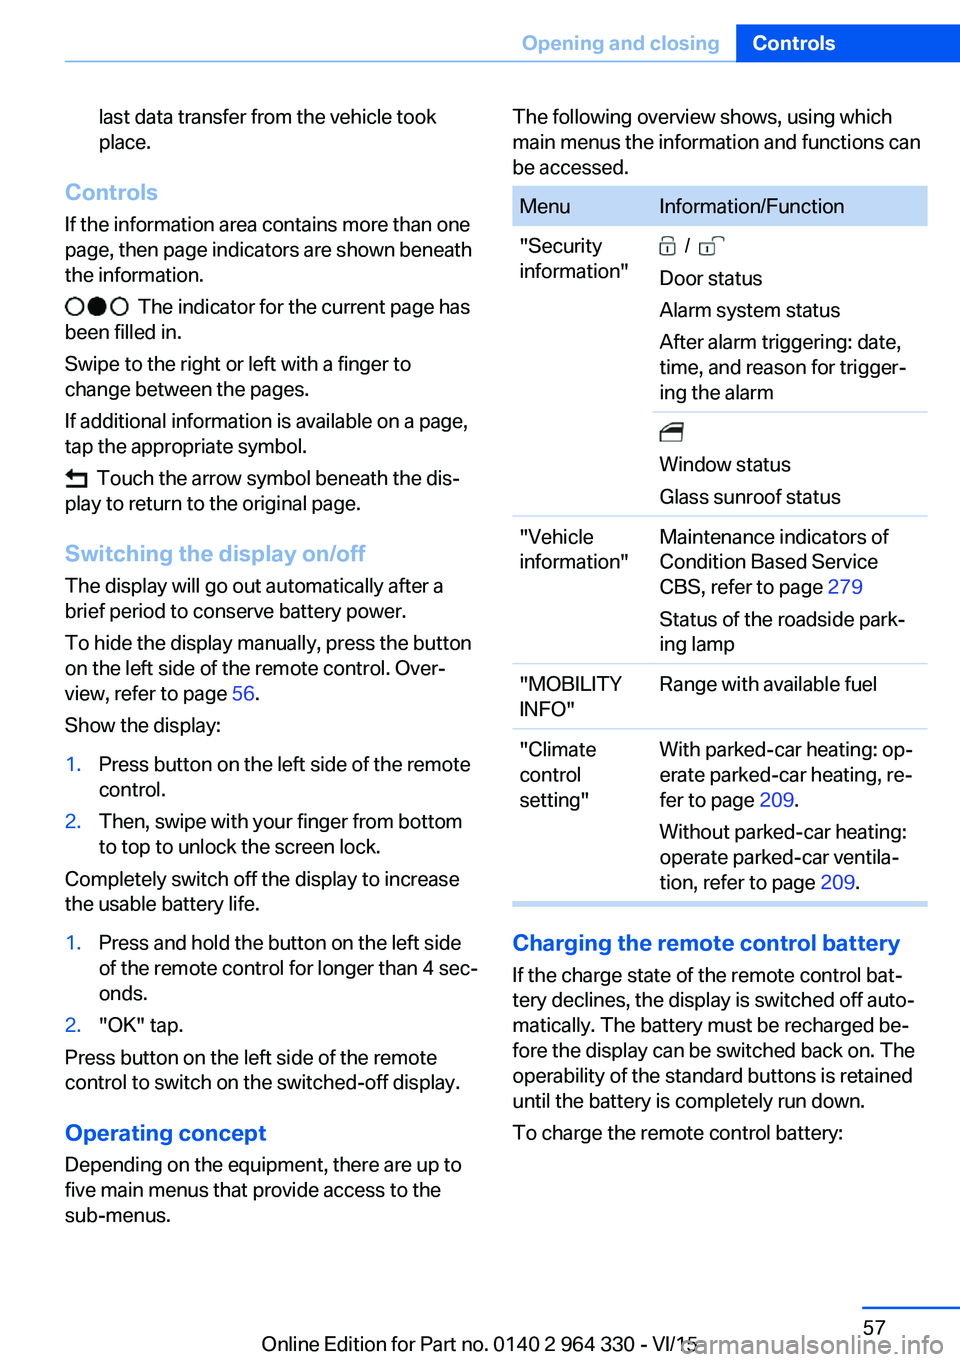
The following overview shows, using which
main menus the information and functions can
be accessed.MenuInformation/Function"Security
information" /
Door status
Alarm system status
After alarm triggering: date,
time, and reason for trigger‐
ing the alarm
Window status
Glass sunroof status"Vehicle
information"Maintenance indicators of
Condition Based Service
CBS, refer to page 279
Status of the roadside park‐
ing lamp"MOBILITY
INFO"Range with available fuel"Climate
control
setting"With parked-car heating: op‐
erate parked-car heating, re‐
fer to page 209.
Without parked-car heating:
operate parked-car ventila‐
tion, refer to page 209.
Charging the remote control battery
If the charge state of the remote control bat‐
tery declines, the display is switched off auto‐
matically. The battery must be recharged be‐
fore the display can be switched back on. The
operability of the standard buttons is retained
until the battery is completely run down.
To charge the remote control battery:
Seite 57Opening and closingControls57
Online Edition for Part no. 0140 2 964 330 - VI/15
Page 65 of 314
Manual operationIn the event of an electrical malfunction, man‐
ually operate the unlocked trunk lid slowly and
smoothly.
WARNING
Body parts can be jammed when operat‐
ing the tailgate. There is risk of injuries. Make
sure that the area of movement of the tailgate
is clear during opening and closing.◀
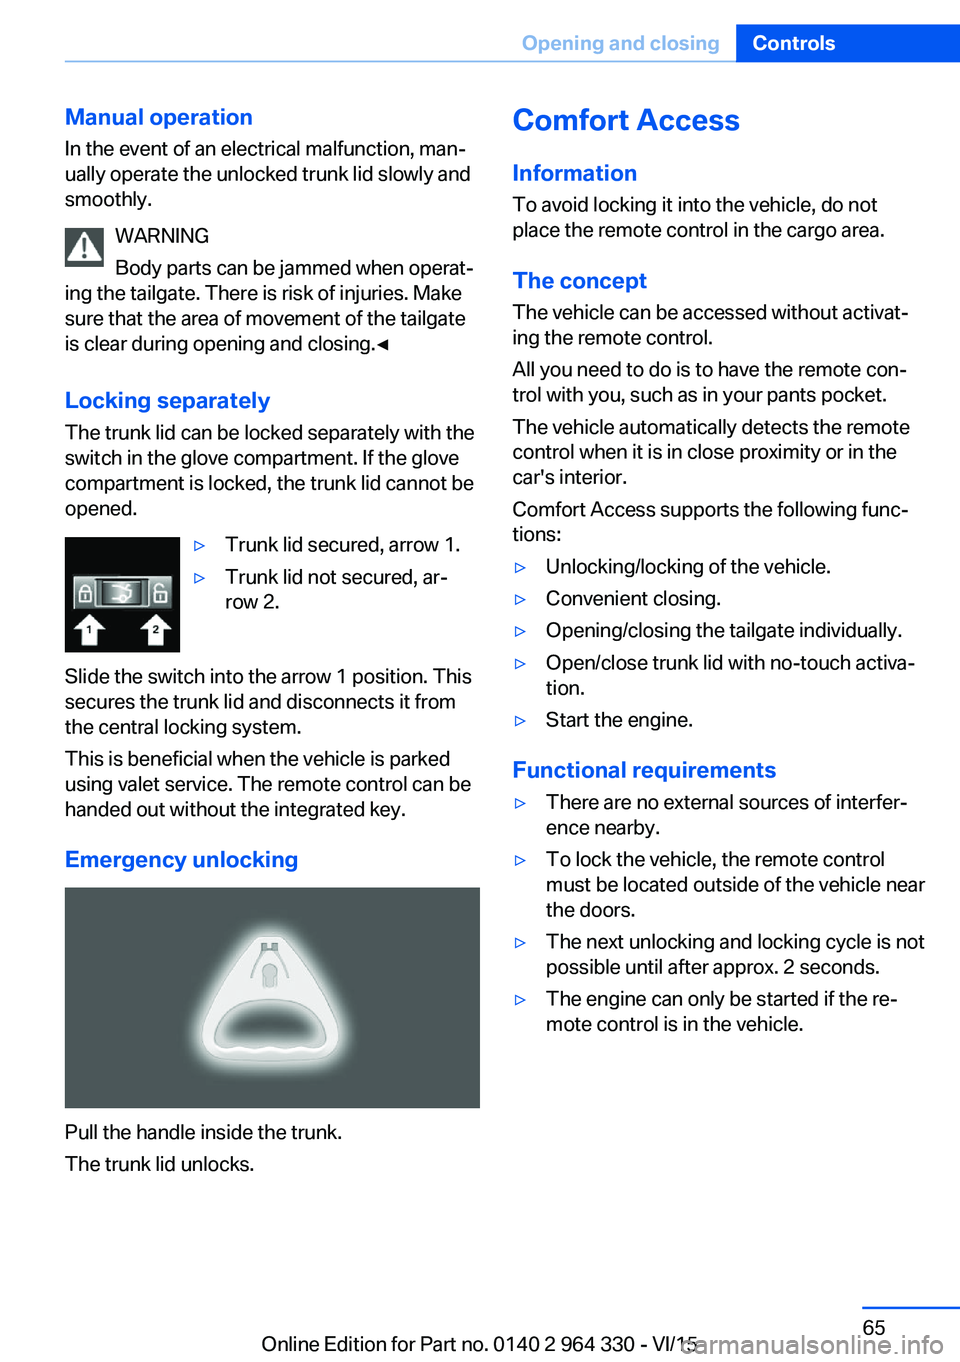
Locking separately The trunk lid can be locked separately with the
switch in the glove compartment. If the glove
compartment is locked, the trunk lid cannot be
opened.▷Trunk lid secured, arrow 1.▷Trunk lid not secured, ar‐
row 2.
Slide the switch into the arrow 1 position. This
secures the trunk lid and disconnects it from
the central locking system.
This is beneficial when the vehicle is parked
using valet service. The remote control can be
handed out without the integrated key.
Emergency unlocking
Pull the handle inside the trunk.
The trunk lid unlocks.
Comfort Access
Information
To avoid locking it into the vehicle, do not
place the remote control in the cargo area.
The concept
The vehicle can be accessed without activat‐
ing the remote control.
All you need to do is to have the remote con‐ trol with you, such as in your pants pocket.
The vehicle automatically detects the remote
control when it is in close proximity or in the
car's interior.
Comfort Access supports the following func‐
tions:▷Unlocking/locking of the vehicle.▷Convenient closing.▷Opening/closing the tailgate individually.▷Open/close trunk lid with no-touch activa‐
tion.▷Start the engine.
Functional requirements
▷There are no external sources of interfer‐
ence nearby.▷To lock the vehicle, the remote control
must be located outside of the vehicle near
the doors.▷The next unlocking and locking cycle is not
possible until after approx. 2 seconds.▷The engine can only be started if the re‐
mote control is in the vehicle.Seite 65Opening and closingControls65
Online Edition for Part no. 0140 2 964 330 - VI/15
Page 81 of 314
Correct use of safety belts▷Wear the belt twist-free and as tight to
your body as possible over your lap and
shoulders.▷Wear the belt deep on your hips over your
lap. The belt may not press on your stom‐
ach.▷Do not wear the belt on your throat, rub it
on sharp edges, guide it or jam it in across
hard or fragile objects.▷Avoid thick clothing.▷Re-tighten the belt frequently upward
around your upper body.
Buckling the belt
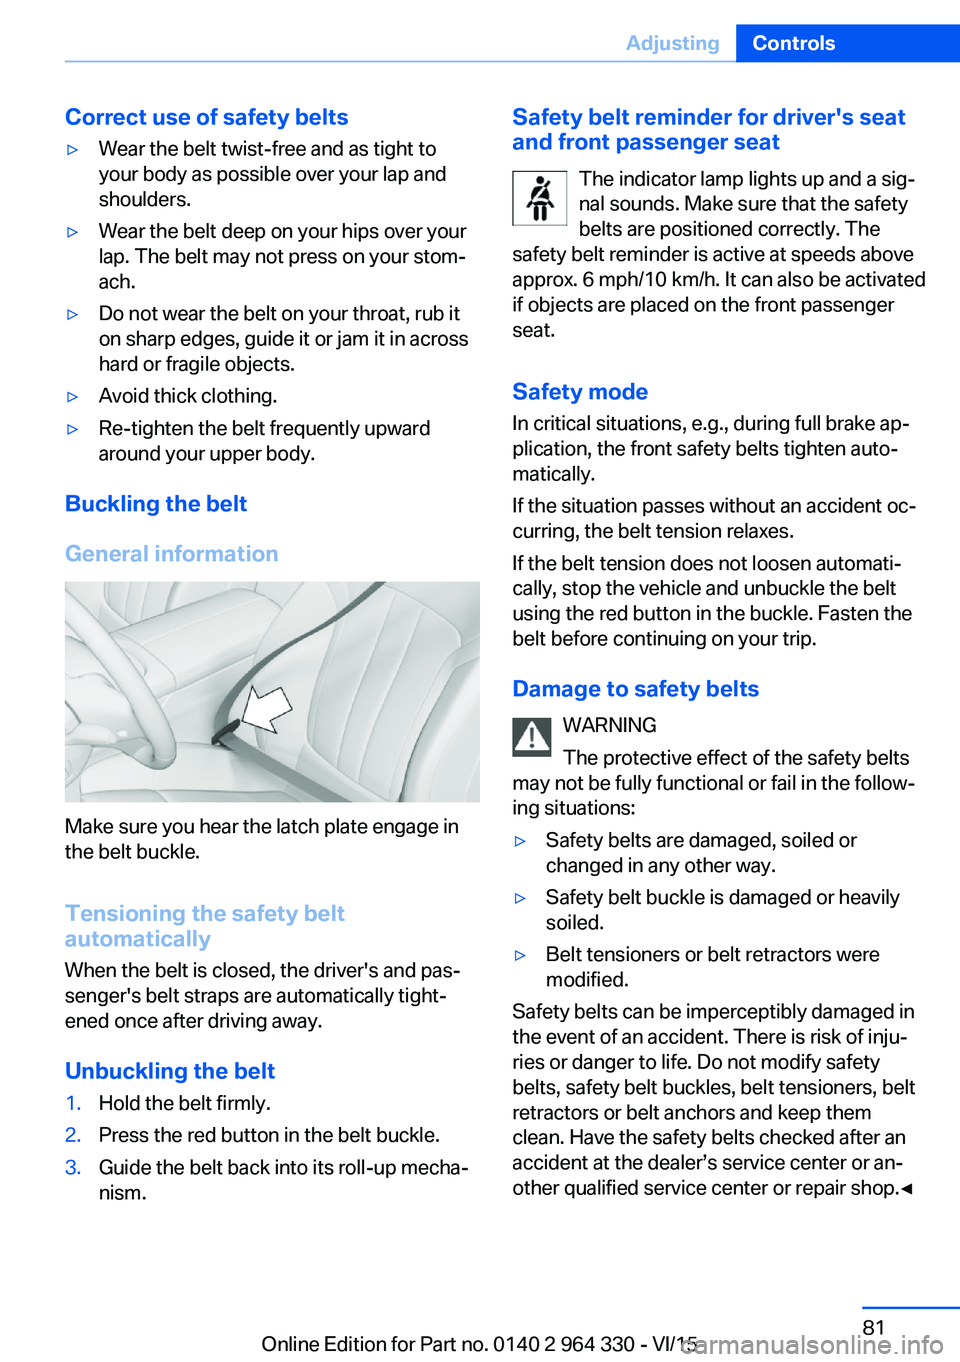
General information
Make sure you hear the latch plate engage in
the belt buckle.
Tensioning the safety belt
automatically
When the belt is closed, the driver's and pas‐
senger's belt straps are automatically tight‐
ened once after driving away.
Unbuckling the belt
1.Hold the belt firmly.2.Press the red button in the belt buckle.3.Guide the belt back into its roll-up mecha‐
nism.Safety belt reminder for driver's seat and front passenger seat
The indicator lamp lights up and a sig‐
nal sounds. Make sure that the safety
belts are positioned correctly. The
safety belt reminder is active at speeds above
approx. 6 mph/10 km/h. It can also be activated
if objects are placed on the front passenger
seat.
Safety mode
In critical situations, e.g., during full brake ap‐
plication, the front safety belts tighten auto‐
matically.
If the situation passes without an accident oc‐
curring, the belt tension relaxes.
If the belt tension does not loosen automati‐
cally, stop the vehicle and unbuckle the belt
using the red button in the buckle. Fasten the
belt before continuing on your trip.
Damage to safety belts WARNING
The protective effect of the safety belts
may not be fully functional or fail in the follow‐
ing situations:▷Safety belts are damaged, soiled or
changed in any other way.▷Safety belt buckle is damaged or heavily
soiled.▷Belt tensioners or belt retractors were
modified.
Safety belts can be imperceptibly damaged in
the event of an accident. There is risk of inju‐
ries or danger to life. Do not modify safety
belts, safety belt buckles, belt tensioners, belt
retractors or belt anchors and keep them
clean. Have the safety belts checked after an
accident at the dealer’s service center or an‐
other qualified service center or repair shop.◀
Seite 81AdjustingControls81
Online Edition for Part no. 0140 2 964 330 - VI/15
Page 106 of 314
After the wipers are folded back down, the
wiper system must be reactivated.1.Switch on drive readiness and press and
hold the wiper lever downward again.2.Wipers return to their resting position and
are ready again for operation.
Washer fluid
Information WARNING
Some antifreeze agents can contain
harmful substances and are flammable. There
is risk of fire and risk of injuries. Observe the
instructions on the containers. Keep antifreeze
away from ignition sources. Do not refill oper‐
ating materials into different bottles. Store op‐
erating materials out of reach of children.
United States: The washer fluid mixture ratio is
regulated by the U.S. EPA and many individual
states; do not exceed the allowable washer
fluid dilution ratio limits that apply. Follow the
usage instructions on the washer fluid con‐
tainer.
Use of BMW’s Windshield Washer Concen‐
trate or the equivalent is recommended.◀
WARNING
Improperly executed work under the
hood can damage components and lead to a
safety risk. There is risk of accidents or risk of
property damage. Have work under the hood
be executed by a dealer’s service center or an‐
other qualified service center or repair shop.◀
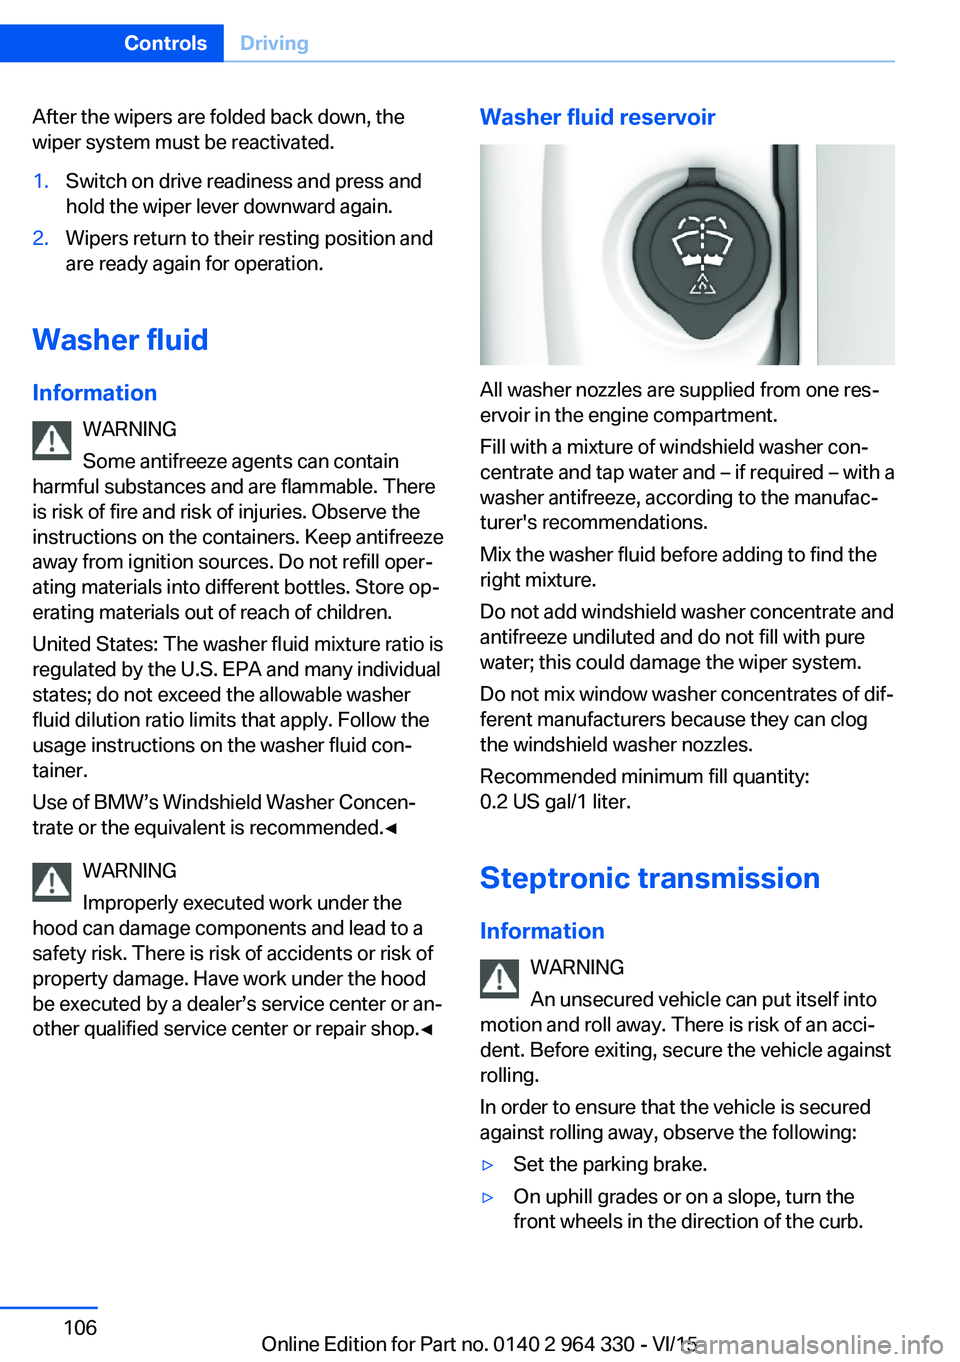
Washer fluid reservoir
All washer nozzles are supplied from one res‐
ervoir in the engine compartment.
Fill with a mixture of windshield washer con‐
centrate and tap water and – if required – with a
washer antifreeze, according to the manufac‐
turer's recommendations.
Mix the washer fluid before adding to find the
right mixture.
Do not add windshield washer concentrate and
antifreeze undiluted and do not fill with pure
water; this could damage the wiper system.
Do not mix window washer concentrates of dif‐
ferent manufacturers because they can clog
the windshield washer nozzles.
Recommended minimum fill quantity:
0.2 US gal/1 liter.
Steptronic transmission
Information WARNING
An unsecured vehicle can put itself into
motion and roll away. There is risk of an acci‐
dent. Before exiting, secure the vehicle against
rolling.
In order to ensure that the vehicle is secured
against rolling away, observe the following:
▷Set the parking brake.▷On uphill grades or on a slope, turn the
front wheels in the direction of the curb.Seite 106ControlsDriving106
Online Edition for Part no. 0140 2 964 330 - VI/15
Page 115 of 314
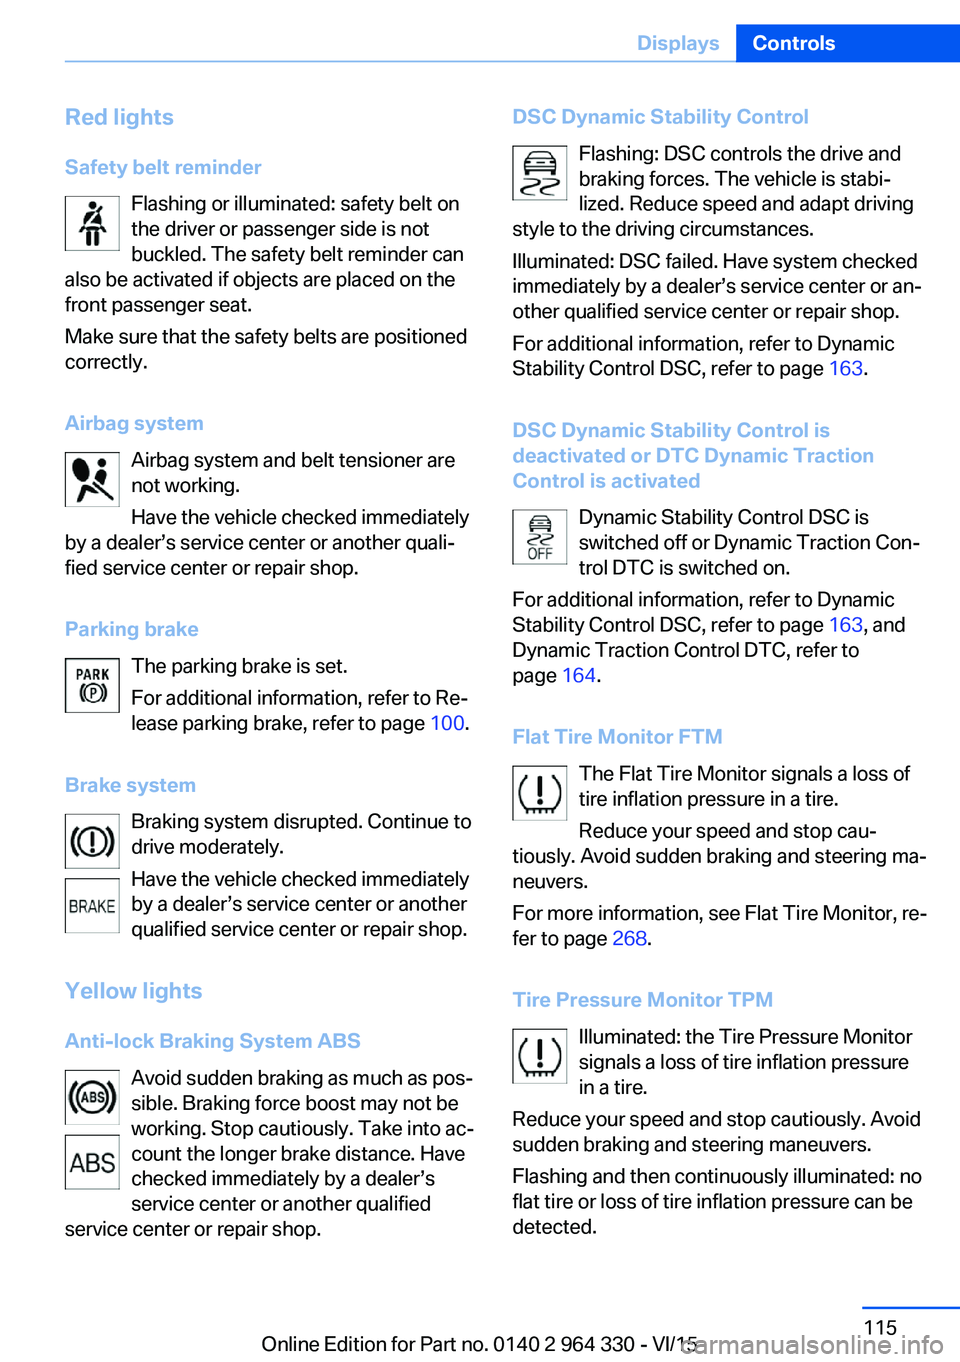
Red lightsSafety belt reminder Flashing or illuminated: safety belt on
the driver or passenger side is not
buckled. The safety belt reminder can
also be activated if objects are placed on the
front passenger seat.
Make sure that the safety belts are positioned
correctly.
Airbag system Airbag system and belt tensioner are
not working.
Have the vehicle checked immediately
by a dealer’s service center or another quali‐
fied service center or repair shop.
Parking brake The parking brake is set.
For additional information, refer to Re‐
lease parking brake, refer to page 100.
Brake system Braking system disrupted. Continue to
drive moderately.
Have the vehicle checked immediately
by a dealer’s service center or another
qualified service center or repair shop.
Yellow lights
Anti-lock Braking System ABS Avoid sudden braking as much as pos‐
sible. Braking force boost may not be
working. Stop cautiously. Take into ac‐
count the longer brake distance. Have
checked immediately by a dealer’s
service center or another qualified
service center or repair shop.DSC Dynamic Stability Control
Flashing: DSC controls the drive and
braking forces. The vehicle is stabi‐
lized. Reduce speed and adapt driving
style to the driving circumstances.
Illuminated: DSC failed. Have system checked
immediately by a dealer’s service center or an‐
other qualified service center or repair shop.
For additional information, refer to Dynamic
Stability Control DSC, refer to page 163.
DSC Dynamic Stability Control is
deactivated or DTC Dynamic Traction
Control is activated
Dynamic Stability Control DSC is
switched off or Dynamic Traction Con‐
trol DTC is switched on.
For additional information, refer to Dynamic
Stability Control DSC, refer to page 163, and
Dynamic Traction Control DTC, refer to
page 164.
Flat Tire Monitor FTM The Flat Tire Monitor signals a loss of
tire inflation pressure in a tire.
Reduce your speed and stop cau‐
tiously. Avoid sudden braking and steering ma‐
neuvers.
For more information, see Flat Tire Monitor, re‐
fer to page 268.
Tire Pressure Monitor TPM Illuminated: the Tire Pressure Monitor
signals a loss of tire inflation pressure
in a tire.
Reduce your speed and stop cautiously. Avoid
sudden braking and steering maneuvers.
Flashing and then continuously illuminated: no
flat tire or loss of tire inflation pressure can be
detected.Seite 115DisplaysControls115
Online Edition for Part no. 0140 2 964 330 - VI/15
Page 116 of 314
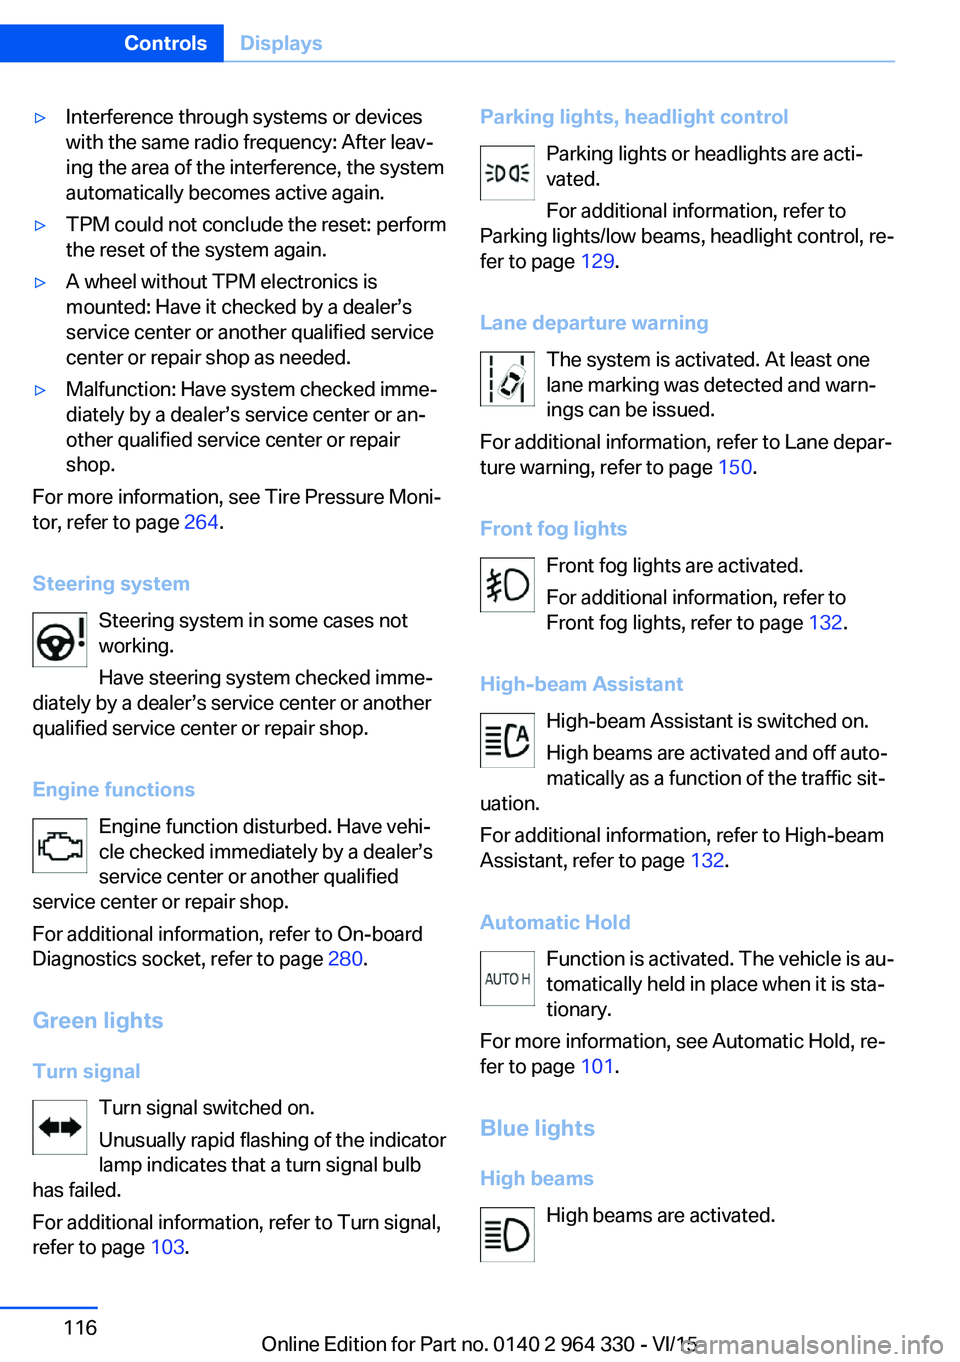
▷Interference through systems or devices
with the same radio frequency: After leav‐
ing the area of the interference, the system
automatically becomes active again.▷TPM could not conclude the reset: perform
the reset of the system again.▷A wheel without TPM electronics is
mounted: Have it checked by a dealer’s
service center or another qualified service
center or repair shop as needed.▷Malfunction: Have system checked imme‐
diately by a dealer’s service center or an‐
other qualified service center or repair
shop.
For more information, see Tire Pressure Moni‐
tor, refer to page 264.
Steering system Steering system in some cases not
working.
Have steering system checked imme‐
diately by a dealer’s service center or another
qualified service center or repair shop.
Engine functions Engine function disturbed. Have vehi‐
cle checked immediately by a dealer’s
service center or another qualified
service center or repair shop.
For additional information, refer to On-board
Diagnostics socket, refer to page 280.
Green lights Turn signal Turn signal switched on.
Unusually rapid flashing of the indicator
lamp indicates that a turn signal bulb
has failed.
For additional information, refer to Turn signal,
refer to page 103.
Parking lights, headlight control
Parking lights or headlights are acti‐
vated.
For additional information, refer to
Parking lights/low beams, headlight control, re‐
fer to page 129.
Lane departure warning The system is activated. At least one
lane marking was detected and warn‐
ings can be issued.
For additional information, refer to Lane depar‐
ture warning, refer to page 150.
Front fog lights Front fog lights are activated.
For additional information, refer to
Front fog lights, refer to page 132.
High-beam Assistant High-beam Assistant is switched on.
High beams are activated and off auto‐
matically as a function of the traffic sit‐
uation.
For additional information, refer to High-beam
Assistant, refer to page 132.
Automatic Hold Function is activated. The vehicle is au‐
tomatically held in place when it is sta‐
tionary.
For more information, see Automatic Hold, re‐
fer to page 101.
Blue lights
High beams High beams are activated.Seite 116ControlsDisplays116
Online Edition for Part no. 0140 2 964 330 - VI/15
Page 117 of 314
For additional information, refer to High
beams, refer to page 103.
General lamps Check Control At least one Check Control message is
displayed or is stored.
Text messages
Text messages in combination with a symbol
in the instrument cluster explain a Check Con‐
trol message and the meaning of the indicator
and warning lights.
Supplementary text messages
Additional information, such as on the cause of
an error or the required action, can be called up
via Check Control.
With urgent messages the added text will be
automatically displayed on the Control Display.
Functions Depending on the Check Control message, the
following functions can be selected.▷"Owner's Manual"
Display additional information about the
Check Control message in the Integrated
Owner's Manual.▷"Service request"
Contact a dealer’s service center or an‐
other qualified service center or repair
shop.▷"BMW Roadside Assistance"
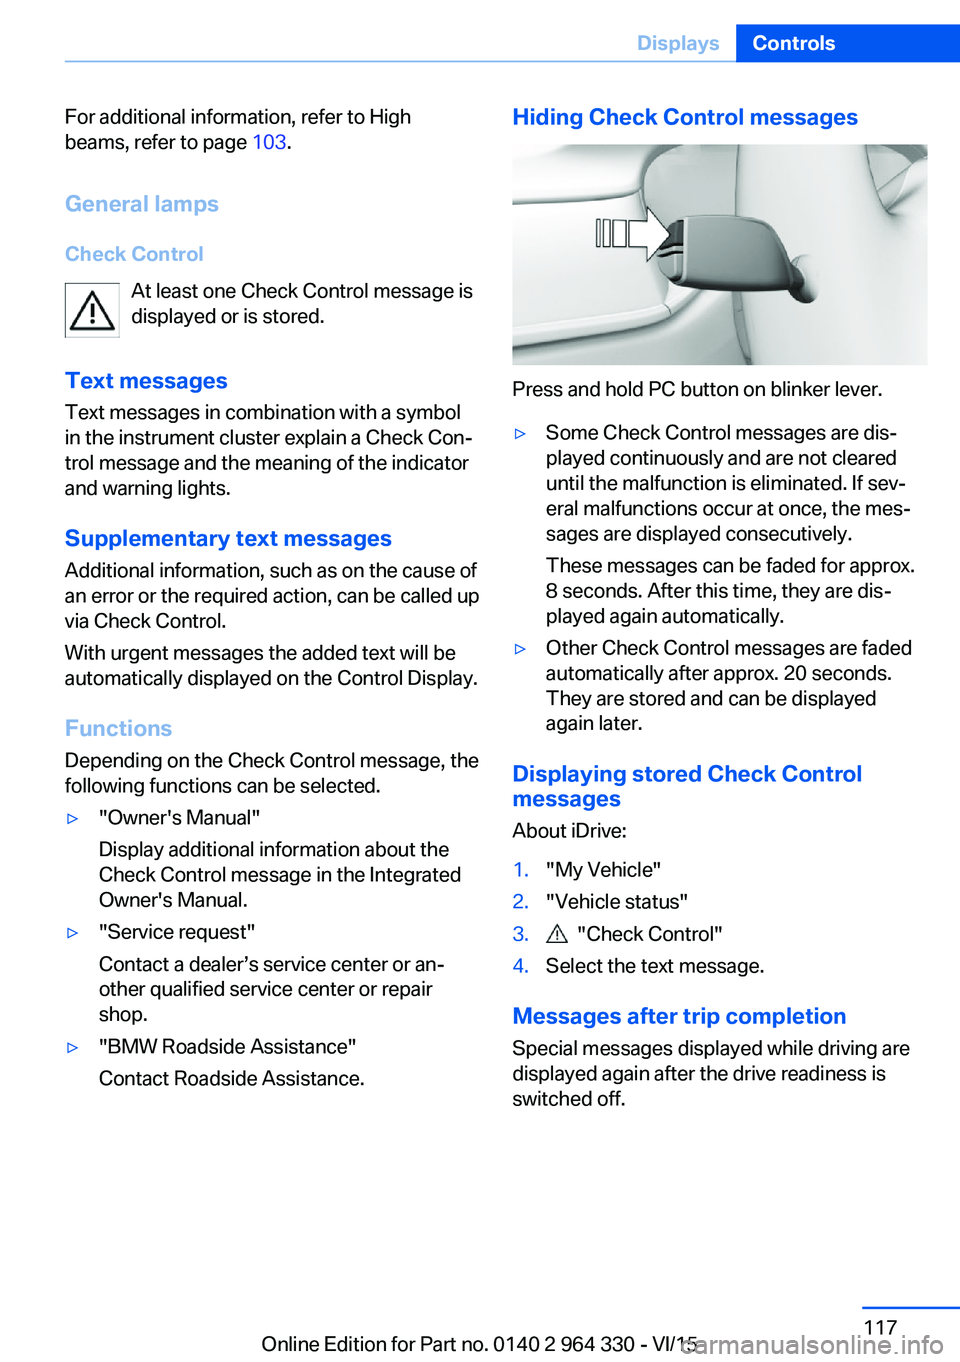
Contact Roadside Assistance.Hiding Check Control messages
Press and hold PC button on blinker lever.
▷Some Check Control messages are dis‐
played continuously and are not cleared
until the malfunction is eliminated. If sev‐
eral malfunctions occur at once, the mes‐
sages are displayed consecutively.
These messages can be faded for approx.
8 seconds. After this time, they are dis‐
played again automatically.▷Other Check Control messages are faded
automatically after approx. 20 seconds.
They are stored and can be displayed
again later.
Displaying stored Check Control
messages
About iDrive:
1."My Vehicle"2."Vehicle status"3. "Check Control"4.Select the text message.
Messages after trip completion Special messages displayed while driving are
displayed again after the drive readiness is
switched off.
Seite 117DisplaysControls117
Online Edition for Part no. 0140 2 964 330 - VI/15