display BMW ACTIVE HYBRID 7 2015 F01H Owner's Manual
[x] Cancel search | Manufacturer: BMW, Model Year: 2015, Model line: ACTIVE HYBRID 7, Model: BMW ACTIVE HYBRID 7 2015 F01HPages: 262, PDF Size: 5.34 MB
Page 210 of 262
Wheels and tiresVehicle features and options
This chapter describes all standard, country-
specific and optional features offered with the
series. It also describes features that are not
necessarily available in your car, e. g., due to
the selected options or country versions. This
also applies to safety-related functions and
systems. The respectively applicable country
provisions must be observed when using the
respective features and systems.
Tire inflation pressure Safety information
The tire characteristics and tire inflation pres‐
sure influence the following:▷The service life of the tires.▷Road safety.▷Driving comfort.
Checking the tire inflation pressure
Check the tire inflation pressure regularly
Regularly check the tire inflation pres‐
sure, and correct it as needed: at least twice a
month and before a long trip. If you fail to ob‐
serve this precaution, you may be driving on
tires with incorrect tire pressures, a condition
that may not only compromise your vehicle's
driving stability, but also lead to tire damage
and the risk of an accident.◀
Tires have a natural, consistent loss of tire in‐
flation pressure.
Tires heat up while driving, and the tire infla‐
tion pressure increases along with the tire's
temperature. The tire inflation pressure speci‐
fications relate to cold tires or tires with the
ambient temperature.
Only check the tire inflation pressure when the
tires are cold. This means after driving no more
than 1.25 miles/2 km or when the vehicle has
been parked for at least 2 hours.
The displays of inflation devices may under-
read by up to 1.45 psi/0.1 bar.
For Flat Tire Monitor: after correcting the tire
inflation pressure, reinitialize the Flat Tire
Monitor.
For Tire Pressure Monitor: after correcting the
tire inflation pressure, reset the Tire Pressure
Monitor.
Tire inflation pressure specifications
The tire inflation pressure table, refer to
page 207, contains all tire inflation pressure
specifications for the specified tire sizes at the
ambient temperature. Tire inflation pressure
specifications apply to approved tire sizes and
recommended tire brands. This information
can be obtained from your service center.
To identify the correct tire inflation pressure,
please note the following:▷Tire sizes of your vehicle.▷Maximum permitted driving speed.
Tire inflation pressures up to
100 mph/160 km/h
For speeds of up to 100 mph/160 km/h and for
optimum driving comfort, note the pressure
values in the tire inflation pressure table, refer
to page 207, and adjust as necessary.
Seite 206MobilityWheels and tires206
Online Edition for Part no. 01 40 2 954 204 - II/15
Page 216 of 262
Maximum speed of winter tiresIf the maximum speed of the vehicle is higher
than the permissible speed for the winter tires,
then a respective symbol is displayed in your
field of vision. You can obtain this sign from the
tire specialist or from your service center.
Maximum speed for winter tires
Do not exceed the maximum speed for
the respective winter tires; otherwise, tire dam‐
age and accidents can occur.◀
Run-flat tires If you are already using run-flat tires, for your
own safety you should replace them only with
the same kind. No spare tire is available in the
case of a flat tire. Your service center will be
glad to advise you.
Rotating wheels between axles Different wear patterns can occur on the frontand rear axles depending on individual driving
conditions. The tires can be rotated between
the axles to achieve even wear. Your service
center will be glad to advise you. After rotating,
check the tire pressure and correct if needed.
Rotating the tires is not permissible on vehi‐
cles with different tire sizes or rim sizes on the
front and rear axles.
StorageStore wheels and tires in a cool, dry place with
as little exposure to light as possible.
Always protect tires against all contact with oil,
grease and fuels.
Do not exceed the maximum tire inflation pres‐
sure indicated on the side wall of the tire.Run-flat tires
Label
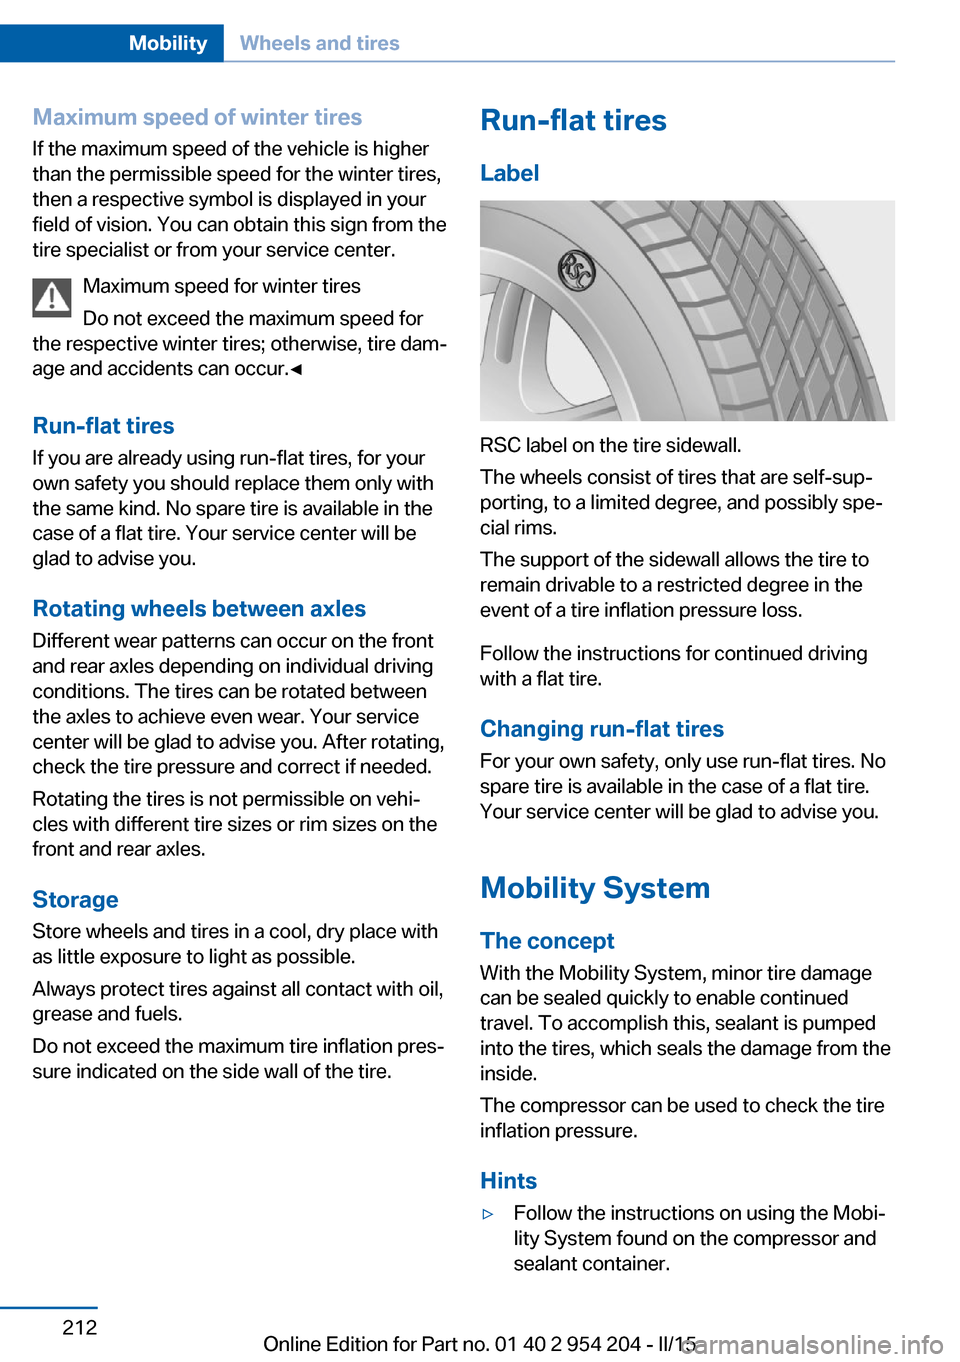
RSC label on the tire sidewall.
The wheels consist of tires that are self-sup‐
porting, to a limited degree, and possibly spe‐
cial rims.
The support of the sidewall allows the tire to
remain drivable to a restricted degree in the
event of a tire inflation pressure loss.
Follow the instructions for continued driving
with a flat tire.
Changing run-flat tires
For your own safety, only use run-flat tires. No
spare tire is available in the case of a flat tire.
Your service center will be glad to advise you.
Mobility System
The concept With the Mobility System, minor tire damagecan be sealed quickly to enable continued
travel. To accomplish this, sealant is pumped
into the tires, which seals the damage from the inside.
The compressor can be used to check the tire inflation pressure.
Hints
▷Follow the instructions on using the Mobi‐
lity System found on the compressor and
sealant container.Seite 212MobilityWheels and tires212
Online Edition for Part no. 01 40 2 954 204 - II/15
Page 222 of 262
Engine oilVehicle features and options
This chapter describes all standard, country-
specific and optional features offered with the
series. It also describes features that are not
necessarily available in your car, e. g., due to
the selected options or country versions. This
also applies to safety-related functions and
systems. The respectively applicable country
provisions must be observed when using the
respective features and systems.
General information The engine oil consumption is dependent on
the driving style and driving conditions.
The engine oil consumption can increase in
case of, for example:▷Sporty driving.▷Break-in the engine.▷Idling of the engine.▷Usage of non-approved engine oil grades.
Therefore, regularly check the engine oil level
after refueling.
The vehicle is equipped with electronic oil
measurement.
The electronic oil measurement has two meas‐
uring principles:
▷Status display▷Detailed measurement
Electronic oil measurement
Status display
The concept
The engine oil level is monitored electronically
while driving and shown on the Control Dis‐
play.
If the engine oil level reaches the minimum
level, a check control message is displayed.
Requirements
A current measured value is available after ap‐
prox. 30 minutes of driving. During a shorter
trip, the status of the last, sufficiently long trip
is displayed.
With frequent short-distance trips, regularly
perform a detailed measurement.
Displaying the engine oil level
On the Control Display:1."Vehicle info"2."Vehicle status"3. "Engine oil level"
Engine oil level display messages
Different messages appear on the display de‐
pending on the engine oil level. Pay attention
to these messages.
If the engine oil level is too low, within the next
125 miles/200 km Add engine oil, refer to
page 219.
Engine oil level too low
Add engine oil immediately; otherwise,
an insufficient amount of engine oil could re‐
sult in engine damage.◀
Take care not to add too much engine oil. Too much engine oil
Have the vehicle checked immediately;
otherwise, surplus engine oil can lead to en‐
gine damage.◀
Seite 218MobilityEngine oil218
Online Edition for Part no. 01 40 2 954 204 - II/15
Page 223 of 262
Detailed measurement
The concept In the detailed measurement the engine oil
level is checked and displayed via a scale.
Gasoline engine:
If the engine oil level reaches the minimum
level, a check control message is displayed.
Diesel engine:
During the measurement, the idle speed is in‐
creased somewhat.
General information
A detailed measurement is only possible with
certain engines.
Requirements▷Vehicle is on level road.▷Steptronic transmission: selector lever in
selector lever position N or P and accelera‐
tor pedal not depressed.▷Engine is running and is at operating tem‐
perature.
Performing a detailed measurement
In order to perform a detailed measurement of
the engine oil level:
1."Vehicle info"2."Vehicle status"3. "Measure engine oil level"4."Start measurement"
The engine oil level is checked and displayed
via a scale.
Time: approx. 1 minute.
Adding engine oil General information
Switch off the ignition and safely park the vehi‐
cle before engine oil is added.
Oil filler neck
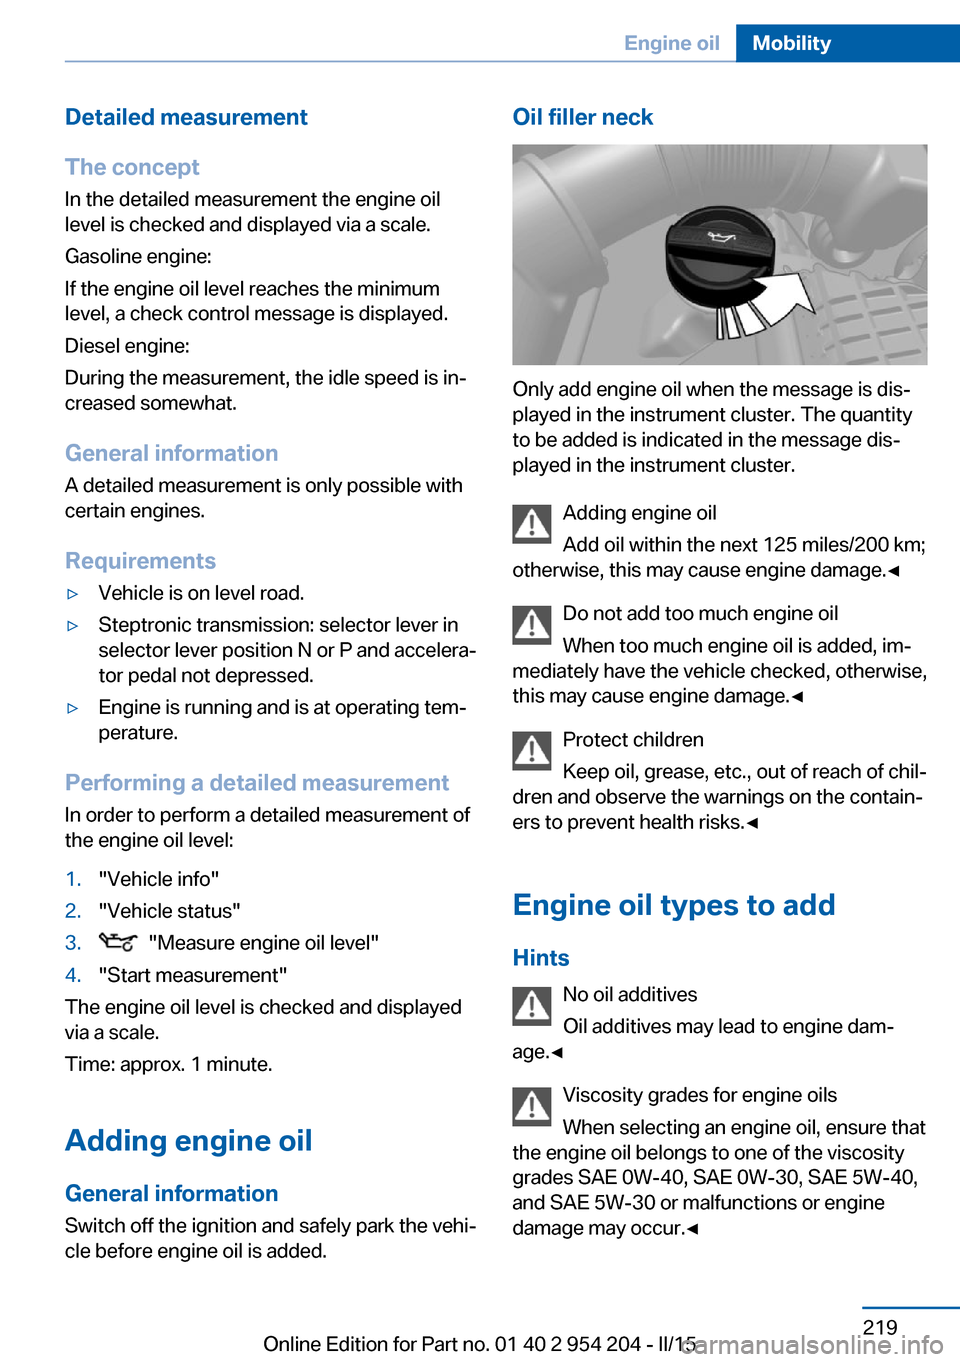
Only add engine oil when the message is dis‐
played in the instrument cluster. The quantity
to be added is indicated in the message dis‐
played in the instrument cluster.
Adding engine oil
Add oil within the next 125 miles/200 km;
otherwise, this may cause engine damage.◀
Do not add too much engine oil
When too much engine oil is added, im‐
mediately have the vehicle checked, otherwise,
this may cause engine damage.◀
Protect children
Keep oil, grease, etc., out of reach of chil‐
dren and observe the warnings on the contain‐
ers to prevent health risks.◀
Engine oil types to add Hints No oil additives
Oil additives may lead to engine dam‐
age.◀
Viscosity grades for engine oils
When selecting an engine oil, ensure that
the engine oil belongs to one of the viscosity
grades SAE 0W-40, SAE 0W-30, SAE 5W-40,
and SAE 5W-30 or malfunctions or engine
damage may occur.◀
Seite 219Engine oilMobility219
Online Edition for Part no. 01 40 2 954 204 - II/15
Page 227 of 262
MaintenanceVehicle features and options
This chapter describes all standard, country-
specific and optional features offered with the
series. It also describes features that are not
necessarily available in your car, e. g., due to
the selected options or country versions. This
also applies to safety-related functions and
systems. The respectively applicable country
provisions must be observed when using the
respective features and systems.
BMW maintenance system The maintenance system indicates required
maintenance measures, and thereby provides
support in maintaining road safety and the op‐
erational reliability of the vehicle.
In some cases scopes and intervals may vary
according to the country-specific version. Re‐
placement work, spare parts, fuels and lubri‐
cants and wear materials are calculated sepa‐
rately. Additional information is available from
the service center.
Condition Based Service
CBS
Sensors and special algorithms take into ac‐
count the driving conditions of your vehicle.
Based on this, Condition Based Service recog‐
nizes the maintenance requirements.
The system makes it possible to adapt the
amount of maintenance corresponding to your
user profile.
Detailed information on service requirements,
refer to page 99, can be displayed on the Con‐
trol Display.Service data in the remote control
Information on the required maintenance is
continuously stored in the remote control. Your service center will read out this data and
suggest the right array of service procedures for your vehicle.
Therefore, hand your service specialist the re‐
mote control with which the vehicle was driven
most recently.
Storage periods Storage periods during which the vehicle bat‐
tery was disconnected are not taken into ac‐
count.
If this occurs, have a service center update the
time-dependent maintenance procedures,
such as checking brake fluid and, if needed,
changing the engine oil and the microfilter/
activated-charcoal filter.
Service and Warranty
Information Booklet for US
models and Warranty and
Service Guide Booklet for
Canadian models
Please consult your Service and Warranty In‐
formation Booklet for US models and Warranty
and Service Guide Booklet for Canadian mod‐
els for additional information on service re‐
quirements.
Maintenance and repair should be performed
by your service center. Make sure to have reg‐
ular maintenance procedures recorded in the
vehicle's Service and Warranty Information
Booklet for US models, and in the Warranty
and Service Guide Booklet for Canadian mod‐
els. These entries are proof of regular mainte‐
nance.Seite 223MaintenanceMobility223
Online Edition for Part no. 01 40 2 954 204 - II/15
Page 234 of 262
Otherwise, there is the risk of fatal injury from
electrocution due to damaged high-voltage
components.◀
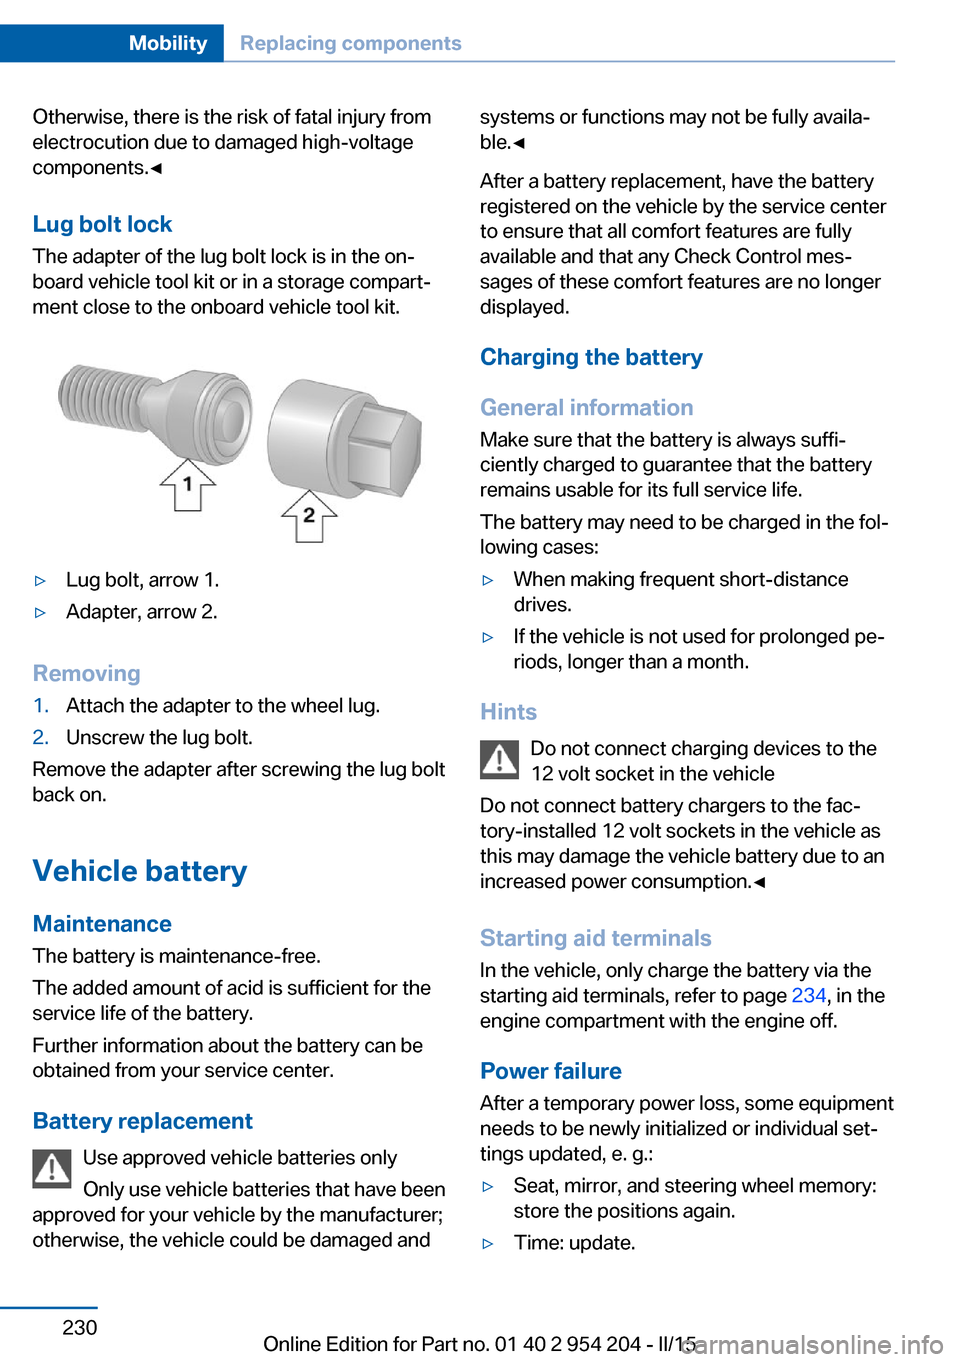
Lug bolt lock
The adapter of the lug bolt lock is in the on‐
board vehicle tool kit or in a storage compart‐
ment close to the onboard vehicle tool kit.▷Lug bolt, arrow 1.▷Adapter, arrow 2.
Removing
1.Attach the adapter to the wheel lug.2.Unscrew the lug bolt.
Remove the adapter after screwing the lug bolt
back on.
Vehicle battery
Maintenance
The battery is maintenance-free.
The added amount of acid is sufficient for the
service life of the battery.
Further information about the battery can be
obtained from your service center.
Battery replacement Use approved vehicle batteries only
Only use vehicle batteries that have been
approved for your vehicle by the manufacturer;
otherwise, the vehicle could be damaged and
systems or functions may not be fully availa‐
ble.◀
After a battery replacement, have the battery
registered on the vehicle by the service center
to ensure that all comfort features are fully
available and that any Check Control mes‐
sages of these comfort features are no longer
displayed.
Charging the battery
General information
Make sure that the battery is always suffi‐
ciently charged to guarantee that the battery
remains usable for its full service life.
The battery may need to be charged in the fol‐
lowing cases:▷When making frequent short-distance
drives.▷If the vehicle is not used for prolonged pe‐
riods, longer than a month.
Hints
Do not connect charging devices to the
12 volt socket in the vehicle
Do not connect battery chargers to the fac‐
tory-installed 12 volt sockets in the vehicle as
this may damage the vehicle battery due to an
increased power consumption.◀
Starting aid terminals
In the vehicle, only charge the battery via the
starting aid terminals, refer to page 234, in the
engine compartment with the engine off.
Power failure
After a temporary power loss, some equipment
needs to be newly initialized or individual set‐
tings updated, e. g.:
▷Seat, mirror, and steering wheel memory:
store the positions again.▷Time: update.Seite 230MobilityReplacing components230
Online Edition for Part no. 01 40 2 954 204 - II/15
Page 236 of 262
Breakdown assistanceVehicle features and options
This chapter describes all standard, country-
specific and optional features offered with the
series. It also describes features that are not
necessarily available in your car, e. g., due to
the selected options or country versions. This
also applies to safety-related functions and
systems. The respectively applicable country
provisions must be observed when using the
respective features and systems.
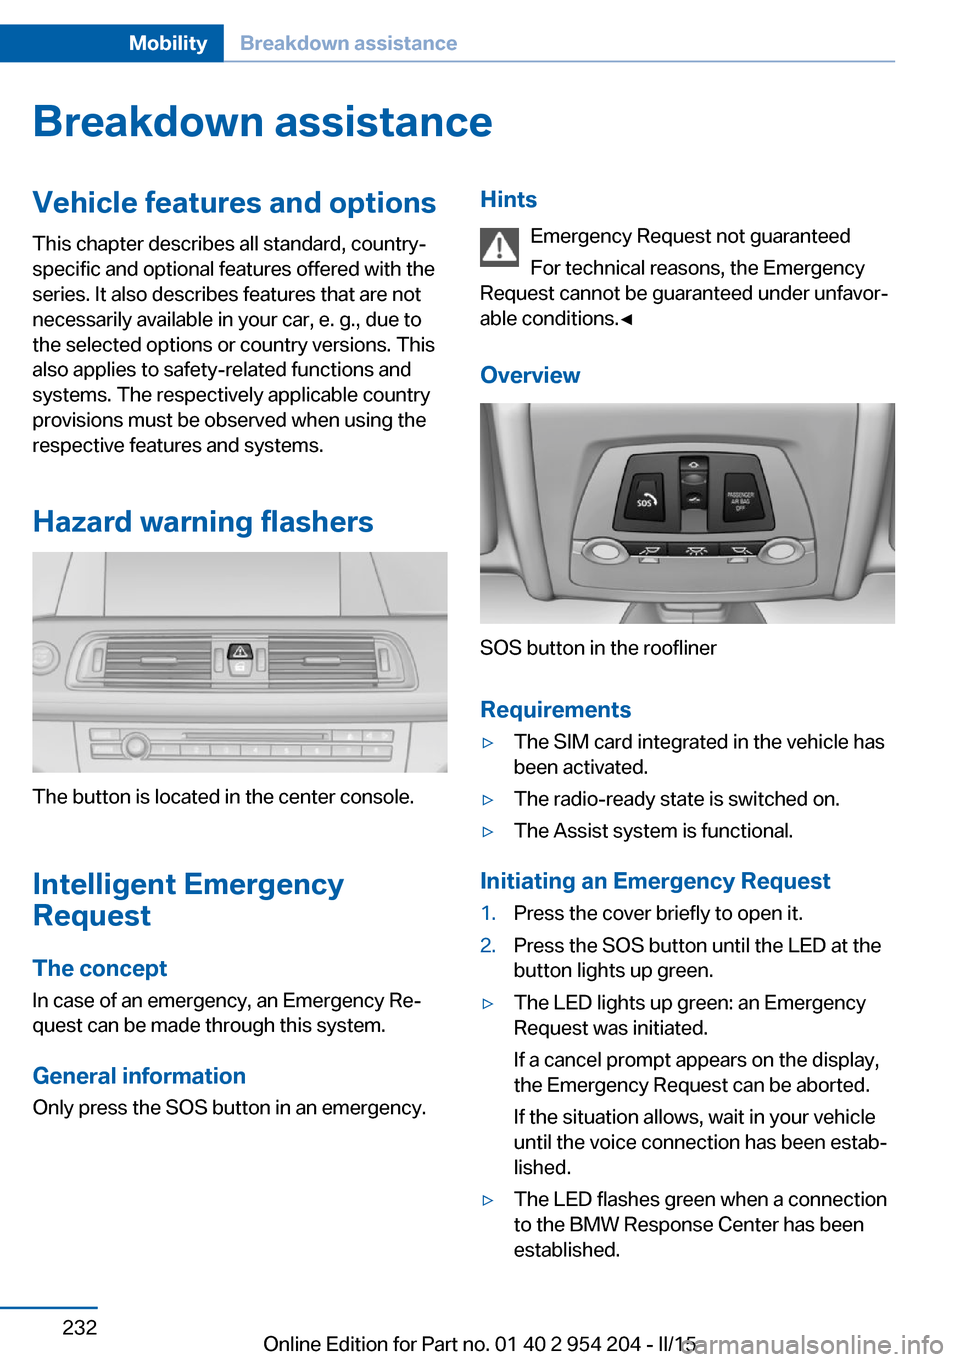
Hazard warning flashers
The button is located in the center console.
Intelligent Emergency
Request
The concept In case of an emergency, an Emergency Re‐
quest can be made through this system.
General information
Only press the SOS button in an emergency.
Hints
Emergency Request not guaranteed
For technical reasons, the Emergency
Request cannot be guaranteed under unfavor‐
able conditions.◀
Overview
SOS button in the roofliner
Requirements
▷The SIM card integrated in the vehicle has
been activated.▷The radio-ready state is switched on.▷The Assist system is functional.
Initiating an Emergency Request
1.Press the cover briefly to open it.2.Press the SOS button until the LED at the
button lights up green.▷The LED lights up green: an Emergency
Request was initiated.
If a cancel prompt appears on the display,
the Emergency Request can be aborted.
If the situation allows, wait in your vehicle
until the voice connection has been estab‐
lished.▷The LED flashes green when a connection
to the BMW Response Center has been
established.Seite 232MobilityBreakdown assistance232
Online Edition for Part no. 01 40 2 954 204 - II/15
Page 244 of 262
Chemical cleaning
Do not clean chemically; this can destroy
the webbing.◀
Use only a mild soapy solution, with the safety
belts clipped into their buckles.
Do not allow the reels to retract the safety
belts until they are dry.
Carpets and floor mats No objects in the area around the pedals
Keep floor mats, carpets, and any other
objects out of the pedal area; otherwise, the
function of the pedals could be impeded while
driving and create the risk of an accident.
Do not place additional floor mats over existing
mats or other objects.
Only use floor mats that have been approved
for the vehicle and can be properly attached to
floor.
Ensure that the floor mats are securely fas‐
tened again after they were removed for clean‐
ing, e.g.◀
Floor mats can be removed from the car's inte‐
rior for cleaning.
If the floor carpets are very dirty, clean with a
microfiber cloth and water or a textile cleaner.
To prevent matting of the carpet, rub back and
forth in the direction of travel only.
Sensor/camera lenses
To clean sensors and camera lenses, use a
cloth moistened with a small amount of glass
detergent.
Displays/monitors Cleaning displays and screens
Do not use any chemical or household
cleaning agents; otherwise, surfaces can be af‐
fected.◀Keeping out moisture
Keep all fluids and moisture away from
the unit; otherwise, electrical components can
be damaged.◀
Avoid pressure
Avoid pressing too hard when cleaning
and do not use abrasive materials; otherwise,
damage can result.◀
Clean with a clean, antistatic microfiber cloth.
Long-term
For idle phases that last several weeks, park
the vehicle with a fully charged battery if possi‐
ble. Your service center can advise you on
what to consider when storing the vehicle for
longer than six weeks.
Do not allow the vehicle to sit idle for ex‐
tended periods with a low charging state
Before storing the vehicle for an extended pe‐
riod, check the battery charge indicator to en‐
sure that the high-voltage battery is fully
charged. If necessary, charge the high-voltage
battery by driving the vehicle. Check the
charge level regularly, and if needed recharge
the high-voltage battery by driving the vehicle.
Don't allow battery charge status to drop too
low - it will damage the battery.◀
NoteFollow the instructions for discharging thehigh-voltage battery, refer to page 189.Seite 240MobilityCare240
Online Edition for Part no. 01 40 2 954 204 - II/15
Page 250 of 262
Everything from A to Z
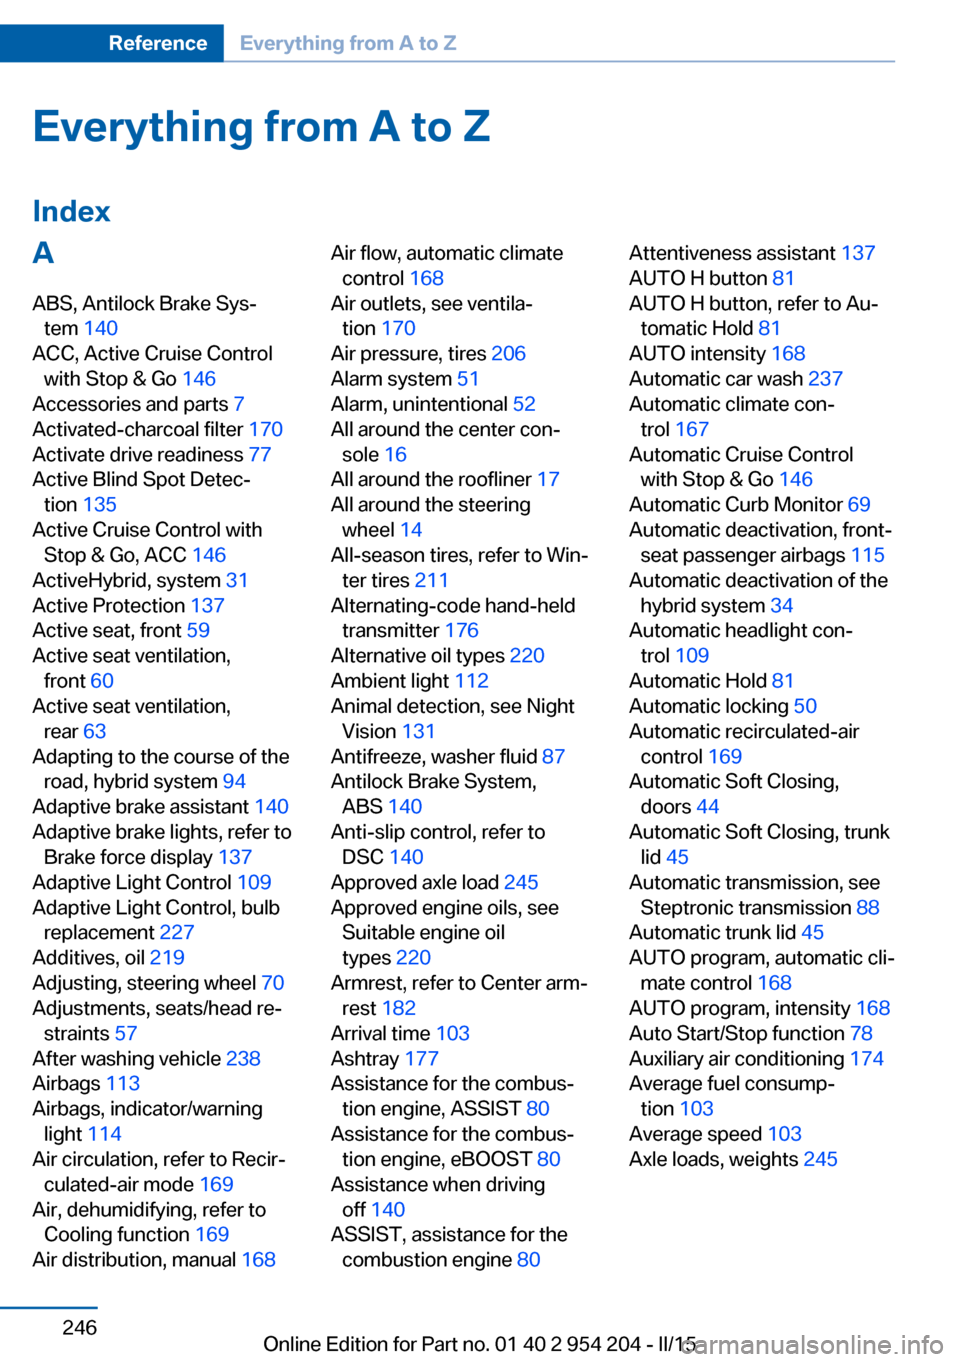
IndexA ABS, Antilock Brake Sys‐ tem 140
ACC, Active Cruise Control with Stop & Go 146
Accessories and parts 7
Activated-charcoal filter 170
Activate drive readiness 77
Active Blind Spot Detec‐ tion 135
Active Cruise Control with Stop & Go, ACC 146
ActiveHybrid, system 31
Active Protection 137
Active seat, front 59
Active seat ventilation, front 60
Active seat ventilation, rear 63
Adapting to the course of the road, hybrid system 94
Adaptive brake assistant 140
Adaptive brake lights, refer to Brake force display 137
Adaptive Light Control 109
Adaptive Light Control, bulb replacement 227
Additives, oil 219
Adjusting, steering wheel 70
Adjustments, seats/head re‐ straints 57
After washing vehicle 238
Airbags 113
Airbags, indicator/warning light 114
Air circulation, refer to Recir‐ culated-air mode 169
Air, dehumidifying, refer to Cooling function 169
Air distribution, manual 168 Air flow, automatic climate
control 168
Air outlets, see ventila‐ tion 170
Air pressure, tires 206
Alarm system 51
Alarm, unintentional 52
All around the center con‐ sole 16
All around the roofliner 17
All around the steering wheel 14
All-season tires, refer to Win‐ ter tires 211
Alternating-code hand-held transmitter 176
Alternative oil types 220
Ambient light 112
Animal detection, see Night Vision 131
Antifreeze, washer fluid 87
Antilock Brake System, ABS 140
Anti-slip control, refer to DSC 140
Approved axle load 245
Approved engine oils, see Suitable engine oil
types 220
Armrest, refer to Center arm‐ rest 182
Arrival time 103
Ashtray 177
Assistance for the combus‐ tion engine, ASSIST 80
Assistance for the combus‐ tion engine, eBOOST 80
Assistance when driving off 140
ASSIST, assistance for the combustion engine 80 Attentiveness assistant 137
AUTO H button 81
AUTO H button, refer to Au‐ tomatic Hold 81
AUTO intensity 168
Automatic car wash 237
Automatic climate con‐ trol 167
Automatic Cruise Control with Stop & Go 146
Automatic Curb Monitor 69
Automatic deactivation, front- seat passenger airbags 115
Automatic deactivation of the hybrid system 34
Automatic headlight con‐ trol 109
Automatic Hold 81
Automatic locking 50
Automatic recirculated-air control 169
Automatic Soft Closing, doors 44
Automatic Soft Closing, trunk lid 45
Automatic transmission, see Steptronic transmission 88
Automatic trunk lid 45
AUTO program, automatic cli‐ mate control 168
AUTO program, intensity 168
Auto Start/Stop function 78
Auxiliary air conditioning 174
Average fuel consump‐ tion 103
Average speed 103
Axle loads, weights 245 Seite 246ReferenceEverything from A to Z246
Online Edition for Part no. 01 40 2 954 204 - II/15
Page 251 of 262
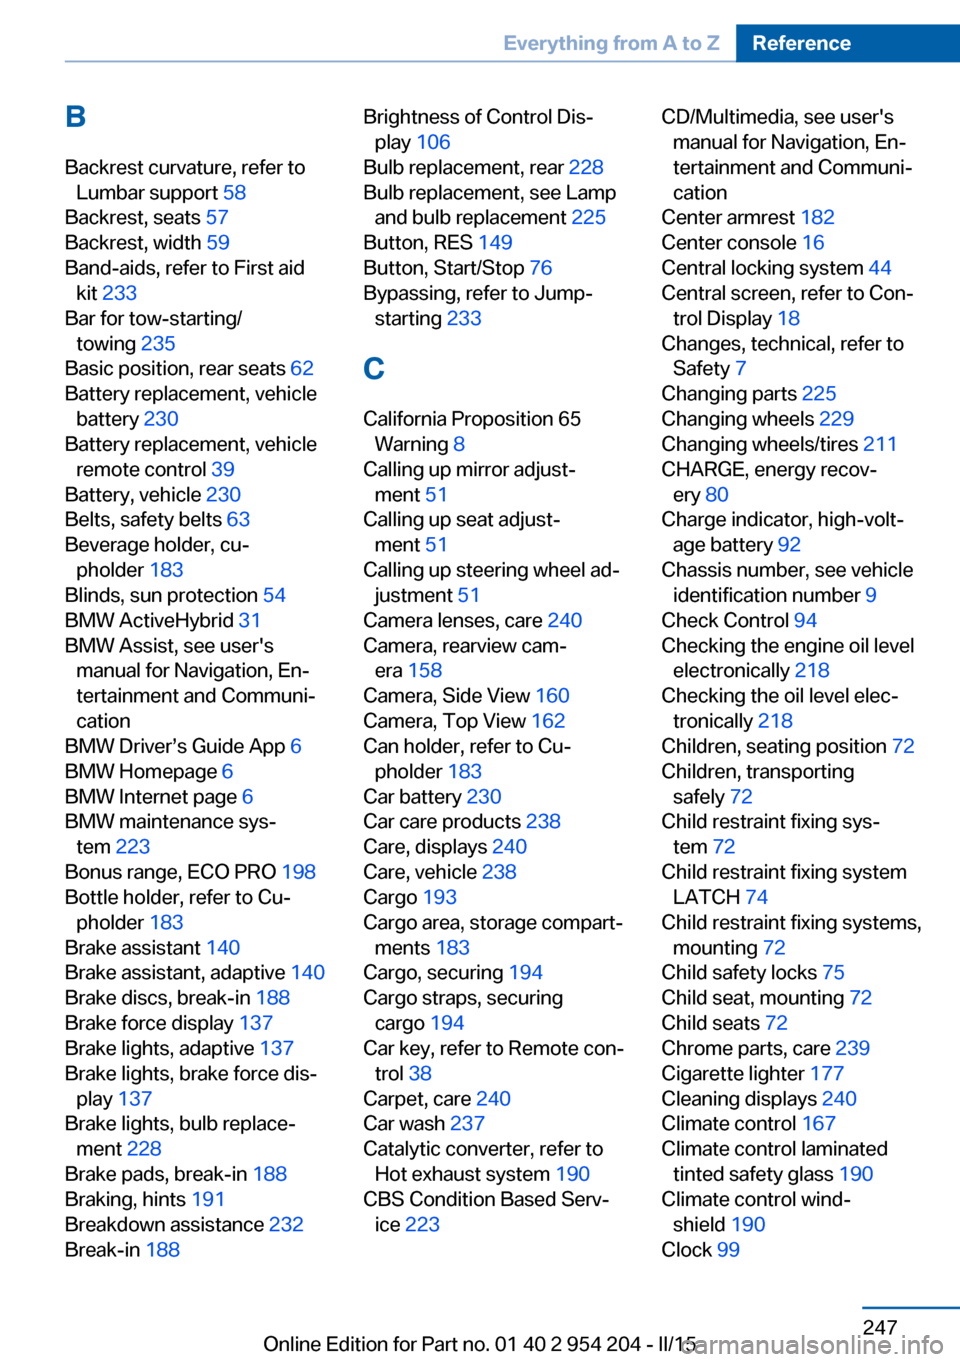
BBackrest curvature, refer to Lumbar support 58
Backrest, seats 57
Backrest, width 59
Band-aids, refer to First aid kit 233
Bar for tow-starting/ towing 235
Basic position, rear seats 62
Battery replacement, vehicle battery 230
Battery replacement, vehicle remote control 39
Battery, vehicle 230
Belts, safety belts 63
Beverage holder, cu‐ pholder 183
Blinds, sun protection 54
BMW ActiveHybrid 31
BMW Assist, see user's manual for Navigation, En‐
tertainment and Communi‐
cation
BMW Driver’s Guide App 6
BMW Homepage 6
BMW Internet page 6
BMW maintenance sys‐ tem 223
Bonus range, ECO PRO 198
Bottle holder, refer to Cu‐ pholder 183
Brake assistant 140
Brake assistant, adaptive 140
Brake discs, break-in 188
Brake force display 137
Brake lights, adaptive 137
Brake lights, brake force dis‐ play 137
Brake lights, bulb replace‐ ment 228
Brake pads, break-in 188
Braking, hints 191
Breakdown assistance 232
Break-in 188 Brightness of Control Dis‐
play 106
Bulb replacement, rear 228
Bulb replacement, see Lamp and bulb replacement 225
Button, RES 149
Button, Start/Stop 76
Bypassing, refer to Jump- starting 233
C
California Proposition 65 Warning 8
Calling up mirror adjust‐ ment 51
Calling up seat adjust‐ ment 51
Calling up steering wheel ad‐ justment 51
Camera lenses, care 240
Camera, rearview cam‐ era 158
Camera, Side View 160
Camera, Top View 162
Can holder, refer to Cu‐ pholder 183
Car battery 230
Car care products 238
Care, displays 240
Care, vehicle 238
Cargo 193
Cargo area, storage compart‐ ments 183
Cargo, securing 194
Cargo straps, securing cargo 194
Car key, refer to Remote con‐ trol 38
Carpet, care 240
Car wash 237
Catalytic converter, refer to Hot exhaust system 190
CBS Condition Based Serv‐ ice 223 CD/Multimedia, see user's
manual for Navigation, En‐
tertainment and Communi‐
cation
Center armrest 182
Center console 16
Central locking system 44
Central screen, refer to Con‐ trol Display 18
Changes, technical, refer to Safety 7
Changing parts 225
Changing wheels 229
Changing wheels/tires 211
CHARGE, energy recov‐ ery 80
Charge indicator, high-volt‐ age battery 92
Chassis number, see vehicle identification number 9
Check Control 94
Checking the engine oil level electronically 218
Checking the oil level elec‐ tronically 218
Children, seating position 72
Children, transporting safely 72
Child restraint fixing sys‐ tem 72
Child restraint fixing system LATCH 74
Child restraint fixing systems, mounting 72
Child safety locks 75
Child seat, mounting 72
Child seats 72
Chrome parts, care 239
Cigarette lighter 177
Cleaning displays 240
Climate control 167
Climate control laminated tinted safety glass 190
Climate control wind‐ shield 190
Clock 99 Seite 247Everything from A to ZReference247
Online Edition for Part no. 01 40 2 954 204 - II/15