towing BMW ACTIVE HYBRID 7 2015 F01H Owner's Manual
[x] Cancel search | Manufacturer: BMW, Model Year: 2015, Model line: ACTIVE HYBRID 7, Model: BMW ACTIVE HYBRID 7 2015 F01HPages: 262, PDF Size: 5.34 MB
Page 55 of 262
Headlamp courtesy delay feature/standing climate control
The settings are saved in the active profile, re‐fer to page 39.1."Settings"2."Doors/key"3. Select the symbol.4.Select the desired function:▷"Pathway lighting"
Headlight courtesy delay feature▷"Comfort cooling"
Stationary climate control
Retrieving the seat, mirror, and
steering wheel settings
The driver's seat, exterior mirror, and steering
wheel position adjusted last will be stored for
the active profile.
When the vehicle is unlocked, these positions
are automatically retrieved if this function was
activated.
Pinch hazard when moving back the seat
If this function is used, first make sure
that the footwell behind the driver's seat is
empty. Otherwise, people might get injured or
objects damaged when the seat is moved
back.◀
The adjustment procedure is interrupted:
▷When a seat position reel is pressed.▷When a button of the seat, mirror, and
steering wheel memory is pressed briefly.
Activating the setting
1."Settings"2."Doors/key"3."Last seat position autom."Alarm system
The conceptWhen the vehicle is locked, the vehicle alarm
system responds to:▷Opening a door, the hood or the trunk lid.▷Movements in the interior.▷Changes in the vehicle tilt, e. g., during at‐
tempts at stealing a wheel or when towing
the car.▷Disconnected battery voltage.
The alarm system briefly signals tampering:
▷By sounding an acoustic alarm.▷By switching on the hazard warning sys‐
tem.▷By flashing the daytime running lights.
Arming and disarming the alarm
system
When you unlock or lock the vehicle, either
with the remote control, Comfort Access or at
the door lock the alarm system is disarmed or
armed at the same time.
Door lock and armed alarm systemUnlocking via the door lock will trigger the
alarm on some country-specific versions.
Trunk lid and armed alarm system The trunk lid can be opened even when the
alarm system is armed.
After the trunk lid is closed, it is locked and
monitored again when the doors are locked.
The hazard warning system flashes once.
Panic mode
You can trigger the alarm system if you find
yourself in a dangerous situation.
Press button on the remote control for
at least 3 seconds.
To switch off the alarm: press any button.
Seite 51Opening and closingControls51
Online Edition for Part no. 01 40 2 954 204 - II/15
Page 126 of 262
tems that can help prevent a imminent colli‐
sion. These systems are active automatically
every time the engine is started using the
Start/Stop button:▷Front-end collision warning, refer to
page 123.▷Pedestrian warning, refer to page 128.
Hints
Personal responsibility
The system does not serve as a substi‐
tute for the driver's personal judgment of the
traffic situation.
Be aware of the traffic situation and the vehi‐
cle's surroundings at all times, otherwise acci‐
dents are still possible despite all warnings.◀
Adapting your speed and driving style
The displays and warnings of the system
do not relieve the driver of the responsibility to
adapt his or her driving speed and style to the
traffic conditions.◀
Be alert
Due to system limitations, warnings may
be not issued at all, or may be issued late or
improperly. Therefore, always be alert and ready to intervene; otherwise, there is the risk
of an accident.◀
Tow-starting and towing
For tow-starting or towing, switch off the
Intelligent Safety systems; otherwise malfunc‐
tions of the individual braking systems might
lead to accidents.◀
At a glance
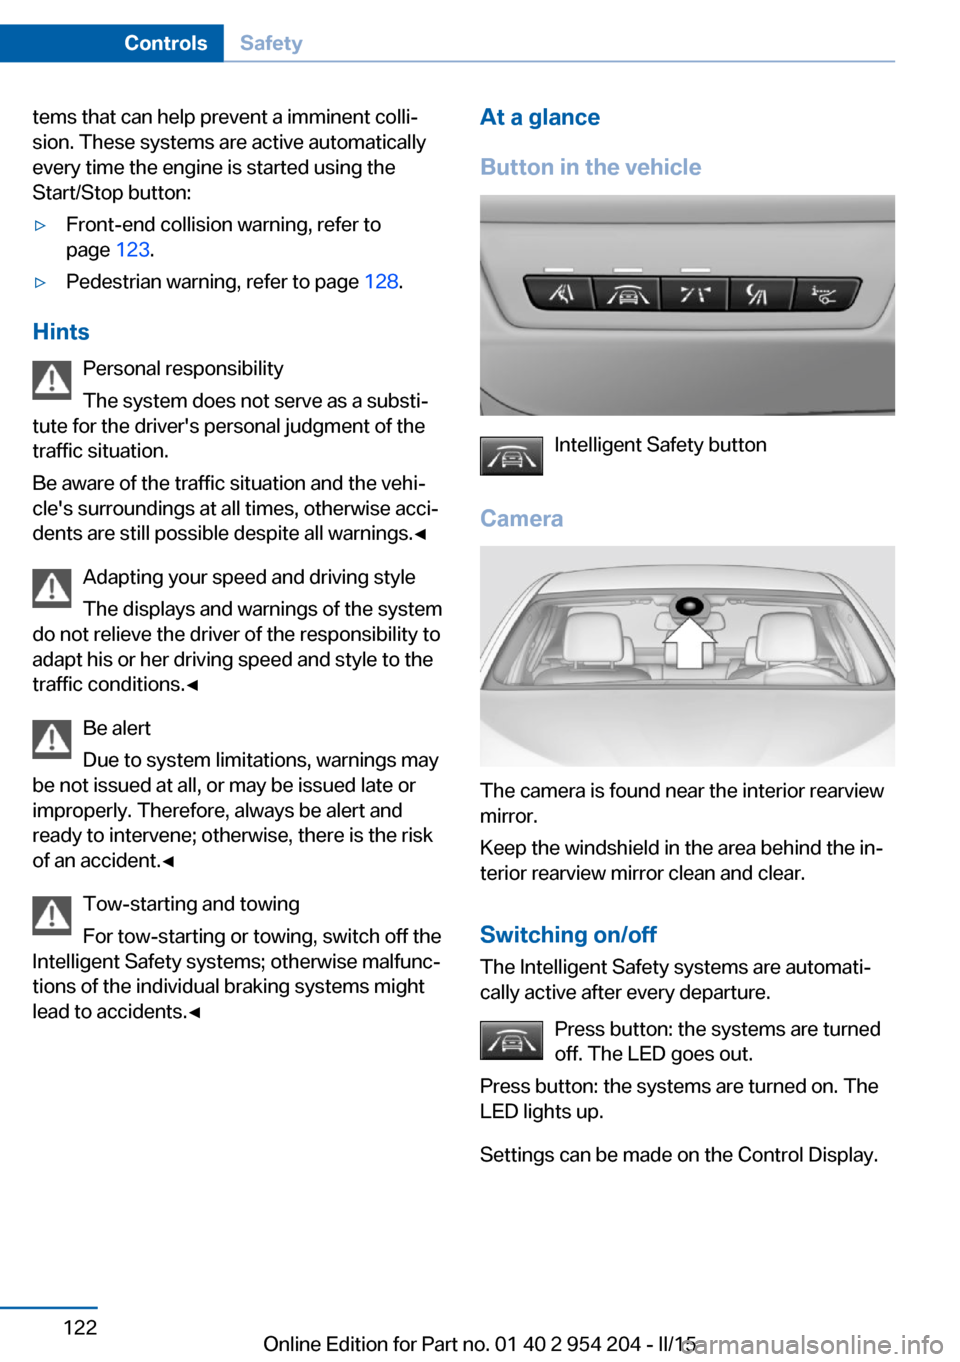
Button in the vehicle
Intelligent Safety button
Camera
The camera is found near the interior rearview
mirror.
Keep the windshield in the area behind the in‐
terior rearview mirror clean and clear.
Switching on/offThe Intelligent Safety systems are automati‐
cally active after every departure.
Press button: the systems are turned
off. The LED goes out.
Press button: the systems are turned on. The
LED lights up.
Settings can be made on the Control Display.
Seite 122ControlsSafety122
Online Edition for Part no. 01 40 2 954 204 - II/15
Page 127 of 262
Front-end collision warning
Depending on the equipment, the collision
warning system consists of one of the two sys‐
tems:▷Front-end collision warning with City Brak‐
ing function, refer to page 123.▷Front-end collision warning with braking
function, refer to page 125
Front-end collision warning
with City Braking function
The concept The ystem can help prevent accidents. If an
accident cannot be prevented, the system will
help reduce the collision speed.
The system sounds a warning before an immi‐
nent collision and actuates brakes independ‐
ently if needed.
The automatic braking intervention is done
with limited force and duration.
A camera in the area of the rearview mirror
controls the system.
The front-end collision warning is available
even if cruise control has been deactivated.
With the vehicle approaching another vehicle
intentionally the collision warning is delayed
avoiding false alarm.
General information The system warns at two levels of an imminent
danger of collision at speeds from approx.
3 mph/5 km/h. Time of warnings may vary with
the current driving situation.
Appropriate braking kicks in at speeds of up to
35 mph/60 km/h.
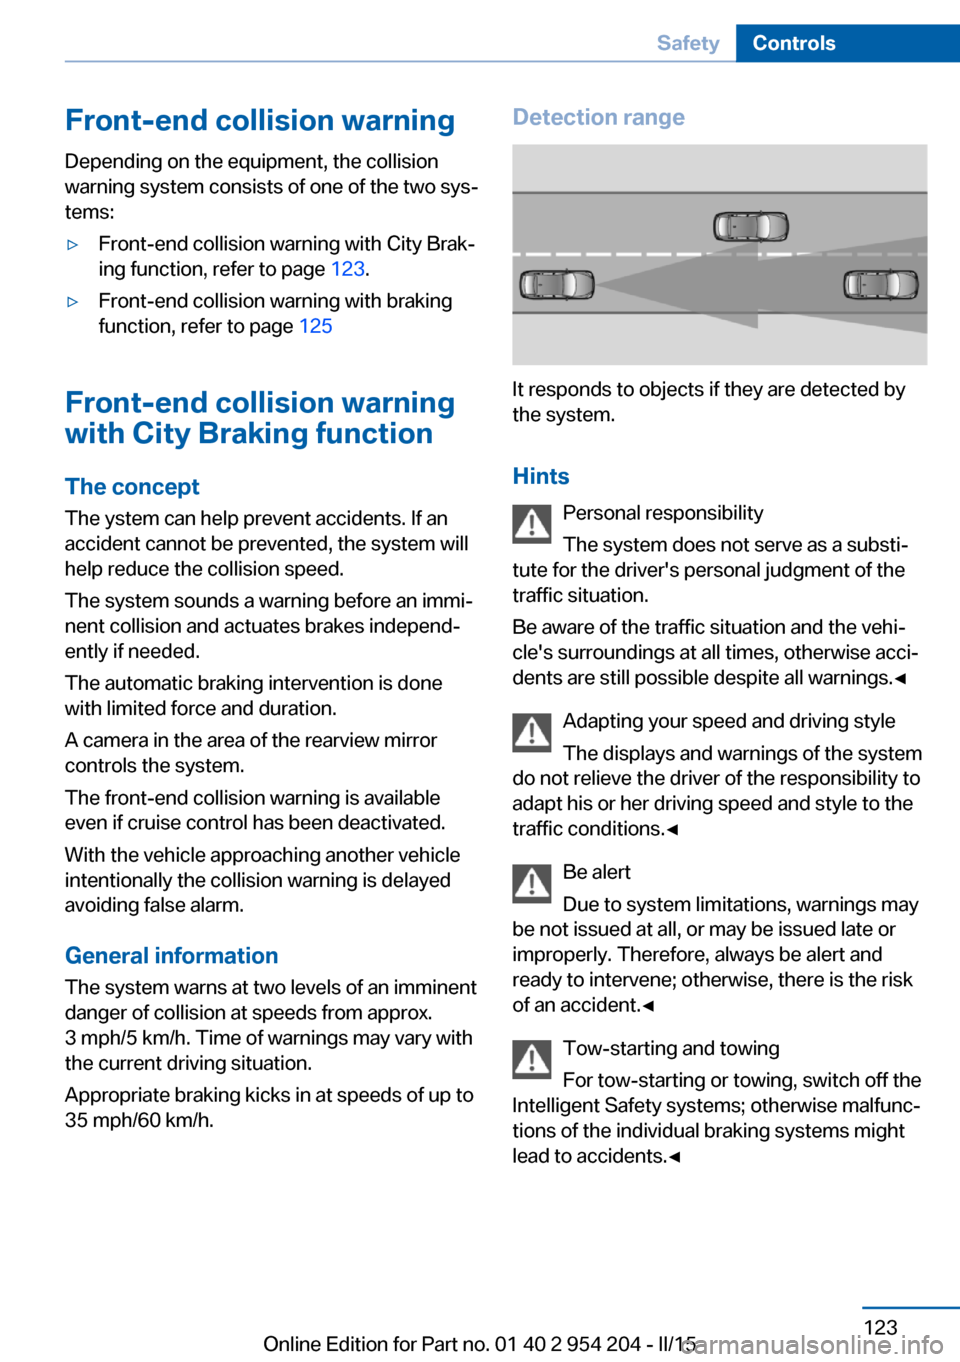
Detection range
It responds to objects if they are detected by
the system.
Hints Personal responsibility
The system does not serve as a substi‐
tute for the driver's personal judgment of the
traffic situation.
Be aware of the traffic situation and the vehi‐
cle's surroundings at all times, otherwise acci‐
dents are still possible despite all warnings.◀
Adapting your speed and driving style
The displays and warnings of the system
do not relieve the driver of the responsibility to
adapt his or her driving speed and style to the
traffic conditions.◀
Be alert
Due to system limitations, warnings may
be not issued at all, or may be issued late or
improperly. Therefore, always be alert and
ready to intervene; otherwise, there is the risk
of an accident.◀
Tow-starting and towing
For tow-starting or towing, switch off the
Intelligent Safety systems; otherwise malfunc‐
tions of the individual braking systems might
lead to accidents.◀
Seite 123SafetyControls123
Online Edition for Part no. 01 40 2 954 204 - II/15
Page 130 of 262
With the vehicle approaching another vehicle
intentionally the collision warning is delayed
avoiding false alarm.
General information
The system issues a two-phase warning of a
possible danger of collision with vehicles at
speeds above approx. 3 mph/5 km/h. Time of
warnings may vary with the current driving sit‐
uation.
Detection range
It responds to objects if they are detected by
the system.
Hints Personal responsibility
The system does not serve as a substi‐
tute for the driver's personal judgment of the
traffic situation.
Be aware of the traffic situation and the vehi‐
cle's surroundings at all times, otherwise acci‐
dents are still possible despite all warnings.◀
Adapting your speed and driving style
The displays and warnings of the system
do not relieve the driver of the responsibility to
adapt his or her driving speed and style to the
traffic conditions.◀
Be alert
Due to system limitations, warnings may
be not issued at all, or may be issued late or
improperly. Therefore, always be alert and
ready to intervene; otherwise, there is the risk
of an accident.◀
Tow-starting and towing
For tow-starting or towing, switch off the
Intelligent Safety systems; otherwise malfunc‐
tions of the individual braking systems might
lead to accidents.◀
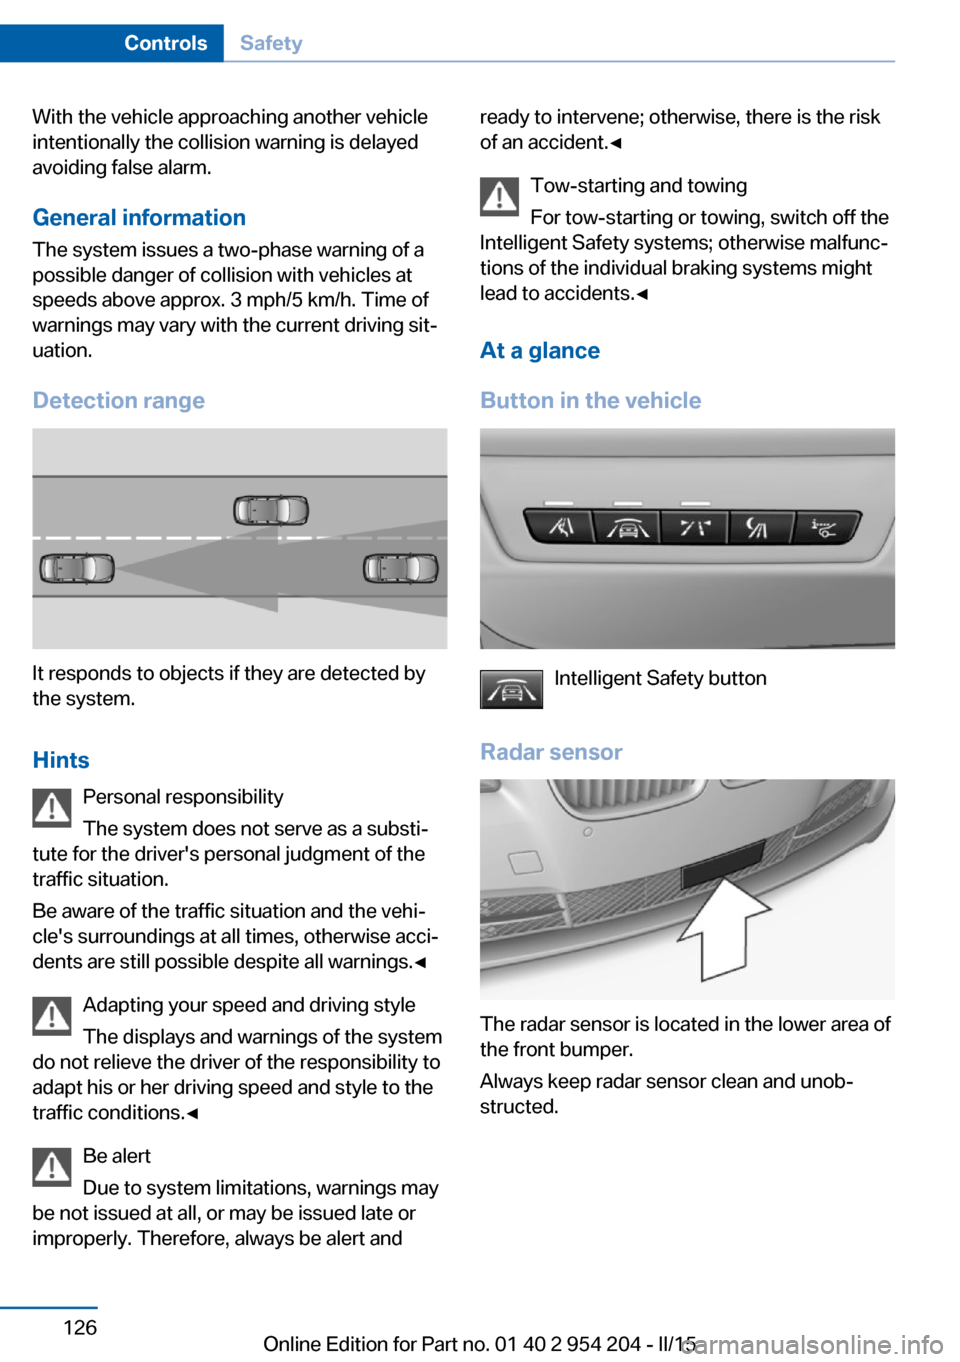
At a glance
Button in the vehicle
Intelligent Safety button
Radar sensor
The radar sensor is located in the lower area of
the front bumper.
Always keep radar sensor clean and unob‐
structed.
Seite 126ControlsSafety126
Online Edition for Part no. 01 40 2 954 204 - II/15
Page 133 of 262
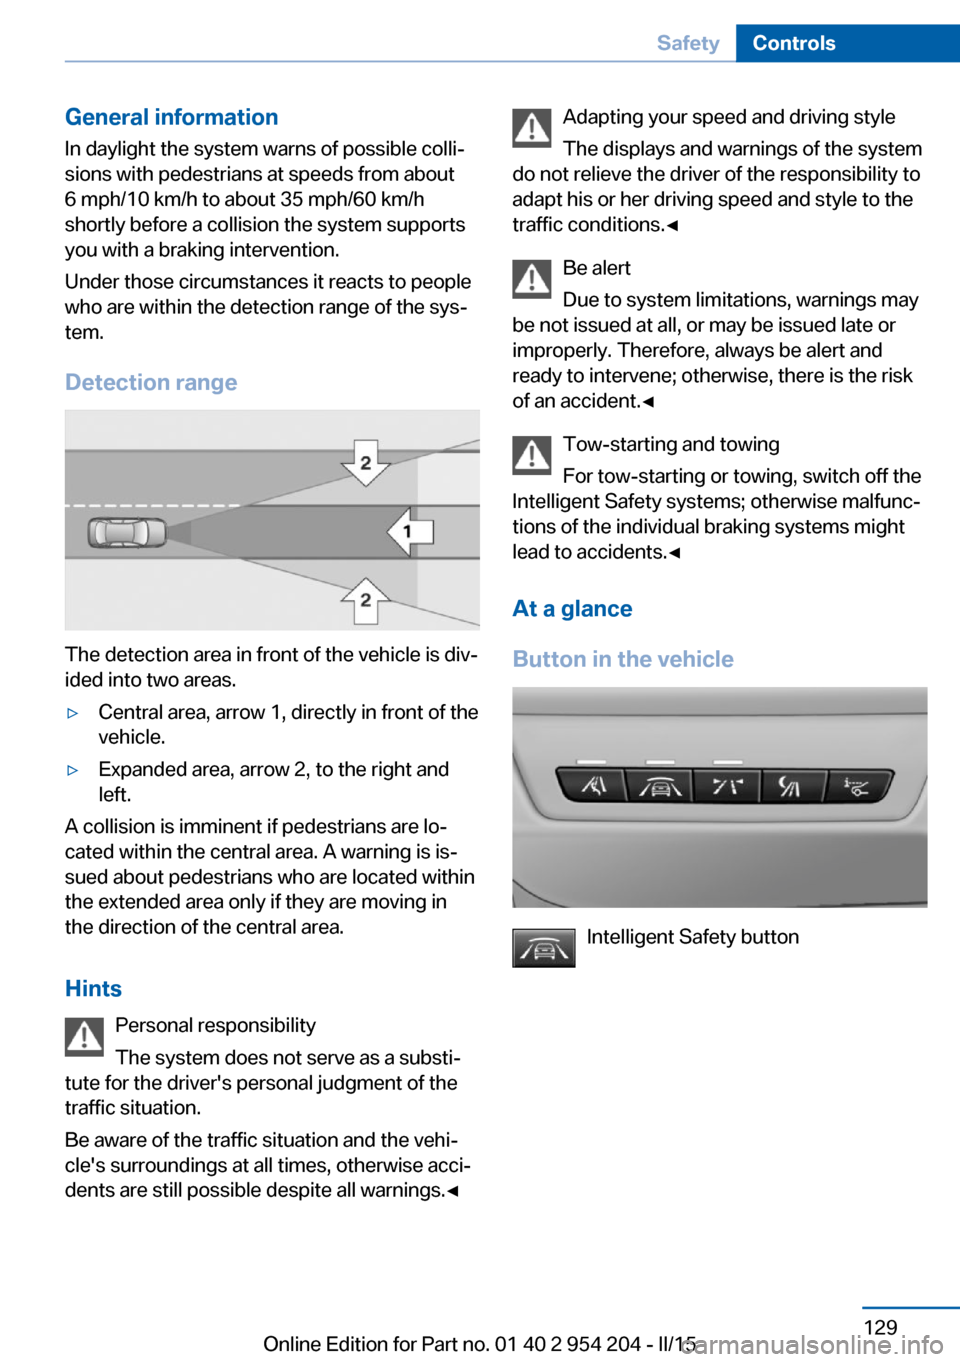
General information
In daylight the system warns of possible colli‐
sions with pedestrians at speeds from about
6 mph/10 km/h to about 35 mph/60 km/h
shortly before a collision the system supports
you with a braking intervention.
Under those circumstances it reacts to people
who are within the detection range of the sys‐
tem.
Detection range
The detection area in front of the vehicle is div‐
ided into two areas.
▷Central area, arrow 1, directly in front of the
vehicle.▷Expanded area, arrow 2, to the right and
left.
A collision is imminent if pedestrians are lo‐
cated within the central area. A warning is is‐
sued about pedestrians who are located within
the extended area only if they are moving in
the direction of the central area.
Hints Personal responsibility
The system does not serve as a substi‐
tute for the driver's personal judgment of the
traffic situation.
Be aware of the traffic situation and the vehi‐
cle's surroundings at all times, otherwise acci‐
dents are still possible despite all warnings.◀
Adapting your speed and driving style
The displays and warnings of the system
do not relieve the driver of the responsibility to
adapt his or her driving speed and style to the
traffic conditions.◀
Be alert
Due to system limitations, warnings may
be not issued at all, or may be issued late or
improperly. Therefore, always be alert and
ready to intervene; otherwise, there is the risk
of an accident.◀
Tow-starting and towing
For tow-starting or towing, switch off the
Intelligent Safety systems; otherwise malfunc‐
tions of the individual braking systems might
lead to accidents.◀
At a glance
Button in the vehicle
Intelligent Safety button
Seite 129SafetyControls129
Online Edition for Part no. 01 40 2 954 204 - II/15
Page 198 of 262
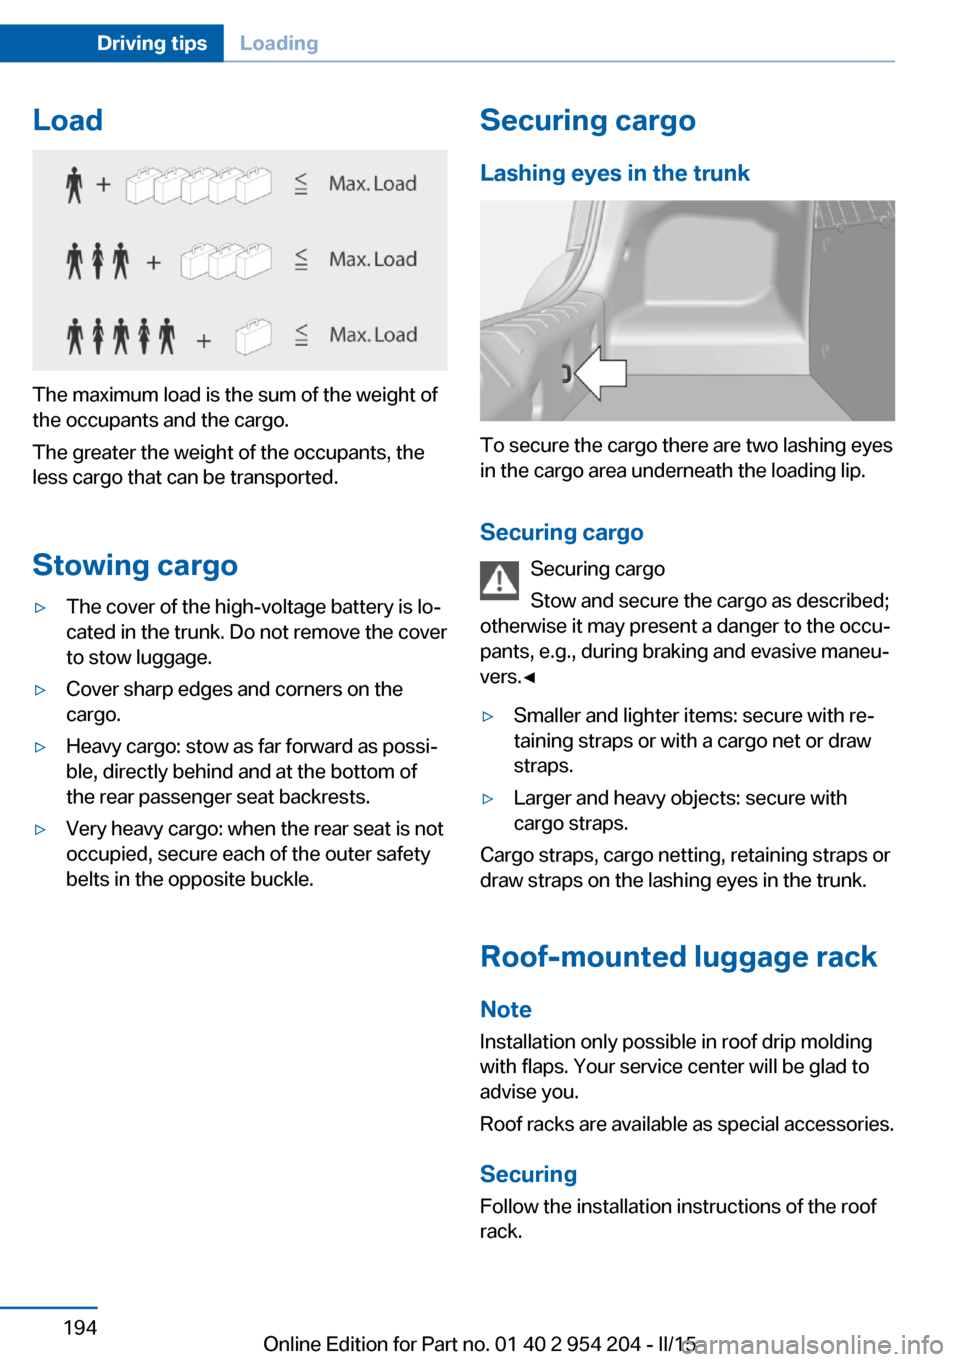
Load
The maximum load is the sum of the weight of
the occupants and the cargo.
The greater the weight of the occupants, the
less cargo that can be transported.
Stowing cargo
▷The cover of the high-voltage battery is lo‐
cated in the trunk. Do not remove the cover
to stow luggage.▷Cover sharp edges and corners on the
cargo.▷Heavy cargo: stow as far forward as possi‐
ble, directly behind and at the bottom of
the rear passenger seat backrests.▷Very heavy cargo: when the rear seat is not
occupied, secure each of the outer safety
belts in the opposite buckle.Securing cargo
Lashing eyes in the trunk
To secure the cargo there are two lashing eyes
in the cargo area underneath the loading lip.
Securing cargo Securing cargo
Stow and secure the cargo as described;
otherwise it may present a danger to the occu‐
pants, e.g., during braking and evasive maneu‐
vers.◀
▷Smaller and lighter items: secure with re‐
taining straps or with a cargo net or draw
straps.▷Larger and heavy objects: secure with
cargo straps.
Cargo straps, cargo netting, retaining straps or
draw straps on the lashing eyes in the trunk.
Roof-mounted luggage rack
Note Installation only possible in roof drip molding
with flaps. Your service center will be glad to
advise you.
Roof racks are available as special accessories.
Securing
Follow the installation instructions of the roof
rack.
Seite 194Driving tipsLoading194
Online Edition for Part no. 01 40 2 954 204 - II/15
Page 219 of 262
If a tire inflation pressure of 2 bar cannot be
reached, contact your service center.
Stowing the Mobility System
1.Unscrew the filling hose of the sealant con‐
tainer from the wheel.2.Unscrew the connection hose of the com‐
pressor from the sealant container.3.Connect the filling hose of the sealant con‐
tainer previously connected to the tire
valve with the available connector on the
sealant container.
This prevents leftover sealant from escap‐
ing from the container.4.Wrap the empty sealant container in suita‐
ble material to avoid dirtying the cargo
area.5.Stow the Mobility System back in the vehi‐
cle.
Distributing the sealant
Immediately drive approx. 5 miles/10 km to en‐
sure that the sealant is evenly distributed in the
tire.
Do not exceed a speed of 50 mph/80 km/h.
If possible, do not drive at speeds less than
12 mph/20 km/h.
To correct the tire inflation pressure
1.Stop at a suitable location.2.Screw the connection hose of the com‐
pressor directly onto the tire valve stem.3.Insert the connector into the power socket
inside the vehicle.4.Correct the tire inflation pressure to
2.5 bar.▷Increase pressure: with the ignition
turned on or the engine running, reel
on the compressor.▷To reduce the pressure: press the but‐
ton on the compressor.Continuing the trip
Do not exceed the maximum permissible
speed of 50 mph/80 km/h.
Reinitialize the Flat Tire Monitor.
Reinitialize the Tire Pressure Monitor.
Replace the defective tire and the sealant con‐
tainer of the Mobility System as soon as possi‐
ble.
Snow chains Fine-link snow chains
Only certain types of fine-link snow chains
have been tested by the manufacturer of the
vehicle, classified as road-safe and approved.
Information about the approved snow chains
are available from the service center.
Use
Use only in pairs on the rear wheels, equipped
with the tires of the following size:▷245/50 R 18.▷245/45 R 19.
Follow the snow chain manufacturer's instruc‐
tions.
Make sure that the snow chains are always
sufficiently tight. Retighten as needed accord‐
ing to the chain manufacturer's instructions.
Do not initialize the Flat Tire Monitor after
mounting snow chains, as doing so may result
in incorrect readings.
Do not initialize the Tire Pressure Monitor after
mounting snow chains, as doing so may result
in incorrect readings.
When driving with snow chains, briefly activate
Dynamic Traction Control if needed.
Maximum speed with snow chains Do not exceed a speed of 30 mph/50 km/hwhen using snow chains.
Seite 215Wheels and tiresMobility215
Online Edition for Part no. 01 40 2 954 204 - II/15
Page 239 of 262
other attempt in order to allow the dis‐
charged battery to recharge.3.Let both engines run for several minutes.4.Disconnect the jumper cables in the re‐
verse order.
Check the battery and recharge if needed.
Tow-starting and towing Note Tow-starting and towing
For tow-starting or towing, switch off the
Intelligent Safety systems; otherwise malfunc‐
tions of the individual braking systems might
lead to accidents.◀
Transporting your vehicle
Note Your vehicle is not permitted to be towed.
Therefore, contact a service center in the
event of a breakdown.
Do not have the vehicle towed
Have your vehicle transported on a load‐
ing platform only; otherwise, damage may oc‐
cur.◀
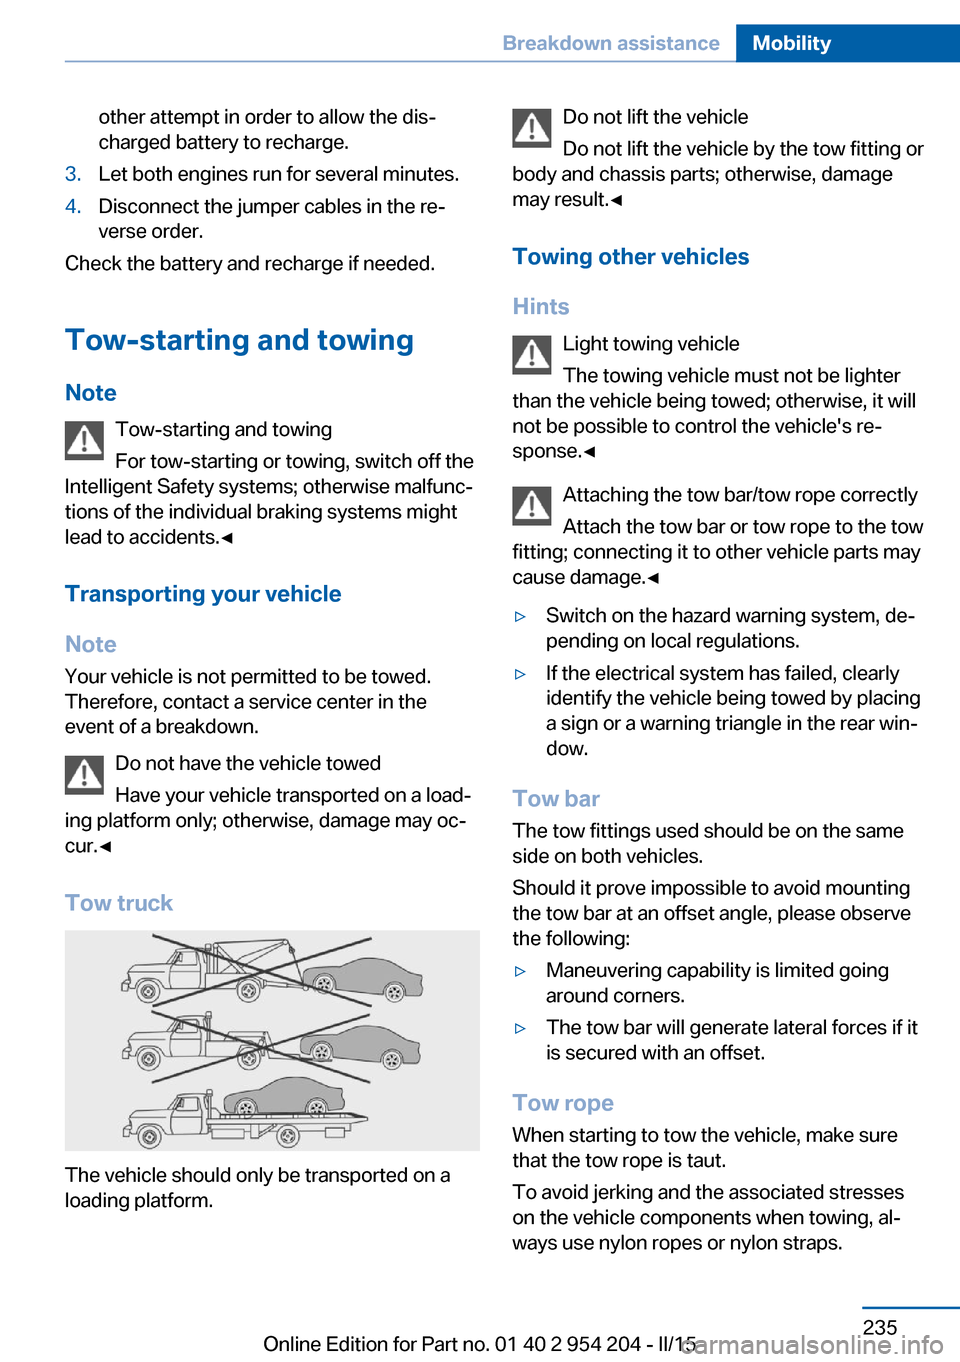
Tow truck
The vehicle should only be transported on a
loading platform.
Do not lift the vehicle
Do not lift the vehicle by the tow fitting or
body and chassis parts; otherwise, damage
may result.◀
Towing other vehicles
Hints Light towing vehicle
The towing vehicle must not be lighter
than the vehicle being towed; otherwise, it will
not be possible to control the vehicle's re‐
sponse.◀
Attaching the tow bar/tow rope correctly
Attach the tow bar or tow rope to the tow
fitting; connecting it to other vehicle parts may
cause damage.◀▷Switch on the hazard warning system, de‐
pending on local regulations.▷If the electrical system has failed, clearly
identify the vehicle being towed by placing
a sign or a warning triangle in the rear win‐
dow.
Tow bar
The tow fittings used should be on the same
side on both vehicles.
Should it prove impossible to avoid mounting
the tow bar at an offset angle, please observe
the following:
▷Maneuvering capability is limited going
around corners.▷The tow bar will generate lateral forces if it
is secured with an offset.
Tow rope
When starting to tow the vehicle, make sure
that the tow rope is taut.
To avoid jerking and the associated stresses
on the vehicle components when towing, al‐
ways use nylon ropes or nylon straps.
Seite 235Breakdown assistanceMobility235
Online Edition for Part no. 01 40 2 954 204 - II/15
Page 240 of 262
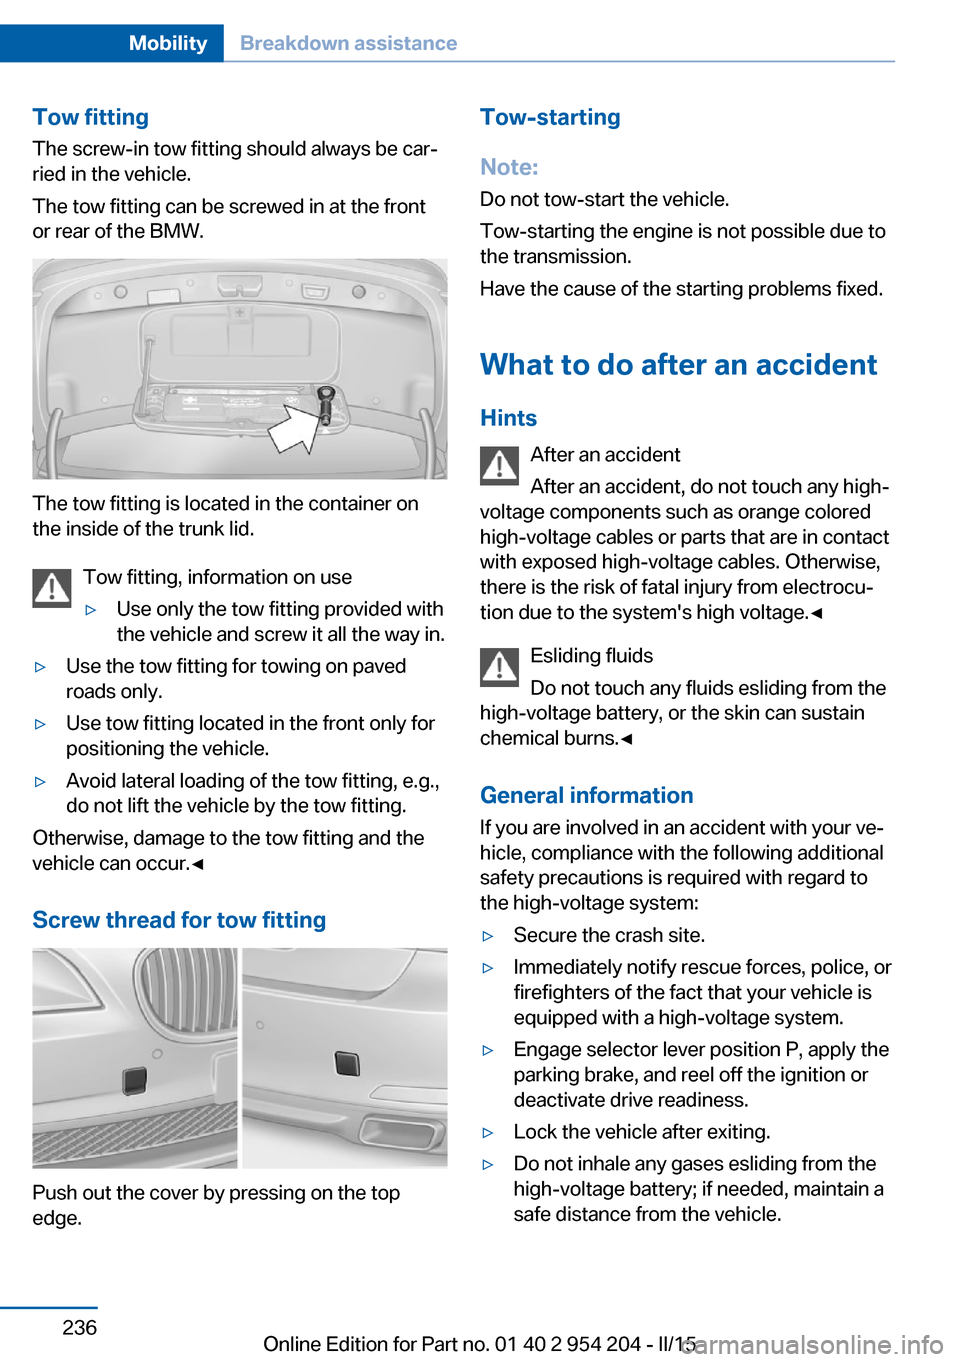
Tow fitting
The screw-in tow fitting should always be car‐
ried in the vehicle.
The tow fitting can be screwed in at the front
or rear of the BMW.
The tow fitting is located in the container on
the inside of the trunk lid.
Tow fitting, information on use
▷Use only the tow fitting provided with
the vehicle and screw it all the way in.▷Use the tow fitting for towing on paved
roads only.▷Use tow fitting located in the front only for
positioning the vehicle.▷Avoid lateral loading of the tow fitting, e.g.,
do not lift the vehicle by the tow fitting.
Otherwise, damage to the tow fitting and the
vehicle can occur.◀
Screw thread for tow fitting
Push out the cover by pressing on the top
edge.
Tow-starting
Note:
Do not tow-start the vehicle.
Tow-starting the engine is not possible due to
the transmission.
Have the cause of the starting problems fixed.
What to do after an accident
Hints After an accident
After an accident, do not touch any high-
voltage components such as orange colored
high-voltage cables or parts that are in contact
with exposed high-voltage cables. Otherwise,
there is the risk of fatal injury from electrocu‐
tion due to the system's high voltage.◀
Esliding fluids
Do not touch any fluids esliding from the
high-voltage battery, or the skin can sustain
chemical burns.◀
General information
If you are involved in an accident with your ve‐
hicle, compliance with the following additional
safety precautions is required with regard to
the high-voltage system:▷Secure the crash site.▷Immediately notify rescue forces, police, or
firefighters of the fact that your vehicle is
equipped with a high-voltage system.▷Engage selector lever position P, apply the
parking brake, and reel off the ignition or
deactivate drive readiness.▷Lock the vehicle after exiting.▷Do not inhale any gases esliding from the
high-voltage battery; if needed, maintain a
safe distance from the vehicle.Seite 236MobilityBreakdown assistance236
Online Edition for Part no. 01 40 2 954 204 - II/15
Page 251 of 262
BBackrest curvature, refer to Lumbar support 58
Backrest, seats 57
Backrest, width 59
Band-aids, refer to First aid kit 233
Bar for tow-starting/ towing 235
Basic position, rear seats 62
Battery replacement, vehicle battery 230
Battery replacement, vehicle remote control 39
Battery, vehicle 230
Belts, safety belts 63
Beverage holder, cu‐ pholder 183
Blinds, sun protection 54
BMW ActiveHybrid 31
BMW Assist, see user's manual for Navigation, En‐
tertainment and Communi‐
cation
BMW Driver’s Guide App 6
BMW Homepage 6
BMW Internet page 6
BMW maintenance sys‐ tem 223
Bonus range, ECO PRO 198
Bottle holder, refer to Cu‐ pholder 183
Brake assistant 140
Brake assistant, adaptive 140
Brake discs, break-in 188
Brake force display 137
Brake lights, adaptive 137
Brake lights, brake force dis‐ play 137
Brake lights, bulb replace‐ ment 228
Brake pads, break-in 188
Braking, hints 191
Breakdown assistance 232
Break-in 188 Brightness of Control Dis‐
play 106
Bulb replacement, rear 228
Bulb replacement, see Lamp and bulb replacement 225
Button, RES 149
Button, Start/Stop 76
Bypassing, refer to Jump- starting 233
C
California Proposition 65 Warning 8
Calling up mirror adjust‐ ment 51
Calling up seat adjust‐ ment 51
Calling up steering wheel ad‐ justment 51
Camera lenses, care 240
Camera, rearview cam‐ era 158
Camera, Side View 160
Camera, Top View 162
Can holder, refer to Cu‐ pholder 183
Car battery 230
Car care products 238
Care, displays 240
Care, vehicle 238
Cargo 193
Cargo area, storage compart‐ ments 183
Cargo, securing 194
Cargo straps, securing cargo 194
Car key, refer to Remote con‐ trol 38
Carpet, care 240
Car wash 237
Catalytic converter, refer to Hot exhaust system 190
CBS Condition Based Serv‐ ice 223 CD/Multimedia, see user's
manual for Navigation, En‐
tertainment and Communi‐
cation
Center armrest 182
Center console 16
Central locking system 44
Central screen, refer to Con‐ trol Display 18
Changes, technical, refer to Safety 7
Changing parts 225
Changing wheels 229
Changing wheels/tires 211
CHARGE, energy recov‐ ery 80
Charge indicator, high-volt‐ age battery 92
Chassis number, see vehicle identification number 9
Check Control 94
Checking the engine oil level electronically 218
Checking the oil level elec‐ tronically 218
Children, seating position 72
Children, transporting safely 72
Child restraint fixing sys‐ tem 72
Child restraint fixing system LATCH 74
Child restraint fixing systems, mounting 72
Child safety locks 75
Child seat, mounting 72
Child seats 72
Chrome parts, care 239
Cigarette lighter 177
Cleaning displays 240
Climate control 167
Climate control laminated tinted safety glass 190
Climate control wind‐ shield 190
Clock 99 Seite 247Everything from A to ZReference247
Online Edition for Part no. 01 40 2 954 204 - II/15