light BMW ACTIVEHYBRID X6 2010 Owners Manual
[x] Cancel search | Manufacturer: BMW, Model Year: 2010, Model line: ACTIVEHYBRID X6, Model: BMW ACTIVEHYBRID X6 2010Pages: 54, PDF Size: 3.16 MB
Page 21 of 54
Reference
At a glance
Controls
Driving tips
Mobility
19
Cruise control
The concept
The cruise control is available for use at speeds
of approx. 20 mph/30 km/h. The vehicle stores
and maintains the speed that you set using the
lever mounted on the steering column.
The cruise control can also be activated
during electric driving, eDRIVE. The
cruise control provides a particularly sensitive
adjustment of the electric drive output.<
Do not use the cruise control under driv-
ing conditions that do not permit a con-
stant speed, e.g. when driving on winding
roads, in heavy traffic or in poor road conditions
such as snow, rain, ice, and loose road surface.
Otherwise you could lose control of the vehicle
and cause an accident.<
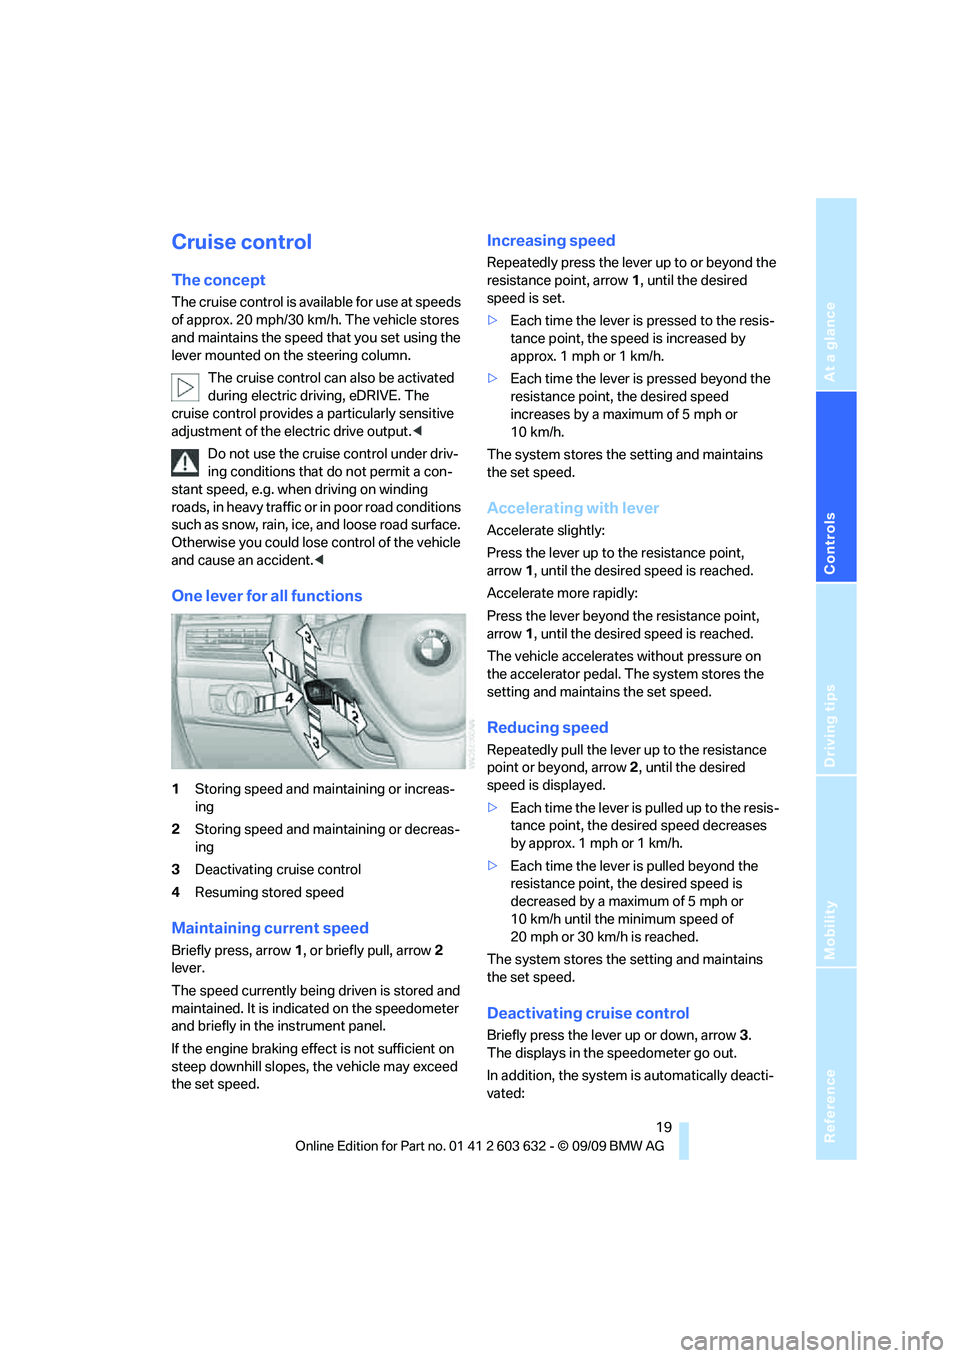
One lever for all functions
1Storing speed and maintaining or increas-
ing
2Storing speed and maintaining or decreas-
ing
3Deactivating cruise control
4Resuming stored speed
Maintaining current speed
Briefly press, arrow1, or briefly pull, arrow2
lever.
The speed currently being driven is stored and
maintained. It is indicated on the speedometer
and briefly in the instrument panel.
If the engine braking effect is not sufficient on
steep downhill slopes, the vehicle may exceed
the set speed.
Increasing speed
Repeatedly press the lever up to or beyond the
resistance point, arrow1, until the desired
speed is set.
>Each time the lever is pressed to the resis-
tance point, the speed is increased by
approx. 1 mph or 1 km/h.
>Each time the lever is pressed beyond the
resistance point, the desired speed
increases by a maximum of 5 mph or
10 km/h.
The system stores the setting and maintains
the set speed.
Accelerating with lever
Accelerate slightly:
Press the lever up to the resistance point,
arrow1, until the desired speed is reached.
Accelerate more rapidly:
Press the lever beyond the resistance point,
arrow1, until the desired speed is reached.
The vehicle accelerates without pressure on
the accelerator pedal. The system stores the
setting and maintains the set speed.
Reducing speed
Repeatedly pull the lever up to the resistance
point or beyond, arrow2, until the desired
speed is displayed.
>Each time the lever is pulled up to the resis-
tance point, the desired speed decreases
by approx. 1 mph or 1 km/h.
>Each time the lever is pulled beyond the
resistance point, the desired speed is
decreased by a maximum of 5 mph or
10 km/h until the minimum speed of
20 mph or 30 km/h is reached.
The system stores the setting and maintains
the set speed.
Deactivating cruise control
Briefly press the lever up or down, arrow3.
The displays in the speedometer go out.
In addition, the system is automatically deacti-
vated:
Page 22 of 54
Driving
20 >when braking
>when transmission position N is engaged
>when DTC is activated or DSC is deacti-
vated
>when HDC is activated
>when the parking brake is set
>when driving stability control systems inter-
vene
Accelerating does not deactivate the cruise
control. After releasing the accelerator pedal,
the stored speed is reached and maintained
again.
Warning lamp
The warning lamp lights up if the
cruise control has been deactivated
automatically, e.g. by a control inter-
vention of the DSC. A message appears on the
Control Display.
Resuming stored speed
Briefly press the button, arrow4. The stored
speed is resumed and maintained.
With the ignition switched off, the stored speed
value is deleted and cannot be resumed again.
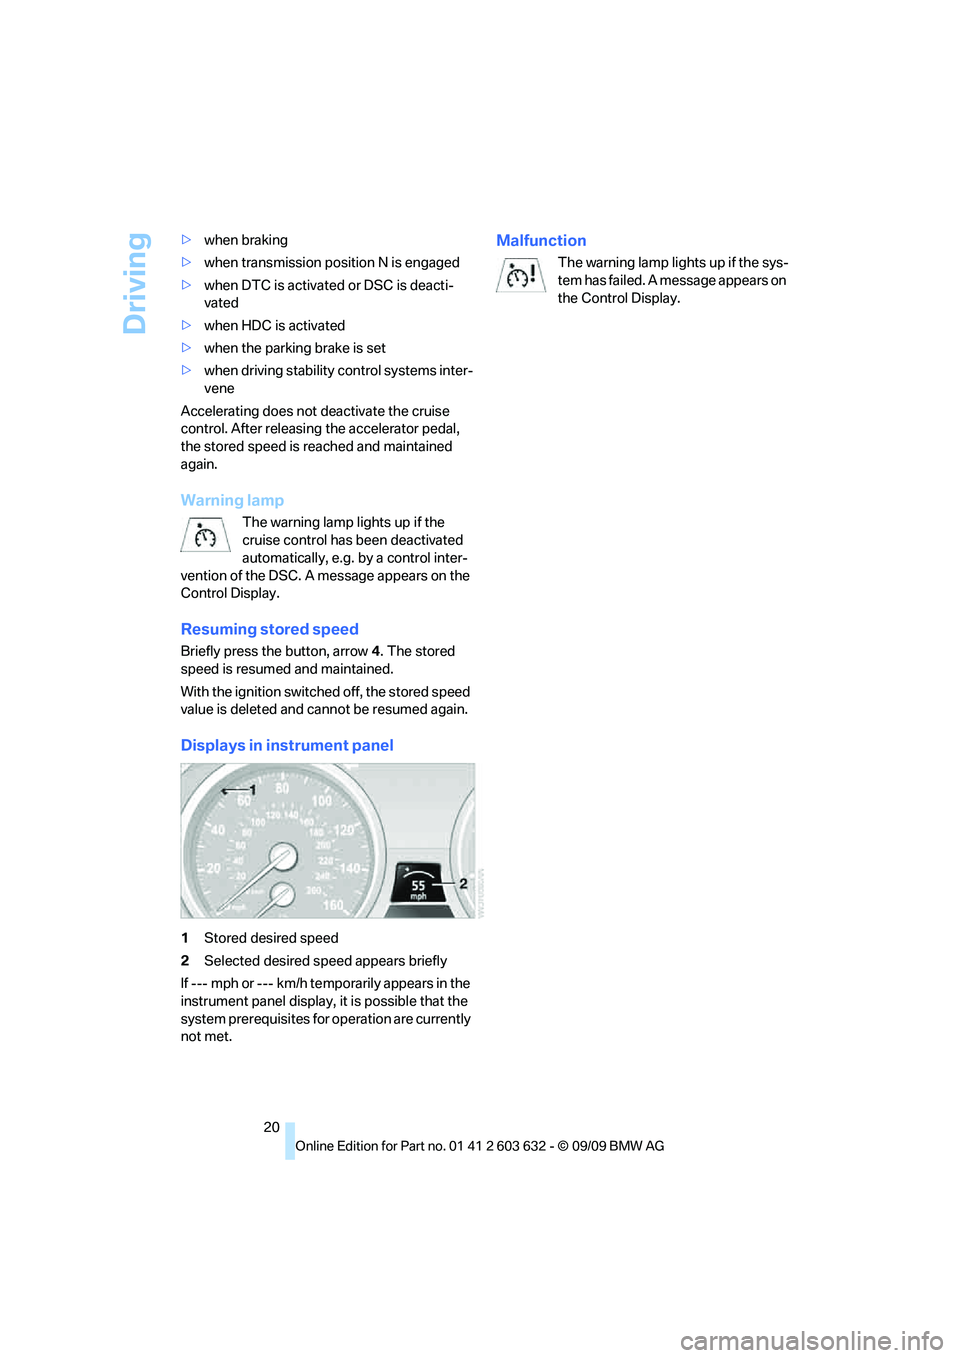
Displays in instrument panel
1Stored desired speed
2Selected desired speed appears briefly
If --- mph or --- km/h temporarily appears in the
instrument panel display, it is possible that the
system prerequisites for operation are currently
not met.
Malfunction
The warning lamp lights up if the sys-
tem has failed. A message appears on
the Control Display.
Page 24 of 54
Everything under control
22
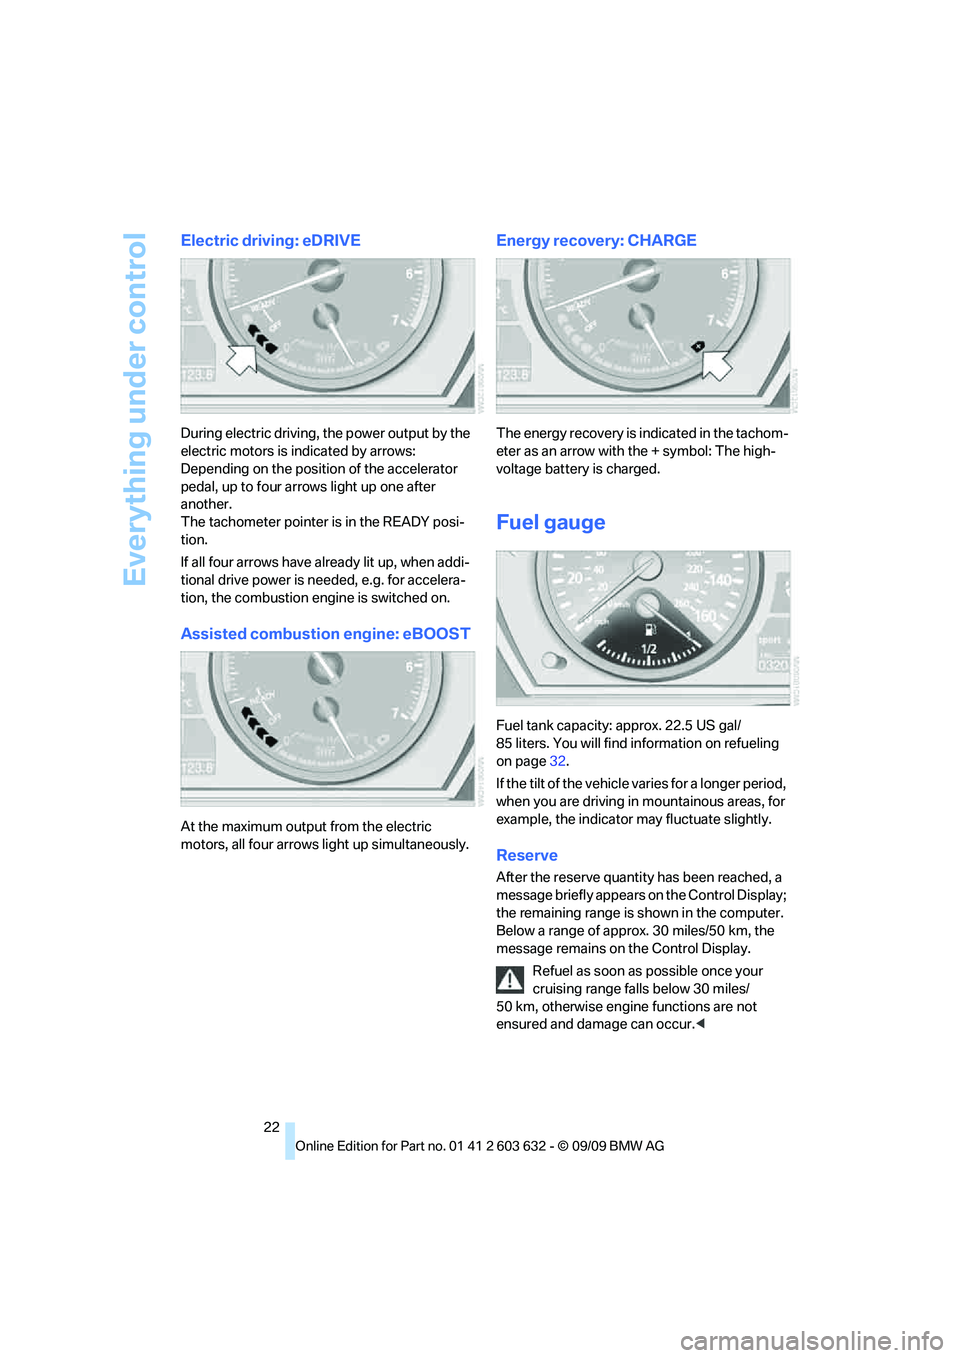
Electric driving: eDRIVE
During electric driving, the power output by the
electric motors is indicated by arrows:
Depending on the position of the accelerator
pedal, up to four arrows light up one after
another.
The tachometer pointer is in the READY posi-
tion.
If all four arrows have already lit up, when addi-
tional drive power is needed, e.g. for accelera-
tion, the combustion engine is switched on.
Assisted combustion engine: eBOOST
At the maximum output from the electric
motors, all four arrows light up simultaneously.
Energy recovery: CHARGE
The energy recovery is indicated in the tachom-
eter as an arrow with the + symbol: The high-
voltage battery is charged.
Fuel gauge
Fuel tank capacity: approx. 22.5 US gal/
85 liters. You will find information on refueling
on page32.
If the tilt of the vehicle varies for a longer period,
when you are driving in mountainous areas, for
example, the indicator may fluctuate slightly.
Reserve
After the reserve quantity has been reached, a
message briefly appears on the Control Display;
the remaining range is shown in the computer.
Below a range of approx. 30 miles/50 km, the
message remains on the Control Display.
Refuel as soon as possible once your
cruising range falls below 30 miles/
50 km, otherwise engine functions are not
ensured and damage can occur.<
Page 29 of 54
Reference
At a glance
Controls
Driving tips
Mobility
27
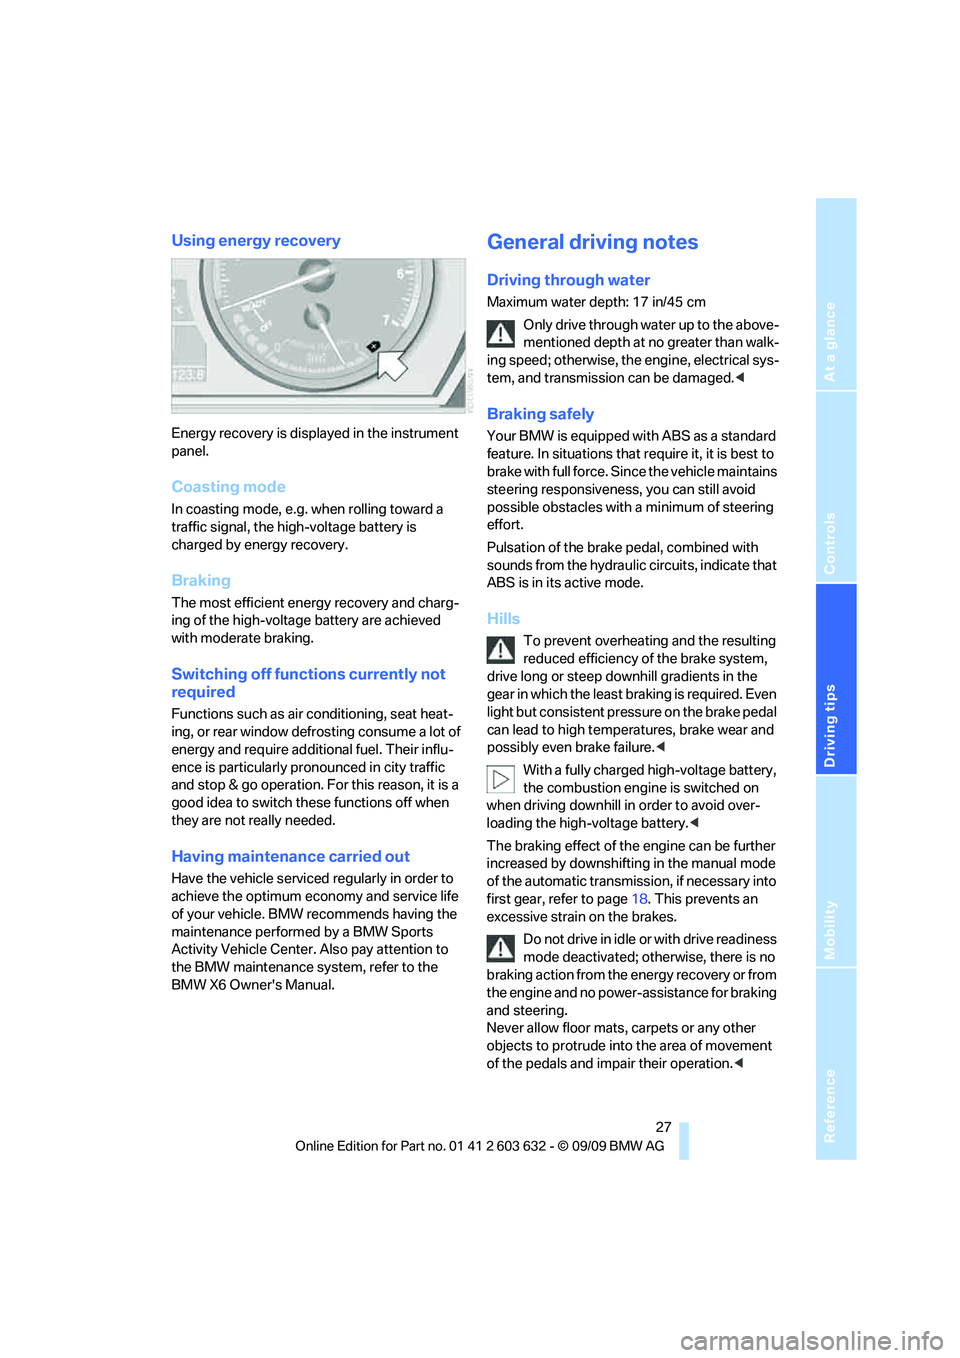
Using energy recovery
Energy recovery is displayed in the instrument
panel.
Coasting mode
In coasting mode, e.g. when rolling toward a
traffic signal, the high-voltage battery is
charged by energy recovery.
Braking
The most efficient energy recovery and charg-
ing of the high-voltage battery are achieved
with moderate braking.
Switching off functions currently not
required
Functions such as air conditioning, seat heat-
ing, or rear window defrosting consume a lot of
energy and require additional fuel. Their influ-
ence is particularly pronounced in city traffic
and stop & go operation. For this reason, it is a
good idea to switch these functions off when
they are not really needed.
Having maintenance carried out
Have the vehicle serviced regularly in order to
achieve the optimum economy and service life
of your vehicle. BMW recommends having the
maintenance performed by a BMW Sports
Activity Vehicle Center. Also pay attention to
the BMW maintenance system, refer to the
BMW X6 Owner's Manual.
General driving notes
Driving through water
Maximum water depth: 17 in/45 cm
Only drive through water up to the above-
mentioned depth at no greater than walk-
ing speed; otherwise, the engine, electrical sys-
tem, and transmission can be damaged.<
Braking safely
Your BMW is equipped with ABS as a standard
feature. In situations that require it, it is best to
brake with full force. Since the vehicle maintains
steering responsiveness, you can still avoid
possible obstacles with a minimum of steering
effort.
Pulsation of the brake pedal, combined with
sounds from the hydraulic circuits, indicate that
ABS is in its active mode.
Hills
To prevent overheating and the resulting
reduced efficiency of the brake system,
drive long or steep downhill gradients in the
gear in which the least braking is required. Even
light but consistent pressure on the brake pedal
can lead to high temperatures, brake wear and
possibly even brake failure.<
With a fully charged high-voltage battery,
the combustion engine is switched on
when driving downhill in order to avoid over-
loading the high-voltage battery.<
The braking effect of the engine can be further
increased by downshifting in the manual mode
of the automatic transmission, if necessary into
first gear, refer to page18. This prevents an
excessive strain on the brakes.
Do not drive in idle or with drive readiness
mode deactivated; otherwise, there is no
braking action from the energy recovery or from
the engine and no power-assistance for braking
and steering.
Never allow floor mats, carpets or any other
objects to protrude into the area of movement
of the pedals and impair their operation.<
Page 40 of 54
Giving and receiving assistance
38 5.Attach the second end of the cable to the
negative terminal of the battery or to the
engine or body ground of the vehicle to be
started.
Charging: 12 Volt battery
1.Start the engine on the assisting vehicle
and activate drive readiness, allowing the
assisting vehicle to run at idle for several
minutes at slightly increased speed.
2.Start the engine on your vehicle in the usual
way.
If the first starting attempt is not successful,
wait a few minutes before another attempt
in order to allow the discharged battery to
recharge.
3.Let the engines run for a few minutes.
4.Disconnect the jumper cables by reversing
the connection sequence.
Have the battery checked if necessary.
Never use spray fluids to start the
engine.<
Charging: High-voltage battery
1.Start the engine on the assisting vehicle
and activate drive readiness, allowing the
assisting vehicle to run at idle for several
minutes at slightly increased speed.
2.Switch on the ignition of your vehicle when
prompted by the corresponding message
on the Control Display. The charging
begins.
3.The charging is concluded when this is
prompted by a corresponding message on
the Control Display.
4.Start the combustion engine of your own
vehicle.
5.Disconnect the jumper cables by reversing
the connection sequence.
Have the hybrid system checked if necessary.
Never use spray fluids to start the
engine.<
Charging interrupted
The charging may be interrupted, for example if
the battery power of the assisting vehicle is
insufficient.
Disconnect the jumper cables in the reverse of
the sequence described above and contact
your BMW Sports Activity Vehicle Center.
Tow-starting and towing
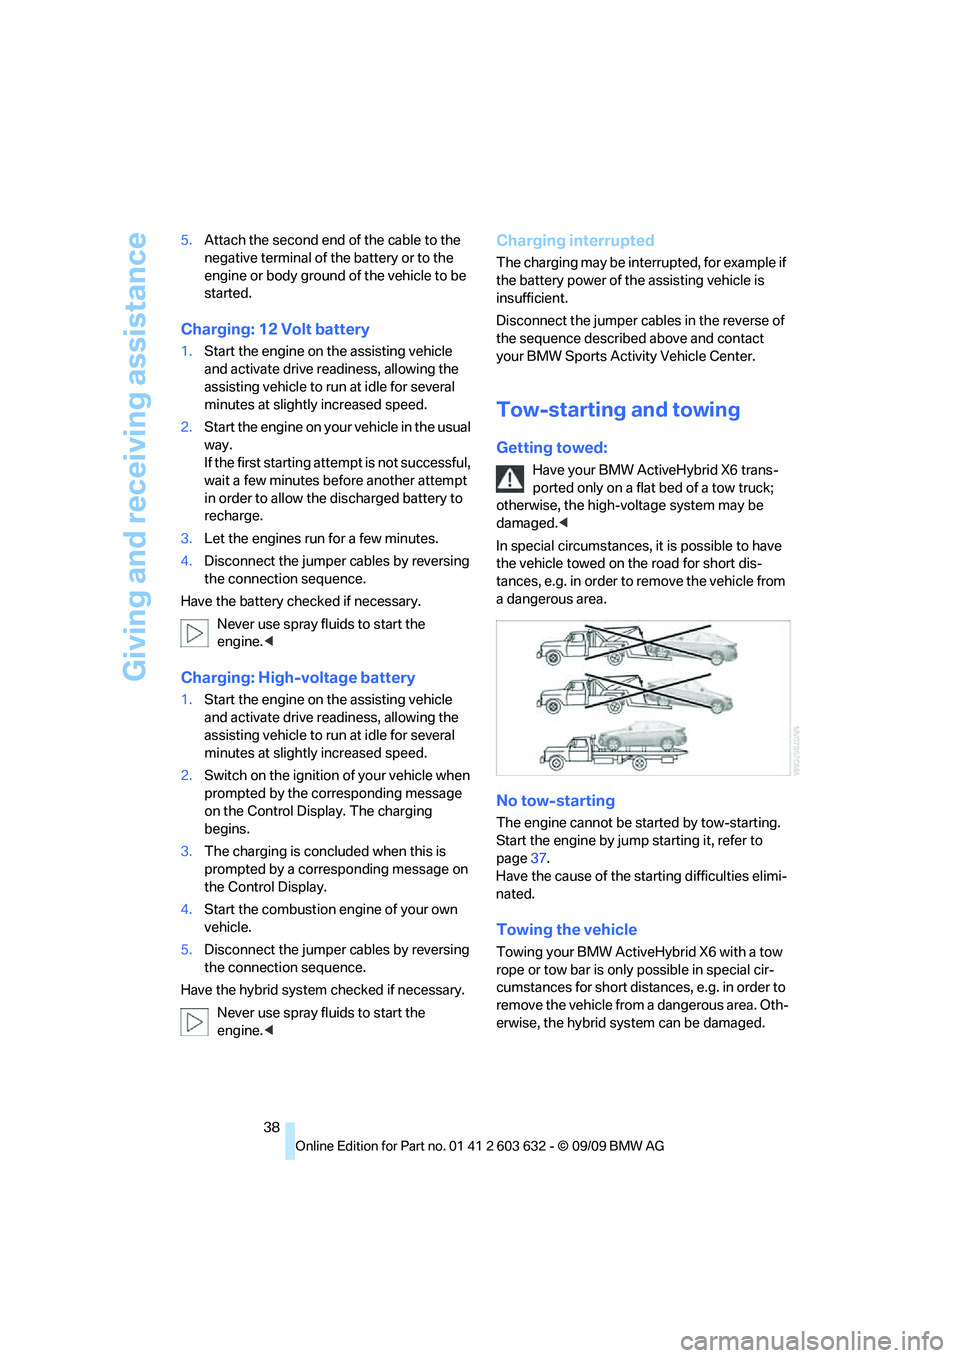
Getting towed:
Have your BMW ActiveHybrid X6 trans-
ported only on a flat bed of a tow truck;
otherwise, the high-voltage system may be
damaged.<
In special circumstances, it is possible to have
the vehicle towed on the road for short dis-
tances, e.g. in order to remove the vehicle from
a dangerous area.
No tow-starting
The engine cannot be started by tow-starting.
Start the engine by jump starting it, refer to
page37.
Have the cause of the starting difficulties elimi-
nated.
Towing the vehicle
Towing your BMW ActiveHybrid X6 with a tow
rope or tow bar is only possible in special cir-
cumstances for short distances, e.g. in order to
remove the vehicle from a dangerous area. Oth-
erwise, the hybrid system can be damaged.
Page 41 of 54
Reference
At a glance
Controls
Driving tips
Mobility
39
Using a tow fitting
The screw-in tow-fitting should always be car-
ried in the vehicle. It can be screwed in at the
front or rear of the BMW.
It is located in the onboard toolkit under the
floor panel flap in the cargo bay.
Use only the tow fitting provided with the
vehicle and screw it all the way in. Use the
tow fitting for towing only on roads. Avoid lateral
loading of the tow fitting, e.g. do not lift the vehi-
cle by the tow fitting. Otherwise damage to the
tow fitting and the vehicle can occur.<
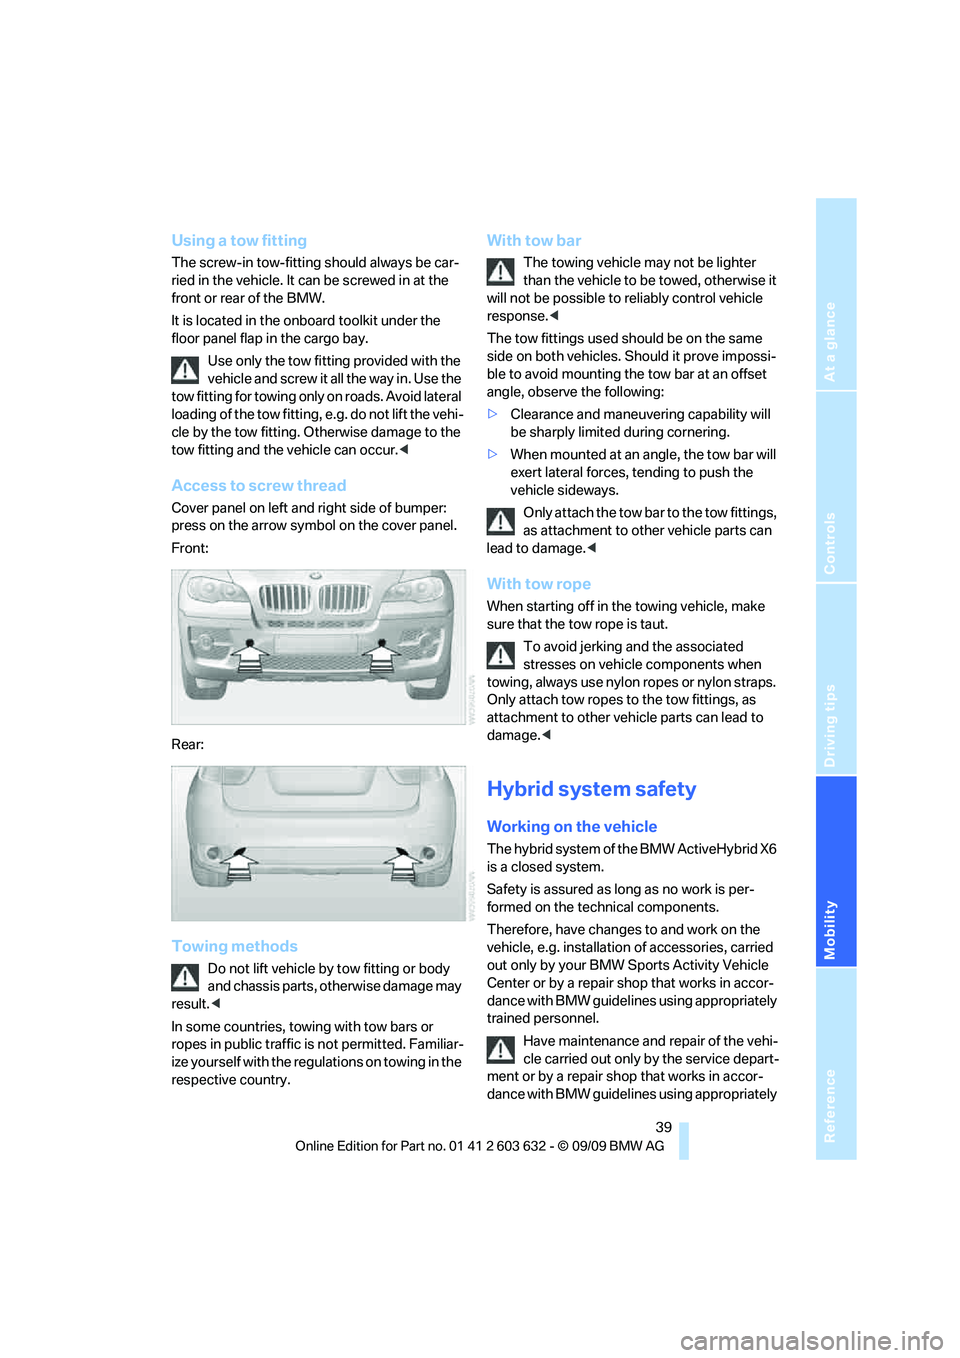
Access to screw thread
Cover panel on left and right side of bumper:
press on the arrow symbol on the cover panel.
Front:
Rear:
Towing methods
Do not lift vehicle by tow fitting or body
and chassis parts, otherwise damage may
result.<
In some countries, towing with tow bars or
ropes in public traffic is not permitted. Familiar-
ize yourself with the regulations on towing in the
respective country.
With tow bar
The towing vehicle may not be lighter
than the vehicle to be towed, otherwise it
will not be possible to reliably control vehicle
response.<
The tow fittings used should be on the same
side on both vehicles. Should it prove impossi-
ble to avoid mounting the tow bar at an offset
angle, observe the following:
>Clearance and maneuvering capability will
be sharply limited during cornering.
>When mounted at an angle, the tow bar will
exert lateral forces, tending to push the
vehicle sideways.
Only attach the tow bar to the tow fittings,
as attachment to other vehicle parts can
lead to damage.<
With tow rope
When starting off in the towing vehicle, make
sure that the tow rope is taut.
To avoid jerking and the associated
stresses on vehicle components when
towing, always use nylon ropes or nylon straps.
Only attach tow ropes to the tow fittings, as
attachment to other vehicle parts can lead to
damage.<
Hybrid system safety
Working on the vehicle
The hybrid system of the BMW ActiveHybrid X6
is a closed system.
Safety is assured as long as no work is per-
formed on the technical components.
Therefore, have changes to and work on the
vehicle, e.g. installation of accessories, carried
out only by your BMW Sports Activity Vehicle
Center or by a repair shop that works in accor-
dance with BMW guidelines using appropriately
trained personnel.
Have maintenance and repair of the vehi-
cle carried out only by the service depart-
ment or by a repair shop that works in accor-
dance with BMW guidelines using appropriately