range extender BMW I3 2014 I01 User Guide
[x] Cancel search | Manufacturer: BMW, Model Year: 2014, Model line: I3, Model: BMW I3 2014 I01Pages: 230, PDF Size: 29.93 MB
Page 98 of 230
Information in detail
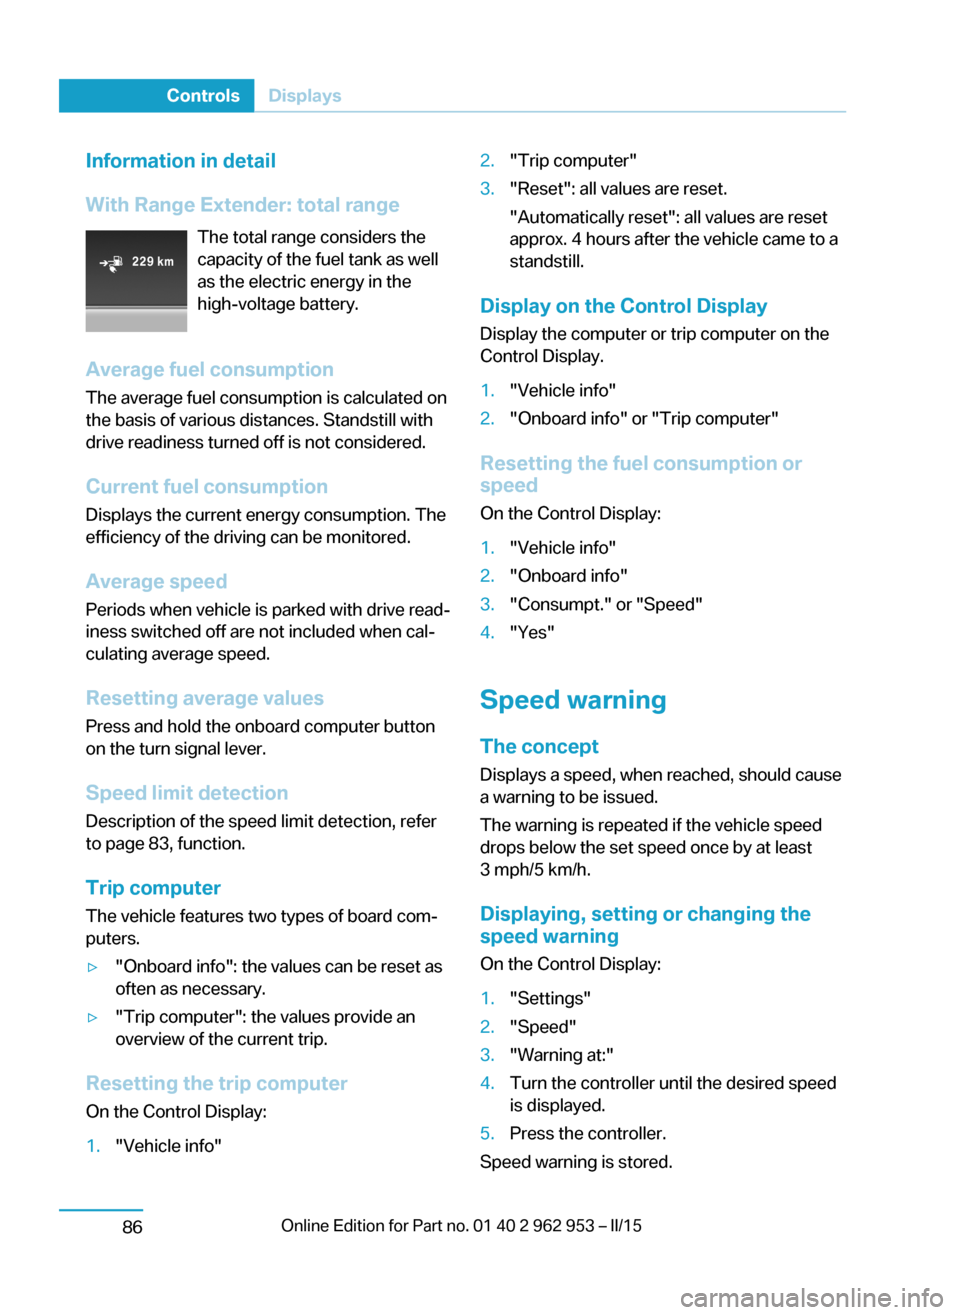
With Range Extender: total range The total range considers the
capacity of the fuel tank as well
as the electric energy in the
high-voltage battery.
Average fuel consumption
The average fuel consumption is calculated on
the basis of various distances. Standstill with
drive readiness turned off is not considered.
Current fuel consumption Displays the current energy consumption. The
efficiency of the driving can be monitored.
Average speed
Periods when vehicle is parked with drive read‐
iness switched off are not included when cal‐
culating average speed.
Resetting average values Press and hold the onboard computer button
on the turn signal lever.
Speed limit detection
Description of the speed limit detection, refer
to page 83, function.
Trip computer
The vehicle features two types of board com‐
puters.▷"Onboard info": the values can be reset as
often as necessary.▷"Trip computer": the values provide an
overview of the current trip.
Resetting the trip computer
On the Control Display:
1."Vehicle info"2."Trip computer"3."Reset": all values are reset.
"Automatically reset": all values are reset
approx. 4 hours after the vehicle came to a
standstill.
Display on the Control Display
Display the computer or trip computer on the
Control Display.
1."Vehicle info"2."Onboard info" or "Trip computer"
Resetting the fuel consumption or
speed
On the Control Display:
1."Vehicle info"2."Onboard info"3."Consumpt." or "Speed"4."Yes"
Speed warning
The concept Displays a speed, when reached, should cause
a warning to be issued.
The warning is repeated if the vehicle speed
drops below the set speed once by at least
3 mph/5 km/h.
Displaying, setting or changing the
speed warning
On the Control Display:
1."Settings"2."Speed"3."Warning at:"4.Turn the controller until the desired speed
is displayed.5.Press the controller.
Speed warning is stored.
Seite 84ControlsDisplays86
Page 156 of 230
Things to remember when drivingVehicle features and options
This chapter describes all standard, country-
specific and optional features offered with the
series. It also describes features that are not
necessarily available in your car, e. g., due to
the selected options or country versions. This
also applies to safety-related functions and
systems.
Breaking-in period
General information Moving parts need time to adjust to one an‐
other (break-in time).
The following instructions will help accomplish
a long vehicle life and good efficiency.
Range Extender The full performance of the Range Extender is
available after a brief operating period and is
only minimally restricted during the run-in
phase.
Control of the Range Extender during and after
the run-in phase, as well as the activation of
the full performance, are preset depending on
the system and take place automatically.
Tires
Tire traction is not optimal due to manufactur‐
ing circumstances when tires are brand-new;
they achieve their full traction potential after a
break-in time.
Drive conservatively for the first
200 miles/300 km.
Brake system
Brakes require an initial break-in period of ap‐
prox. 300 miles/500 km to achieve optimal per‐
formance between brake discs and brakepads. Drive moderately during this break-in pe‐
riod.
Following part replacement
The same break-in procedures should be ob‐
served if any of the components above-men‐
tioned have to be renewed in the course of the
vehicle's operating life.
Using eDRIVE efficiently The concept
eDRIVE operates automatically. Proactive driv‐
ing utilizes energy consumption and energy re‐
covery optimally. Energy recovery is used to
charge the high-voltage battery. It is important
for the supply of electrical components and
thus a prerequisite for an extensive range. En‐
ergy consumption and recovery depend very
much, among other things, on your driving
style.
Optimizing driving style
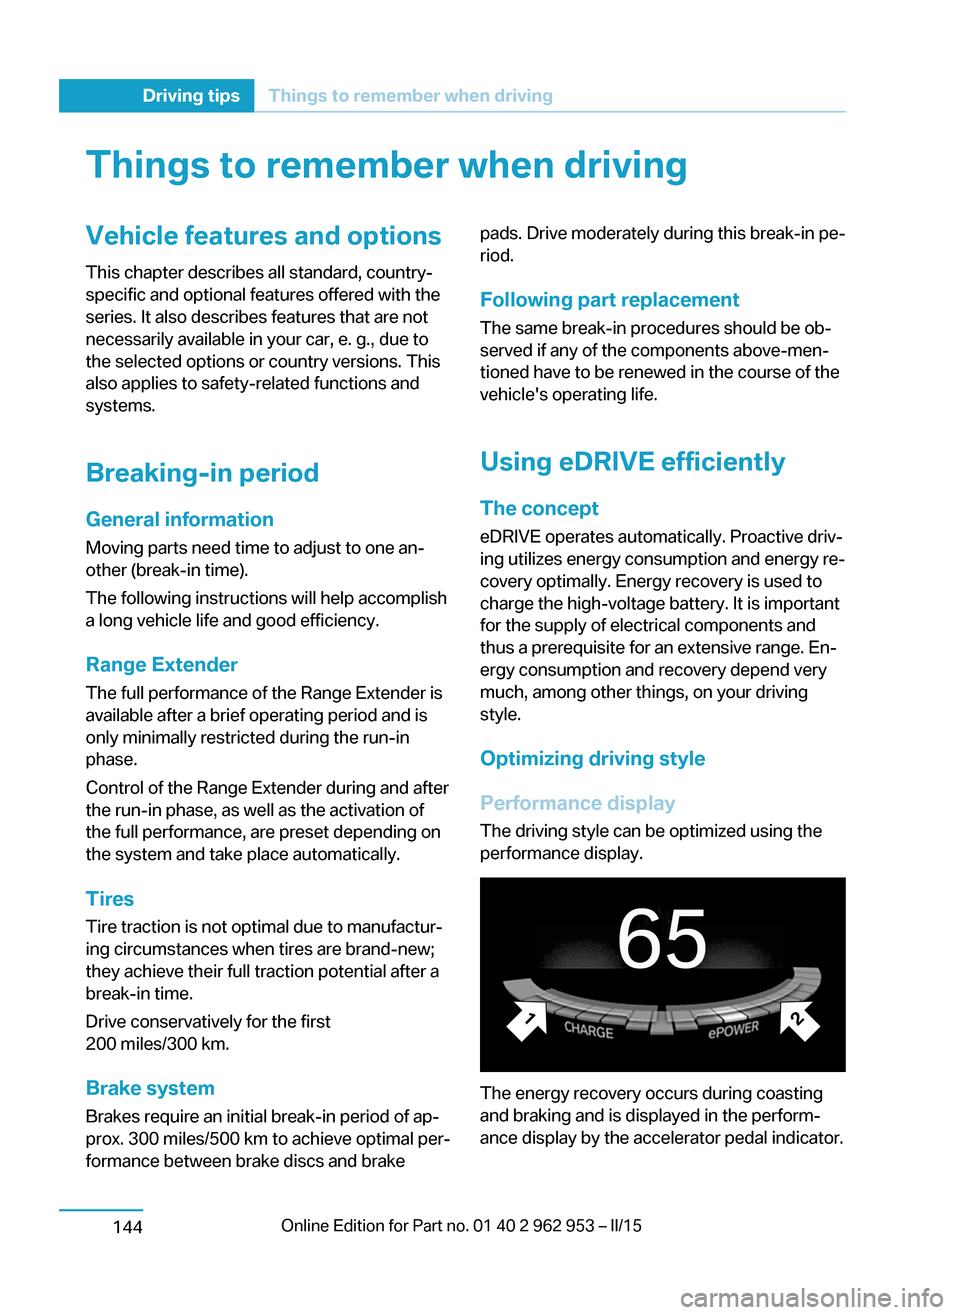
Performance display The driving style can be optimized using the
performance display.
The energy recovery occurs during coasting
and braking and is displayed in the perform‐
ance display by the accelerator pedal indicator.
Seite 142Driving tipsThings to remember when driving144
Page 169 of 230
of the Level 2 charging station. The permitted
charge current strength can vary by country.
The charge current strength for Level 2 charg‐
ing, refer to page 162, can be adjusted in the
vehicle in two steps.
At delivery, the charge current for
Level 2 charging is set to "Reduced". This set‐
ting should be maintained, unless it was veri‐
fied that a higher charge current strength is
permitted in the individual case.
The charge current changes depending on the
setting."Maximum""Reduced"32 A20 A
Depending on the charge current, the charging
duration changes.
Range Extender
With Range Extender, refer to page 67,
switched on, the current charging state can be
maintained. In this way, a higher range is ach‐
ieved.
Hints Working with electrical current
When working with electrical current, ob‐
serve the safety regulations. Otherwise, with
high voltage or excess current there is a risk to
persons and property, e.g., from electrocution or fire.◀
Have the charging device checked be‐
fore commissioning
Before the initial charging process, have your
own charging device checked at the charging location by a qualified electrician, that is,
charging port on the vehicle, charging cable,
charging station or household socket and con‐
nected circuits. Otherwise, there is a danger of
damage to the vehicle and overloading of the
supply mains at the charging location.◀
Follow instructions at the charging sta‐
tion
When working with electrical current, follow
the instructions at the charging station. Other‐
wise, there is a risk of an accident.◀
Make sure that the charging device is in
flawless operating condition
Only use the charging device in a flawless con‐
dition. Otherwise, a risk of fire may result, e.g.,
from the device heating up because of, say,
worn contacts or damage.◀
No simultaneous charging and refueling
Do not refuel while a charging cable is
plugged in, and maintain an adequate safety
distance from highly flammable materials. Oth‐
erwise, there is a danger of personal injury and
property damage from burning fuel vapors,
e.g., if the charging cable is improperly plug‐
ged in or unplugged.◀
Have the charging port cleaned by
trained personnel
If the charging port is dirty, have the car
cleaned only by appropriately trained person‐
nel. Otherwise, there is a danger of injury from high voltage.◀
Charging cable General information
Use a Level 1 charging cable, Level 2 charging
cable or the permanently installed charging ca‐
ble of a charging station to charge the vehicle.
Different charging cables can be required de‐ pending on the country.
Level 1 charging cable
With the Level 1 charging cable, it is permissi‐
ble to perform charging from grounded house‐
hold sockets. At the power connection of a
household socket, charging is done with alter‐
nating current.Seite 155Charging vehicleMobility157
Page 175 of 230
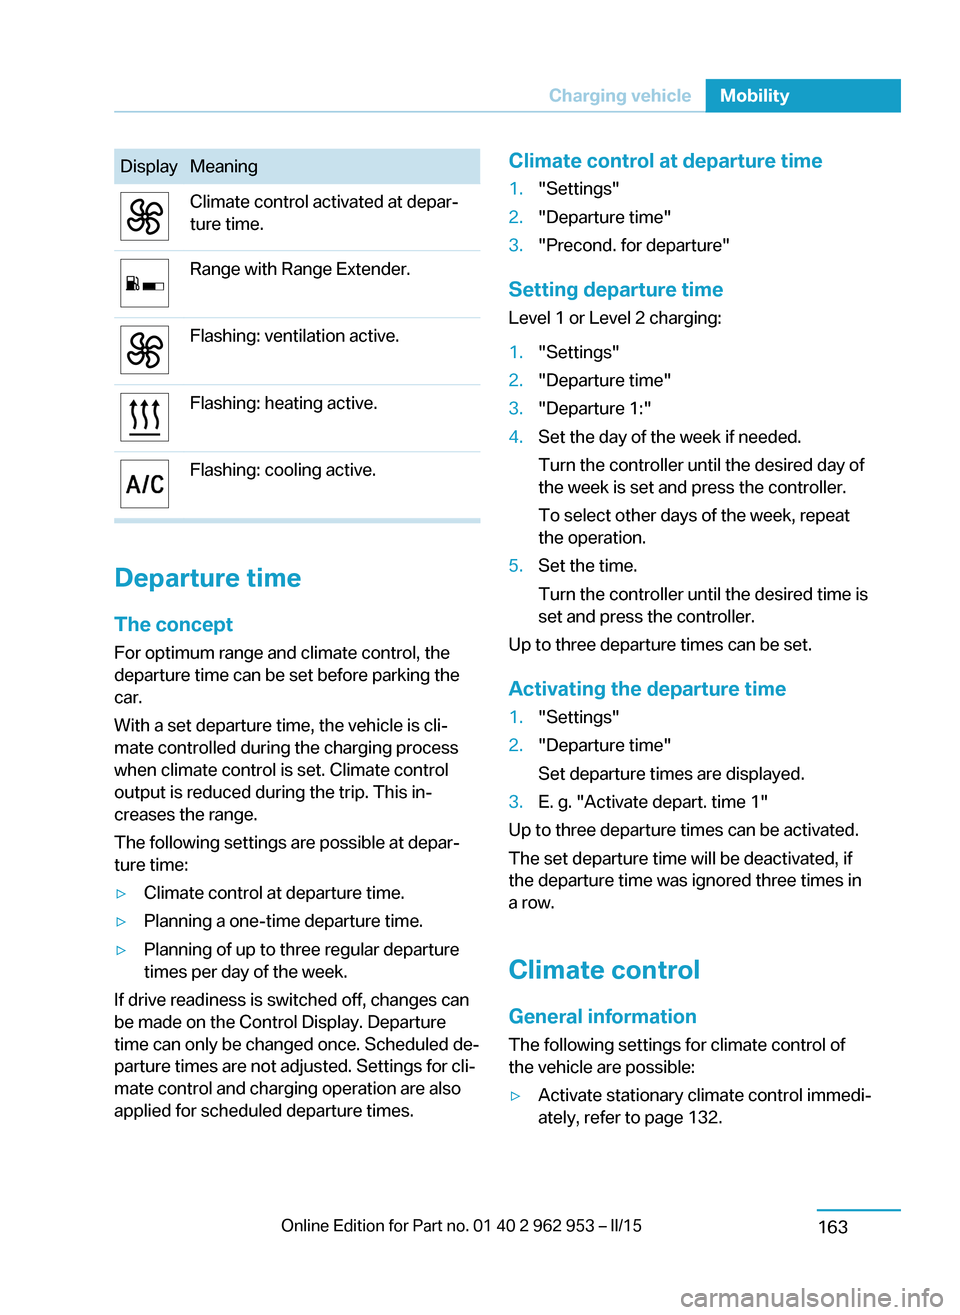
DisplayMeaningClimate control activated at depar‐
ture time.Range with Range Extender.Flashing: ventilation active.Flashing: heating active.Flashing: cooling active.
Departure time
The concept For optimum range and climate control, the
departure time can be set before parking the
car.
With a set departure time, the vehicle is cli‐
mate controlled during the charging process
when climate control is set. Climate control
output is reduced during the trip. This in‐
creases the range.
The following settings are possible at depar‐
ture time:
▷Climate control at departure time.▷Planning a one-time departure time.▷Planning of up to three regular departure
times per day of the week.
If drive readiness is switched off, changes can
be made on the Control Display. Departure
time can only be changed once. Scheduled de‐
parture times are not adjusted. Settings for cli‐
mate control and charging operation are also
applied for scheduled departure times.
Climate control at departure time1."Settings"2."Departure time"3."Precond. for departure"
Setting departure time
Level 1 or Level 2 charging:
1."Settings"2."Departure time"3."Departure 1:"4.Set the day of the week if needed.
Turn the controller until the desired day of
the week is set and press the controller.
To select other days of the week, repeat
the operation.5.Set the time.
Turn the controller until the desired time is
set and press the controller.
Up to three departure times can be set.
Activating the departure time
1."Settings"2."Departure time"
Set departure times are displayed.3.E. g. "Activate depart. time 1"
Up to three departure times can be activated.
The set departure time will be deactivated, if
the departure time was ignored three times in
a row.
Climate control General information
The following settings for climate control of
the vehicle are possible:
▷Activate stationary climate control immedi‐
ately, refer to page 132.Seite 161Charging vehicleMobility163
Page 177 of 230
RefuelingVehicle features and options
This chapter describes all standard, country-
specific and optional features offered with the
series. It also describes features that are not
necessarily available in your car, e. g., due to
the selected options or country versions. This
also applies to safety-related functions and
systems.
Hints
A sufficient amount of fuel must be added to
operate the Range Extender. When the Range
Extender is activated, the current charging
state is maintained. The vehicle has a greater
range.
Do not refuel unless the engine is at a
standstill and the selector lever is in posi‐
tion P/N
Do not refuel unless the engine is at a standstill
and the selector lever is in position P/N, other‐
wise the buildup of pressure may cause the
fuel nozzle to shut off prematurely.◀
Tank ventThe concept
The vehicle is equipped with a special fuel
tank. It is designed for special requirements
that arise in operation with the Range Ex‐
tender.
General information
In the fuel tank, excess pressure can build up
due to gasoline vapors which are dissipated
before the tank lid is opened.
At a glance The button is located on the driver's footwell.Tank venting1.Switch off drive readiness.2.
Press button to start the pressure
equalization.
The status of the tank venting is displayed
in the instrument cluster. In rare cases, the
tank venting can last several seconds.
If the tank venting has been completed, a
message is displayed in the instrument
cluster. The tank lid is released for open‐
ing.
3.Open the fuel filler flap.
If the fuel filler flap is not opened within 10
minutes after the fuel filler flap was re‐
leased, the fuel filler flap relocks. Press
button again.
Fuel lid
Opening
Before opening , vent the tank, refer to
page 165.
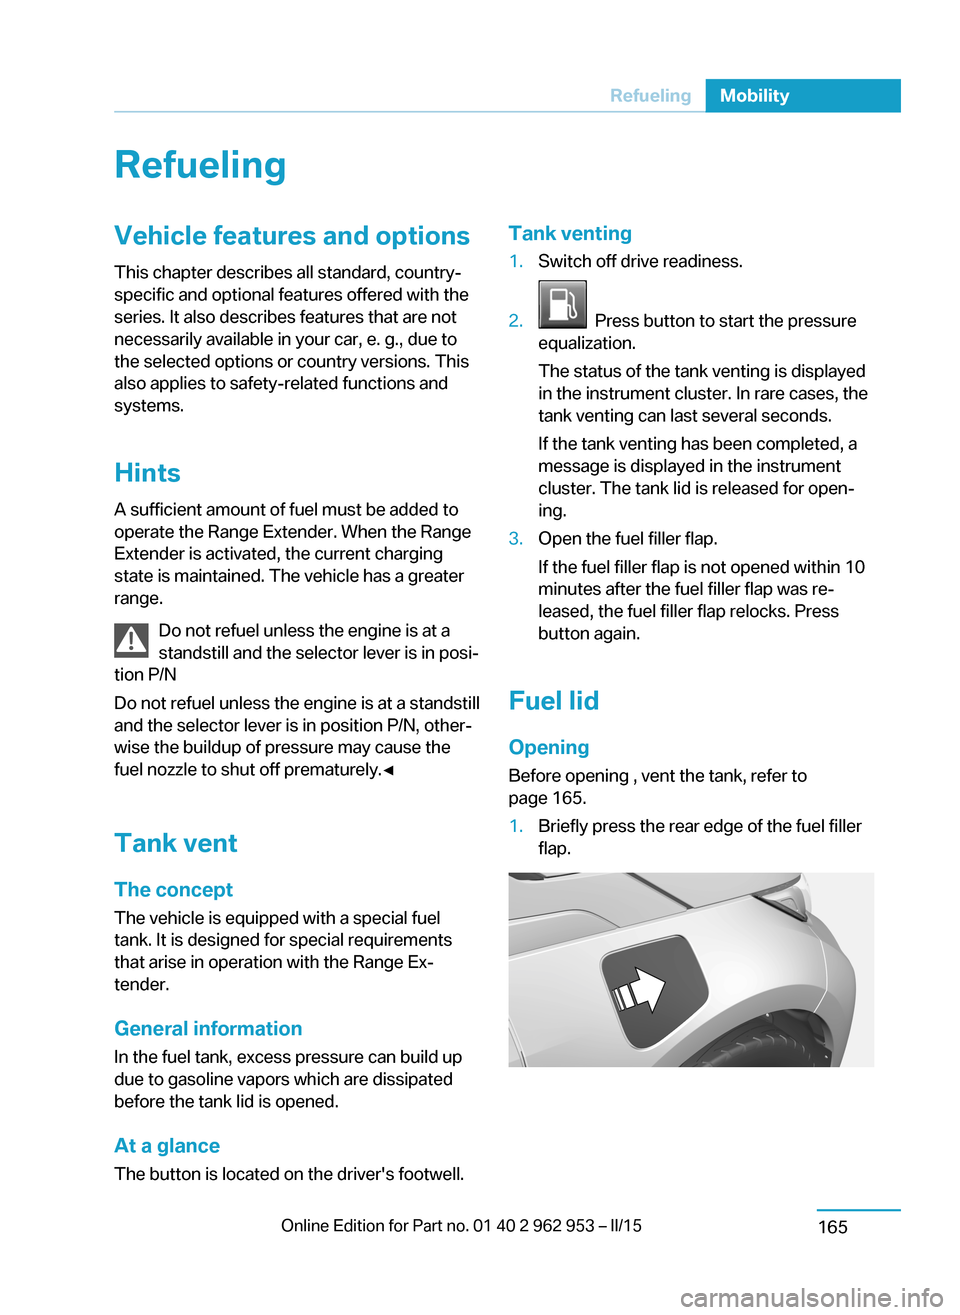
1.Briefly press the rear edge of the fuel filler
flap.Seite 163RefuelingMobility165
Page 180 of 230
FuelVehicle features and optionsThis chapter describes all standard, country-
specific and optional features offered with the
series. It also describes features that are not
necessarily available in your car, e. g., due to
the selected options or country versions. This
also applies to safety-related functions and
systems.
Fuel recommendation
Note General fuel quality
Even fuels that conform to the specifica‐
tions can be of low quality. This may cause en‐
gine problems, for instance poor engine start-
up behavior, poor handling and/or poor
performance. Switch gas stations or use a
brand name fuel with a higher octane rating.◀
Gasoline
For the best fuel efficiency, the gasoline
should be sulfur-free or very low in sulfur con‐
tent.
Fuels that are marked on the gas pump as con‐
taining metal must not be used.
Refuel only with unleaded gasoline with‐
out metallic additives.
Do not refuel with any leaded gasoline or gaso‐
line with metallic additives, e. g. manganese or
iron, as this can cause permanent damage to
the catalytic converter and other compo‐
nents.◀
Fuels with a maximum ethanol content of
10 %, i. e., E10, may be used for refueling.
Ethanol should satisfy the following quality
standards:
US: ASTM 4806–xxCAN: CGSB-3.511–xx
xx: comply with the current standard in each
case.
Do not use a fuel with a higher percent‐
age of ethanol
Do not use a fuel with a higher ethanol per‐
centage than recommended or one with other
types of alcohol, e.g. M5 to M100; otherwise
this could damage the engine and fuel supply
system.◀
Recommended fuel grade BMW recommends AKI 91.
Minimum fuel grade
BMW recommends AKI 89.
Minimum fuel grade
Do not use any gasoline below the mini‐
mum fuel grade as this may impair engine per‐
formance.◀
Fuel supply in winter Depending on the region, many gas stations
sell fuel that has been customized to winter or
summer conditions.
Fuel that is available in winter helps make a
cold start easier, e. g.
The manufacturer of the vehicle recommends
filling the tank with the corresponding fuel at
the start of winter to ensure the operational re‐
liability of the Range Extender at low tempera‐
tures.Seite 166MobilityFuel168
Page 191 of 230
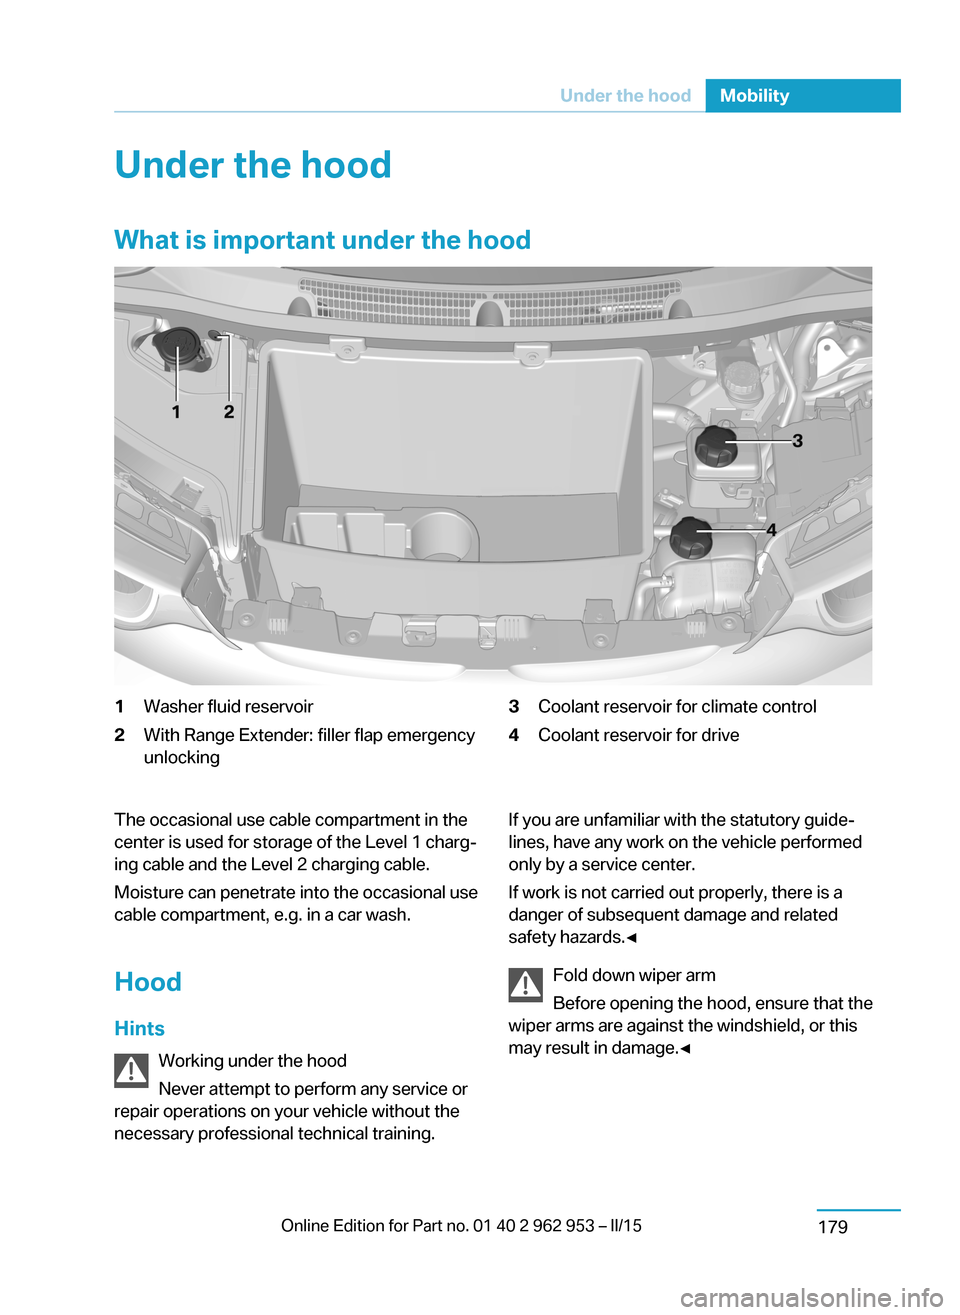
Under the hoodWhat is important under the hood1Washer fluid reservoir2With Range Extender: filler flap emergency
unlocking3Coolant reservoir for climate control4Coolant reservoir for driveThe occasional use cable compartment in the
center is used for storage of the Level 1 charg‐
ing cable and the Level 2 charging cable.
Moisture can penetrate into the occasional use
cable compartment, e.g. in a car wash.
Hood Hints Working under the hood
Never attempt to perform any service or
repair operations on your vehicle without the
necessary professional technical training.If you are unfamiliar with the statutory guide‐
lines, have any work on the vehicle performed
only by a service center.
If work is not carried out properly, there is a
danger of subsequent damage and related
safety hazards.◀
Fold down wiper arm
Before opening the hood, ensure that the
wiper arms are against the windshield, or this
may result in damage.◀Seite 177Under the hoodMobility179
Page 193 of 230
Engine oilVehicle features and options
This chapter describes all standard, country-
specific and optional features offered with the
series. It also describes features that are not
necessarily available in your car, e. g., due to
the selected options or country versions. This
also applies to safety-related functions and
systems.
General information
Engine oil consumption depends on the fre‐
quency of Range Extender use. Therefore,
regularly check the engine oil level after refuel‐
ing.
Checking the oil level
Note Check the engine oil level with Range Extender
warmed up to operating temperature.
After switching off the Range Extender, wait
several minutes before checking the oil level
so that the engine oil can collect in the oil pan.
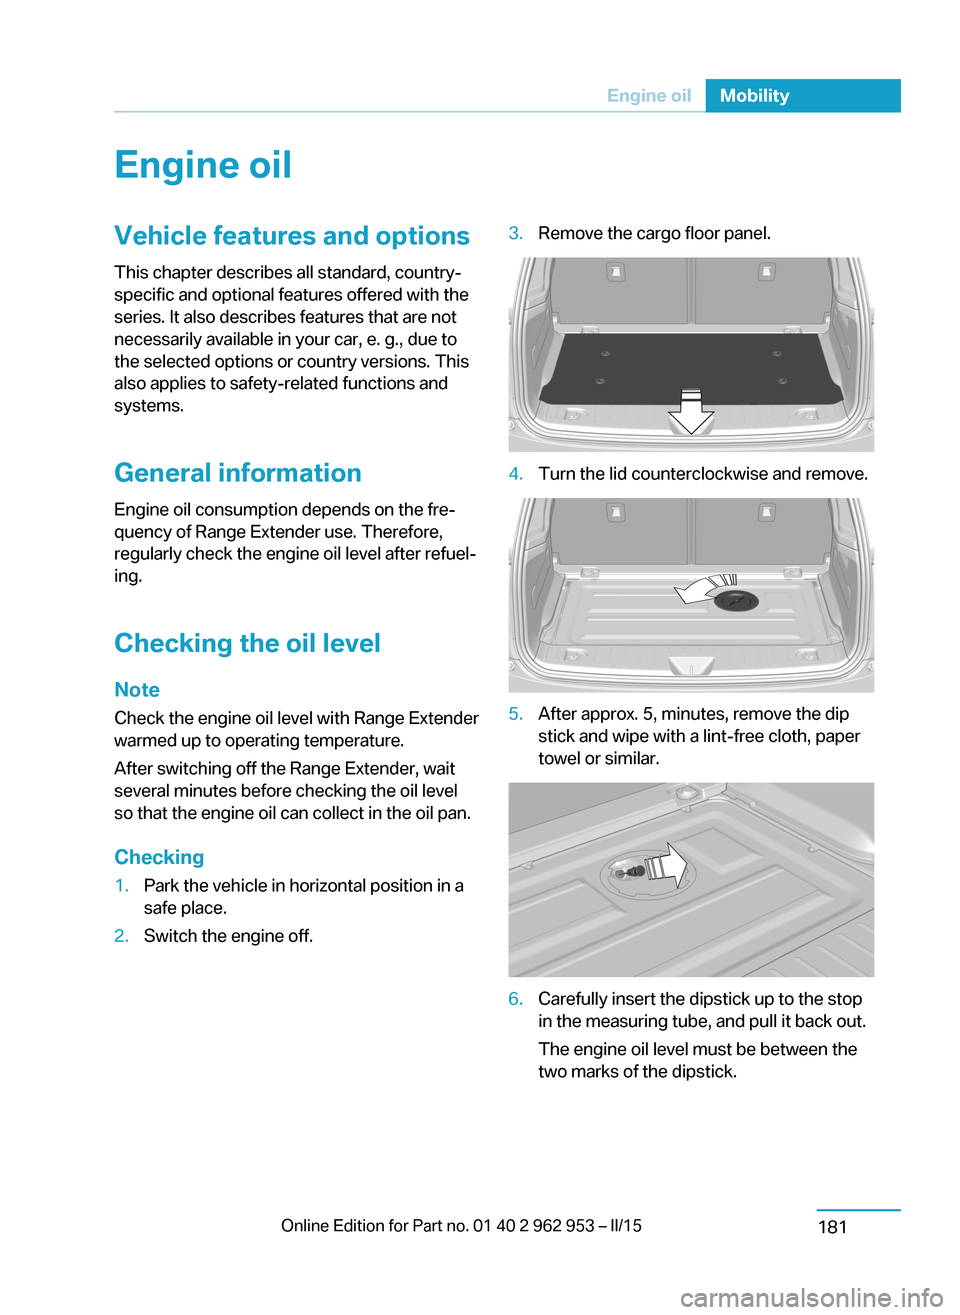
Checking1.Park the vehicle in horizontal position in a
safe place.2.Switch the engine off.3.Remove the cargo floor panel.4.Turn the lid counterclockwise and remove.5.After approx. 5, minutes, remove the dip
stick and wipe with a lint-free cloth, paper
towel or similar.6.Carefully insert the dipstick up to the stop
in the measuring tube, and pull it back out.
The engine oil level must be between the
two marks of the dipstick.Seite 179Engine oilMobility181
Page 198 of 230
and Service Guide Booklet for Canadian mod‐
els. These entries are proof of regular mainte‐
nance.
Socket for OBD Onboard
Diagnosis
Note Socket for Onboard DiagnosisThe socket for onboard diagnostics may
only be used by the service center or a work‐
shop that operates in accordance with the
specifications of the vehicle manufacturer with
correspondingly trained personnel and other
authorized persons. Otherwise, use may result
in operating problems for the vehicle.◀
Position
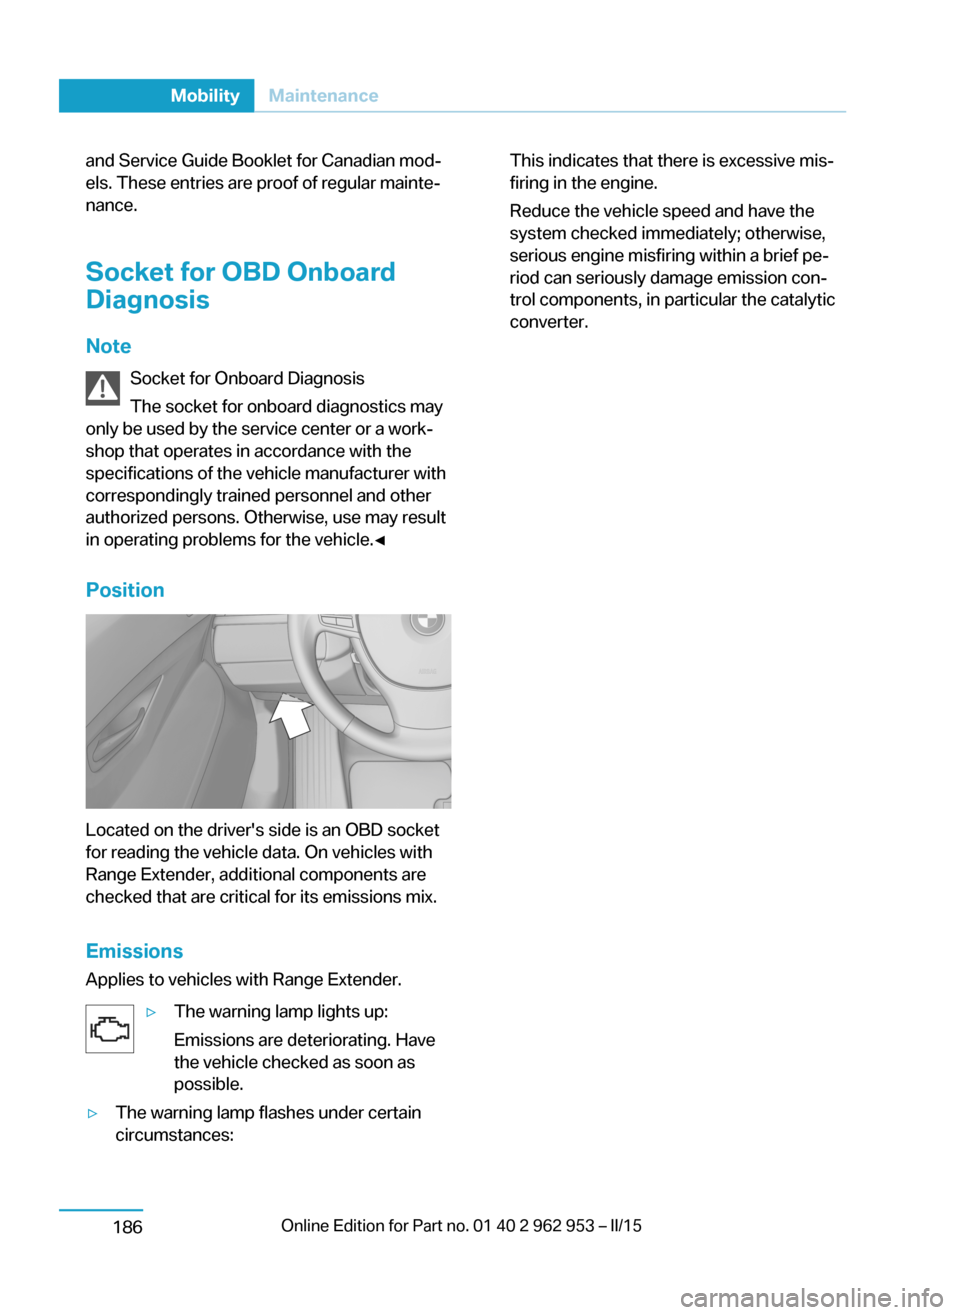
Located on the driver's side is an OBD socket
for reading the vehicle data. On vehicles with
Range Extender, additional components are
checked that are critical for its emissions mix.
Emissions
Applies to vehicles with Range Extender.
▷The warning lamp lights up:
Emissions are deteriorating. Have
the vehicle checked as soon as
possible.▷The warning lamp flashes under certain
circumstances:This indicates that there is excessive mis‐
firing in the engine.
Reduce the vehicle speed and have the
system checked immediately; otherwise,
serious engine misfiring within a brief pe‐
riod can seriously damage emission con‐
trol components, in particular the catalytic
converter.Seite 184MobilityMaintenance186
Page 217 of 230
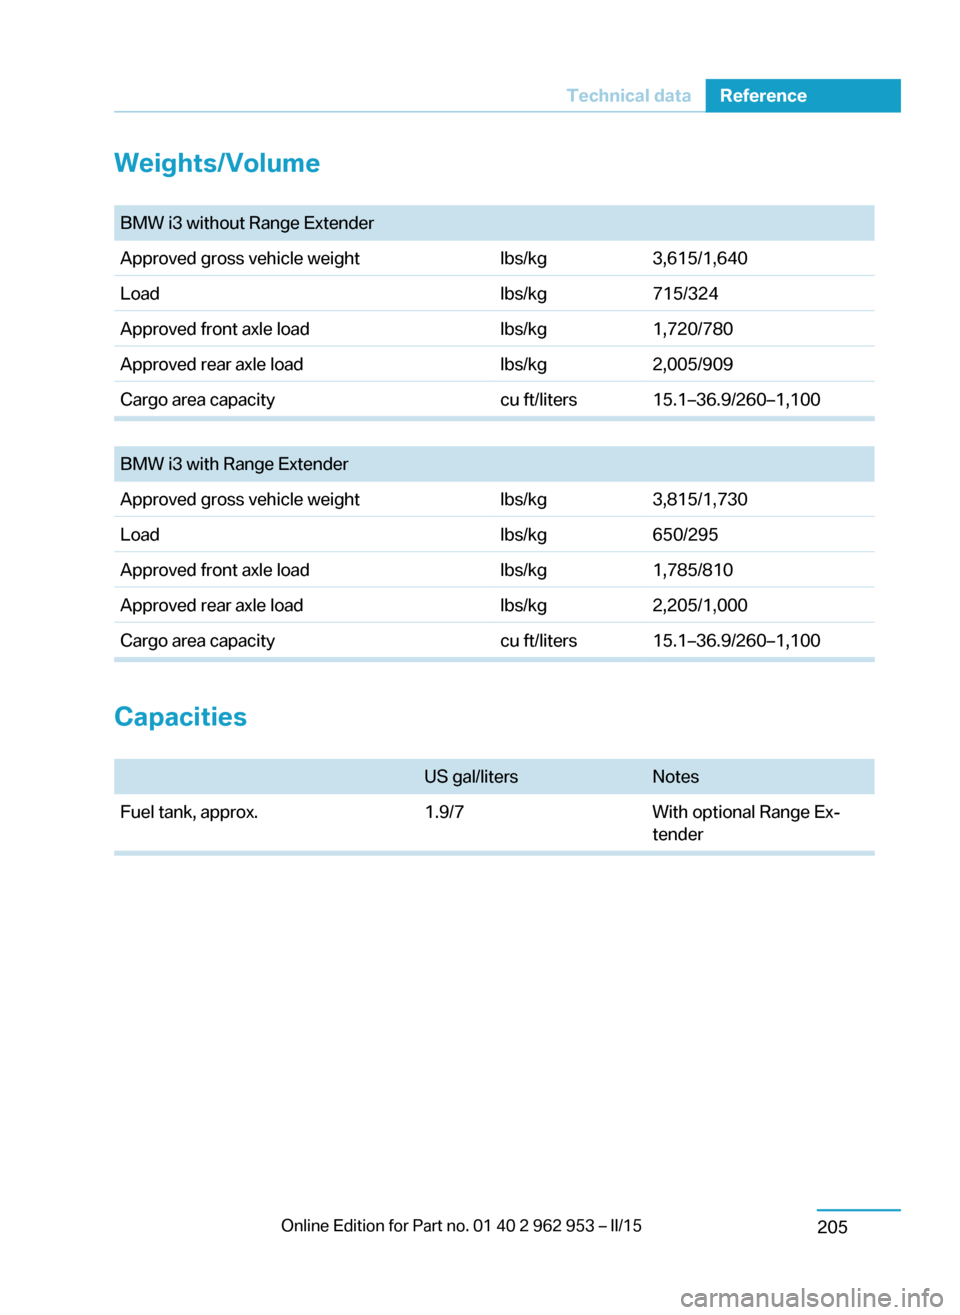
Weights/Volume BMW i3 without Range ExtenderApproved gross vehicle weightlbs/kg3,615/1,640Loadlbs/kg715/324Approved front axle loadlbs/kg1,720/780Approved rear axle loadlbs/kg2,005/909Cargo area capacitycu ft/liters15.1–36.9/260–1,100
BMW i3 with Range ExtenderApproved gross vehicle weightlbs/kg3,815/1,730Loadlbs/kg650/295Approved front axle loadlbs/kg1,785/810Approved rear axle loadlbs/kg2,205/1,000Cargo area capacitycu ft/liters15.1–36.9/260–1,100
Capacities
US gal/litersNotesFuel tank, approx.1.9/7With optional Range Ex‐
tenderSeite 203Technical dataReference205