BMW I8 2014 I12 Owner's Manual
Manufacturer: BMW, Model Year: 2014, Model line: I8, Model: BMW I8 2014 I12Pages: 216, PDF Size: 12.45 MB
Page 161 of 216
Mobility
In order to always ensure your mobility, you will find important information on operating fluids,wheels and tires, maintenance and Roadside Assistance in the following.Online Edition for Part no. 01 40 2 957 072 - X/14
Page 162 of 216
Charging vehicleVehicle features and options
This chapter describes all standard, country-
specific and optional features offered with the
series. It also describes features that are not
necessarily available in your car, e. g., due to
the selected options or country versions. This
also applies to safety-related functions and
systems.
The concept
The vehicle can be charged using various
charging cables at charging stations or hous‐
hold sockets. Control and monitoring of the
charging process are handled completely au‐
tomatically. The charge current strength can
be set by means of the Control Display.
General information
High-voltage battery The high-voltage battery is used as an energy
accumulator. The high-voltage battery can be
charged by energy recovery during the trip or
via the power grid.
When charging via the power grid, you can
chose between the following variants.▷Level 1 charging via a household socket.▷Level 2 charging via a Level 2 charging sta‐
tion.
Level 1 charging is possible via a household
socket within a voltage range of 100 volts to
240 volts.
For optimal use of the energy from the power
grid, charging at a Level 2 charging station,
such as BMW i Wallbox, is recommended.
Charge current
The charge current strength is indicated in am‐
peres.
The vehicle cannot automatically detect the
maximum permissible charge current strength
during charging via a household socket or
charging station.
Level 1 charging
Prior to the first Level 1 charging at your own
household socket, as well as when charging at
external electrical power sockets in Level 1,
the allowed charge current strength must be
determined, e.g. by a qualified electrician.
The charge current strength for Level 1 charg‐
ing, refer to page 150, can be adjusted in the
vehicle in three steps.
At delivery, the charge current for
Level 1 charging is set to "Low".
Depending on the country-specific version,
one of four ampere ratings is printed on the
Level 1 charging cable. This ampere rating is
the limit which must be adhered to for the vehi‐
cle if the charge current is set to "Maximum".
According to the market-specific version, the
charge current strength changes differently if
the setting "Reduced" or "Low" is selected."Maximum""Reduced""Low"8 A6 A6 A10 A7.5 A6 A12 A9 A6 A15 A11.25 A7.5 A
Depending on the charge current, the charging
duration changes.
Seite 146MobilityCharging vehicle146
Online Edition for Part no. 01 40 2 957 072 - X/14
Page 163 of 216
Maintaining charging state
Should it be necessary, e.g., to conserve the
electrical range for a later point in time on the
trip, the current charging state of the high-volt‐
age battery can be maintained with Maintain‐
ing charging state, refer to page 61.
Hints Working with electrical current
When working with electrical current, ob‐
serve the safety regulations. Otherwise, with
high voltage or excess current there is a risk to
persons and property, e.g., from electrocution
or fire.◀
Have the charging device checked be‐
fore commissioning
Before the initial charging process, have your
own charging device checked at the charging location by a qualified electrician, that is,
charging port on the vehicle, charging cable,
charging station or household socket and con‐
nected circuits. Otherwise, there is a danger of
damage to the vehicle and overloading of the
supply mains at the charging location.◀
Follow instructions at the charging sta‐
tion
When working with electrical current, follow
the instructions at the charging station. Other‐
wise, there is a risk of an accident.◀
Make sure that the charging device is in
flawless operating condition
Only use the charging device in a flawless con‐
dition. Otherwise, a risk of fire may result, e.g.,
from the device heating up because of, say,
worn contacts or damage.◀
No simultaneous charging and refueling
Do not refuel while a charging cable is
plugged in, and maintain an adequate safety
distance from highly flammable materials. Oth‐
erwise, there is a danger of personal injury andproperty damage from burning fuel vapors,
e.g., if the charging cable is improperly plug‐
ged in or unplugged.◀
Have the charging port cleaned by
trained personnel
If the charging port is dirty, have the car
cleaned only by appropriately trained person‐
nel. Otherwise, there is a danger of injury from
high voltage.◀
Charging cable General information
Use a Level 1 charging cable, Level 2 charging
cable or the permanently installed charging ca‐
ble of a charging station to charge the vehicle.
Different charging cables can be required de‐
pending on the country.
Level 1 charging cable
With the Level 1 charging cable, it is permissi‐
ble to perform charging from grounded house‐
hold sockets. At the power connection of a
household socket, charging is done with alter‐
nating current.
When a Level 1 charging cable is used, this
may produce efficiency values other than indi‐
cated on the energy label.
Level 2 charging cableThe Level 2 charging cable makes it possible
to recharge at sockets of designated
Level 2 charging stations using a special plug.
Charging is performed with alternating current
at designated Level 2 charging stations. The
charging process can be completed faster than
at household sockets.
If necessary, the charging cable is attached to
the charging station.Seite 147Charging vehicleMobility147
Online Edition for Part no. 01 40 2 957 072 - X/14
Page 164 of 216
HintsUse approved charging cables only
Use only approved charging cables or
charging stations for charging. Otherwise,
there is a danger of property damage or per‐ sonal injury, e.g., from burning cables. Informa‐
tion about the approved charging cables can
be obtained from the service center.◀
Use the charging cable only for charging
the vehicle, and do not extend it
Use the charging cable only for charging the
vehicle and do not extend it with cables or
adapters. Otherwise, it may not be possible to
complete the charging process or property
damage might occur, e.g., due to a cable fire.◀
Do not use any damaged charging cables
Do not use any damaged charging ca‐
bles. Otherwise, there is a risk of injury from
high voltage.◀
Storage
The Level 1 charging cable is located in the
cargo area.
The Level 2 charging cable can be stored in
the same place.
If required, store the charging cable with the
installed plug cover to prevent moisture in the
charging cable plug.Connection
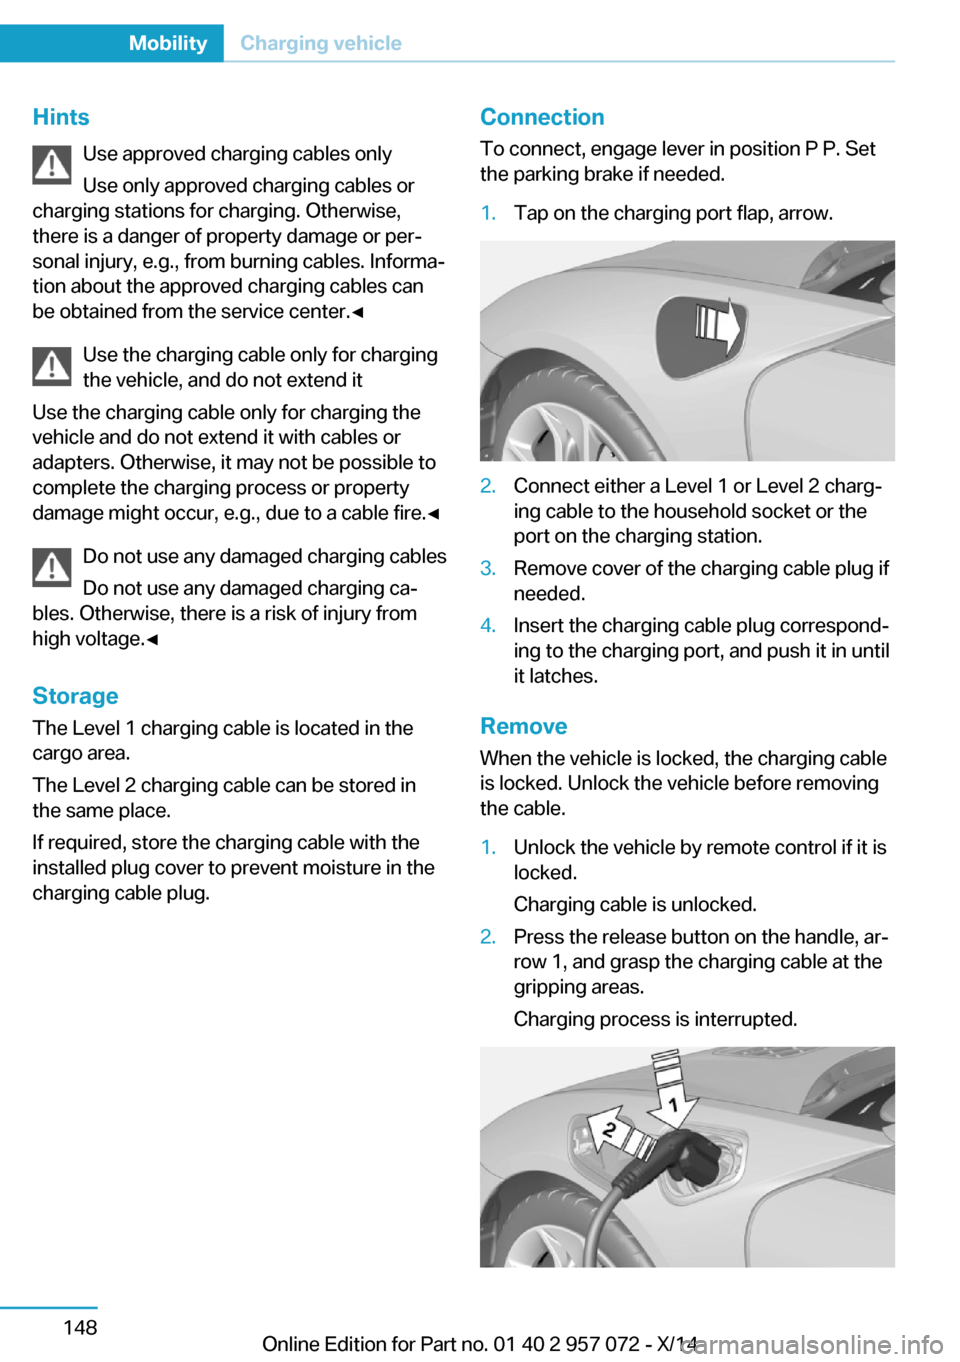
To connect, engage lever in position P P. Set
the parking brake if needed.1.Tap on the charging port flap, arrow.2.Connect either a Level 1 or Level 2 charg‐
ing cable to the household socket or the
port on the charging station.3.Remove cover of the charging cable plug if
needed.4.Insert the charging cable plug correspond‐
ing to the charging port, and push it in until
it latches.
Remove
When the vehicle is locked, the charging cable
is locked. Unlock the vehicle before removing
the cable.
1.Unlock the vehicle by remote control if it is
locked.
Charging cable is unlocked.2.Press the release button on the handle, ar‐
row 1, and grasp the charging cable at the
gripping areas.
Charging process is interrupted.Seite 148MobilityCharging vehicle148
Online Edition for Part no. 01 40 2 957 072 - X/14
Page 165 of 216
3.Remove the charging cable from the
charging port, arrow 2.4.Close the charging port flap.5.Attach cover of the charging cable plug if
needed.6.Disconnect either a Level 1 or Level 2
charging cable from the household socket
or the port on the charging station.7.Stow the charging cable.
At a charging station, insert the perma‐
nently installed charging cable in the place
provided for it.
Manual release
The charging cable may be locked during the
charging process.
The charging cable may be locked during the
charging process if the vehicle is locked.
Manual unlocking of the charging
cable
In case of an electrical malfunction, the charg‐
ing cable can be manually unlocked.
When charging at a charging station, complete
the charging process at the charging station
before unlocking the charging cable.
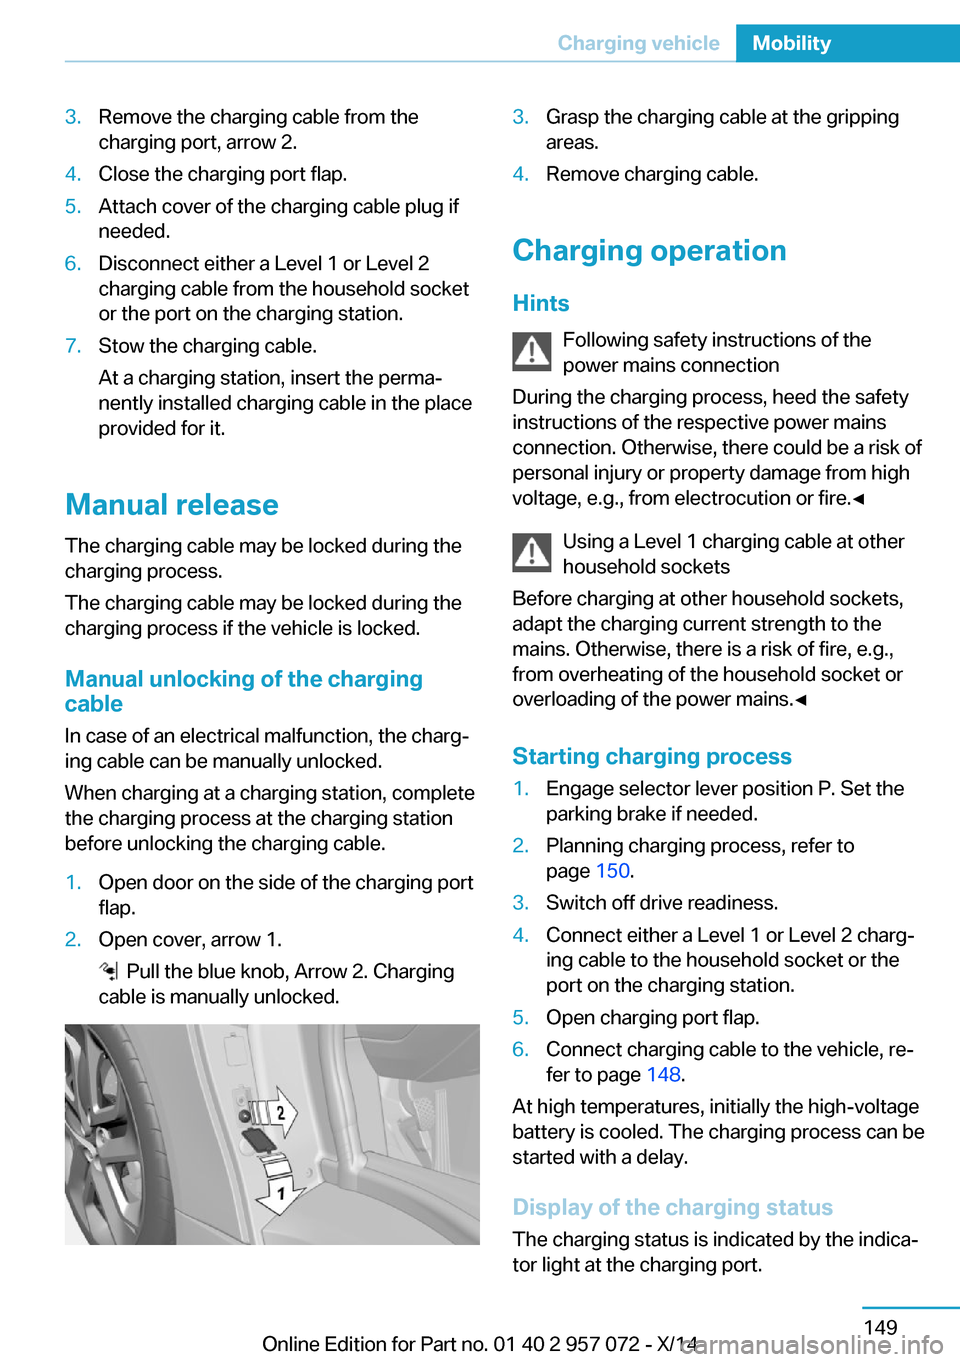
1.Open door on the side of the charging port
flap.2.Open cover, arrow 1.
Pull the blue knob, Arrow 2. Charging
cable is manually unlocked.
3.Grasp the charging cable at the gripping
areas.4.Remove charging cable.
Charging operation
Hints Following safety instructions of the
power mains connection
During the charging process, heed the safety
instructions of the respective power mains
connection. Otherwise, there could be a risk of
personal injury or property damage from high
voltage, e.g., from electrocution or fire.◀
Using a Level 1 charging cable at other
household sockets
Before charging at other household sockets,
adapt the charging current strength to the
mains. Otherwise, there is a risk of fire, e.g.,
from overheating of the household socket or
overloading of the power mains.◀
Starting charging process
1.Engage selector lever position P. Set the
parking brake if needed.2.Planning charging process, refer to
page 150.3.Switch off drive readiness.4.Connect either a Level 1 or Level 2 charg‐
ing cable to the household socket or the
port on the charging station.5.Open charging port flap.6.Connect charging cable to the vehicle, re‐
fer to page 148.
At high temperatures, initially the high-voltage
battery is cooled. The charging process can be
started with a delay.
Display of the charging status
The charging status is indicated by the indica‐
tor light at the charging port.
Seite 149Charging vehicleMobility149
Online Edition for Part no. 01 40 2 957 072 - X/14
Page 166 of 216
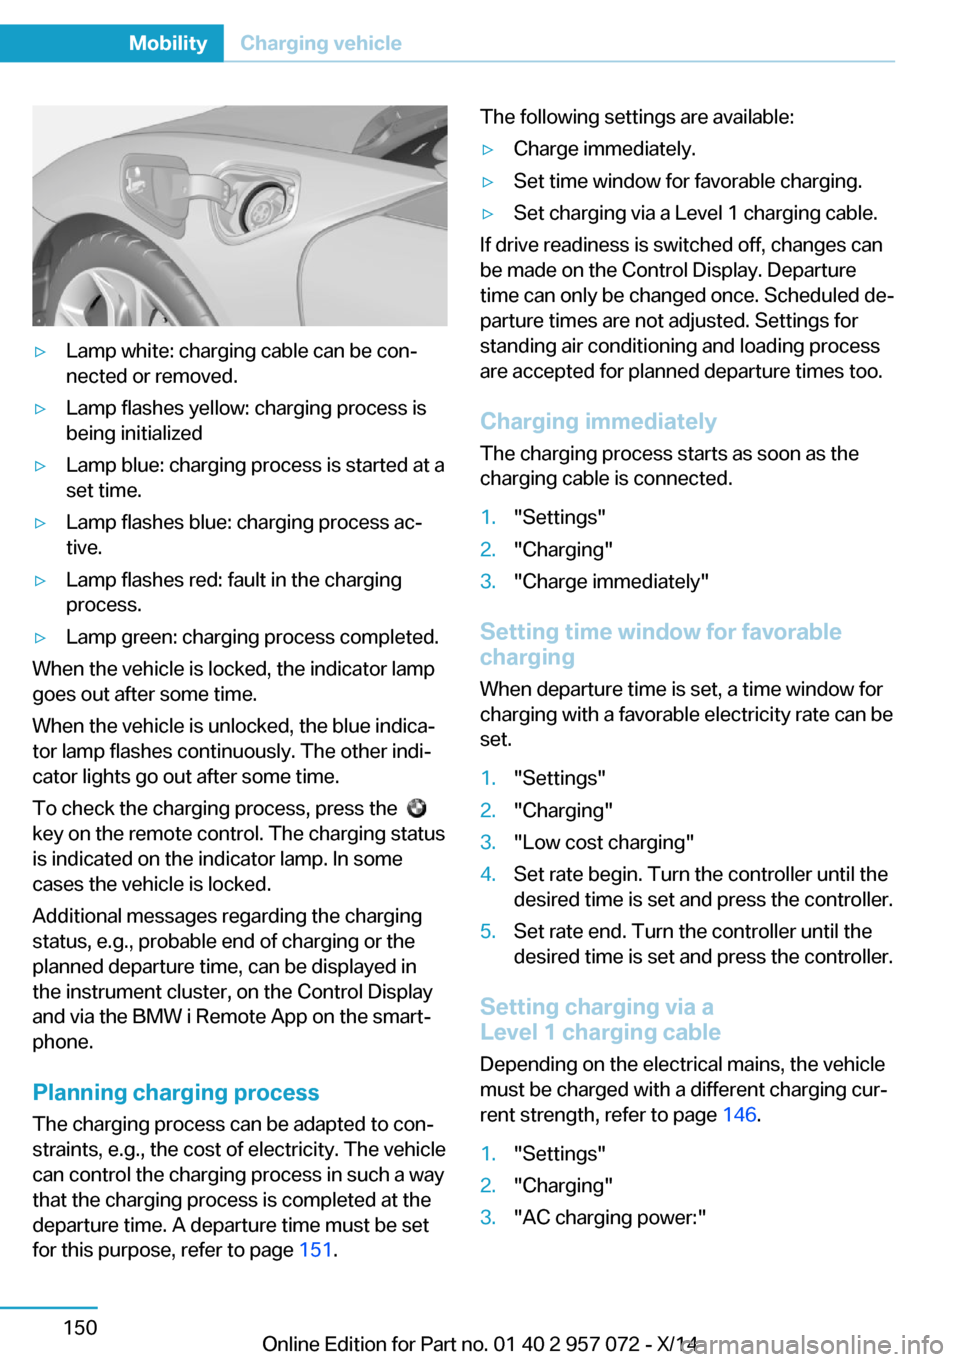
▷Lamp white: charging cable can be con‐
nected or removed.▷Lamp flashes yellow: charging process is
being initialized▷Lamp blue: charging process is started at a
set time.▷Lamp flashes blue: charging process ac‐
tive.▷Lamp flashes red: fault in the charging
process.▷Lamp green: charging process completed.
When the vehicle is locked, the indicator lamp
goes out after some time.
When the vehicle is unlocked, the blue indica‐
tor lamp flashes continuously. The other indi‐
cator lights go out after some time.
To check the charging process, press the
key on the remote control. The charging status
is indicated on the indicator lamp. In some
cases the vehicle is locked.
Additional messages regarding the charging
status, e.g., probable end of charging or the
planned departure time, can be displayed in
the instrument cluster, on the Control Display
and via the BMW i Remote App on the smart‐
phone.
Planning charging process The charging process can be adapted to con‐
straints, e.g., the cost of electricity. The vehicle
can control the charging process in such a way
that the charging process is completed at the
departure time. A departure time must be set
for this purpose, refer to page 151.
The following settings are available:▷Charge immediately.▷Set time window for favorable charging.▷Set charging via a Level 1 charging cable.
If drive readiness is switched off, changes can
be made on the Control Display. Departure
time can only be changed once. Scheduled de‐
parture times are not adjusted. Settings for
standing air conditioning and loading process
are accepted for planned departure times too.
Charging immediately
The charging process starts as soon as the
charging cable is connected.
1."Settings"2."Charging"3."Charge immediately"
Setting time window for favorable
charging
When departure time is set, a time window for
charging with a favorable electricity rate can be
set.
1."Settings"2."Charging"3."Low cost charging"4.Set rate begin. Turn the controller until the
desired time is set and press the controller.5.Set rate end. Turn the controller until the
desired time is set and press the controller.
Setting charging via a
Level 1 charging cable
Depending on the electrical mains, the vehicle
must be charged with a different charging cur‐
rent strength, refer to page 146.
1."Settings"2."Charging"3."AC charging power:"Seite 150MobilityCharging vehicle150
Online Edition for Part no. 01 40 2 957 072 - X/14
Page 167 of 216
Settings are stored. When you change charg‐
ing locations you also might need to change
the setting for charging.
Set the charge current strength at other
household sockets to "Low".
Stopping charging process The charging operation can be stopped at any
time by removing the charging cable and con‐
tinued at a later time by connecting the charg‐
ing cable in order to use other loads on the
power connection or to prevent simultaneous
high power from multiple loads.
The charging operation is interrupted when the
vehicle is unlocked and automatically resumed
after a brief time or when it is locked.
Continue charging operation If the charging operation is interrupted, e.g.,
through a temporary power failure, the charg‐
ing operation is automatically continued after
the interruption.
Terminating charging process1.Removing the charging cable from the ve‐
hicle, refer to page 148.2.Stow the charging cable as required.3.Close the charging port flap.4.Lock vehicle if it is unlocked.
Displays in the instrument
cluster
The charging state indicator light shows the
charging state of the high-voltage battery in
the instrument cluster, if operating readiness is
turned on. If all segments are filled, the high-
voltage battery is fully charged.
Even if no segments are filled, the high-voltage
system is still under high voltage.
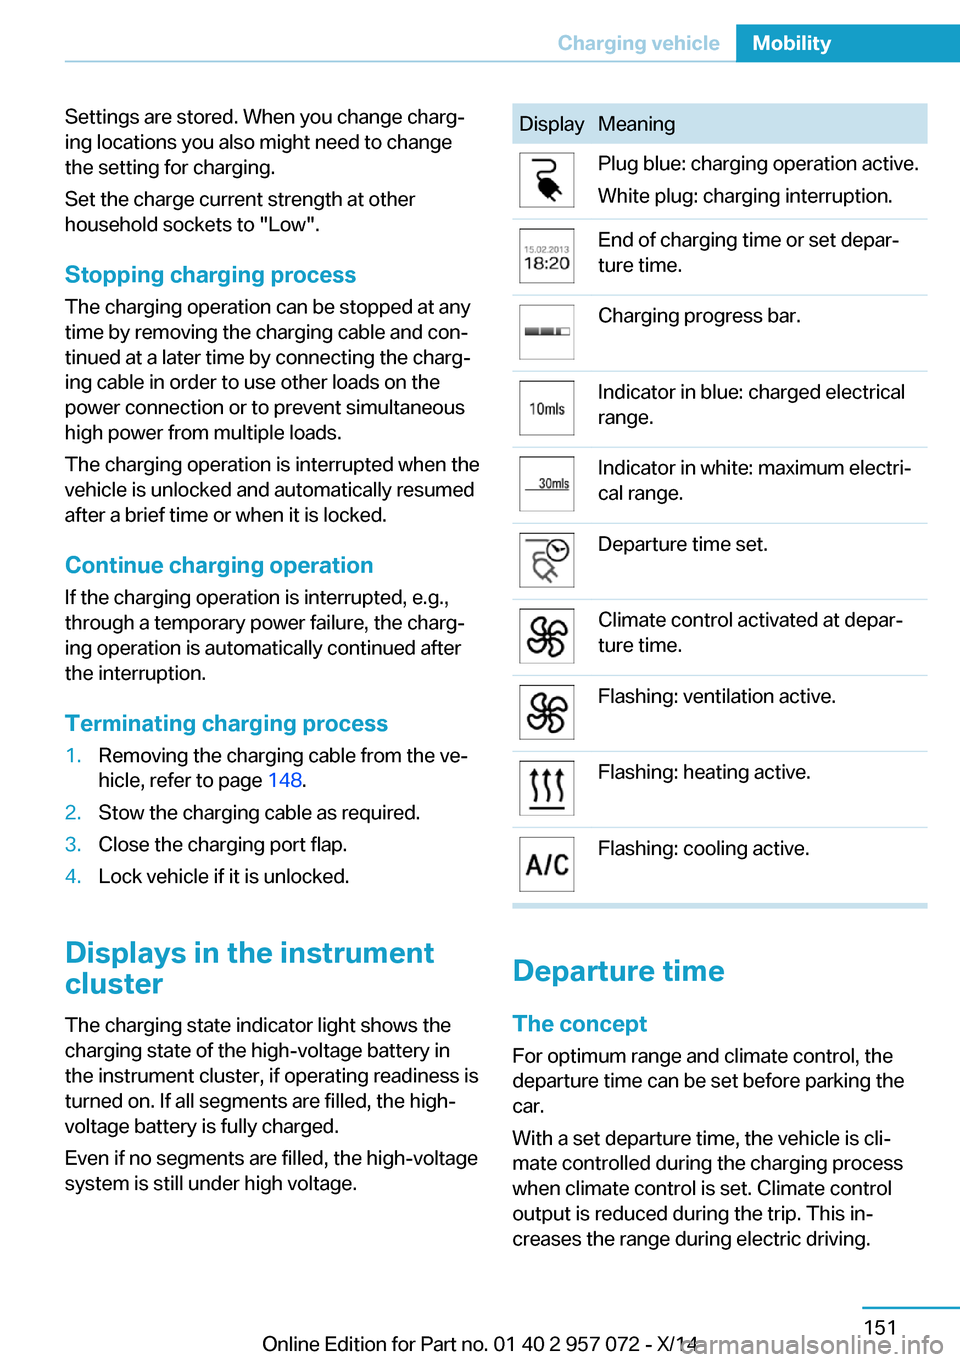
DisplayMeaningPlug blue: charging operation active.
White plug: charging interruption.End of charging time or set depar‐
ture time.Charging progress bar.Indicator in blue: charged electrical
range.Indicator in white: maximum electri‐
cal range.Departure time set.Climate control activated at depar‐
ture time.Flashing: ventilation active.Flashing: heating active.Flashing: cooling active.
Departure time
The concept For optimum range and climate control, the
departure time can be set before parking the
car.
With a set departure time, the vehicle is cli‐
mate controlled during the charging process
when climate control is set. Climate control
output is reduced during the trip. This in‐
creases the range during electric driving.
Seite 151Charging vehicleMobility151
Online Edition for Part no. 01 40 2 957 072 - X/14
Page 168 of 216
The following settings are possible at depar‐
ture time:▷Climate control at departure time.▷Planning a one-time departure time.▷Planning of up to three regular departure
times per day of the week.
If drive readiness is switched off, changes can
be made on the Control Display. Departure
time can only be changed once. Scheduled de‐
parture times are not adjusted. Settings for cli‐
mate control and charging operation are also
applied for scheduled departure times.
Climate control at departure time
1."Settings"2."Departure time"3."Precond. for departure"
Setting departure time
1."Settings"2."Departure time"3."Departure 1:"4.Set the day of the week if needed.
Turn the controller until the desired day of
the week is set and press the controller.
To select other days of the week, repeat
the operation.5.Set the time.
Turn the controller until the desired time is
set and press the controller.
Up to three departure times can be set.
Activating the departure time
1."Settings"2."Departure time"
Set departure times are displayed.3.E. g. "Activate depart. time 1"
Up to three departure times can be activated.
The set departure time will be deactivated, if
the departure time was ignored three times in
a row.
Climate control General information
The following settings for climate control of
the vehicle are possible:▷Activate stationary climate control immedi‐
ately, refer to page 123.
With stationary climate control activated
and no charging cable connected, the
range is reduced.▷Planned climate control at the set depar‐
ture time, refer to page 124.
Discharged high-voltage and
vehicle battery
General information
In addition to the high-voltage battery, the ve‐
hicle has a 12 volt vehicle battery, which is re‐
quired for operation of the onboard electron‐
ics.
With a discharged vehicle battery, no operation
of the vehicle is possible.
Place vehicle in service To place the vehicle in service, charge as
usual.
If there is no possibility of charging on site,
contact the service center.
Charging vehicle with a discharged
vehicle battery
1.Unlock the vehicle, if needed, using the
integrated key, refer to page 36.2.Secure the vehicle against rolling.Seite 152MobilityCharging vehicle152
Online Edition for Part no. 01 40 2 957 072 - X/14
Page 169 of 216
3.Connect either a Level 1 or Level 2 charg‐
ing cable to the household socket or the
port on the charging station.4.Attach charging cable corresponding to
the charging socket connection.
Charging is started. The charging status is
not displayed. Do not open vehicle during
this time.
After several minutes, the vehicle is slightly
charged. The onboard electronics are ready
again. It is again possible to open the vehicle.
The charging status as well as the charging
state of the high-voltage battery can be dis‐
played again.
If the vehicle battery cannot be charged, con‐
tact the service center.
Seite 153Charging vehicleMobility153
Online Edition for Part no. 01 40 2 957 072 - X/14
Page 170 of 216
RefuelingVehicle features and options
This chapter describes all standard, country-
specific and optional features offered with the
series. It also describes features that are not
necessarily available in your car, e. g., due to
the selected options or country versions. This
also applies to safety-related functions and
systems.
Hints Refuel promptly
Refuel no later than at a range of
30 miles/50 km or engine operation might fail
and damage might occur.◀
Do not refuel unless the engine is at a
standstill and the selector lever is in posi‐
tion P/N
Do not refuel unless the engine is at a standstill
and the selector lever is in position P/N, other‐
wise the buildup of pressure may cause the
fuel nozzle to shut off prematurely.◀
Tank ventThe concept
The vehicle is equipped with a special fuel
tank. It is designed for special requirements
that arise with the hybrid operation of the vehi‐
cle, e.g., alternating drive with combustion en‐
gine or electric motor.
General information
In the fuel tank, excess pressure can build up
due to gasoline vapors which are dissipated
before the tank lid is opened.At a glance
The button is located on the driver's side on
the door armrest.
Tank venting1.Switch off drive readiness.2.
Press button to start the pressure
equalization.
The status of the tank venting is displayed
in the instrument cluster. In rare cases, the
tank venting can last several seconds.
If the tank venting has been completed, a
message is displayed in the instrument
cluster. The tank lid is released for open‐
ing.
3.Open the fuel filler flap.
If the fuel filler flap is not opened within 10
minutes after the fuel filler flap was re‐
leased, the fuel filler flap relocks. Press
button again.
Fuel lid
Opening
Before opening , vent the tank, refer to
page 154.
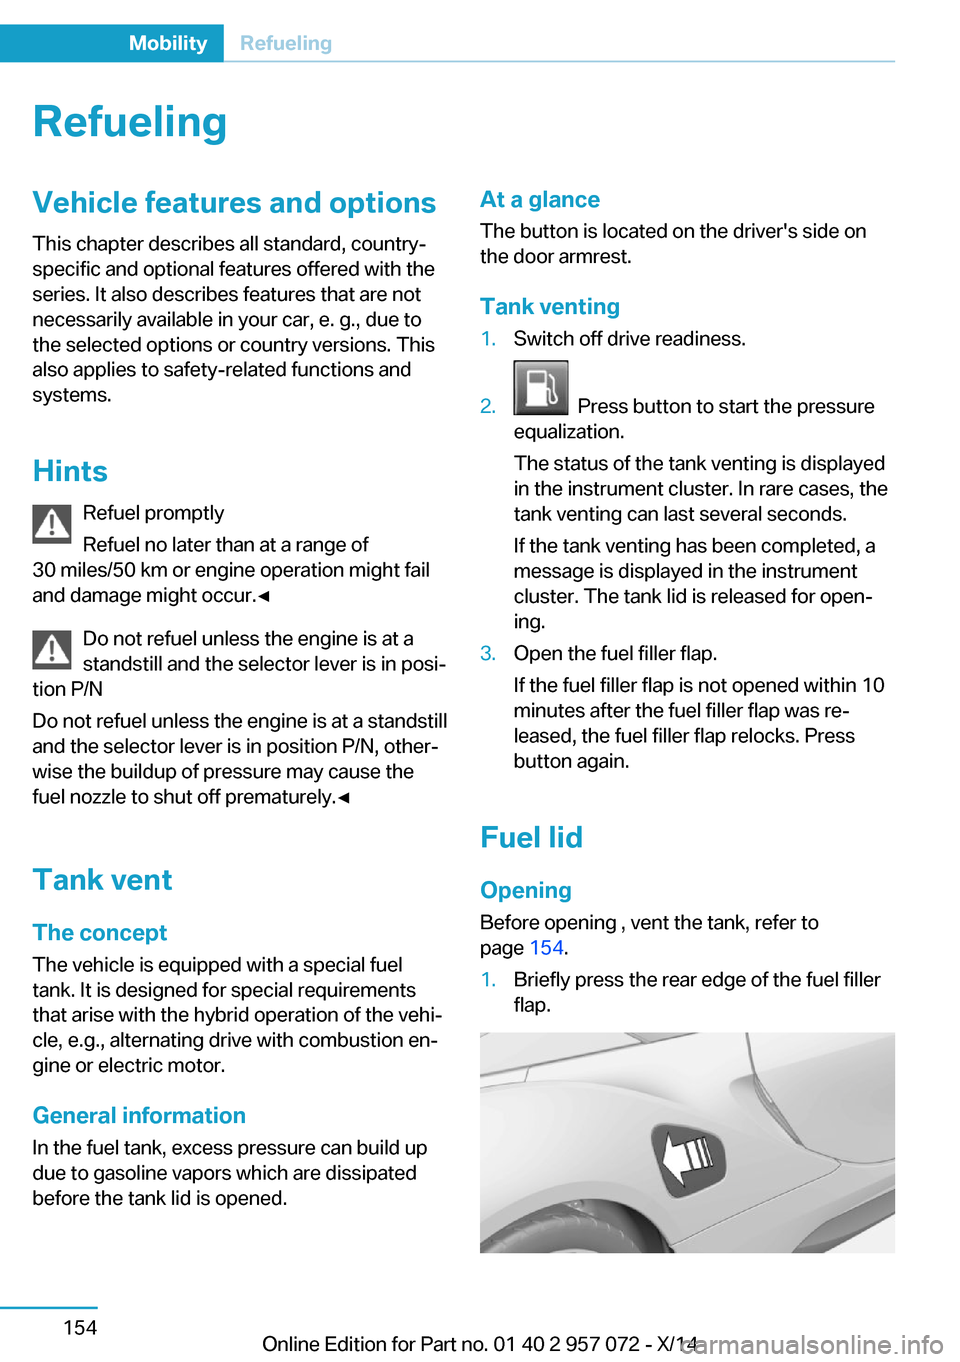
1.Briefly press the rear edge of the fuel filler
flap.Seite 154MobilityRefueling154
Online Edition for Part no. 01 40 2 957 072 - X/14