automatic transmission BMW I8 2014 I12 Owner's Manual
[x] Cancel search | Manufacturer: BMW, Model Year: 2014, Model line: I8, Model: BMW I8 2014 I12Pages: 216, PDF Size: 12.45 MB
Page 53 of 216
4.Insert a battery of the same type with the
positive side facing up.5.Press the cover closed.
Take the used battery to a recycling
center or to your service center.
New remote controls New remote controls are available from the
service center.
Loss of the remote controls Lost remote controls can be disabled by your
service center.
Emergency detection of remote
control
Also in the following situations, radio-ready
state and drive readiness can be established:
▷Interference of radio transmission to re‐
mote control by external sources e.g., by
radio masts.▷Empty battery in remote control.▷Interference from radio transmissions
through mobile devices in close proximity
to remote control.▷Interference of radio transmission by
charger while charging items such as mo‐
bile devices in the vehicle.
A Check Control message is displayed if one
attempts to turn on the radio-ready state or ac‐
tivate engine readiness.
Activation of drive readiness via
emergency detection of the remote
control
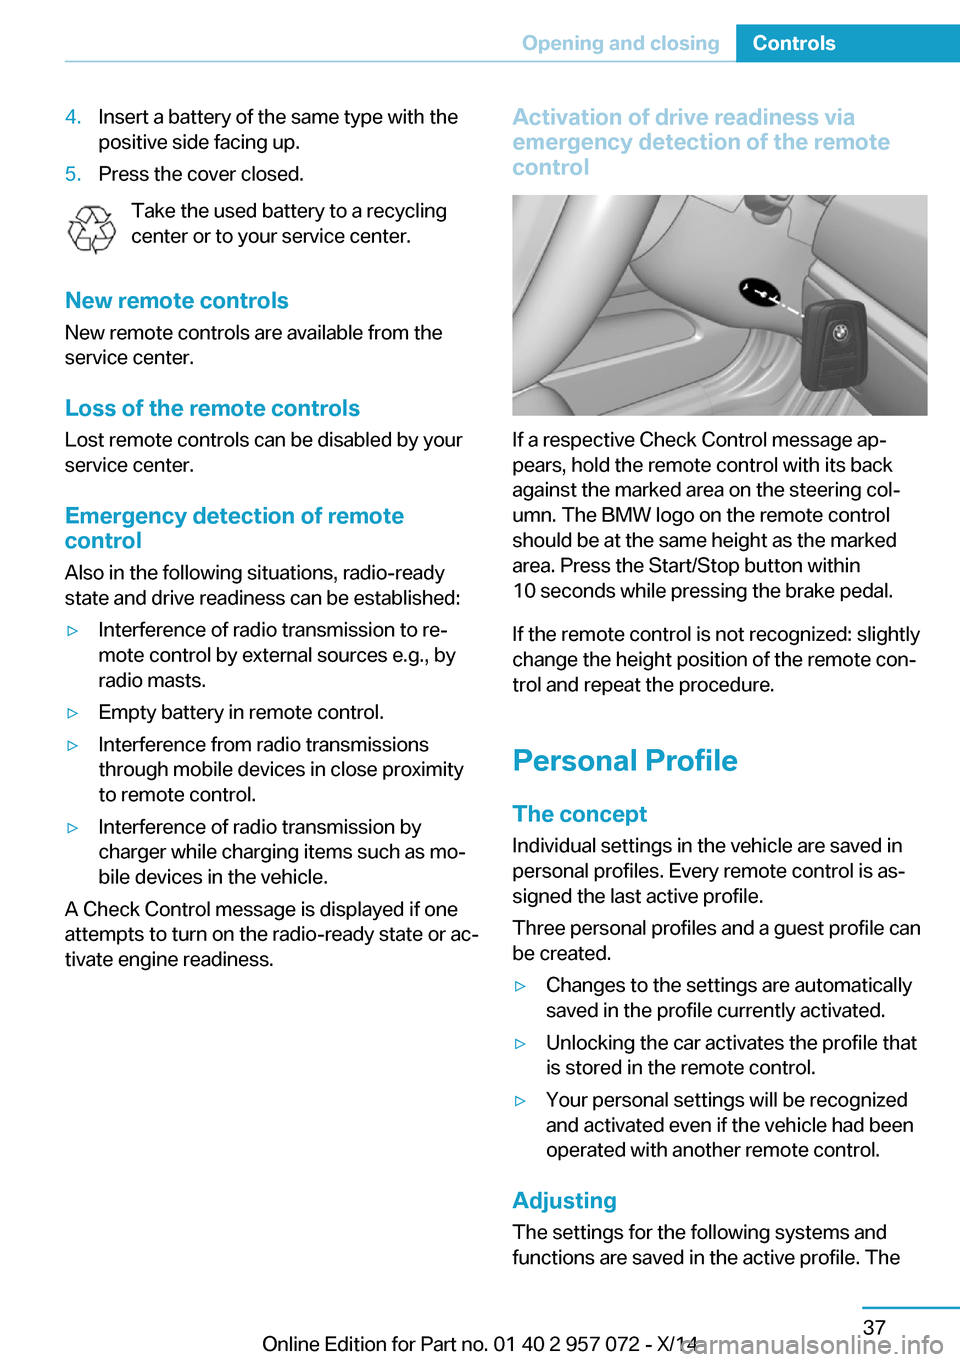
If a respective Check Control message ap‐
pears, hold the remote control with its back
against the marked area on the steering col‐
umn. The BMW logo on the remote control
should be at the same height as the marked
area. Press the Start/Stop button within
10 seconds while pressing the brake pedal.
If the remote control is not recognized: slightly
change the height position of the remote con‐
trol and repeat the procedure.
Personal Profile
The concept Individual settings in the vehicle are saved in
personal profiles. Every remote control is as‐
signed the last active profile.
Three personal profiles and a guest profile can
be created.
▷Changes to the settings are automatically
saved in the profile currently activated.▷Unlocking the car activates the profile that
is stored in the remote control.▷Your personal settings will be recognized
and activated even if the vehicle had been
operated with another remote control.
Adjusting
The settings for the following systems and
functions are saved in the active profile. The
Seite 37Opening and closingControls37
Online Edition for Part no. 01 40 2 957 072 - X/14
Page 83 of 216
Folding wipers back down
Before switching the ignition on, fold the
wipers back down to the windshield; other‐
wise, the wipers may become damaged when
they are activated.◀1.Switch on the ignition.2.Push wiper lever down. Wipers move to
their resting position and are ready again
for operation.
Washer fluid
General information Antifreeze for washer fluid
Antifreeze is flammable and can cause
injury if it is used incorrectly.
Therefore, keep it away from possible sources
of ignition.
Only keep it in the closed original container
and inaccessible to children.
Follow the notes and instructions on the con‐
tainer.
United States: The washer fluid mixture ratio is
regulated by the U.S. EPA and many individual
states; do not exceed the allowable washer
fluid dilution ratios limits that apply. Follow the
usage instructions on the washer fluid con‐
tainer. Use BMW’s Windshield Washer Con‐
centrate or the equivalent.◀
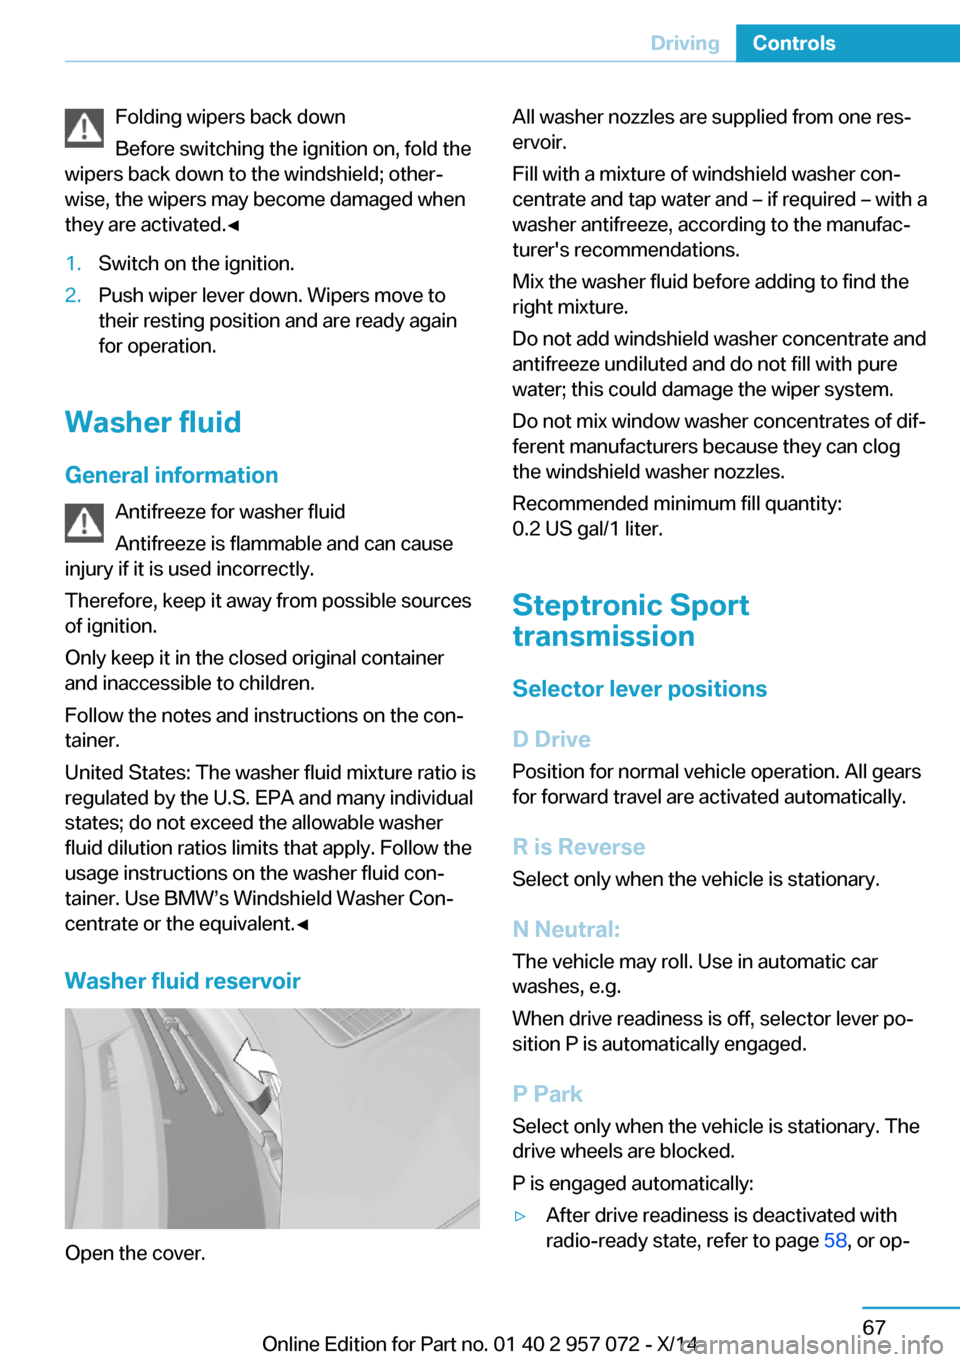
Washer fluid reservoir
Open the cover.
All washer nozzles are supplied from one res‐
ervoir.
Fill with a mixture of windshield washer con‐
centrate and tap water and – if required – with a
washer antifreeze, according to the manufac‐
turer's recommendations.
Mix the washer fluid before adding to find the
right mixture.
Do not add windshield washer concentrate and
antifreeze undiluted and do not fill with pure
water; this could damage the wiper system.
Do not mix window washer concentrates of dif‐
ferent manufacturers because they can clog
the windshield washer nozzles.
Recommended minimum fill quantity:
0.2 US gal/1 liter.
Steptronic Sport
transmission
Selector lever positions
D Drive
Position for normal vehicle operation. All gears
for forward travel are activated automatically.
R is Reverse
Select only when the vehicle is stationary.
N Neutral: The vehicle may roll. Use in automatic carwashes, e.g.
When drive readiness is off, selector lever po‐
sition P is automatically engaged.
P Park
Select only when the vehicle is stationary. The
drive wheels are blocked.
P is engaged automatically:▷After drive readiness is deactivated with
radio-ready state, refer to page 58, or op‐Seite 67DrivingControls67
Online Edition for Part no. 01 40 2 957 072 - X/14
Page 86 of 216
Gears will only be shifted at appropriate engine
and road speeds, for example downshifting is
not possible if the engine speed is too high.
The selected gear is briefly displayed in the in‐
strument cluster, followed by the current gear.
If the shift paddles on the steering wheel are
used to shift gears in automatic mode, the
transmission temporarily switches to manual
mode.
In the manual mode, if there has been no ac‐
celeration or shifting of the shift paddles within
a certain amount of time, the transmission
switches back to automatic mode.
Displays in the instrument cluster The selector lever position is dis‐played, e.g.: P.
Electronic unlocking of the
transmission lock
General information Electronically unlock the transmission lock to
maneuver vehicle from the danger area.
Engaging selector lever position N1.Depress the brake pedal.2.Press and hold the Start/Stop button.3.Press and hold the selector lever into posi‐
tion N, until position N is displayed in the
instrument cluster.
A corresponding Check Control message
is displayed.4.Release Start/Stop button and selector
lever.5.Release brake.6.Maneuver the vehicle from the danger area
and secure it against moving on its own.Launch Control
The concept Launch Control enables optimum accelerationon surfaces with good traction.
Hints Component wear
Do not use Launch Control too often;
otherwise, this may result in premature wear of
components due to the high stress placed on
the vehicle.◀
Do not use Launch Control during the break-in,
refer to page 134, period.
To increase vehicle stability, activate DSC
again as soon as possible.
Requirements Launch Control is available when the combus‐tion engine is warmed up, that is, after uninter‐
rupted driving with the combustion engine of
at least 6 miles/10 km.
To start with Launch Control do not steer the
steering wheel.
Start with launch control
With the combustion engine running:1. Press button.
TRACTION is displayed in the instrument
cluster and the indicator lamp for DSC OFF
lights up.2.Engage selector lever position S.3.With the left foot, forcefully press down on
the brake.4.Press and hold down the accelerator pedal
beyond the resistance point at the full
throttle position.
A flag symbol is displayed in the instru‐
ment cluster.5.The starting engine speed adjusts. Within
3 seconds, release the brake.Seite 70ControlsDriving70
Online Edition for Part no. 01 40 2 957 072 - X/14
Page 97 of 216
Your service specialist can read the current
service requirements from your remote con‐
trol.
Display
Data regarding the service status or legally
mandated vehicle inspections are automati‐
cally transmitted to your service center before
a service due date.
Detailed information on service
requirements
More information on the scope of service re‐
quired can be displayed on the Control Dis‐
play.
On the Control Display:1."Vehicle info"2."Vehicle status"3. "Service required"
Required maintenance procedures and le‐
gally mandated inspections are displayed.4.Select an entry to call up detailed informa‐
tion.
Symbols
Sym‐
bolsDescriptionNo service is currently required.The deadline for scheduled mainte‐
nance or a legally mandated inspec‐
tion is approaching.The service deadline has already
passed.
Entering appointment dates
Enter the dates for the required inspections.
Make sure that the vehicle's date and time are
set correctly.
On the Control Display:1."Vehicle info"2."Vehicle status"3. "Service required"4."§ Vehicle inspection"5."Date:"6.Adjust the settings.7.Confirm.
The entered date is stored.
Automatic Service Request
Data regarding the service status or legally
mandated vehicle inspections are automati‐
cally transmitted to your service center before
a service due date.
You can check when your service center was
notified.
On the Control Display:
1."Vehicle info"2."Vehicle status"3.Open "Options".4."Last Service Request"
Gear shift indicator
The conceptThe system recommends the most fuel effi‐
cient gear for the current driving situation.
Depending on the vehicle's features and coun‐
try version of the vehicle, the gear shift indica‐
tor is active in the manual mode of the Step‐
tronic transmission.
Suggestions to shift gear up or down are dis‐
played in the instrument cluster.
The gear shift indicator is not available when
Max eDRIVE is activated.
On vehicles without a gear shift indicator, the
engaged gear is displayed.
Seite 81DisplaysControls81
Online Edition for Part no. 01 40 2 957 072 - X/14
Page 128 of 216
Switching on/off
Switching on automatically PDC switches on automatically in the following
situations:▷If selector lever position R is engaged while
the engine is running or in electric mode.
The rearview camera also switches on.▷If equipped with front PDC: when obsta‐
cles are detected behind or in front of the
vehicle by PDC and the speed is slower
than approx. 2 mph/3 km/h.
You may turn off automatic activation:
1."Settings"2."Parking"3.Select setting.
Settings are stored for the profile currently
in use.
Automatic deactivation during forward
travel
The system switches off when a certain driving
distance or speed is exceeded.
Switch the system back on if needed.
With front PDC: switching on/off
manually
Press button.
▷On: the LED lights up.▷Off: the LED goes out.
The rearview camera image is displayed when
the reverse gear is engaged by pressing the
button.
Display
Signal tones When approaching an object, an intermittent
sound indicates the position of the object. E. g.
if an object is detected to the left rear of the
vehicle, a signal tone sounds from the left rear
speaker.
The shorter the distance to the object, the
shorter the intervals.
If the distance to a detected object in the front
is less than approx. 12 in/30 cm and in the rear
less than approx. 20 in/50 cm, a continuous
tone is sounded.
With front PDC: if objects are located both in
front of and behind the vehicle, an alternating
continuous signal is sounded.
The signal tone is switched off:▷When the vehicle moves away from an ob‐
ject by more than approx. 4 in/10 cm.▷When selector lever position P is engaged
on vehicles with Steptronic transmission.
Volume
The volume of the PDC signal tone can be ad‐
justed similar to the sound and volume set‐
tings of the radio.
Settings are stored for the profile currently in
use.
Visual warning
The approach of the vehicle to an object can
be shown on the Control Display. Objects that
are farther away are already displayed on the
Control Display before a signal sounds.
A display appears as soon as Park Distance
Control (PDC) is activated.
The range of the sensors is represented in the
colors green, yellow and red.
When the image of the rearview camera is dis‐
played, the reel can be made to PDC:
"Rear view camera"
System limits
Limits of ultrasonic measurement
Ultrasonic measuring might not function under
the following circumstances:
Seite 112ControlsDriving comfort112
Online Edition for Part no. 01 40 2 957 072 - X/14
Page 135 of 216
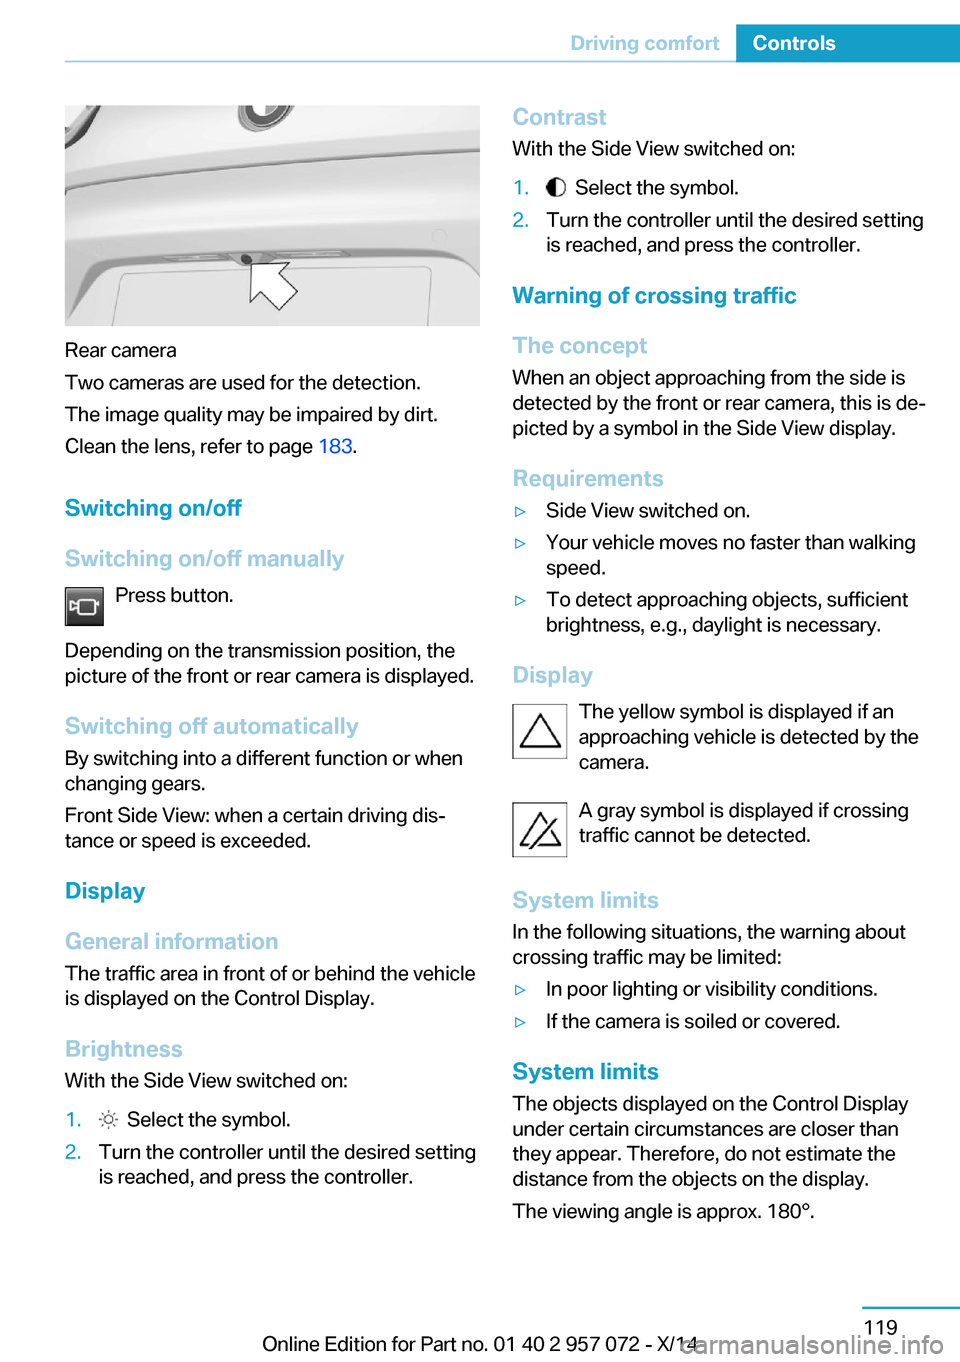
Rear camera
Two cameras are used for the detection.
The image quality may be impaired by dirt.
Clean the lens, refer to page 183.
Switching on/off
Switching on/off manually Press button.
Depending on the transmission position, the
picture of the front or rear camera is displayed.
Switching off automaticallyBy switching into a different function or when
changing gears.
Front Side View: when a certain driving dis‐
tance or speed is exceeded.
Display
General information The traffic area in front of or behind the vehicle
is displayed on the Control Display.
Brightness
With the Side View switched on:
1. Select the symbol.2.Turn the controller until the desired setting
is reached, and press the controller.Contrast
With the Side View switched on:1. Select the symbol.2.Turn the controller until the desired setting
is reached, and press the controller.
Warning of crossing traffic
The concept When an object approaching from the side is
detected by the front or rear camera, this is de‐
picted by a symbol in the Side View display.
Requirements
▷Side View switched on.▷Your vehicle moves no faster than walking
speed.▷To detect approaching objects, sufficient
brightness, e.g., daylight is necessary.
Display
The yellow symbol is displayed if anapproaching vehicle is detected by the
camera.
A gray symbol is displayed if crossing
traffic cannot be detected.
System limits
In the following situations, the warning about
crossing traffic may be limited:
▷In poor lighting or visibility conditions.▷If the camera is soiled or covered.
System limits
The objects displayed on the Control Display
under certain circumstances are closer than
they appear. Therefore, do not estimate the
distance from the objects on the display.
The viewing angle is approx. 180°.
Seite 119Driving comfortControls119
Online Edition for Part no. 01 40 2 957 072 - X/14
Page 150 of 216
Things to remember when drivingVehicle features and options
This chapter describes all standard, country-
specific and optional features offered with the
series. It also describes features that are not
necessarily available in your car, e. g., due to
the selected options or country versions. This
also applies to safety-related functions and
systems.
Breaking-in period
General information Moving parts need time to adjust to one an‐
other (break-in time).
The following instructions will help accomplish
a long vehicle life and good efficiency.
During break-in, do not use the Launch Con‐
trol, refer to page 70.
Engine, transmission, and axle drive Always obey the official speed limit.
Up to 1,200 miles/2,000 km
Do not exceed the maximum engine and road
speed:▷For gasoline engine 4,500 rpm and
100 mph/160 km/h.
Avoid full load or kickdown under all circum‐
stances.
From 1,200 miles/2,000 km The engine and vehicle speed can gradually be
increased.
Tires
Tire traction is not optimal due to manufactur‐
ing circumstances when tires are brand-new;
they achieve their full traction potential after a
break-in time.
Drive conservatively for the first
200 miles/300 km.
Brake system
Brakes require an initial break-in period of ap‐
prox. 300 miles/500 km to achieve optimal per‐
formance between brake discs and brake
pads. Drive moderately during this break-in pe‐
riod.
Following part replacement
The same break-in procedures should be ob‐
served if any of the components above-men‐
tioned have to be renewed in the course of the
vehicle's operating life.
Using eDRIVE efficiently The concept
eDRIVE operates automatically. Proactive driv‐
ing utilizes energy consumption and energy re‐
covery optimally. Energy recovery is used to
charge the high-voltage battery. It is important
for the supply of electrical components and
thus a prerequisite for an extensive range. En‐
ergy consumption and recovery depend very
much, among other things, on your driving
style.
Optimizing driving style
Performance display The driving style can be optimized using the
performance display in ECO PRO mode.Seite 134Driving tipsThings to remember when driving134
Online Edition for Part no. 01 40 2 957 072 - X/14
Page 194 of 216
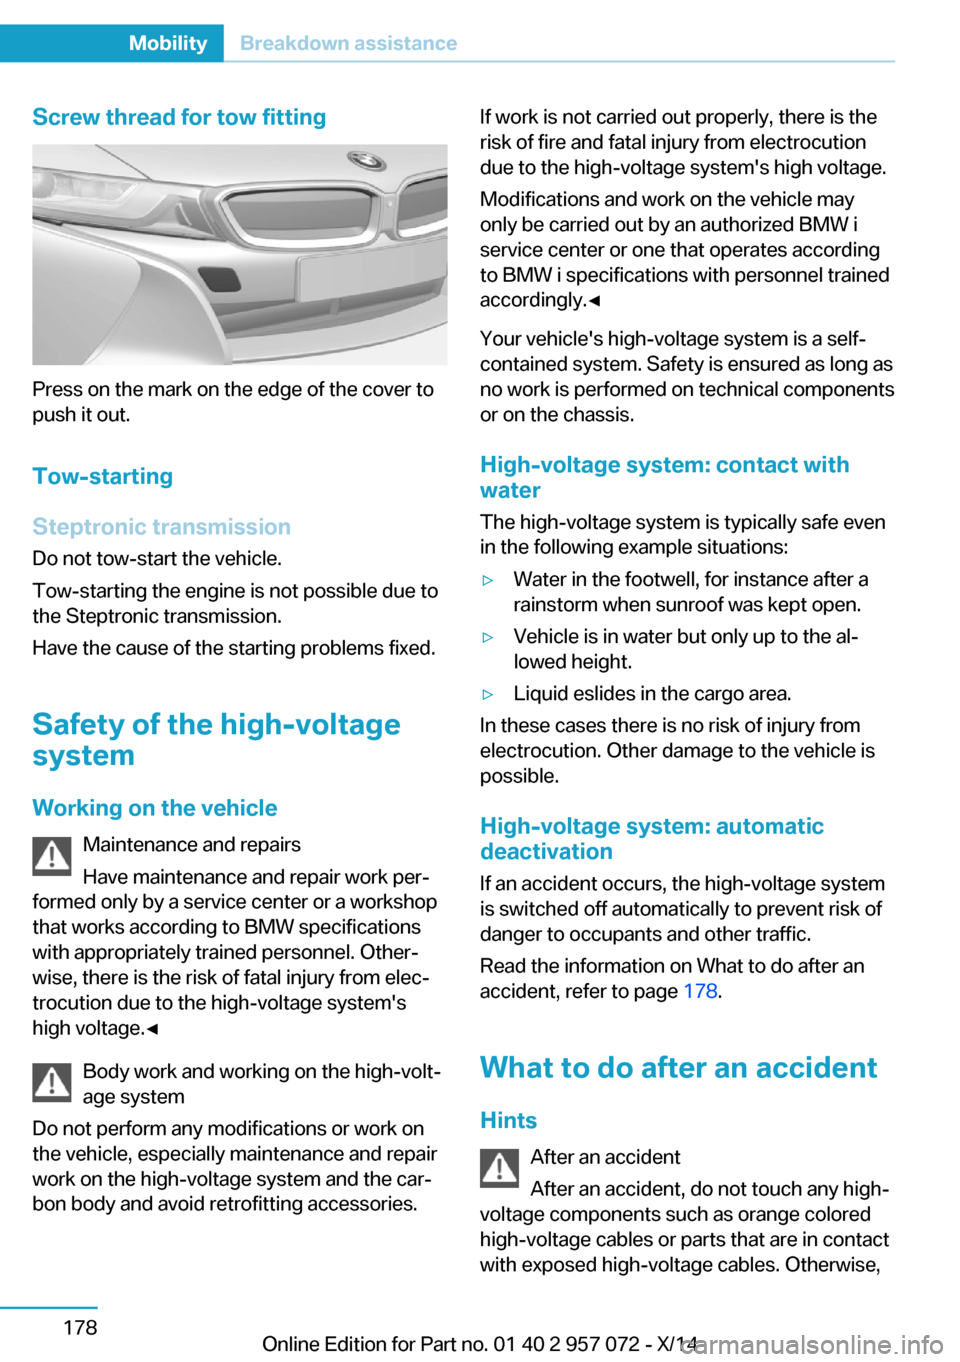
Screw thread for tow fitting
Press on the mark on the edge of the cover to
push it out.
Tow-starting
Steptronic transmission
Do not tow-start the vehicle.
Tow-starting the engine is not possible due to
the Steptronic transmission.
Have the cause of the starting problems fixed.
Safety of the high-voltage
system
Working on the vehicle Maintenance and repairs
Have maintenance and repair work per‐
formed only by a service center or a workshop
that works according to BMW specifications
with appropriately trained personnel. Other‐
wise, there is the risk of fatal injury from elec‐
trocution due to the high-voltage system's
high voltage.◀
Body work and working on the high-volt‐
age system
Do not perform any modifications or work on
the vehicle, especially maintenance and repair
work on the high-voltage system and the car‐
bon body and avoid retrofitting accessories.
If work is not carried out properly, there is the
risk of fire and fatal injury from electrocution
due to the high-voltage system's high voltage.
Modifications and work on the vehicle may
only be carried out by an authorized BMW i
service center or one that operates according
to BMW i specifications with personnel trained
accordingly.◀
Your vehicle's high-voltage system is a self-
contained system. Safety is ensured as long as
no work is performed on technical components
or on the chassis.
High-voltage system: contact with
water
The high-voltage system is typically safe even
in the following example situations:▷Water in the footwell, for instance after a
rainstorm when sunroof was kept open.▷Vehicle is in water but only up to the al‐
lowed height.▷Liquid eslides in the cargo area.
In these cases there is no risk of injury from
electrocution. Other damage to the vehicle is
possible.
High-voltage system: automatic
deactivation
If an accident occurs, the high-voltage system
is switched off automatically to prevent risk of
danger to occupants and other traffic.
Read the information on What to do after an
accident, refer to page 178.
What to do after an accident Hints After an accident
After an accident, do not touch any high-
voltage components such as orange colored
high-voltage cables or parts that are in contact
with exposed high-voltage cables. Otherwise,
Seite 178MobilityBreakdown assistance178
Online Edition for Part no. 01 40 2 957 072 - X/14
Page 206 of 216
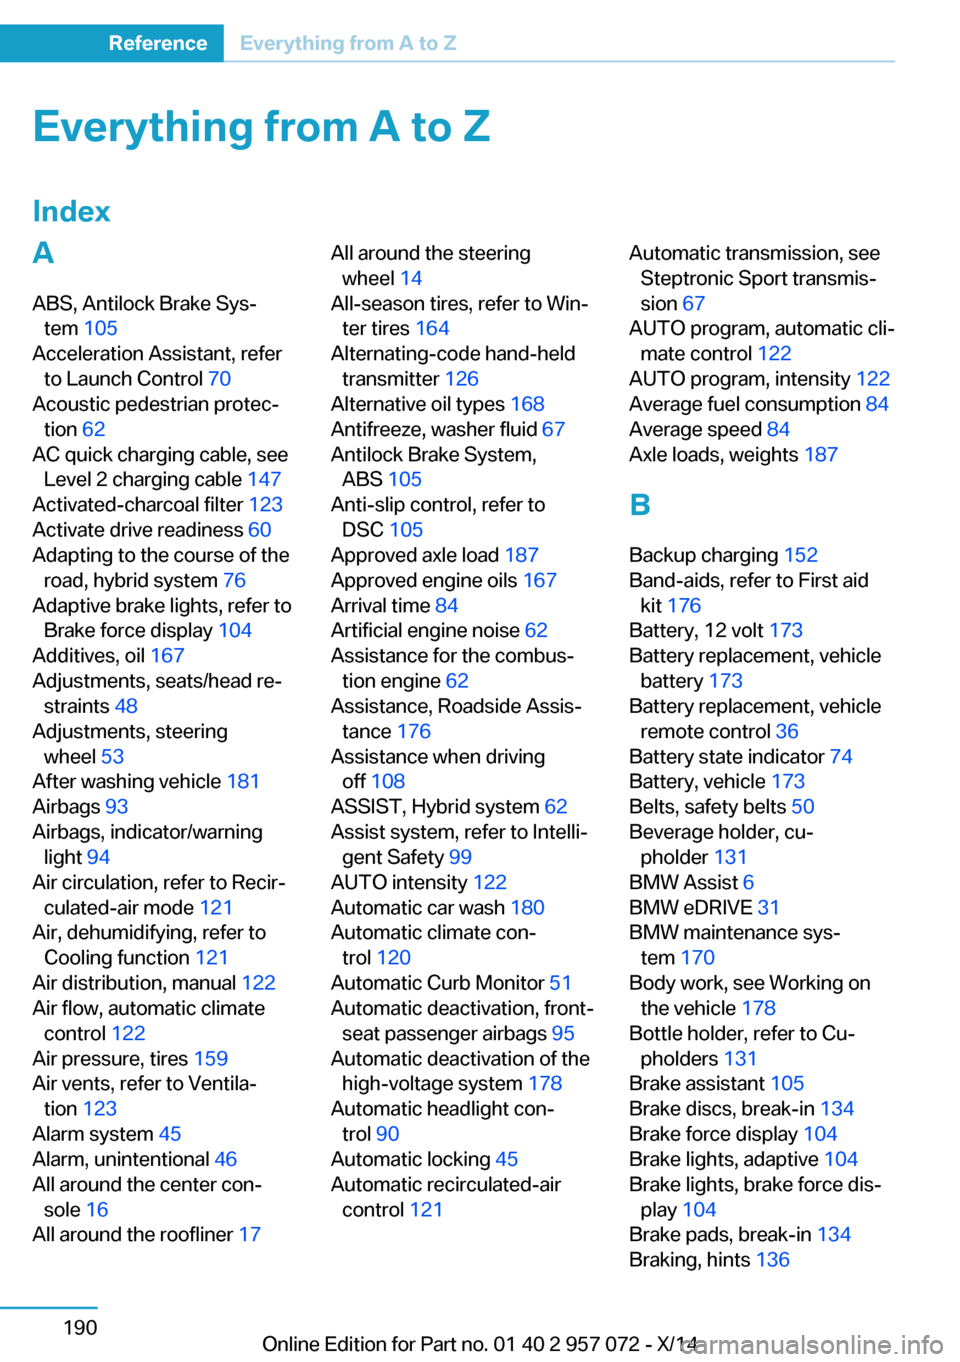
Everything from A to Z
IndexA ABS, Antilock Brake Sys‐ tem 105
Acceleration Assistant, refer to Launch Control 70
Acoustic pedestrian protec‐ tion 62
AC quick charging cable, see Level 2 charging cable 147
Activated-charcoal filter 123
Activate drive readiness 60
Adapting to the course of the road, hybrid system 76
Adaptive brake lights, refer to Brake force display 104
Additives, oil 167
Adjustments, seats/head re‐ straints 48
Adjustments, steering wheel 53
After washing vehicle 181
Airbags 93
Airbags, indicator/warning light 94
Air circulation, refer to Recir‐ culated-air mode 121
Air, dehumidifying, refer to Cooling function 121
Air distribution, manual 122
Air flow, automatic climate control 122
Air pressure, tires 159
Air vents, refer to Ventila‐ tion 123
Alarm system 45
Alarm, unintentional 46
All around the center con‐ sole 16
All around the roofliner 17 All around the steering
wheel 14
All-season tires, refer to Win‐ ter tires 164
Alternating-code hand-held transmitter 126
Alternative oil types 168
Antifreeze, washer fluid 67
Antilock Brake System, ABS 105
Anti-slip control, refer to DSC 105
Approved axle load 187
Approved engine oils 167
Arrival time 84
Artificial engine noise 62
Assistance for the combus‐ tion engine 62
Assistance, Roadside Assis‐ tance 176
Assistance when driving off 108
ASSIST, Hybrid system 62
Assist system, refer to Intelli‐ gent Safety 99
AUTO intensity 122
Automatic car wash 180
Automatic climate con‐ trol 120
Automatic Curb Monitor 51
Automatic deactivation, front- seat passenger airbags 95
Automatic deactivation of the high-voltage system 178
Automatic headlight con‐ trol 90
Automatic locking 45
Automatic recirculated-air control 121 Automatic transmission, see
Steptronic Sport transmis‐
sion 67
AUTO program, automatic cli‐ mate control 122
AUTO program, intensity 122
Average fuel consumption 84
Average speed 84
Axle loads, weights 187
B Backup charging 152
Band-aids, refer to First aid kit 176
Battery, 12 volt 173
Battery replacement, vehicle battery 173
Battery replacement, vehicle remote control 36
Battery state indicator 74
Battery, vehicle 173
Belts, safety belts 50
Beverage holder, cu‐ pholder 131
BMW Assist 6
BMW eDRIVE 31
BMW maintenance sys‐ tem 170
Body work, see Working on the vehicle 178
Bottle holder, refer to Cu‐ pholders 131
Brake assistant 105
Brake discs, break-in 134
Brake force display 104
Brake lights, adaptive 104
Brake lights, brake force dis‐ play 104
Brake pads, break-in 134
Braking, hints 136 Seite 190ReferenceEverything from A to Z190
Online Edition for Part no. 01 40 2 957 072 - X/14
Page 209 of 216
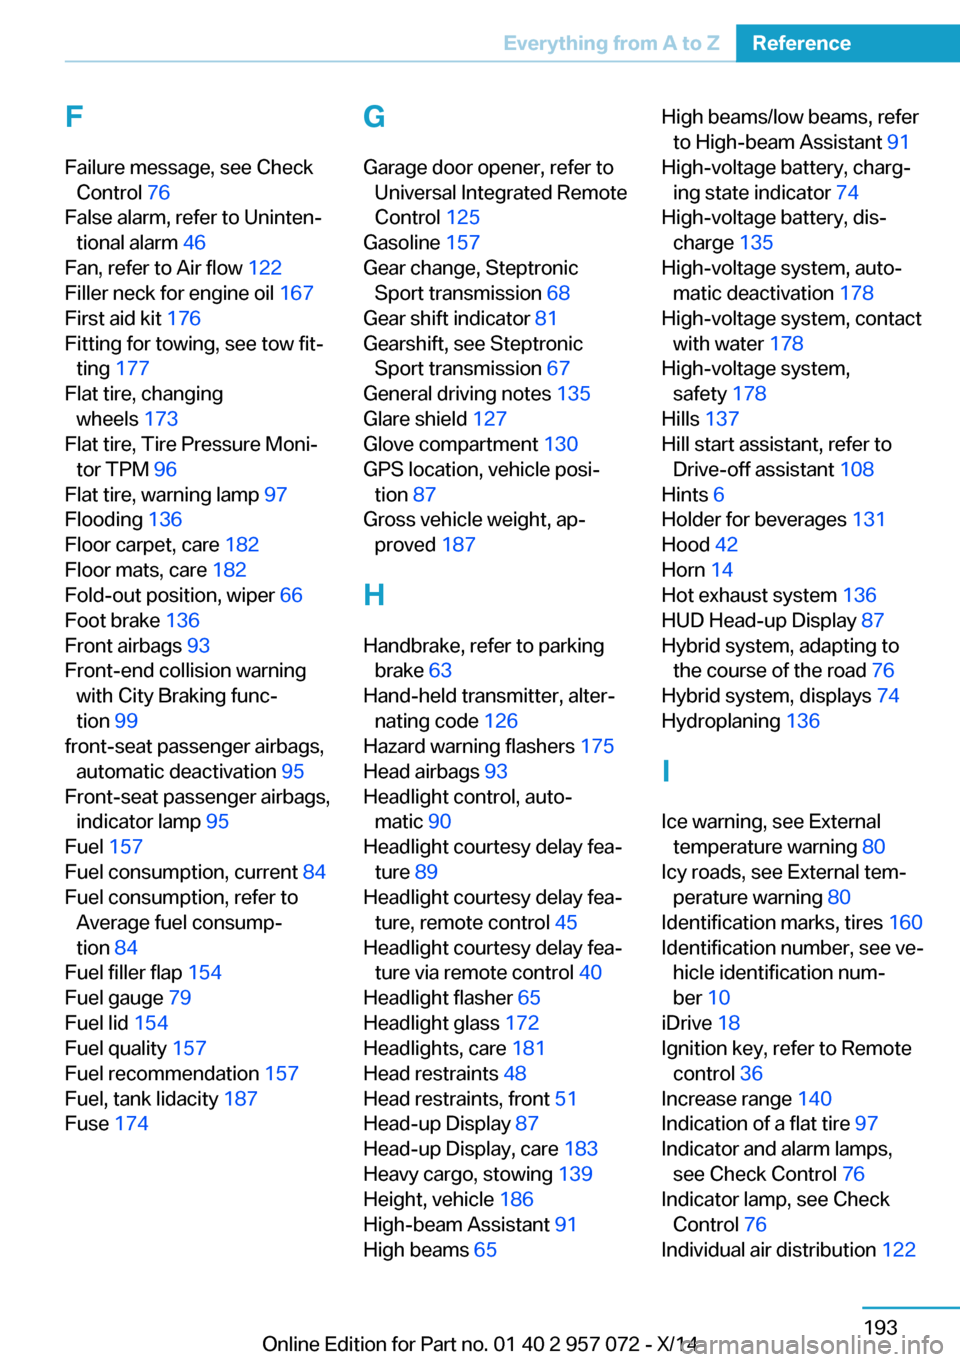
F
Failure message, see Check Control 76
False alarm, refer to Uninten‐ tional alarm 46
Fan, refer to Air flow 122
Filler neck for engine oil 167
First aid kit 176
Fitting for towing, see tow fit‐ ting 177
Flat tire, changing wheels 173
Flat tire, Tire Pressure Moni‐ tor TPM 96
Flat tire, warning lamp 97
Flooding 136
Floor carpet, care 182
Floor mats, care 182
Fold-out position, wiper 66
Foot brake 136
Front airbags 93
Front-end collision warning with City Braking func‐
tion 99
front-seat passenger airbags, automatic deactivation 95
Front-seat passenger airbags, indicator lamp 95
Fuel 157
Fuel consumption, current 84
Fuel consumption, refer to Average fuel consump‐
tion 84
Fuel filler flap 154
Fuel gauge 79
Fuel lid 154
Fuel quality 157
Fuel recommendation 157
Fuel, tank lidacity 187
Fuse 174 G
Garage door opener, refer to Universal Integrated Remote
Control 125
Gasoline 157
Gear change, Steptronic Sport transmission 68
Gear shift indicator 81
Gearshift, see Steptronic Sport transmission 67
General driving notes 135
Glare shield 127
Glove compartment 130
GPS location, vehicle posi‐ tion 87
Gross vehicle weight, ap‐ proved 187
H
Handbrake, refer to parking brake 63
Hand-held transmitter, alter‐ nating code 126
Hazard warning flashers 175
Head airbags 93
Headlight control, auto‐ matic 90
Headlight courtesy delay fea‐ ture 89
Headlight courtesy delay fea‐ ture, remote control 45
Headlight courtesy delay fea‐ ture via remote control 40
Headlight flasher 65
Headlight glass 172
Headlights, care 181
Head restraints 48
Head restraints, front 51
Head-up Display 87
Head-up Display, care 183
Heavy cargo, stowing 139
Height, vehicle 186
High-beam Assistant 91
High beams 65 High beams/low beams, refer
to High-beam Assistant 91
High-voltage battery, charg‐ ing state indicator 74
High-voltage battery, dis‐ charge 135
High-voltage system, auto‐ matic deactivation 178
High-voltage system, contact with water 178
High-voltage system, safety 178
Hills 137
Hill start assistant, refer to Drive-off assistant 108
Hints 6
Holder for beverages 131
Hood 42
Horn 14
Hot exhaust system 136
HUD Head-up Display 87
Hybrid system, adapting to the course of the road 76
Hybrid system, displays 74
Hydroplaning 136
I
Ice warning, see External temperature warning 80
Icy roads, see External tem‐ perature warning 80
Identification marks, tires 160
Identification number, see ve‐ hicle identification num‐
ber 10
iDrive 18
Ignition key, refer to Remote control 36
Increase range 140
Indication of a flat tire 97
Indicator and alarm lamps, see Check Control 76
Indicator lamp, see Check Control 76
Individual air distribution 122 Seite 193Everything from A to ZReference193
Online Edition for Part no. 01 40 2 957 072 - X/14