transmission BMW I8 2014 I12 Owner's Manual
[x] Cancel search | Manufacturer: BMW, Model Year: 2014, Model line: I8, Model: BMW I8 2014 I12Pages: 216, PDF Size: 12.45 MB
Page 32 of 216
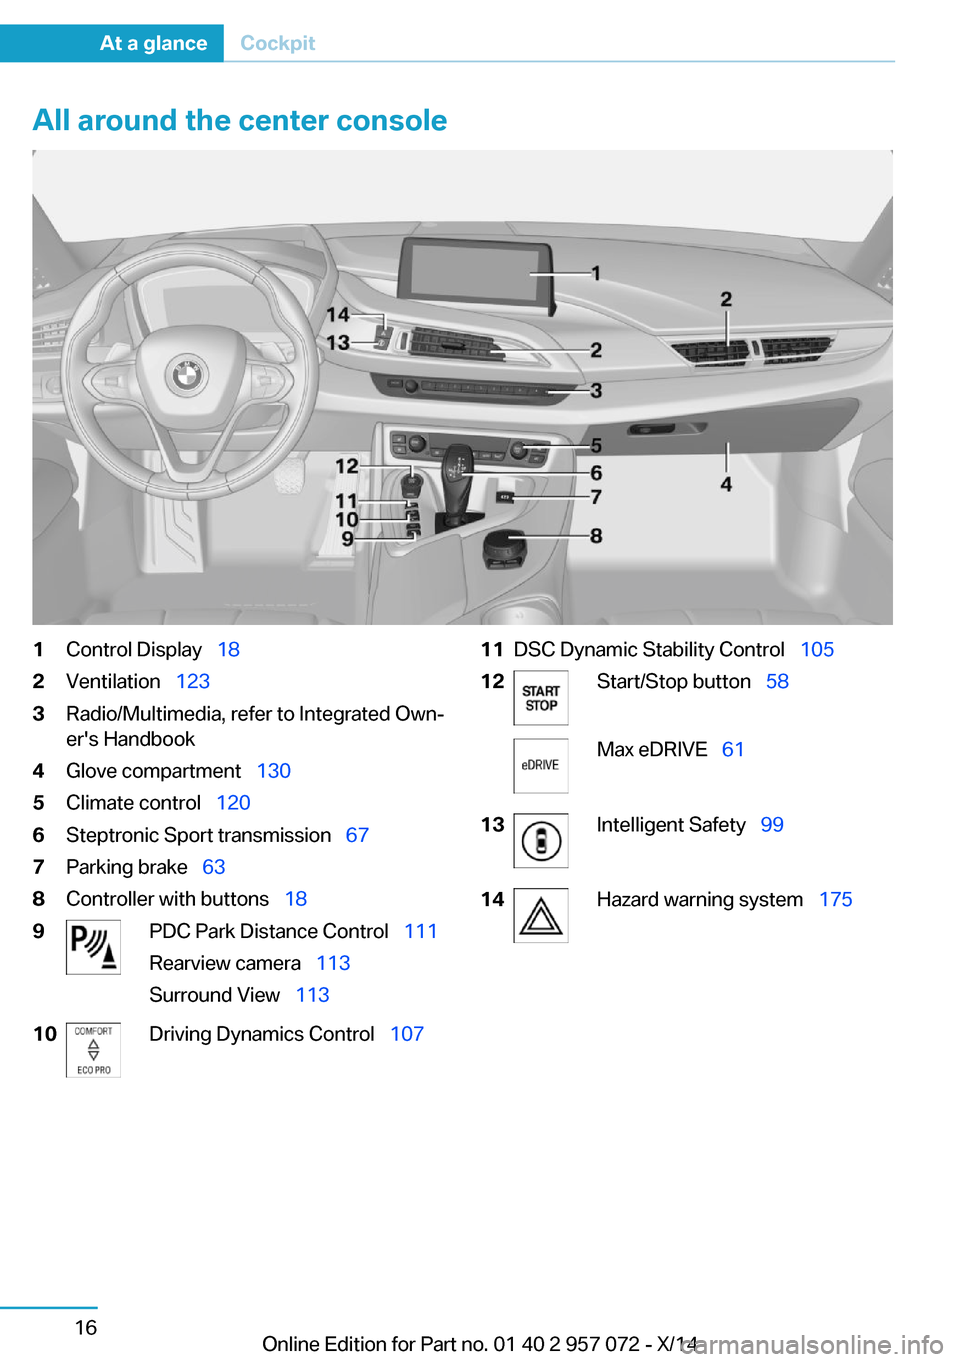
All around the center console1Control Display 182Ventilation 1233Radio/Multimedia, refer to Integrated Own‐
er's Handbook4Glove compartment 1305Climate control 1206Steptronic Sport transmission 677Parking brake 638Controller with buttons 189PDC Park Distance Control 111
Rearview camera 113
Surround View 11310Driving Dynamics Control 10711DSC Dynamic Stability Control 10512Start/Stop button 58Max eDRIVE 6113Intelligent Safety 9914Hazard warning system 175Seite 16At a glanceCockpit16
Online Edition for Part no. 01 40 2 957 072 - X/14
Page 53 of 216
4.Insert a battery of the same type with the
positive side facing up.5.Press the cover closed.
Take the used battery to a recycling
center or to your service center.
New remote controls New remote controls are available from the
service center.
Loss of the remote controls Lost remote controls can be disabled by your
service center.
Emergency detection of remote
control
Also in the following situations, radio-ready
state and drive readiness can be established:
▷Interference of radio transmission to re‐
mote control by external sources e.g., by
radio masts.▷Empty battery in remote control.▷Interference from radio transmissions
through mobile devices in close proximity
to remote control.▷Interference of radio transmission by
charger while charging items such as mo‐
bile devices in the vehicle.
A Check Control message is displayed if one
attempts to turn on the radio-ready state or ac‐
tivate engine readiness.
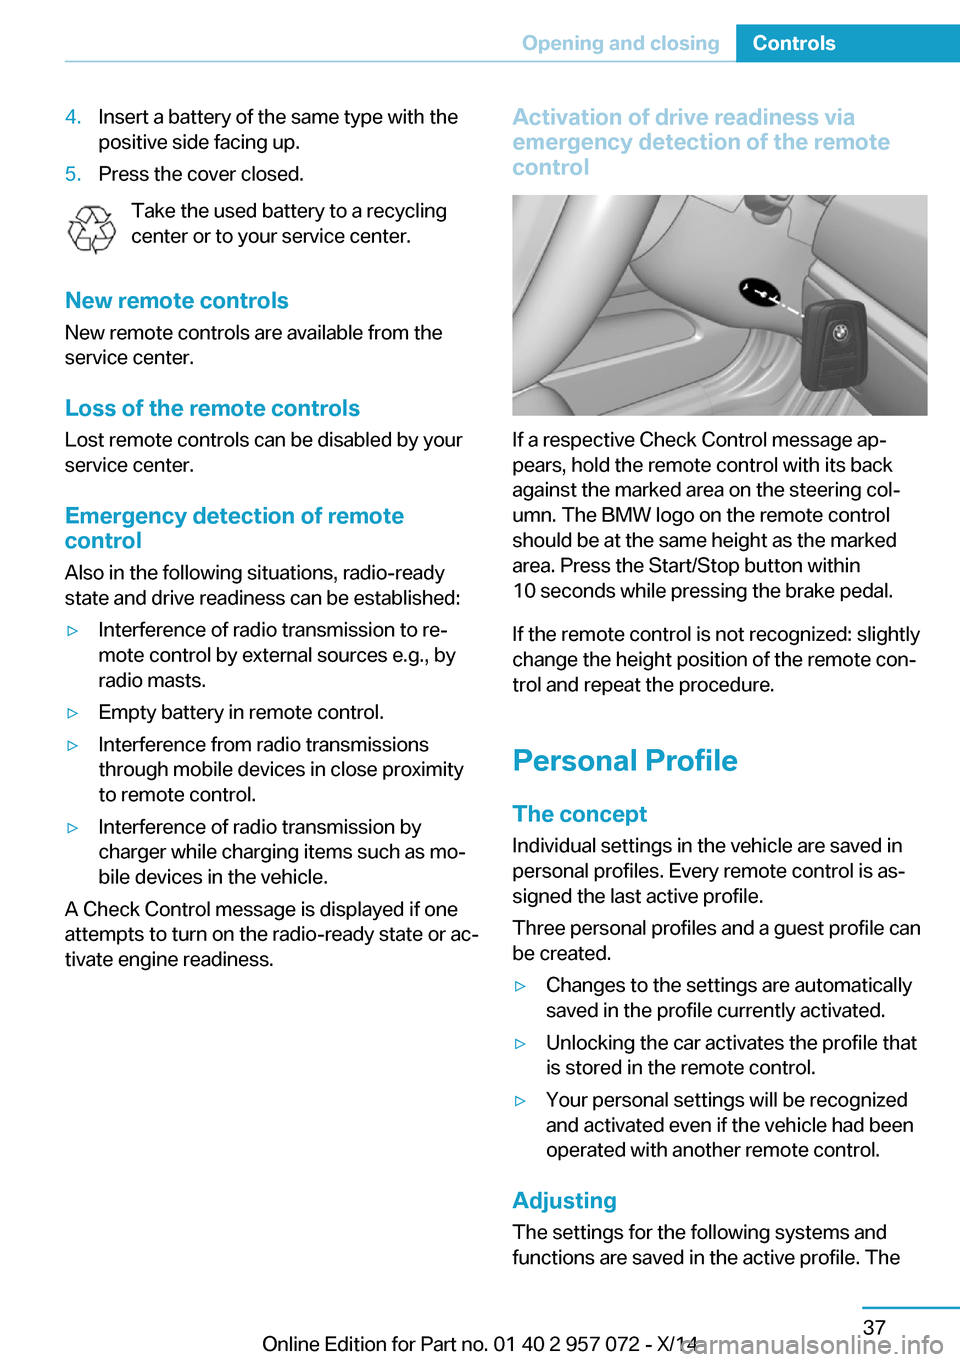
Activation of drive readiness via
emergency detection of the remote
control
If a respective Check Control message ap‐
pears, hold the remote control with its back
against the marked area on the steering col‐
umn. The BMW logo on the remote control
should be at the same height as the marked
area. Press the Start/Stop button within
10 seconds while pressing the brake pedal.
If the remote control is not recognized: slightly
change the height position of the remote con‐
trol and repeat the procedure.
Personal Profile
The concept Individual settings in the vehicle are saved in
personal profiles. Every remote control is as‐
signed the last active profile.
Three personal profiles and a guest profile can
be created.
▷Changes to the settings are automatically
saved in the profile currently activated.▷Unlocking the car activates the profile that
is stored in the remote control.▷Your personal settings will be recognized
and activated even if the vehicle had been
operated with another remote control.
Adjusting
The settings for the following systems and
functions are saved in the active profile. The
Seite 37Opening and closingControls37
Online Edition for Part no. 01 40 2 957 072 - X/14
Page 56 of 216
LockingLocking from the outside
Do not lock the vehicle from the outside
with people inside the car, as the vehicle can‐
not be unlocked from inside without special
knowledge.◀
Press button on the remote control.
All doors and the tailgate are locked.
Anti-theft protection is switched on. It pre‐
vents the doors from being unlocked using the
door openers.
The alarm system, refer to page 45, is armed.
Switching on interior lights Press button on the remote control with
the vehicle locked.
This function is not available, if the interior
lamps were switched off manually.
If the button is pressed again within 10 sec‐
onds after vehicle was locked, the interior mo‐
tion sensor and tilt alarm sensor of the anti-
theft warning system, refer to page 46, are
turned off. After locking, wait 10 seconds be‐
fore pressing the button again.
Unlocking the tailgate Press button on the remote control for
approx. 1 second.
The tailgate opens slightly, regardless of
whether the vehicle was previously locked or
unlocked.
Depending on the features and the country
version, it is also possible to have door un‐ locked. Create the settings, refer to page 44.
If the doors were not unlocked, the tailgate is
locked again as soon as it closes.Do not place the remote control in the
cargo area
Take the remote control with you and do not
leave it in the cargo area; otherwise, the re‐
mote control is locked inside the vehicle when
the tailgate is closed.◀
Provide edge protection
Sharp objects or those with edges can
hit the rear window while driving and damage
the heat conductors of the rear window. Pro‐
vide edge protection.◀
Without alarm system: switching the
headlamp courtesy delay feature on
The headlight courtesy delay feature function
must be set for the remote control button. For
Settings, refer to page 44.
Briefly press the button on the remote
control.
The duration can be set in the Control Display.
With alarm system: panic mode You can trigger the alarm system if you find
yourself in a dangerous situation.
Press button on the remote control for
at least 3 seconds.
To reel off the alarm: press any button.
Malfunction
Remote control detection by the vehicle can
among others be malfunctioning under the fol‐
lowing circumstances:▷Interference of the radio connection from
transmission towers or other equipment
with high transmit power.▷Shielding of the remote control due to
metal objects.▷Interference of the radio connection from
mobile phones or other electronic devices
in direct proximity.Seite 40ControlsOpening and closing40
Online Edition for Part no. 01 40 2 957 072 - X/14
Page 60 of 216
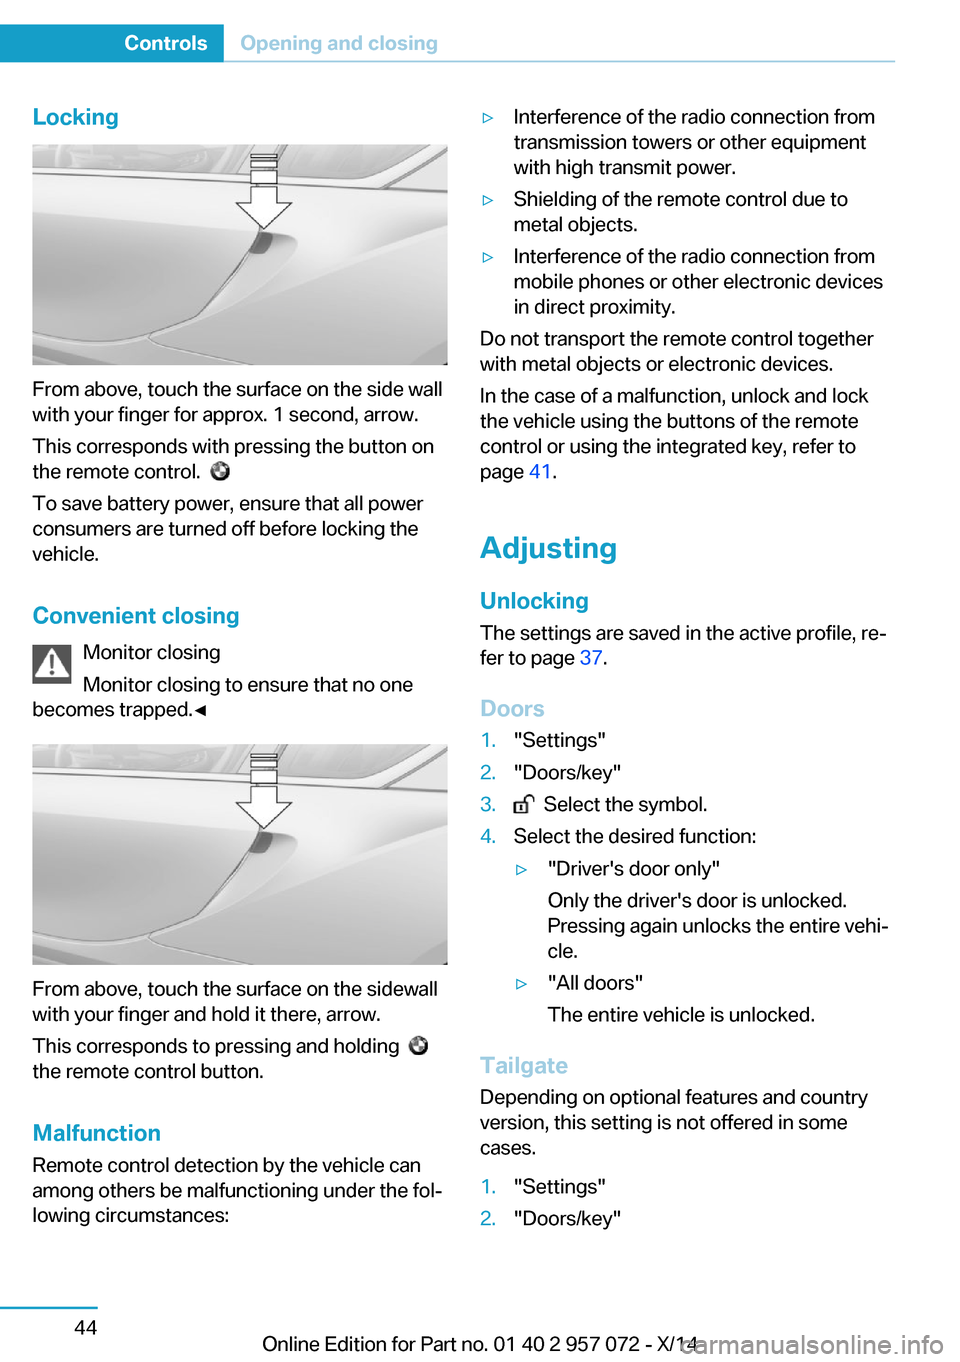
Locking
From above, touch the surface on the side wall
with your finger for approx. 1 second, arrow.
This corresponds with pressing the button on
the remote control.
To save battery power, ensure that all power
consumers are turned off before locking the
vehicle.
Convenient closing Monitor closing
Monitor closing to ensure that no one
becomes trapped.◀
From above, touch the surface on the sidewall
with your finger and hold it there, arrow.
This corresponds to pressing and holding
the remote control button.
Malfunction
Remote control detection by the vehicle can
among others be malfunctioning under the fol‐
lowing circumstances:
▷Interference of the radio connection from
transmission towers or other equipment
with high transmit power.▷Shielding of the remote control due to
metal objects.▷Interference of the radio connection from
mobile phones or other electronic devices
in direct proximity.
Do not transport the remote control together
with metal objects or electronic devices.
In the case of a malfunction, unlock and lock
the vehicle using the buttons of the remote
control or using the integrated key, refer to
page 41.
Adjusting
Unlocking The settings are saved in the active profile, re‐
fer to page 37.
Doors
1."Settings"2."Doors/key"3. Select the symbol.4.Select the desired function:▷"Driver's door only"
Only the driver's door is unlocked.
Pressing again unlocks the entire vehi‐
cle.▷"All doors"
The entire vehicle is unlocked.
Tailgate
Depending on optional features and country
version, this setting is not offered in some
cases.
1."Settings"2."Doors/key"Seite 44ControlsOpening and closing44
Online Edition for Part no. 01 40 2 957 072 - X/14
Page 83 of 216
Folding wipers back down
Before switching the ignition on, fold the
wipers back down to the windshield; other‐
wise, the wipers may become damaged when
they are activated.◀1.Switch on the ignition.2.Push wiper lever down. Wipers move to
their resting position and are ready again
for operation.
Washer fluid
General information Antifreeze for washer fluid
Antifreeze is flammable and can cause
injury if it is used incorrectly.
Therefore, keep it away from possible sources
of ignition.
Only keep it in the closed original container
and inaccessible to children.
Follow the notes and instructions on the con‐
tainer.
United States: The washer fluid mixture ratio is
regulated by the U.S. EPA and many individual
states; do not exceed the allowable washer
fluid dilution ratios limits that apply. Follow the
usage instructions on the washer fluid con‐
tainer. Use BMW’s Windshield Washer Con‐
centrate or the equivalent.◀
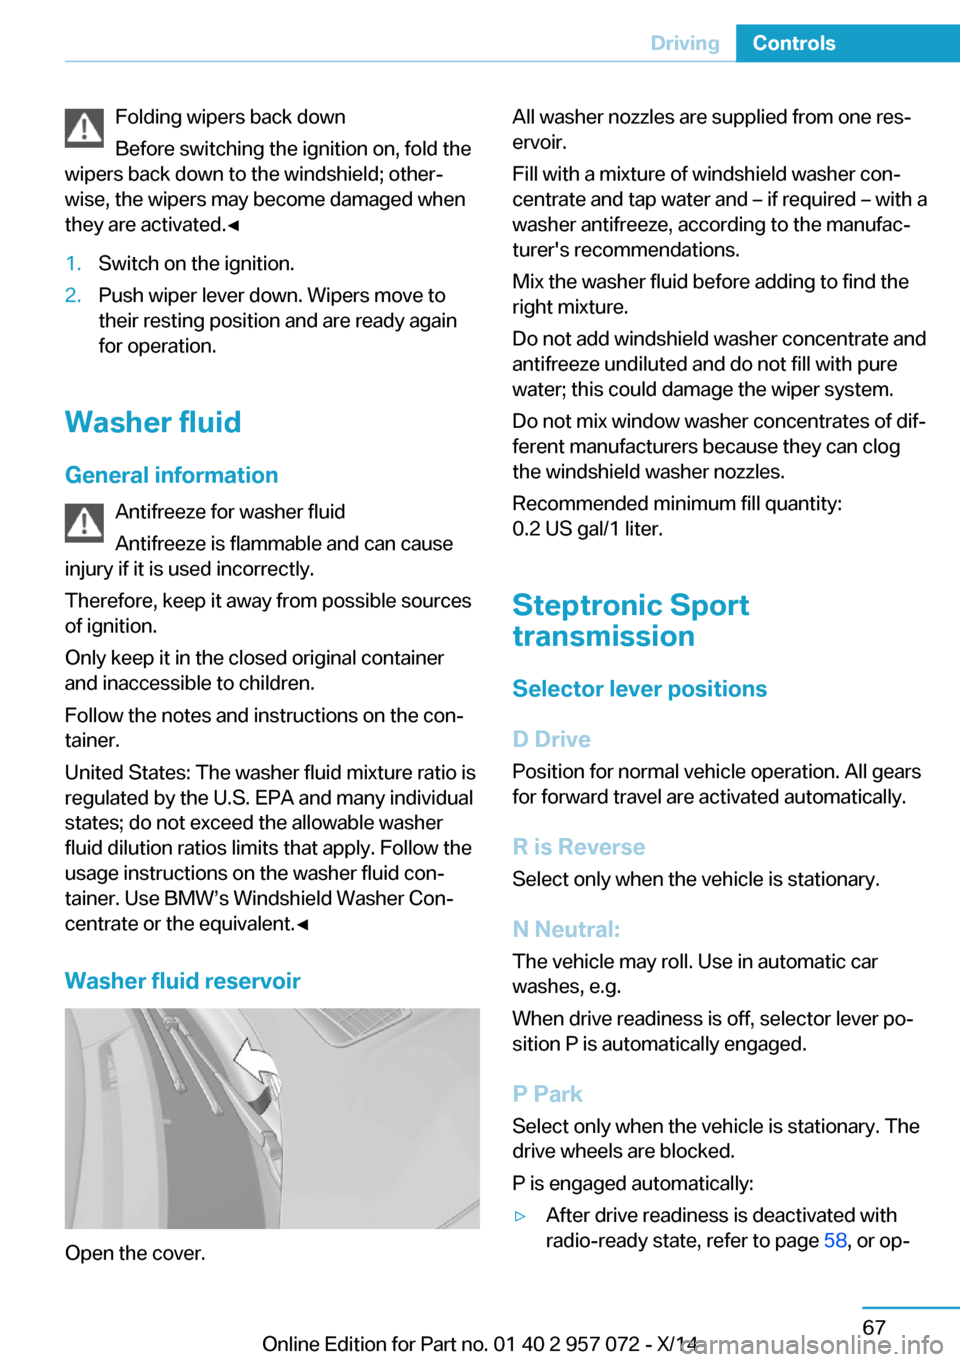
Washer fluid reservoir
Open the cover.
All washer nozzles are supplied from one res‐
ervoir.
Fill with a mixture of windshield washer con‐
centrate and tap water and – if required – with a
washer antifreeze, according to the manufac‐
turer's recommendations.
Mix the washer fluid before adding to find the
right mixture.
Do not add windshield washer concentrate and
antifreeze undiluted and do not fill with pure
water; this could damage the wiper system.
Do not mix window washer concentrates of dif‐
ferent manufacturers because they can clog
the windshield washer nozzles.
Recommended minimum fill quantity:
0.2 US gal/1 liter.
Steptronic Sport
transmission
Selector lever positions
D Drive
Position for normal vehicle operation. All gears
for forward travel are activated automatically.
R is Reverse
Select only when the vehicle is stationary.
N Neutral: The vehicle may roll. Use in automatic carwashes, e.g.
When drive readiness is off, selector lever po‐
sition P is automatically engaged.
P Park
Select only when the vehicle is stationary. The
drive wheels are blocked.
P is engaged automatically:▷After drive readiness is deactivated with
radio-ready state, refer to page 58, or op‐Seite 67DrivingControls67
Online Edition for Part no. 01 40 2 957 072 - X/14
Page 86 of 216
Gears will only be shifted at appropriate engine
and road speeds, for example downshifting is
not possible if the engine speed is too high.
The selected gear is briefly displayed in the in‐
strument cluster, followed by the current gear.
If the shift paddles on the steering wheel are
used to shift gears in automatic mode, the
transmission temporarily switches to manual
mode.
In the manual mode, if there has been no ac‐
celeration or shifting of the shift paddles within
a certain amount of time, the transmission
switches back to automatic mode.
Displays in the instrument cluster The selector lever position is dis‐played, e.g.: P.
Electronic unlocking of the
transmission lock
General information Electronically unlock the transmission lock to
maneuver vehicle from the danger area.
Engaging selector lever position N1.Depress the brake pedal.2.Press and hold the Start/Stop button.3.Press and hold the selector lever into posi‐
tion N, until position N is displayed in the
instrument cluster.
A corresponding Check Control message
is displayed.4.Release Start/Stop button and selector
lever.5.Release brake.6.Maneuver the vehicle from the danger area
and secure it against moving on its own.Launch Control
The concept Launch Control enables optimum accelerationon surfaces with good traction.
Hints Component wear
Do not use Launch Control too often;
otherwise, this may result in premature wear of
components due to the high stress placed on
the vehicle.◀
Do not use Launch Control during the break-in,
refer to page 134, period.
To increase vehicle stability, activate DSC
again as soon as possible.
Requirements Launch Control is available when the combus‐tion engine is warmed up, that is, after uninter‐
rupted driving with the combustion engine of
at least 6 miles/10 km.
To start with Launch Control do not steer the
steering wheel.
Start with launch control
With the combustion engine running:1. Press button.
TRACTION is displayed in the instrument
cluster and the indicator lamp for DSC OFF
lights up.2.Engage selector lever position S.3.With the left foot, forcefully press down on
the brake.4.Press and hold down the accelerator pedal
beyond the resistance point at the full
throttle position.
A flag symbol is displayed in the instru‐
ment cluster.5.The starting engine speed adjusts. Within
3 seconds, release the brake.Seite 70ControlsDriving70
Online Edition for Part no. 01 40 2 957 072 - X/14
Page 92 of 216
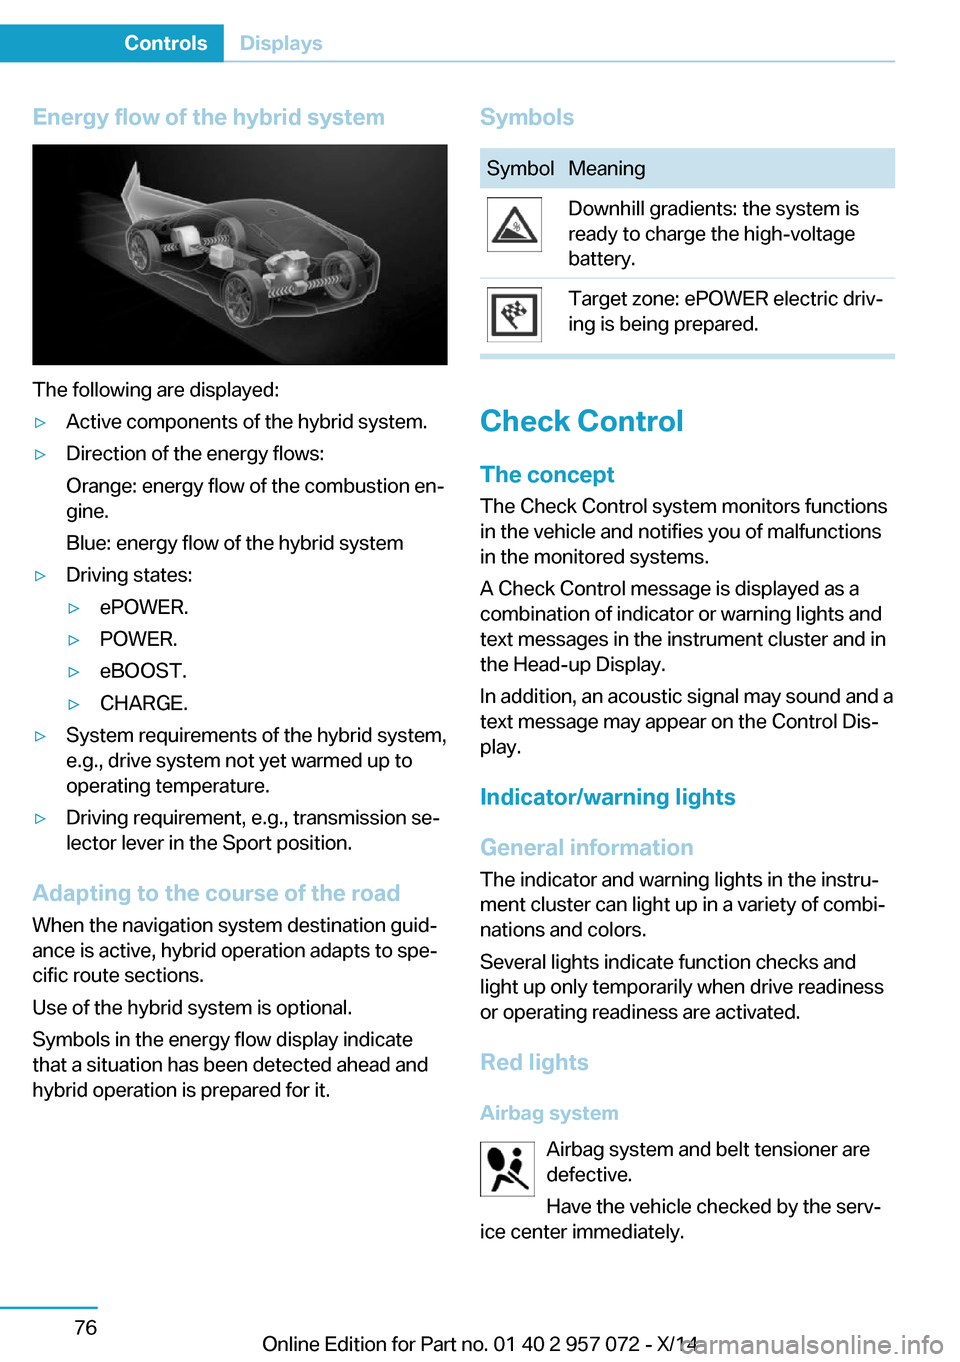
Energy flow of the hybrid system
The following are displayed:
▷Active components of the hybrid system.▷Direction of the energy flows:
Orange: energy flow of the combustion en‐
gine.
Blue: energy flow of the hybrid system▷Driving states:▷ePOWER.▷POWER.▷eBOOST.▷CHARGE.▷System requirements of the hybrid system,
e.g., drive system not yet warmed up to
operating temperature.▷Driving requirement, e.g., transmission se‐
lector lever in the Sport position.
Adapting to the course of the road
When the navigation system destination guid‐
ance is active, hybrid operation adapts to spe‐
cific route sections.
Use of the hybrid system is optional.
Symbols in the energy flow display indicate
that a situation has been detected ahead and
hybrid operation is prepared for it.
SymbolsSymbolMeaningDownhill gradients: the system is
ready to charge the high-voltage
battery.Target zone: ePOWER electric driv‐
ing is being prepared.
Check Control
The concept The Check Control system monitors functions
in the vehicle and notifies you of malfunctions
in the monitored systems.
A Check Control message is displayed as a
combination of indicator or warning lights and
text messages in the instrument cluster and in
the Head-up Display.
In addition, an acoustic signal may sound and a text message may appear on the Control Dis‐
play.
Indicator/warning lights
General information
The indicator and warning lights in the instru‐
ment cluster can light up in a variety of combi‐
nations and colors.
Several lights indicate function checks and
light up only temporarily when drive readiness
or operating readiness are activated.
Red lights Airbag system Airbag system and belt tensioner are
defective.
Have the vehicle checked by the serv‐
ice center immediately.
Seite 76ControlsDisplays76
Online Edition for Part no. 01 40 2 957 072 - X/14
Page 97 of 216
Your service specialist can read the current
service requirements from your remote con‐
trol.
Display
Data regarding the service status or legally
mandated vehicle inspections are automati‐
cally transmitted to your service center before
a service due date.
Detailed information on service
requirements
More information on the scope of service re‐
quired can be displayed on the Control Dis‐
play.
On the Control Display:1."Vehicle info"2."Vehicle status"3. "Service required"
Required maintenance procedures and le‐
gally mandated inspections are displayed.4.Select an entry to call up detailed informa‐
tion.
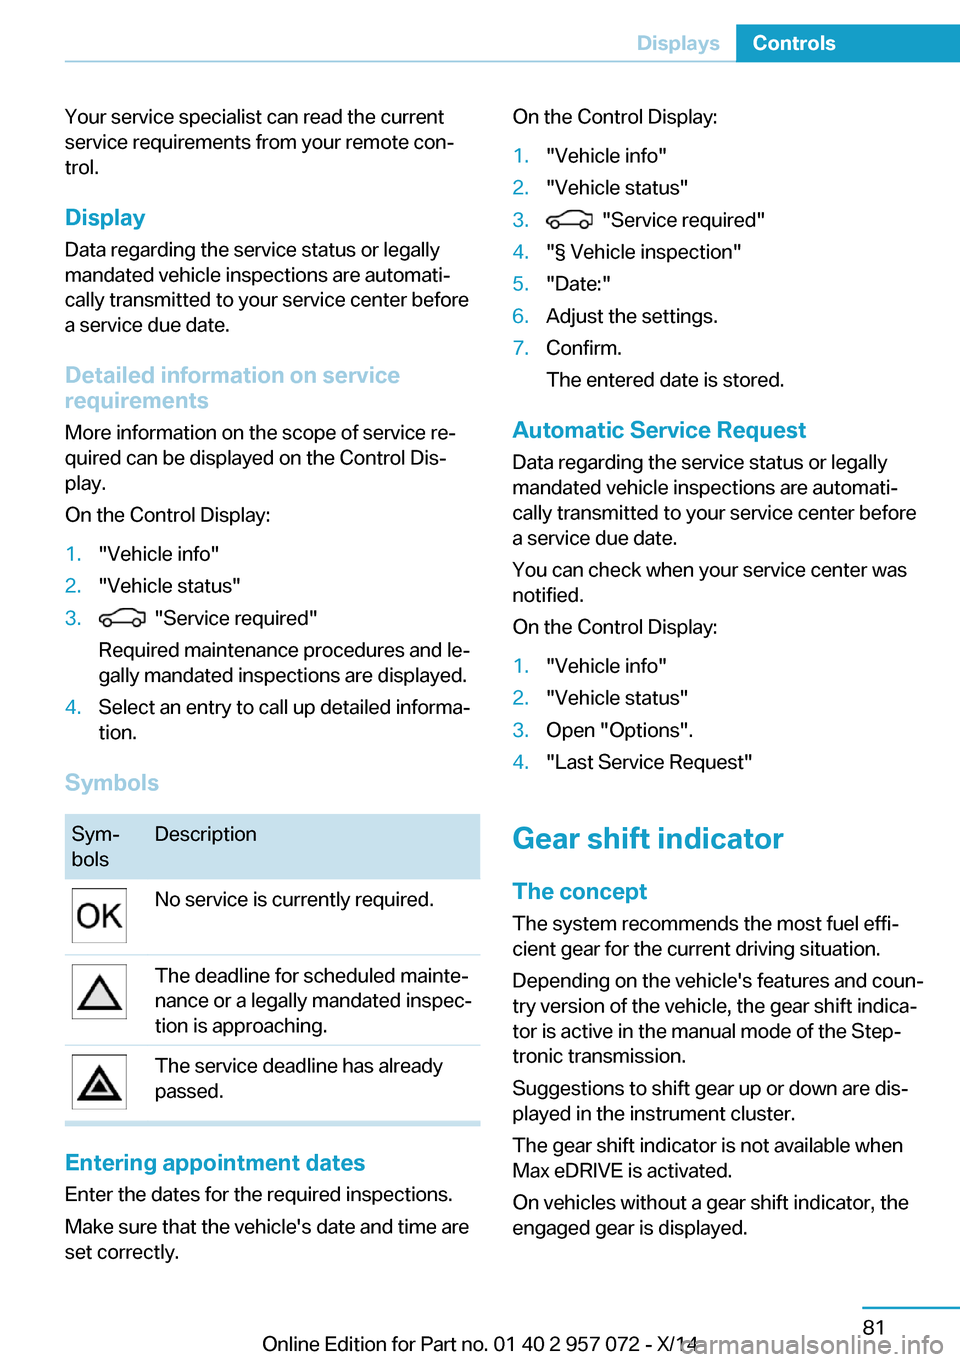
Symbols
Sym‐
bolsDescriptionNo service is currently required.The deadline for scheduled mainte‐
nance or a legally mandated inspec‐
tion is approaching.The service deadline has already
passed.
Entering appointment dates
Enter the dates for the required inspections.
Make sure that the vehicle's date and time are
set correctly.
On the Control Display:1."Vehicle info"2."Vehicle status"3. "Service required"4."§ Vehicle inspection"5."Date:"6.Adjust the settings.7.Confirm.
The entered date is stored.
Automatic Service Request
Data regarding the service status or legally
mandated vehicle inspections are automati‐
cally transmitted to your service center before
a service due date.
You can check when your service center was
notified.
On the Control Display:
1."Vehicle info"2."Vehicle status"3.Open "Options".4."Last Service Request"
Gear shift indicator
The conceptThe system recommends the most fuel effi‐
cient gear for the current driving situation.
Depending on the vehicle's features and coun‐
try version of the vehicle, the gear shift indica‐
tor is active in the manual mode of the Step‐
tronic transmission.
Suggestions to shift gear up or down are dis‐
played in the instrument cluster.
The gear shift indicator is not available when
Max eDRIVE is activated.
On vehicles without a gear shift indicator, the
engaged gear is displayed.
Seite 81DisplaysControls81
Online Edition for Part no. 01 40 2 957 072 - X/14
Page 128 of 216
Switching on/off
Switching on automatically PDC switches on automatically in the following
situations:▷If selector lever position R is engaged while
the engine is running or in electric mode.
The rearview camera also switches on.▷If equipped with front PDC: when obsta‐
cles are detected behind or in front of the
vehicle by PDC and the speed is slower
than approx. 2 mph/3 km/h.
You may turn off automatic activation:
1."Settings"2."Parking"3.Select setting.
Settings are stored for the profile currently
in use.
Automatic deactivation during forward
travel
The system switches off when a certain driving
distance or speed is exceeded.
Switch the system back on if needed.
With front PDC: switching on/off
manually
Press button.
▷On: the LED lights up.▷Off: the LED goes out.
The rearview camera image is displayed when
the reverse gear is engaged by pressing the
button.
Display
Signal tones When approaching an object, an intermittent
sound indicates the position of the object. E. g.
if an object is detected to the left rear of the
vehicle, a signal tone sounds from the left rear
speaker.
The shorter the distance to the object, the
shorter the intervals.
If the distance to a detected object in the front
is less than approx. 12 in/30 cm and in the rear
less than approx. 20 in/50 cm, a continuous
tone is sounded.
With front PDC: if objects are located both in
front of and behind the vehicle, an alternating
continuous signal is sounded.
The signal tone is switched off:▷When the vehicle moves away from an ob‐
ject by more than approx. 4 in/10 cm.▷When selector lever position P is engaged
on vehicles with Steptronic transmission.
Volume
The volume of the PDC signal tone can be ad‐
justed similar to the sound and volume set‐
tings of the radio.
Settings are stored for the profile currently in
use.
Visual warning
The approach of the vehicle to an object can
be shown on the Control Display. Objects that
are farther away are already displayed on the
Control Display before a signal sounds.
A display appears as soon as Park Distance
Control (PDC) is activated.
The range of the sensors is represented in the
colors green, yellow and red.
When the image of the rearview camera is dis‐
played, the reel can be made to PDC:
"Rear view camera"
System limits
Limits of ultrasonic measurement
Ultrasonic measuring might not function under
the following circumstances:
Seite 112ControlsDriving comfort112
Online Edition for Part no. 01 40 2 957 072 - X/14
Page 135 of 216
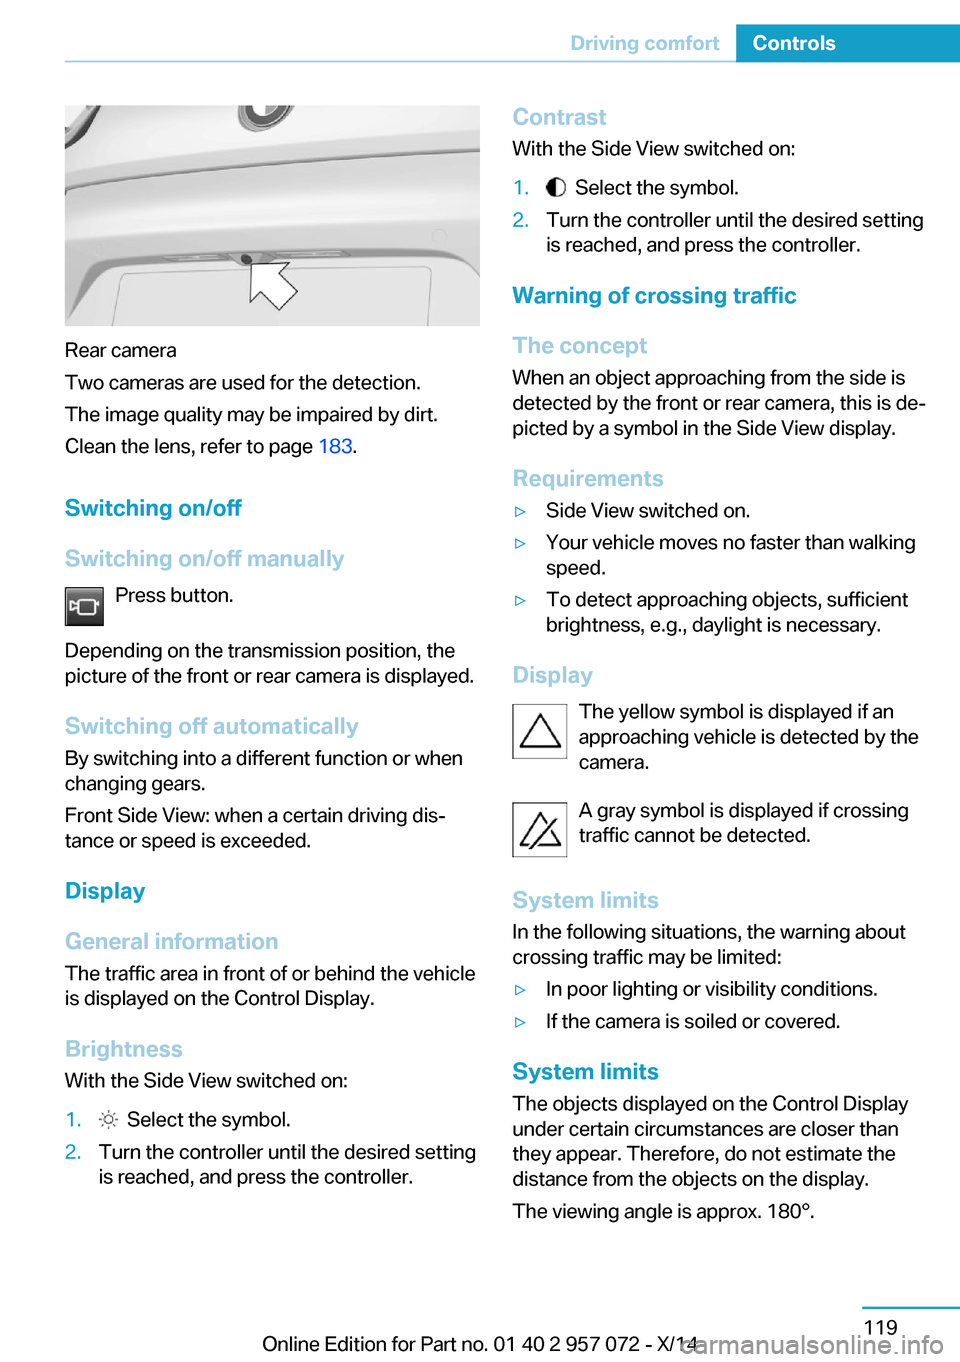
Rear camera
Two cameras are used for the detection.
The image quality may be impaired by dirt.
Clean the lens, refer to page 183.
Switching on/off
Switching on/off manually Press button.
Depending on the transmission position, the
picture of the front or rear camera is displayed.
Switching off automaticallyBy switching into a different function or when
changing gears.
Front Side View: when a certain driving dis‐
tance or speed is exceeded.
Display
General information The traffic area in front of or behind the vehicle
is displayed on the Control Display.
Brightness
With the Side View switched on:
1. Select the symbol.2.Turn the controller until the desired setting
is reached, and press the controller.Contrast
With the Side View switched on:1. Select the symbol.2.Turn the controller until the desired setting
is reached, and press the controller.
Warning of crossing traffic
The concept When an object approaching from the side is
detected by the front or rear camera, this is de‐
picted by a symbol in the Side View display.
Requirements
▷Side View switched on.▷Your vehicle moves no faster than walking
speed.▷To detect approaching objects, sufficient
brightness, e.g., daylight is necessary.
Display
The yellow symbol is displayed if anapproaching vehicle is detected by the
camera.
A gray symbol is displayed if crossing
traffic cannot be detected.
System limits
In the following situations, the warning about
crossing traffic may be limited:
▷In poor lighting or visibility conditions.▷If the camera is soiled or covered.
System limits
The objects displayed on the Control Display
under certain circumstances are closer than
they appear. Therefore, do not estimate the
distance from the objects on the display.
The viewing angle is approx. 180°.
Seite 119Driving comfortControls119
Online Edition for Part no. 01 40 2 957 072 - X/14