inflation pressure BMW I8 2015 I12 User Guide
[x] Cancel search | Manufacturer: BMW, Model Year: 2015, Model line: I8, Model: BMW I8 2015 I12Pages: 224, PDF Size: 12.46 MB
Page 185 of 224
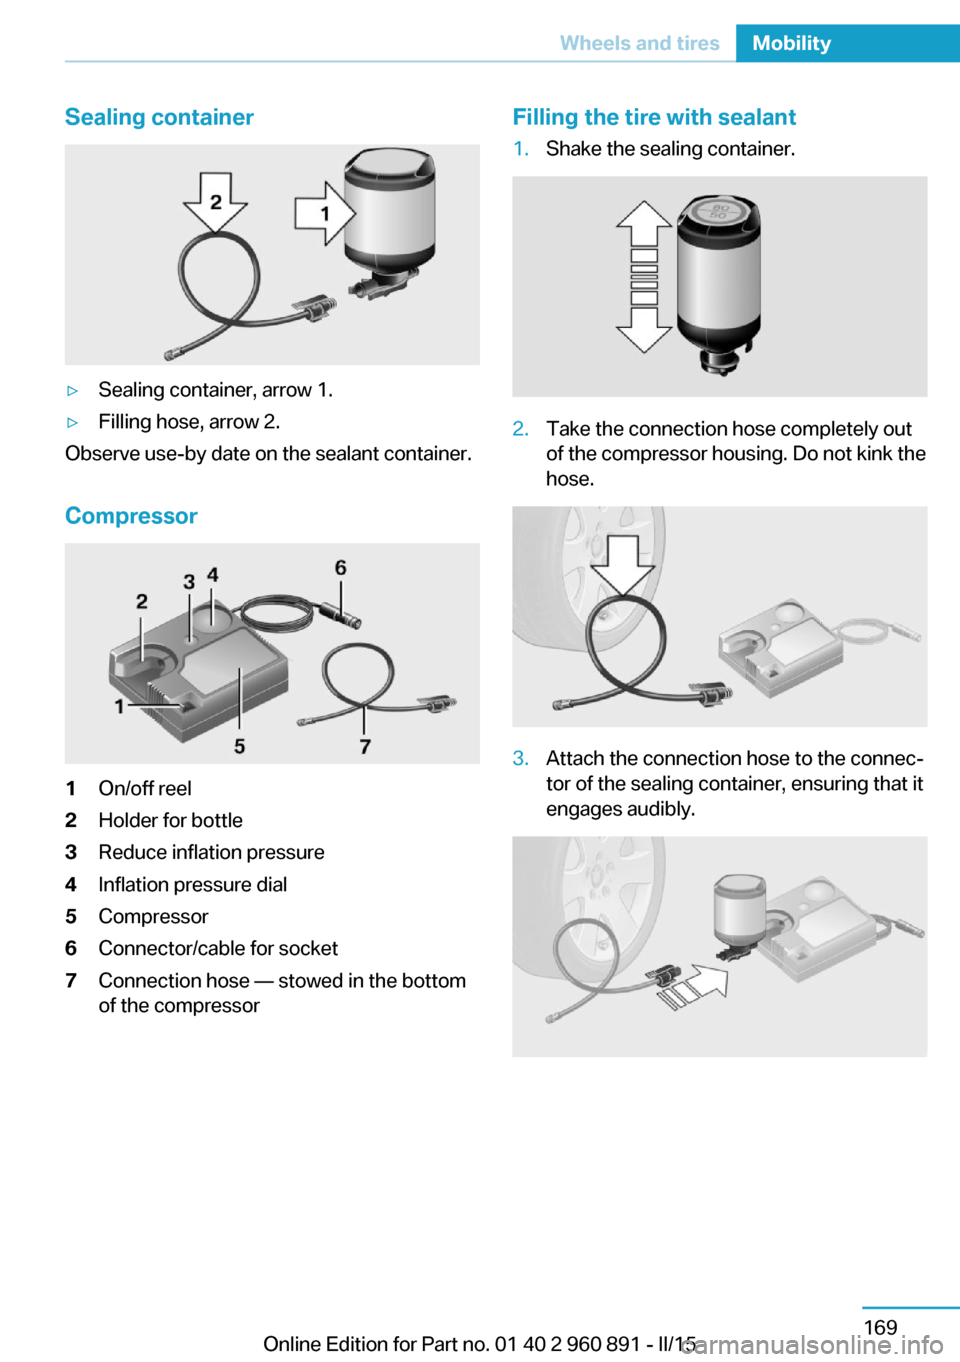
Sealing container▷Sealing container, arrow 1.▷Filling hose, arrow 2.
Observe use-by date on the sealant container.
Compressor
1On/off reel2Holder for bottle3Reduce inflation pressure4Inflation pressure dial5Compressor6Connector/cable for socket7Connection hose — stowed in the bottom
of the compressorFilling the tire with sealant1.Shake the sealing container.2.Take the connection hose completely out
of the compressor housing. Do not kink the
hose.3.Attach the connection hose to the connec‐
tor of the sealing container, ensuring that it
engages audibly.Seite 169Wheels and tiresMobility169
Online Edition for Part no. 01 40 2 960 891 - II/15
Page 186 of 224
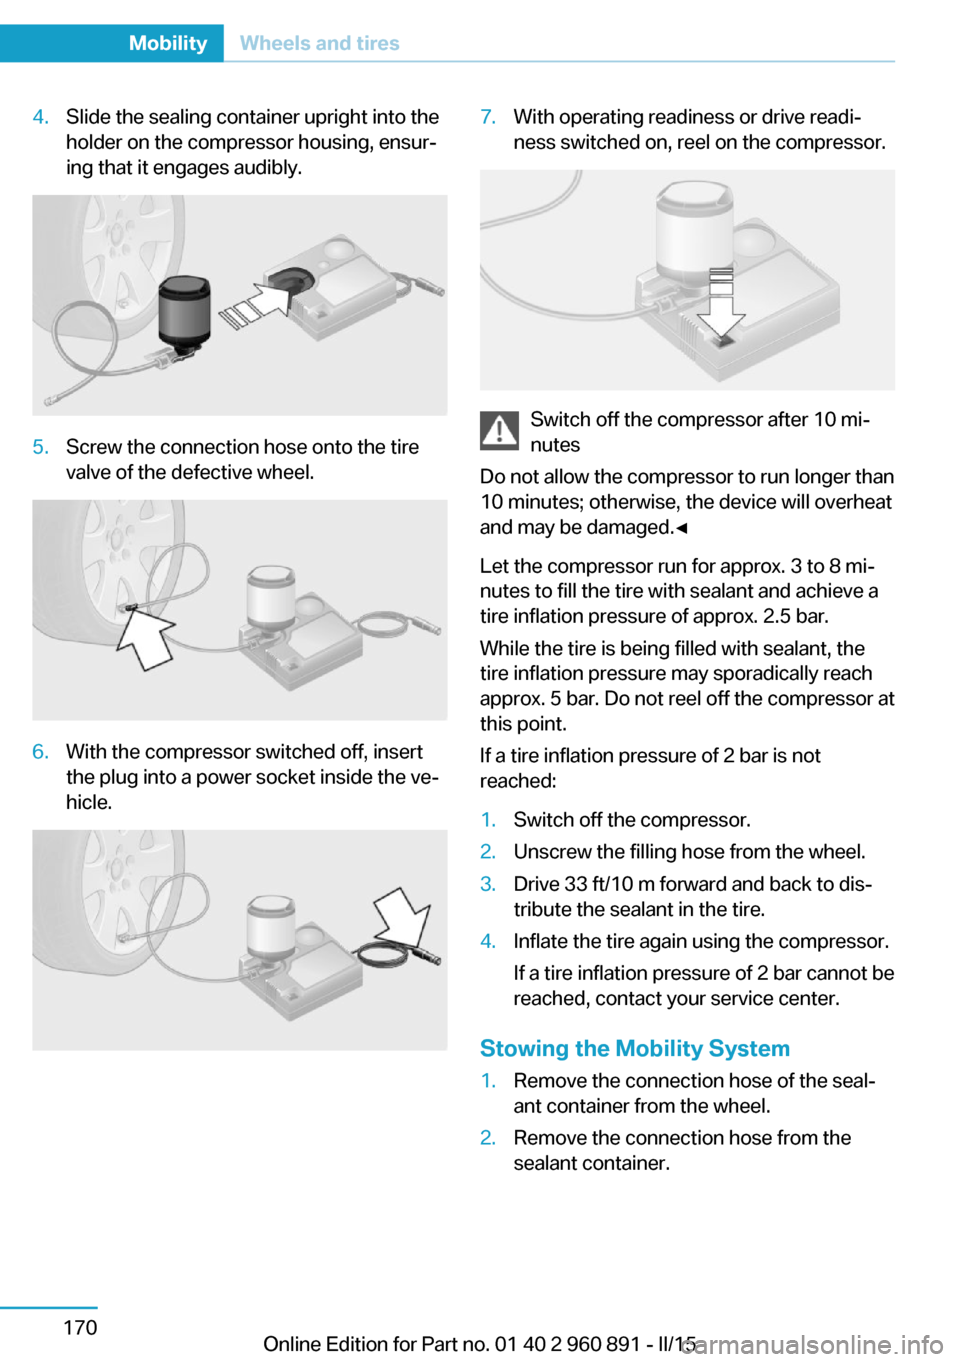
4.Slide the sealing container upright into the
holder on the compressor housing, ensur‐
ing that it engages audibly.5.Screw the connection hose onto the tire
valve of the defective wheel.6.With the compressor switched off, insert
the plug into a power socket inside the ve‐
hicle.7.With operating readiness or drive readi‐
ness switched on, reel on the compressor.
Switch off the compressor after 10 mi‐
nutes
Do not allow the compressor to run longer than
10 minutes; otherwise, the device will overheat
and may be damaged.◀
Let the compressor run for approx. 3 to 8 mi‐
nutes to fill the tire with sealant and achieve a
tire inflation pressure of approx. 2.5 bar.
While the tire is being filled with sealant, the
tire inflation pressure may sporadically reach
approx. 5 bar. Do not reel off the compressor at
this point.
If a tire inflation pressure of 2 bar is not
reached:
1.Switch off the compressor.2.Unscrew the filling hose from the wheel.3.Drive 33 ft/10 m forward and back to dis‐
tribute the sealant in the tire.4.Inflate the tire again using the compressor.
If a tire inflation pressure of 2 bar cannot be
reached, contact your service center.
Stowing the Mobility System
1.Remove the connection hose of the seal‐
ant container from the wheel.2.Remove the connection hose from the
sealant container.Seite 170MobilityWheels and tires170
Online Edition for Part no. 01 40 2 960 891 - II/15
Page 187 of 224
3.Wrap the empty sealant container and con‐
nection hose in suitable material to avoid
dirtying the cargo area.4.Stow the Mobility System back in the vehi‐
cle.
Distributing the sealant
Immediately drive approx. 5 miles/10 km to en‐
sure that the sealant is evenly distributed in the
tire.
Do not exceed a speed of 50 mph/80 km/h.
If possible, do not drive at speeds less than
12 mph/20 km/h.
To correct the tire inflation pressure
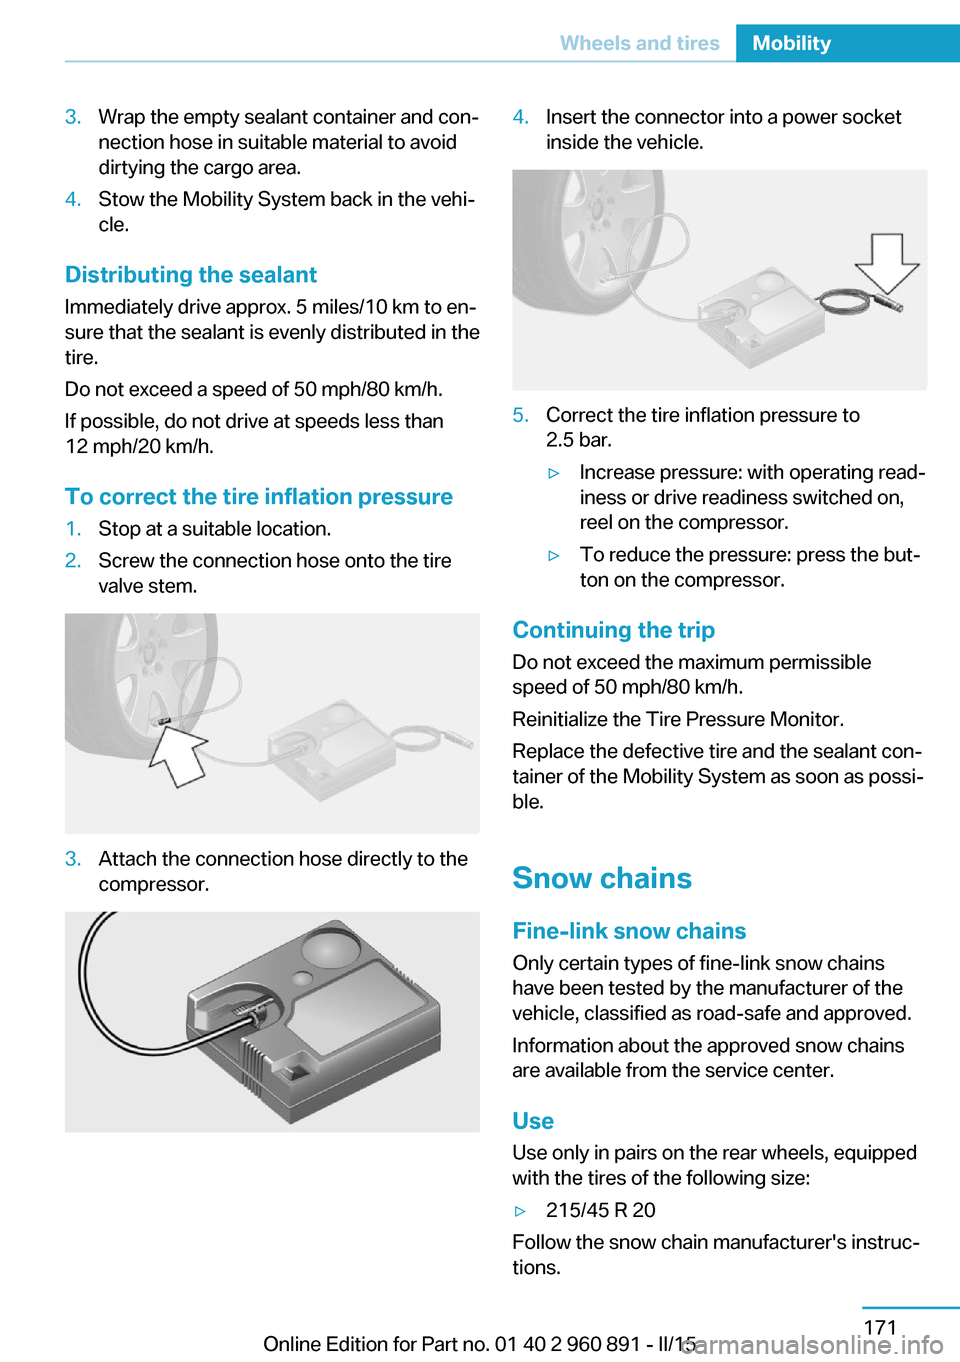
1.Stop at a suitable location.2.Screw the connection hose onto the tire
valve stem.3.Attach the connection hose directly to the
compressor.4.Insert the connector into a power socket
inside the vehicle.5.Correct the tire inflation pressure to
2.5 bar.▷Increase pressure: with operating read‐
iness or drive readiness switched on,
reel on the compressor.▷To reduce the pressure: press the but‐
ton on the compressor.
Continuing the trip
Do not exceed the maximum permissible
speed of 50 mph/80 km/h.
Reinitialize the Tire Pressure Monitor.
Replace the defective tire and the sealant con‐
tainer of the Mobility System as soon as possi‐
ble.
Snow chains Fine-link snow chains
Only certain types of fine-link snow chains
have been tested by the manufacturer of the
vehicle, classified as road-safe and approved.
Information about the approved snow chains
are available from the service center.
Use
Use only in pairs on the rear wheels, equipped
with the tires of the following size:
▷215/45 R 20
Follow the snow chain manufacturer's instruc‐
tions.
Seite 171Wheels and tiresMobility171
Online Edition for Part no. 01 40 2 960 891 - II/15
Page 197 of 224
HintsDo not perform any work on the lighting
system
Have any work on the lighting system, includ‐
ing bulb replacement, performed only by a
service center. Due to the high voltage present
in the system, there is a danger of fatal injuries
if work is carried out improperly.◀
Irritation of the retina
Never look directly into the headlights or
their light sources for a lengthy period of time,
otherwise this could irritate your retinas.◀
Do not remove the covers
Do not remove the covers, and never
stare into the unfiltered light for several hours;
otherwise, irritation of the retina could result.◀
Changing wheels
Hints
When sealants are used, an immediate wheel
change when there is a loss of tire inflation
pressure in the event of a flat tire is unneces‐
sary.
Which is why no spare tire is available.
The tools for changing wheels are available as
accessories from your service center.
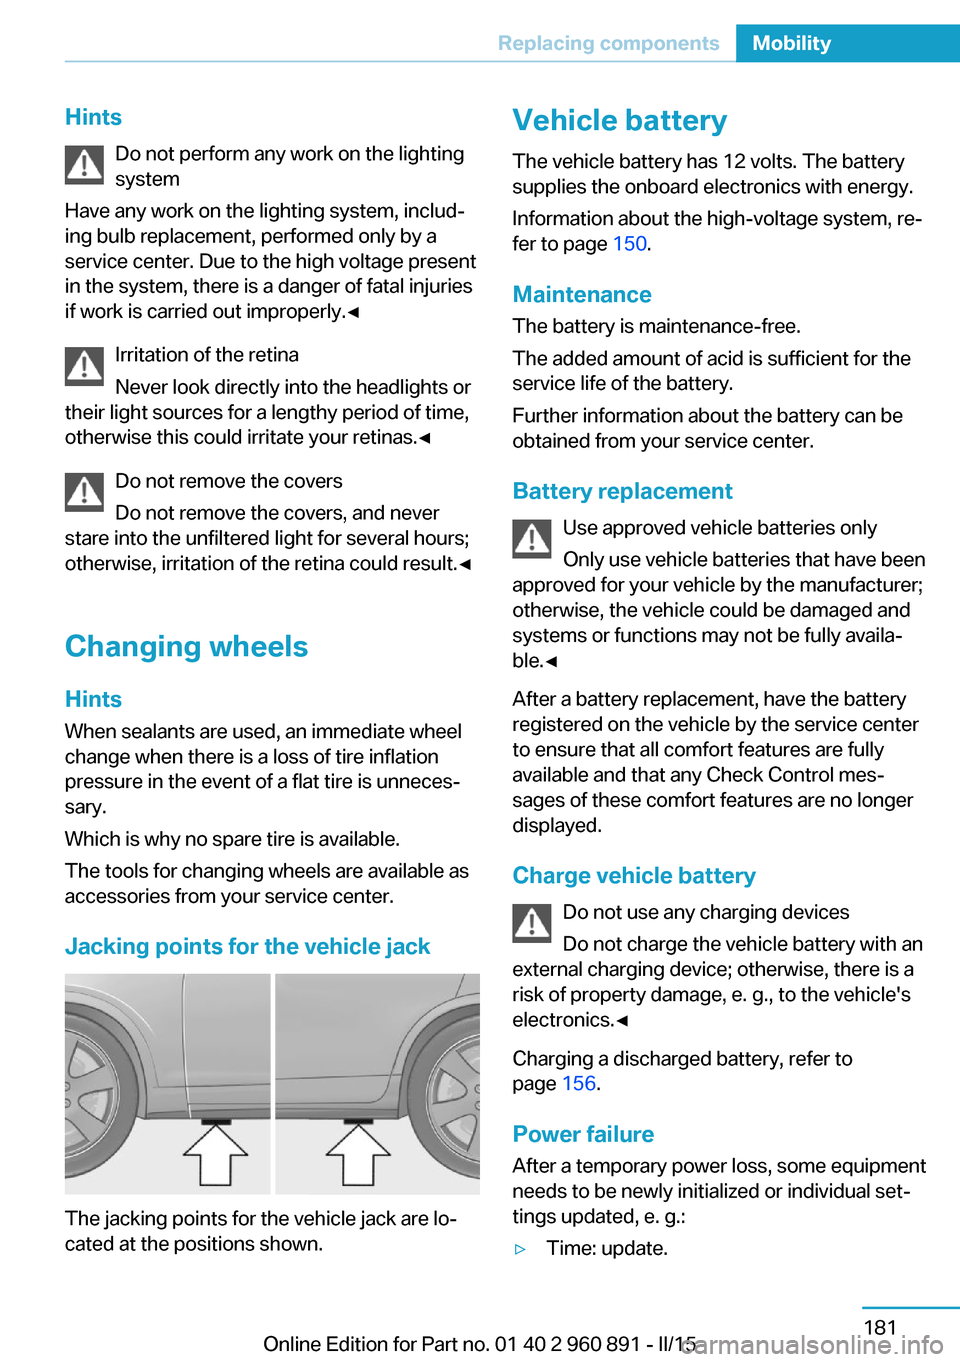
Jacking points for the vehicle jack
The jacking points for the vehicle jack are lo‐
cated at the positions shown.
Vehicle battery
The vehicle battery has 12 volts. The battery
supplies the onboard electronics with energy.
Information about the high-voltage system, re‐
fer to page 150.
Maintenance
The battery is maintenance-free.
The added amount of acid is sufficient for the
service life of the battery.
Further information about the battery can be
obtained from your service center.
Battery replacement Use approved vehicle batteries only
Only use vehicle batteries that have been
approved for your vehicle by the manufacturer;
otherwise, the vehicle could be damaged and
systems or functions may not be fully availa‐
ble.◀
After a battery replacement, have the battery
registered on the vehicle by the service center
to ensure that all comfort features are fully
available and that any Check Control mes‐
sages of these comfort features are no longer
displayed.
Charge vehicle battery Do not use any charging devices
Do not charge the vehicle battery with an
external charging device; otherwise, there is a
risk of property damage, e. g., to the vehicle's
electronics.◀
Charging a discharged battery, refer to
page 156.
Power failure
After a temporary power loss, some equipment
needs to be newly initialized or individual set‐
tings updated, e. g.:▷Time: update.Seite 181Replacing componentsMobility181
Online Edition for Part no. 01 40 2 960 891 - II/15
Page 218 of 224
Identification number, see ve‐hicle identification num‐
ber 10
iDrive 18
Ignition key, refer to Remote control 38
Increase range 144
Indication of a flat tire 100
Indicator and alarm lamps, see Check Control 79
Indicator lamp, see Check Control 79
Individual air distribution 126
Individual settings, refer to Personal Profile 39
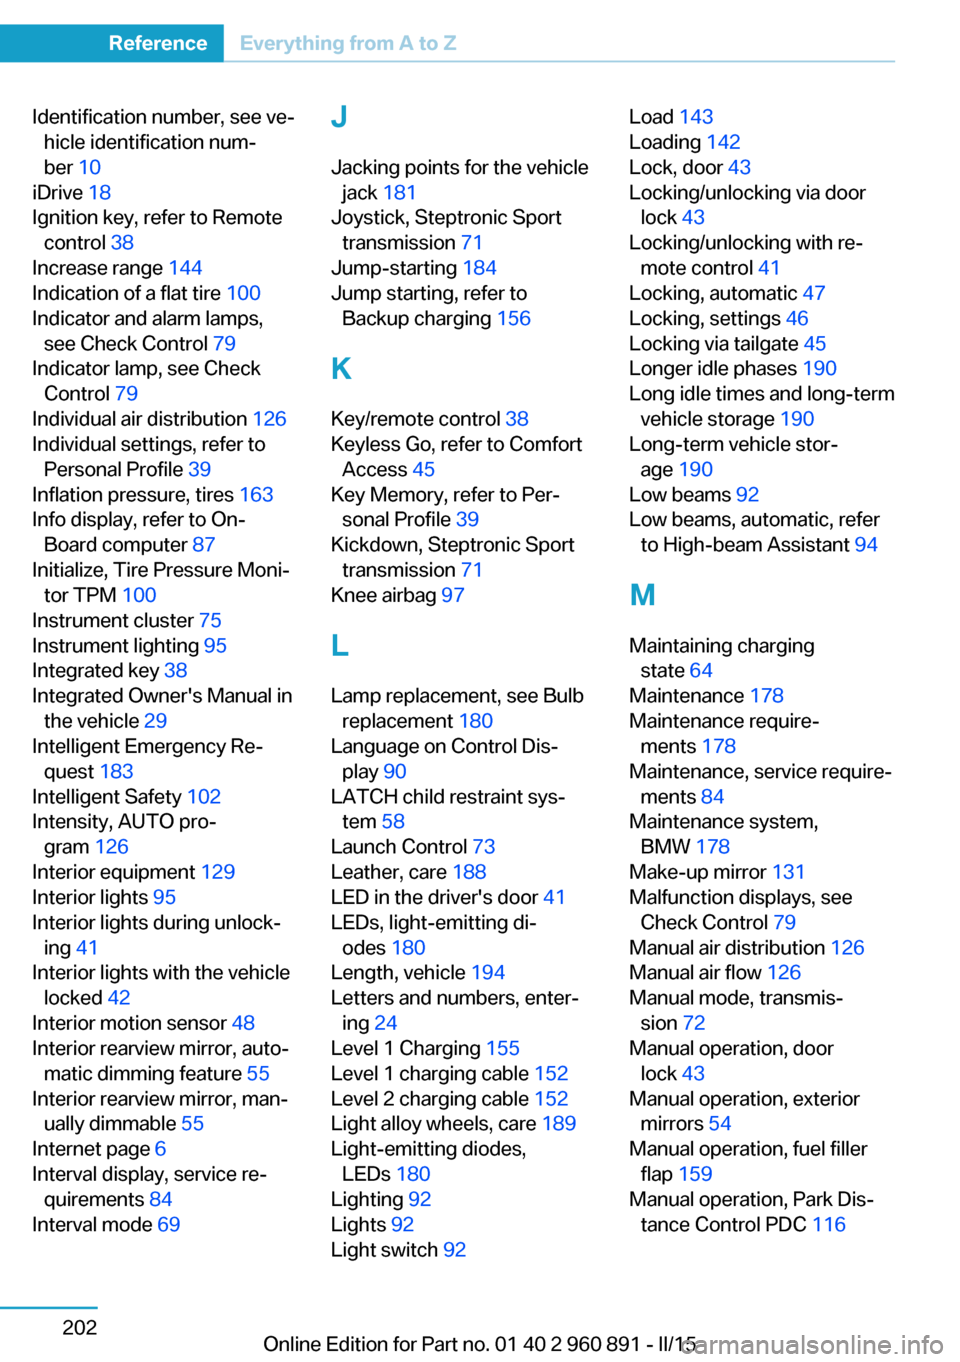
Inflation pressure, tires 163
Info display, refer to On- Board computer 87
Initialize, Tire Pressure Moni‐ tor TPM 100
Instrument cluster 75
Instrument lighting 95
Integrated key 38
Integrated Owner's Manual in the vehicle 29
Intelligent Emergency Re‐ quest 183
Intelligent Safety 102
Intensity, AUTO pro‐ gram 126
Interior equipment 129
Interior lights 95
Interior lights during unlock‐ ing 41
Interior lights with the vehicle locked 42
Interior motion sensor 48
Interior rearview mirror, auto‐ matic dimming feature 55
Interior rearview mirror, man‐ ually dimmable 55
Internet page 6
Interval display, service re‐ quirements 84
Interval mode 69 J
Jacking points for the vehicle jack 181
Joystick, Steptronic Sport transmission 71
Jump-starting 184
Jump starting, refer to Backup charging 156
K Key/remote control 38
Keyless Go, refer to Comfort Access 45
Key Memory, refer to Per‐ sonal Profile 39
Kickdown, Steptronic Sport transmission 71
Knee airbag 97
L
Lamp replacement, see Bulb replacement 180
Language on Control Dis‐ play 90
LATCH child restraint sys‐ tem 58
Launch Control 73
Leather, care 188
LED in the driver's door 41
LEDs, light-emitting di‐ odes 180
Length, vehicle 194
Letters and numbers, enter‐ ing 24
Level 1 Charging 155
Level 1 charging cable 152
Level 2 charging cable 152
Light alloy wheels, care 189
Light-emitting diodes, LEDs 180
Lighting 92
Lights 92
Light switch 92 Load 143
Loading 142
Lock, door 43
Locking/unlocking via door lock 43
Locking/unlocking with re‐ mote control 41
Locking, automatic 47
Locking, settings 46
Locking via tailgate 45
Longer idle phases 190
Long idle times and long-term vehicle storage 190
Long-term vehicle stor‐ age 190
Low beams 92
Low beams, automatic, refer to High-beam Assistant 94
M
Maintaining charging state 64
Maintenance 178
Maintenance require‐ ments 178
Maintenance, service require‐ ments 84
Maintenance system, BMW 178
Make-up mirror 131
Malfunction displays, see Check Control 79
Manual air distribution 126
Manual air flow 126
Manual mode, transmis‐ sion 72
Manual operation, door lock 43
Manual operation, exterior mirrors 54
Manual operation, fuel filler flap 159
Manual operation, Park Dis‐ tance Control PDC 116 Seite 202ReferenceEverything from A to Z202
Online Edition for Part no. 01 40 2 960 891 - II/15
Page 221 of 224
Start function during malfunc‐tion 39
Starting the combustion en‐ gine 63
Stationary climate con‐ trol 127
Status control display, tires 100
Status information, iDrive 22
Status of Owner's Manual 7
Steering wheel, adjusting 56
Steptronic Sport transmis‐ sion 70
Storage compartments 134
Storage compartments, loca‐ tions 134
Storage, tires 168
Storing the vehicle 190
Suitable engine oils 175
Summer tires, tread 166
Sun visor 131
Supplementary text mes‐ sage 82
Surround View 117
Switch for Dynamic Driv‐ ing 111
Switch, refer to Cockpit 14
Symbols 6
Symbols in the status field 22
SYNC program, automatic cli‐ mate control 125
T Tachometer 82
Tailgate closing 45
Tailgate, emergency unlock‐ ing 45
Tailgate opening 44
Tailgate via remote con‐ trol 42
Tail lamps, see Bulb replace‐ ment 180
Tank unlocking, refer to Tank vent 158
Tank vent 158 Technical changes, refer to
Safety 7
Technical data 194
Telephone 6
Temperature, automatic cli‐ mate control 125
Temperature display for ex‐ ternal temperature 83
Temperature, engine oil 83
Text message, supplemen‐ tary 82
Theft alarm system, refer to Alarm system 47
Tilt alarm sensor 48
Time of arrival 88
Tire damage 166
Tire identification marks 164
Tire inflation pressure 163
Tire Pressure Monitor TPM 99
Tires, changing 167
Tire sealant 168
Tires, everything on wheels and tires 163
Tire tread 166
Tone 6
Top View 120
Total range 83
Total vehicle weight 195
Touchpad 21
Tow fitting 185
Towing 185
Tow lug, see Tow fitting 185
Tow-starting 185
TPM Tire Pressure Moni‐ tor 99
Traction control 110
TRACTION, driving dynam‐ ics 110
Transmission lock, electronic unlocking 73
Transmission, see Steptronic Sport transmission 70
Transporting children safely 57
Tread, tires 166 Trip computer 88
Triple turn signal activa‐ tion 68
Trip odometer 83
Turning circle lines, rearview camera 119
Turning radius 194
Turn signals, operation 67
U Unintentional alarm 48
Units of measure 90
Universal remote control 129
Unlock button, Steptronic Sport transmission 71
Unlocking/locking via door lock 43
Unlocking/locking with re‐ mote control 41
Unlocking, settings 46
Updates made after the edito‐ rial deadline 7
Upholstery care 189
USB interface 132
V Vanity mirror 131
Variable light distribution 93
Vehicle battery 181
Vehicle battery, replac‐ ing 181
Vehicle, break-in 138
Vehicle care 188
Vehicle features and op‐ tions 6
Vehicle identification num‐ ber 10
Vehicle jack 181
Vehicle paint 188
Vehicle position, GPS loca‐ tion 90
Vehicle wash 187
Ventilation 127 Seite 205Everything from A to ZReference205
Online Edition for Part no. 01 40 2 960 891 - II/15