set clock BMW I8 2015 I12 Owner's Manual
[x] Cancel search | Manufacturer: BMW, Model Year: 2015, Model line: I8, Model: BMW I8 2015 I12Pages: 224, PDF Size: 12.46 MB
Page 37 of 224

Function is deactivated.
Touchpad Some iDrive functions can be operated using
the touchpad on the controller:
Selecting functions1."Settings"2."Touchpad"3.Select the desired function.▷"Speller": enter letters and numbers.▷"Interactive map": viewing the interac‐
tive map.▷"Browser": enter Internet addresses.▷"Audio feedback": pronounces entered
letters and numbers.
Entering letters and numbers
Entering letters requires some practice at the
beginning. When entering, pay attention to the
following:
▷For the input of upper/lower case letters
and numbers, it may be necessary to reel
via the controller to the corresponding In‐
put mode, refer to page 24, e.g. when the
spelling of upper and lower case letters is
identical.▷Enter characters as they are displayed on
the Control Display.▷Always enter associated characters, such
as accents or periods so that the letter can
be clearly recognized. Possible input de‐
pends on the set language. Where neces‐
sary, enter special characters via the con‐
troller.▷To delete a character, slide to the left on
the touchpad.▷To enter a blank space, slide to the right in
the center of the touchpad.▷To enter a hyphen, slide to the right in the
upper area of the touchpad.▷To enter an underscore, swipe to the right
in the lower area of the touchpad.
Using interactive map and Internet
Via touch-pad move the interactive map in the
navigation system and Internet sites.
FunctionControlsMove interactive map or
Internet sites.Swipe into re‐
spective direc‐
tion.Enlarge/shrink interactive
map or Internet sites.Drag in or out on
the touchpad with
fingers.Display the menu or open
a link in the Internet.Tap once.
Changing settings
You may change control display settings via
touchpad. Swipe left or right accordingly.
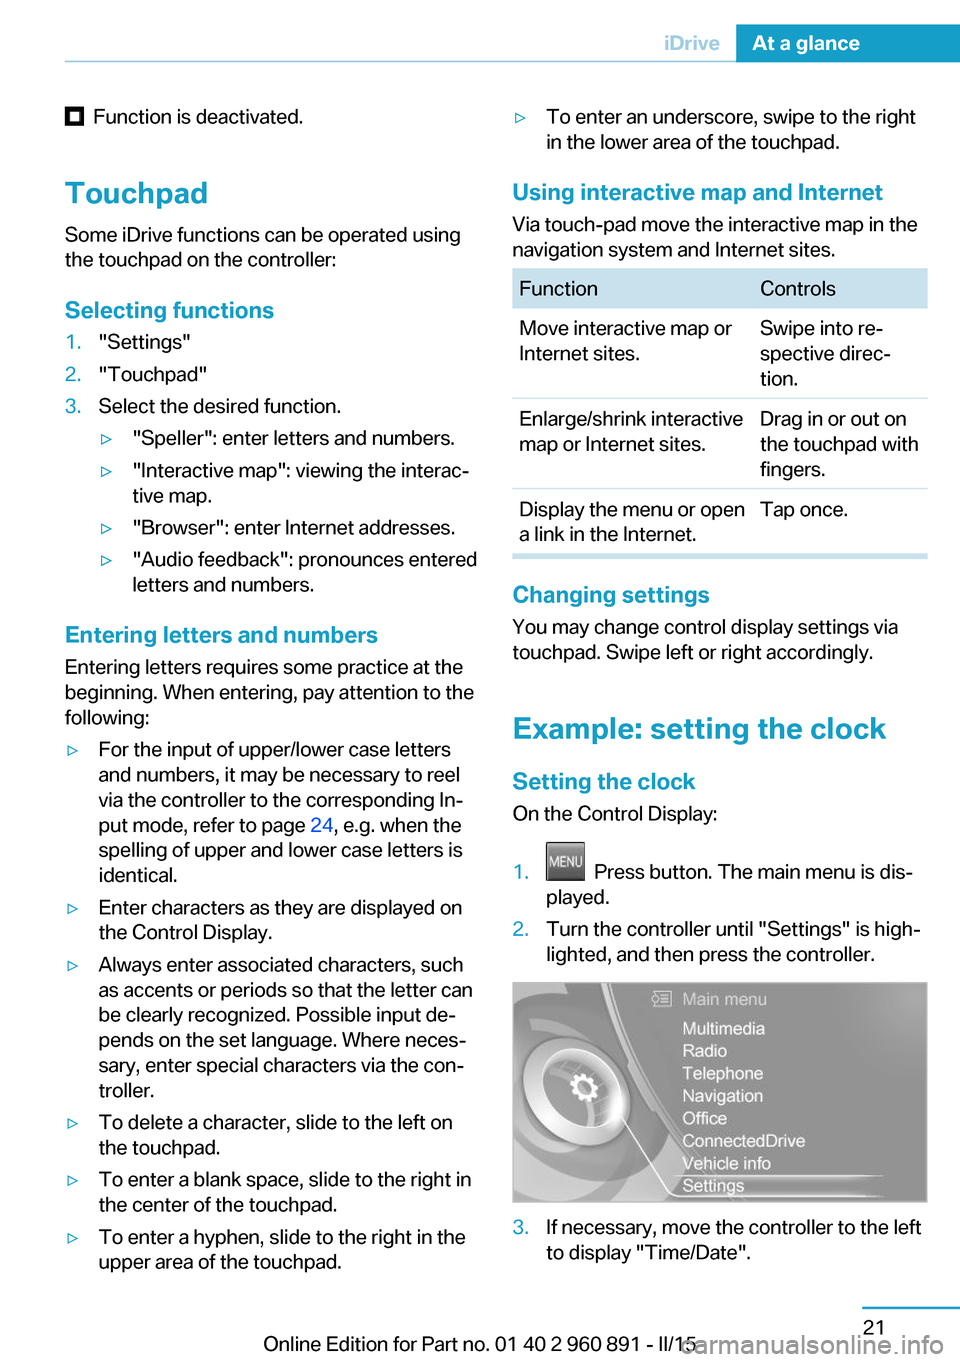
Example: setting the clock Setting the clock
On the Control Display:
1. Press button. The main menu is dis‐
played.2.Turn the controller until "Settings" is high‐
lighted, and then press the controller.3.If necessary, move the controller to the left
to display "Time/Date".Seite 21iDriveAt a glance21
Online Edition for Part no. 01 40 2 960 891 - II/15
Page 171 of 224

4.Set rate begin. Turn the controller until the
desired time is set and press the controller.5.Set rate end. Turn the controller until the
desired time is set and press the controller.
Setting charging via a
Level 1 charging cable
Depending on the electrical mains, the vehicle
must be charged with a different charging cur‐
rent strength, refer to page 150.
1."Settings"2."Charging"3."AC charging power:"
Settings are stored. When you change charg‐
ing locations you also might need to change
the setting for charging.
Set the charge current strength at other
household sockets to "Low".
Stopping charging process The charging operation can be stopped at any
time by removing the charging cable and con‐
tinued at a later time by connecting the charg‐
ing cable in order to use other loads on the
power connection or to prevent simultaneous
high power from multiple loads.
The charging operation is interrupted when the
vehicle is unlocked and automatically resumed
after a brief time or when it is locked.
Continue charging operation If the charging operation is interrupted, e.g.,
through a temporary power failure, the charg‐
ing operation is automatically continued after
the interruption.
Terminating charging process
1.Removing the charging cable from the ve‐
hicle, refer to page 152.2.Stow the charging cable as required.3.Close the charging port flap.4.Lock vehicle if it is unlocked.Displays in the instrument
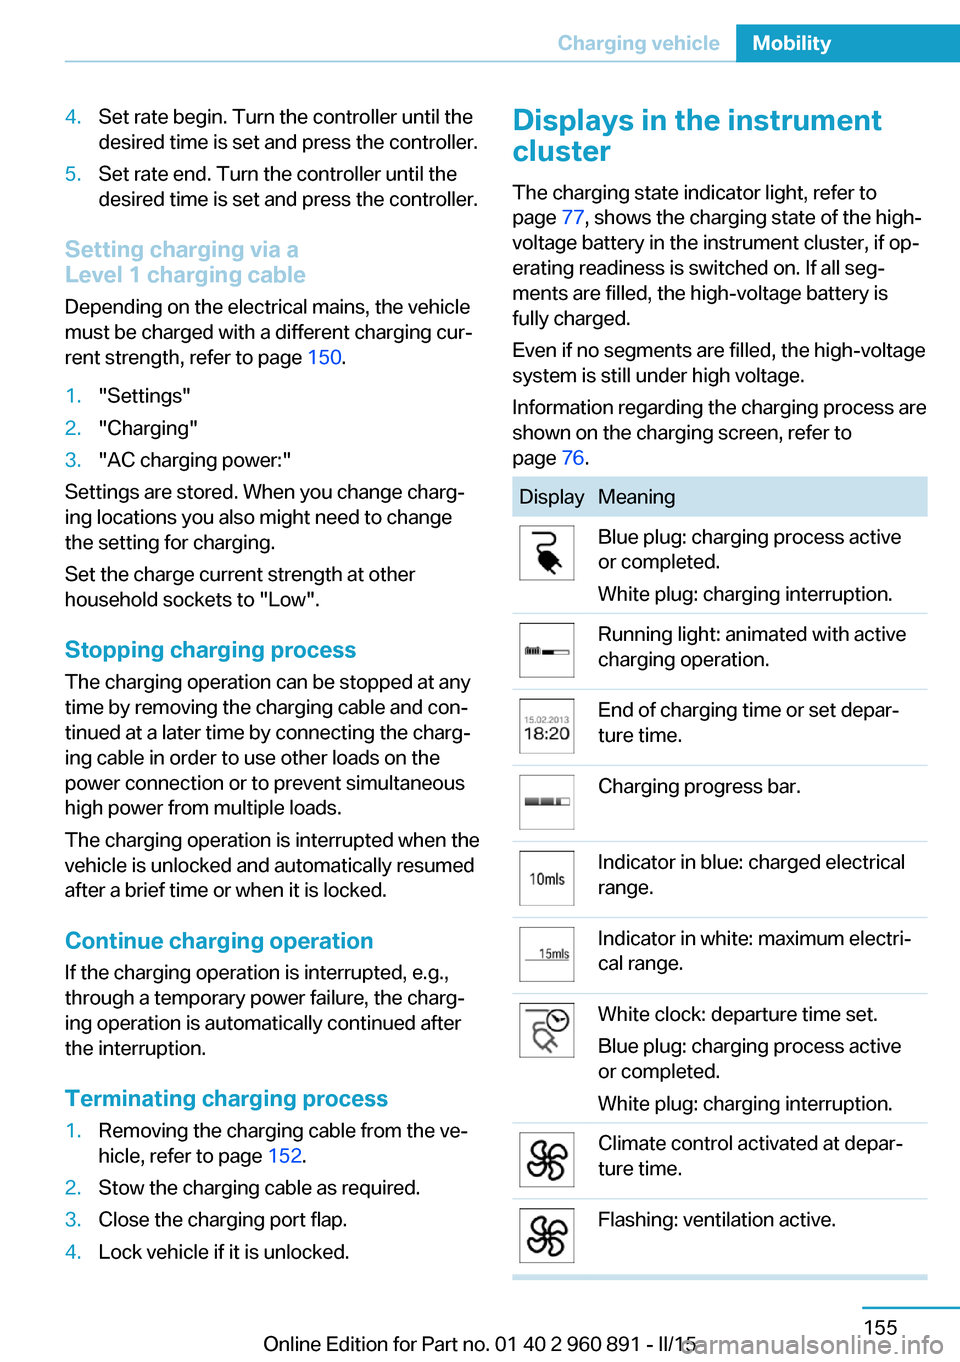
cluster
The charging state indicator light, refer to page 77, shows the charging state of the high-
voltage battery in the instrument cluster, if op‐
erating readiness is switched on. If all seg‐
ments are filled, the high-voltage battery is
fully charged.
Even if no segments are filled, the high-voltage
system is still under high voltage.
Information regarding the charging process are
shown on the charging screen, refer to
page 76.DisplayMeaningBlue plug: charging process active
or completed.
White plug: charging interruption.Running light: animated with active
charging operation.End of charging time or set depar‐
ture time.Charging progress bar.Indicator in blue: charged electrical
range.Indicator in white: maximum electri‐
cal range.White clock: departure time set.
Blue plug: charging process active
or completed.
White plug: charging interruption.Climate control activated at depar‐
ture time.Flashing: ventilation active.Seite 155Charging vehicleMobility155
Online Edition for Part no. 01 40 2 960 891 - II/15
Page 215 of 224

Braking, hints 140
Breakdown assistance 183
Break-in 138
Brightness of Control Dis‐ play 90
Bulb replacement 180
Bulbs and lamps 180
Button, Start/Stop 61
Bypassing, refer to Jump- starting 184
C
California Proposition 65 Warning 8
Camera lenses, care 190
Camera, rearview cam‐ era 118
Camera, Side View 122
Camera, Top View 121
Car battery 181
Car care products 188
Care, displays 190
Care, vehicle 188
Cargo 142
Cargo area 132
Cargo cover 132
Car key, refer to Remote con‐ trol 38
Carpet, care 189
Car wash 187
Catalytic converter, refer to Hot exhaust system 140
CBS Condition Based Serv‐ ice 178
Center armrest 134
Center console 16
Central locking system 44
Central screen, refer to Con‐ trol Display 18
Changes, technical, refer to Safety 7
Changing wheels 181
Changing wheels/tires 167
CHARGE, energy recov‐ ery 66 Charging battery, see Vehicle
charging 150
Charging, refer to Charging vehicle 150
Charging, refer to Vehicle charging 150
Charging screen 76
Charging state indicator, high-voltage battery 77
Charging status, see display of the charging status 154
Charging vehicle 150
Charging vehicle, refer to Ve‐ hicle charging 150
Chassis number, see vehicle identification number 10
Check Control 79
Checking the engine oil level electronically 173
Checking the oil level elec‐ tronically 173
Children, seating position 57
Children, transporting safely 57
Child restraint fixing sys‐ tem 57
Child restraint fixing system LATCH 58
Child restraint fixing systems, mounting 57
Child seat, mounting 57
Child seats 57
Chrome parts, care 189
Cleaning displays 190
Climate control 124
Clock 83
Closing/opening via door lock 43
Closing/opening with remote control 41
Combination reel, refer to Turn signals 67
Combination switch, refer to Wiper system 68
Combustion engine, start‐ ing 63 Comfort Access 45
COMFORT program, Dy‐ namic Driving Control 111
Compressor 168
Computer, refer to On-board computer 87
Condensation on win‐ dows 127
Condensation under the vehi‐ cle 141
Condition Based Service CBS 178
Confirmation signal 47
ConnectedDrive 6
ConnectedDrive Services 6
Connecting electrical devi‐ ces 131
Contact with water, high-volt‐ age system 34
Control Display 18
Control Display, settings 89
Controller 18
Control systems, driving sta‐ bility 109
Convenient opening with the remote control 42
Coolant 177
Coolant temperature 83
Cooling function 125
Cooling, maximum 125
Cooling system 177
Corrosion on brake discs 141
Cosmetic mirror 131
Courtesy lamps during un‐ locking 41
Courtesy lamps with the vehi‐ cle locked 42
Cruise control 113
Cruising range 83
Current fuel consumption 87
D
Damage, tires 166
Data, technical 194
Date 83 Seite 199Everything from A to ZReference199
Online Edition for Part no. 01 40 2 960 891 - II/15